


1930s Zenith 5-s-29
Here is a list of links that will take you directly to the threads where I have posted pictures in case you want to skip straight to the pics.
http://www.xtremesystems.org/forums/...8&postcount=22
http://www.xtremesystems.org/forums/...0&postcount=27
http://www.xtremesystems.org/forums/...1&postcount=32
http://www.xtremesystems.org/forums/...4&postcount=49
http://www.xtremesystems.org/forums/...3&postcount=61
http://www.xtremesystems.org/forums/...8&postcount=65
http://www.xtremesystems.org/forums/...8&postcount=88
http://www.xtremesystems.org/forums/...&postcount=102
http://www.xtremesystems.org/forums/...&postcount=107
http://www.xtremesystems.org/forums/...&postcount=114
Completed Pics
http://www.xtremesystems.org/forums/...&postcount=159
Introduction
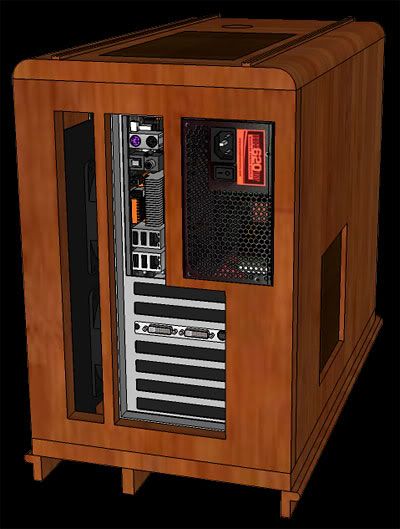
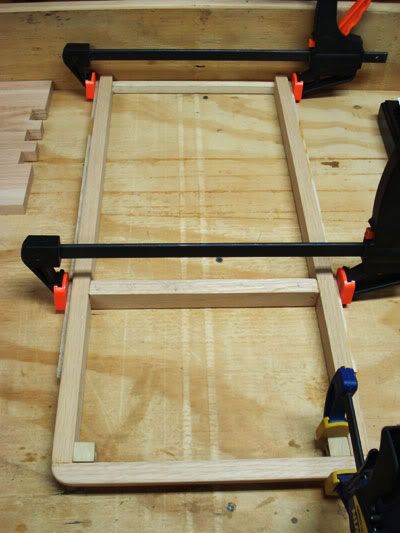
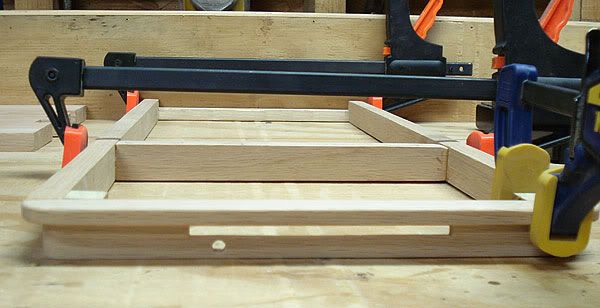
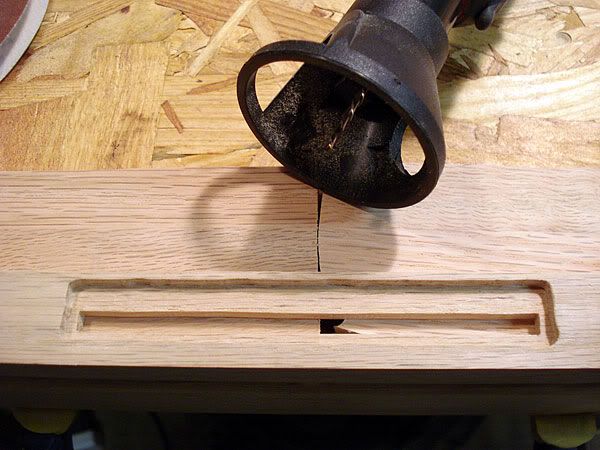
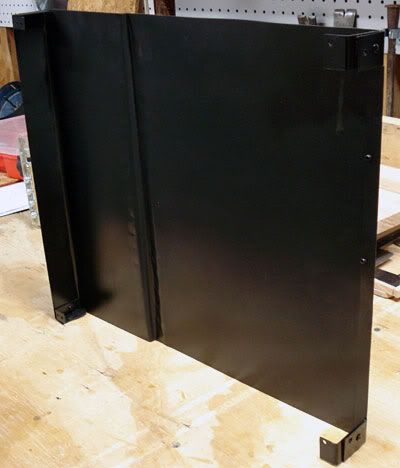
As I enjoy the design and building process, I find myself again working on another custom wood case design. A few years ago, I became so disgruntled with cases not designed for watercooling that I decided to make my own case. Since I like to work with wood, this material was my natural choice. This case is my 4th custom case build.
There was a time in particular during the early 20th century when for several decades there was an emphasis on aesthetic quality and workmanship in furniture made for the home. This extended to the central electronic device of the era, namely the radio. My last case I modeled after many of the furniture and architectural designs of the early 20th century with the idea of building a custom watercooled case that would have fit the time period had it been built then.
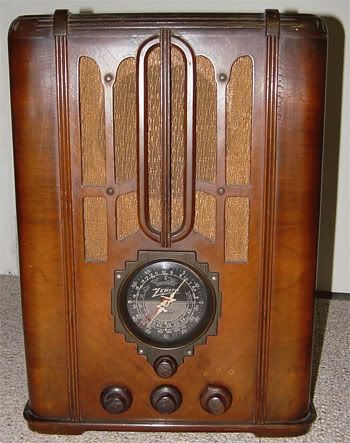
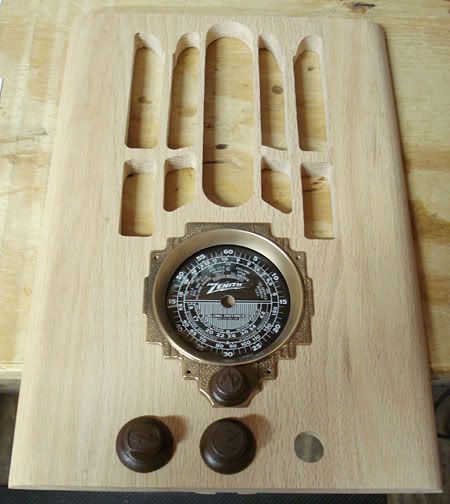
For this build, I wanted to take things one step further by designing this case directly after a particular model of antique radio. Many radio collectors frequently collect radios built during the 1920s and 1930s because of their stylish appearances. I am not a radio collector in any way, but I do have an appreciation for the styling of many of these radios.
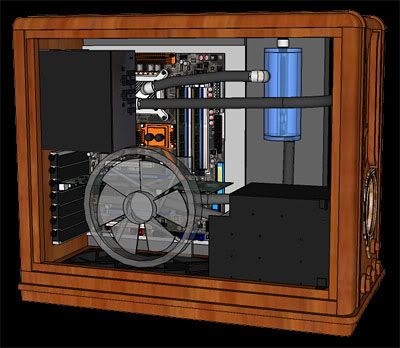
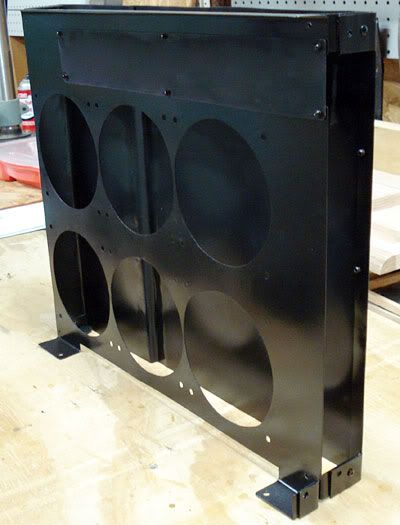
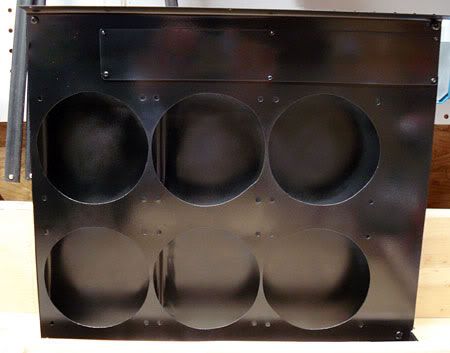
My plan is to build a performance minded system with a regular ATX MB with mid-sized tower dimensions. I want to reuse my current parts since they are only about 6 months old, and I currently don't want to spend the money yet on an I7 setup. I considered changing to a micro ATX MB, but given the proportions of the radios that I have researched, using a micro ATX MB offers me no real benefit as far as size goes.
I spent a lot of time researching and looking around at literally hundreds of antique radio pictures online. Many radios do not have a shape that can reasonably be replicated for use as a computer due to the space and placement constraints of components. It is also necessary to find really good pictures of a radio in order to be able to build a case after it. There are a number of radios that I could build after and like, but there simply aren't enough detailed photos of them to come up with a fairly accurate design.
MODELING
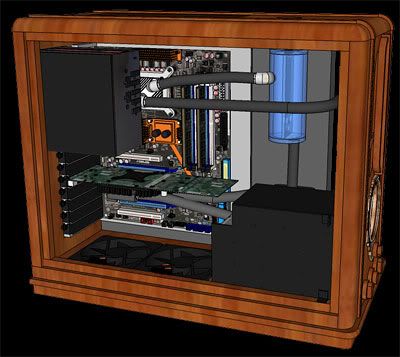
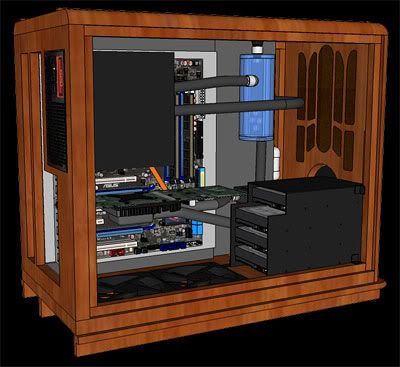
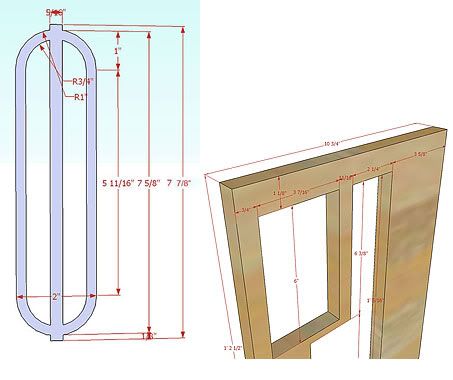
I have spent the last two months almost every day working in Sketchup modeling to the tune of probably 200+ hours (fortunately I have a lot of down time at work where I can use my laptop). This includes time I spent modeling several of the Bitspower rotary fittings
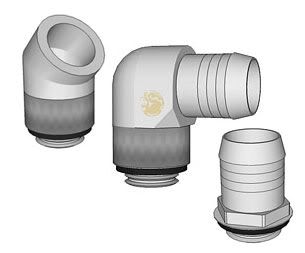
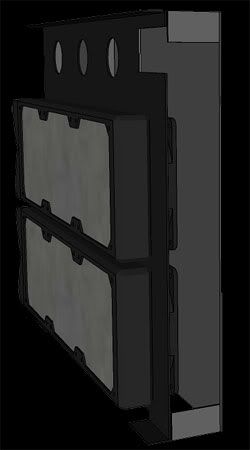
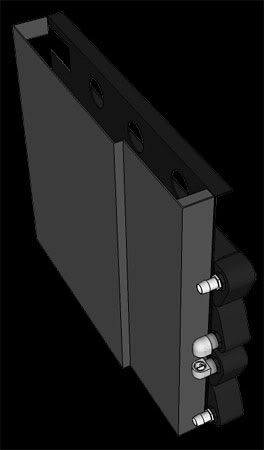
which have been posted on the Sketchup Components Collection website. I was dealing a couple of pretty tight areas and wanted to have the fittings modeled to get an exact placement of components. I messed with every combination of placement using triple radiators I could think of.
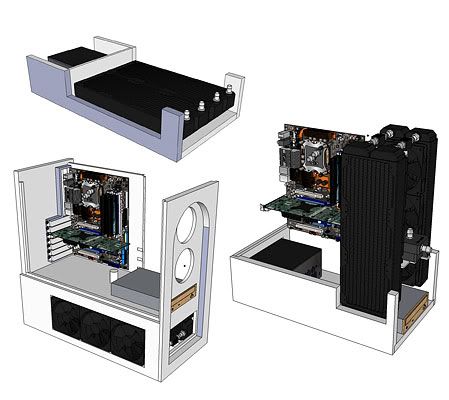
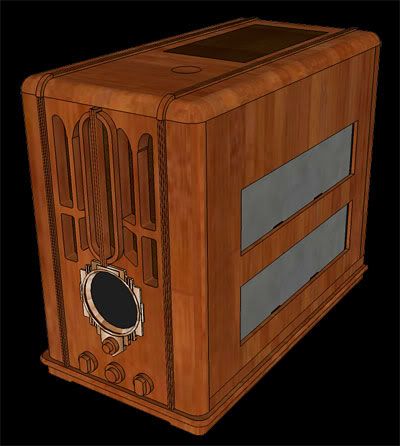
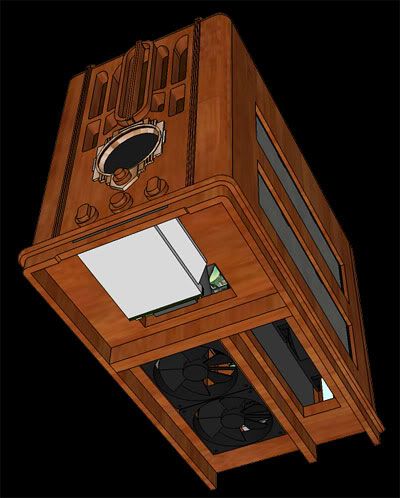
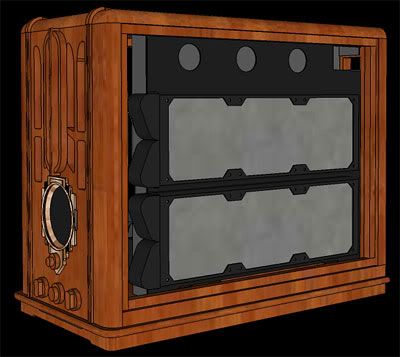
I prefer using dual triple rads as I like a system to be as quiet as possible as well as being future proof. I also wanted the dimensions of this build to be smaller than my current case due to the way that it fits inside of my desk.
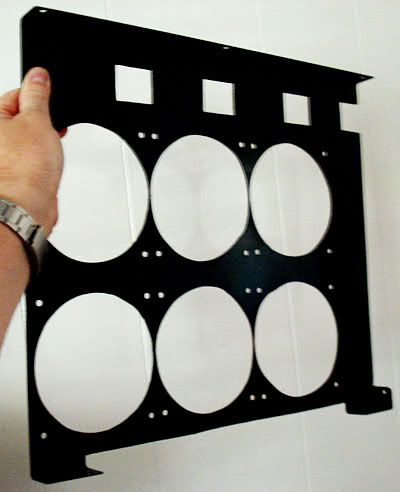
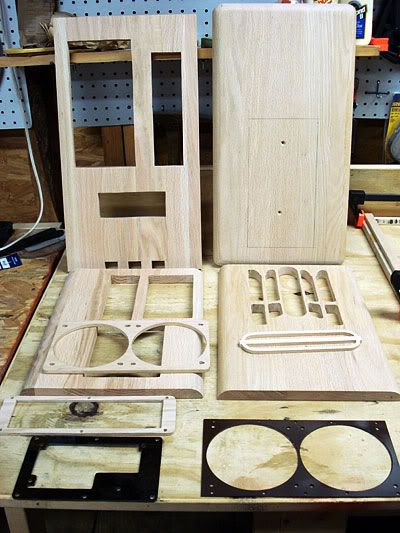
I spent a lot of time hashing out the placement of each component and the loop order of the setup down to every last detail I could think of. For example, I designed at least 5 different hard drive mounts alone. I do not like T-lines. I designed and redesigned the res to make it easily accessible for filling with the pump directly beneath it for good water supply to the pump. I have never spent anywhere near the amount of time designing a setup as I have this one.
DESIGN OPTIONS
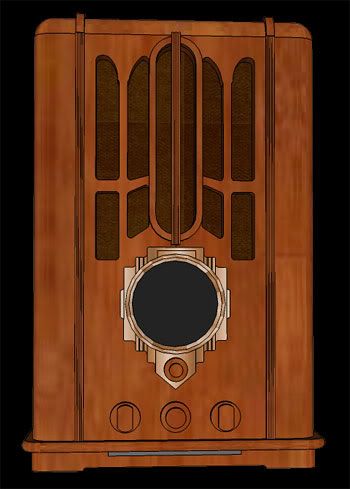
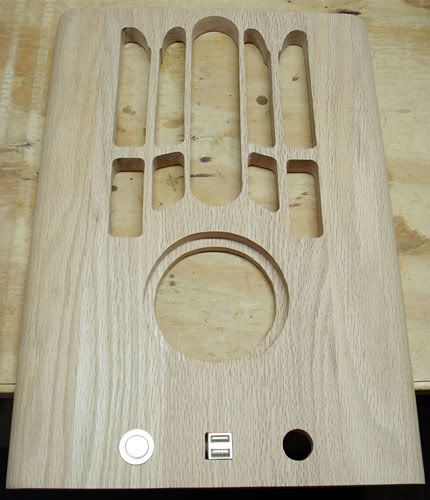
The first radio design that I settled on was a 1935 Grunow 650 Tombstone radio.
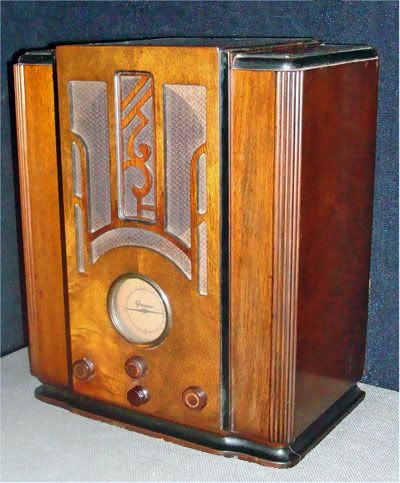
The dimensions and size fit what I was looking for. This model would require quite a bit of time and detailed routing due to the design. I completely modeled a design for this radio, and may build this in the future. However, in researching some more, I ran across the 1934-36 Zenith 5-S-29.
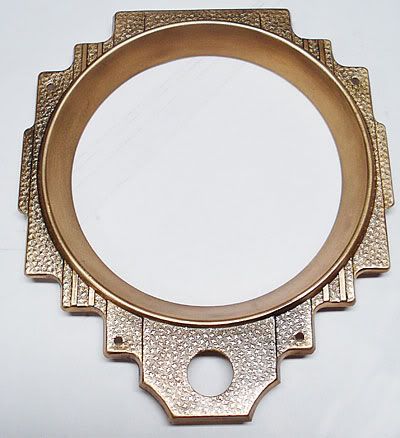
My daughter really likes the look of this radio (she likes the Grunow as well), which was one vote for sure in its favor, but I also found that I could get a replica radio dial, dial glass, escutcheon (dial bezel), and knobs for it. Since the Grunow wasn't as popular of a radio, parts are not available, so I drew the radio dial from a picture, would have to make my own knobs, and would have to make my own escutcheon (dial bezel). Buying the replica parts is costing me about $120, but it will add a very genuine look and feel to the case. My consultation team (wife and daughter) think that I should build them both, and I am entertaining the idea in the back of my mind. For the moment however I am just working on the Zenith design.

 Reply With Quote
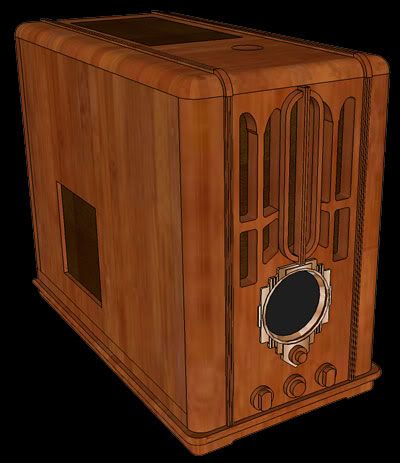


Bookmarks