Page 9 of 10 FirstFirst ... 678910 LastLast
Results 201 to 225 of 250

Thread: Project Quintessence

  1. #201
    Xtreme Addict
    Join Date
    Feb 2005
    Location
    Tennessee
    Posts
    1,171
    Quote Originally Posted by shazza View Post
    Nice!
    Quote Originally Posted by theseeker View Post
    I always check your updates!
    Thank you guys. Its nice to know someone out there is looking!

    Quote Originally Posted by CptDreadFlint View Post
    Keep up the great work, Gary! Just an idea, brown hammered paint may look visually striking against the copper color of the pipes/tubes...(may not have to paint the pipes to match).
    Pictures worth a k...
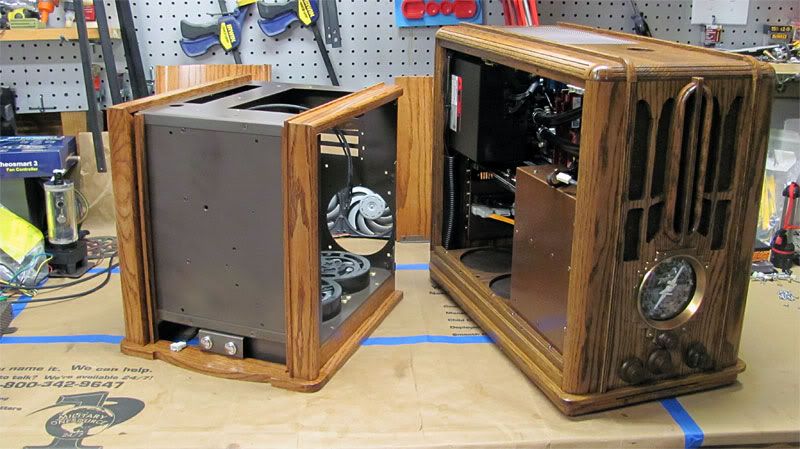
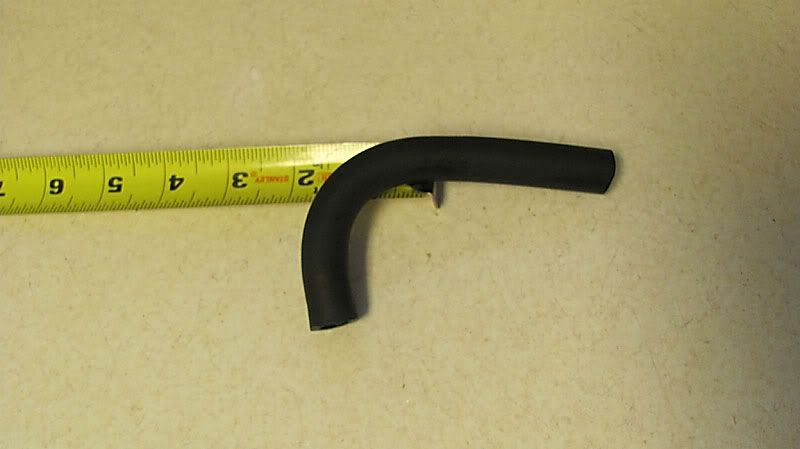
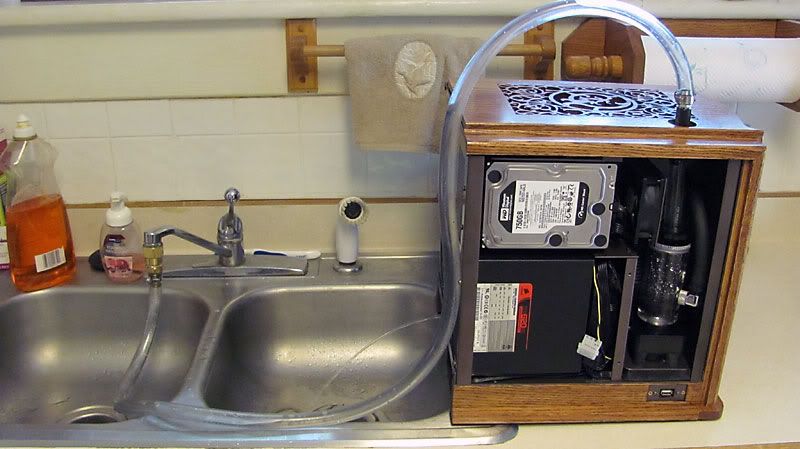
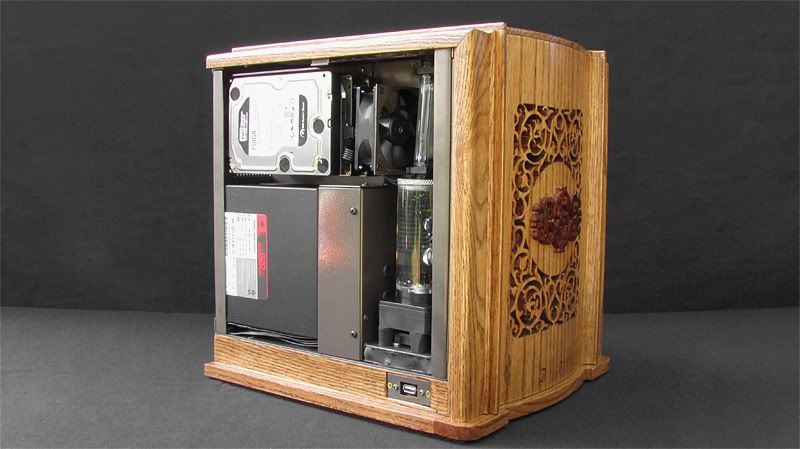
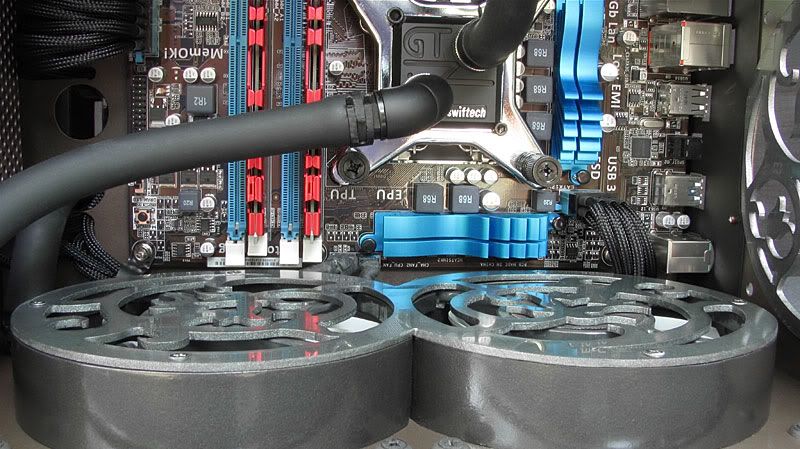
    That idea already is lurking in the back of my mind. I'm not sure however how hard it will be to sand and polish copper tubing to get it looking good. It would have to be sanded to remove the ink stamping on the tubing. The other problem is that with the case as compact as it is, I am almost certainly going to have to solder in a few elbows. I don't see being able to just bend the tubing enough to make it fit. I don't think the solder joints would look very good.

  2. #202
    I am Xtreme
    Join Date
    Mar 2007
    Location
    Sugar Land, TX
    Posts
    1,730
    Gary,
    I have quite a few of the BP crystals that I will not be using in various sizes and the BP fittings too, C47 & C48. Let me know what you need.
    The BP fittings are easily painted BTW. All you need is self adhesion primer and the color of your choice for the final finish.
    Rocky

  3. #203
    Xtreme Addict
    Join Date
    Feb 2005
    Location
    Tennessee
    Posts
    1,171
    Quote Originally Posted by theseeker View Post
    Gary,
    I have quite a few of the BP crystals that I will not be using in various sizes and the BP fittings too, C47 & C48. Let me know what you need.
    The BP fittings are easily painted BTW. All you need is self adhesion primer and the color of your choice for the final finish.
    Rocky
    I really appreciate the offer. I however already ordered 12 total of the C47 and C48 fittings in black for this build from PerfPCS. That should be more than enough for what I need. I will keep the painting idea in mind. I've already got a couple of cans of etching primer.

  4. #204
    Xtreme Addict
    Join Date
    Feb 2005
    Location
    Tennessee
    Posts
    1,171
    Putting in Parts, Lighting, Watercooling, etc. Part 1

    Time for a little bit of a tease. I've gotten all of the metal parts primed and painted, and have all of the wooden parts stained and lacquered. I put about 7 coats of lacquer on this case for a nice heavy finish.

    I drained out the Zenith radio, and have started swapping out parts into Quintessence. I have to still buff out the lacquer finish, but I can do that after I get it up and running since the front and top are removable. The MB is installed. Both rads are cleaned out and dried, and the CPU and GPU blocks are cleaned out. They were only tarnished, but I took them apart anyway and soaked them in some Tarnx. I worked today on getting the LED lighting installed. I've got a little more of that to go tomorrow, and have power lines to run. This little detailed stuff is so time consuming! Stay tuned...


    Thanks for stopping by.

  5. #205
    I am Xtreme
    Join Date
    Mar 2007
    Location
    Sugar Land, TX
    Posts
    1,730
    Outstanding as usual!

  6. #206
    Xtreme Addict
    Join Date
    Feb 2005
    Location
    Tennessee
    Posts
    1,171
    Putting in Parts, Lighting, Watercooling, etc. Part 2

    I've been chipping away at this just about every day since the last update, mainly working on wiring and the like. I spent 4 hours a couple of nights ago just sanding scrollwork by hand. I had to use small folded up pieces of 500 grit to sand all of the scrollwork as bits and pieces of material fibers were stuck in the lacquer all throughout the scrollwork.

    I made a set of fan mounts to hold the fans onto the side panel. They are held to the side panel by #2 x 1/4” screws.


    I managed to get all of the wiring hidden in the area in front of the PSU and underneath the case. This really took some doing trying to figure out how to route everything and get it all to fit in that tight space. Being able to tie wiring up underneath made all of the difference.


    I had to come up with a way to mount a 4 port USB panel to the case. There isn't enough clearance behind the top rad and the PCI backpanel to mount it, and I like having the extra internal USB ports for the printer/scanner, etc as some items don't like USB hubs. I decided to mount it to the rear of the case. I marked the holes off using the PCI bracket that comes with the 4 ports. I drilled holes, used a carbide Dremel bit to ream out as much as possible, and then filed the rest. I had my shop vac on the entire time so that I wouldn't shoot bits of metal all over the case interior.


    Here is a shot of the interior of the MB side of the case. I have bits of paper towel stuffed into the water blocks and rads to keep stuff out of them. I haven't mounted the fan controller yet as I need to get the watercooling in place first as it will be easier without the controller being in the way.


    I'm at the point that I'm ready to start running tubing for the watercooling. I'm planning on going with copper tubing, with the exception of in and out of the pump. I think I'm going to use a bit of clear vinyl tubing here to help prevent pump vibrations from being transferred by hard tubing to the case.

    Stay tuned...

    Thanks for stopping by.

  7. #207
    I am Xtreme
    Join Date
    Mar 2007
    Location
    Sugar Land, TX
    Posts
    1,730
    Outstanding, you are one ingenious carpenter, H20 cooler and Jack of all trades! I love your updates.

  8. #208
    Xtreme Addict
    Join Date
    Feb 2005
    Location
    Tennessee
    Posts
    1,171
    Thanks a lot. I really appreciate the comment. I feel sometimes though like the jack of all trades-master of none! Just think of everything you are supposed to be good at for modding: computer tech, 3d designer, metalworker, woodworker (in my unusual case), photographer, plumber, videographer, artist, etc.

    I just ran into a major problem. I was planning on hard lining the tubing with 1/2" OD copper tubing, which is all I can get here in that size. I was going to do like another modder is doing in a thread on Bit-tech using Bitspower BP-MBWP-C47 fittings with 12mm OD copper, which fits perfectly. The fittings are exactly 12mm ID, so the hard lined copper is a no go for me as my tubing won't go into the fittings as 1/2" OD is 12.4mm (by my calipers). The copper in countries that use the metric system must be 12mm OD as he is using.

    Oh well, back to tubing.
    Last edited by voigts; 05-21-2011 at 11:35 PM.

  9. #209
    Xtreme Addict
    Join Date
    Feb 2005
    Location
    Tennessee
    Posts
    1,171
    Putting in Parts, Lighting, Watercooling, etc. Part 3

    Forming Tubing

    I've been steadily working the last few weeks getting everything installed and running. This includes a number adjustments to fix minor issues. I had a CPU block problem that I had to fix. Once I got tubing installed, I found after pumping up the loop with air pressure as I usually do that the CPU block was leaking. I got a new o-ring, but because I overtightened one of the screws in the process, I ended up having to tap out the one screw from #6-32 to #8-32. With just a bit of Dremel work to make the larger screw head fit, it works fine and is barely noticeable. Yay!

    Because of the problem of US 1/2” OD tubing not fitting the Bitspower fittings, I abandoned the idea of using copper tubing and have opted for using rubber Norprene tubing instead. With this tubing, being able to form it has been a big help in this case given its compact size. The nice thing about forming tubing is that once it is formed, it holds its shape and doesn't push back.

    I bought a 3/8” spring to use with the 3/8”ID 5/8”OD Norprene tubing. I have to say that this is the best tubing I've ever used, and I've tried just about everything from XSPC, Primochill, Tygon, Clearflex, Masterkleer, and a few others. The bend radius is incredible. Using the spring, I boiled and then chilled the tubing several times, using rubber bands to hold the spring and tubing in the bend radius I was after.


    The result.


    If I didn't form this tube going from the pump to the bottom radiator, the tube would push back against the pump and push it out of position. This way the tubing and pump stay where I want them. I used this technique several times to get tubing routed the way I want. It works great and also prevents having to use unnecessary fittings.

    Flushing/Filling

    Being concerned about debris possibly being in the loop, I bought some fittings from the local hardware store and connected the loop to the kitchen faucet to force flush it out. I only opened up the faucet partially, as I don't really need full household pressure in the loop since the drain hole is small.


    I used an Enzotech extension piece srewed into the fillport to make it easier to fill the case. I did a couple of fill/flush/drains with distilled water after the tap flush. I use an old external PSU to hook up the pump to.


    I bought this little G1/4” threaded Primochill funnel not long ago, and although I think it is a bit overpriced at $8, it is really, really handy. It has an o-ring so that it seals against the fillport to prevent any leaks when filling. It makes filling so much easier. I should have bought this a long time ago.


    Everything is in and installed. One issue I have yet to resolve is that for some reason my MCP35X pump (hooked up to the Sunbeam Rheostat 3) and the Rheostat are not getting any PWM signal, and the pump's RPMs are not registering with the MB. I've had to turn the Rheostat on manual for the fans, and since the pump isn't getting any signal, it is running at the default 12v. I've got to take the PWM cable out and see if somehow I got a wire crossed when I soldered in an extension.

    Final pics should be coming soon.

    Thanks for stopping by.
    Last edited by voigts; 06-03-2011 at 04:23 PM.

  10. #210
    I am Xtreme
    Join Date
    Mar 2007
    Location
    Sugar Land, TX
    Posts
    1,730
    You are one creative person, period!

    However, after viewing your pictures, I feel the need to drain something..

    Excellent work as usual.

  11. #211
    Xtreme Addict
    Join Date
    Feb 2005
    Location
    Tennessee
    Posts
    1,171
    Quote Originally Posted by theseeker View Post
    You are one creative person, period!

    However, after viewing your pictures, I feel the need to drain something..

    Excellent work as usual.
    I thought the exact same thing. I almost made the little title for the section, "Project Quintessence takes a leak."

    Quote Originally Posted by spotswood View Post
    One word...Awesome!
    Thanks Rich.

  12. #212
    Moderator
    Join Date
    Aug 2007
    Location
    Back and forth between Florida and Maine
    Posts
    4,097


    I'm proud of you, Gary --- you are making great progress. Those little funnels are handy - I just broke one (don't ask how), so need to get another.

  13. #213
    Xtreme Member
    Join Date
    Feb 2006
    Posts
    367
    Geez, my first visit here in ages and the first thing I see is another sterling example from voigts.
    Good to see some things don't change.
    "Let's face it, we're not changing the world. We're building a product that helps people buy more crap - and watch :banana::banana::banana::banana:." - Bill Watkins- CEO Seagate Technology

  14. #214
    Xtreme Addict
    Join Date
    Feb 2005
    Location
    Tennessee
    Posts
    1,171
    Quote Originally Posted by clokker View Post
    Geez, my first visit here in ages and the first thing I see is another sterling example from voigts.
    Good to see some things don't change.
    Where in the world have you been? I haven't seen you around in a long time.

    Thanks for the kind words. Don't be a stranger. I will be working in Photoshop the next several days on getting my final pics cleaned up and should have final pics up shortly.

  15. #215
    Xtreme Addict
    Join Date
    Feb 2005
    Location
    Tennessee
    Posts
    1,171
    Finished Pictures

    This journey is finally at an end. Here are the final pictures.


    Continued in next post:

  16. #216
    Xtreme Addict
    Join Date
    Feb 2005
    Location
    Tennessee
    Posts
    1,171


    Here are a couple of pics of my high-speed, uber advanced photo studio. It was a nice, cloudy day in front of my shed in the shade. I only have a simple Canon SX120 SLR camera with a $25 Ebay tripod. I set up a couple of sawhorses with wooden supports and a couple of pieces of OSB board. The background holders are made of 1 1/2” PVC. The black and gray foreground/background is just plain black fabric. The black fabric foreground looks more gray due to the lighting.


    Pictures of Lights in the Dark

    These pics were taken with a flat piece of 1/4” plywood and black fabric in my bedroom on our bed with a corner of the bedroom behind. Our bedroom is painted a Cranberry color., and I have the windows completely blacked-out making it very dark in there. An article a while back on Bit-tech regarding taking better camera shots helped me with these. I set my camera to shutter speed priority, set it to a 5 second exposure, and used a 2 second timer. I metered the shot (camera button down half-way) completely in the dark, and then once the camera shutter opened, I turned on the bedroom light for about 3 seconds, cut it off, and let the camera shutter continue in the dark for the other 2 seconds. This way I could capture the lights and still get the case.


    Thank you to everyone who chimed in and gave encouragement on this project.
    Last edited by voigts; 06-13-2011 at 01:49 AM.

  17. #217
    Xtreme Member
    Join Date
    Dec 2008
    Location
    Jerusalem, Israel
    Posts
    252
    finally it's done!
    very good job.

    got any plans for new projects?
    [SIGPIC][/SIGPIC]


    EVGA SR-2 , 2X Intel Xeon 5620, 12X2GB Corsair Domminator 1600 MHZ CL7
    3X GTX580, Corsair AX1200, Lian Li PC-Z70
    3X Dell U2311H, Liliput 7" touchscreen monitor

  18. #218
    Xtreme Addict
    Join Date
    Feb 2005
    Location
    Tennessee
    Posts
    1,171
    I am casually working on new case ideas for my daughter's computer. I'm not sure though when I'll get started on it. I'll probably wait a few months. Its getting too hot to want to be outside!

    One point I will add to the worklog. The rubber mounts (with chipset fan in between to cool the bottom of the pump) and the Petra's Gel Stuff are doing a wonderful job together on isolating the pump from the case. No pump vibration/noise is going to the case at all.
    Last edited by voigts; 06-09-2011 at 07:55 AM.

  19. #219
    Xtreme Guru
    Join Date
    Dec 2009
    Location
    Latvia, Riga
    Posts
    3,972
    voigts: what do you think of next project to be some steam-punk styled? Or case integrated into table?

  20. #220
    Xtreme Enthusiast
    Join Date
    Jan 2008
    Location
    Vancouver, Canada
    Posts
    612
    Outstanding Gary; a total work of art!

    I've thoroughly enjoyed following this project; albeit as a lurker.

    I hope you can now enjoy your latest masterpiece; I look forward to your next project.

  21. #221
    Xtreme Addict
    Join Date
    Feb 2005
    Location
    Tennessee
    Posts
    1,171
    Quote Originally Posted by churchy View Post
    voigts: what do you think of next project to be some steam-punk styled? Or case integrated into table?
    To be honest, believe it or not, I'm not really into the steam-punk look per se. I've seen some very well done steam-punk mods, but that's not really my style. The other problem is that I have to make cases that are the kind of thing I can put in my living room and my wife be happy with. Our deal is that I can make anything I want as long as it "looks good." I know she wouldn't go for steam-punk. As for the case/table idea, I've seen some of these done well also, but I prefer stand alone cases if for nothing else that I usually take them outside to blow the dust out of them.

    Quote Originally Posted by charles_h View Post
    Outstanding Gary; a total work of art!

    I've thoroughly enjoyed following this project; albeit as a lurker.

    I hope you can now enjoy your latest masterpiece; I look forward to your next project.
    Thanks a lot Charles. I'm glad you chimed in. I didn't know you were lurking. I'll probably start on another one towards the end of summer for my daughter.

  22. #222
    Engineering The Xtreme
    Join Date
    Feb 2007
    Location
    MA, USA
    Posts
    7,217
    Fantastic, superb, outstanding! a very well thought out design and a final finish to match!


  23. #223
    I am Xtreme
    Join Date
    Jun 2007
    Location
    Imperial Palace, UDE of Pitatopia
    Posts
    8,396


    Excellent finished product voigts.
    Circles SucQ!

    If your annoyed by sigs telling you to put things in your sig, then put this in your sig

    Bribery won't work on me...just say NO to AT!!!

  24. #224
    Moderator
    Join Date
    Aug 2007
    Location
    Back and forth between Florida and Maine
    Posts
    4,097
    Beautiful finished product, and great photos. You really did a nice job fitting everything in there, not to mention all the detail with the scroll work.

  25. #225
    Xtreme Guru
    Join Date
    Dec 2009
    Location
    Latvia, Riga
    Posts
    3,972
    Voigts: hmm, something for daughter? How about something pseudo-wooden-laptop (but not mobile per se, just look-a-like) - as in bottom part with normal keyboard made in (+maybe some easy to access usb ports and dvd drive), and top part - wooden frame arround normal LCD screen and some mini itx pc behind it?
    Though then again, your stuff looks good in our eyes with it's retro-ism, but will it fit for younger generation as well? :/ I somehow fail to imagine your works not wooden natural colored but in some bright artificial colors :/
    Probably first you have to spy for your daughter tastes, especially related to current furniture in her room
    Though then again maybe some embossed nice flower decoration patterns on surfaces might help.

Page 9 of 10 FirstFirst ... 678910 LastLast

Bookmarks

Bookmarks

Posting Permissions

  • You may not post new threads
  • You may not post replies
  • You may not post attachments
  • You may not edit your posts
  •