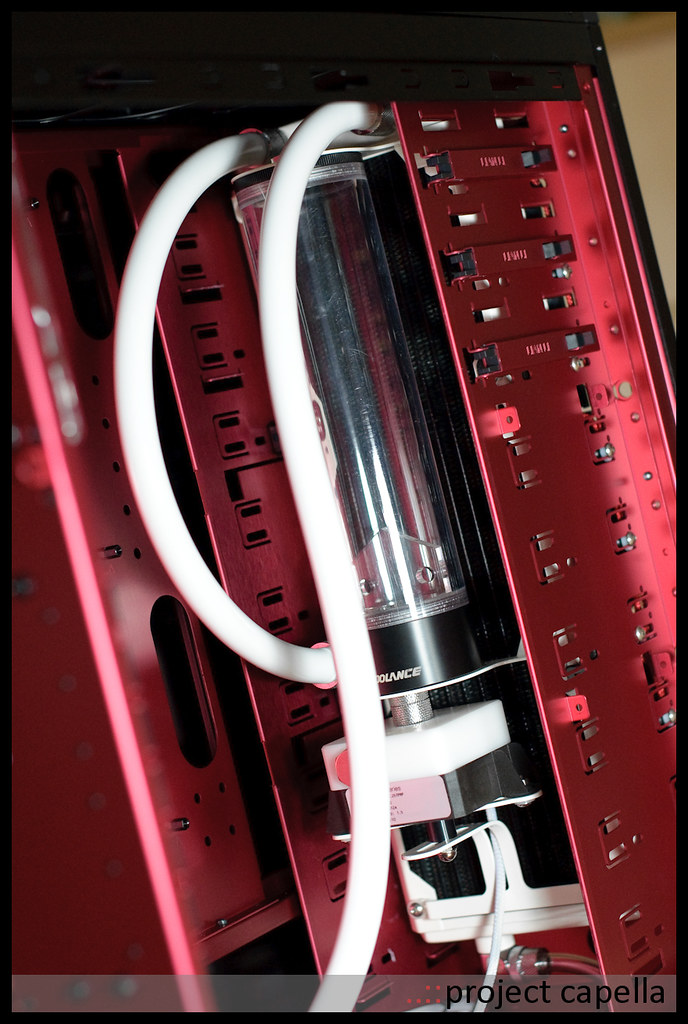
Gloss BLACK
Gloss RED
Other (please reply to thread including color + finish e.g. gloss/matte/hammered...)
*Please note edited bold text from previous post*![]()
Oh yeah, That R3E is what I am hanging out for.
It's not really the right colours for me but I feel I can work with it.
Should be out in mid March, fingers crossed, just whating for the reviews.
Then if all goes well, buy more sleeving, the right color this time.![]()
Thanks for dropping by ohms! The R3E is definitely a prime contender, if it lives up to ROG's performance legacy then my decision is already made, just waitin' for them to hit store shelves man.
Thanks as always Capt.I'm not only happy with how it looks, I'm relieved. Seeing your build come along I value your aesthetic input as much as anyone else's. Cheers.
*me swills more stella*
I also secretly blame you for the rampant increasing-frequent use of the word 'situation' in the fora. Damn you word-choice virus vector!
Lulz you guys kill me
Alright that good to hear bianco, thanks for the reassurance.
You and me both brother.
***
Touch-up
I tweaked the p-clip arrangement a bit and added spacers. Now the cables run straight unlike before.
Tried to capture the minimal gap between the roof and the top of the cooling unit. Alas the light did not cooperate so you'll just have to take my word for it.
And an overview of the cooling module/unit/shebang/(hebang?)/assembly.
Cheers.
Last edited by Kibbler; 03-02-2010 at 08:38 AM.
That does "just fit" - looking forward to see what you'll do with the HD(s), optical drive etc, now that your cooling thingamajig is taking up the front quarters. The tubing flow is now giving me this kind of fun vibe:
The R3E is a big improvement over the last two from a looks perspective and will not only look great in your build, but should be a top performer as well.
This turned way better than i thought, very nice job Kibbler. Excellent cleanliness.
vuuuu
![]()
![]()
Thanks Emir.
I stand corrected.
***
Aqua
That's a familiar logo.
Drum roll please...
There we go that's the stuff.
Appetizers from left to right:
1) A plastic screw terminal (2 leads) which Shoggy said I needed (?) for ATX shutdown.
2) Plexi display cover.
3) ATX standby power adapter. It's ugly and I'm not gonna use it, I got it to figure out the wiring so I can crimp my own.
4) Black faceplate.
Argh main course nom nom nom...
The packaging aesthetics may seems a bit old hat compared to EK's new bold colors, but it's nonetheless well designed.
Aqua-ero! (You're thinking "hey that blue LCD won't match! Don't worry I've a few tricks up my sleeve.)
That whole aluminum piece is a hold-down for a black heatsink, which in turn cools a few extra components on the PCB. Problem: The powerbooster heatsink bends the PCB. A-C should REALLY consider adding a steel backplate and rubber insulating gasket to the other side to keep the PCB from warping, like how EK's motherboard backplates are designed. This would also ensure proper pressure and contact between the heatsink and the new components.
EDIT: I improved mine a bit by using a new thermal pad and re-seating the heatsink (it's actually in 2 pieces, friction fit). Attached and re-attached a few times to make sure the components are making good contact on the thermal pad.
Autobots, disassemble!
![]()
Last edited by Kibbler; 03-04-2010 at 09:37 AM.
that's some nice stuff
also like the drain on the rad![]()
Duality: Q9550 - P5Q Deluxe - 8GB OCZ - HD5850 - 4,64TB WD - HX650 - X-fi - Aquaero 4 - Lian Li V1000b II Plus @Dual loops watercooling
Loop 1 => DDC18w w/ EK X-top V2 - EK Supreme HF - EK FC5850 - PA120.3 - Multires 150
Loop 2 => DDC18w w/ EK X-top V2 - PA120.1 - MIPS mosfet 1&2 - mips NB - Mips Ramfreezer 4 - MIPS SB - Multires 150
Looks great.
Now you just need some touch-up paint for those two spots on the drive cage that got nicked (possibly by the radiator?)
Sorry.You've probably already noticed it. Please take it as a compliment and not a criticism. It's just that your build is looking nice enough that anything that strays a tiny bit from the norm will stand out. One of the prices you pay for building an excellent machine.
That's a beautiful reddish paint that you've gone with. It blends with the black really well. I usually don't care for red in builds all that much, but you've gone with a great shade of it.
Very nice build. Keep up the great work!
Last edited by Xion X2; 03-04-2010 at 09:34 AM.
Project:
[sigpic][/sigpic]
We can always trust you kibbler to find a quick and easy fix for any challenge at comes along, well done mate.
I also forgot to say earlier that I am glad to see that you have just run the return hose straight to the res without any 90 or 45 degree fittings.![]()
Oh and remember as for as the rad goes, a Snug Fit, Is a Good Fit.
Edit: I think that may very well just be white paint from the rad and not chips in the red anodized case and if so should just rub off easily.![]()
Last edited by kgtiger; 03-04-2010 at 09:40 AM. Reason: Add comment for above post.
Yep, my thought as well. Should come right off with some dead paint remover by Meguiar's or a similar brand.
I'm sure it was really tough to mount the rad in that space without nicking something. When I'm working in a case, the rad is usually the first thing to hit something because of their size.
Project:
[sigpic][/sigpic]
SCORE on the Aquaero!
(situation)
Thanks for pointing that out Xion. Graeme got it, the rad nicked it on the way in but thankfully the surface took no damage. What you're seeing is small paint flecks catching the light just right (wrong). I cleared them with a thumbnail pretty easily.
Btw I didn't paint the case it came anodized red.
Thanks KG, I prefer to use as few fittings as possible. On that return line I actually went back just now and took off about an inch and a half of tubing. I was worried it came out too much and would interfere with tall ram. Now the curve should just clear the edge of the motherboard.
...
...
EDIT:
***
I'm making a note here: I took a closer look at Wezly's Raven project, then I found and examined more photos of Raven1 and Raven2.
That wasn't a good idea.
For the past hour and likely for the next hour my head is flooding with sweet ideas for setups in those cases: Put the rad here, patch the plate here, move the PSU there, route from here to here, mount the pump here.
It's a disease I tell you.
Last edited by Kibbler; 03-04-2010 at 08:05 PM.
"On FedEx vehicle for delivery"
Subtitle: Among the greatest phrases in the English language next to "sleep with me" and "we can't stop here, this is bat country."
I guess on account of availability Aquaeros are seldom seen in the wild, so I decided to upload more photos of the device itself so you can take a closer look at how it's built.
Here's where we left off. Remove four screws...
...and the faceplate + brackets come right off. The brackets are solid but not cleanly bent. I will make my own.
Buttons are nice solid metal, and they just slide out and off.
And of course, the powerbooster mod. Remove the four screws at the right edge and close to the middle there...
...and the LCD comes off. The entire thing is basically an Aquaero LT + LCD (and a few spacers).
The LCD mates (uh oh euphemisms are back with a vengeance!) with the Aquaero via a 2x8 pin interface at the right there. They're standard jumper-size 0.10" pitch pins.
EDIT: See those two nuts there? Those are powerbooster heatsink mounting screws. Between them lies perfectly serene, bare PCB. No surface-mounted anything. I think A-C should install a backplate here to keep the Aquaero from warping. Two layers: 2mm steel, and 1mm rubber. Shouldn't be costly at all.
Here's the back of the (Crystalfontz) LCD unit. Curious cats can go to their website (great website, lots of technical detail) and search for part number CFAH2002A-TML-JT# but you won't find the exact one. I think the last 3 or 4 characters denote custom jobs, in this case a custom job for A-C (for soldering on the female connector housing).
So what's a guy to do...
That. Is. Fast.Mar 4, 2010 8:55 AM - Picked up - SPOKANE, WA
Mar 6, 2010 11:18 AM - Delivered - SINGAPORE SG
Nice! Right away I am a fan of this company. (btw granted I haven't ordered much from Petra but I never got a pen. Always felt left out of that club.)
Two new units oh hell yeah! They're beautiful!
Altogether now Crystalfontz orgy!
Here are the backs of the new units. The one on the right is of a newer, thinner design with two additional pins for running the backlight off 5V (at least, if I'm reading the data sheet correctly). Otherwise they are pin-compatible. They're also bare LCDs so I'm heading out in a short while to scrounge for the right connector housing.
I took the liberty of blacking out the part number so you sneaky lot won't go and spoil all the fun.
All in good time.
Thanks for looking!
Last edited by Kibbler; 03-05-2010 at 09:47 PM.
Should be fun playing with those crystal fontz boards. I have one in my parts bin somewhere I used with some Atmel processor to make a fun little embedded project a while back. Anyways, point was that the LCDs are fun little shinies to play with![]()
Good stuff, Kibbler. So, I'm a bit confused - did you manage to get a display from CF that already has the custom connector for the Aquaero, or do you have to put the connector on? (I'm sure it's clear from your photos, just a bit daft this morning). And yes - I recall playing the same roulette with regards to the last few digits on the CF lcd.
Please do show us how you end up setting it up - I'd like to rescue my Aquaero display!
is it something like this? http://www.crystalfontz.com/product/CFAH2002Y-PDI-ET
I worked on them for a while tonight and it's not all smooth sailing, as you'll see in a minute...
I got 2 displays from CF, both of which came with bare PCBs (as they all do). This afternoon I went out and got the proper connector, came back, cut them to size and soldered them on. Here are the results...
1) Stock blue
2) Beautiful beautiful red*
3) There is no #3. Know why? Because in my distracted state I soldered the connector to the wrong side of the PCB!!
*But there's a problem with the red unit, something I failed to notice before ordering it. It has a slightly different character set stored in (unmodifiable) ROM than the original display. So...for example where it should say "Lüfter" it shows some nonsense like "LФfter." Not acceptable, and not fixable.
The good thing is they are pin-compatible like I thought, so you can definitely resurrect your Aquaero this way. Just need to make sure you have a character set-compatible models. I'll update more once I am sure what's going on.
Needless to say I'm hitting some snags in this department. I'm gonna take a break and work on something else now.
Close. CFAH2002Y-RDI-ET.![]()
I'm sorry, but the soldering the connector to the wrong side is kind of funnywhat kind of connectors do these use, though?
great job as always![]()
Worklog: Project Black Copper
Lian Li PC-P80 | Thermochill PA140.3 | Noiseblocker fans | mdpc-x stuff
One day i'm gonna learn to use those displays, you make them look so tempting with your damn great photos. And i never commented on the rad pics at the top of the page, which, by the way, look epic of course
![]()
Bookmarks