-
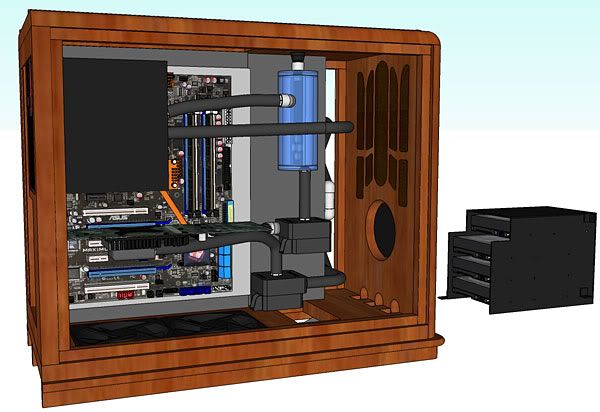
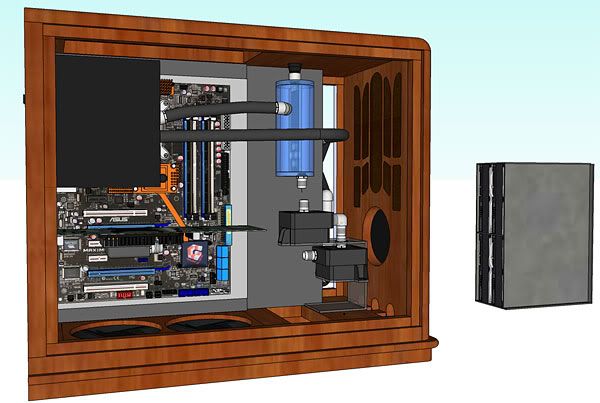
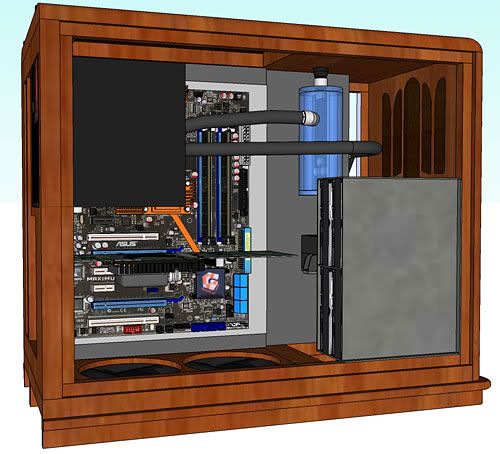
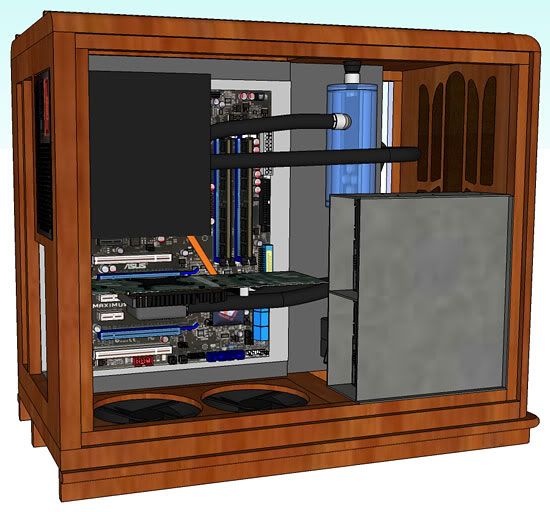
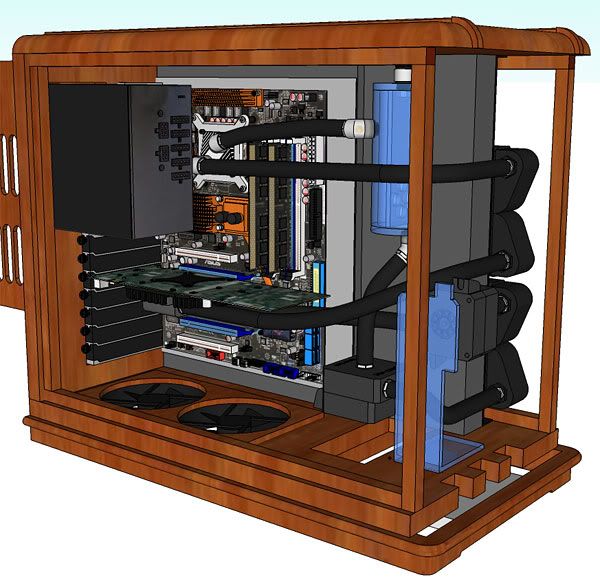
Motherboard Mounted
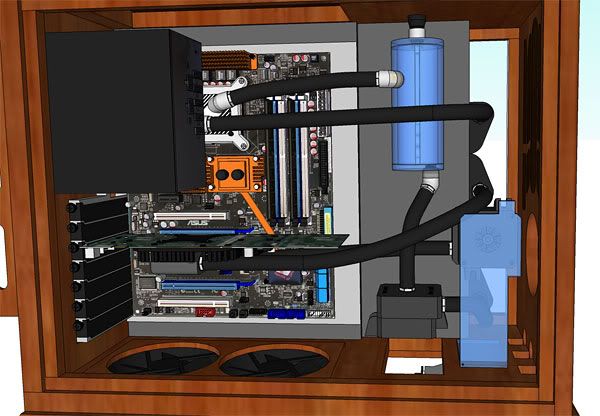
I got the Motherboard from my old system mounted as well as the PSU and wires to power everything. It took me a good bit of time to work out exactly where to put my wiring. I knew with this design that wire management was going to be an issue since I added the rad air chamber to the case, thereby eliminating that area for wiring to be hid.

Dual Pump Problem
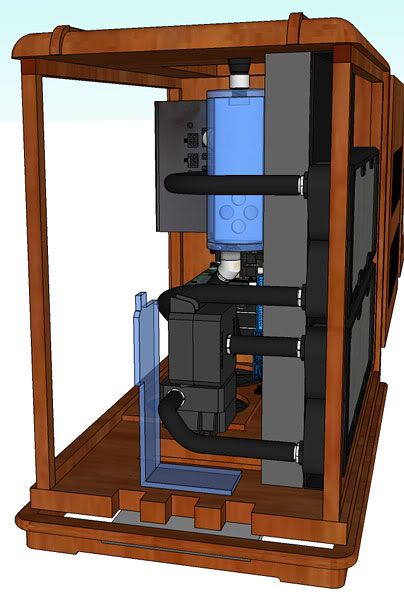
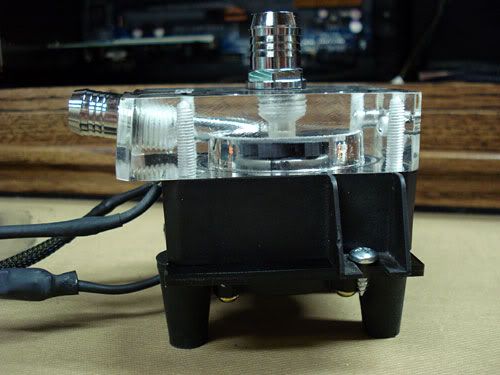
I planned originally on having one DDC pump mounted in between the HD mount and air chamber.

I made the mount, and test fitted it where I planned on it going.
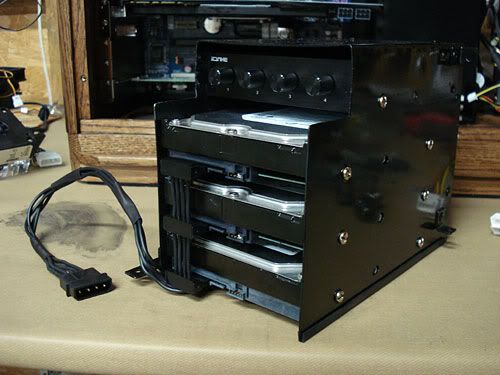
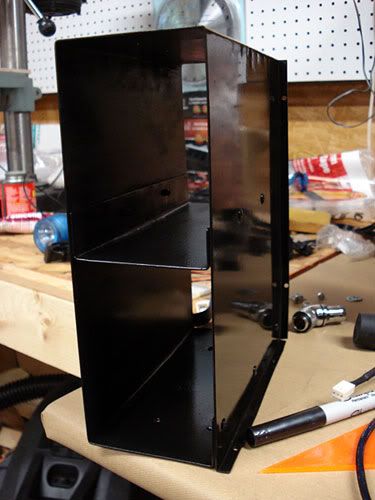
I mounted the hard drives and fan controller, and made the SATA power cable.
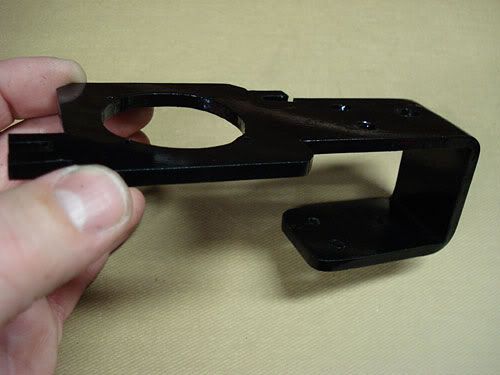
Pump Mount v2 and HD Mount v2
I however ran into an issue. As I have been making this, I really wanted to be able to use 2 pumps for redundancy since my original DDC-1 is now about 2 1/2 years old, and I bought a new DDC3.1 anyway. Figuring this issue out has been a pain. I messed around with several different ways to mount two pumps, but with the wiring in place, nothing worked. So I went back and pulled from a different HD mount that I came up with earlier that would be thinner and allow for more room between the air chamber and HD mount.
So I have been at work making another HD mount and pump mount.
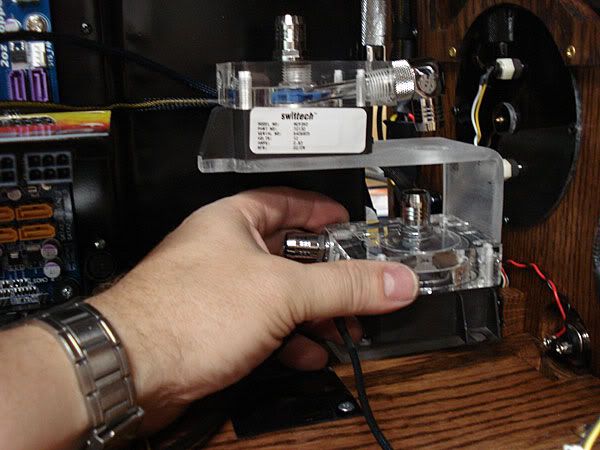
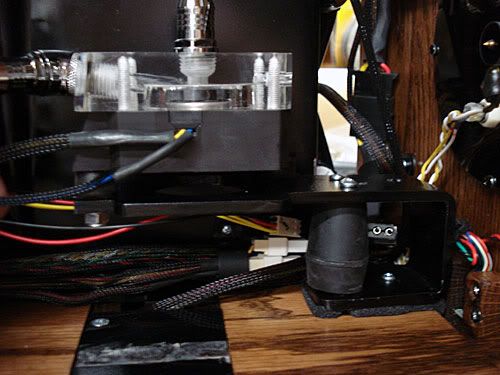
I have two 1/2" rubber pieces for the pump to sit on between it and the acrylic mount. The one pump will feed directly into the second pump. The angle on the end of the XSPC block is going to make getting the tubing from the one pump outlet into the second pump inlet a bit tight, but hopefully some boiling water will fix this issue.
I've made and painted the new HD mount
Pump Mounts v3
Well, after spending time looking at this pump mount scenario, I came to the conclusion that it simply isn't going to work well as I am going to have problems trying to get the line from the bottom of the rads to the GPU. So, back to the drawing board again. This time I think I've finally got the problem figured out. I'm repositioning the pumps again and changing the tubing routing. I think this will solve a number of problems regarding tubing routing and room for the wiring. The bottom pump feeds the bottom rad, and the bottom rad feeds the inlet of the second pump.
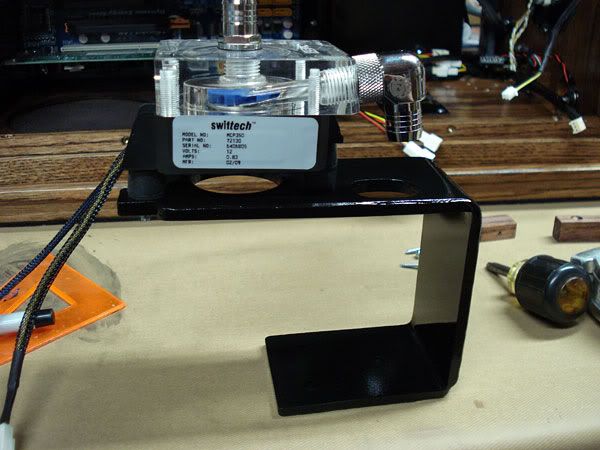
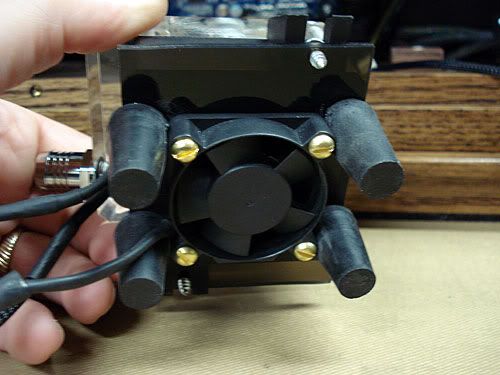
I made a nifty little mount using rubber stoppers for the bottom most pump with a small chipset fan underneath it that I have been using.
I've also made and mounted the second pump, but don't have a pic of it yet.
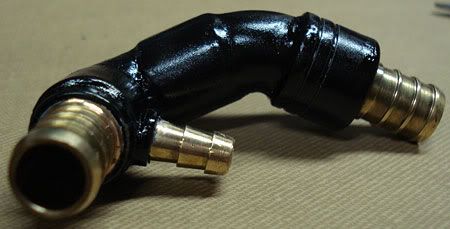
Trying to figure out exactly where to put a drain has been one other issue that I have been wrestling with on this case. I finally came up and made this fitting that will go between the bottom pump and the bottom barb on the rad. There is a 1/4" copper line that feeds down from the small barb through the bottom of the case that I will cap off. So in order to drain the setup, I merely have to park the case over the kitchen sink and remove the small cap from the line underneath. It is made from a 90 degree 1/2" copper street elbow, and 45 degree street, two PEX solder barbs, and a 1/4" hose mender cut almost in half and trimmed down and soldered into a hole I drilled.

Here it is painted
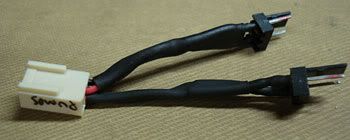
I've also been busy on wiring. Simple things like a short connector for the pump power leads have to be made.
The PCI-E wires that come with the PSU are of course too short to route neatly. I ordered PCI-E connectors from Performance-PCS. Since the page on their site however didn't mention needing to order pins along with the connectors, I got the connectors in sans any pins. I had to call them to find out which pins I needed and place another order and wait for it to come in with pins.
This is almost 60' of 18 gauge black wiring needed just to make the two PCI-E power wires. I squooshed on and soldered the pins today. I plan on sleeving them and putting them in place shortly. My daughter is holding them for the pic.
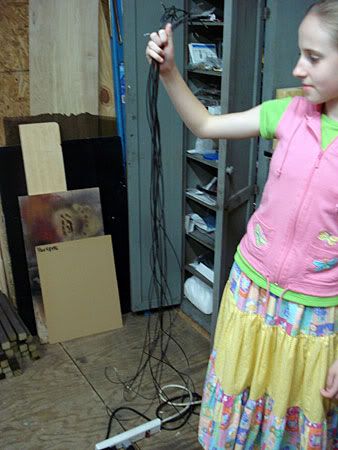
I'm really very blessed as she is a good kid. She thinks this project is really neat and she likes it. She however wouldn't mind when I am done with this one if I made one like it for her.
Once I get the PCI-E cables in place, I have to finalize some connections and start putting tubing in place. I also have to make the SATA power cables. I bought a little $20 single unit burner so that I can plug it in and use a pot for boiling water for the 7/16"ID tubing so that I don't have to go inside and take over the dining room table. My wife liked the burner idea. She hates it when I cover the table with computer.
 Posting Permissions
- You may not post new threads
- You may not post replies
- You may not post attachments
- You may not edit your posts
-
Forum Rules


 Reply With Quote
Bookmarks