


Hello everybody of XtremeSystems !
Let me introduce myself First. My name is Tom and Im new to these forums. Im almost 18 years old and Im casemodding for 2 years now.
I joined these forums because some people (especially nigelke) said I had to post my project on the XS forums. He said people there liked extreme stuff and as I am making a well extreme casemod, I thought by myself I could post my log here as well.
Well lets see What have I done before?
In april 2006 I started to look at those magnificent pieces of art, so called Casemods. Im creative and handy, so I started to make my own. The first one never finished, because I was not happy with the result I had to make another one, a better one.
First of all: sorry for my English, Im trying to do my best writing English
This is what happened after a year of modding:
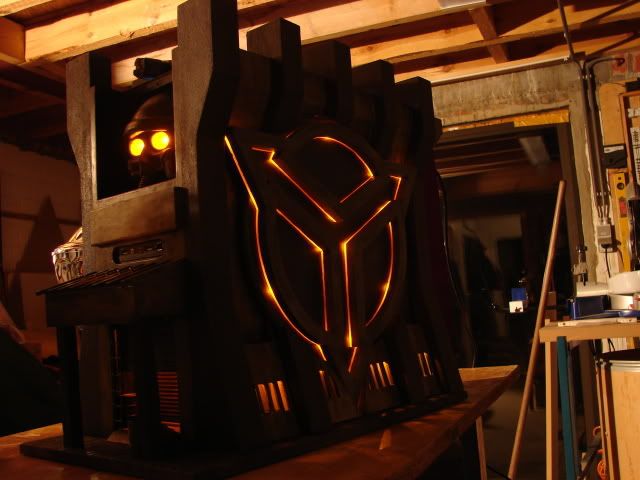
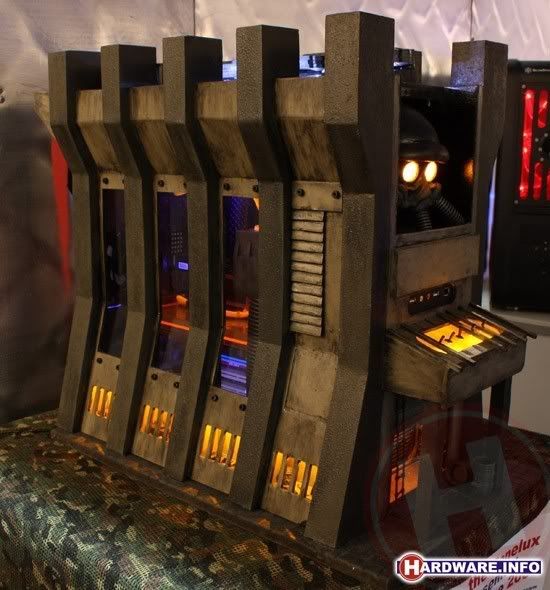
My project HELGHAN was finished in November 2007. Based upon the Killzone2 game for PS3. With this casemod I won the Benelux Casemod League and I got a lot of cool prices.
After this, I was sure to begin a new project. A very big, extreme project
Normally, I started with this project before Helghan. But I was not experienced enough in the beginning.
Now I think I am, so Im proud to present my new casemod / caseconstruction: Elements of Fortune
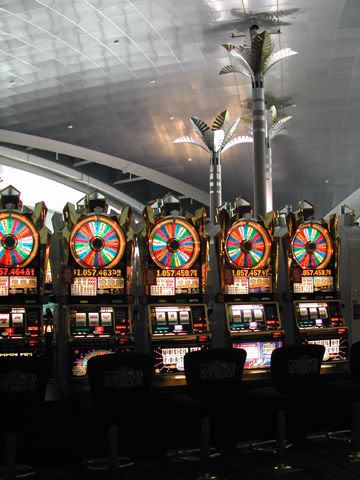
The ideas of making this case are from the wheel of fortune slot machine, standing in casinos all over the world. I want to rebuild it, based on pictures and my own sketches.
This case will be about 2 metres high and probably it will take place in a local hardware/modding store when it is finished. I hope to go to some LANparties as well.
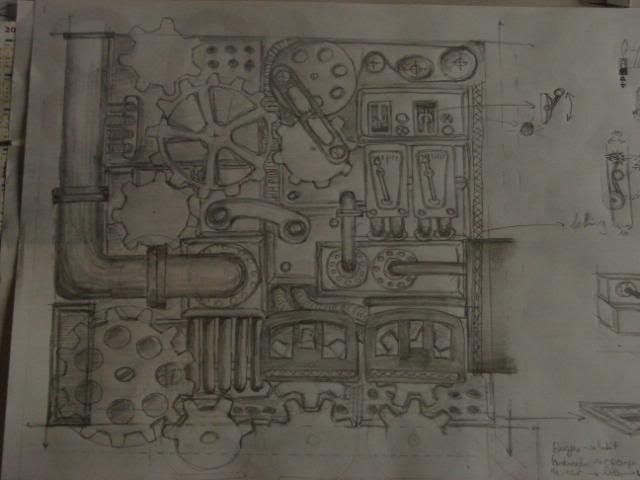
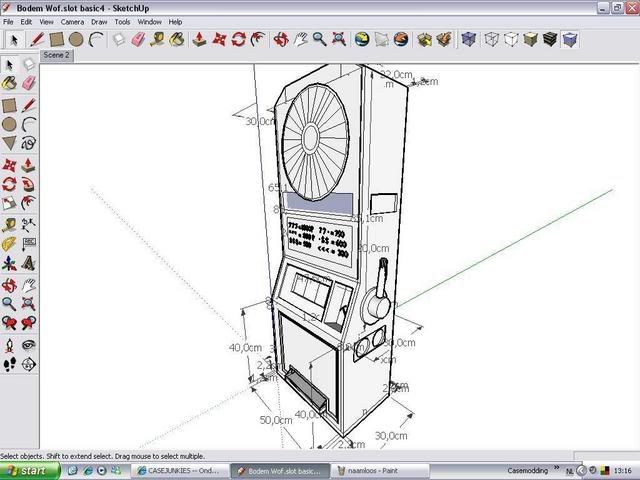
I got loads of pictures of sketching with hand and with sketchup. The first designs in sketchup looked like this:
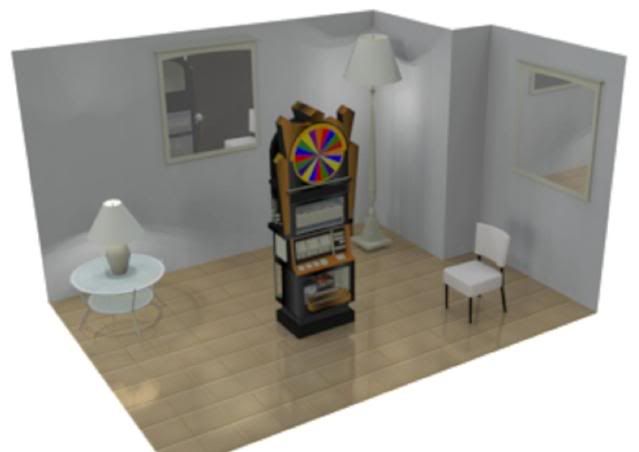
A while later, I made a better model:
As you can see, this case will be huge. It will not only contain computer hardware, but also a lot of casino-like stuff and sweet eye-candy.
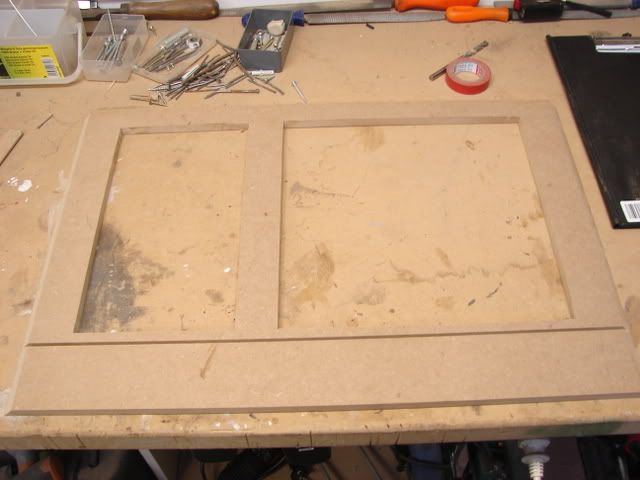
I will start at the beginning of the mod, and thats the base/ bottom
After that the level on top of the bottom and so on In total, there are approx. 5 layers.
Bottom:
Layer1
During the progress of modding, some things may change of course.
Because I already did some work on the project, I will summarize it.
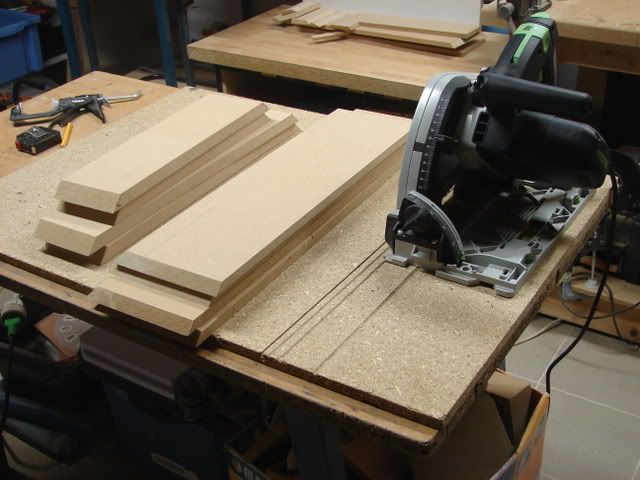
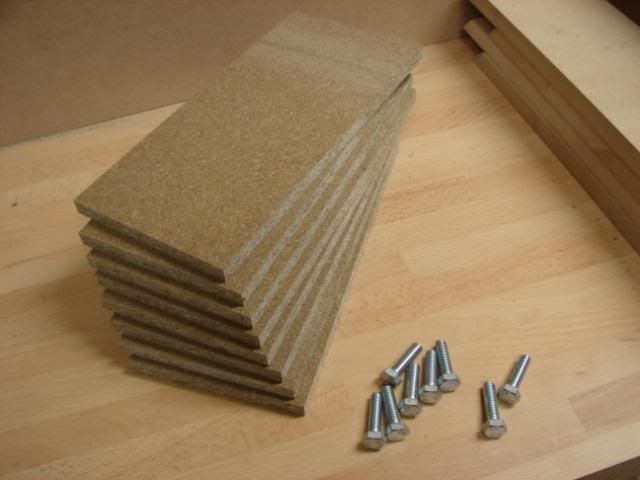
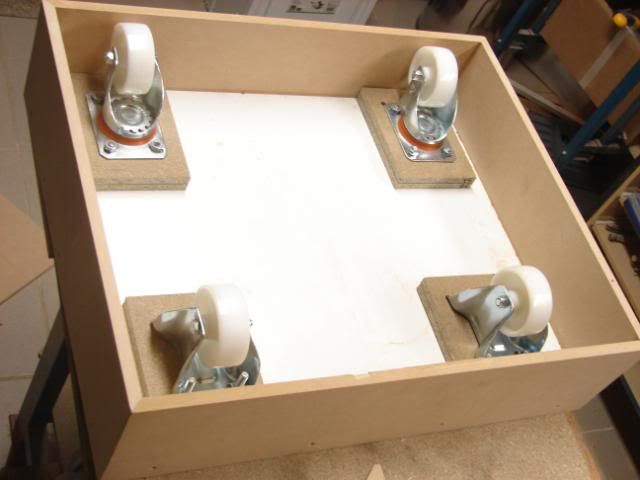
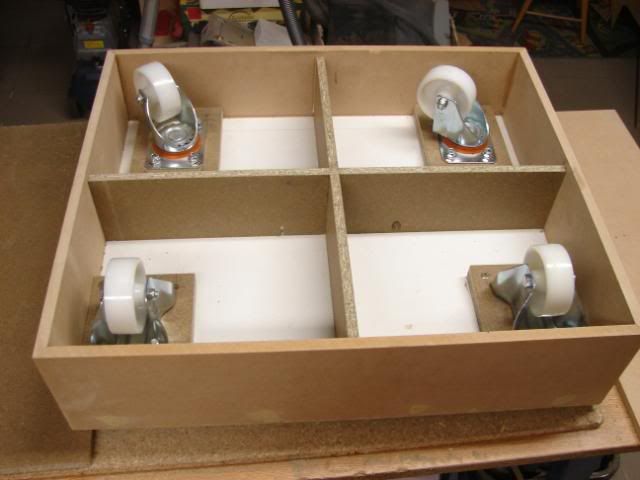
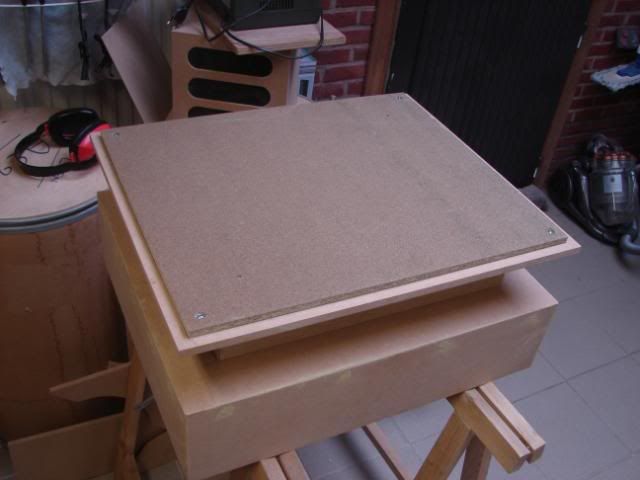
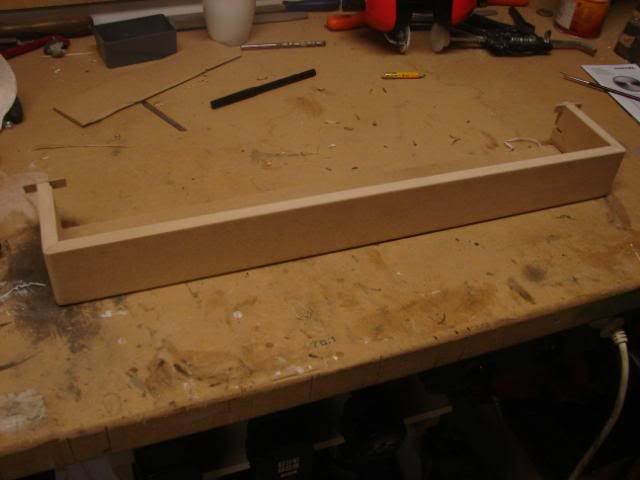
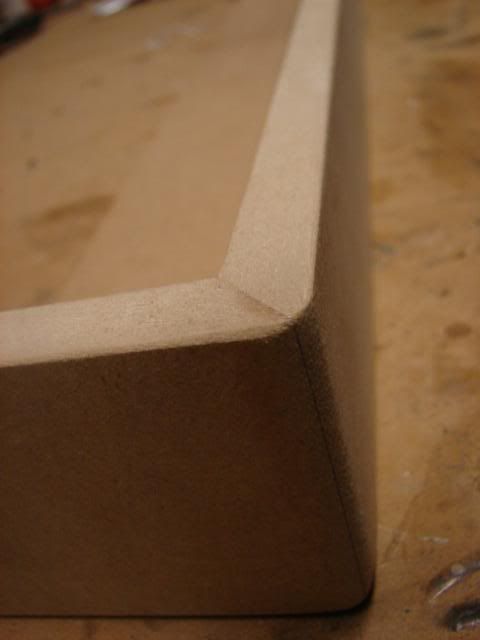
So first the bottom, Im going to make it with wood (MDF), 12/18mm thickness.
To make it strong, I added another 18mm sheet of wood (white)
And to move the case for a small distance, I added some wheels
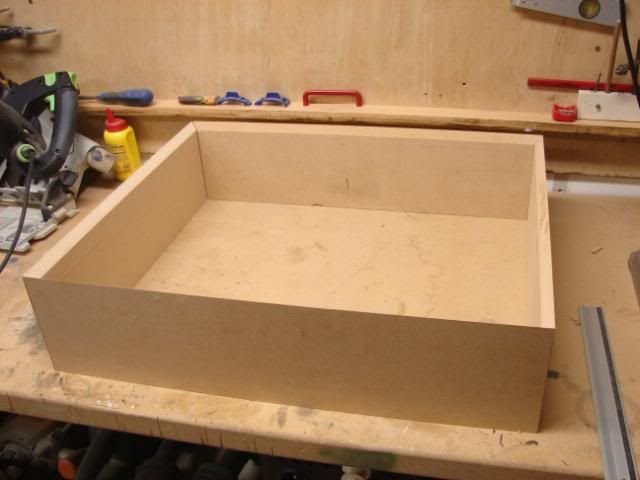
Then I already began on the second layer, as I like doing several things at once.
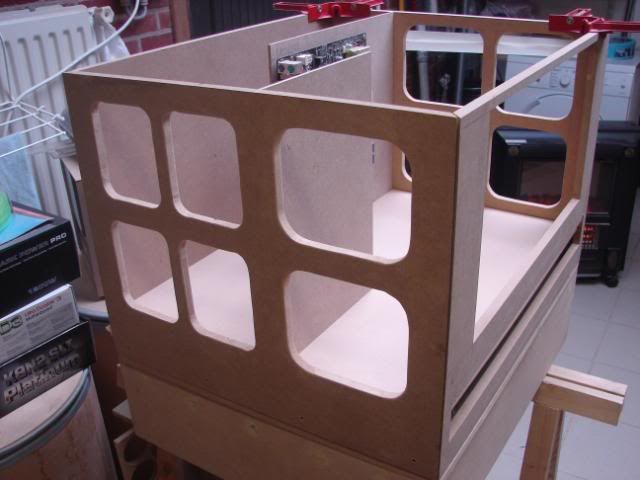
A side panel:
To make it a (little) bit lighter, I made some holes inside the side panel.
Dont worry, you wont see a thing of the woodworks when the project is finished
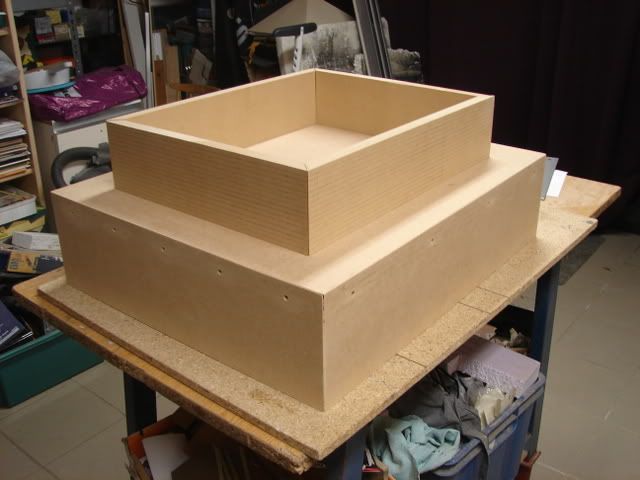
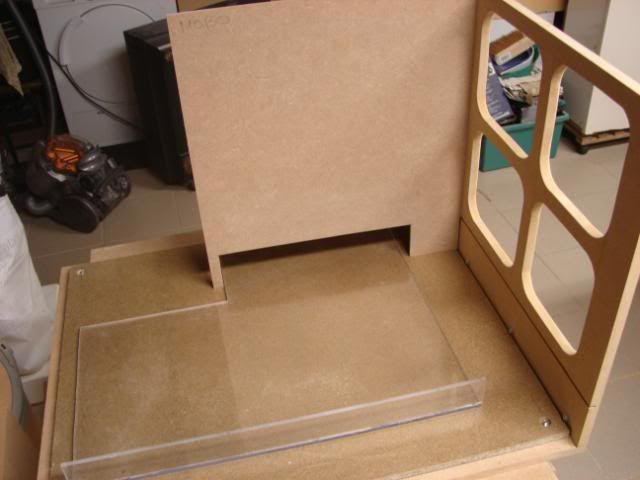
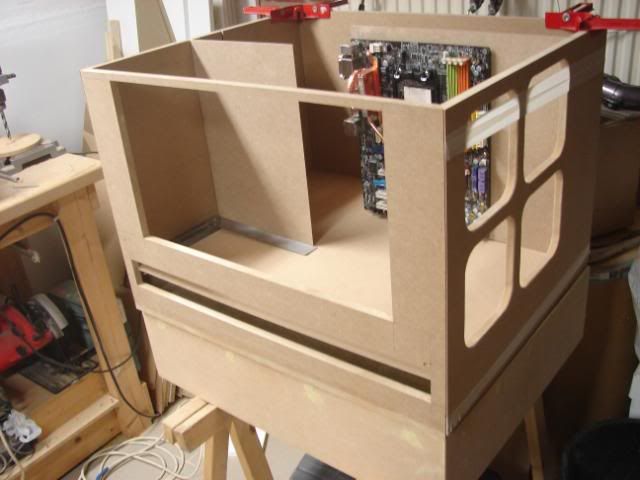
I you look closely, you will see that I made some cuts inside the wood, but they are only sawed half way in the sheet of wood. I will use these cuts to attach my motherboard panel, false bottom panel
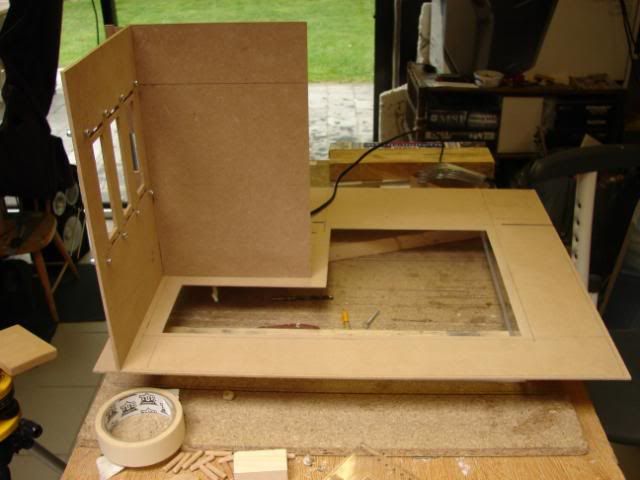
Here you see what I mean with false bottom
Beneath this bottom, there will be a plexi reservoir, filled with water and cogs (gears) to make eye-candy. There is no meaning for the reservoir for the other hand, just eye-candy but you will see more later about that
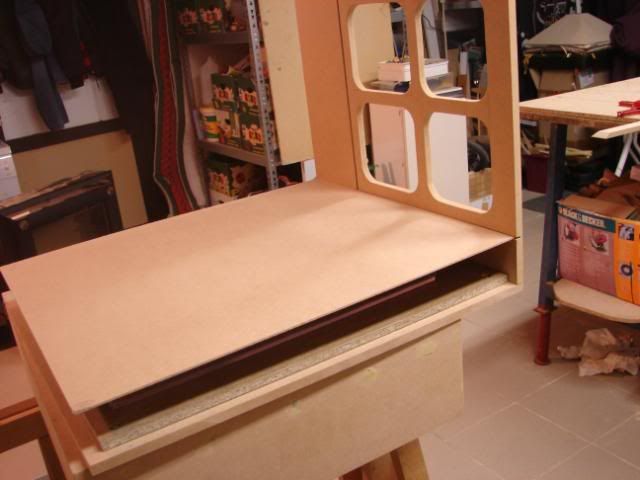
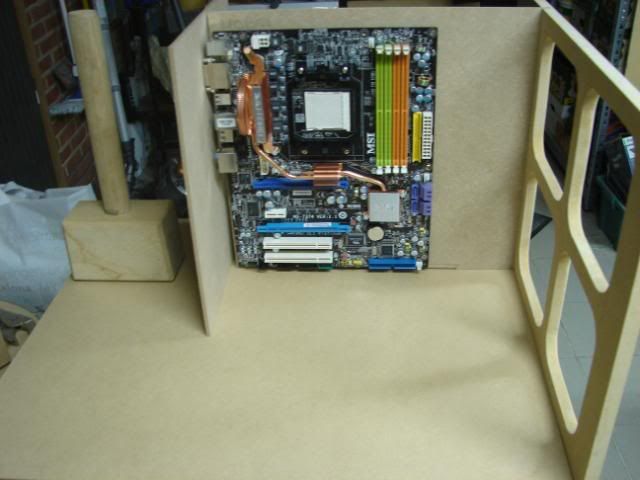
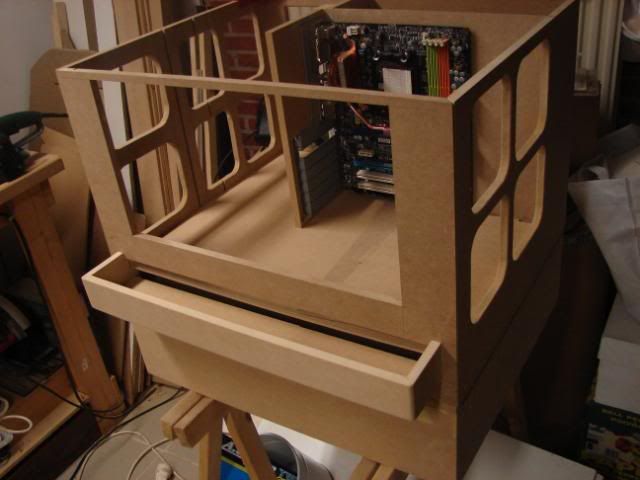
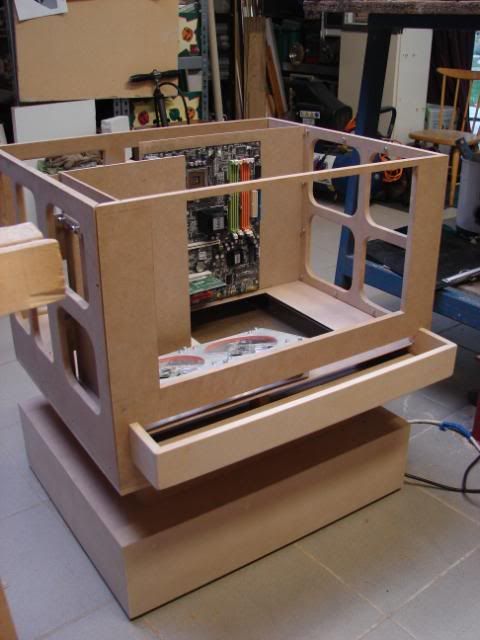
Here you can see the motherboard panel:
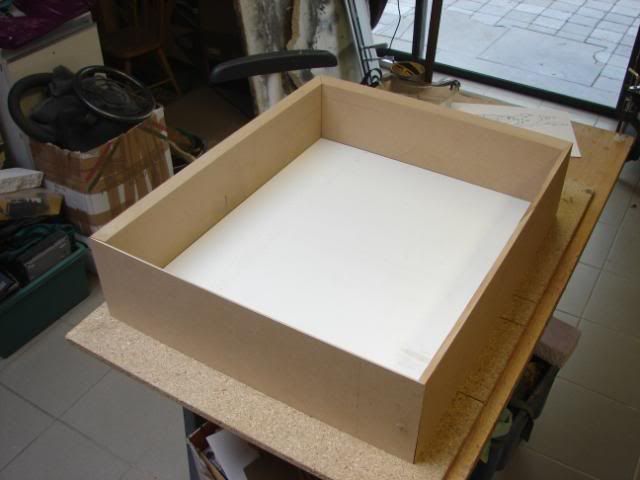
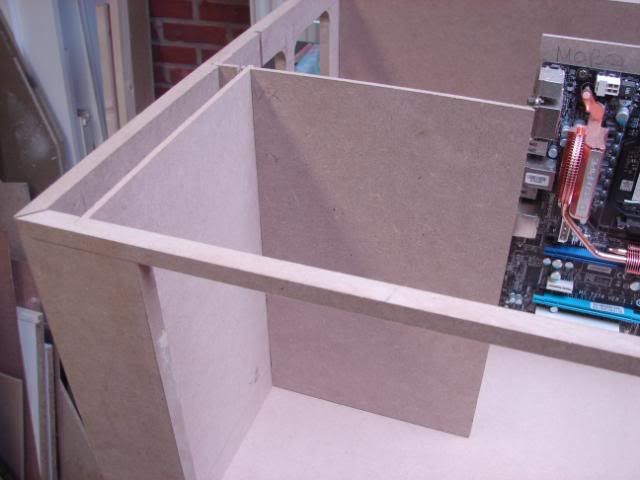
And how it fits together, the false bottom is standing vertical, as the sidepanel is laying down the table
(not the final motherboard, just to give an impression)
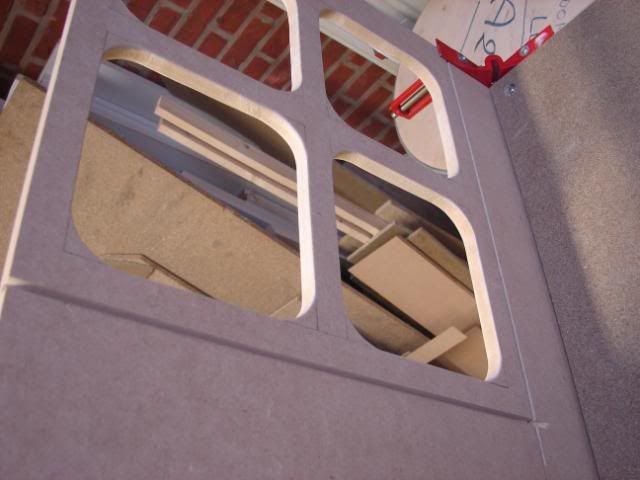
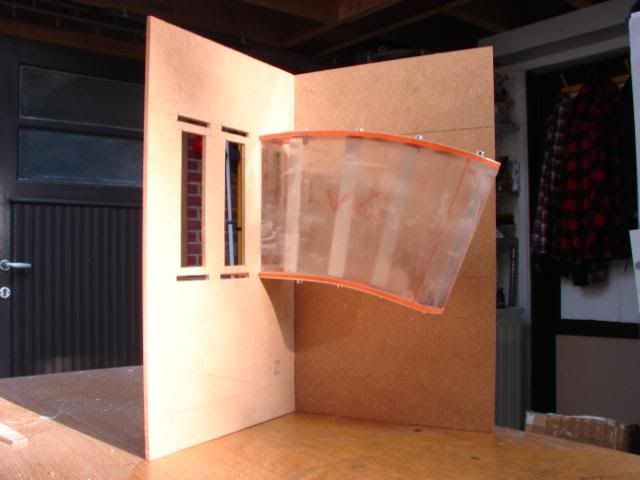
The other side panel, and front panel with a large window.
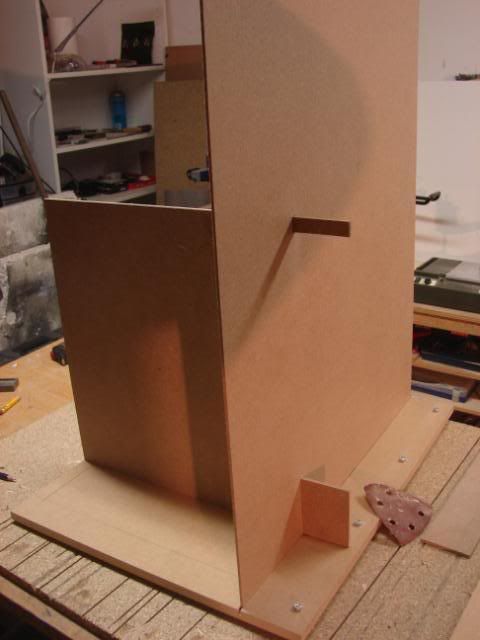
Hard drives will be attached in a special casing, and that casing will be placed here:
As you can see another false inside wall that will hide power (12v) and Sata cables coming from the hard drives.
The rear panel. The small window is supposed to get the wires to the monitor and keyboard and USB peripheralsThe big window will be a window for some artwork I will try to make.
Like here you can see the Motherboard I/O panel, and behind the motherboard tray there is still some place to make something special. This is what I want to make in polyester. (or plastics)
(in 3D, and I also want to make the cogs (gears) to spin around :p )
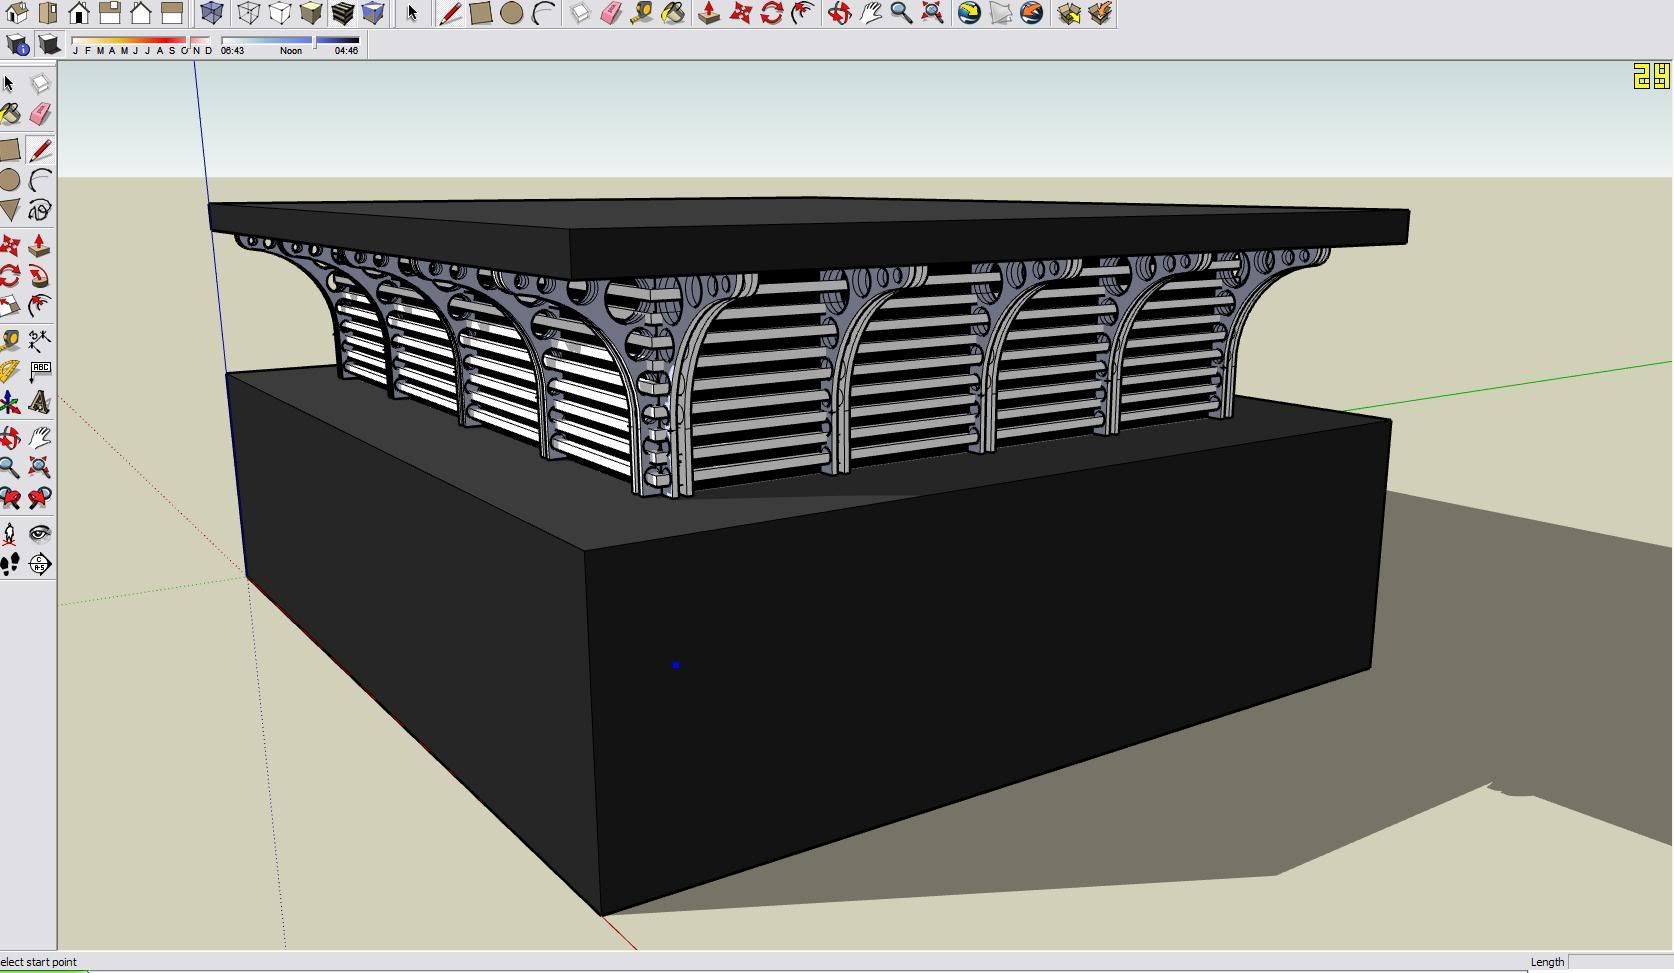
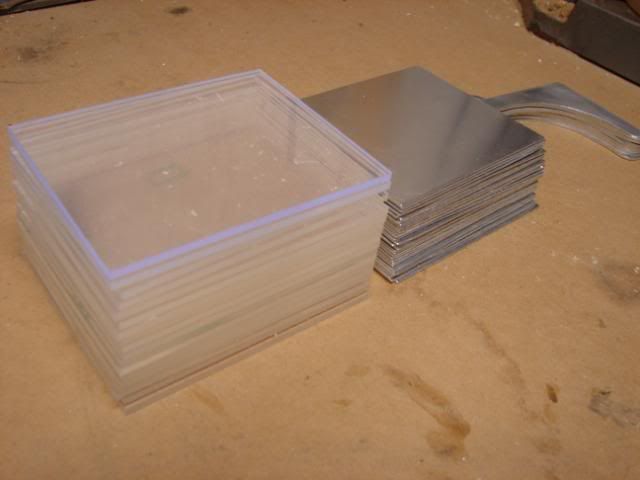
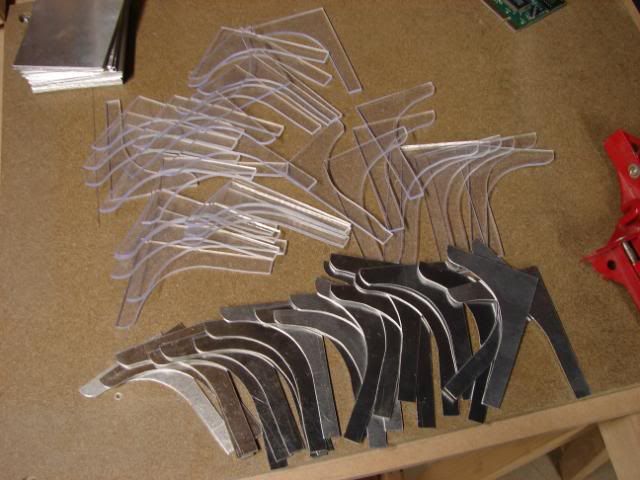
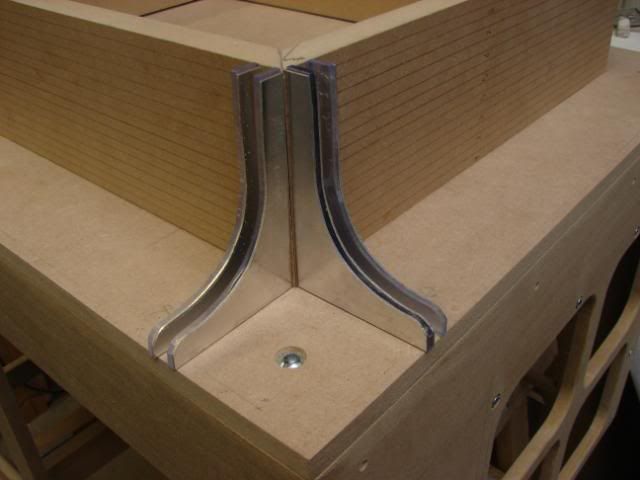
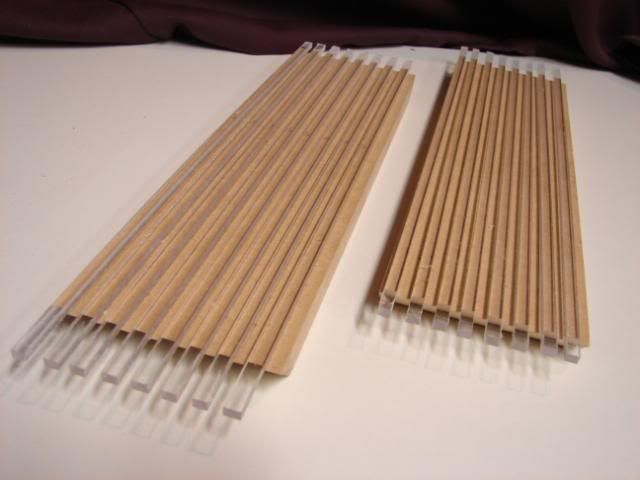
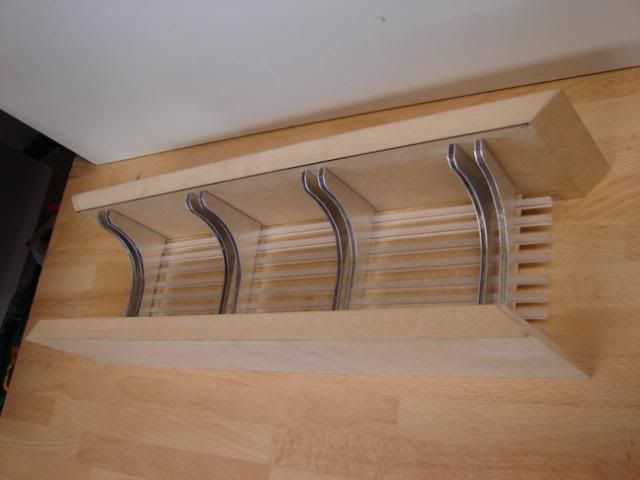
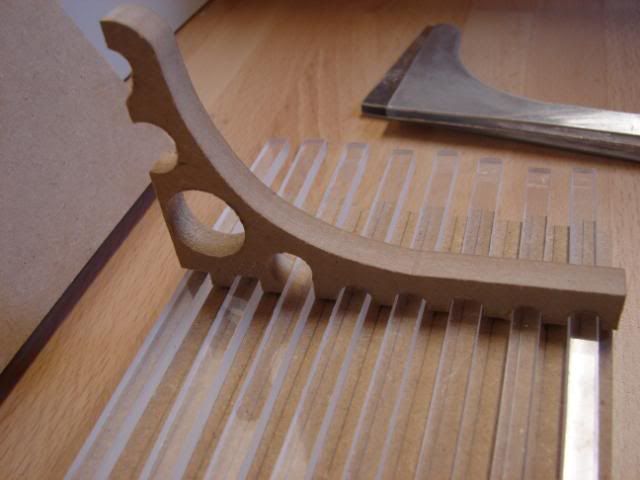
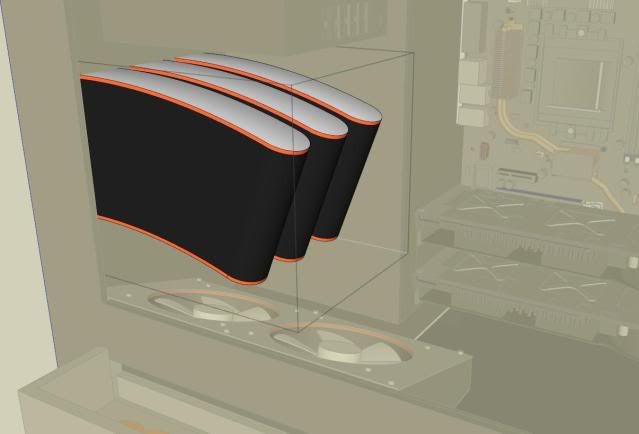
Okay, you remember the bottom sketch? You have seen a lots of white rafters?/shingles? and struts
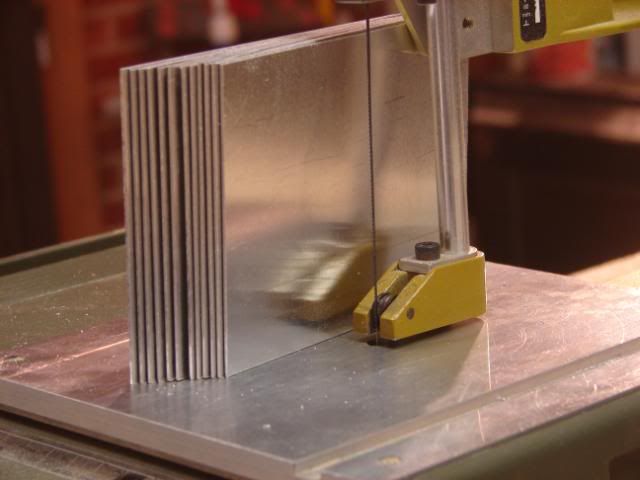
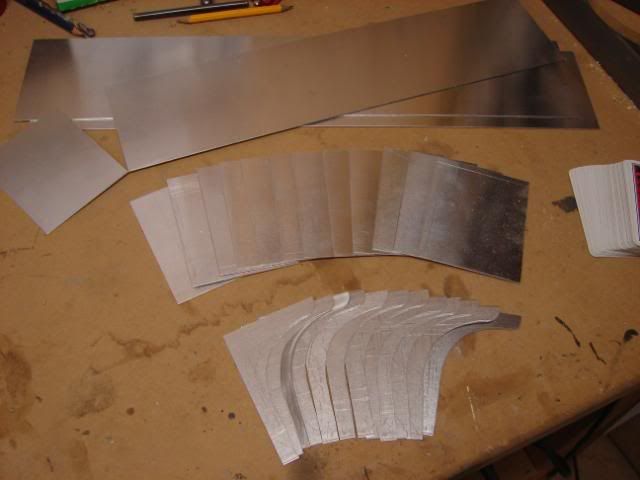
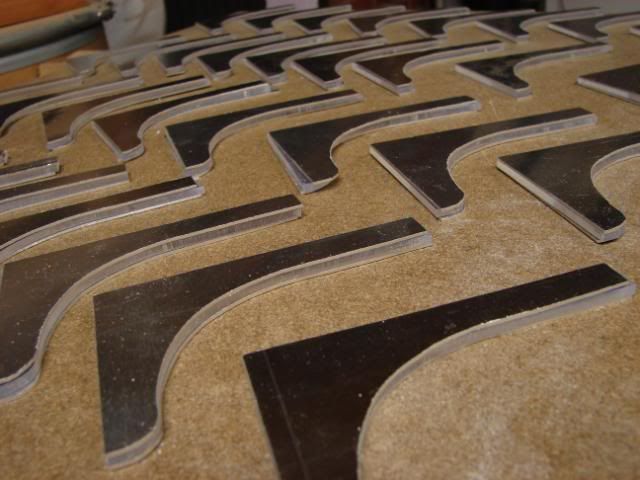
Now, there is a lot of work to make the struts, each one is made out of 4 aluminum struts, and 2 blue plexi. Those are glued together and after that they will be enlightened with LEDs.
And the acrylic / plexi ones too
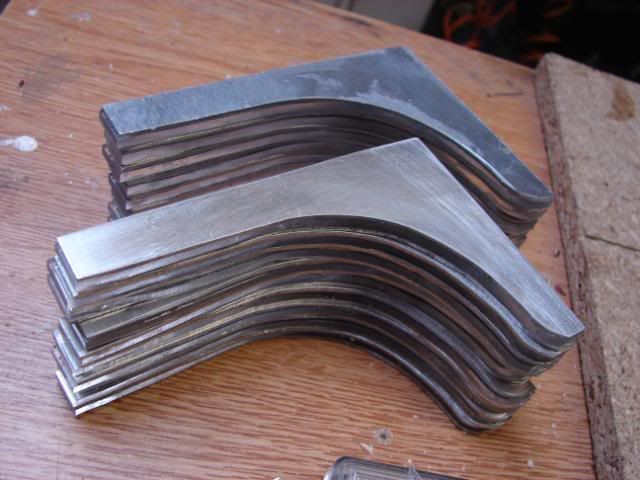
Ready to glue ...
This moment (12th of may) they are still being glued, it takes a lot of time but I already got some ready.
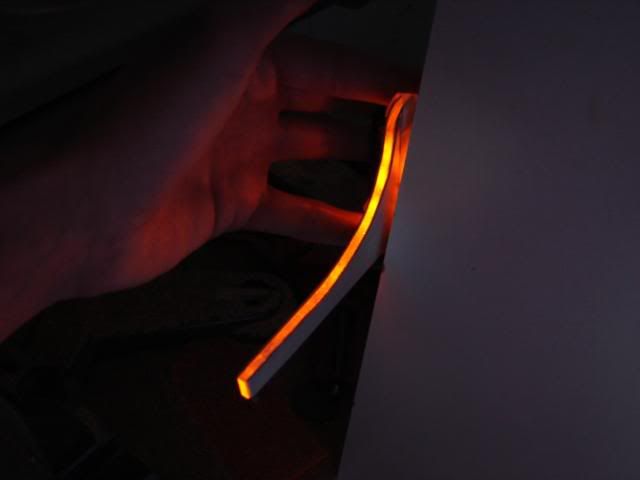
To check if they give good light, I tried something.
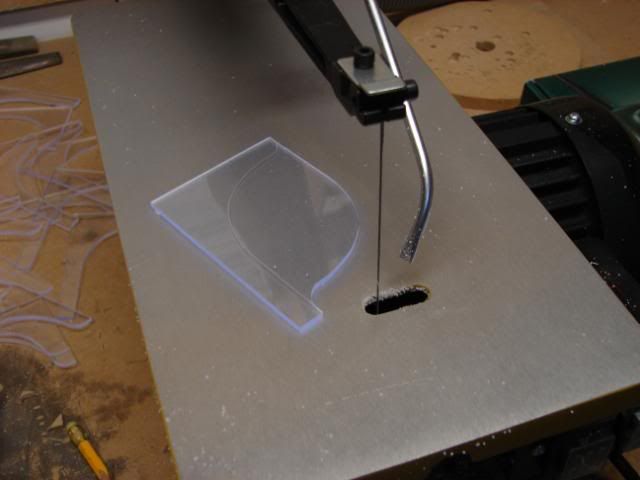
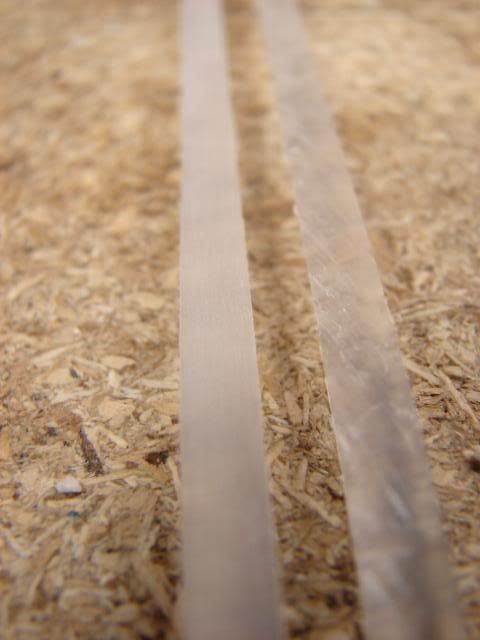
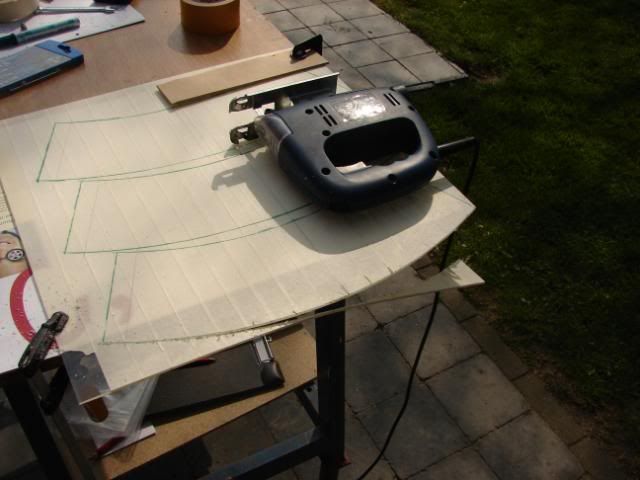
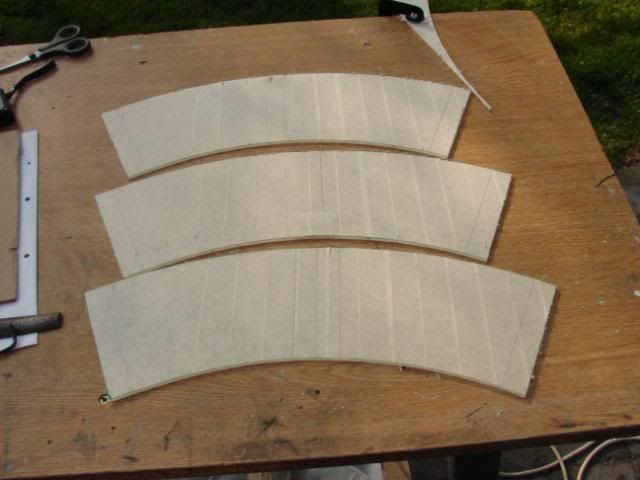
Together with the struts, I also made the with acrylic rafters.
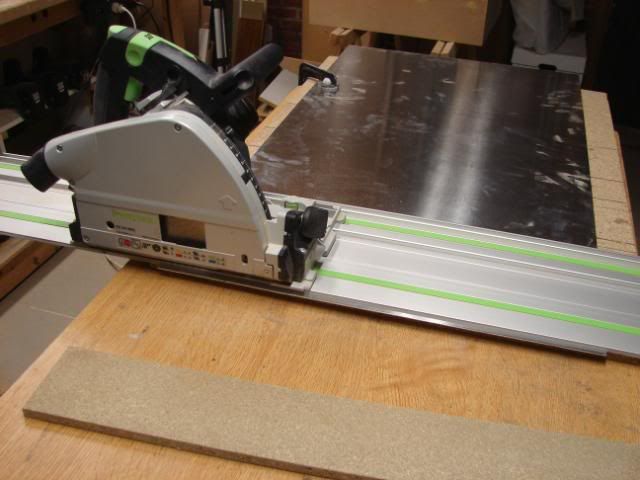
After sawing with a circular saw, I have to sand each rafter by hand but its worth sanding it
Technique of sawing is like this:
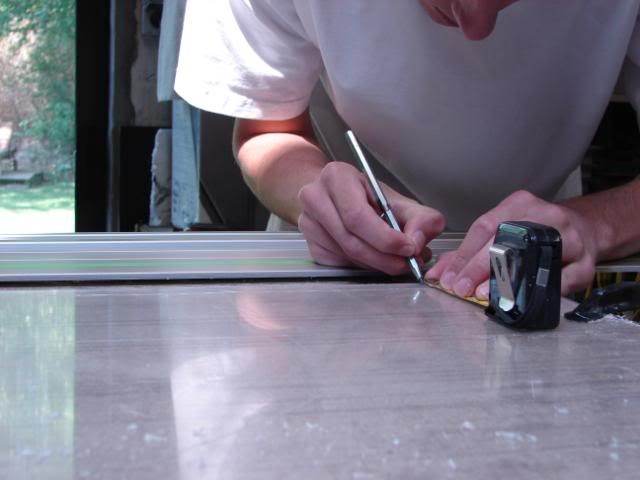
Marking the plexi on 6mm.
Using a detailed circular saw
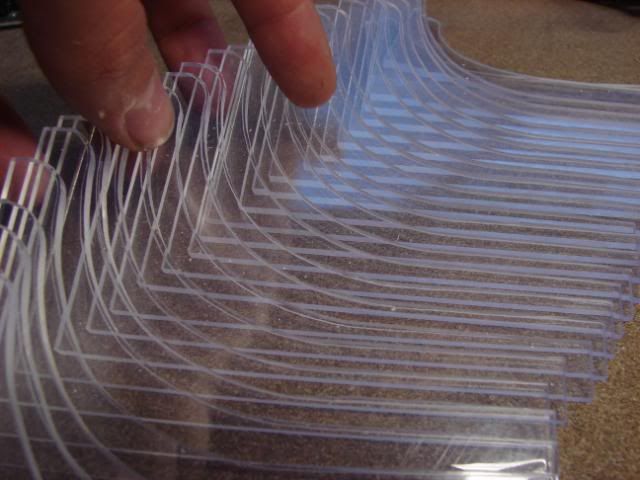
Tadaa !now the sanding ugh xD
There still needs to be holes in the struts, then they will fit correctly like this.
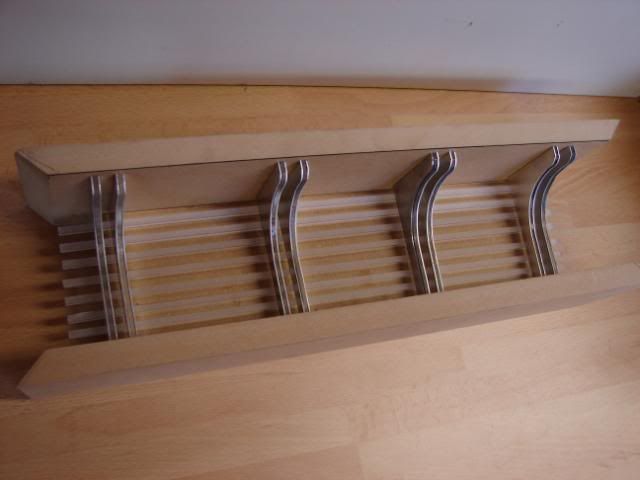
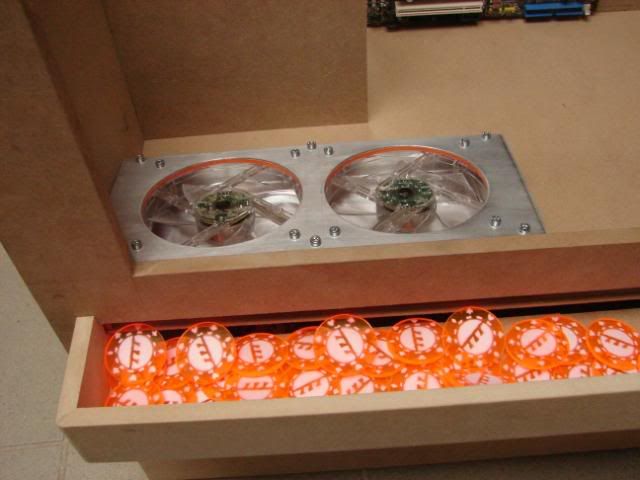
Lets head back to do some woodworking. Every classic slot machine got a payout container with the chips in it you have won during gambling.
I sand and file the etches, so you dont hurt yourself
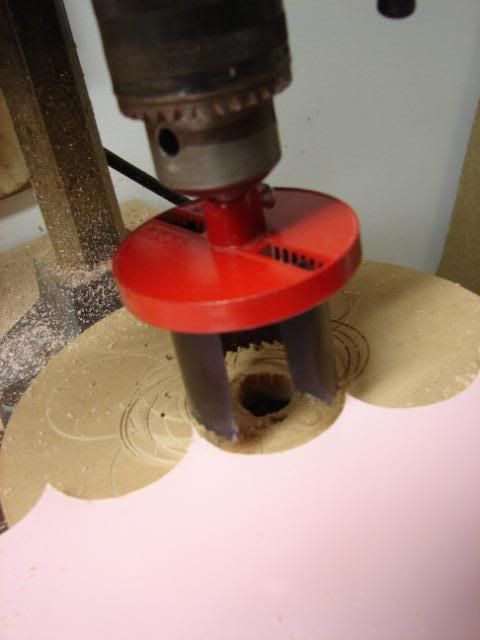
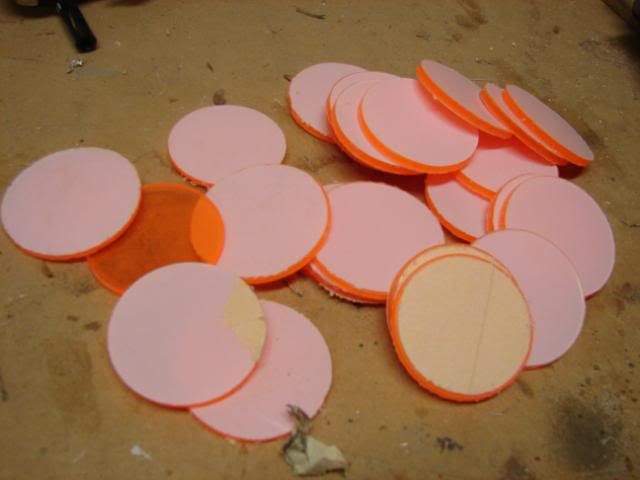
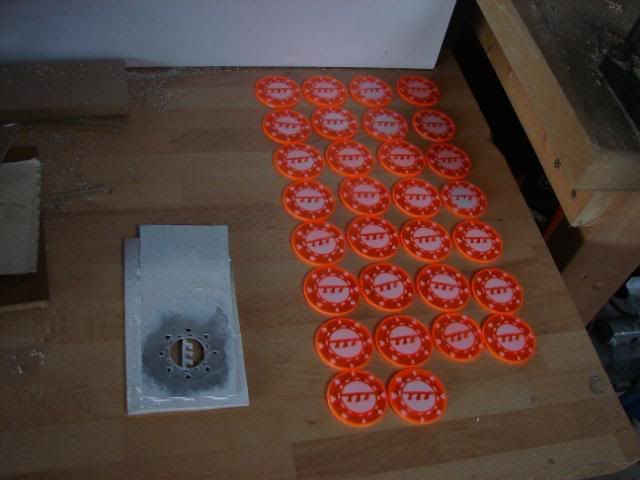
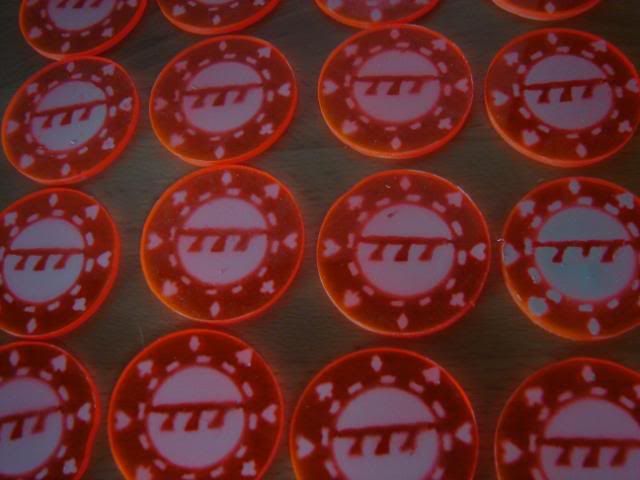
The container wont be empty of course, I made chips myself. Here are some pictures how I did it.
I made chips out of a orange-acrylic sheet.
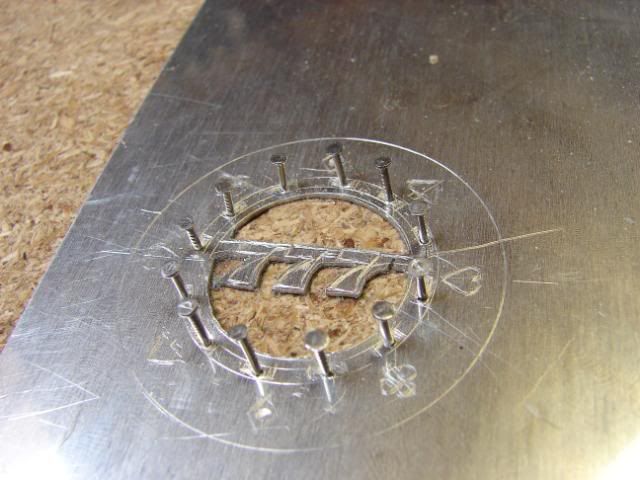
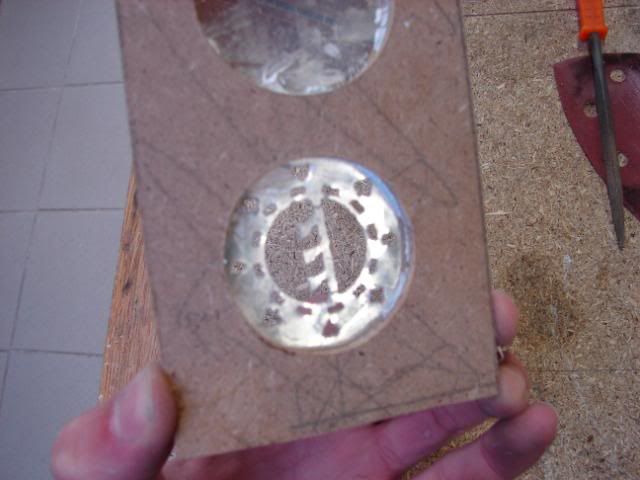
After that I made a mold out of aluminum.
Because the holes and details are so small, I had to make holes with small nails.
Result:
I took a white bus of paint and sprayed some chips by placing them inside the mold.
They are certainly not perfect, but because I dont want to spend a lot of money on them, I am happy with the result
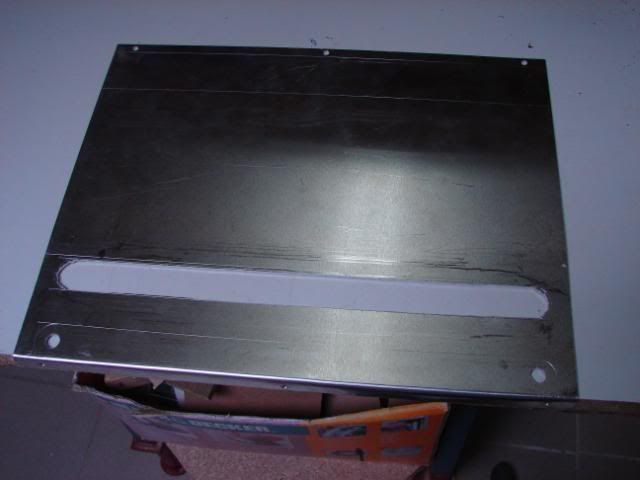
Behind the chips, the air intake will take place.
I had to bend it, using my hands a hammer and some grips.
It still needs to be polished and painted, but because I dont have the tools to do that on a good way I will wait a while.
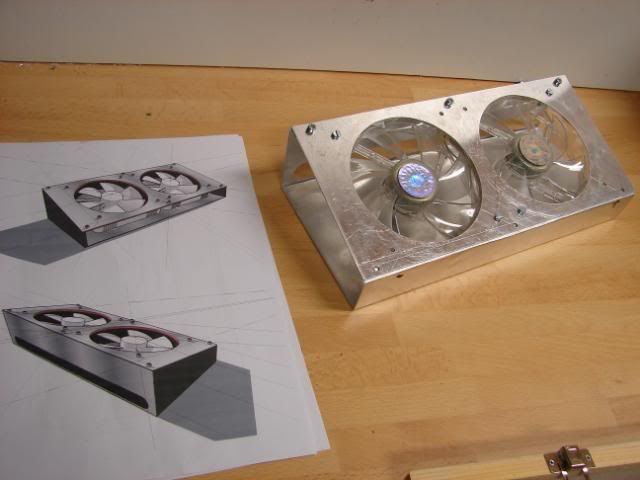
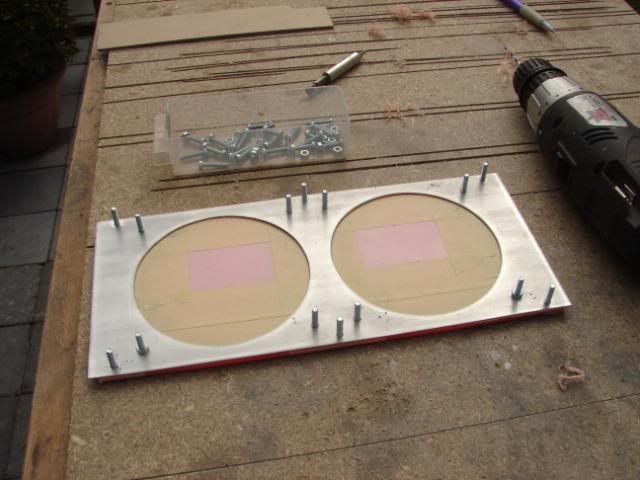
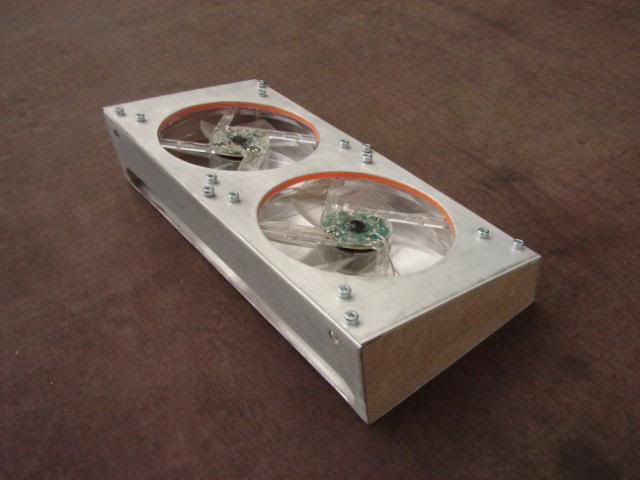
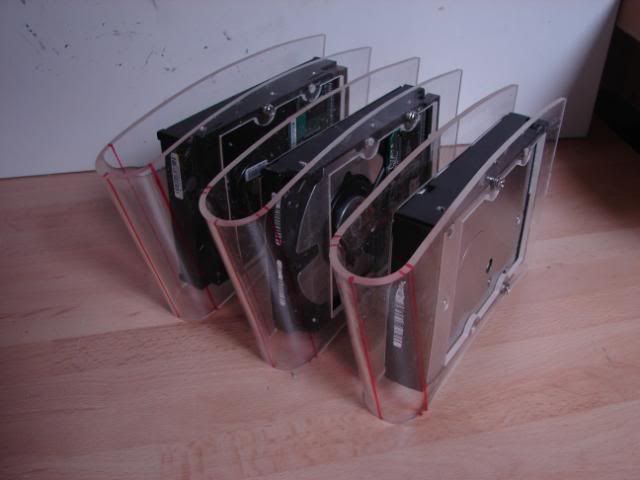
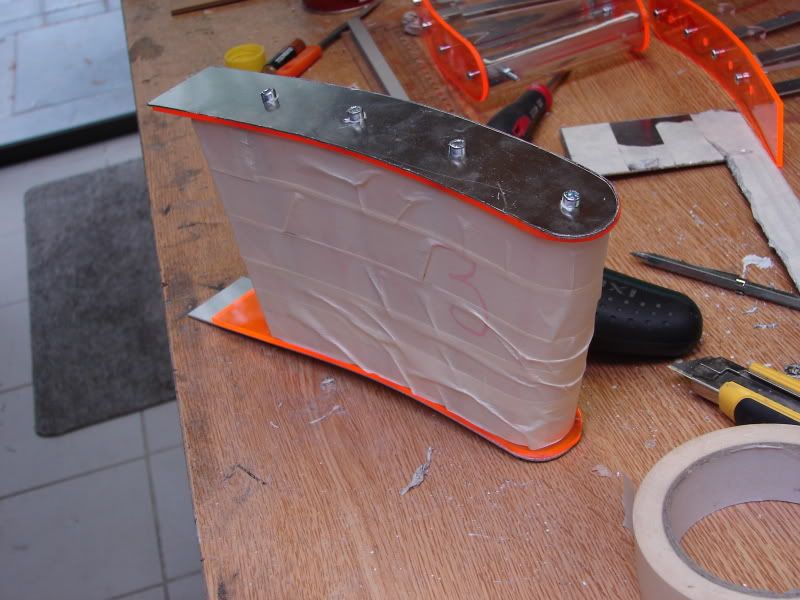
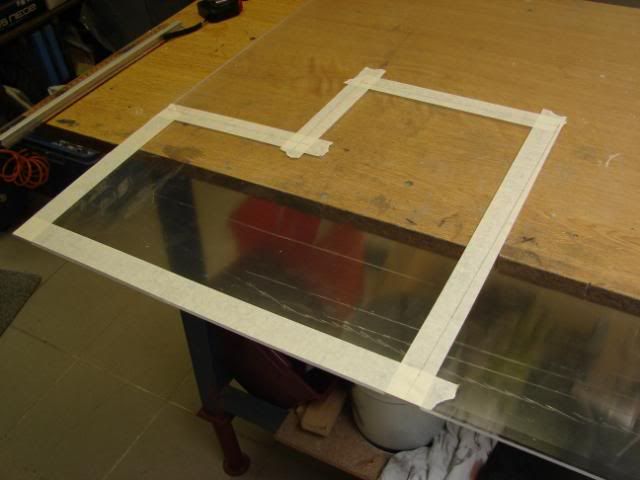
So I started on the hard disk drive casings. 3 hard drives will be attached inside a acrylic / aluminum casing.
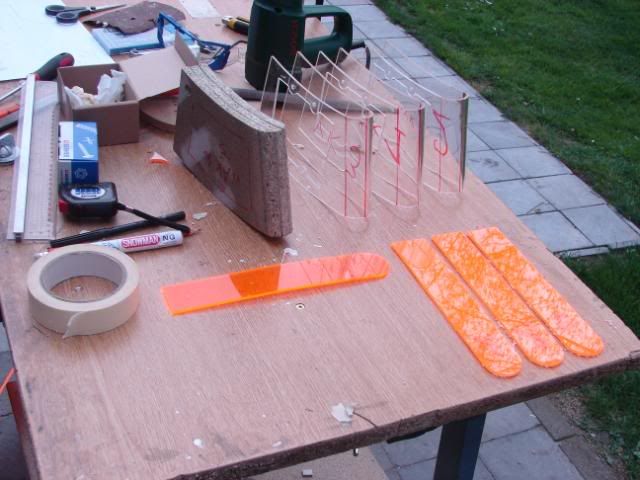
Sawing the acrylic:
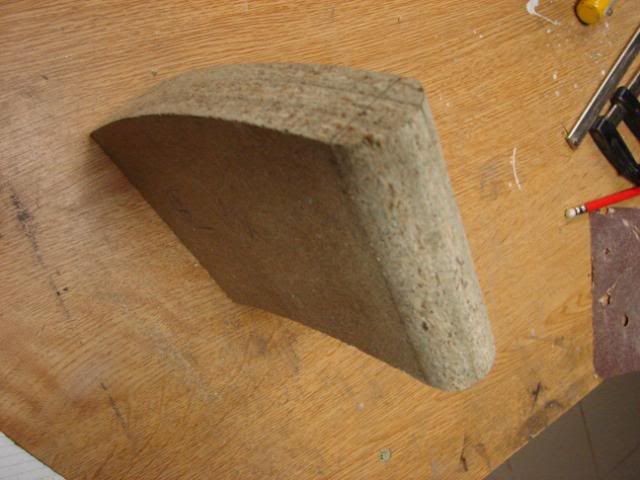
To bend the acrylic, I made a mold out of wood (maybe I should say lumber, I dont really know
You also see a gap. The hard drives get a cold breeze because the acrylic is not totally closed
3 HDD casings, with 3.5inch hard drives
LOADS of work on the hard drives Im not going to post all of that because I dont think it is very intresting :p
2 more to make but Im out of aluminum, and I dont have good transport to get it for the moment
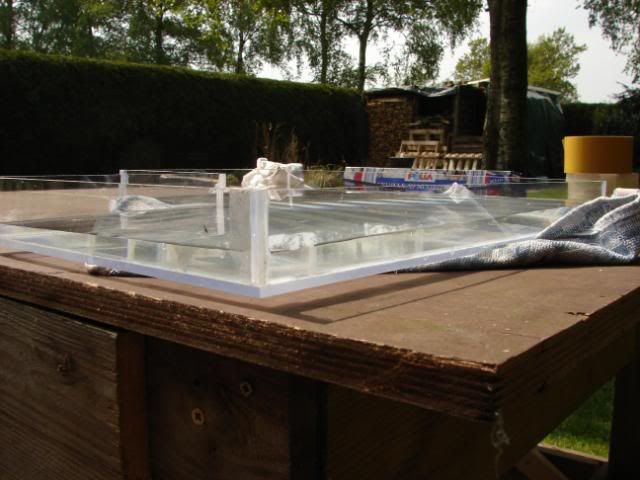
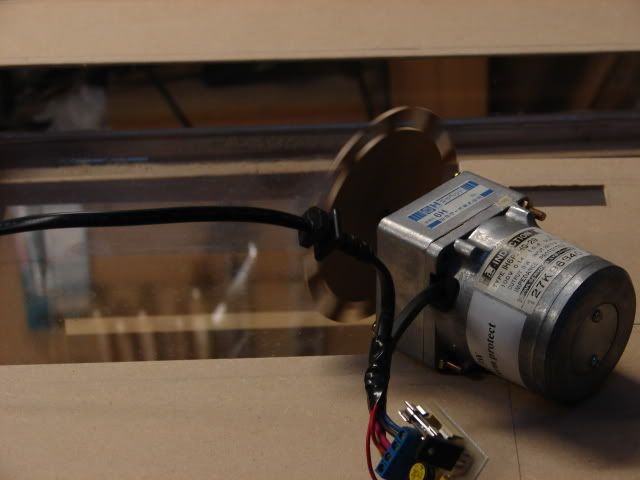
In the beginning of this project log, I said that there will be an acrylic reservoir. Inside that reservoir will be spinning cogs (gears) and water/fluid
You can see where the reservoir will be in the following 2 pictures
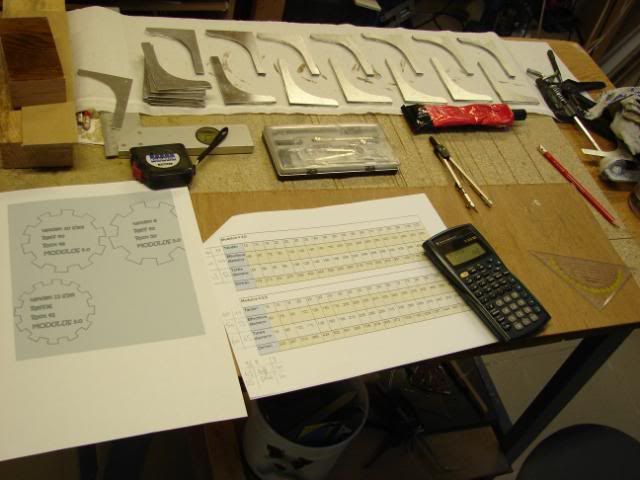
To calculate the cogs and I searched Wikipedia.org for more info and yes I FOUND INFO :p
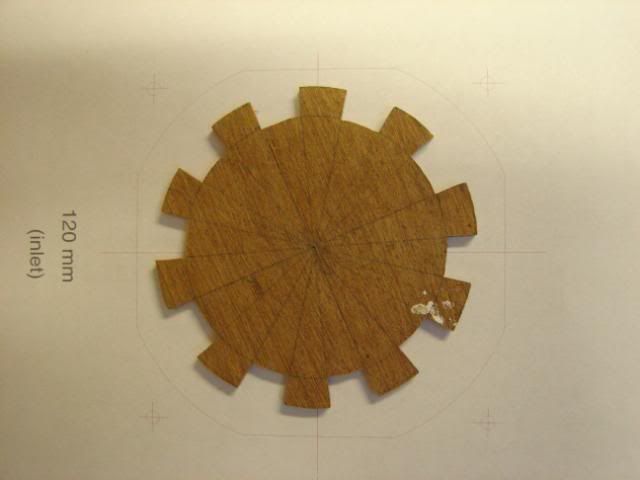
Yes, this is wood, only to test if the cogs will do their job.
Until here next update is coming!
Feel free to ask, comment or criticize !


 Reply With Quote


Bookmarks