-
Quick update: CPU OC results~~~
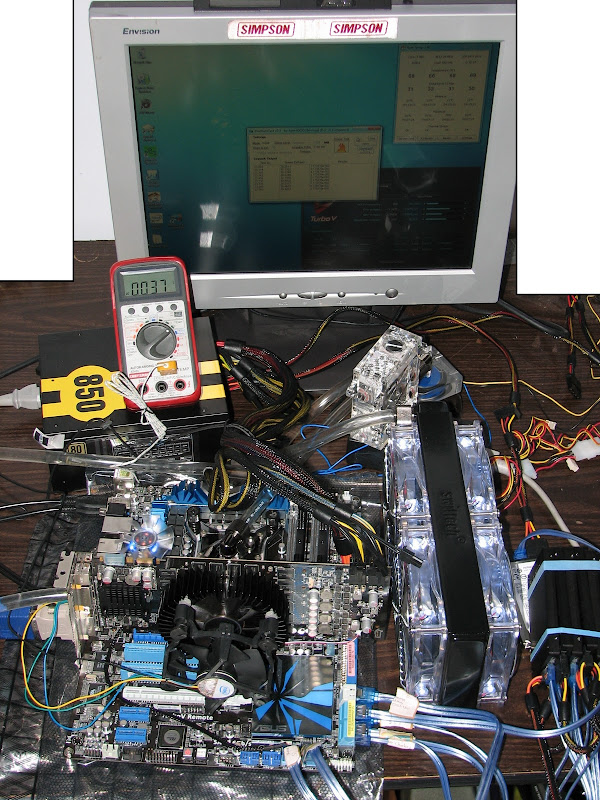
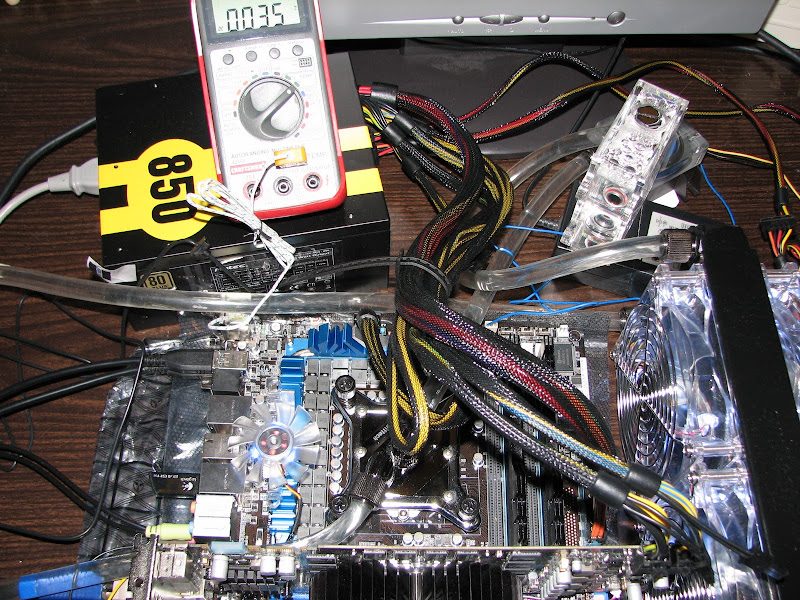
So here's my bench testing setup.
Since my last update I have added:
- 6 x 128GB SSDs in RAID-0 using the onboard 6x SATA 3.0Gbps ports (bottom right corner.. like the rubber bands? lol
 )
) - 1x EK V2 acrylic pump top to the MCP350 to provide better pump performance (and some acrylic 'bling'),
- 4x 120mm Yate Loon D12SL-12 White LED fans from PetrasTechShop.com,
- 3/8" ID 1/2" OD Tygon tubing,
- Koolance Compression fittings.
The ASUS P7P55D Premium motherboard has 32 phases of voltage regulator circuitry (VRMs) power to the CPU
(the more phases, the more stable the overclock voltage will be).
ASUS also includes a feature on this motherboard called T.Probe,
which monitors the temperature of each VRM, and then adjusts the VRM loading to balance out their temperatures.
This ensures that no single VRM will fail prematurely to the other ones, very nice! (picture taken from another source)

I found that on the high power overclocking passes, the VRM heatpipe heatsink
(the blue heatpipe heatsink on the top and left o the CPU),
was passing 85 deg C...
this temperature is still within safe levels, but I decided to just stick a fan on there to keep the temps down anyway.
I had the tiny blue LED fan (pretty quiet) off the G.Skill memory kit that I wasn't using, so I just stuck it on the VRM heatsink, just to the left of the CPU.
+1 bling agility skill.
Result: 37 deg C max. 
I started overclocking by using the ASUS Hybrid Design features.
The ASUS P7P55D Premium can team up with the ASUS TurboV EVO software, which has a couple great features on it.
You can adjust all of these settings from Windows, allowing you to boot up with a known-stable BIOS configuration setting,
and then overclock and test for stability while in Windows.
Gone are the days of changing settings in BIOS, rebooting, waiting for OS to boot up (hoping it doesn't crash), testing, restarting, then repeat cycle all over again.
Here is a screenshot of the TurboV EVO software (screenshot taken from PureOC):
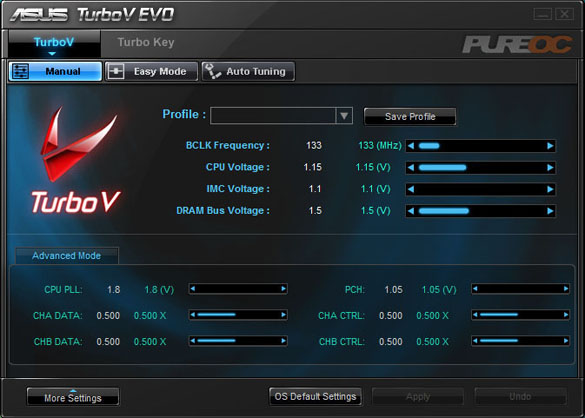
Adjustable parameters:
Bclk (base clock), vCPU (CPU voltage), vIMC (integrated memory controller voltage), vDRAM (DRAM voltage);
CPU PLL (CPU clock generator voltage), PCH (peripheral controller hub voltage), CH A/B DATA/CTRL thresholds (advanced data settings).
You can change these settings quite drastically, which is quite empowering.
200 Mhz Bclk is only about half of the maximum setting on this software (!)
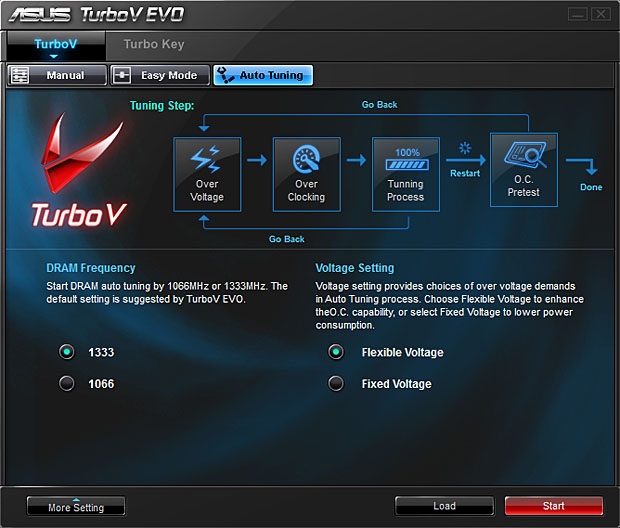
The ASUS TurboV EVO software also has an AutoTune feature.
This automatically raises your settings incrementally,
and then tests your system for stability after each increase.
Very cool feature to obtain a quick and easy overclock setting,
especially if you're new to overclocking and intimidated by all the settings.
I also found that the settings of "Auto" in BIOS are much better on this ASUS board than most.
For instance, it would automatically bump the CPU voltage in response to overclock changes that were made.
So the results of my CPU overclocking are:
(I consider IntelBurnTest a great program to test CPU stability, much faster to find errors than Prime95)
Using ASUS BIOS OCtune feature (takes like 20 seconds!):
3.59 Ghz! (19 x 189 Bclk)
@ 1.35 vCore (set to AUTO), 1.38 vIMC (set to AUTO).
Hyperthreading and Turbo boost ON,
All power saving features ON.
Maximum CPU speed:
4.4 Ghz (22 x 200 Bclk)
@ 1.45 vCore (manual, Fixed), 1.38 vIMC (manual)
Hyperthreading and Turbo boost OFF,
All power saving features OFF.
Temperatures maxed out around 88-89 deg C (Thanks again to my awesome watercooling sponsor SWIFTECH!!!)
Optimum CPU setting:
4.0 Ghz (20 x 200 Bclk)
@ 1.375 vCore (manual, Fixed), 1.38 vIMC (manual)
Hyperthreading ON and Turbo boost OFF,
All power saving features ON.
Temperatures maxed out around 72-73 deg C (Thanks again to my awesome watercooling sponsor SWIFTECH!!!)
Note: my personal 'optimum' is defined by:
-Need to have power saving features on (efficiency matters to me)
-Need a large buffer to Tj.max, since I eventually will cool a GPU in this loop as well
Last edited by zads; 12-19-2009 at 02:49 PM.
Tags for this Thread
 Posting Permissions
- You may not post new threads
- You may not post replies
- You may not post attachments
- You may not edit your posts
-
Forum Rules


 Reply With Quote
Bookmarks