

Attack of the fan blade monster at PPC again heyOriginally Posted by JoeChuo

They really need to find him


Attack of the fan blade monster at PPC again hey
They really need to find him
Project Millertime: The Core I5 build
Crunching/folding box on air: AMD Athlon X2 7750 Black Edition; Sapphire Radeon HD 4830; Gigabyte MA78GM-US2H; Lian Li PC-V351; Windows 7 RC
An additions to my hardware's collections!
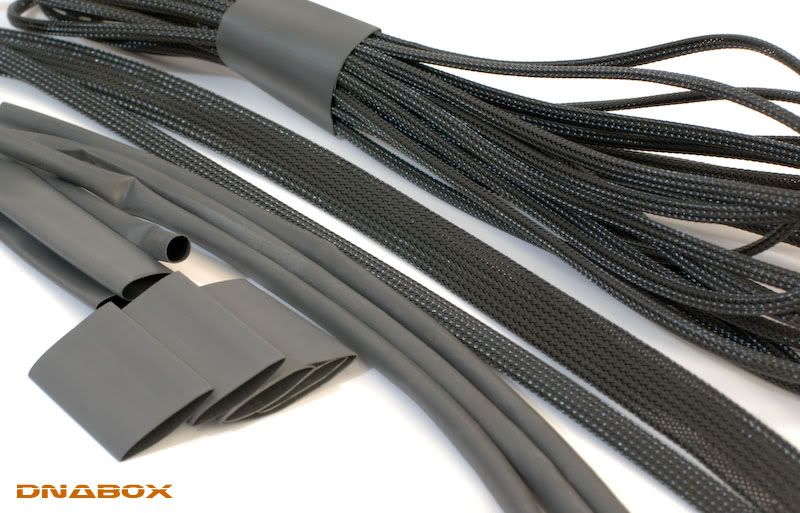
MDPC sleeve! My babe asked me ... what's that! I say ... It's a condom for wires! Haha!
The black screws and rivets!
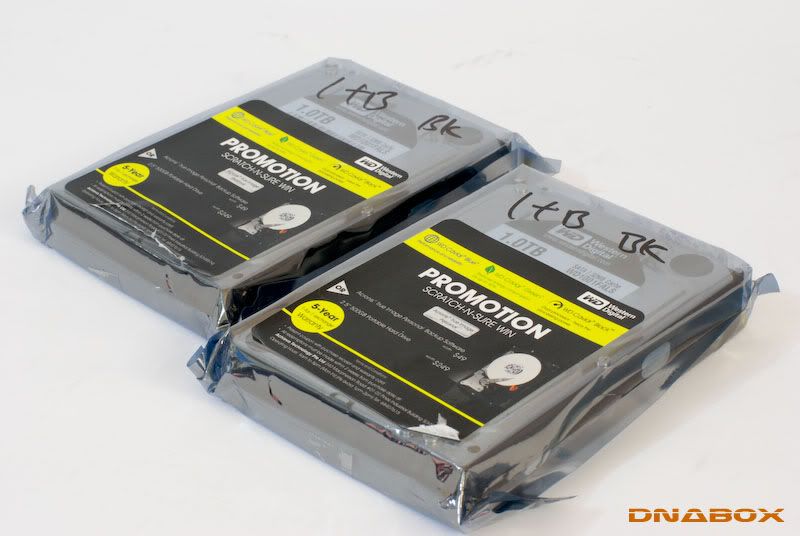
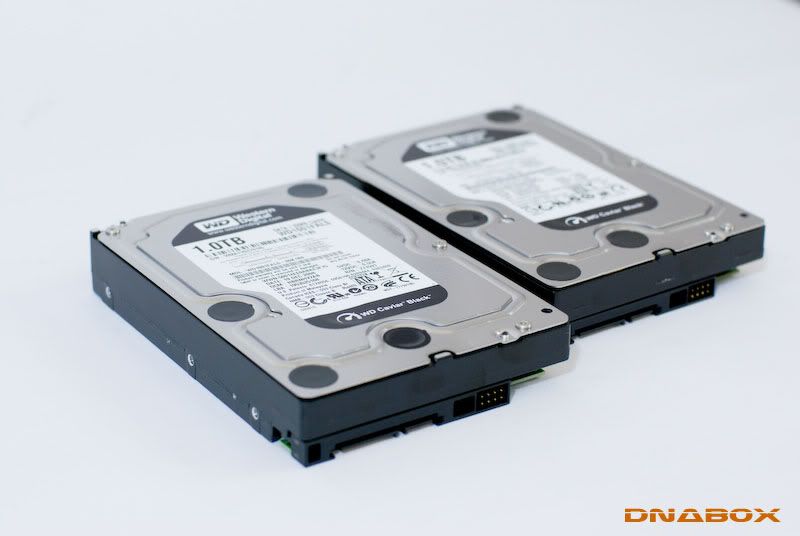
WD Caviar Black 1TB ... nice!
This one is the odd one! Black DVDRom!

Wow, the workmanship on this is top notch, MDPC for sure! Absolutely fantastic work!

That's all I wanted to know. Old but good one.
When Your worklog will be finished ;>
C2Q DFI ATI5870
Liquid Cooling by RN, EK, Bits and others
[SIGPIC][/SIGPIC]
subbed
haha bro... finally shifted the log here...
It still looks really intriguing even after viewing it for the 2nd time...
man, that's a great build
and great photography
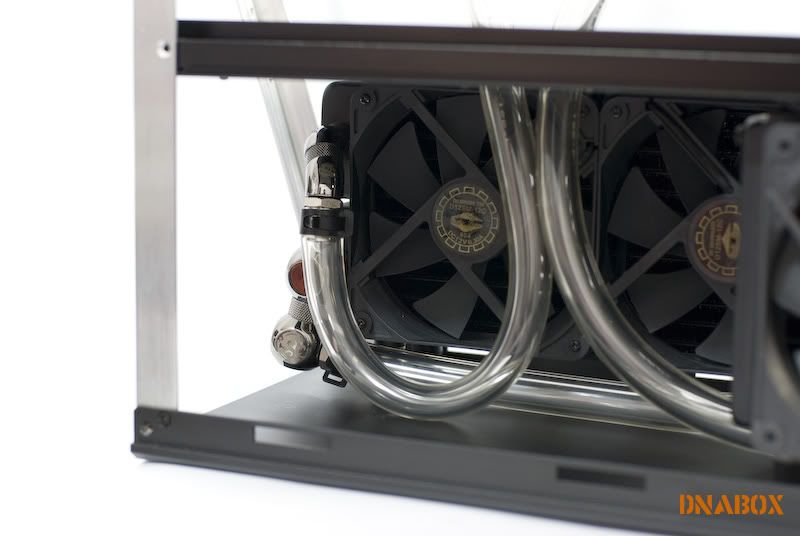
Duality: Q9550 - P5Q Deluxe - 8GB OCZ - HD5850 - 4,64TB WD - HX650 - X-fi - Aquaero 4 - Lian Li V1000b II Plus @Dual loops watercooling
Loop 1 => DDC18w w/ EK X-top V2 - EK Supreme HF - EK FC5850 - PA120.3 - Multires 150
Loop 2 => DDC18w w/ EK X-top V2 - PA120.1 - MIPS mosfet 1&2 - mips NB - Mips Ramfreezer 4 - MIPS SB - Multires 150
Did you paint the DVD drive or did it come like that? Linky?

This project is awesome...big respect for Author
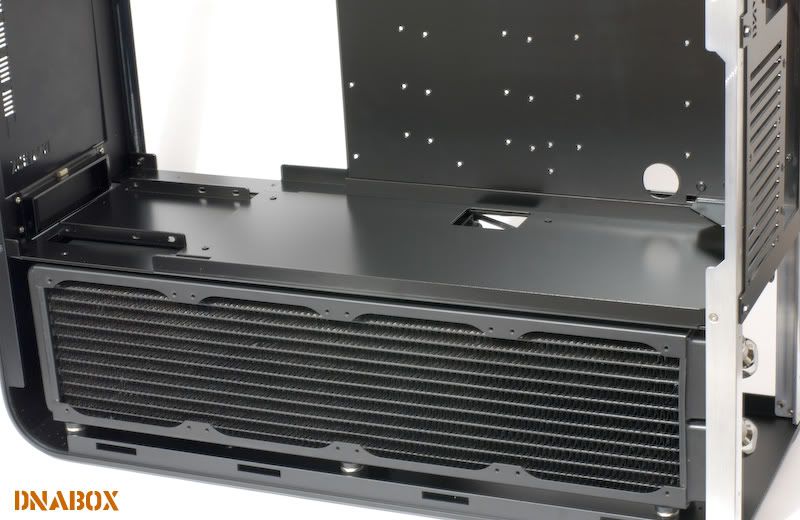
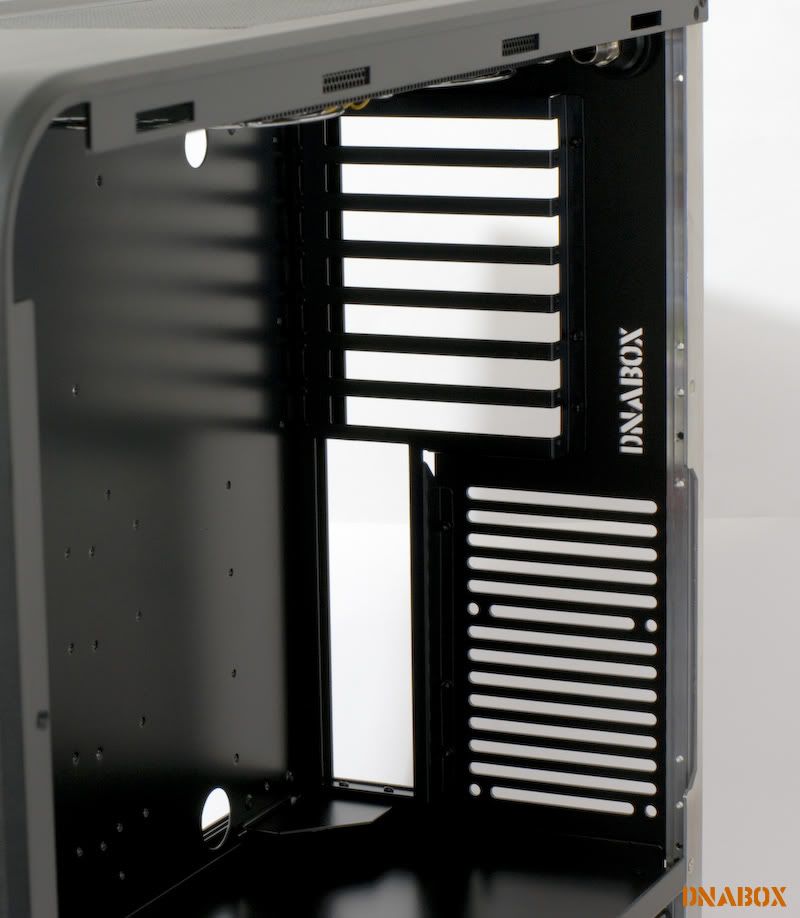
Nice build, and I'm digging the HDD anti vibes on the rads. Clever!
Hesitant myself to put holes in my Feser 360s.
Did you use O-rings or anything when you screwed the rubber stands directly into your rads?
I'm just concerned about the leak factor...
[SIGPIC][/SIGPIC]
Now Playing
black freighter: i7 920 | evga classified | mm extended ascension pedestal | 2 x 300gb vraps
dead men tell no tales build: q9770 | asus striker 2 extreme | 2x4gb ddr3 ocz reaper | 2 x gtx 280 oc2 | 2x 300gb vraps | mm ufo-cyo | pcp&c 1200W
Epic build!
Gotta love those panels...
Keep us updated x)
Haha at the fan. I broke one of my UK 3ks and I couldn't find the fin either.
Hehe! Never ending one ... it will just continue
Thanks!
You start your too ... awesome!
Thanks!
Powder coated ...
Love your project too ..Sir! Drooling every time saw your pic!
Yep! Need to be extra careful there. I used rubber washer in between the rad and the standoff.
Thanks!
Yours got chomp! too ... haha!
More pic! >> took before the tube thing ...
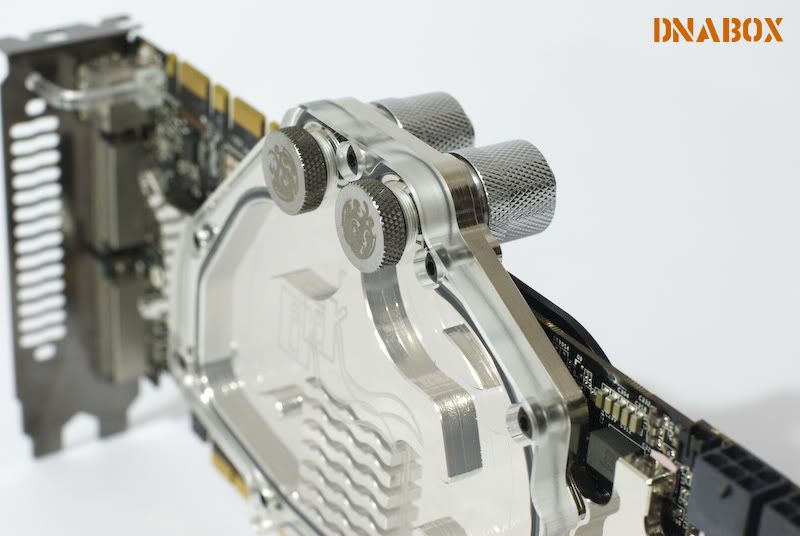
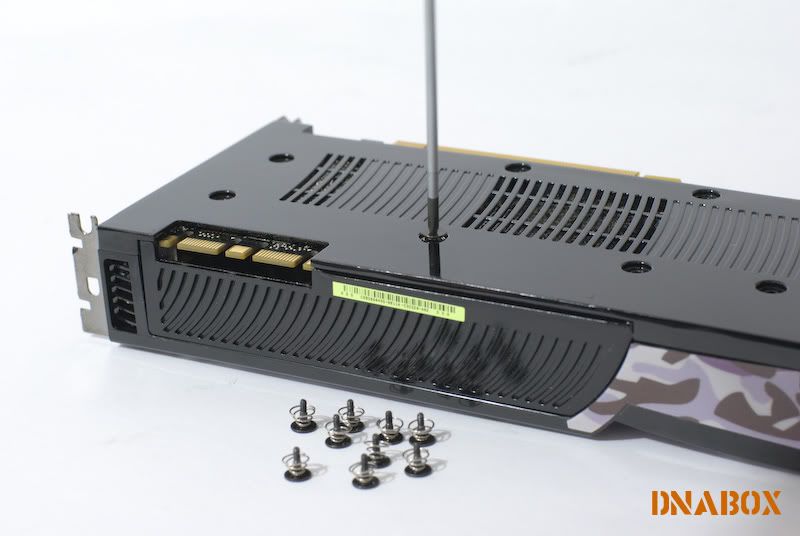
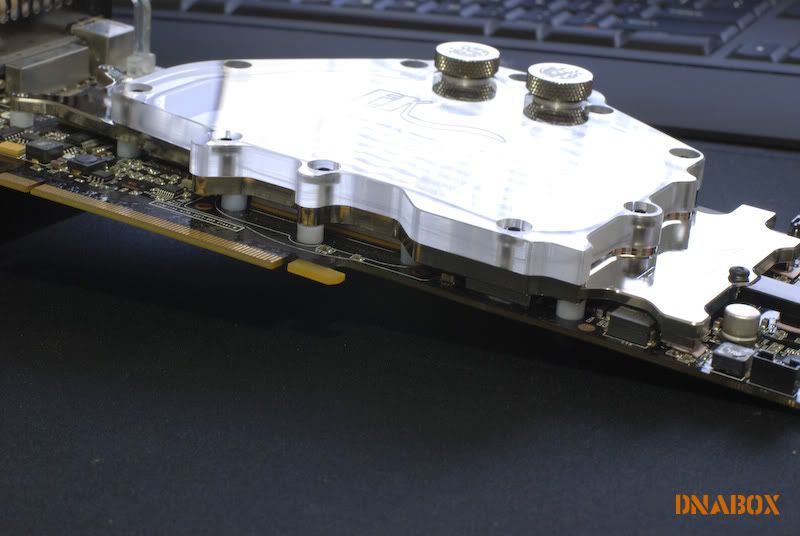
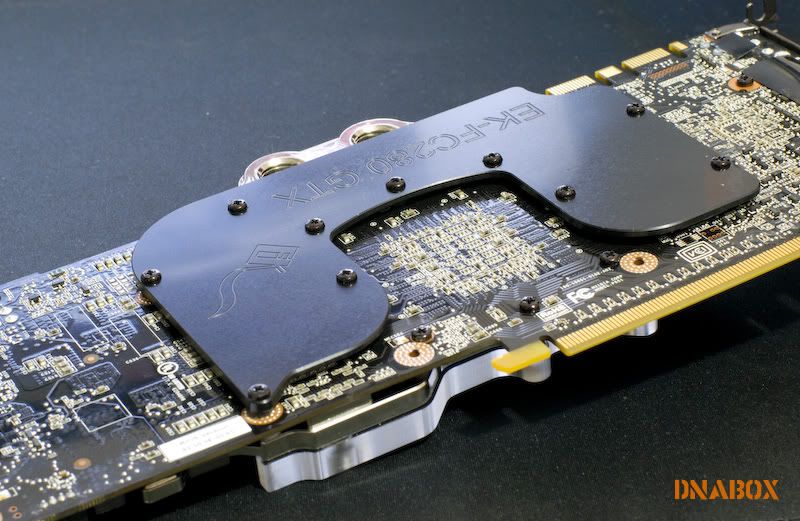
Asus EN280GTX on EK Waterblock
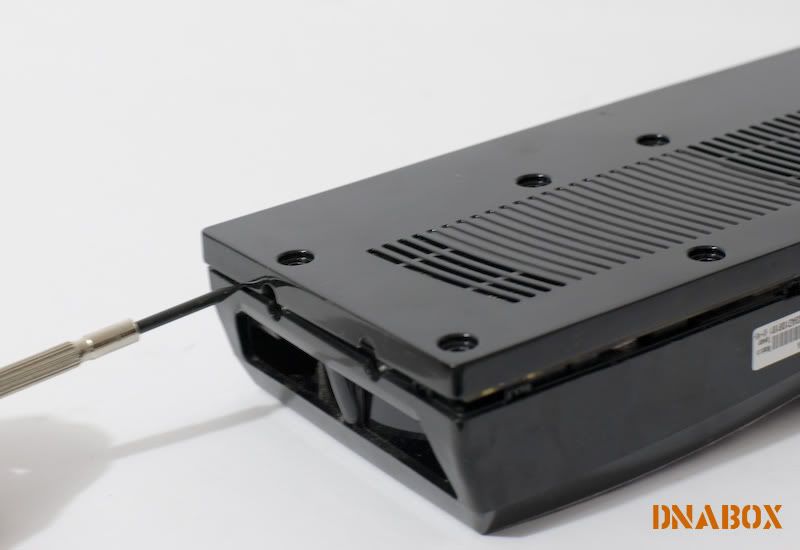
This is my first time ... cold sweat! GTX 280 is very difficult to disassemble! Here I show some of the process ... for noob guide.
First ... remove the ten screws on the back, use a screwdriver with a small tip
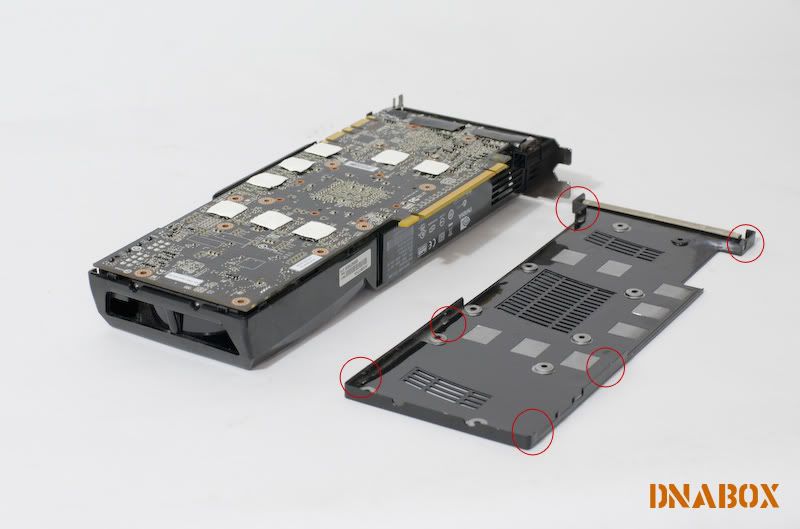
The card Clip and Hook system which is a major pain to work with. I marked six of the clip spots in below picture. Take note of the hook location during prying the back cover ... gentle though!
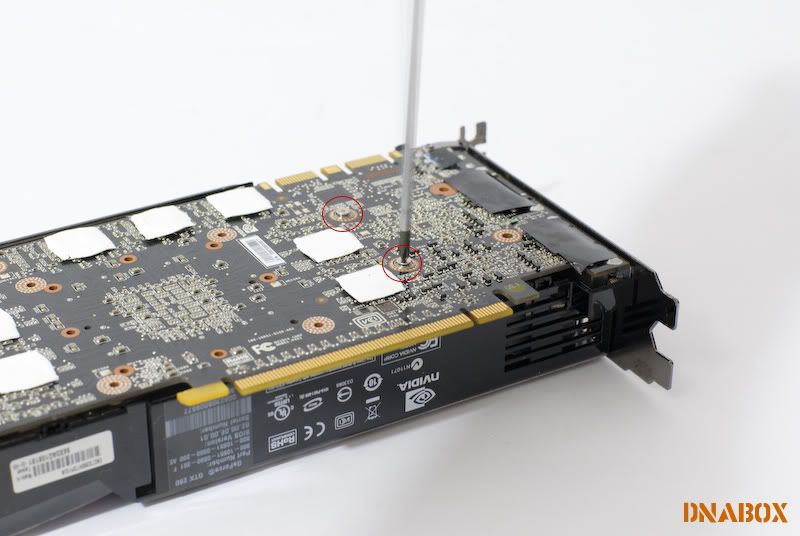
Next remove the two marked screws below, yep only two screws. You will need a very small screwdriver here [Precision Screwdriver works best]
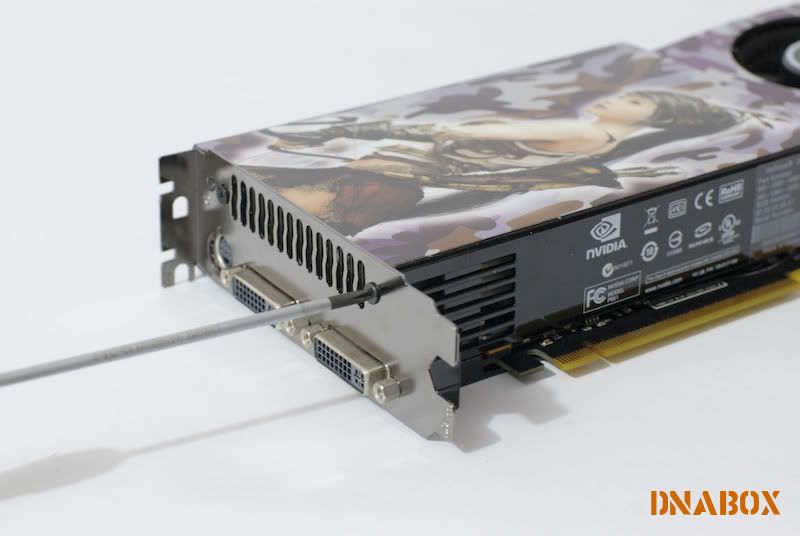
Final step you have to remove the screws near the fan exhaust, then you can separate the PCB and the top cooler. You need to use enough force to overcome the suction force between GPU IHS and heatsink base. Done!
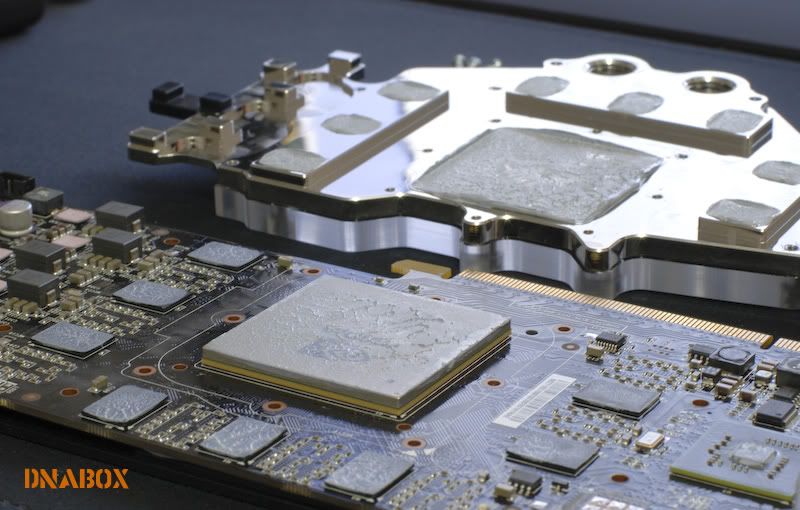
Eeew! That looks nasty thermal paste!
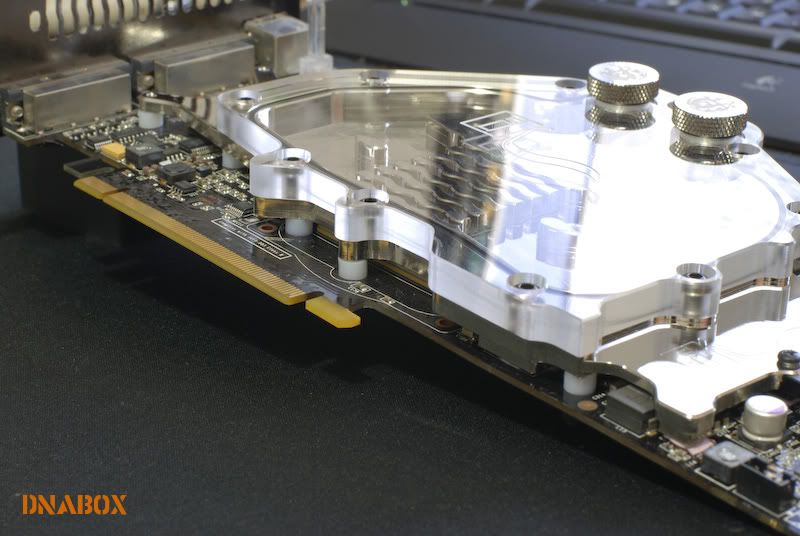
Clean and ready for waterblock [EK-FC280 GTX - Nickel]
Standoff MOD ... After cutting, grinding, sanding and final measuring! 4mm [~0.02mm Tolerance]
Another shot!
Surface contact ... very good!
Eeeew! My bad ... applied too much thermal paste ... haha! Will fix that after remount.
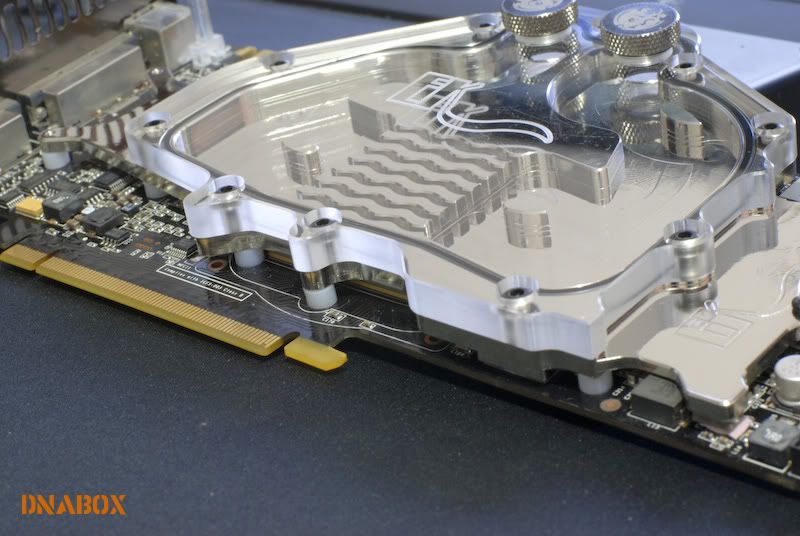
Finished!
Where is BANANA card! Confirmed no bananas!
Black screw again! Haha! Joy!
Fav Shot ...
so what did you win for the WD harddisk promotion? I got the backup software
anyway, keep it up! good job!
could you reduce the tubing length by just running the loop from the feser quad upwards in a 90 degree bend toward the midplate instead of running in a huge 180 degree loop? are you trying to avoid impeding the airflow by running it down then up so that the area directly in front of the fan remains relatively clear?
also, Joe, any reason as to why you used 20mm fans for the quad feser and s-flexes for the dual feser? is it for tubing clearance between the 2 rads?
Last edited by dr-; 06-13-2009 at 11:42 PM.
Got the backup software too.Hmmm ... 20mm fan ... I shouldn't get that one anyway. Being a noob ... my first WC.
Loving the work so far, gonna be building my TJ07 next week so am getting ideas from great builds such as yours and of course all murdermod ones. What hose clips are you using ?
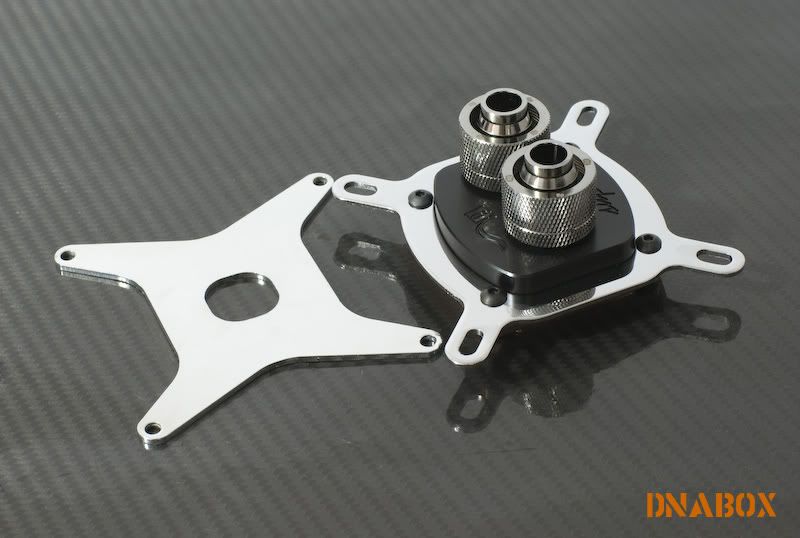
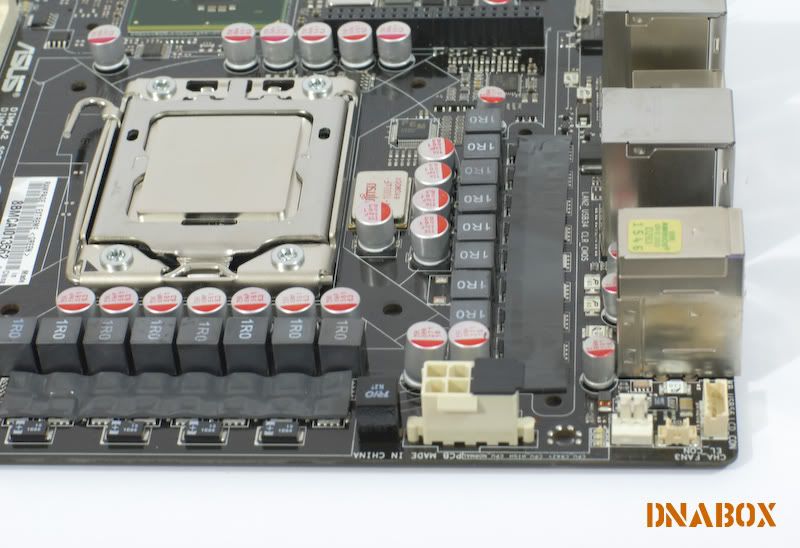
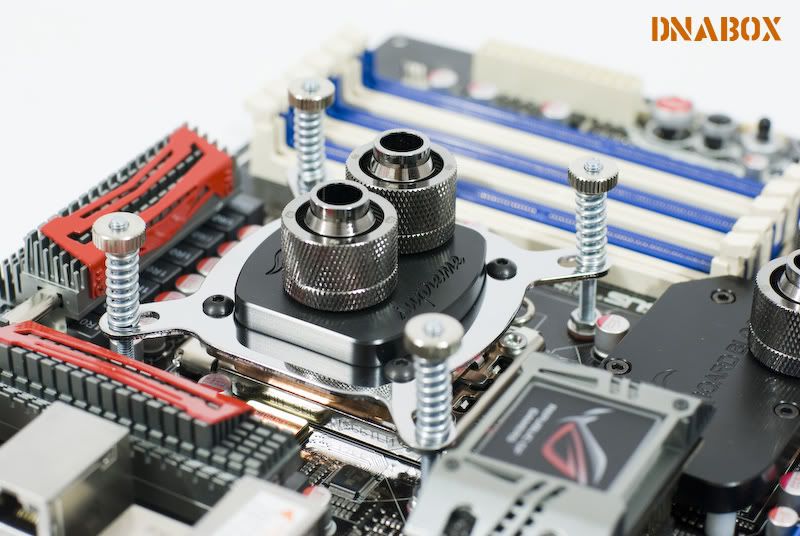
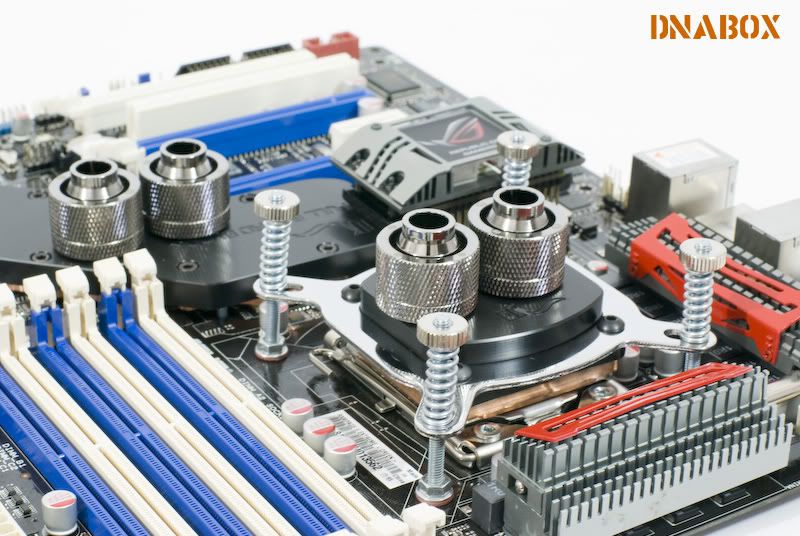
EK Supreme with i7 Mounting plate and EK Backplate CPU 1366
Shiny!
EK-FB RE2 - Acetal
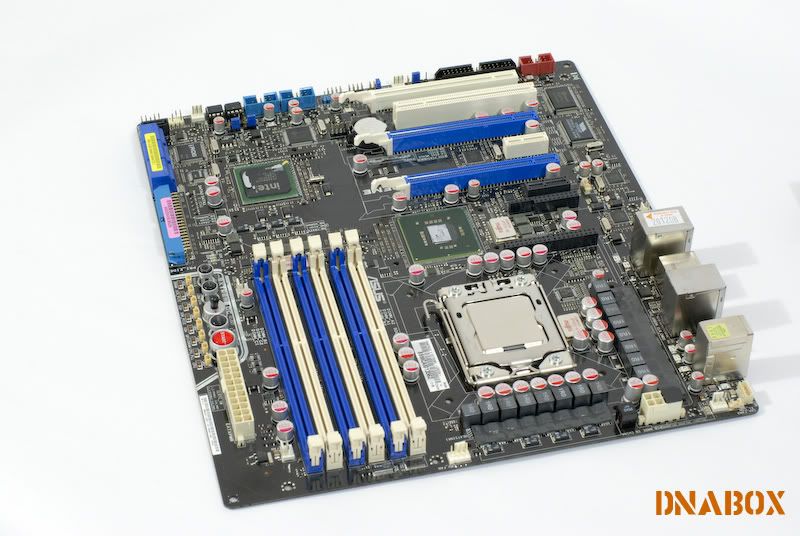
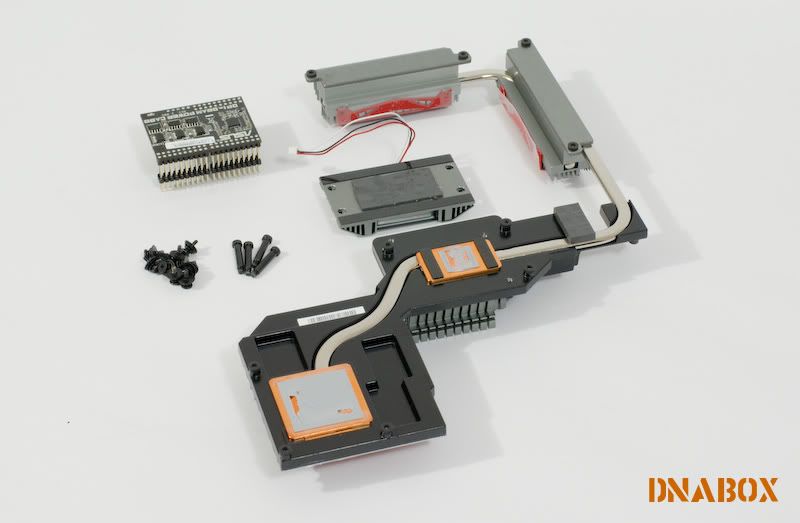
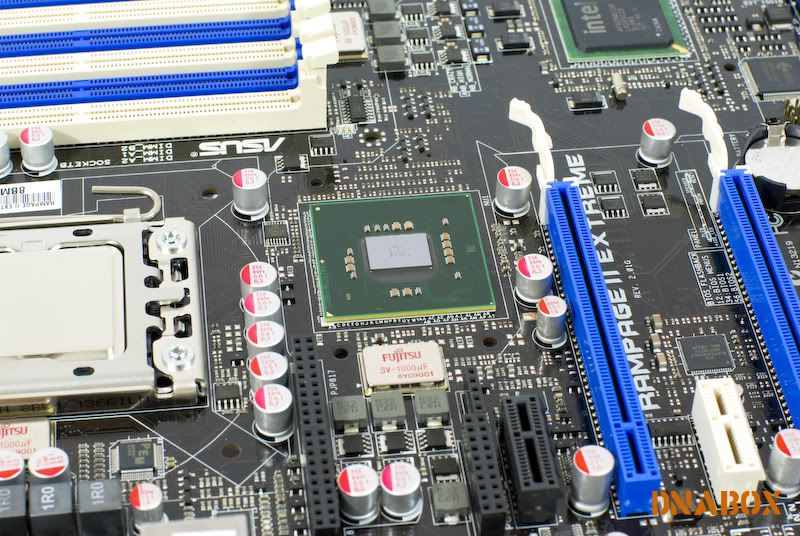
Installing the NB/SB water block
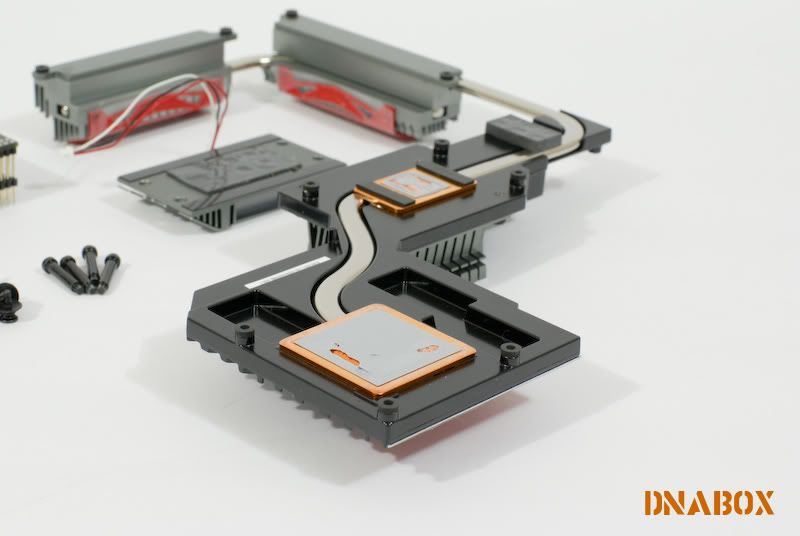
Disassemble the heat sink ... waaah! the mobo naked!
Eeeew! On the right [IO side] ... the thermal pad contact not good! Asus QC check it out!
X58 ... awesome chips!
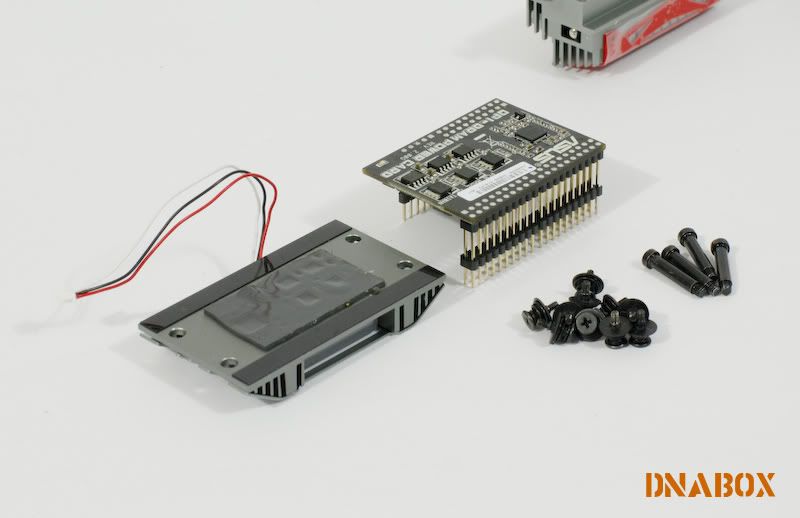
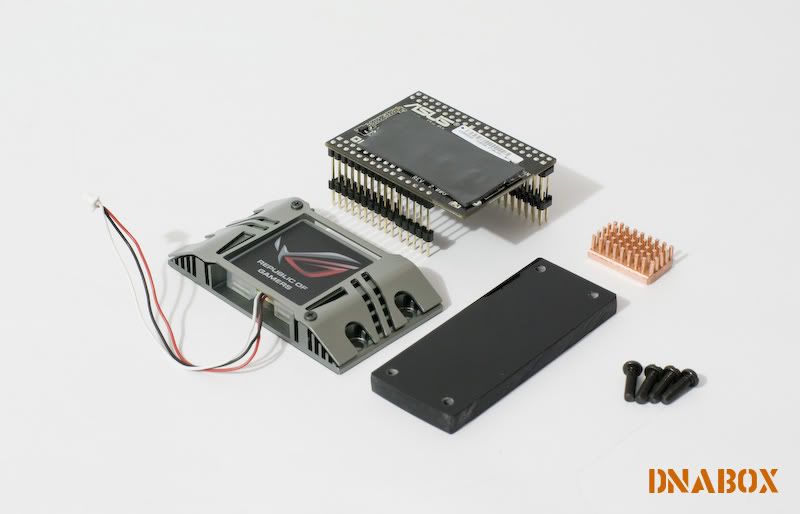
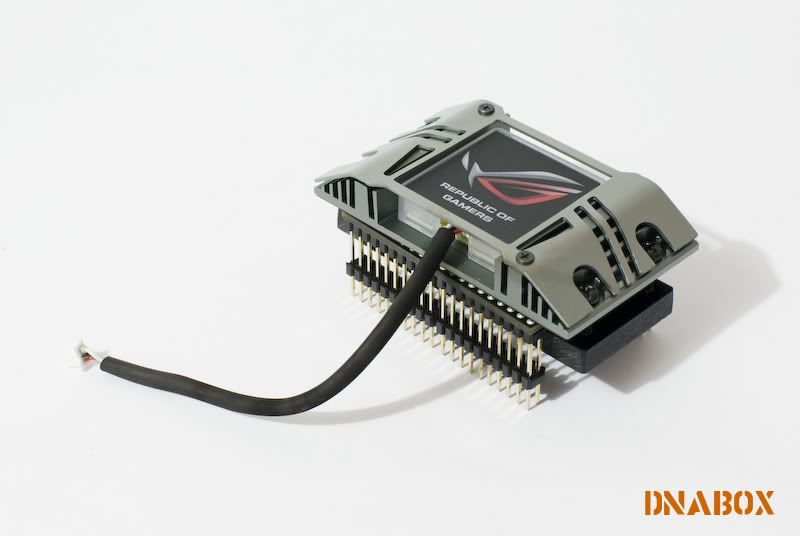
Asus ROG light/heatsink for the QPI DRAM Power Card >> Small MOD
Item needed >>
1. 3mm arcylic cut into size
2. 10mm 3M0.5 screw [Drill bit and hand tap also]
3. Heat sink from old mobo ... cut into size
Place the old heat sink onto the original thick thermal pad on top the chips. Simple ... and easy! Haha!
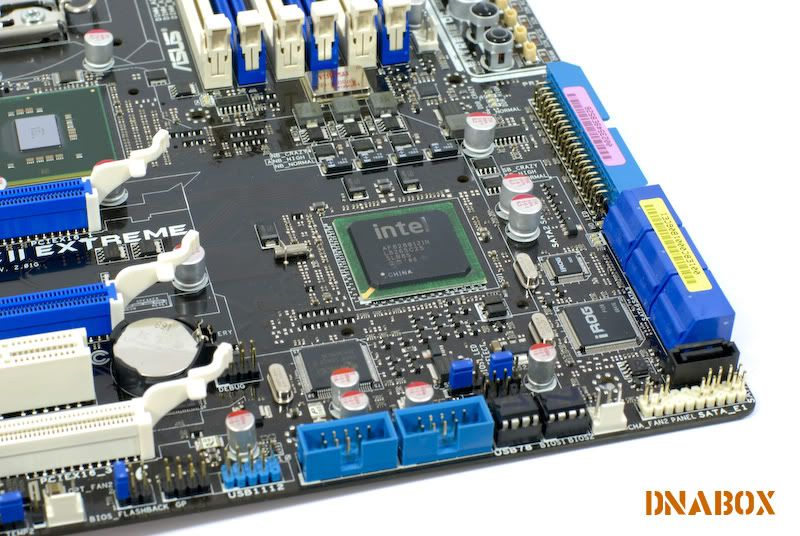
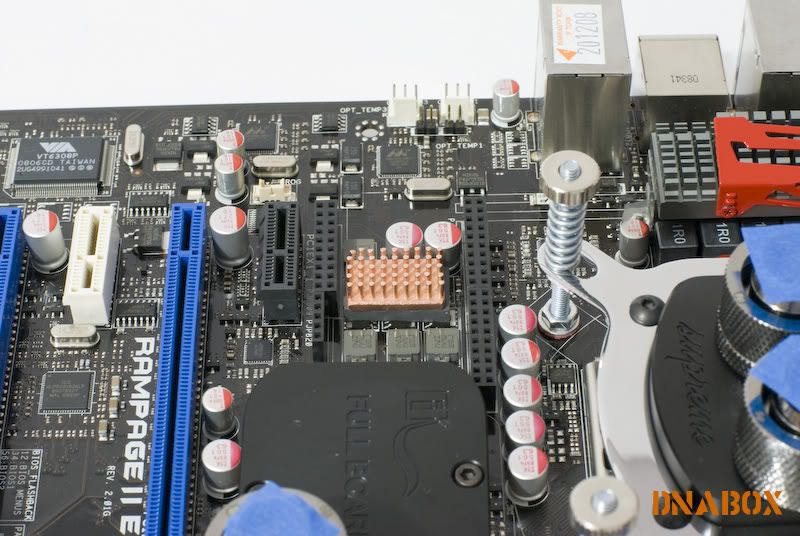
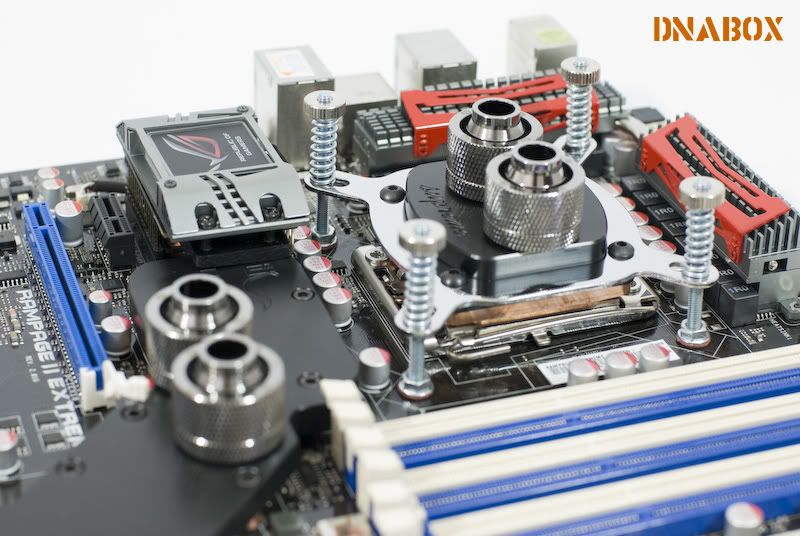
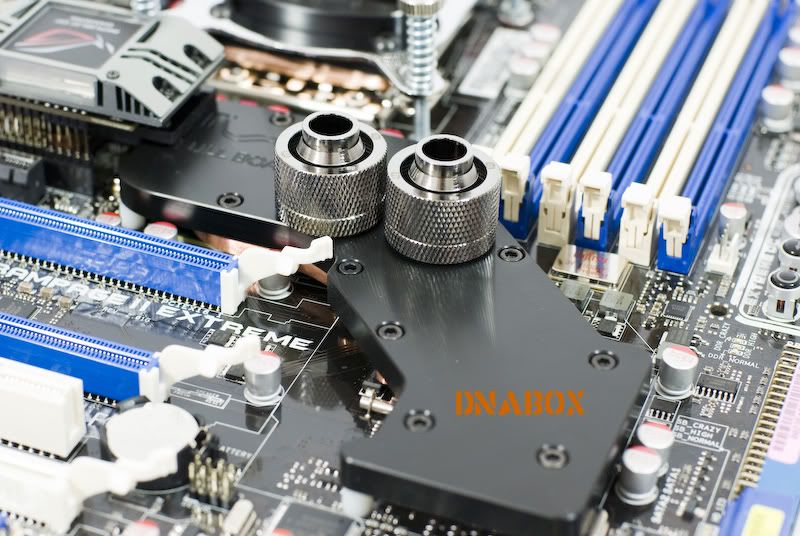
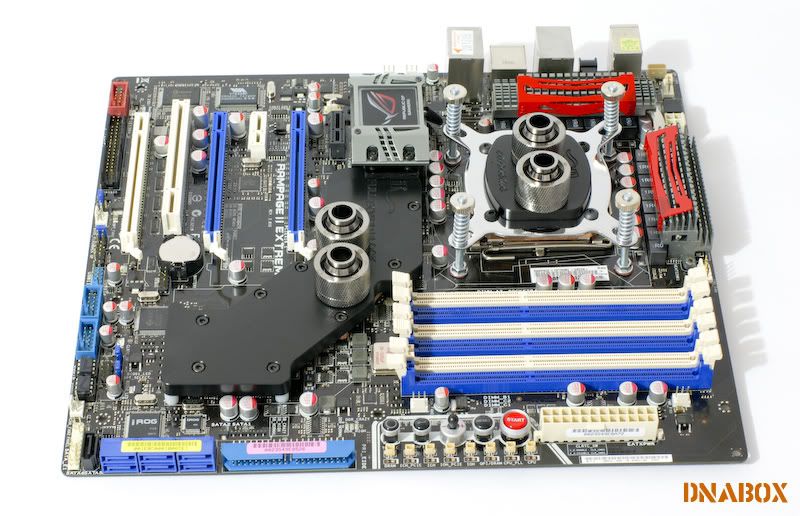
Water Block Installed!
EK Supreme ... FTW!
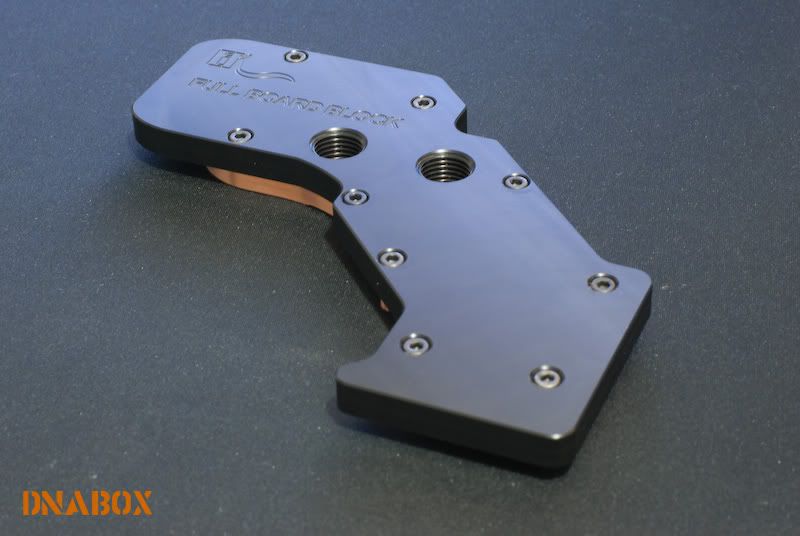
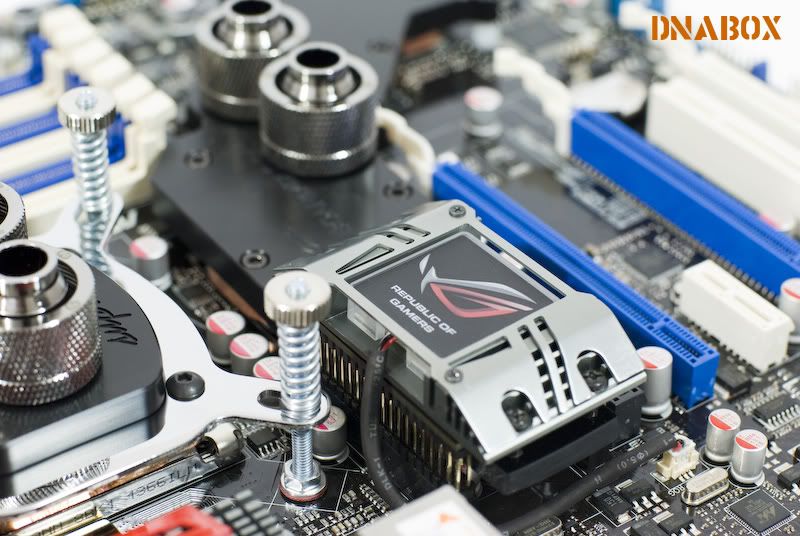
EK Full Board Block ... with MOD standoff
Full board shot >> Joy!
Enjoy!

I like the standoff idea! Must really make it less frightening to put the waterblock on
Continue the great work, I can't wait for the time to roll around on my next build and for me to finally cough up the cash for some custom cuts.
Looking good joe, keep em coming
Project Millertime: The Core I5 build
Crunching/folding box on air: AMD Athlon X2 7750 Black Edition; Sapphire Radeon HD 4830; Gigabyte MA78GM-US2H; Lian Li PC-V351; Windows 7 RC
Love the standoff idea as well, in fact I may even "borrow" it from you.
Corsair 700D
Intel i7 920 @ 4.20|Asus P6T6 Revolution|G.Skill 6gb DDR3 1600|Zotac GTX480|Intel x-25-M 80GB x 2 / Raid0
H2O
|Perfecting the Obsidian series case. Build log to follow soon...|
great work mate
i luv the way you work
You will love it for sure ...
Thanks bro!
Thanks!
m m m m m Im lovin it
 Posting Permissions


 Reply With Quote


Bookmarks