Was fairly happy with AC and my Lian Li V1000 but needed to upgrade cpu and graphics as I do a lot of 3D modeling and other gpu intensive use.
So, I started by adding a 680i board, e6600 cpu and 8800gtx gpu to my existing case.
As this empty interior shows it's a tight little case.
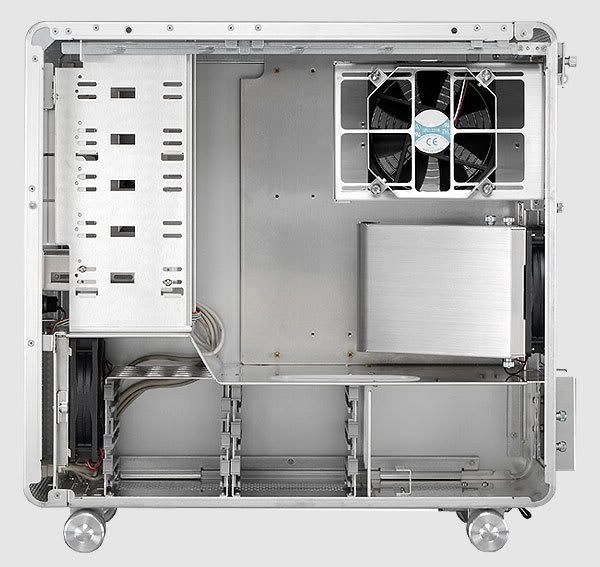
Took about two weeks to realise it needed WC.
Looking through everyones' builds here, I could see I wanted a quad or similar.
However there was a couple of problems.
Neither MM cases or Lian Li 343 were sold in my country and although a couple of intrepid souls had shipped theirs' in it was a total cost blow out at step one. That was not going to go down well with the little woman, especially as the V1000 was only a couple of months old. Still I figured it could go to her if I found a case to suit me.
The other was that switching AC cooling had shown how much I didn't want to have to strip out half the build and motherboard any time I wanted to change a block. Along with that I was hoping to adequately cool quad cpu, dual gpu and chipset in the future, so two loops with all that entailed was to fit in some how.
The more I looked for WC components, the more a PA120.3 for each loop looked right. So a few more of the usual cases were crossed off the list.
As the first couple of 343B builds appeared I could see it was in essence two Lian Li cases joined together and guys were fitting two big rads. Why not do the same?
If my V1000 was only six inches wider there'd be room for everything I wanted and even a small section at the front for my M-cube set up.
The V-Twin was conceived!
I'm currently trying to make it a reality. A very slow process.
First off was getting a second V1000 and stripping it out.
Wasn't too difficult. Just drill out a few rivets and the motherboard plate came out. All the drive cages, fans and front slot covers were removed.
I'd already done some sketchup and photoshop work and knew the stock slots had to go. They don't look great on one case and it was twice as bad with two.
The finished look will be the same hole pattern as the rest of the case.
So there it was a case with a hole. I was committed.
Last edited by Jedda; 08-26-2007 at 09:15 AM.
Reason: Spelling
I use a hole saw for each corner then join the holes with dremel or jig saw (once I found how slow a dremel is and had the first exploding cut-off wheel whistle past my ear). Jig saw rules!
And then cut and fitting some edge mould to neaten everything up and protect against the leads fraying.
You can see I joined cpu and N/B cut out together but this pic doesn't show the S/B holes. The two long slots are for my mobo wire management. The top Grommet is for usb leads.
Now that's some skilz. Very nice and great work, keep it coming. Damn that's looking good, front looks really good.
subscribed,
andyc
Thanks Andy.
The front is never going to look as good as the 343 but I think with everything behind that hole pattern it should look integrated.
I have an extra power button, of course, so I'm going to use it to open and close the dvd door. That way I can stealth it into the other mesh.
Wiring, sleeving etc is taking up heaps of time. Just getting rad screws sorted took a week.
BTW crap camera batteries, so I'm swapping rechargeables in and out. So the date stamps don't mean anything.
Love this concept, and if I didn't have a 343 it would be a high contender. Could use one of the switches for reset one for power, but don't hit the wrong one
More pics! More pics!
Has to be some form of addiction we have watching systems come together
Looks very good and good concept! Hopefully you won't have to move it much after the build though! I wonder how sturdy the joint between the two cases will be once you get the weight of the entire system in there. How are the two cases joined together physically? Did I miss it?
I was thinking this also. Maybe add a 3/16" aluminum plate across the whole bottom riveted in for structural strength..Maybe in some key locations bolts and washers to spread the load and take any stress off of the rivets..
Make it the entire size of the bottom and add your wheels after to tie it all together..
__________________ The XS WCG team needs your support.
A good project with good goals.
Come join us,get that warm fuzzy feeling that you've done something good for mankind.
Quote:
Originally Posted by Frisch
If you have lost faith in humanity, then hold a newborn in your hands.
Thanks for the responses guys.
So far I'm using the standard side panel mounting holes to bolt them together but I have the axle mounting points underneath if it needs to be strapped together like Movieman suggests. We'll see.
I'm not sure about wheels yet. Two pairs of V-series trucks looks OTT and the wheels domed hubs conflict anyway. I may have a set of 343 castors coming, which would be great as they have brakes too.
I've tried a set of local castors and not been really happy with them. Hope the 343B ones suit it more.
Awesome!! About time you teased us with some pics Jedda. I knew that you've been working on this for a bit with the info I've gathered from some of your posts, great to finally see it irl!!
*waiting to see more* xD
__________________ They say the definition of madness is doing the same thing and expecting a different result.
Howlin' Pelle Almqvist
Wanted socket head screws for a contrast on the top rad grill, so had to tap the rad holes.
First a quick drill to get 3.3mm for M3 threads. I used the hole offcuts to protect the core.
Then the tapping was easy. There's enough room that the tap is turning freely before you get near the core.
I won't bore you with the fan sleeving. It's been seen enough.
But since it was done already, I decided to do a trial fit as I wanted to see how it was going to look from the front.
What do you think?
I'm kinda happy with it but might play around a bit more.
The screen is mainly to show the M-cube readings but can do other stuff too. I'm not totally keen on it's look without the hole pattern. Might mount two stealthed dvd's instead.
This camera is garbage. Gotta bite the bullet and finally get a digital slr. Been using my old nikons and hasselblads with film, like a dinosaur. Never have caught up on all my scanning of transparencies. lol
__________________
Chilled PC UK - Watercooling Parts, Any Custom work undertaken including Laser Cutting (any parts, grills, side panels, brackets etc), Anodising, Powdercoating , Custom Spraying and Airbrushing, Fabrication, Watercooling Installs and more all done to the highest standard.
Actually that pic is quite puzzling. In the flesh, all the sections look exactly the same colour and finish. They must be reflecting different specularity to the camera's flash, but not to the eye with other light sources.
I can't drill the LCD bezel as the pcb and components extend behind it.
Painting the case has crossed my mind. We'll see. First I want to finish it as silver and black and make it work.
After that I might strip and paint it, if I'm not content with the outcome. It definitely looks better than the pics show. Which is a bit frustrating.