

Thanks guys! Wait till I get the sides done, they'll be chrome


Thanks guys! Wait till I get the sides done, they'll be chrome
Nice
Dell Ultra Sharp 24" LCD
Core i7 920 @ 4GHZ
Gigabyte EX58-UD5
2 GIG Wintec AMPX DDR3 @ 1600mhz
ATI 4850 512MB
Sweiftech Dual MCR320 Radiators
Dtek Fuzion + MCW60 + MCW30 blocks.
ATI 650 Pro HDTV Wonder
(2 X 150GB RAPTORS) RAID 0
Thermaltake Armor LCS
Just a little update here. Finally got things put together and got some temp readings. Clocking my Q6600 between 3.7 and 4.0 temps are around 55* under load (stressing with small ffts) and idle right around 30*. I still need to take a reading of how cold the air is coming in from the bottom of the case but at least that gives you an idea of the cooling capabilities with the fans pulling air in. Also in case your worried about dust pulling in the case, just custom cut yourself a filter to cover the rad.
Last edited by GameGuru; 09-19-2007 at 02:43 PM.
GameGuru
do you have a photo how is your d5 seats there?
still dont know is it possible to mount two d5 at the bottom
As a gift, I received one of these HSPC cases well, its time to put it to use, make sure all works, no RMAs
Minor set back well, 2 setbacks...
Ive connected a single raptor to the rig to see if all works, recognizes all peripherals to realize my HDD does not show up well, come to think of it now, it was warmer than usual but being that Its a weekend and Ive given my brain 2 days off it took a Snap, Crackle, Pop and a Smoke Signal from my 2nd HDD to make me realize that something was wrong hence 2 HDD down the drain
WD RMA rocks! got new drive and all parts working...
i changed the MB from a P5K Premium to a DFI UT P35 T2R and it took a while but the green is growing on me...
had to change some parts for something else since i wont be using an ASUS board anymore... such as the EK NB/SB blocks...
i have MCW30 so i am thinking about putting them to use... but still considering...
after firing it up with the stock HSF, i put the PA160 to cool the CPU...
been a bit busy and haven't been able to spend more than an hour at a time but slowly... progressing...
"The ultimate measure of a man is not where he stands in moments of comfort and convenience, but where he stands in times challenge and controversy."
Dr. Martin Luther King Jr.
DIY: Self Clinching Nuts
Canon EOS 7D | Tokina 12-24mm f/4 | Canon EF 24-105 f/4 L | Canon EF 70-200 f/2.8 L IS Mk II | Canon EF 35mm f/1.4 L | Canon EF 400mm f/5.6 L | Canon EF 100-400mm f/4-5.6 L
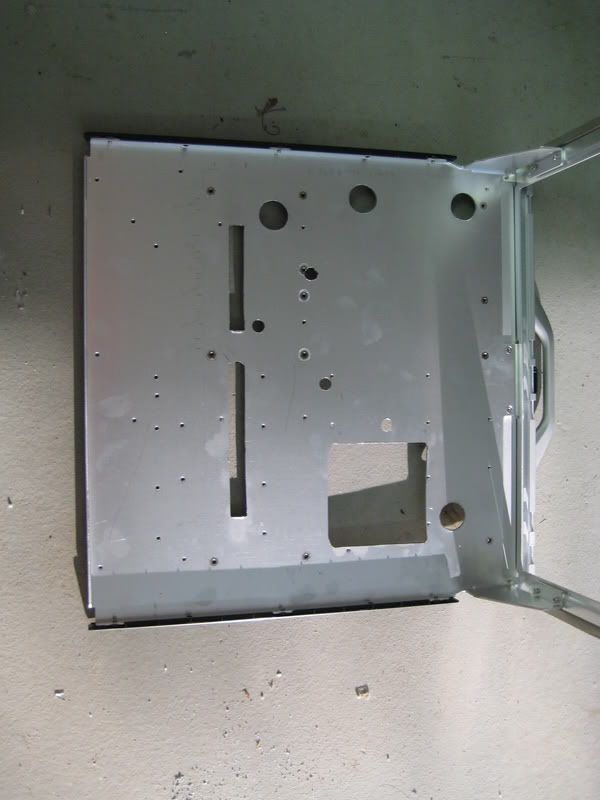
1.MB tray
a. Measure and cut CPU bracket hole
b. Measure and cut 24 pin ATX hole
c. Measure and cut holes for SATA
d. Measure and cut holes for 4 pin CPU PWR
e. Measure and cut misc holes for i/o, Firewire, USB, Sound...
the CPU hole got a bit messy but eh... i used the knock-out tool for most of the 1" holes and the rest, jigsaw was the way to go...
2.Chassis
a. Cut hole for PA160 at top of chassis
b. Cut hole for PA120.3 at bottom of chassis
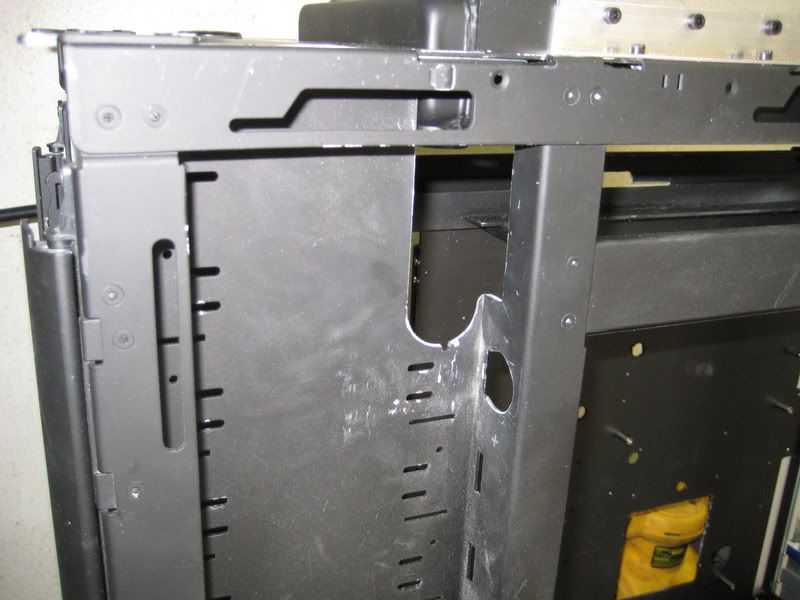
c. Cut necessary holes for cable management
this hole basically allows me to pull out all the power cables to the side, then behind the MB tray... in theory...
d. Paint
the painting thread talks about 2-3 coats of primer, then couple of coats of paint... with wet-sanding in between... ok... all sounded great... till after the first coat of primer... hell with it... i just lost patience... but end result is not bad...
matte black paint on the internals is not too bad looking...
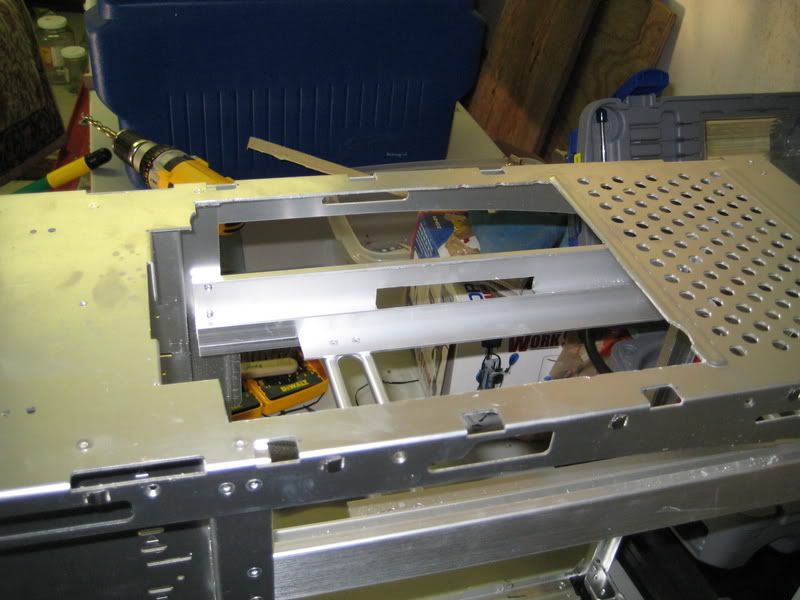
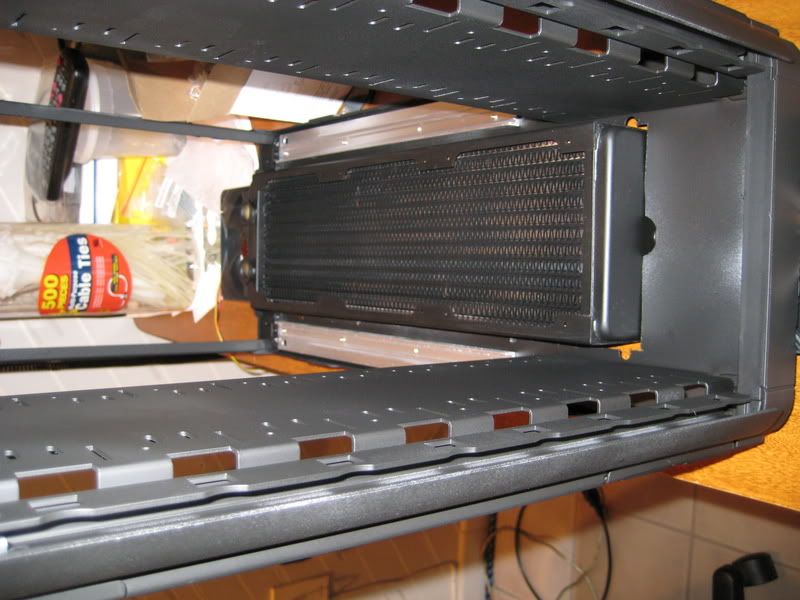
here's couple of pics with the 120.3 placed in the bottom...
if you look closely, the edges are not straight but it's not noticeable.
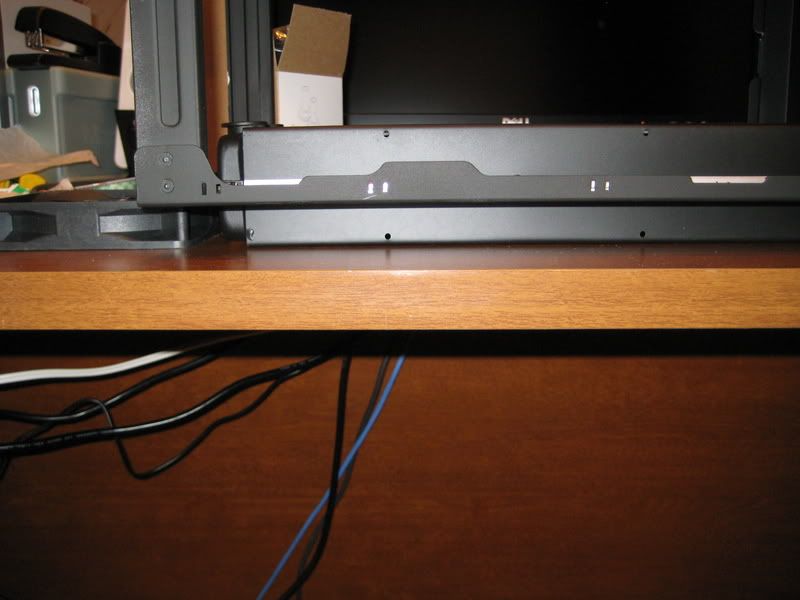
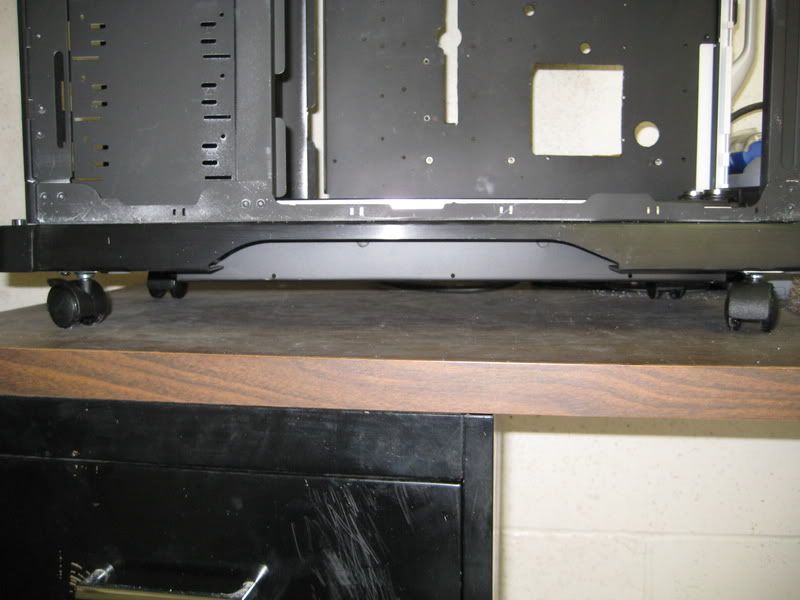
i used a pair of YL's to raise the case to see how it's going to mount when finished...
basically, the radiator will come through the case 15mm and the balance under the case...
next i am going to take the 160 off the current test setup and start mounting the radiators to the case.
easiest way is to take aluminum L brackets and mount em...
well, that's all for now...
appreciate any/all comments.
"The ultimate measure of a man is not where he stands in moments of comfort and convenience, but where he stands in times challenge and controversy."
Dr. Martin Luther King Jr.
DIY: Self Clinching Nuts
Canon EOS 7D | Tokina 12-24mm f/4 | Canon EF 24-105 f/4 L | Canon EF 70-200 f/2.8 L IS Mk II | Canon EF 35mm f/1.4 L | Canon EF 400mm f/5.6 L | Canon EF 100-400mm f/4-5.6 L
I would say no, I don't see how you would get two D5's in the bottom if your mounting a rad in the bottom as well. See my sig for pics.Originally Posted by rioja


looking good kinghong
thanks... i checked the MB tray last nite... not the cleanest paint job but it gets hidden when i assemble the computer...
the case, i think i am going to get a sander and shave off a bit so i can put the edge trims... the 120.3 is too tight right now...
hope to get more works this weekend...
"The ultimate measure of a man is not where he stands in moments of comfort and convenience, but where he stands in times challenge and controversy."
Dr. Martin Luther King Jr.
DIY: Self Clinching Nuts
Canon EOS 7D | Tokina 12-24mm f/4 | Canon EF 24-105 f/4 L | Canon EF 70-200 f/2.8 L IS Mk II | Canon EF 35mm f/1.4 L | Canon EF 400mm f/5.6 L | Canon EF 100-400mm f/4-5.6 L

sounds good, shave/sand around edges, put edge trims, put PA rad snuggly...
what size are the channel moldings? planning to add some to my CM832 mod
well, one of my worst fears came true last nite... the PA160 is too close to the PSU...
to make it fit, i need to move the PSU 3/4" to 1" to the front... but sadly, the drive bay structure gives me only about 1/2" room...
either i will get longer screws to keep the PSU sticking out or see about cutting the chassis a bit more...
@ iceredwing, i replied to you via PM but in case, get edge molding that has inner channel wider than 1/8"
the CM seems to be thicker than the Lian Li's
"The ultimate measure of a man is not where he stands in moments of comfort and convenience, but where he stands in times challenge and controversy."
Dr. Martin Luther King Jr.
DIY: Self Clinching Nuts
Canon EOS 7D | Tokina 12-24mm f/4 | Canon EF 24-105 f/4 L | Canon EF 70-200 f/2.8 L IS Mk II | Canon EF 35mm f/1.4 L | Canon EF 400mm f/5.6 L | Canon EF 100-400mm f/4-5.6 L
bring on the dremel and reinforced cutting disks.....
and the safety goggles too...
hmm or stick the PSU 1 inch out of chassis?...
yea... it was quite late when i realized this...
the PSU option may happen because the barbs may make the cutting way more complicated...
well, in any case... i will see when i get home tonight...
"The ultimate measure of a man is not where he stands in moments of comfort and convenience, but where he stands in times challenge and controversy."
Dr. Martin Luther King Jr.
DIY: Self Clinching Nuts
Canon EOS 7D | Tokina 12-24mm f/4 | Canon EF 24-105 f/4 L | Canon EF 70-200 f/2.8 L IS Mk II | Canon EF 35mm f/1.4 L | Canon EF 400mm f/5.6 L | Canon EF 100-400mm f/4-5.6 L
hm, i'm going to put 120.2 on top with standart psu seasonic 700w
and i still think it's posiible)
parts are coming next week so we'll see
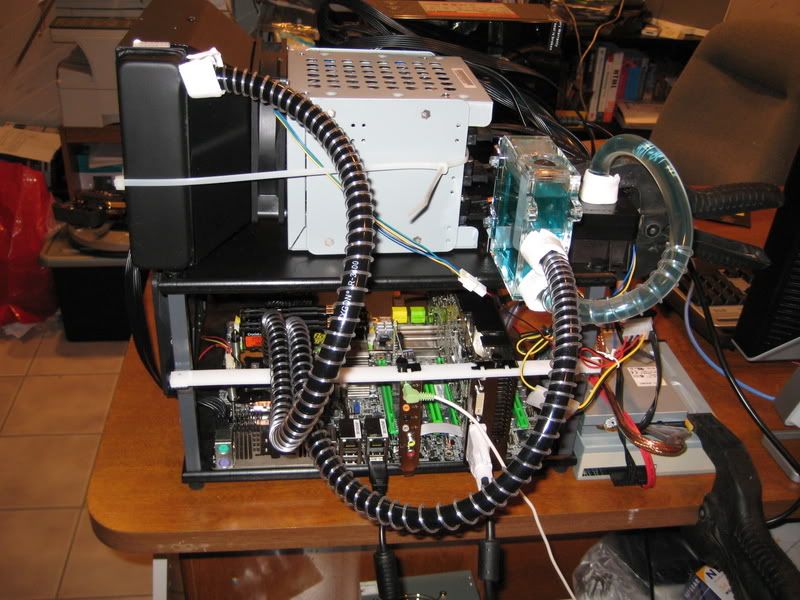
damn... it's been so long since i've started this... but i haven't given up...
work keep getting in the way of this...
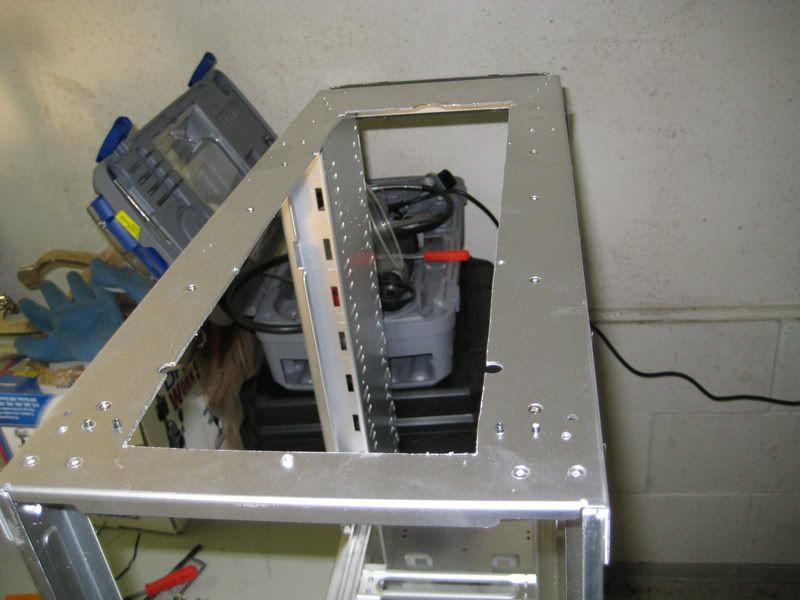
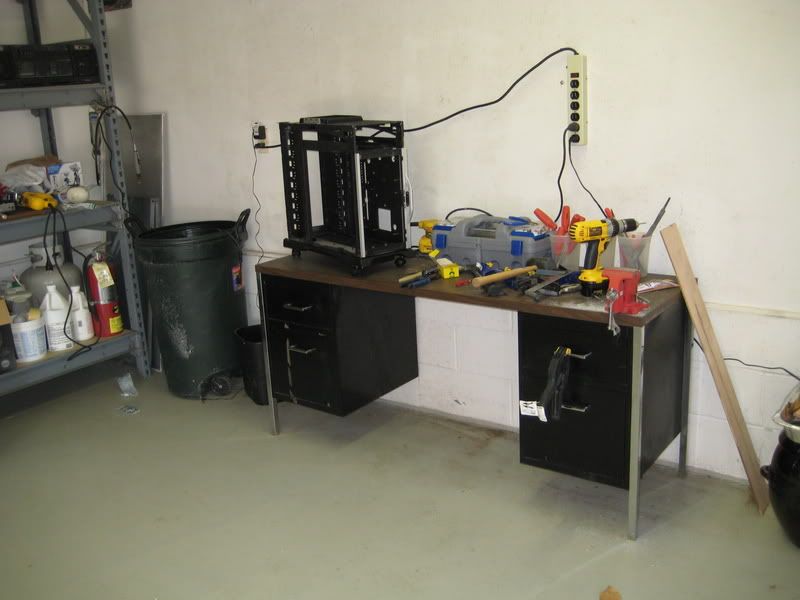
i was able to setup my "workshop" in my garage... and did most of the case modding work done...
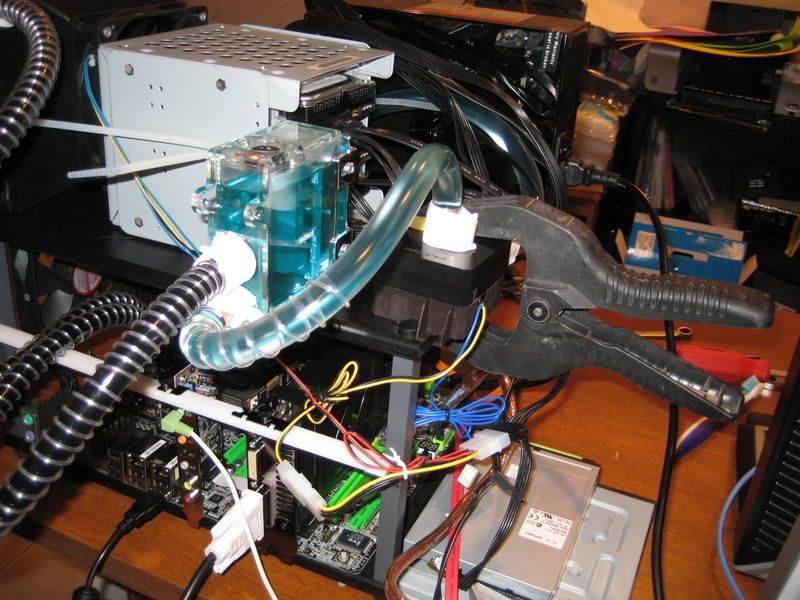
i love those older office furnitures that weigh a ton... great and quite sturdy enough to bolt a 3" clamp...
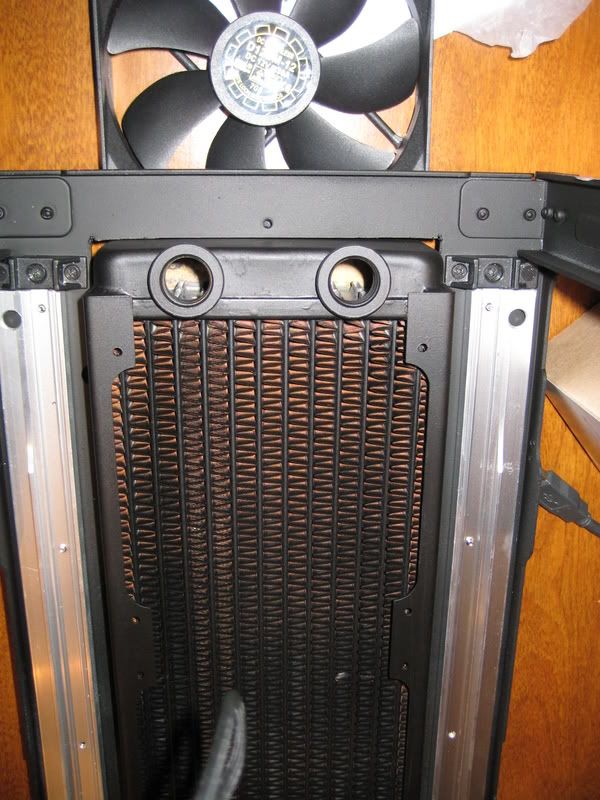
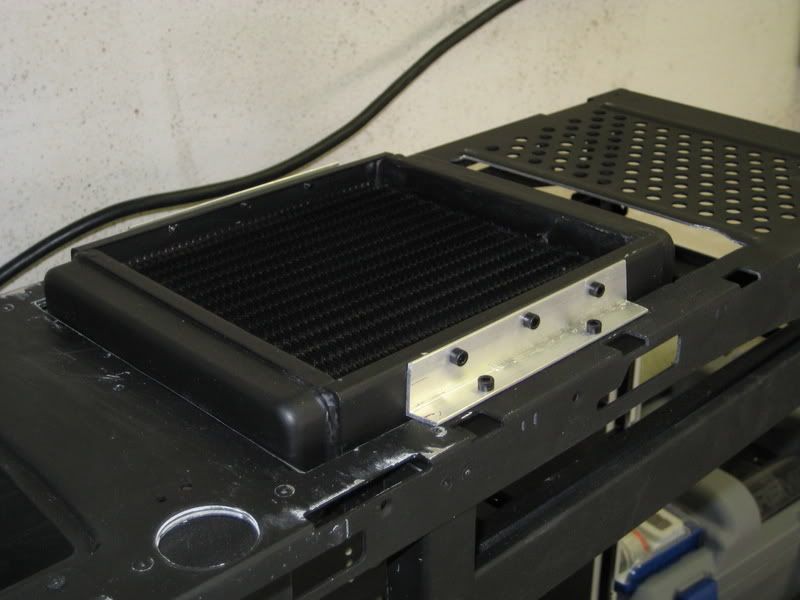
in order to clear the X3 PSU at back, i had to move the PA160 way up front... and due to the shroud, it pretty much left the first bay useless for a DVD drive so i am going to mount my card reader there.
also used aluminum L-shaped brackets to mount my PA160. i decided to use 6-32 socket machined screws for mount.
drilled additional holes on the radiator to stabilize the mount more...
the barb outlet of the 160 also ran into the bay frames so more dremmel and knock-out work there... but end finish is not bad...
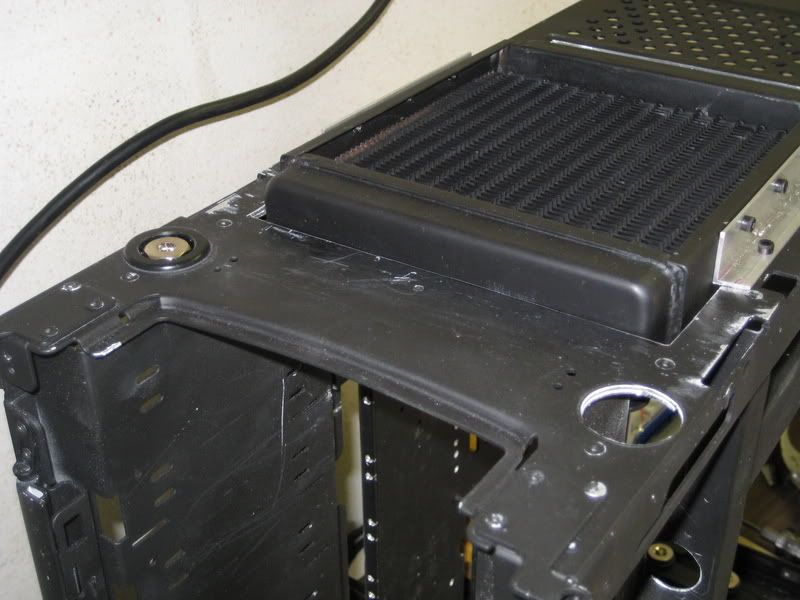
and 2 holes for fill ports from reservoir to the case...
i was thinking of fixing the fill port to the top panel cover but that would mean that i need to place enough slack in the tubes... not going to happen... i'm running out of room already... so i dont mind opening the top lid in order to access the fillport...
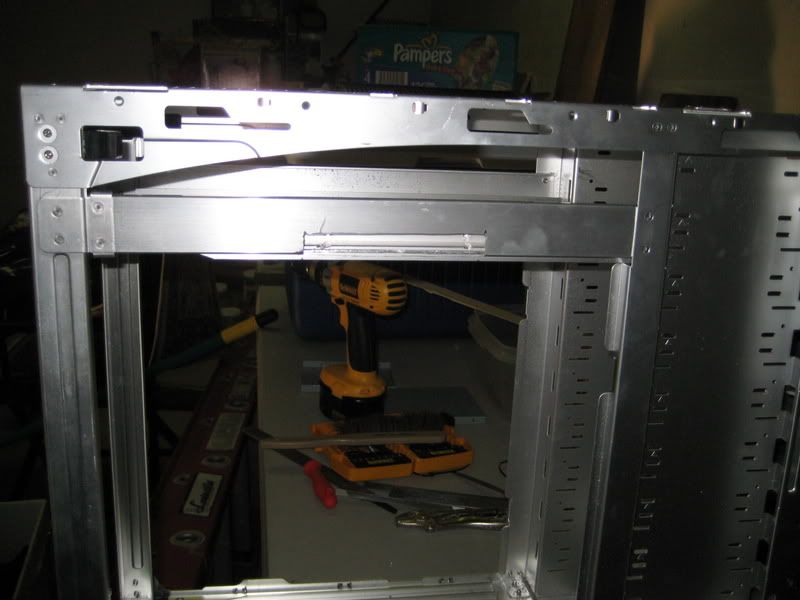
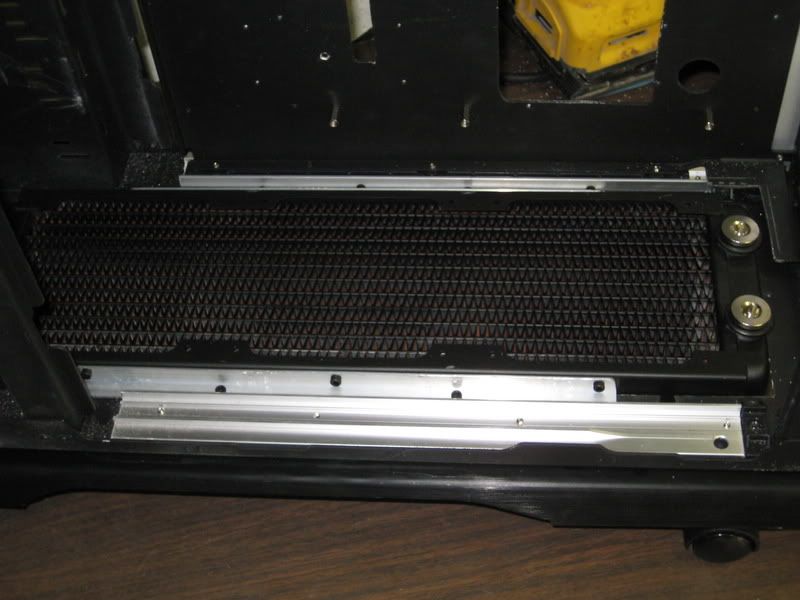
pic of the PA120.3 mounted on the bottom...
i am planning on blowing the air out of the case and i think i have enough clearance... if not... i can get bigger casters for bout 1/4"~ 3/8" additional clear... else, i will find me some blocks of wood i guess...
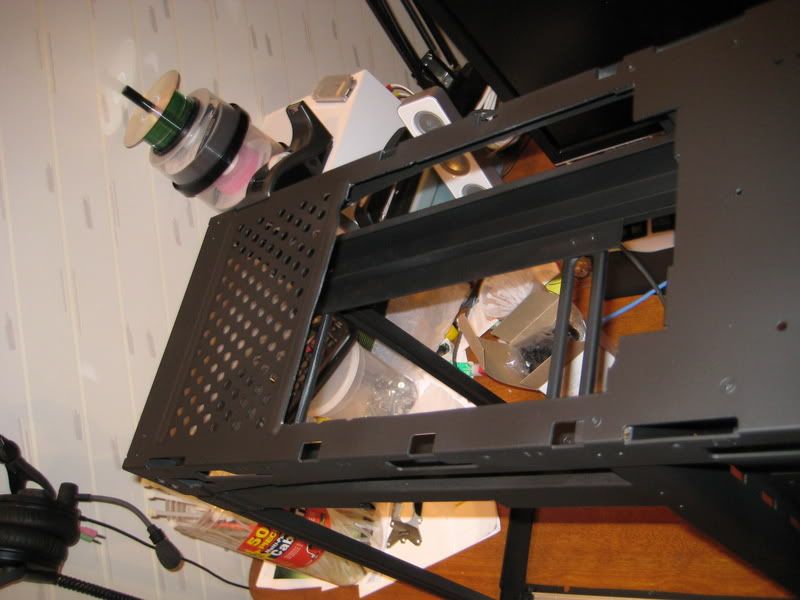
another shot of the mounting rail for the 120.3...
and from the back side...
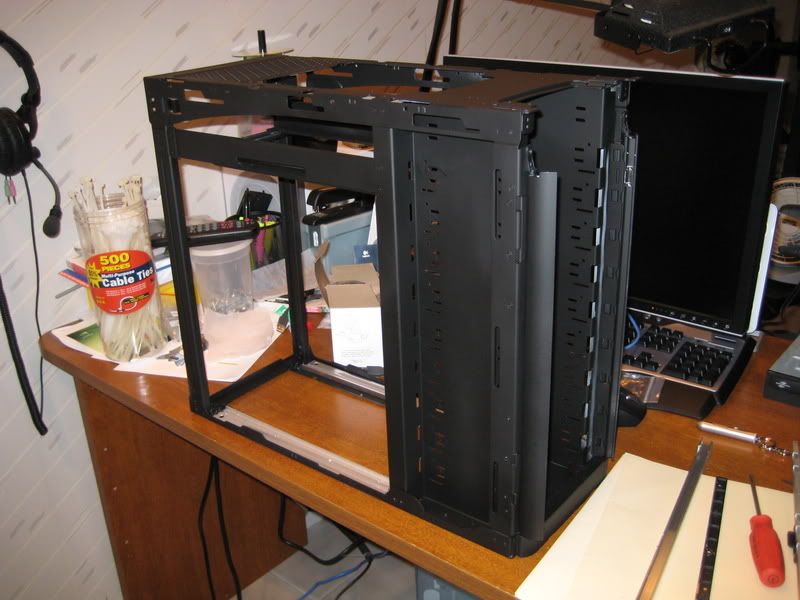
i had difficulties mounting both reservoir and pumps into this case... it's not as roomy as i'd originally imagined... but solution came about in the form of EK-Multioption 100... so cute... and size wise is similar to that of the MCRES but the barb position gave me that little elbow room needed...
i need to make mounting brackets to mount the RES across and behind the HDD areas of the 5 1/4" bays and also plan to cut up a old CD Drive case to mount the pumps...
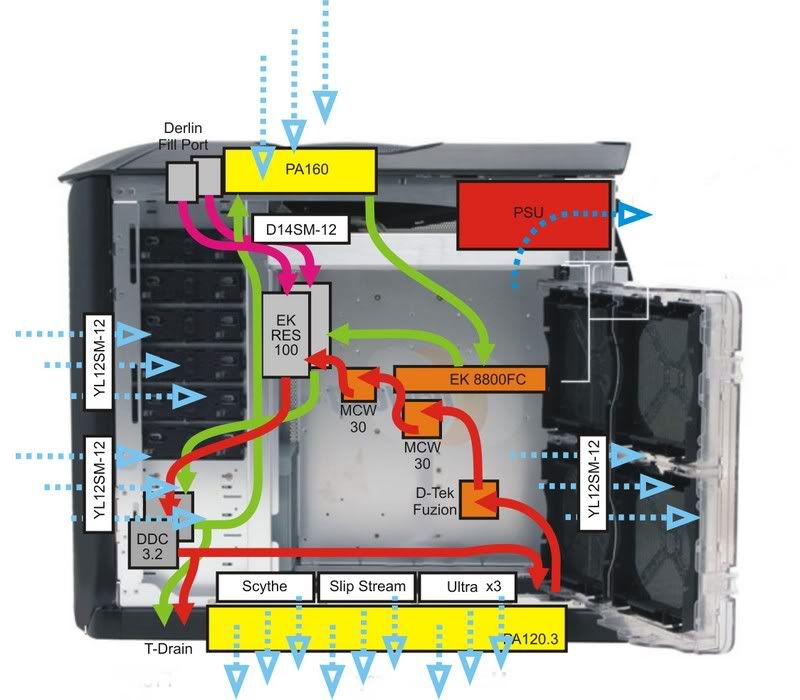
as for airflow, i want to push case air out of the bottom, thru the PA120.3... not the most ideal solution but i do hope that i have enough supply of cool air to sufficiently cool it... else, i guess i have to open up the case and flip the fans...
here's a graphic rendition...
and yea... i should have planned it better before cuttin and paintin... but heck...
"The ultimate measure of a man is not where he stands in moments of comfort and convenience, but where he stands in times challenge and controversy."
Dr. Martin Luther King Jr.
DIY: Self Clinching Nuts
Canon EOS 7D | Tokina 12-24mm f/4 | Canon EF 24-105 f/4 L | Canon EF 70-200 f/2.8 L IS Mk II | Canon EF 35mm f/1.4 L | Canon EF 400mm f/5.6 L | Canon EF 100-400mm f/4-5.6 L
Keep us updated with more pictures as you progress, always interesting to see how people approach problems and how they solve different dilemmas.

Ah first time I spotted this! I wanted one of those cases before I got my 3D Aurora 570, but I couldn't afford itAlso I couldn't figure out how to stick a triple rad in there but I see that is taken care of. Can't wait to see this progress

The Cardboard Master Crunch with us, the XS WCG team
Intel Core i7 2600k @ 4.5GHz, 16GB DDR3-1600, Radeon 7950 @ 1000/1250, Win 10 Pro x64
this build is looking great!!! can't wait to see the finished rig looks very promising indeed!!
I actually got rid of my stacker 830 in favour of a v2000....because i thought the 830 was a terrible wc case..i still have it 2... maybe i should use it on a another wc build
The blue and the orange colors are sexy
System: E8400 // P5Q-E // Ballistix // HD3850 // HX520 http://valid.x86-secret.com/show_oc.php?id=419486
Thermochill pa120.3 // D-tek FuZion bowed+ costum nozzle // MCW60 // EK150 // dcc1 18w w/top


are there any updates on this?
he he he... by the time i finish this, my computer may be outdated...
anyways, recent work loads and such...
plus the holiday seasons... busy season for dads, my lil girls are looking at me...
every nite...
couple of updates to report.
PUMP:
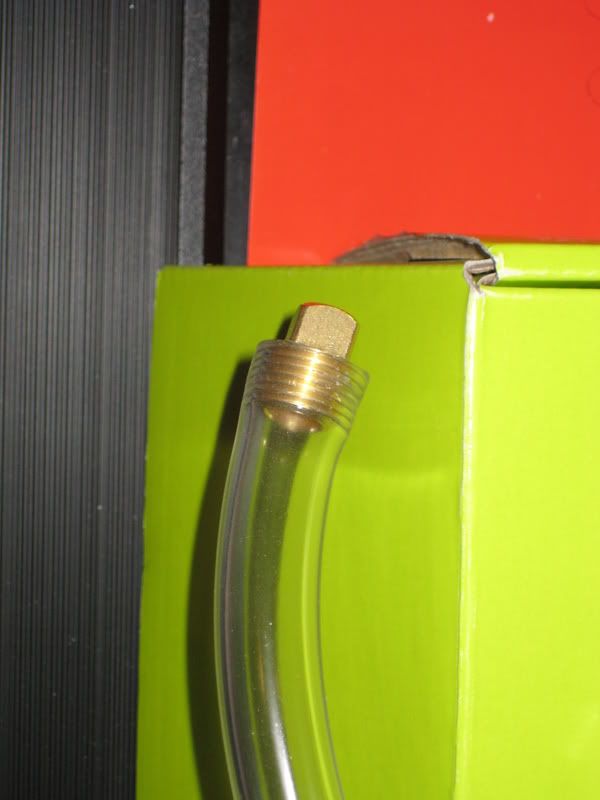
ok, detoured a bit here... i decided to buy Danger Den Derlin T right at front of the pump and pull out Drain T from there...
i used the DD G1/4 x G1/4 nipple and rest are combo of 1/2" D-Tek & EK Barbs did not want to spend more money on this...
the fit is interesting... but i have to admit, EK and the DD Nipple does not give a nice fit as the D-Tek so i used Teflon... i will put this to leak testing... i'm will hope for the best but...
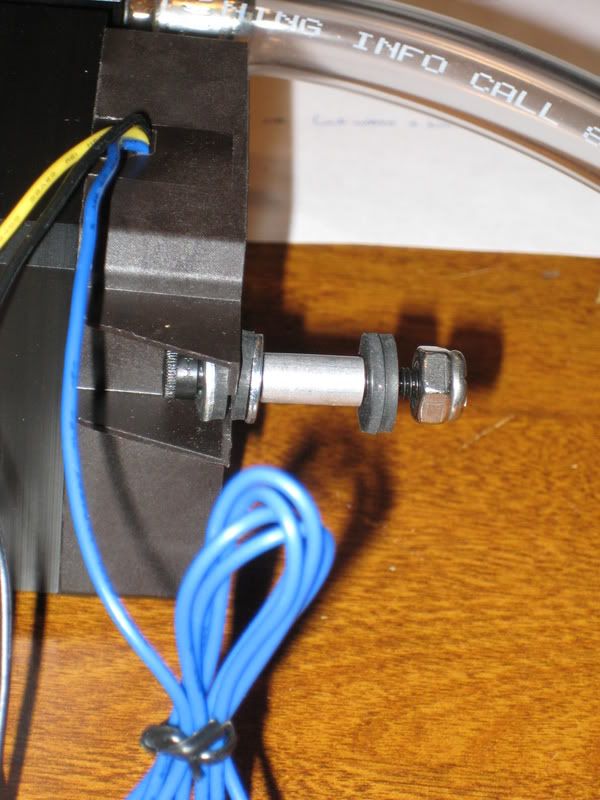
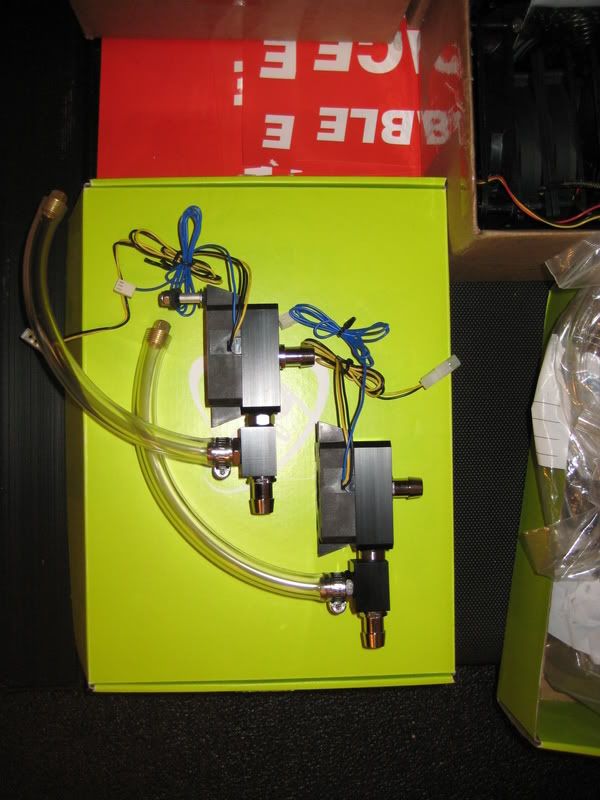
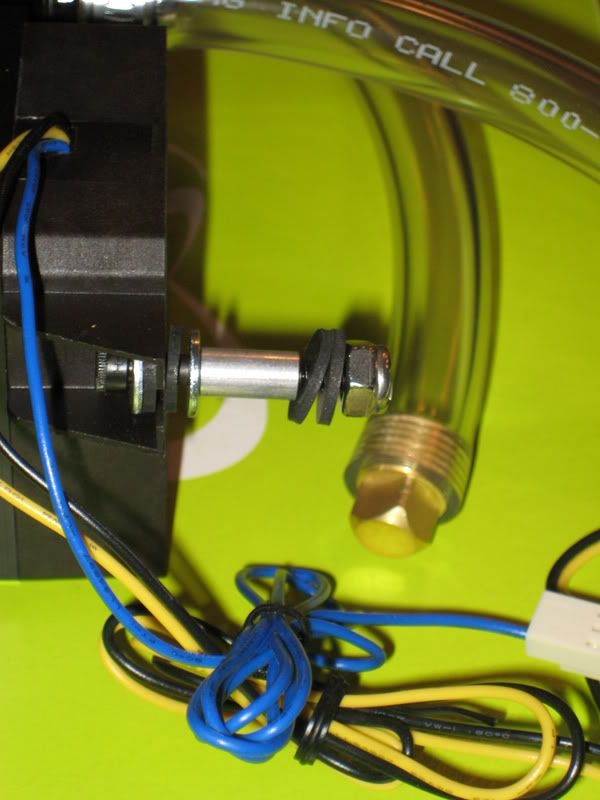
i am mounting 2 DDC3.2 on the 5 1/4" bay side by side, using a standoff for some airflow.
here i used 6-32 x 1 1/2" screw, bunch of washers, aluminum standoff, and more locknuts and Home Depot goodies for my pump mount screws... hopefully it will hold.
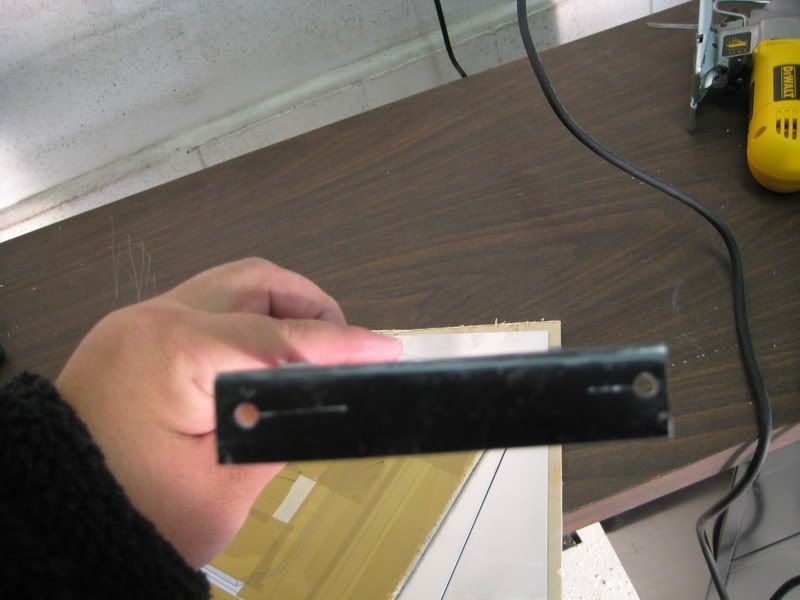
here i took a Aluminum panel from my previous mod (a LL PC-V1200 case), some sandwich with 1/4" plywoods, wood screws to hold in place, jigsaw and hole saw... voila!
edges were bent using a vise, block of wood and mallet.
not the cleanest... off centered a bit... but will do... hopefully the paintjob will hide the flaws.
here's some pic of pump assembly's... and a better shot of the plug i'm using at end of drain...
RESERVOIR:
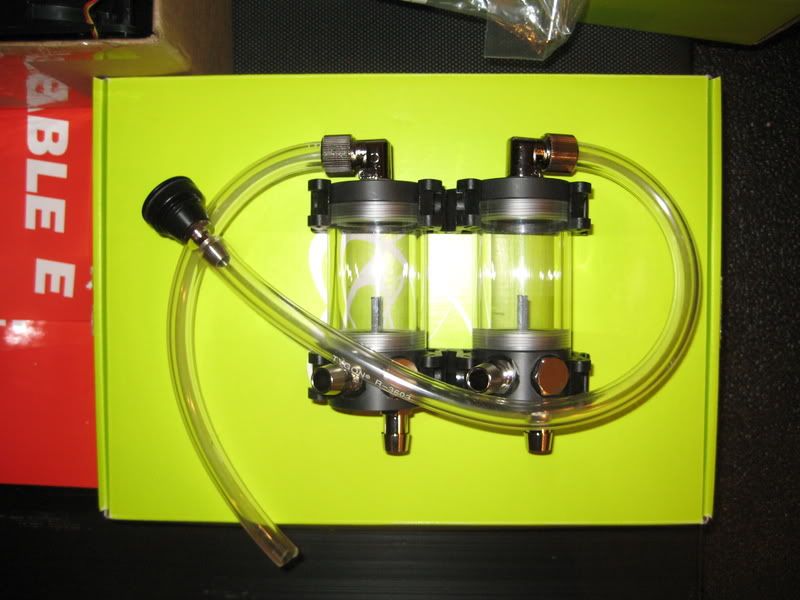
EK Multires 100 x 2 helped a ton on my res placement.
i did not want to share 1 RES with my 2 loops...
bottom hole is the OUTLET to feed PUMP, side hole for the INLET, top hole for FillPort via Koolance's swivelin fittings... the 3/8" tubing fit with the Koolance, and i had some spare 3/8" barbs so... here's what my RES assembly will finally look like.
the fill ports goes off to each side of the case, if you see my last post, i drilled the holes for the Fill Ports... Derlin of course...
again, i will have to remove the top lid in order to access the fillports.
i dont intend to cut more holes on top of my case at the moment... and how often will you access it? eh?
btw, the EK mounting clips are very weak... and i was dissappointed with how easy they break... i had to purchase aftermarket clips to hold em... much nicer quality...
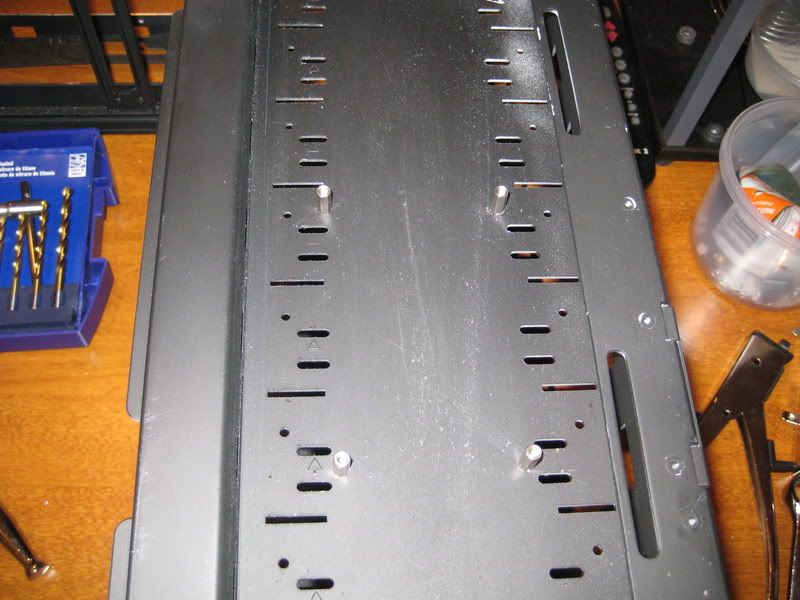
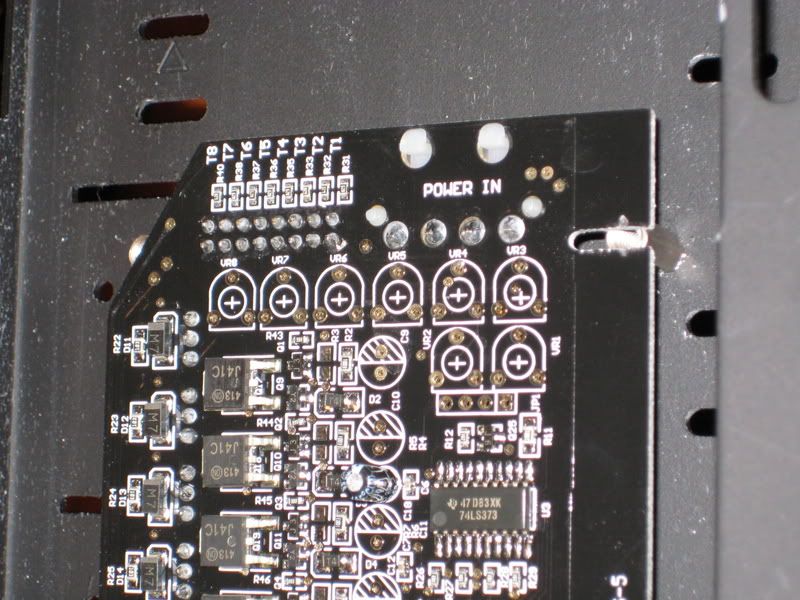
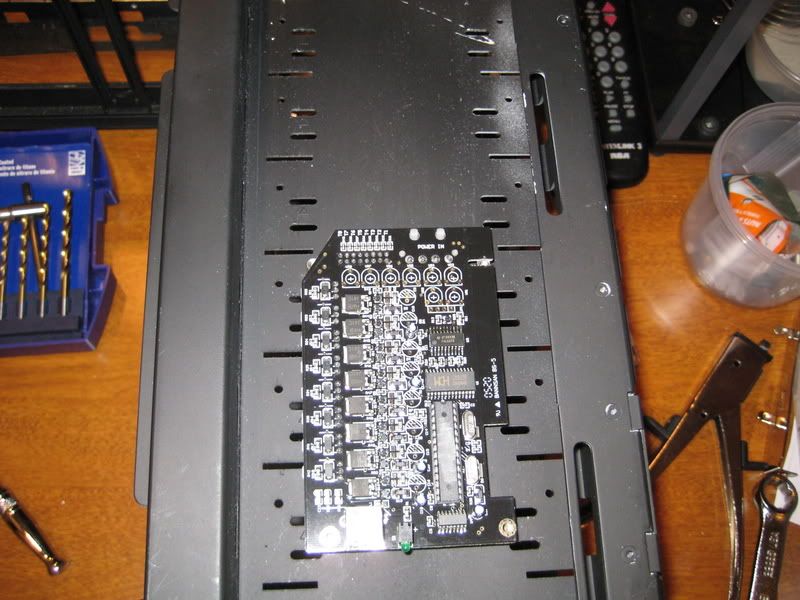
FAN CONTROL:
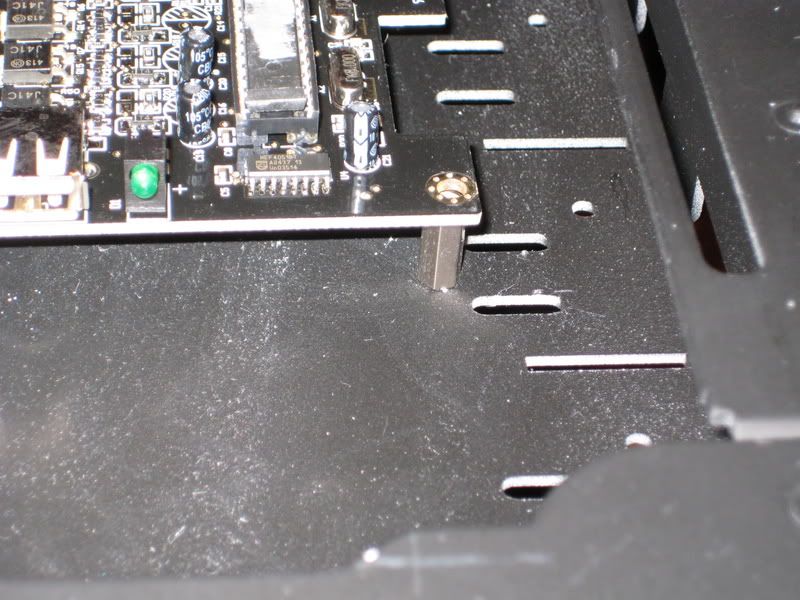
i purchased Sunbeam Theta TP101 Software Fan Controller from P-PC's and instead of having all that fan wires and thermo sensor wires cluttering up a slot, i decided to remove the metal slot thingy and mount that sucker to the hidden side of my chassis...
using the MB standoffs... just need to get a good measure, drill and also, shave a bit off on the Theta board.
i think it fits nicely... will be much cleaner than seeing that mess of wires in the slot...
i've used a knockout to punch out 2 holes for cable access/management... it 's bout 1" Dia hole so it should be enough to squeeze molex and misc cables.
my case and parts are being painted in my wharehouse atm...
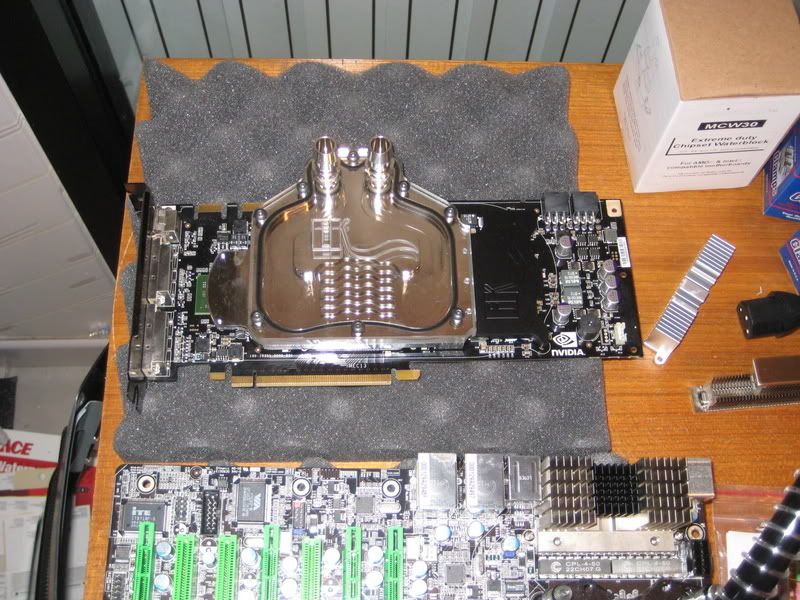
in the meantime... some eye-candy...
ooh, that nickel sure is purdy!!!
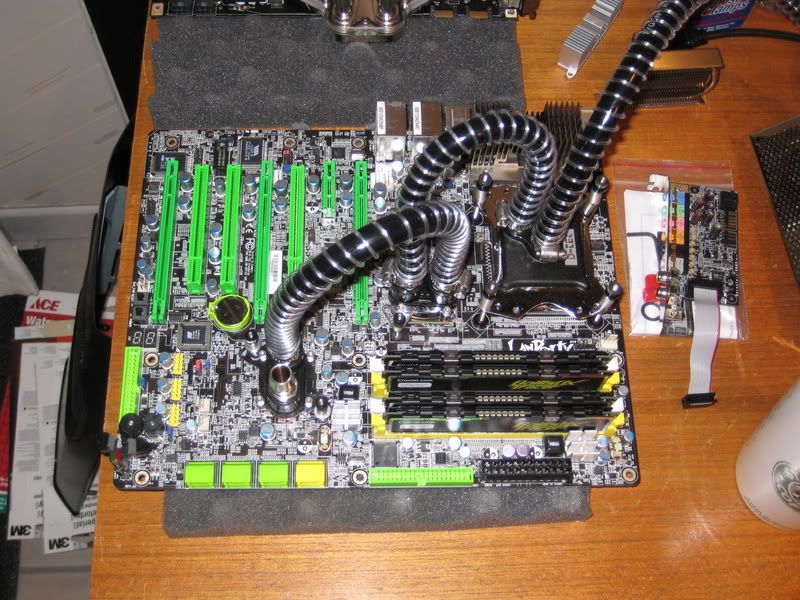
i've taken it appart and re-did all the tubing and re-seat the blocks... and i had to place the nozzle too... 7/16" - 9/16 OD tubes are real flexible... was able to do a CPU-NB loop using the 2 closest barb, making sure that the upper barb is OUTLET to ease in bleeding...
i will try to post more pics later...
thanks for your interest...
time for a break... laterz...

"The ultimate measure of a man is not where he stands in moments of comfort and convenience, but where he stands in times challenge and controversy."
Dr. Martin Luther King Jr.
DIY: Self Clinching Nuts
Canon EOS 7D | Tokina 12-24mm f/4 | Canon EF 24-105 f/4 L | Canon EF 70-200 f/2.8 L IS Mk II | Canon EF 35mm f/1.4 L | Canon EF 400mm f/5.6 L | Canon EF 100-400mm f/4-5.6 L
whaaah! that's gonna look priceless sweet! I like the little EK res's
The multiple screen Wallpaper topic!: http://www.xtremesystems.org/forums/...d.php?t=190723
The System wallpaper topic!: http://www.xtremesystems.org/forums/...d.php?t=180050
more updates!!! woohoo
keep it up
New work-in-progress - watercooled dual-rad Lian-Li A05:
http://www.xtremesystems.org/forums/...d.php?t=156162
Opteron 175 @ 3.0GHz
273x11
 Posting Permissions


 Reply With Quote


Bookmarks