Page 1 of 2 12 LastLast
Results 1 to 25 of 41

Thread: Cabinet PC

  1. #1
    Xtreme Enthusiast
    Join Date
    Dec 2004
    Location
    Chico, CA
    Posts
    749

    Cabinet PC

    Cabinet PC


    *** This project is now complete. If you wish to skip to the Complete Thread with a summary of the build log, the Link is --> Here <-- ***


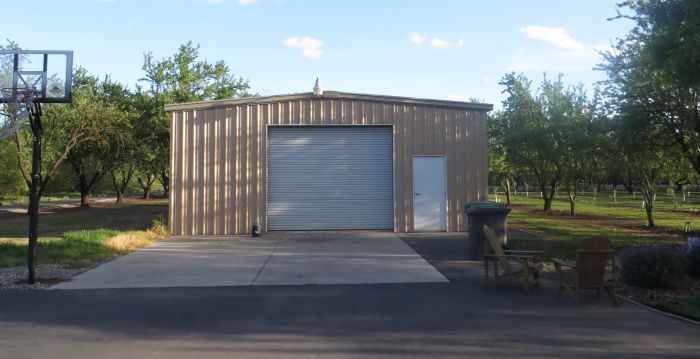
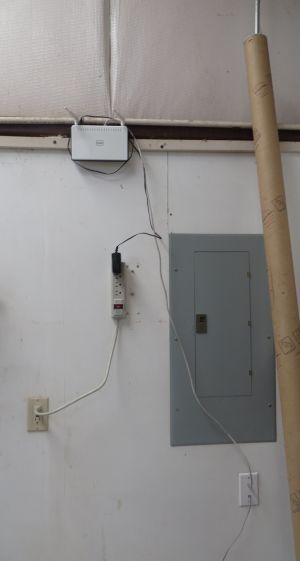
    I've got a decent shop, but its separated from my house (which is a good thing, so I can tinker even at night).


    However, I haven?t got a PC in it, which would be useful for browsing, music, photoediting, etc.

    When I needed it, I?ve been toting my laptop over.


    As you can, see, my shop has got a lot of modular workstation type units, so why not a PC?


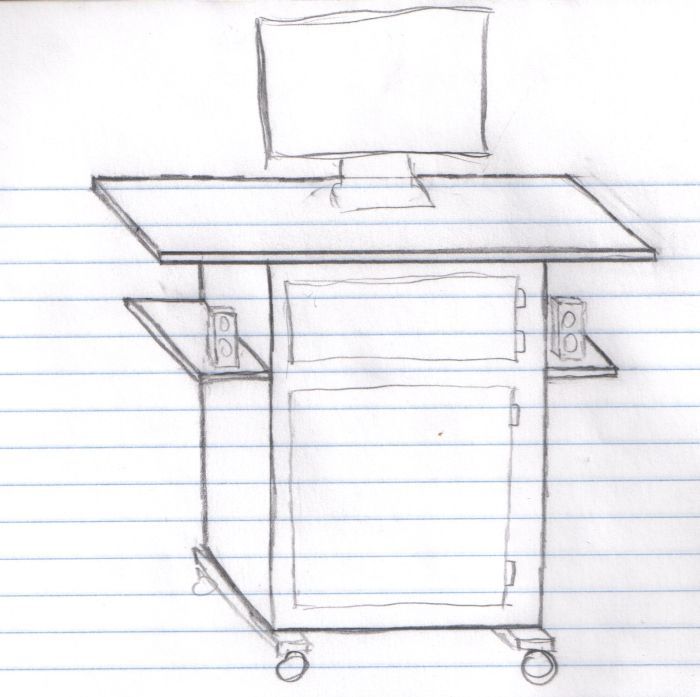
    Important concept notes:

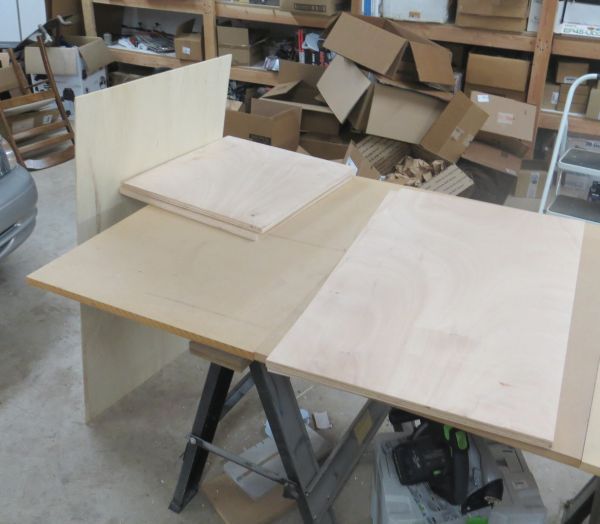
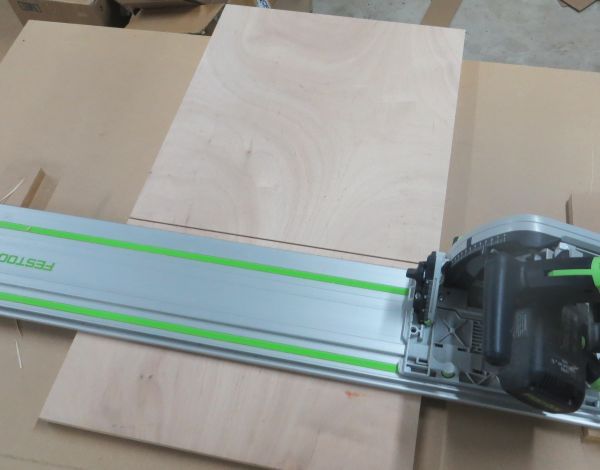
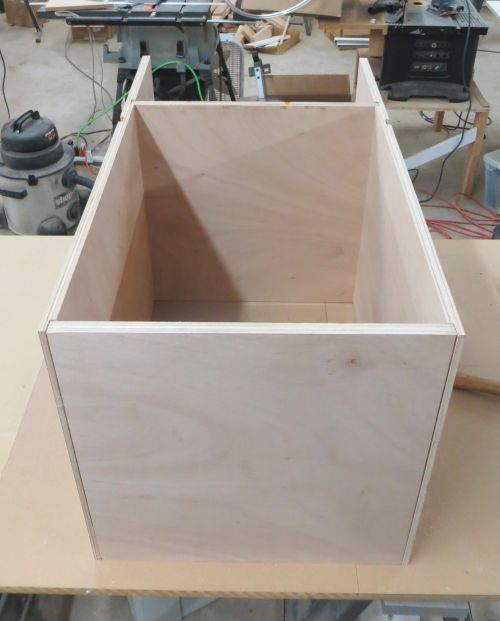
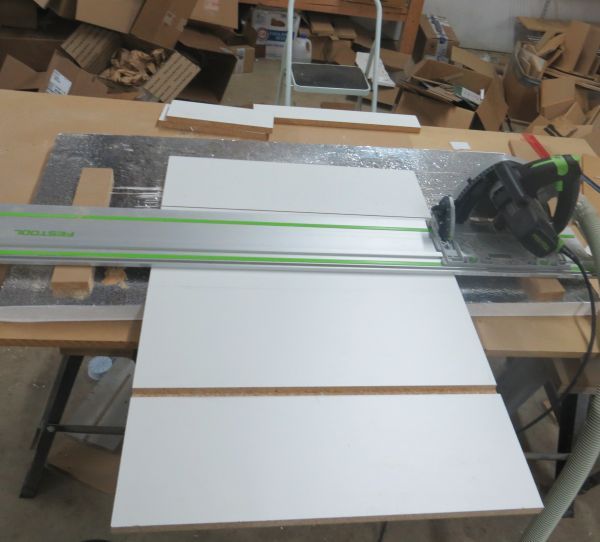
    1) Built on a simple cabinet structure, with a desktop

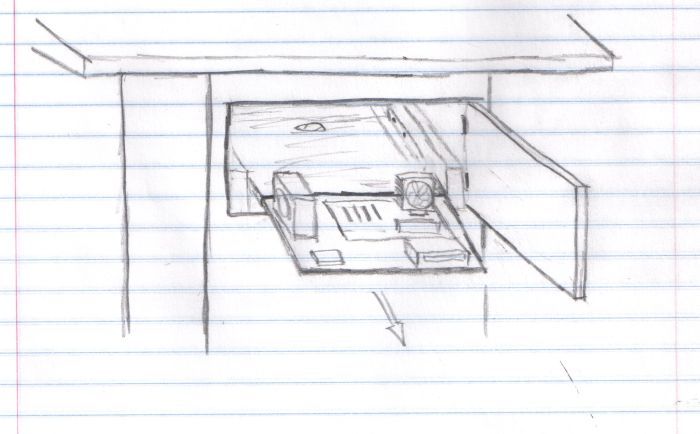
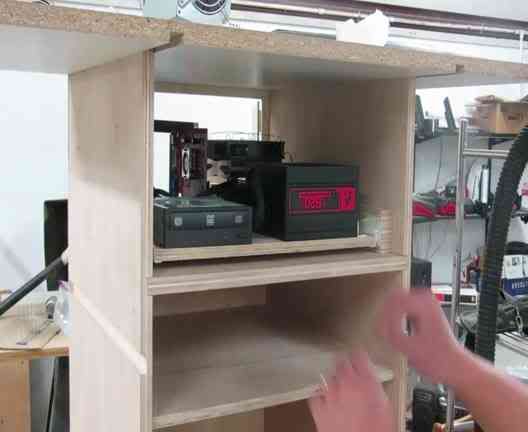
    2) PC mounted on a pull out shelf unit

    3) Speakers for music

    4) Mounted on wheels

    5) This one is meant to be a quick and simple build--focus on function and low cost. Aesthetics are taking a back seat. Not really for performance either, the PC is going to be cobbled together components.

  2. #2
    Xtreme Guru
    Join Date
    Dec 2009
    Location
    Latvia, Riga
    Posts
    3,972
    Aesthetics one thing, but what about ergonomics? Or this will be built for only ocasionally small work while standing near it? If you gonna sit by, you'll have to sit with legs unconfortably sideways.

  3. #3
    Xtreme Enthusiast
    Join Date
    Dec 2004
    Location
    Chico, CA
    Posts
    749
    Probably not got to get a lot of extended use, primarily standing.

    Height to the table top, including casters, 40".

    The table top hangs over the cabinet by 4.5", should provide enough room for the toes.

  4. #4
    Xtreme Guru
    Join Date
    Dec 2009
    Location
    Latvia, Riga
    Posts
    3,972
    Hmm. That + wheels .. probably for easy relocating near to different instrument tables? Then i'd think of getting some wifi N adapter, + think of something for power cord to not easy accidentally be pulled out (-1)well fixed on this 'cabinet' end, -2)maybe of some cable reel to make it longer/shorter on need to basis). Also imho important to ensure good dust protection/filtering for air or liquid cooling, as usage place - workshop. And i'd make shorter left side, longer right side shelve, for better mouse placement (or make that expanding in some way). Imho trackball gives up too much of usage comfort for compactness.
    Last edited by Church; 03-26-2013 at 05:18 AM.

  5. #5
    Xtreme Member
    Join Date
    Dec 2012
    Location
    Buenos Aires
    Posts
    306
    Subbed, seems like a good idea

  6. #6
    Xtreme Enthusiast
    Join Date
    Dec 2004
    Location
    Chico, CA
    Posts
    749
    People have brought up a lot of important functional points, thanks!


    1) This is mainly going to be a short use stand up station: the table top is set for 40” including the caster wheels


    2) Not drawn, I will have a simple shelf on top of the desktop for a monitor stand, with the keyboard underneath.


    3) Since its on wheels, obviously its meant to be mobile. My plan is to have an extension cord, maybe wound on a pair of cleats. But I do also have this APC UPS, which works well, altho the LCD has burn out:


    Should be able to power the system for a while, even with the speakers. Cabinet boom box, yah?


    4) Dust control. Definitely going to be an issue. The cabinet is mostly enclosed, and I plan on keeping positive pressure with 3 dust filtered 120mm fans intake, with 2 120mm fans exhausting. Still probably going to get dusty--on the other hand the whole system is easily accessed (on the pull out tray) for a dust blasting.


    5) Wireless connection. I picked up an on sale Edimax USB plug (I plan to have a USB hub on the desktop) for cheap. I supposed I could find a PCI card (my planned mobo does not have built in wifi), but I would also need an external antenna extension, as the whole motherboard (including i/o ports) will be within the cabinet enclosure.


    6) On the subject of wireless, some observant posters have wondered how I get internet access into my shop--a very valid point.


    Here is my shop, as pictured from the corner of my garage.


    (yeah, I know its purty)

    While not far from my router (which is just inside my garage) the shop is entirely metal. Which means no good penetration by 802.11. In fact, if I leave the door open, I get 3 bars or reception, if I close the door, zero.

    Currently I’m doing a sort of ghetto wireless bridge.


    If you look in the picture, I’ve got this weatherproof box sitting outside the shop roll down:


    Inside is an extension cord and a cheap edimax wireless access point.


    Which is then connected to an older wireless router, giving me wireless within the shop, even with all the doors closed:


    Believe it or not, this ghetto setup has worked for me all the way thru winter, sub-freezing temps, wind, rain, and hail.

    Kudos to edimax tech support who helped me set up the access point as its not-intended wireless bridging function.


    However, I am pleased to say this week, I incidentally am having an electrician by to install a whole-house-surge protector (BTW definitely a wise investment), but he is also going to pull ethernet to my shop, so it will soon be non-ghetto wireless.


    Last year, I personally wired my house with CAT6, and pre-wired a line to my telco box in my garage, in the hopes of one day getting line pulled thru a buried conduit I know exists to my shop. Hopefully that will happen this week.


    Pat my own shoulder, here is my CAT6/gigabit ethernet router and switch, in my laundry room next to my garage:


  7. #7
    Xtreme Enthusiast
    Join Date
    Dec 2004
    Location
    Chico, CA
    Posts
    749
    Okay, no more ghetto wireless for me: I now have Cat6 lined to my shop from my hub!


    Let’s get back to building!


    First I headed to Home Depot and picked out a 4’ x 8’ panel of 3/4” plywood (~$45), and had them rip it down for me into the following panels:


    Left panel: 34” x 20”
    Right panel: 34” x 20”
    Structural shelf: 19” x 20”
    Bottom of cabinet: 19” x 20”
    Top door (final dimensions): 18.25” x 8.5”
    Bottom door (final dimensions): 18.25” 21.34”


    Other sheet lumber I needed:

    2’ x 4’ 1/2” ply (~$15):
    Motherboard tray: 16 3/8” x 17.5”
    Floating shelf: 18 3/8” x 18”


    2’ x 4’ 1/4” ply (~$10):
    Backer panel of cabinet: 34.5” x 19.75”


    Other sheet lumber involved:


    3/4” white laminate (~$20--this I had lying around the shop from other projects):
    Table top: 36” x 24.5”
    Wing shelves (x2): 8.5” x 20”


    Other items picked up at this shopping trip:

    Cable pass thrus (x2) ($3 x 2)
    Set of shelf pins ($4)


    Here we go with the stuff at my shop:


    Let’s get a cuttin’:

    My left and right side panels got dados and rabet joints to fit the structural shelf panel and bottom panel.


    To make these joints, I used my trust festool plunge cutter. It takes about 8 passes to generate a 3/4” wide dado or rabet, which is annoying. On the other hand, for the tools I’ve got (table saw, router), it generates the most accurate, safe, and least dusty grooves. I do have an old radial arm saw, which could mow it out quickly with a dado blade set, but the lengths of the grooves required exceeds a single pass.


    Just putting the 4 3/4” plywood panels together, and its already looking like a cabinet:


    Note, it looks upside-down, but the solid panel is the bottom--time to make the table top:


    I added dado grooves to the table top to join to the cabinet base:


    Put the 2 together and its already looking like something!


  8. #8
    Xtreme Enthusiast
    Join Date
    Dec 2004
    Location
    Chico, CA
    Posts
    749
    Sorry for the pause in posts, but I am back after a nice vacation!


    (Points for guessing the location? Mrs. Navig?s in the foreground).


    Let?s get back to it. I next decided to work on my doors.


    I was planning on having 2 doors--the top for access to the pc components, the bottom for storage.


    Again, keeping with the simple and economical theme, I decided not to build a face frame for my cabinets. Instead I purchased 2 sets of these hinges:


    http://www.rockler.com/product.cfm?p...0&site=ROCKLER

    (2 x $9 = $18)


    I just cut my doors to size and mount them directly to the plywood box, no need for mortising or building a face frame.


    And here I mounted the hinges:


    Cut my top door:


    And here it is opened:


    Next I worked on my door-stop/catch mechanism. I had some push-to-open latches from a previous build, so I simply used those. Here is the mcmaster part#:


    mcmaster part # 10825A28

    (I ended using a total of 3 for 3 x $2.25 = $6.75)

    http://www.mcmaster.com/10825A28


    And here is a video of the latch and door in action:


    (click to play)


    And repeated the process for the lower door:


  9. #9
    Xtreme Enthusiast
    Join Date
    Dec 2004
    Location
    Chico, CA
    Posts
    749
    Answer to previous non-modding question. Just back from a trip to Zion National Park.

    Plus Bryce Canyon:


    Next I began work on my system tray.

    I picked up these standard cabinet slides from Home Depot (~$15).


    Note, I had to mount the right side slide on a block to allow me to pull out the tray, without having to open the cabinet door fully.


    And here was my system tray:


    And mounted up:


    The nice things about this drawer slide set is that it is real easy to fully remove the tray (see video later).


    Next I organized where I wanted my components to lay:


    The items in the foreground will actually be in the back of the cabinet. I felt this was the best layout for cabling and airflow. It is a little odd to have the powersupply up front, but I think that was the best choice.


    Next, I had an old pci rack I had fabricated laying around:


    I hacked it apart to build what I needed:


    And mountings for my motherboard were set:


    Turned my attention to mounting the power supply:


    And the drives:


    Assembled my system:


    This is almost actually my real system, short of the real hard drive.

    System is:

    e8600

    Gigabyte EP45 UD3R

    2x4gb G.skill RAM

    Thermalright 140mm HSF (model escapes me)

    Corsair HX620 psu

    Kingston 128gb SSD

    Asus Radeon card (model escapes me)


    Into the cabinet it goes:


    And here is a video of the system tray in action!


    (click to play)

  10. #10
    Xtreme Member
    Join Date
    Dec 2012
    Location
    Buenos Aires
    Posts
    306
    Nice, it's a test bench/desk hybrid...

  11. #11

  12. #12
    Xtreme Addict
    Join Date
    Feb 2005
    Location
    OZtralia
    Posts
    2,051
    Nice mobile 'pooter and bench

    Have you thought about a dust filter/air intake @ the back ???

    I love your shed !!!!!
    lots and lots of cores and lots and lots of tuners,HTPC's boards,cases,HDD's,vga's,DDR1&2&3 etc etc all powered by Corsair PSU's

  13. #13
    Xtreme Enthusiast
    Join Date
    Dec 2004
    Location
    Chico, CA
    Posts
    749
    This is the airflow plan:


    3 intakes, 2 exhausts, keeping it under positive pressure, filters on the intakes.

  14. #14
    Xtreme Addict
    Join Date
    Feb 2005
    Location
    OZtralia
    Posts
    2,051
    You only need one 120mm intake and a slower 120mm exhaust
    lots and lots of cores and lots and lots of tuners,HTPC's boards,cases,HDD's,vga's,DDR1&2&3 etc etc all powered by Corsair PSU's

  15. #15
    Xtremely Hot Sauce
    Join Date
    Sep 2007
    Location
    New York
    Posts
    3,586
    Quote Originally Posted by alpha0ne View Post
    You only need one 120mm intake and a slower 120mm exhaust
    I would go so far as to say just a dual intake. Make sure it's filtered--several times over. Broad mesh filter on the outside, finer mesh filter on the inside. You'll want to keep things protected from wood and metal dust.

    My toys:
    Asus Sabertooth X58 | Core i7-950 (D0) | CM Hyper 212+ | G.Skill Sniper LV 12GB DDR3-1600 CL9 | GeForce GTX 670-2048MB | OCZ Agility 4 512GB, WD Raptor 150GB x 3 (RAID0), WD Black 1TB x 2 (RAID0) | XFX 650W CAH9 | Lian-Li PC-9F | Win 7 Pro x86-64
    Gigabyte EX58-UD3R | Core i7-920 (D0) | Stock HSF | G.Skill Sniper LV 4GB DDR3-1600 CL9 | Radeon HD 2600 Pro 512MB | WD Caviar 80GB IDE, 4TB x 2 (RAID5) | Corsair TX750 | XClio 188AF | Win 7 Pro x86-64
    Dell Dimension 8400 | Pentium 4 530 HT (E0) | Stock HSF | 1.5GB DDR2-400 CL3 | GeForce 8800 GT 256MB | WD Caviar 160GB SATA | Stock PSU | (Broken) Stock Case | Win Vista HP x86
    Little Dot DAC_I | Little Dot MK IV | Beyerdynamic DT-880 Premium (600 Ω) | TEAC AG-H300 MkIII | Polk Audio Monitor 5 Series 2's

  16. #16
    Xtreme Enthusiast
    Join Date
    Dec 2004
    Location
    Chico, CA
    Posts
    749
    Not really known for my restraint in cooling!


    Anyway, my shop is insulated, but not cooled, so it gets to 100f regularly. Quietness is also not a priority, as the intended primary purpose of this unit is to be a boom-box. Also, happen to have a 5 channel fan controller laying around, so 5 low speed 120mm fans it is.

  17. #17
    Xtreme Enthusiast
    Join Date
    Dec 2004
    Location
    Chico, CA
    Posts
    749
    Next I cut my backer panel.


    I?m going to need a door here to access the i/o panel of the motherboard.


    Besides just covering the backside, its important structurally, keeping the cabinet square.


    Access door, opened with the same push-to-open latch as the front doors.


  18. #18
    Xtreme Guru
    Join Date
    Dec 2009
    Location
    Latvia, Riga
    Posts
    3,972
    BTW, what sound/speakers are you planning to install in this? What do you think if alongside normal speakers install in easy to reach place normal minijack socket, so that earphones (with long spiraled wire of course) could be used when working in workshop at some very loud machine-tool (for sound insulation as well). I'd also would cut in into table surface some usb ports for easy plug in without reaching anywhere far or some flash-sticks and alikes.

  19. #19
    Xtreme Enthusiast
    Join Date
    Dec 2004
    Location
    Chico, CA
    Posts
    749
    I've got a pair of logitech x 2.1 speakers:

    http://www.amazon.com/Logitech-X-240.../dp/B000MDZWUS

    They have a little interface console (with jacks), which I will mount up top. I'm re-using stuff I've already got. You can see them in the background of some of the pics, on some shelving.

    Also got a USB hub--got this one fairly cheap on newegg, I believe $10.


    Let?s get back to it!


    Focused my attention on the monitor stand situation.


    I built the basic structure with 3 pieces of melamine board:


    Then I put together my wiring. In the theme of low cost and re-using stuff around the shop, I started with a mess of discarded wires.


    Work my magic, and bam, got a switch panel:


    Cut a hole where I want my switch panel:


    And mounted it up:


    A little bit of finish work--iron on melamine trim. The trim is available from Home Depot ($4), also helps to have the trimming blade.


    Don?t want my monitor to tip while I?m rolling about, so I?m going to bolt the base down:


    And here is my proposed layout (sans the cabinet):


  20. #20
    Xtreme Addict
    Join Date
    Feb 2005
    Location
    OZtralia
    Posts
    2,051
    Nice work Navig but if your workshop is anything like my shed with dust even when using an industrial vacuum I would change the placing of your switch panel to the side/under the monitor stand
    lots and lots of cores and lots and lots of tuners,HTPC's boards,cases,HDD's,vga's,DDR1&2&3 etc etc all powered by Corsair PSU's

  21. #21
    Xtreme Enthusiast
    Join Date
    Dec 2004
    Location
    Chico, CA
    Posts
    749
    Too late, its already hard mounted. Hopefully not enough dust to jam the buttons--they seem hi quality, plus easy to wipe off the desktop.


    I went to work on my fan panels, starting with some ⅛? bronze acrylic panels:


    Cut my fan holes with a circle cutter on my drill press:


    And here were the completed panels:


    Next, I laid out the holes I would need to cut in the wood panels:


    Long straights I cut with my circular saw, then finished the corners with a multi-tool.


    Holes cut:


    And mounting the fan panel:


    And now my "case" will have ventilation. Plan is for 3 120mm fans with dust filters as intakes on the right, 2 120mm fans on the right for exhaust.

  22. #22
    Xtreme Enthusiast
    Join Date
    Dec 2004
    Location
    Chico, CA
    Posts
    749
    Time to build my truck.


    Started with a cross of 2x4 lumber:


    Stained it with Minwax polyshades mahogany--stain + polyurethane in one.


    This is the first time I’ve used this product, Minwax polyshades. Worked nice for this sort of rough quick painting--one coat and it is nice and sealed and stained. Later on, tho, for more refined staining--as you will see--I was not so pleased with this product.


    Added my caster wheels (got these on sale from Rockler for $10). 2 wheels turn, 2 wheels have brakes.


    Put my cabinet on the truck to makes sure everything fits well:


    Also, forgot to mention, last time I had the cabinet panels apart, I added shelf pin holes to the larger bottom compartment--so you can see a second floating shelf down there.

  23. #23
    Xtreme Enthusiast
    Join Date
    Dec 2004
    Location
    Chico, CA
    Posts
    749
    Time to get into the meat of painting.


    I started with my components that were going to get stained.

    First, everything got sanded down, 120 grit and 200 grit on a random orbital sander. Then thoroughly de-dusted. Then I taped all my edges for edge-drips.


    I used the pre-stain above, and then the combo stain+polyurethane pictured above.


    The combo polyshade goes on very streaky:


    But does mellow nicely. This was just one coat--and since this was going to be the inside/less seen side, I deemed this good enough.


    After letting this all dry thoroughly, couple of days, I removed all my masking tape, hit the other side with 200 grit sand paper, and re-taped.


    Here’s why I tape edges--its just too difficult to avoid runs and edge drips:


    That spoon is in there because I use it to seal my tape edges, otherwise paint will soak under the tape. This is obviously much more important if you are relying on your tape to generate a clean line, instead of just masking as I am doing.


    Here is my first coat on the “show” side of my panels:


    I’ve let it completely dry, and come back and sanded it with 200 grit.


    At this point I felt like it was not stained enough, so I went for a second coat:


    I feel like a second coat came out too dark, really losing most of the natural grain of the wood. Had I known it would come out this dark I wouldn’t have applied a second coat. At this point it is practically paint. In the past, regular stain-only products I’ve used, second coats never cause this much wash-out of the grain.


    On the other hand, the finish of this stain+poly combo is just fantastic--I had planned on putting a third coat of clear polyurethane on top, but it wasn’t necessary:


    Now that I had the system tray painted, I went ahead and assembled it:


    Computer on a tray:


  24. #24
    Xtreme Enthusiast
    Join Date
    Dec 2004
    Location
    Chico, CA
    Posts
    749
    Hi all,

    Posts may be a little scarce as I am on vacation in London/Paris, but I do have pics on my laptop.


    Back to the project.

    Next I prepped all my non-stain panels:


    (Middle structural shelf, bottom panel)


    (Side panels x2, floating shelf, backer panel and door, shelf slide mount, kicker panel).


    All the pieces were hit with 120 grit sand paper, cleaned, and masked.


    Next I applied the first coat of polyurethane (Minwax, oil based, hi gloss).

    Halfway applied to this panel, you can see what it does!


    Here it is after the first coat has dried--I waited 48 hours.


    Hit this with 220grit and laid a second coat.


    The finish is amazing.


  25. #25
    Xtreme Addict
    Join Date
    Oct 2006
    Location
    England, UK
    Posts
    1,838
    Looking good.

    Hope you have some serious dust filters on your intakes and around the cabinet because it looks like you do alot of woodwork and wood dust could become quite a problem.

Page 1 of 2 12 LastLast

Bookmarks

Bookmarks

Posting Permissions

  • You may not post new threads
  • You may not post replies
  • You may not post attachments
  • You may not edit your posts
  •