Page 4 of 10 FirstFirst 1234567 ... LastLast
Results 76 to 100 of 250

Thread: Project Quintessence

  1. #76
    Xtreme Addict
    Join Date
    Feb 2005
    Location
    Tennessee
    Posts
    1,171
    Quote Originally Posted by shazza View Post
    smile at "vacation."

    Glad to see things are progressing It's never as fast as you want, but I think that's the nature of modding.
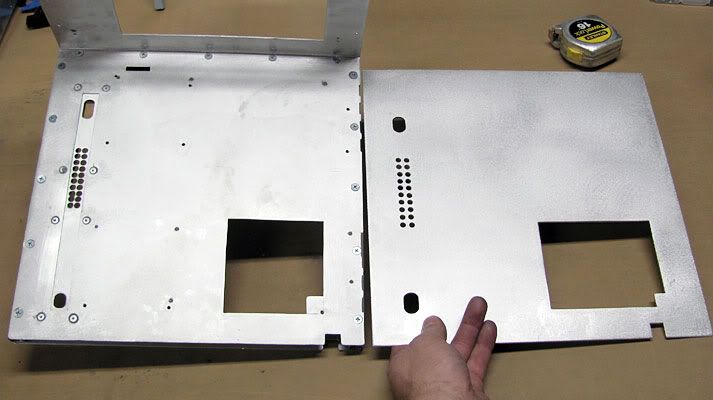
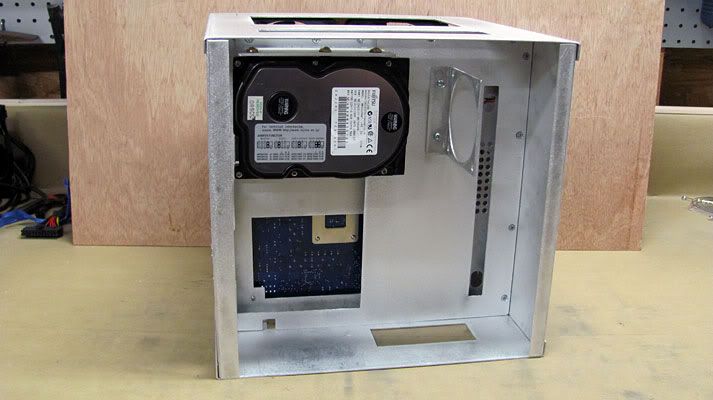
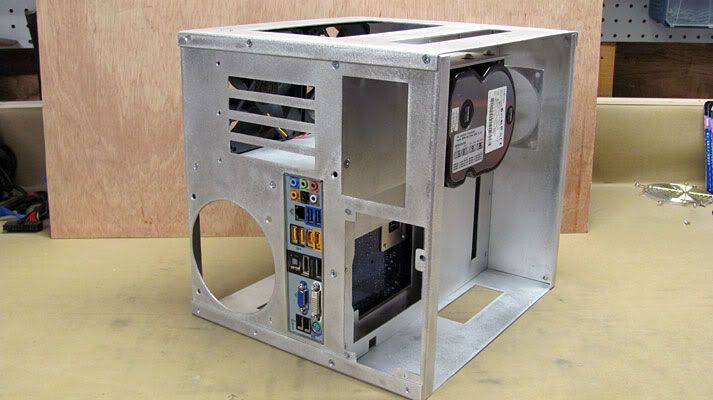
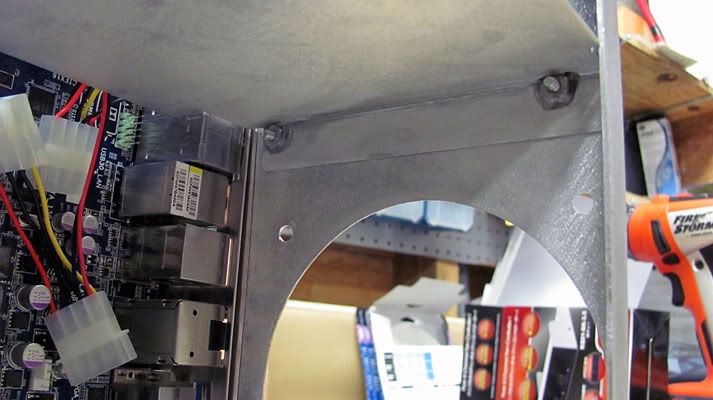
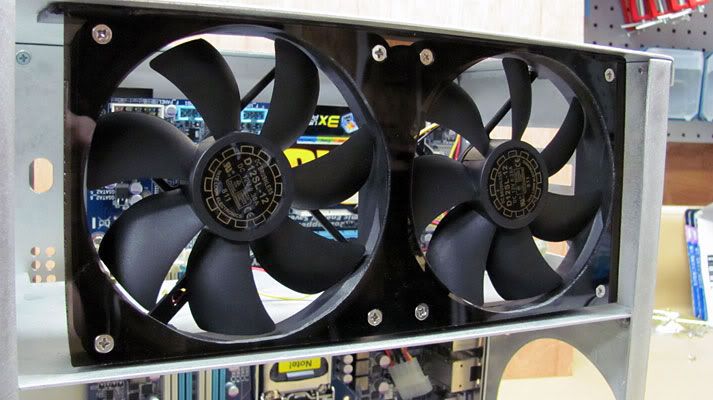
    that is so true. i really don't want to spend the time to redo the MB and PSU panels, but I just can't live with them like they are. At least this time i think they will turn out very good since I've had practice.

    Quote Originally Posted by Waterlogged View Post
    Condolences on the vacation.
    I just came in from spending 2 hours working on my mother-in-law's poor ragged out rusted car on this "vacation" of mine. I now have to go run to the auto parts store so i can come back today and spend some more fun "vacation" time. The plus side of this is at least I'm not at my normal job.

  2. #77
    Xtreme Addict
    Join Date
    Feb 2005
    Location
    Tennessee
    Posts
    1,171
    I finally have some updates to put up on this project. Between going out of town, overtime, being sick for a week, etc., I just haven't had the time to do much of anything with it.

    After having messed with and patched, etc. the motherboard tray just way too much for my liking, I just had enough and decided to scrap it and make a new one, as well as the rear panel and a new top panel design. I also didn't like the center support, so that needed to go. I was just running into too many nit-picky issues with the MB panel and PSU panel as they were. I split the design up into the MB panel, PSU panel, and a separate top panel. This will make countersinking the screw holes much easier to manage as that was a major problem with the sides bent like they were to cover the top.

    New Center Spacer

    I again used 1/2” square iron tube, but this time I got a friend of mine to weld the pieces together into one piece. It was a real pain having the pieces separate. He welded them for me, and I hit them with a grinder to get the welds ground down.


    New MB Tray, PSU Tray, and Top Panel

    I made the new panels. The PSU panel and top panels were pretty straight forward. For the MB tray, instead of trying to make a removable piece for the ATX wiring to pass through the panel, I just drilled the holes right into the panel. It gives a much cleaner look, and I am pleased with the result so far.


    Here is the old MB tray compared to the new one so far.


    I still have to drill and tap the MB mounting holes, cut the slots for the PCI slots, and drill and countersink the mounting holes for the trays.

    Thanks for stopping by.

  3. #78
    Moderator
    Join Date
    Aug 2007
    Location
    Back and forth between Florida and Maine
    Posts
    4,097
    Wow - very nice job on the new tray. Your perfectionism is paying off!

  4. #79
    I am Xtreme
    Join Date
    Jun 2007
    Location
    Imperial Palace, UDE of Pitatopia
    Posts
    8,396
    I was just thinking about dragging this log back to the surface the other day. Nice update voigts

    Quote Originally Posted by shazza View Post
    Wow - very nice job on the new tray. Your perfectionism is paying off!
    . . .and you, don't you have a build you should be finishing too?
    Circles SucQ!

    If your annoyed by sigs telling you to put things in your sig, then put this in your sig

    Bribery won't work on me...just say NO to AT!!!

  5. #80
    Xtreme Addict
    Join Date
    Nov 2009
    Location
    Netherlands
    Posts
    1,884
    Good to see you're still going strong with the build Voigts . When can we expect to see the first pieces of wood appear ?
    “Little expense had been spared to create the impression that no expense had been spared.” - Hitchhiker's Guide
    It's better to ask dumb questions now, than to look stupid later
    Mondays:

  6. #81
    Xtreme Addict
    Join Date
    Feb 2005
    Location
    Tennessee
    Posts
    1,171
    Quote Originally Posted by shazza View Post
    Wow - very nice job on the new tray. Your perfectionism is paying off!
    I just couldn't live with the MB tray the way it was. It was nagging at me, and the center spacer/support just was a pain.

    Quote Originally Posted by Waterlogged View Post
    I was just thinking about dragging this log back to the surface the other day. Nice update voigts

    . . .and you, don't you have a build you should be finishing too?
    Thanks. I haven't given up.

    She does have one she needs to finish, doesn't she?

    Quote Originally Posted by Alexandr0s View Post
    Good to see you're still going strong with the build Voigts . When can we expect to see the first pieces of wood appear ?
    Not soon enough for my liking, I can tell you. Life has just been busy lately. I have to go out of town this weekend, and again in 3 weeks for over 2 weeks. I would really like to be done with metal before I go out of town for the 2 weeks.

  7. #82
    Xtreme Addict
    Join Date
    Feb 2005
    Location
    Tennessee
    Posts
    1,171
    Base Pieces Assembled, Center Airflow Divider in Place, GPU Fans Mount in Place

    Time for a few more updates. I got all of the holes drilled, countersunk, tapped, etc. on the new pieces. It took like 8 hours just to drill, countersink, tap, and sand all of the holes. I don't have the bottom riveted on at this point as I don't want to keep having to drill them out to make adjustments. I also sanded all of the pieces with 60 grit just to do an initial sanding. I will go back and sand them all down to probably 150 grit before they get powdercoated.


    As you can see from the pics, I also got the center air divider cut and mounted. In order for the screws to have something to thread into and hold, I had to JBWeld on some nuts. This is because I had to sand down the ends to adjust it so that it would fit properly, and the ends were just too thin to hold a thread.


    I also made a mount to hold the 2 GPU fans out of 1/8” smoked acrylic.


    Here are a couple of shots of the holes for the ATX power cable so you can see how they fit with the divider.


    I next have to make a mount for the fan controller.

    Thanks for stopping by.

  8. #83
    Xtreme Addict
    Join Date
    Nov 2009
    Location
    Netherlands
    Posts
    1,884


    No wood?


    Lol, joking of course. I love the case so far, though I really think LQ would have been awesome for this one .

    Just noticed my siggy cat is joining the sofa emoticons .
    “Little expense had been spared to create the impression that no expense had been spared.” - Hitchhiker's Guide
    It's better to ask dumb questions now, than to look stupid later
    Mondays:

  9. #84
    Xtreme Addict
    Join Date
    Feb 2005
    Location
    Tennessee
    Posts
    1,171
    LQ? Can you enlighten me as to what this is?

  10. #85
    Xtreme Addict
    Join Date
    Nov 2009
    Location
    Netherlands
    Posts
    1,884
    Quote Originally Posted by voigts View Post
    LQ? Can you enlighten me as to what this is?
    D'oh, I have the habit of abbreviating Liquid Cooling to LQ, I have no idea why (I blame the 'q' in 'liquid' ).
    “Little expense had been spared to create the impression that no expense had been spared.” - Hitchhiker's Guide
    It's better to ask dumb questions now, than to look stupid later
    Mondays:

  11. #86
    Xtreme Member
    Join Date
    Nov 2008
    Location
    Eagle Rock, Ca.
    Posts
    398
    Ahoy Gary! Just dropping in to tell you how much I really like the idea of JB Welding nuts to help support tapped holes on thin panels.
    Looking forward to seeing the wooden fretwork.

    Keep up the great work!
    (Yes. I'm planning an update soon.)

  12. #87
    Moderator
    Join Date
    Aug 2007
    Location
    Back and forth between Florida and Maine
    Posts
    4,097
    Hey there, voigts - hope life is going well for you, and you're getting some time for your build. I'm looking to you for inspiration!

  13. #88
    Xtreme Addict
    Join Date
    Feb 2005
    Location
    Tennessee
    Posts
    1,171
    Quote Originally Posted by CptDreadFlint View Post
    Ahoy Gary! Just dropping in to tell you how much I really like the idea of JB Welding nuts to help support tapped holes on thin panels.
    Looking forward to seeing the wooden fretwork.

    Keep up the great work!
    (Yes. I'm planning an update soon.)
    Ahoy, the captain pops out of hiding! The nuts were just an idea that popped into my head as a way to solve the problem. They work great. I'll be looking for your update. I haven't had much time to work on this, so I know the feeling.

    Quote Originally Posted by shazza View Post
    Hey there, voigts - hope life is going well for you, and you're getting some time for your build. I'm looking to you for inspiration!
    Thanks for keeping your eye out Sharon. I've been working a lot of overtime for the last couple of months, and have been out of town for almost 2 weeks now. When I get back home next week the overtime should die down and allow me to get back on this provided I don't get bogged down in a porch project that I need to finish among other things that need doing. The only metalwork I think that I have left to do is to mount the fan controller. Then its should be on to wood. Yey! Kudos for guys that like to work with metal. I'll take my wood anyday. I'm going to have to do a thorough vacuuming of my shop to try to get the gazillian bits of metal up.

  14. #89
    Moderator
    Join Date
    Aug 2007
    Location
    Back and forth between Florida and Maine
    Posts
    4,097
    Just checking in - congrats on your MoM nomination at Bit-Tech.

  15. #90
    Xtreme Addict
    Join Date
    Feb 2005
    Location
    Tennessee
    Posts
    1,171
    Thanks Sharon. How's are those trips of yours going?

    I've finally got a bit of an update here. It's pretty bad when you have to start working on a mod while you are put up in a one bedroom apartment while you are out of town to be able to get anything done. My class load at this training is pretty light, so I figured I would do something useful with my time.

    Starting Work on Front and Top Piece's Scrollwork

    I started working on the front and top piece's scrollwork. I bought the oak and had it cut a bit longer on each end and left it wider than what I need. I drilled pilot holes and screwed the front piece to the top piece, since they are both using the same pattern. This way I am cutting them both at once which will save a lot of time.I printed out the scrollwork pattern using a laser printer on a sheet of regular paper. I then measured where I wanted the pattern to go, and used painter's tape to cover up everything else. Please bear with the pictures as I'm out of town at the moment and only have my cell phone to work with.


    Using spray adhesive from Lowes, I put a heavy coat on the paper and the wood as once its down, I don't want it to go anywhere. I will sand off whatever is left after I'm done cutting.


    Since I need a drill to get anything accomplished, I used this opportunity to buy a much needed close quarters drill. This is going to come in very handy. One time too many while modding I have had a horrible time trying to drill holes with a regular drill due to lack of space.


    I spent over an hour drilling about 50 holes by hand with the drill. The smaller cutouts will require a drill press to get the starter holes perfectly perpendicular to the wood.


    I'm going to see if anyone here has a drill press I can borrow, and if not, I'll start scrollsawing whatever I can. I'm only about 1 3/4 hours from home. I happened across a listing for a basic two speed 16" Delta scrollsaw with stand for only $35 on Craigslist. I bought it and figure I'll lug it home to go with my other scrollsaw at the end of this training I am at. At least I'll hopefully be getting something done on this project while I am here.

    Thanks for stopping by.
    Last edited by voigts; 10-20-2010 at 06:50 PM.

  16. #91
    Xtreme Addict
    Join Date
    Nov 2009
    Location
    Netherlands
    Posts
    1,884
    sheesh, I'd go crazy over that amount of work 
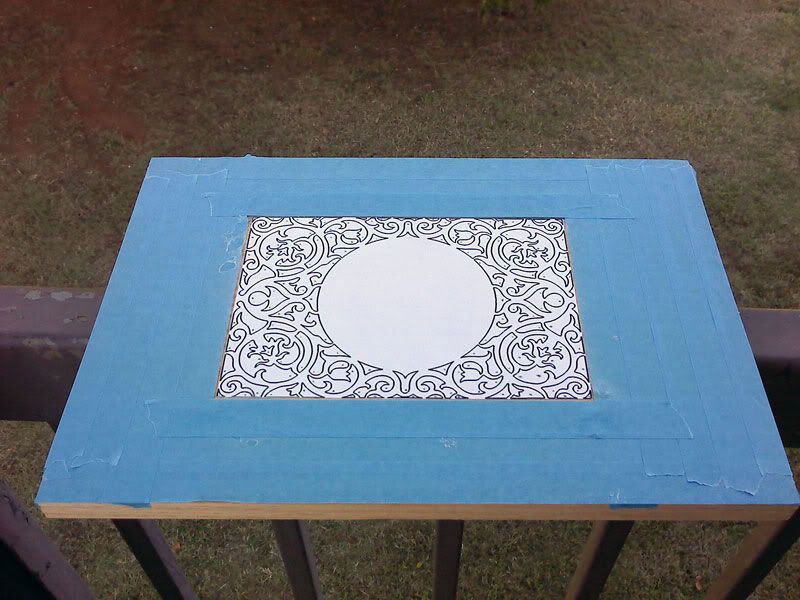
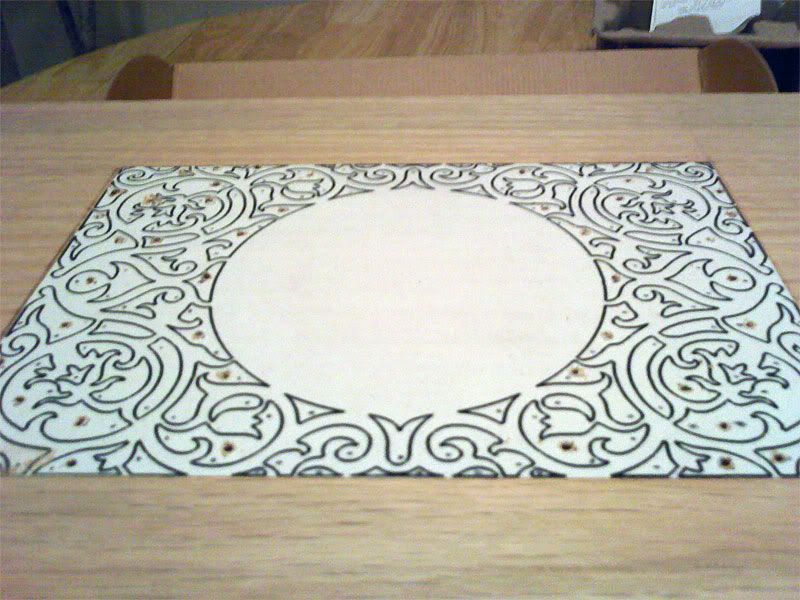
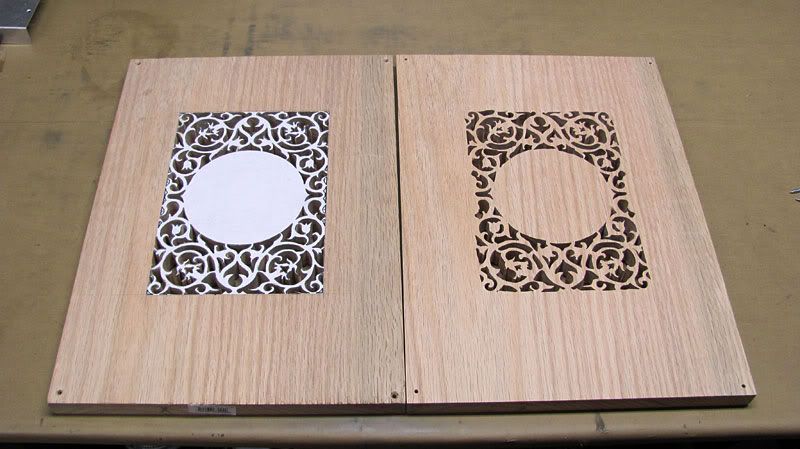
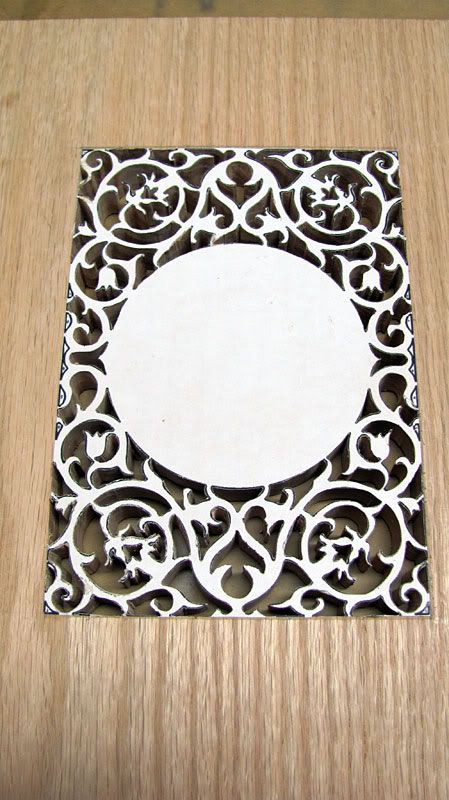
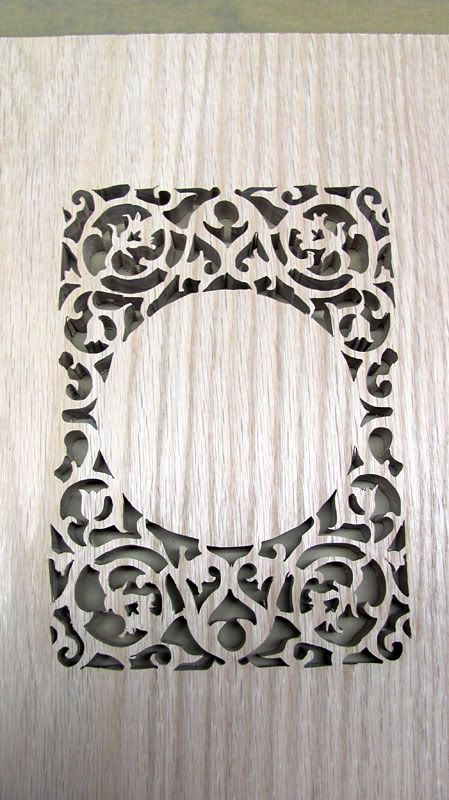
! Good luck sawing/drilling all those little designs
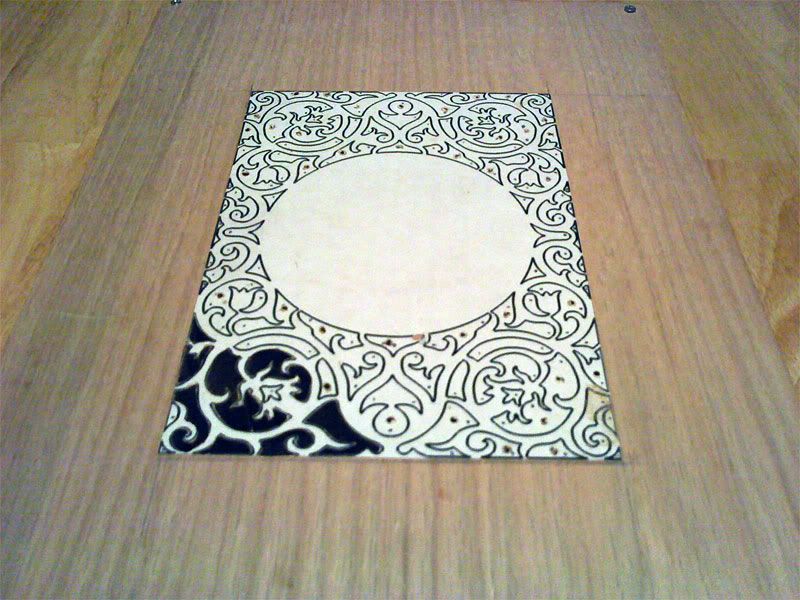
    “Little expense had been spared to create the impression that no expense had been spared.” - Hitchhiker's Guide
    It's better to ask dumb questions now, than to look stupid later
    Mondays:

  17. #92
    Xtreme Addict
    Join Date
    Feb 2005
    Location
    Tennessee
    Posts
    1,171
    Mind you this is just for the front and top. I will have the sides to do after this. It isn't particularly hard work, but it will be time consuming.

  18. #93
    Xtreme Addict
    Join Date
    Feb 2005
    Location
    Tennessee
    Posts
    1,171
    Two hours at the scrollsaw yielded me this.


    This thing is going to take a while...

  19. #94
    I am Xtreme
    Join Date
    Jun 2007
    Location
    Imperial Palace, UDE of Pitatopia
    Posts
    8,396
    Quote Originally Posted by voigts View Post
    Two hours at the scrollsaw yielded me this.


    This thing is going to take a while...
    You think that's going to take you a while?. . .just wait until you sand all that scroll work.
    Circles SucQ!

    If your annoyed by sigs telling you to put things in your sig, then put this in your sig

    Bribery won't work on me...just say NO to AT!!!

  20. #95
    Xtreme Member
    Join Date
    Jan 2008
    Posts
    224
    Quote Originally Posted by voigts View Post
    Two hours at the scrollsaw yielded me this. This thing is going to take a while...
    Wouldn't one of those small hand tool drill bits that cuts sideways like a router bit work better than a scroll saw? What tool are you using - that monster craftsman saw or something handheld?


    __________________________________________________
    Last edited by liguhy; Today at 1/2 second ago. Reason: You can always edit your writing more...and I'm anal-retentive.

  21. #96
    Xtreme Addict
    Join Date
    Feb 2005
    Location
    Tennessee
    Posts
    1,171
    Quote Originally Posted by Waterlogged View Post
    You think that's going to take you a while?. . .just wait until you sand all that scroll work.
    You had to remind me of that. Hopefully with a Dremel it won't be too bad. At least that's what I'm telling myself.

    Quote Originally Posted by liguhy View Post
    Wouldn't one of those small hand tool drill bits that cuts sideways like a router bit work better than a scroll saw? What tool are you using - that monster craftsman saw or something handheld?
    No. You need a scrollsaw as it holds both ends of the bit and gives you very good control. Any tool that just holds one end of the bit is not going to cut a perpendicular, straight shape. It will bend the blade sideways and slant the hole.

    Since I'm not at home at the moment, I'm using a 16" 2 speed Delta scrollsaw that I picked up on Craigslist. My Sears scrollsaw would just be too heavy to take. It weighs a ton.

  22. #97
    Xtreme Addict
    Join Date
    Feb 2005
    Location
    Tennessee
    Posts
    1,171
    Front and Top Pieces Scrollwork Cutouts

    I finally finished cutting the rest of the cutouts. Trying to scroll saw through 1 1/2” of Oak is no picnic (for those of you who have never used a scrollsaw, this type of work is usually done on 1/4” thick wood). I figured that cutting both the top and front pieces at once would reduce the time required.

    I'm on the fence however as to whether or not I like the results so far. There are a lot of inconsistencies in the resulting pattern that I'm not sure I can straighten out to my satisfaction. I'm considering checking to see how much it would cost to have just the front and top patterns laser cut out of 1/4”, and modifying the front and top designs accordingly to incorporate the 1/4” patterns into the 3/4” panels. I'm going to see if I can fix them with some Dremeling first.


    Thanks for stopping by.

  23. #98
    Moderator
    Join Date
    Aug 2007
    Location
    Back and forth between Florida and Maine
    Posts
    4,097
    Impressive!

  24. #99
    Xtreme Member
    Join Date
    Nov 2008
    Location
    Eagle Rock, Ca.
    Posts
    398
    Wowzers! Came out looking amazing, Gary!


    1 1/2" thick oak with a scroll saw!?
    You must have arms like Ahhnold. You should show off your guns on your next update.

  25. #100
    I am Xtreme
    Join Date
    Jun 2007
    Location
    Imperial Palace, UDE of Pitatopia
    Posts
    8,396
    Actually, I see what voigts is talking about as far as "inconsistencies" (just zoom in on the last pic). If I went through all that work and it turned out like it did, I probably be a little bit disappointed. In fact, I probably would have tried to fix them (If I thought I could) before going any further. Not trying to sound like an arse, it's just the perfectionist in me (and if I'm not mistaken, voigts too).

    voigts, could you maybe do the scroll work on a full sized (h x w) 1/4" piece and then use 1/2" piece with the proper size hole in it underneath and glue/dowel/screw the 2 pieces together after the scroll work was done?
    Circles SucQ!

    If your annoyed by sigs telling you to put things in your sig, then put this in your sig

    Bribery won't work on me...just say NO to AT!!!

Page 4 of 10 FirstFirst 1234567 ... LastLast

Bookmarks

Bookmarks

Posting Permissions

  • You may not post new threads
  • You may not post replies
  • You may not post attachments
  • You may not edit your posts
  •