

My vote is on the latter.Originally Posted by voigts


My vote is on the latter.
Circles SucQ!
If your annoyed by sigs telling you to put things in your sig, then put this in your sig
Bribery won't work on me...just say NO to AT!!!
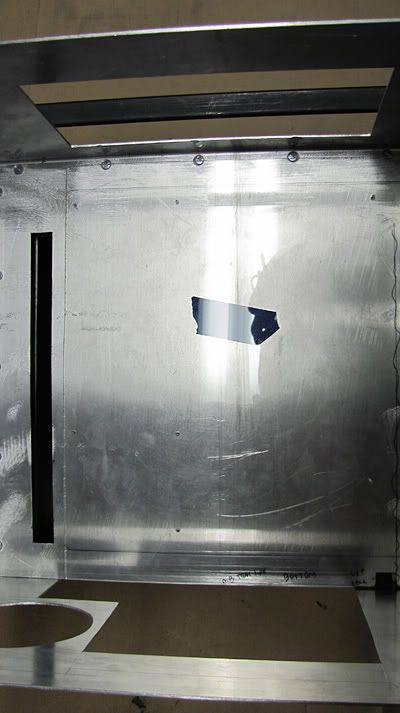
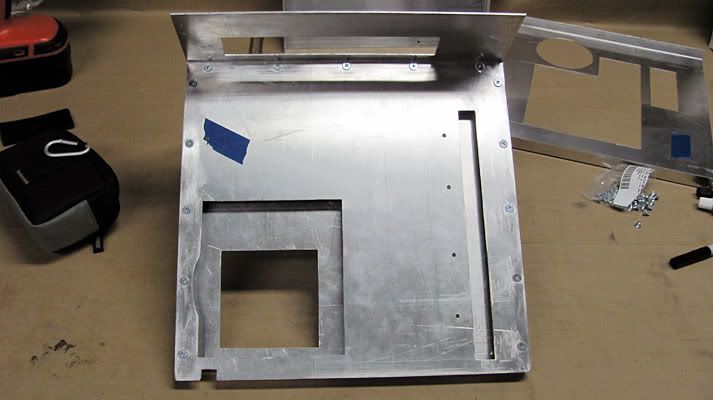
There's not a whole lot exciting to show in this update. I finished cutting out the areas in the bottom panel that needed to go. I also countersunk, drilled, and tapped out 30 holes, 15 per side, to screw the MB tray and the back side to the center 1/2 square tube spacer/support that fits between them. Its amazing how much time little stupid stuff can take.
Transferring MB Tray and PCI Panel Spacing
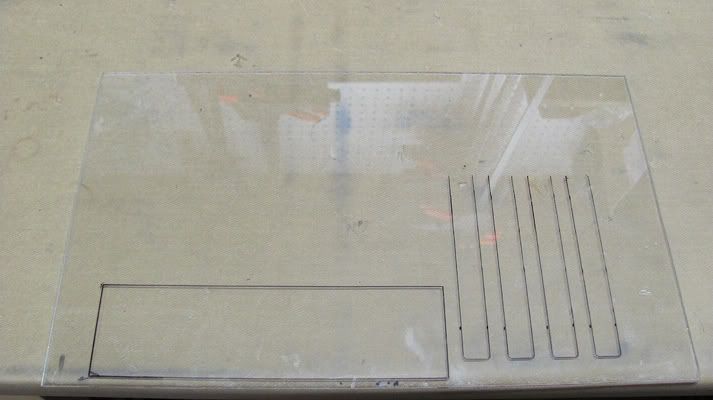
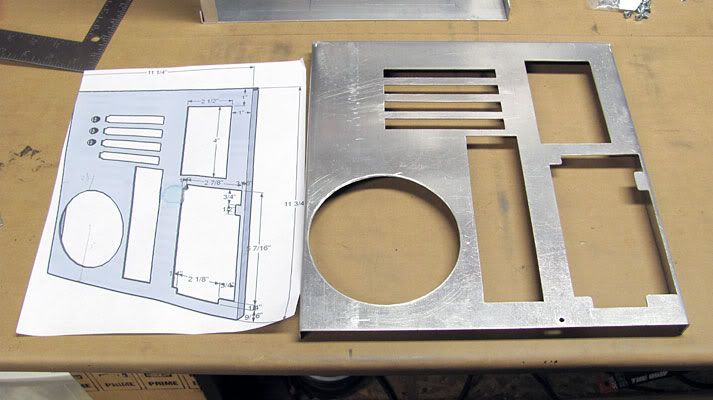
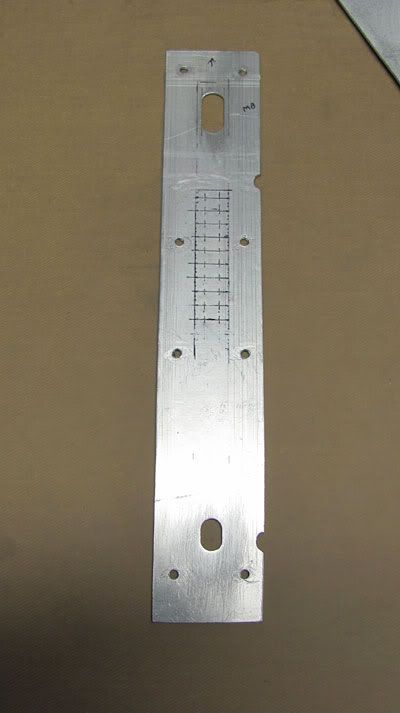
I set about today getting markings transferred to the MB tray and PCI panel so that I can cut and drill for the PCI/IO panel and MB mounts. I bought a Lian Li Micro ATX MB from Performance-PCS so use as a guide to trace from. According to my Sketchup plans, the MB should sit 13/16 from the bottom of the case. Using clear 1/16 thick acrylic, I cut a piece the size of the PCI panel area, and one the size of the MB tray.
I spaced the Lian Li MB tray 13/16 up from the bottom of the acrylic, and traced out the shape of the PCI panel and the holes for the mounting screws.
I drilled out the corners of the PCI markings in the acrylic with a small 1/16 drill bit, and then used an ultra fine sharpie to dot those corner locations on the aluminum. I did the same for the MB tray. I've got the MB tray mounting holes all drilled and tapped out.
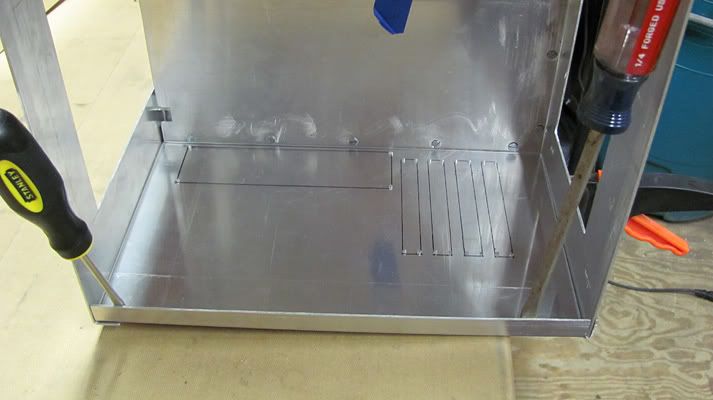
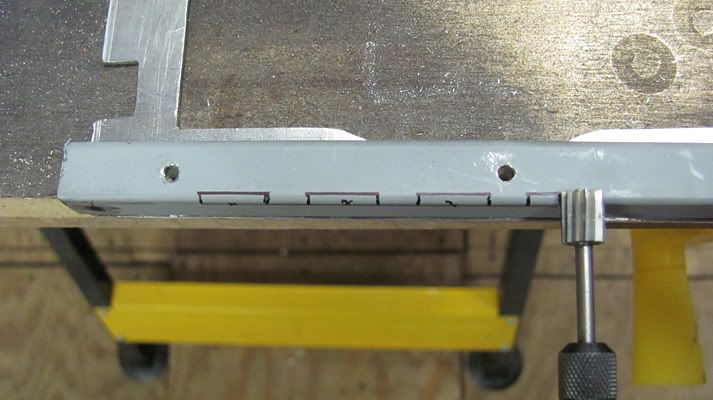
I also marked on the center spacer piece where I need to cut out to allow for the PCI panel slot covers. I used a carbide Dremel cutting bit to hack out the spaces in the steel spacer.
I'll have to take an after picture on this one tomorrow. It took a while, but the carbide bit did the trick, along with some grinding.
Hopefully I'll get started cutting out the slots and IO panel area on the PCI panel tomorrow. I'll be so glad when I'm done messing with metal. I'll take wood any day over metal.
It has dawned on me that I am going to need to have a MB in hand before this project is finished and I get the metal powdercoated. I have to make sure everything fits right as once everything is powdercoated, there is no further drilling/adjusting to be done on the metal without potentially ruining the finish. I have been looking and researching socket 1156 Mbs, and I think at this point, I am going to go with an ASUS P7H55D-M EVO for $124. I would like to go with a Maximus Gene III, but its hard for me to justify the $65 price difference. I have to go out of town next week for a week, so I am hoping to get the back panel cut out and done before then.
Thanks for stopping by.
Latest Project Log: Project Quintessence
1935 Zenith Radio Scratch Build
Incredible rendering work
sigh
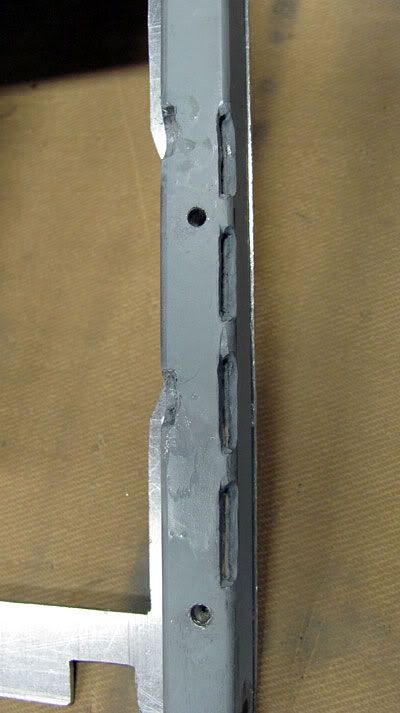
I just got back from being out of town for a week, and have some more pics to show. First, here is that pic after hacking away the area in the center spacer for the PCI covers. Its not very pretty, but this will not be seen at all as it will be behind the MB panel. I just needed the space so that the PCI covers can slide in properly.
Problem with Screws
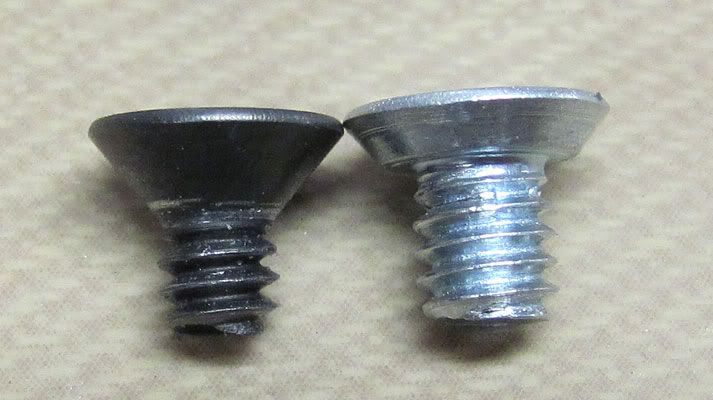
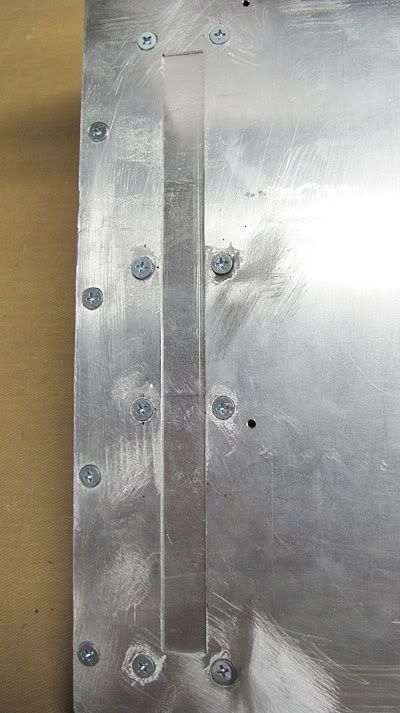
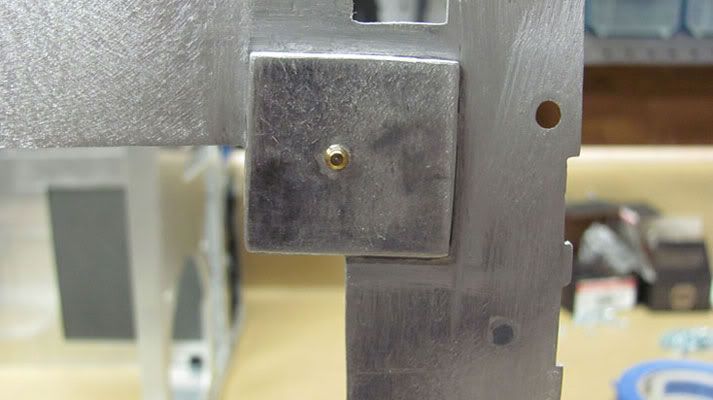
It is amazing just how much a minor detail can cause you lots of grief. I ordered #6-32 x 1/4 black oxide finished hex head screws from smallparts.com to use to screw the panels to the central spacer, and the case itself together. Thankfully while I was at it, I also ordered some #8-32 x 1/4 phillips screws figuring that they would come in handy since these can't be had locally. I'm using 16 gauge aluminum, which is about 1/16 thick. I wanted to countersink all of the screws so that they would look better, and in no way interfere with the MB. I had tapped out all 30 holes to secure the panels to the center spacer in #6-32, and countersunk the holes. There was a big problem however that I ran into. The allen screws have a bevel that is greater than 1/16, so even with the holes being countersunk, the screws stuck out well above the surface of the panels. Here is a pic to show you what I mean:
Thankfully, the #8-32 x 1/4 screws have a very shallow bevel, so I ended up having to further countersink all of the screw holes in the panels, and retap all of the holes in the spacer. Recountersinking the holes in the panels was a serious pain. I ended up having to use a 5/16 drill bit instead of a countersinking bit to get the holes right. For a few of the holes, I ended up going back and using a bit of JB weld to fill in a bit as they had gaps around the screws. I can't even tell you what a pain this has been. After having messed with this for a few days, I was able to move on to making other cuts.
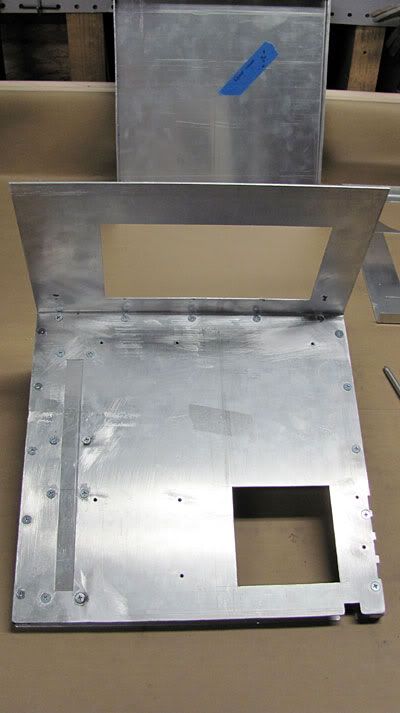
Panels
All of the panels will get a good sanding down once I'm done with them, so the scratches in the pics are only temporary. Sanding them down will be the last thing I do to them before going to the powdercoater.
I decided to make a cutout behind the MB so that the PSU would have a more area to draw in air from, and also to provide a bit of airflow behind the MB.
I also changed the way that the wiring plate is done from what I had originally planned. After trying my original idea, I ended up just using a flat plate countersunk with screws attached behind the MB tray. I think this still looks ok, is a lot simpler, and will still serve the purpose. I want this plate to be removable so that if I change out Mbs later down the road and want to adjust where the ATX and SATA cables come through, I can simply make another panel, which would be easy to do. I haven't drilled out the holes in it yet to allow for the cables.
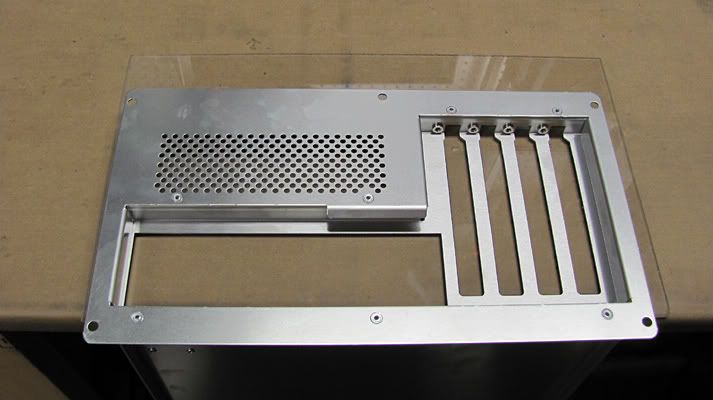
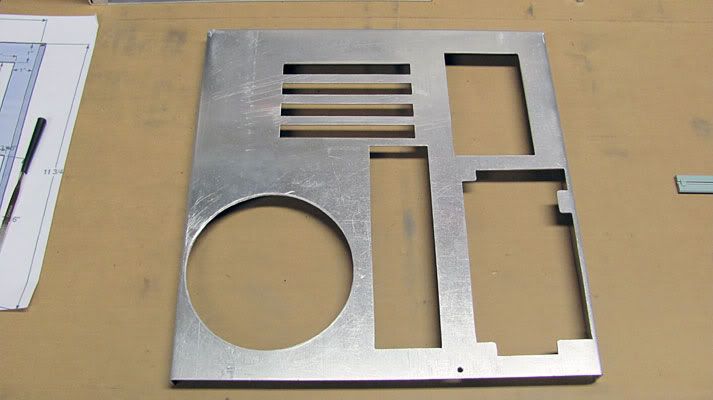
I finished cutting out the backpanel and PCI slots. I had to do a lot of careful measuring while comparing to my Lian-Li Micro ATX mb panel to get the spacing right. I am hoping that everything is measured out correctly. I'll find out when my motherboard comes in.
I bought a GIGABYTE GA-H57M-USB3 MB that should be here tomorrow. I also got a buddy of mine to pick me up a brand spankin new Intel Core I7-875K quad from Microcenter in Atlanta (can we say only $200 + tax boys and girls). I am so glad to have gotten in on that deal.
Thanks for stopping by.
Latest Project Log: Project Quintessence
1935 Zenith Radio Scratch Build
Yay - an update. Thanks, voigts. I was getting ready to ask yesterday when we'd see more. Your build is inspiring me.
I've been back and forth a few times having to go out of town. I'm going again in a couple of weeks for a week, and then I don't have to go anywhere for about 6 weeks. This has been a busy spring/summer.
Latest Project Log: Project Quintessence
1935 Zenith Radio Scratch Build
I'm still watching, just taking everything in quietly eating some popcorn.

Circles SucQ!
If your annoyed by sigs telling you to put things in your sig, then put this in your sig
Bribery won't work on me...just say NO to AT!!!
Popcorn Time Again...
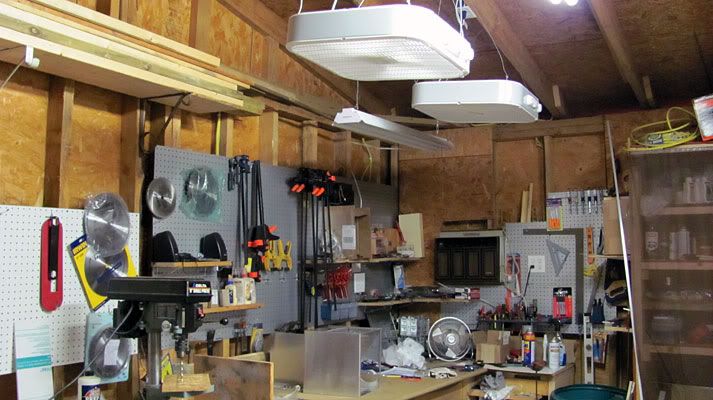
Overhead Fans for My Shop
I spent the better part of a day off doing a much needed add-on to my shop. I hung two box fans from the ceiling over my worktable area, and wired them in. I ran them both through separate power switches so that I can just flip them each individually on and off without having to reach overhead every time to turn them on and off. With it getting hot outside, these are quickly proving to be a big help. I about sweat to death though installing them. I was working in 90+ heat with no fans at all while the power was off due to running the wiring. It was worth the effort though.
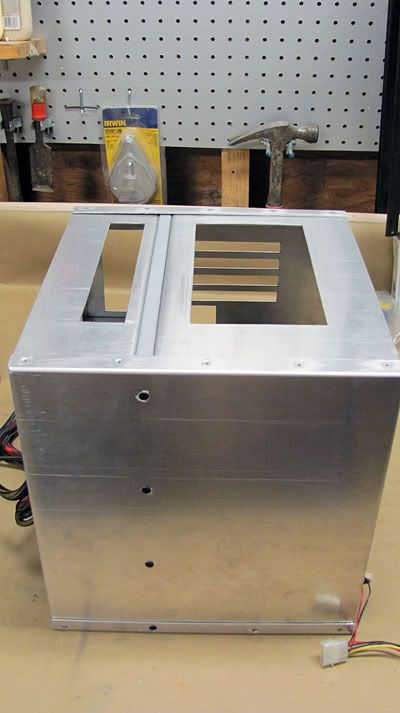
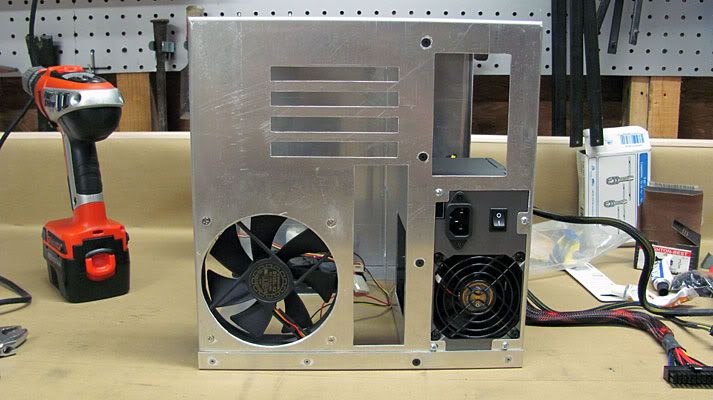
Putting Some Pieces Together
I've got the body panels cut out, and started putting the pieces together to make sure everything fits right. I bought countersunk 1/8 rivets from allensfasteners.com, and countersunk and riveted and/or screwed the panels together.
I drilled and countersunk the holes for the bottom and rear case fans.
PSU Mounting
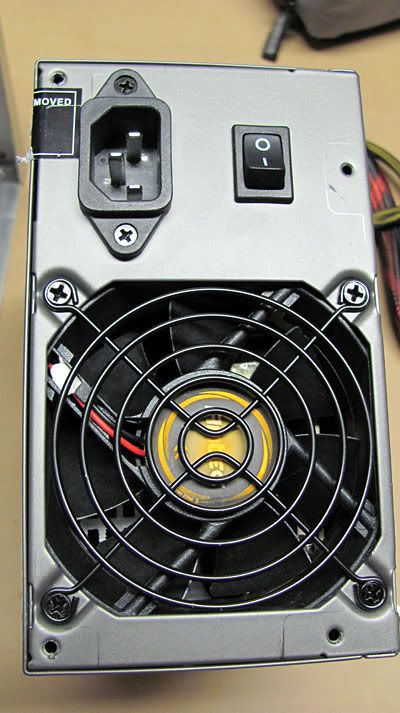
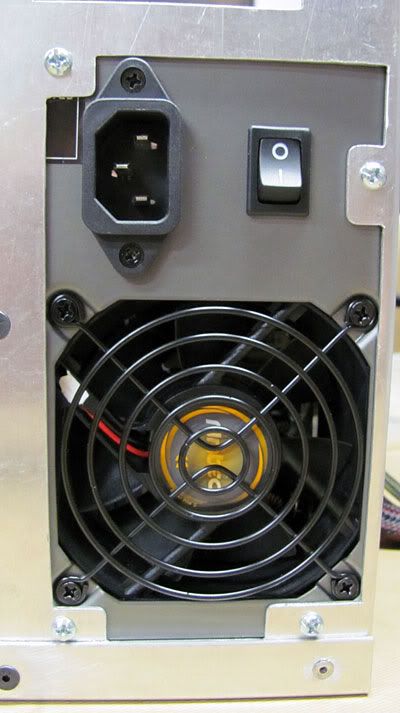
I cut out the PSU area per the drawing I made in Sketchup. Using a spare PSU, I put it in place, traced the outline of the cutout in pencil onto the PSU, measured the screw holes in relation to the tracing on the PSU, and then transferred that onto the case and drilled out the holes.
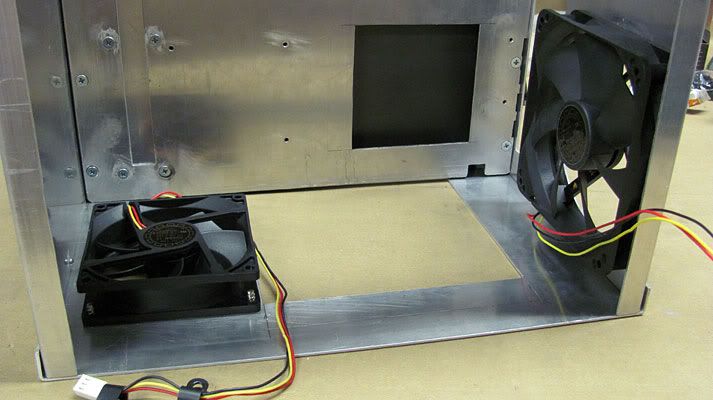
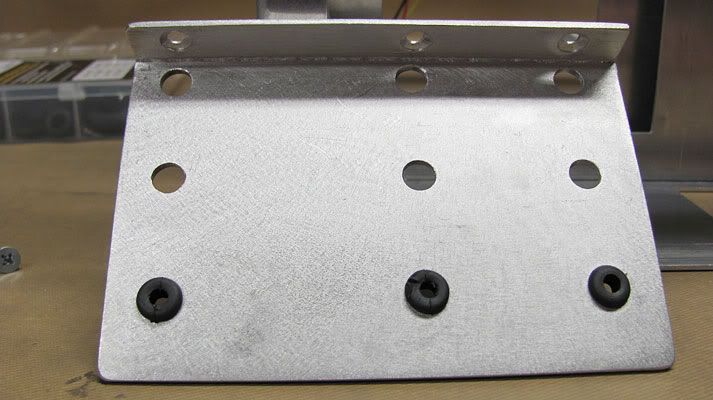
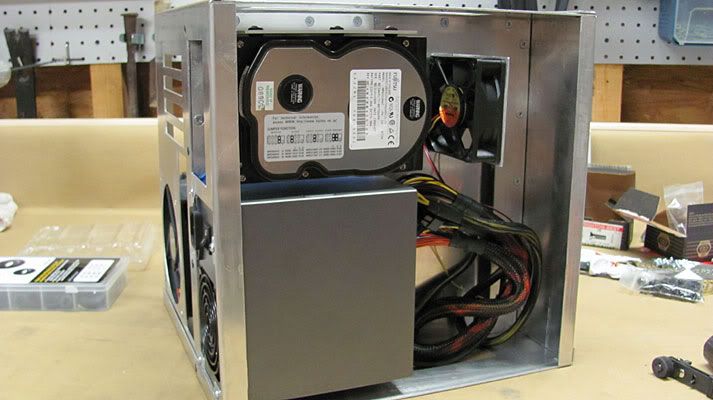
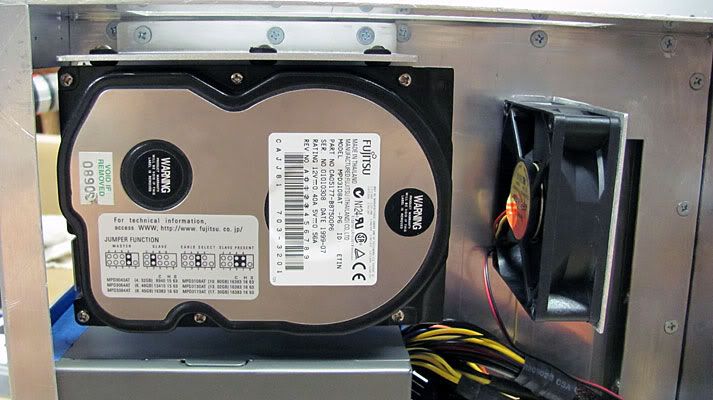
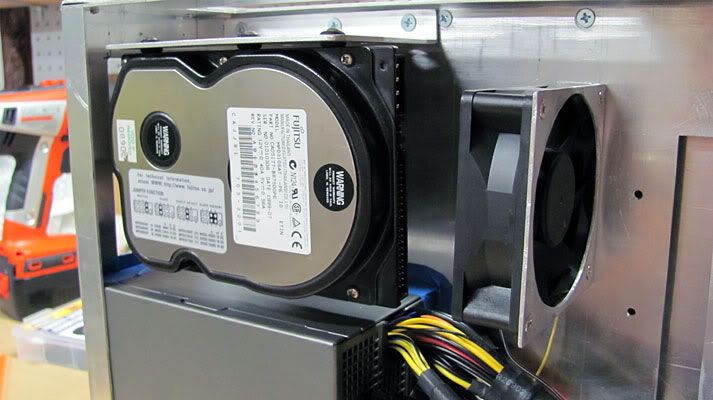
Hardrives Mount
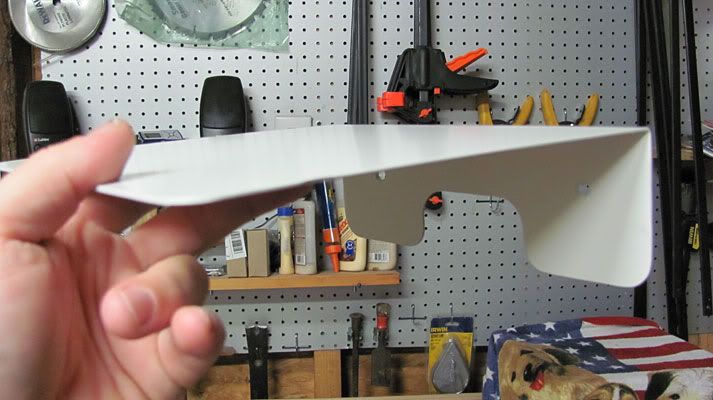
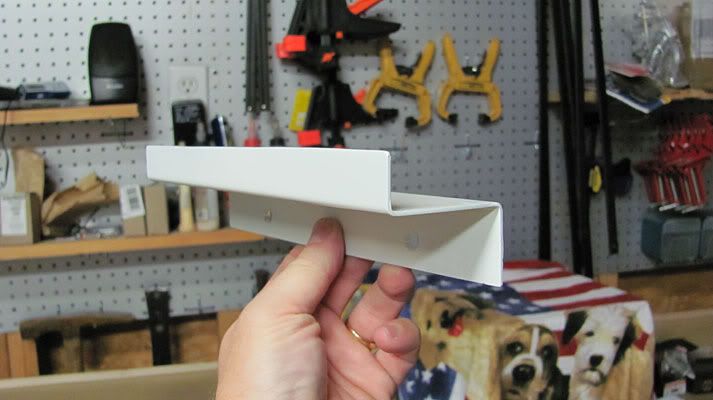
I used a piece of 10 gauge aluminum to make the mount for the harddrives. I had to bend this in a 6 vice with a hammer and piece of 2 x 4 as a beating block since its way too thick for my metal brake. I want the hard drives to be mounted directly touching rubber to help isolate vibrations as much as possible, so I opted for using rubber grommets through the mount. This way the harddrives contact rubber, not metal. I used an old dead hardrive to get my hole spacing and placement. Using this thick mount at the top, I see no need for an additional bottom piece. If I want to remove any drives, it only takes 3 screws and the entire mount comes right out drives and all.
I also made an 80mm fan mount so that I'll have a bit of airflow directed at the hard drives.
That's all for now.
Thanks for stopping by.
Latest Project Log: Project Quintessence
1935 Zenith Radio Scratch Build

I like that mount quite a bit. Nice work.
Great update, thanks for the pictures Voigts.
Little expense had been spared to create the impression that no expense had been spared. - Hitchhiker's GuideMondays:It's better to ask dumb questions now, than to look stupid later
Thanks. I am going for something simple that somewhat isolates the hard drives from the case, yet is easy to remove. 3 screws and about 30 seconds is all it takes to take it out, yet it is very sturdy. The rubber grommets allow the drives to kind of float a bit in place.
You get around, don't you? Despite your username, I can't help but recognize that strange avatar from over at Bit-tech.
Latest Project Log: Project Quintessence
1935 Zenith Radio Scratch Build
I try sticking with similar things (names, avatars), so that people know it's me. I enjoy bit-tech, some of the project logs there are simply amazing
.
Little expense had been spared to create the impression that no expense had been spared. - Hitchhiker's GuideMondays:It's better to ask dumb questions now, than to look stupid later
Truly a Master Craftsman!
XSWCG Disclaimer:
We are not responsible for the large sums of money that you WILL want to spend to upgrade and add additional equipment. This is an addiction and the forum takes no responsibility morally or financially for the equipment and therapy cost. Thank you and have a great day.
Sigmund Freud said... "Failure to CRUNCH is a sign of Sexual Inadequacies".
Thanks, but unfortunately not as master as I'd like. Somehow I ended up mirroring the MB holes when I marked and tapped them out, so now that I got my MB in, I'm having to take part of the case back apart and patch and then redrill and retap all of the MB mounting holes. Aarghhh!
Latest Project Log: Project Quintessence
1935 Zenith Radio Scratch Build
Ah see, you do have some Pirate in you.
Circles SucQ!
If your annoyed by sigs telling you to put things in your sig, then put this in your sig
Bribery won't work on me...just say NO to AT!!!
lolz
Dig your workshop fan setup on the ceiling situation, Gary.
This gives me ideas to install something similar to my "sweatshop" as my little cubby hole I work in can get up to 90f+ as well.
Grommets for anti HD vibrations ftw!
Man, just mention "Pirate" and look who shows up! CptDreadFlint in the flesh.
Those fans are a huge help. I was out in my workshed yesterday at 4pm with the official temp being about 94. With a high velocity floor fan (on low- keeps any random mosquitoes from biting) blowing on my bottom half and the new ceiling box fans on medium, it was quite tolerable.
I've spent a good bit of time messing with little details on the MB tray and feeling like I'm getting nothing accomplished. I've fixed the MB mounts, done some work on the wiring pass-through, and remade the PCI bracket slots in the MB tray as I managed to get them placed backwards along with the MB holes. JB Weld is my friend. Its good stuff.
Latest Project Log: Project Quintessence
1935 Zenith Radio Scratch Build
First stage cleared. Now find magic phrase for him to post his build updates/new pics
Awesome work so far, Voigts.
Those screws must have been a headache, such a little thing that can chew up so much time. I also like your HDD solution + fan mounting,
it should keep the drives very quiet and cool.
Besides the little mishap with the mobo tray, this project is looking really well thought out. Your fabrication skills are incredible too!
Keep it up, mate
Ow ow ow, I know that!
RUM RUM RUM!
Little expense had been spared to create the impression that no expense had been spared. - Hitchhiker's GuideMondays:It's better to ask dumb questions now, than to look stupid later
My stuff looks like crap compared to your log. If I hadn't of spent so much time messing with the MB tray, I would probably just go ahead and remake it. I am still half tempted to do so.
I got a good laugh out of this.
Maybe I should add damsel to kidnap and buried treasure to the list.
Latest Project Log: Project Quintessence
1935 Zenith Radio Scratch Build
Just replace "you" with "ye" all the time, and throw in "matey" once in a while. Start new posts with "Avast!"
Avast, I have an update for ye mateys...
Mounting Motherboard
I got my motherboard in finally after over a week wait (slow shipping), and got it mounted on the MB tray.
I ran into a problem though that because of mismarking the hole positions, the bottom right hole was in the middle of the square hole I cut to help with the PSU airflow. I JB welded a piece onto the corner to give the screw something to mount to.
PSU Wiring Insert
I copied and drilled out the holes for the PSU wiring insert on the MB. I'm not satisfied with the way the holes turned out on this. I should have taken more time to make sure they are exactly straight, and they really need to be spaced apart a bit more.
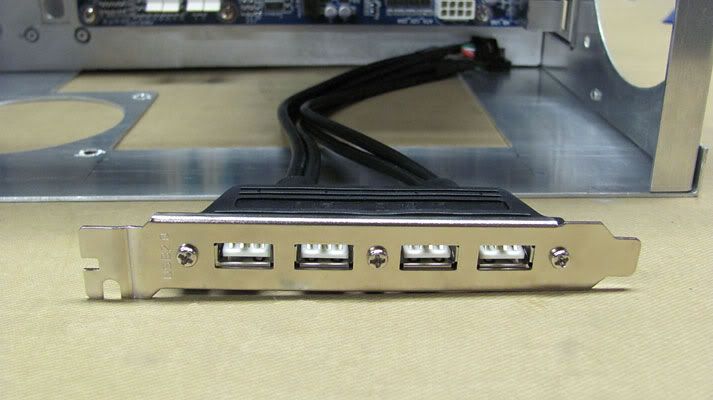
I got in a 4 port USB PCI bracket to add some USB ports to the MB as the Micro ATX MB only has 4 ports. I bent the bracket out, and that is where I will drill mounting holes on the backpanel for mounting. I'll make a custom mount for the bracket, but I want the holes to line up so that you could simply bend a regular PCI bracket flat and screw it into the back panel if need be.
I got some stuff in from Frozen CPU that I ordered. I got rubber fan mounts, sound absorbing material, fan screws, an 80mm Scythe S-Flex fan, and a 92mm Scythe S-Flex fan. They by far have the best deal on sound absorbing material, and give you twice as much as anywhere else I can find for $20.
Not exactly related to this build, but I also made a metal shelf for my new Asus RT-N16 router to sit on above my desk, and a shelf for my external 1TB HD to sit on mounted behind my desk. It will be used as a NAS. I haven't gotten them hooked up yet though as I had to leave to go out of town for a week and a half. I get to spend my vacation at my mother-in-law's.
Plan to Redo Motherboard and PSU Panels and Make New Top Panel
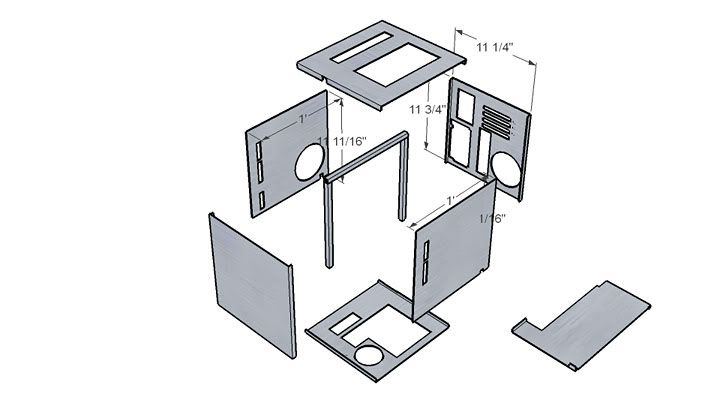
After looking it all over and messing entirely too much with the MB tray in particular, I've decided to scrap the MB tray and PSU panels completely. The large bends in the current design simply have caused way too many problems trying to get clean countersinks, and I've had to patch too much for my liking due to goofs. I went back to the place I bought my aluminum from, and got a new 1' x 4' piece of 16 gauge to make new panels from. Thankfully I found this metal shop that is very reasonable. He cut the piece to be exactly 1' wide for me, and only charged me $10 cash for the alu sheet. Everywhere else locally wants a lot more, and won't cut anything for less than a $20 min charge. I also got a new piece of 1/2 steel square bar to make a new center support as I'm not happy with it either. I am going to change the MB and PSU panels to be just plain square pieces, and make a new top panel piece. This will eliminate my countersinking issues. I also ordered some #6 screws from Smallparts.com so use in place of the #8 screws I am currently using as they should countersink much better.
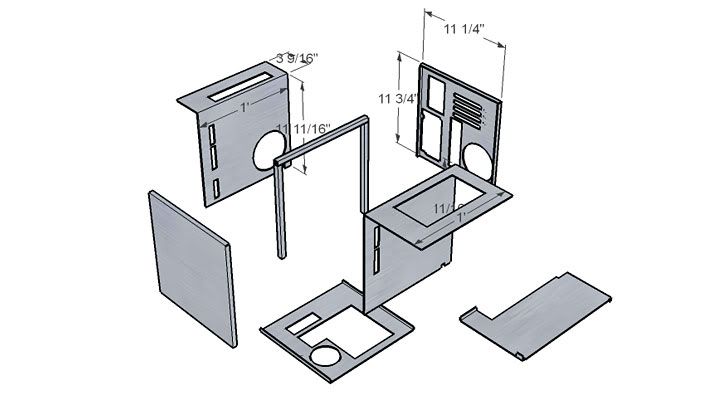
Old/Current Plans:
Revised Plans:
I won't get any more done until I get back from vacation in a week and a half.
Thanks for stopping by and happy 4th of July everyone.
Latest Project Log: Project Quintessence
1935 Zenith Radio Scratch Build
smile at "vacation."
Glad to see things are progressing
Condolences on the vacation.
Circles SucQ!
If your annoyed by sigs telling you to put things in your sig, then put this in your sig
Bribery won't work on me...just say NO to AT!!!
 Posting Permissions


 Reply With Quote
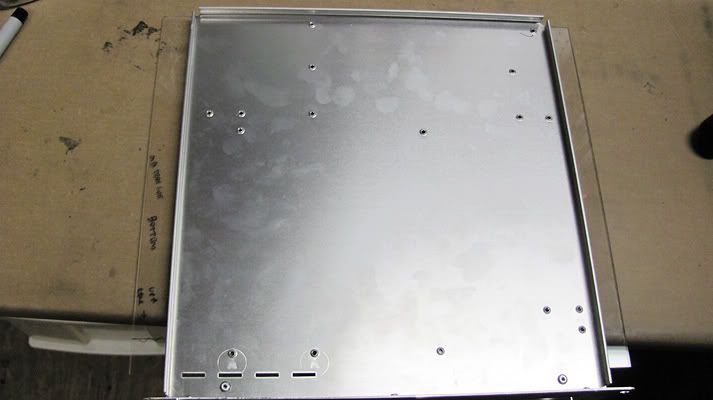


Bookmarks