

Im liking your progress in it .. where did you buy such case? .. 4 radiators all 360?
And why do you need that much radiators ?
I think its useless but explain me please..


Im liking your progress in it .. where did you buy such case? .. 4 radiators all 360?
And why do you need that much radiators ?
I think its useless but explain me please..
I remember this build fondly. Glad to see you back at things, Ic3man.
[SIGPIC][/SIGPIC]
Now Playing
black freighter: i7 920 | evga classified | mm extended ascension pedestal | 2 x 300gb vraps
dead men tell no tales build: q9770 | asus striker 2 extreme | 2x4gb ddr3 ocz reaper | 2 x gtx 280 oc2 | 2x 300gb vraps | mm ufo-cyo | pcp&c 1200W
It's a Mountainmods Ascension:Originally Posted by Raiden

http://www.mountainmods.com/
4x360 rads are over the top I agree but useless I think not lol!
Cheers
Oh and Happy New Year all
As promised, here's how I intend to mount the pumps. The position may be altered slightly depending on the routing of tubing but you get the general idea.
Custom made dual DDC pump bracket:
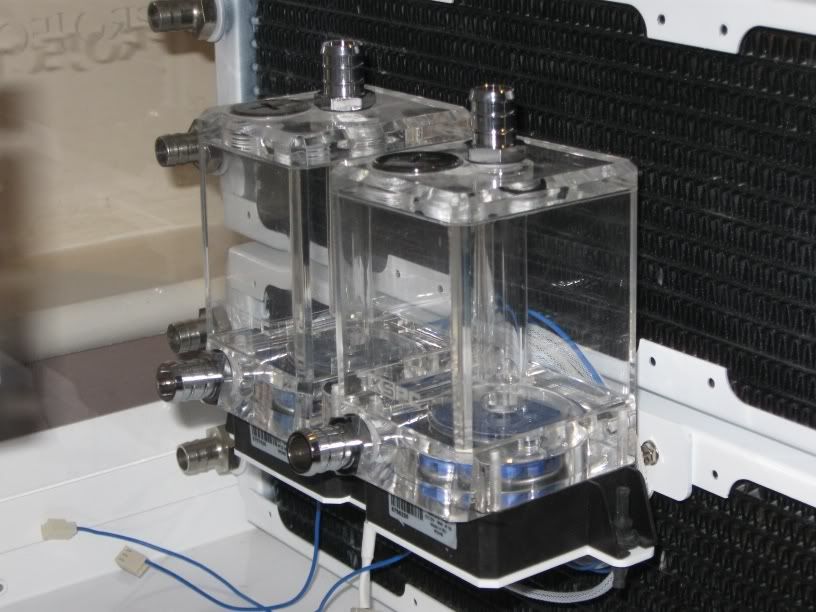
Pumps mounted with XSPC reservoirs:
The pumps will be mounted with rubber noise dampening mounts as even though the DDC's are not loud they can give off noise through vibration:
Have you not seen my build then? MANY radiators in that.... Speaking of which.. I should really update.... after I clean up this mess I made from being drunk as a skunk last night....
Ice - It's bloody good to see you back, this build makes me small and feel all warm and fuzzy, but I wish you'd used better sleeving
WCUK's sleeving isn't bad for money and is bloody beautifull - almost MDPC style
~Bex
PROJECT :: The Xtreme (WET) Dream!!!
PERSONAL H2O BESTS :
E8600 @ 4.8GHz
PERSONAL AIR BESTS :
Sempron140 @ 4Ghz (Stock Cooler)i7 3960x @ 5.4ghz (Air Cooler)
Bex : "Who said girls can't play PC games or overclock!? Do I look like your imagination!?"
Aaron : "TBH, a girl doing all that is a pretty perfect girl!"
Swift_Wraith : "could someone please check bex for a penis?"
Cheers Bex. The braiding WAS from WCUK but before they got the new stock in. I'll probs do it again if/when I get the time (and after the sliced/burnt fingers have healed!).
Aaaah I see. Unlucky
Hope you heal soon!
~Bex
PROJECT :: The Xtreme (WET) Dream!!!
PERSONAL H2O BESTS :
E8600 @ 4.8GHz
PERSONAL AIR BESTS :
Sempron140 @ 4Ghz (Stock Cooler)
Bex : "Who said girls can't play PC games or overclock!? Do I look like your imagination!?"
Aaron : "TBH, a girl doing all that is a pretty perfect girl!"
Swift_Wraith : "could someone please check bex for a penis?"
this is coming out beautiful. The white is definitely something to ponder for a bit. Amazing job!
AMD Ryzen 7 7800X3D // ASUS ROG Crosshair X670E Hero // ARCTIC Liquid Freezer III 360 A-RGB // G.SKILL Trident Z5 Neo RGB Series (AMD Expo) DDR5 RAM 32GB (2x16GB) 6000MT/s CL30 // ZOTAC Gaming GeForce RTX 4090 AMP Extreme AIRO // Samsung Pro 980 2TB NVMe (OS and Games) // WD Black 10TB HDD (Storage)
Got enough PA120.3's there?
Man, what a nice build!
heat
TJ07-Ultra 1200W-E8400-Rampage Formula-4870-4gb G.skill-74gb Raptor-500gb Seagate-Windows 7
Apogee GTZ-XSPC Razor-DDC3.2 w/ XSPC top-PA120.3-MCR220-EK 250 res
Sorry for the severe lack of updates guys. Lot's of RL issues I've had to cope with which have sadly taken priority. Anyway, here's the continuation:
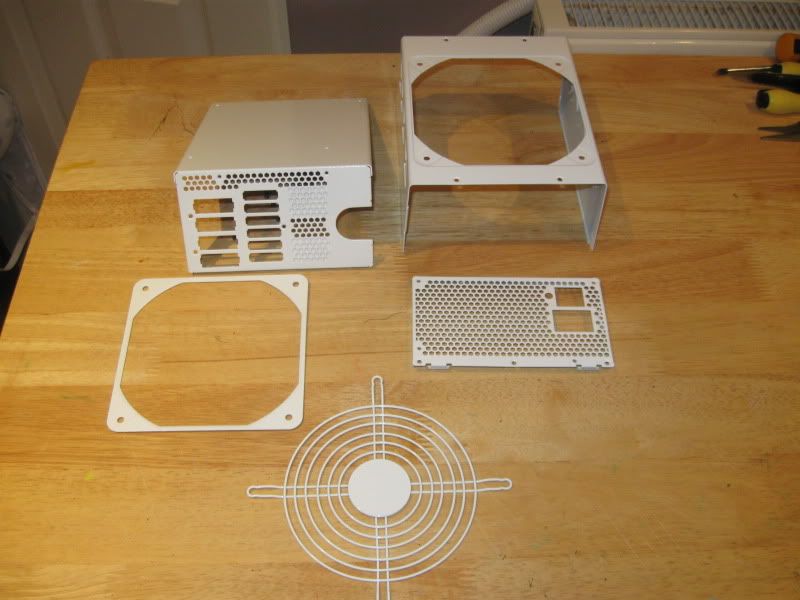
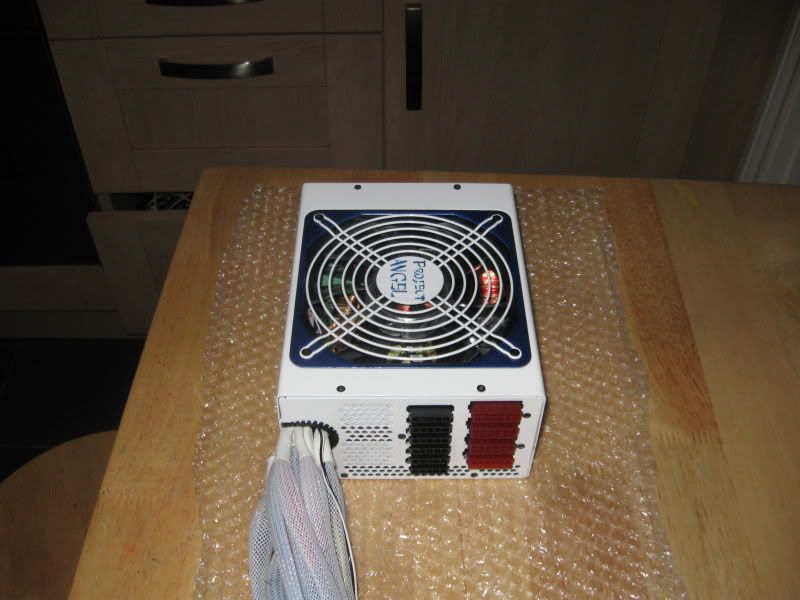
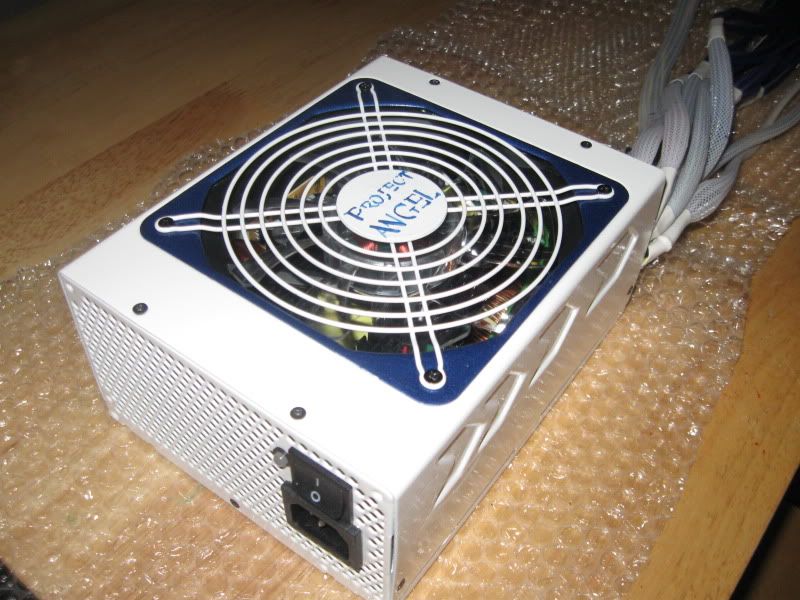
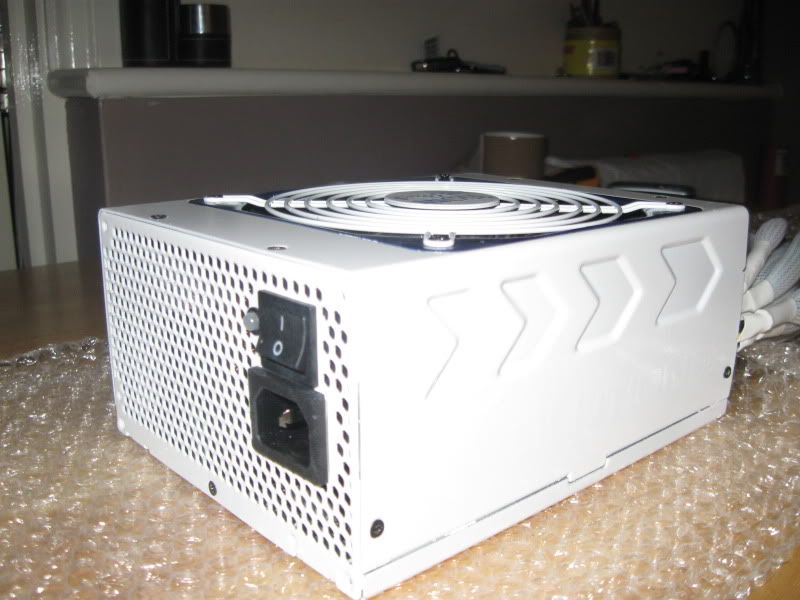
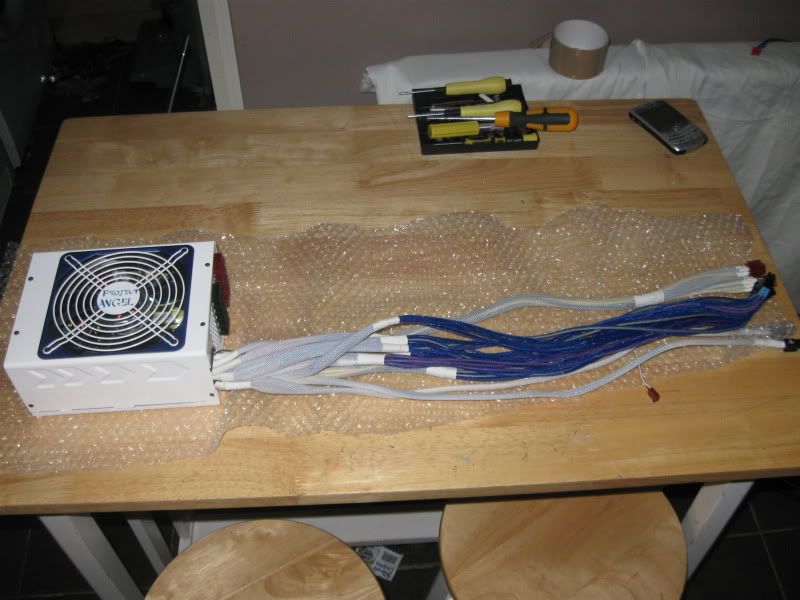
To keep the white theme going, I sprayed the PSU:
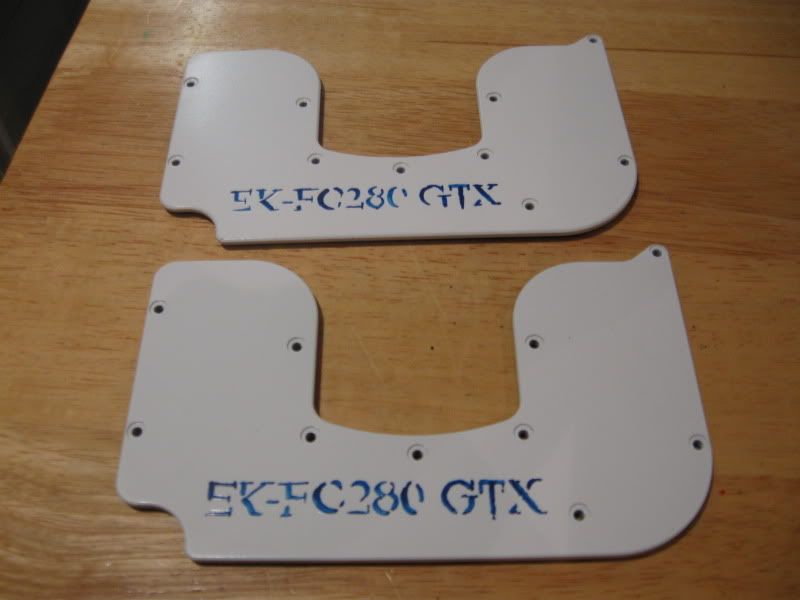
I also added a little detailing to the grill and GTX back plates:
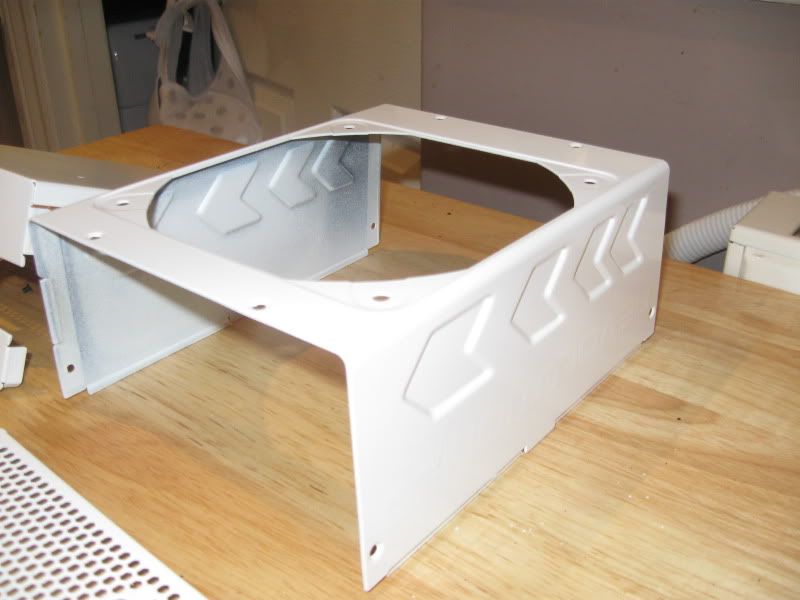
After leaving the paint to fully harden on the PSU for 48 hours, I re-assembled it.
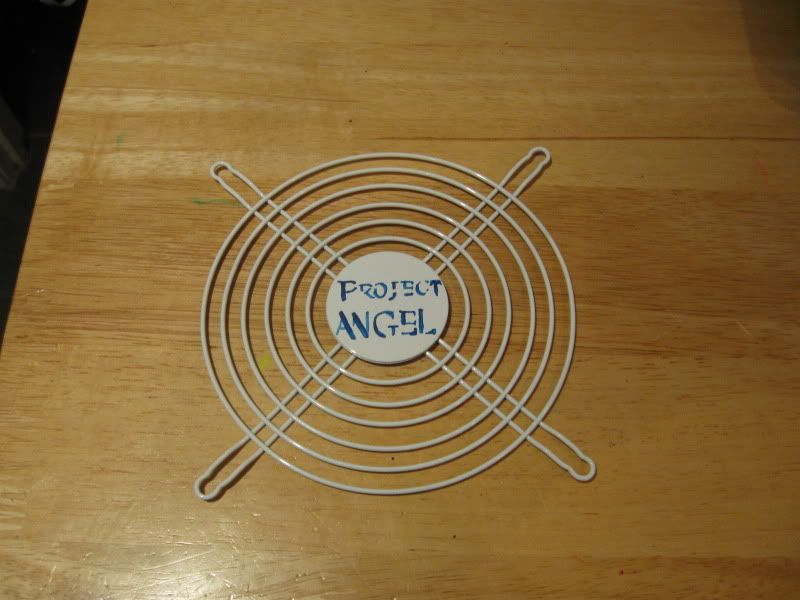
Quite pleased with the results. I might do a bit more detailing on it (Project Angel on the sides perhaps?) but I don't want to over do it and spoil the effect. The grill surround was sprayed cobalt metalic blue, matching the board. It appears a little dark in the photos though
.
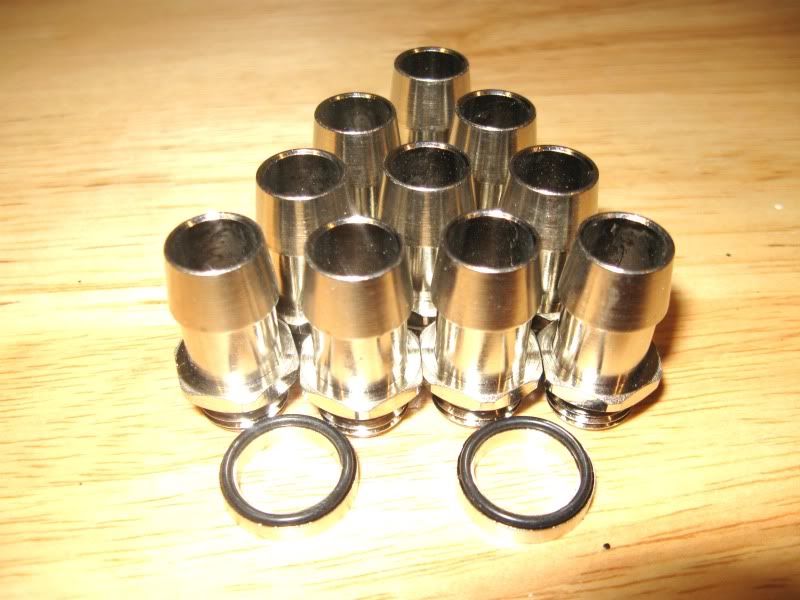
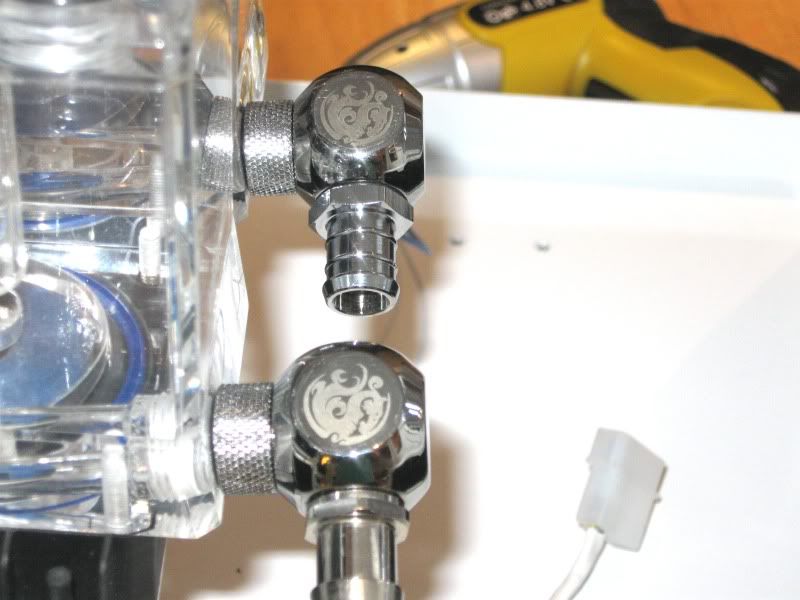
Decided on using barbs and 7/16's. I know the fashion is to use comp fittings but I personally think they look a little bulky. I also don't trust them. That said they do look mint if there isn't too much being cooled. For me however I don't think they are right for this build.
The barbs are standard hi-flow affairs which give the best grip imo. This is imperative as I intend to use 7/16 tubing WITHOUT any form of fixing (tie wraps/jubilees etc). This should give a nice clean appearance.
To minimised the amount of flex on the tubing, I also intend to use these babies:
Gotta love shiny bitspower goodies. Overpriced for sure but they certainly look the dogs danglies!
Motherboard prep:
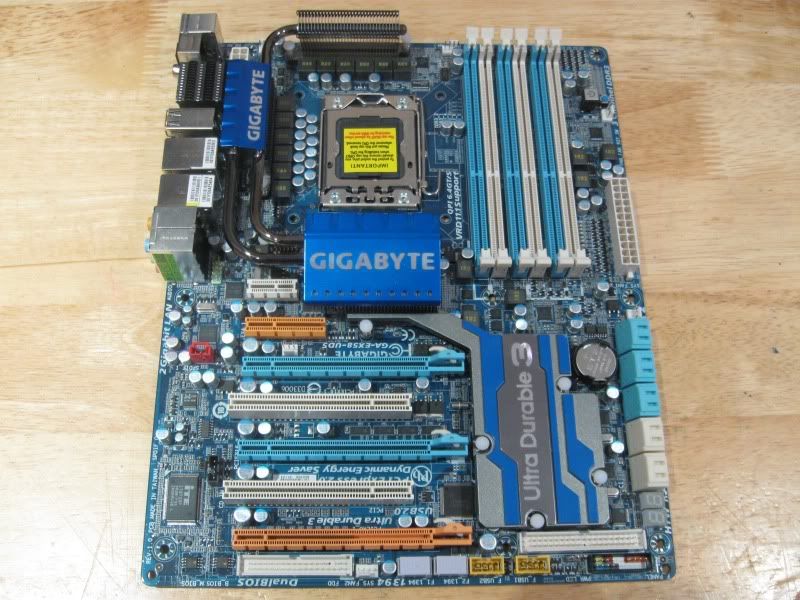
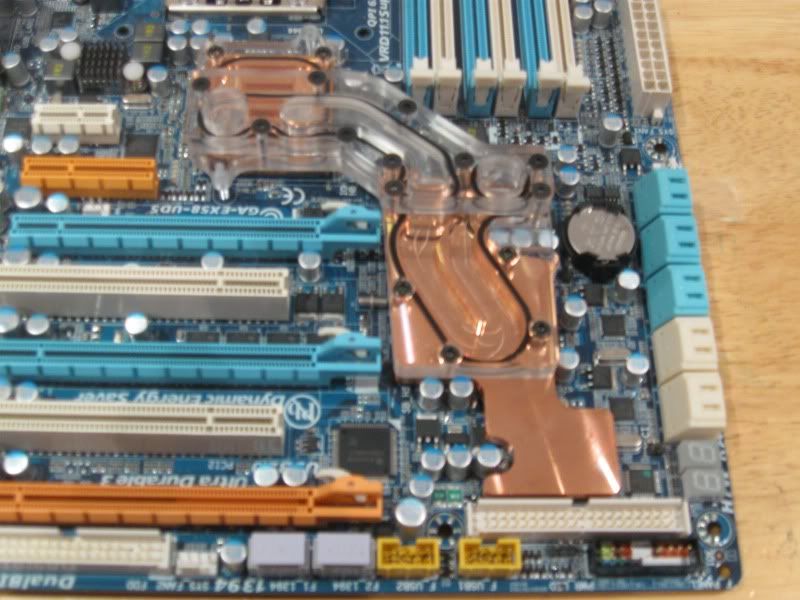
The Gigabyte EX58-UD5 is the older revision but that doesn't mena it's any less capable than the newer one. Infact I've heard on the grapevine that it actually overclocks BETTER than the newer revision. Anyway for those that don't know what this board looks like here ya go:
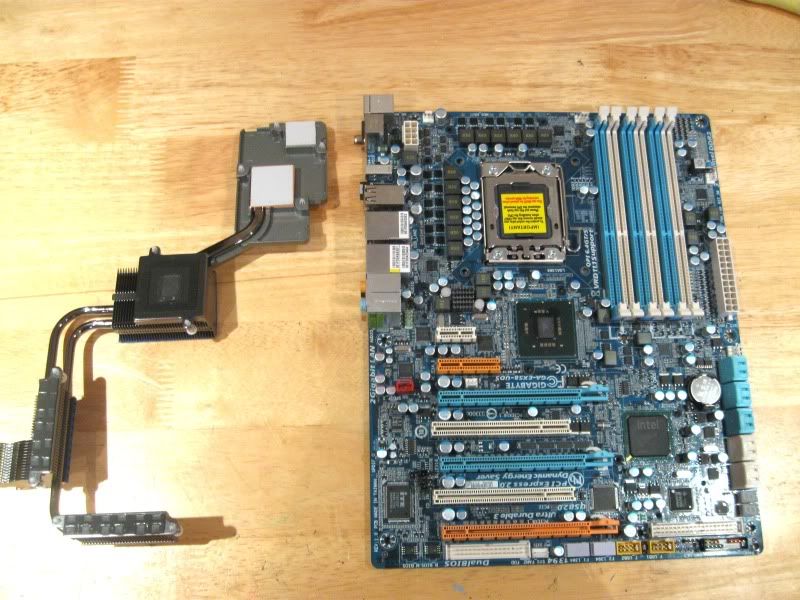
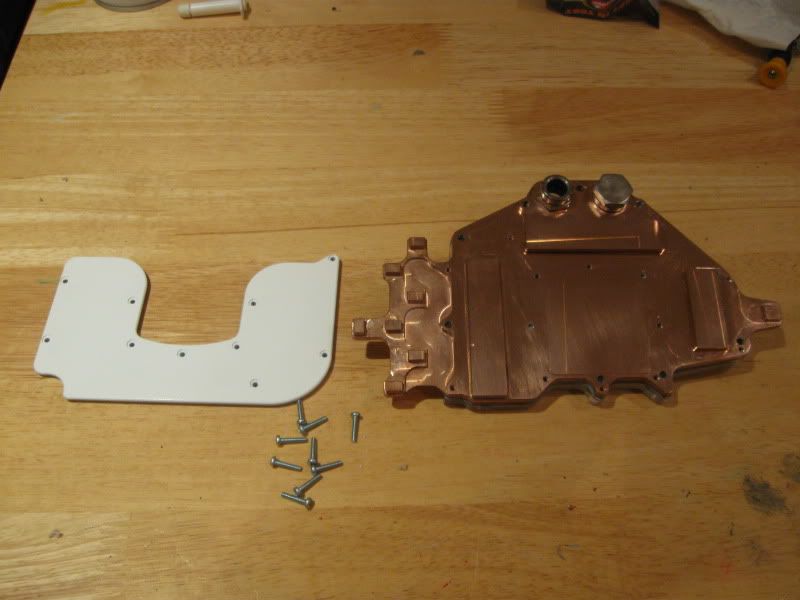
While the stock cooling looks nice, like most things OEM, they are made with budget in mind. I decided to go for the full monty EK setup but first I removed the stock heatpiped affair, which is a doddle to do as it's only attached via push pins:
Stock vs the EK kit:
more to come...
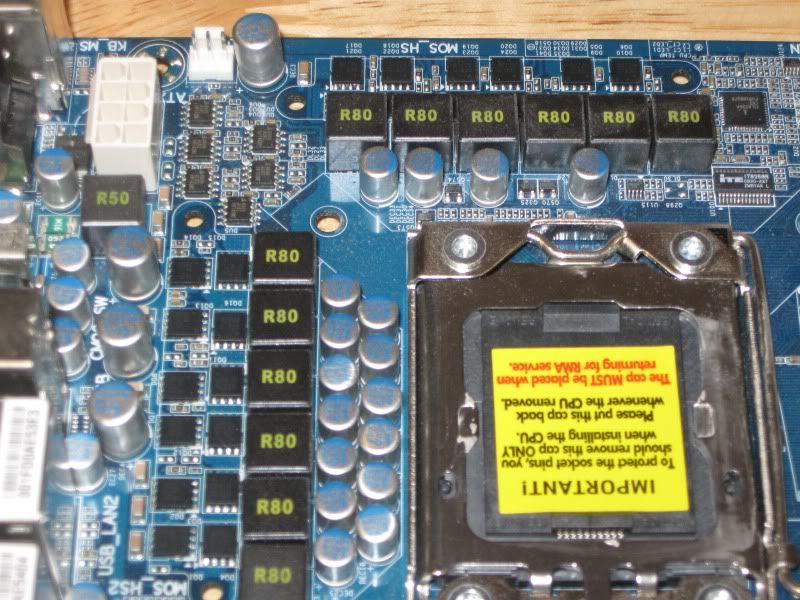
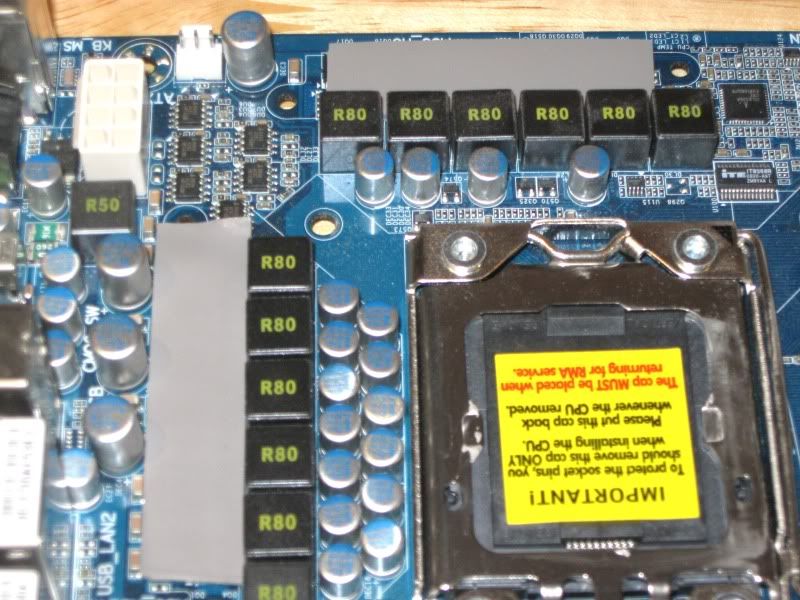
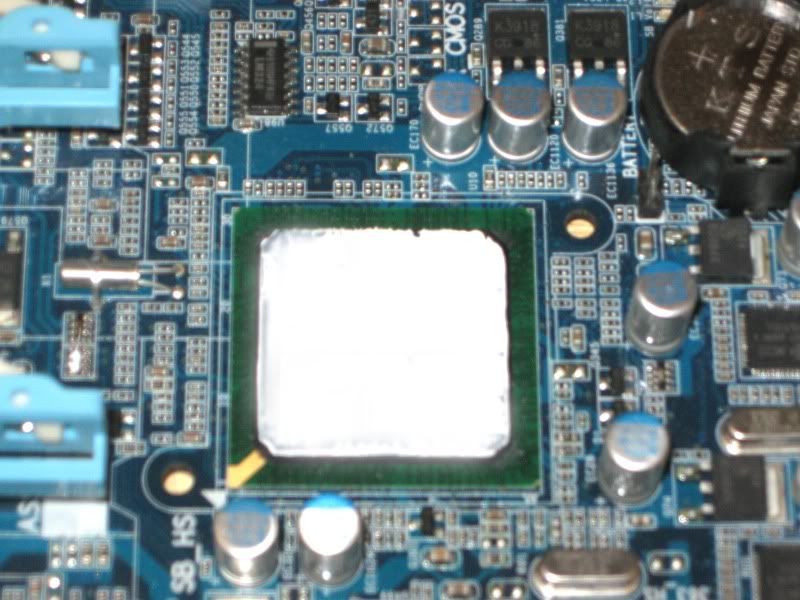
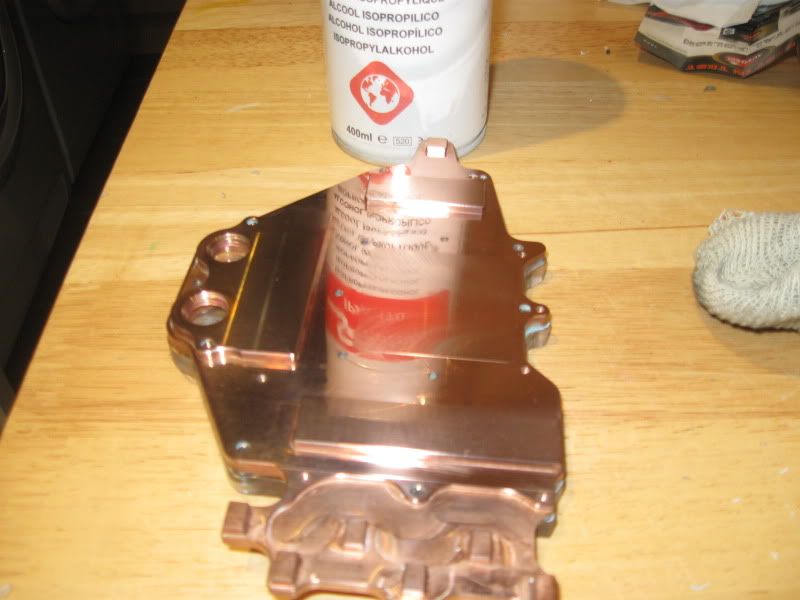
Strip washing the mobo was made all the more easy thanks to IPA. Both sets of MOSFETs, NB (QPI) and SB (ICH10R) were given a good clean to remove all traces of the original compound, to ensure the best possible surface contact to the blocks:
I was gonna use paste on the fets but as the levels were so misaligned, thermal tape was the best option.
For the chipset I used Arctic Ceramique which is getting on a bit but still pretty good stuff (and more importantly non conductive!).
Appologies for some of the poor quality pics - crap lighting and crap camera.
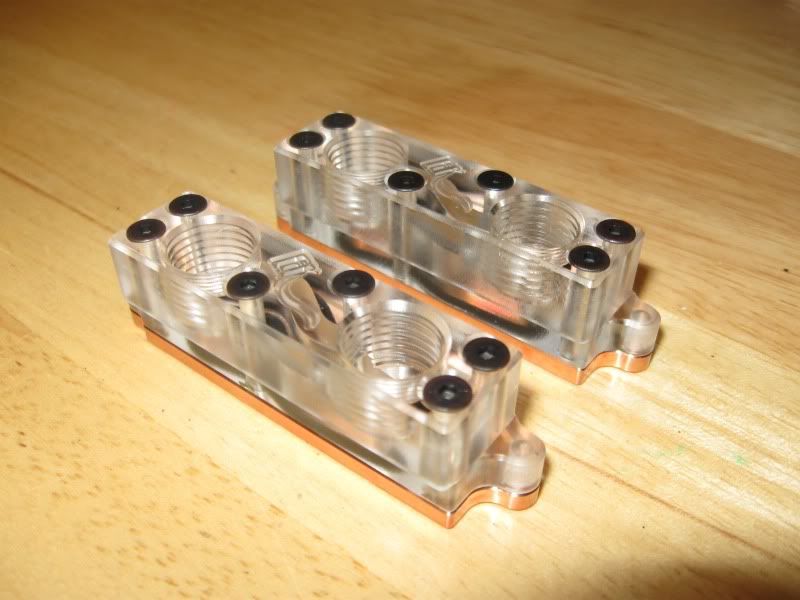
Back to the shiny bits. Heres a few shots of the chipset blocks:
Fitting the blocks was a doddle thanks to EK's perfectly machined blocks and aligned screw holes. An idea for the future might be to get some white delrin/acetel style tops instead of the acrylic but for now the acrylic look better than black for my build.
Here they are fitted to the board:
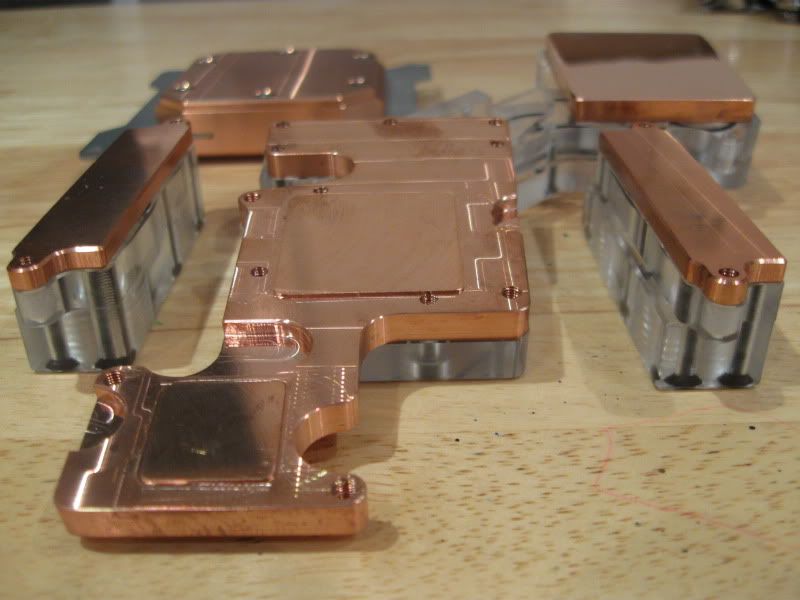
...Oh an it would have been a shame not to take a piccy of all the onboard copper blocks together:
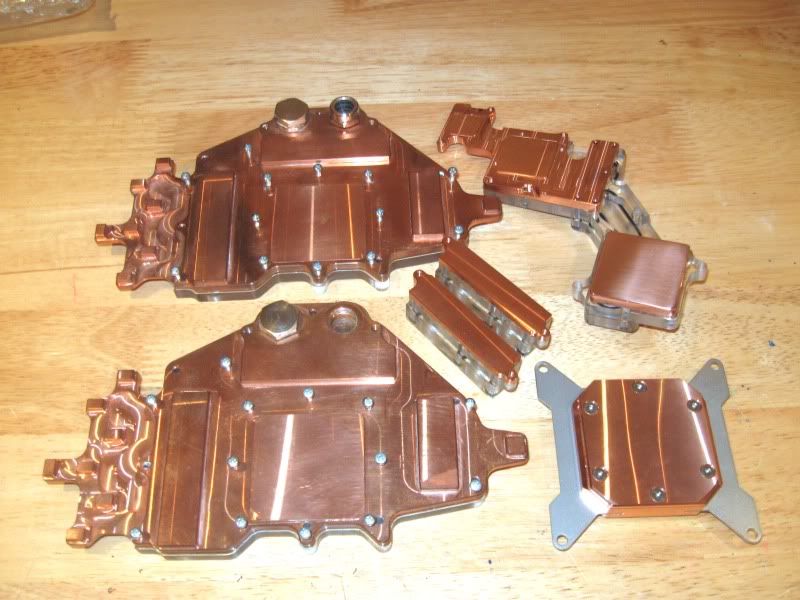
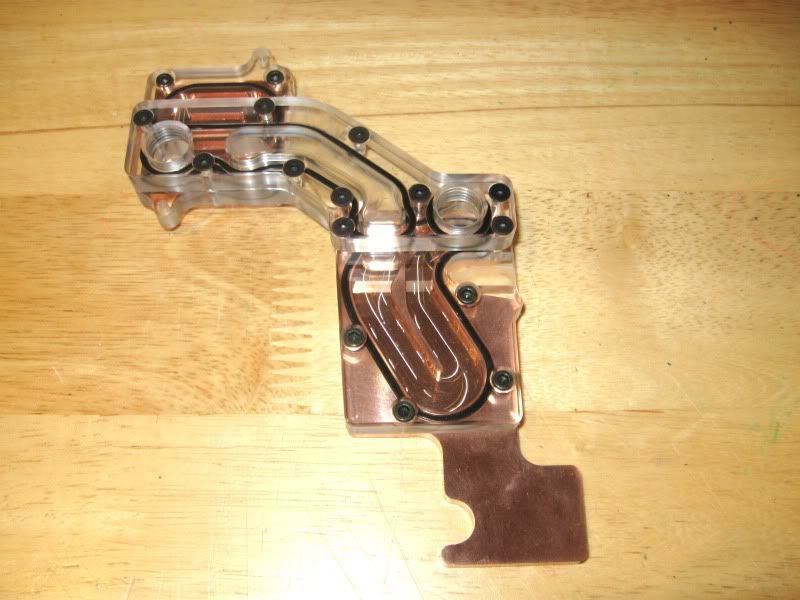
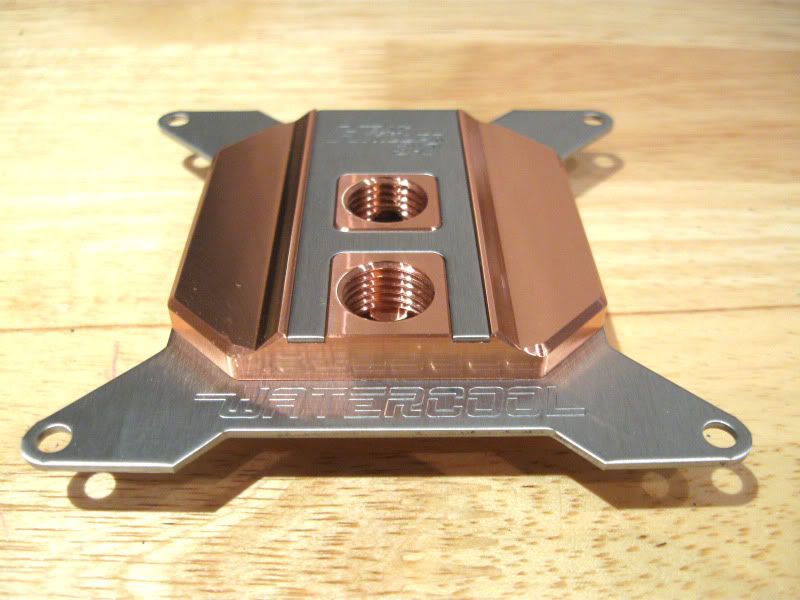
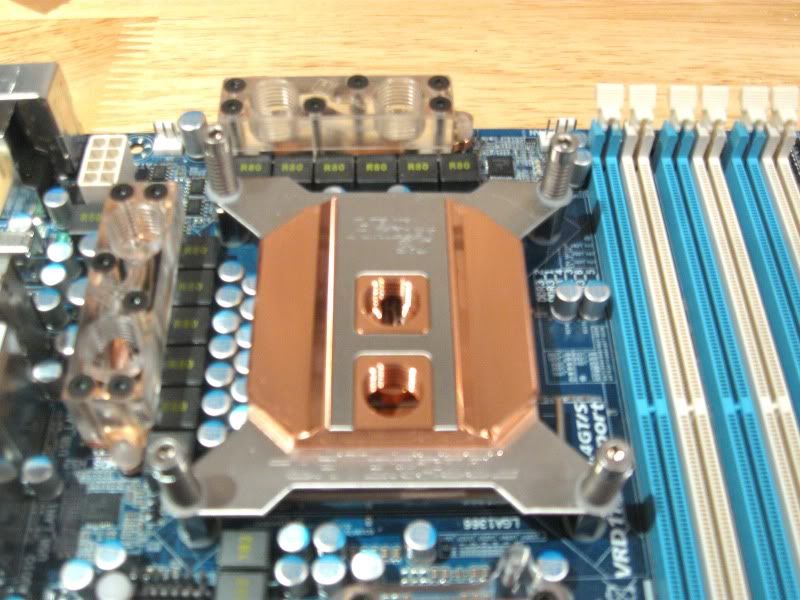
As mentioned earlier in the build log, I will be using the full copper Watercool Heatkiller block for the CPU so here's a few snaps of that block too:
Must say this block is perhaps the best looking block I've seen for some time. Not only that but it's also (and more importnantly) the best performing block on the market at present. The LT version with the Delrin top is cheaper and almost performs on a par with the full CU block but I couldn't resist the lush full CU version
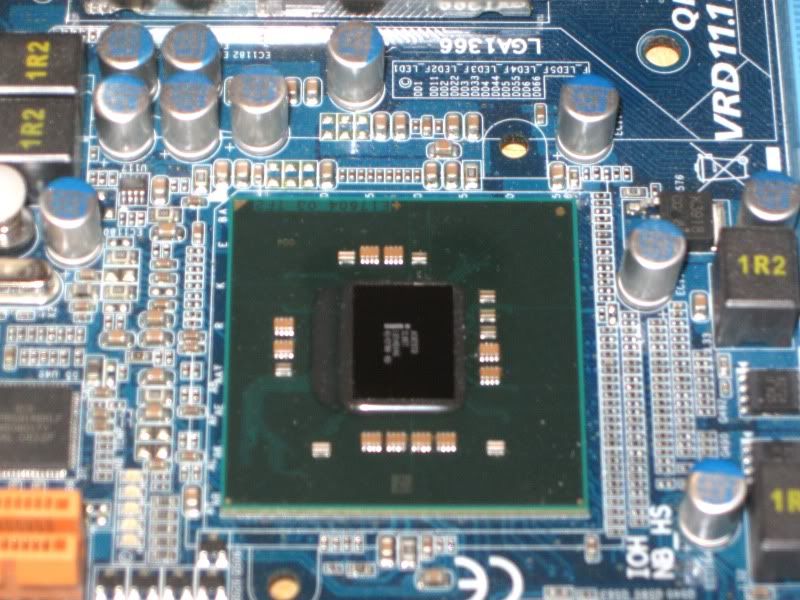
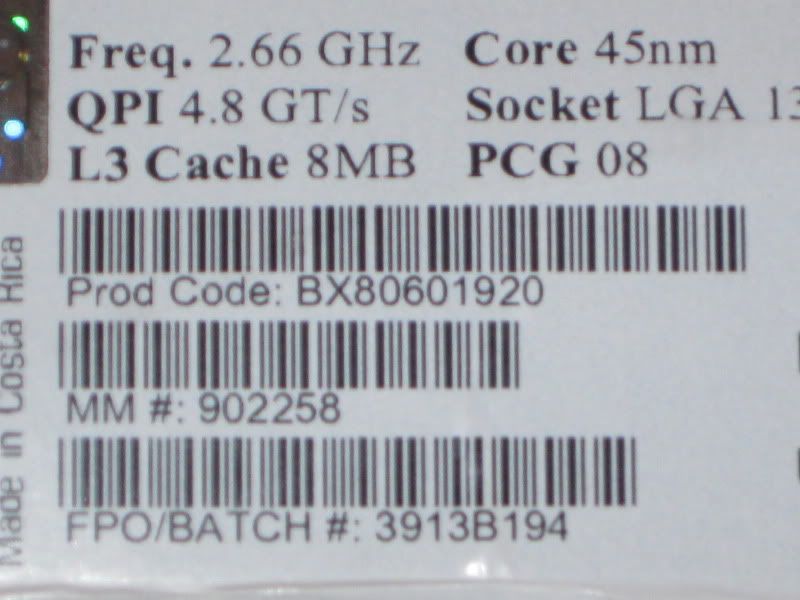
For those who are interested here's the FPO/Batch of the CPU. No idea if it's a good one or not but as long as I get 4/4.2 without issue I'm happy:
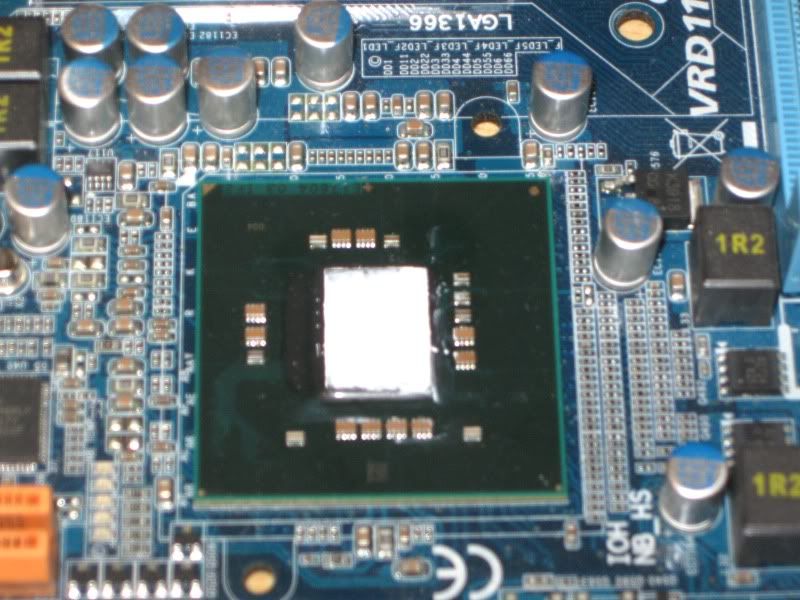
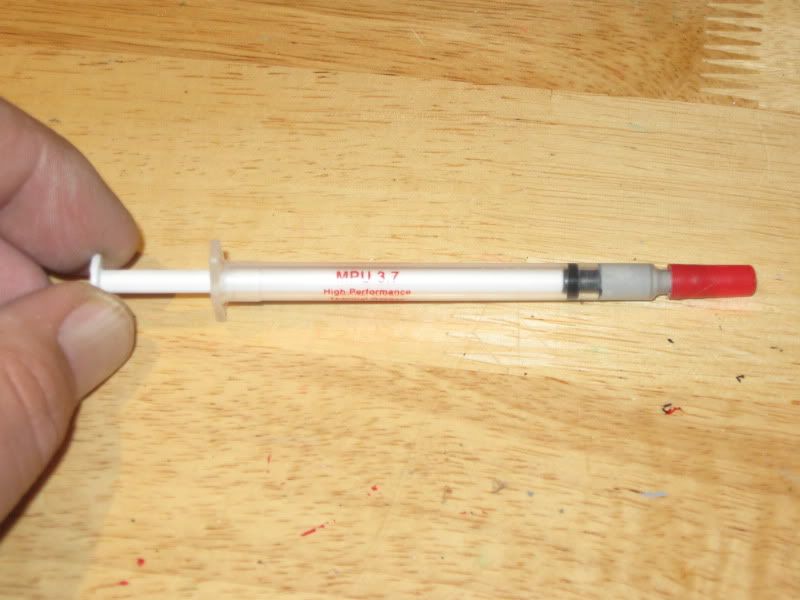
The paste choice is not so critical as it once was as most popular 'high performance' pastes perform within a degree of each other so I went with what I know is good, Shinetsu Microsi:
Next up - CPU mount
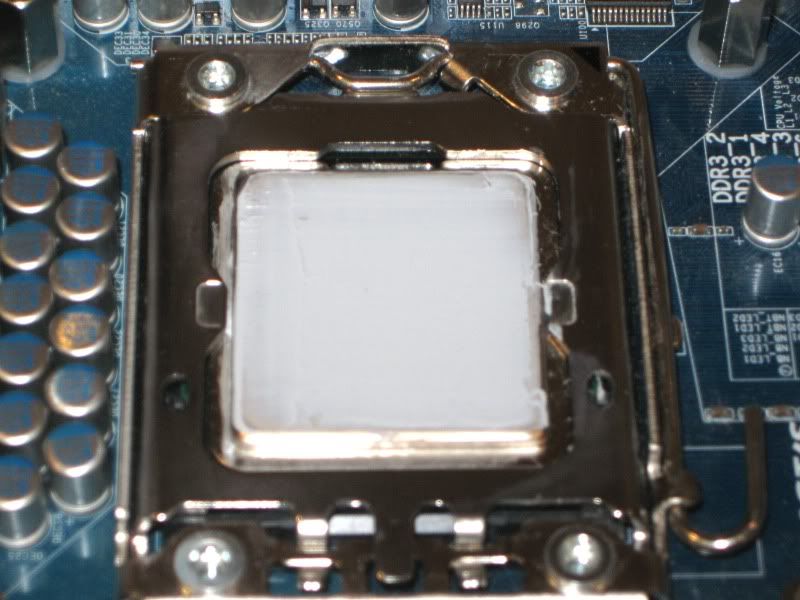
Spreading the microSI was a total PITA as the batch I got was very dry but with a little persuasion I got a then sliver onto the CPU. I prefer to use the spread method rather than the blob, it's what works best for me but I have little doubt that the blob method works best for others so I won't get into an arguement about that here!
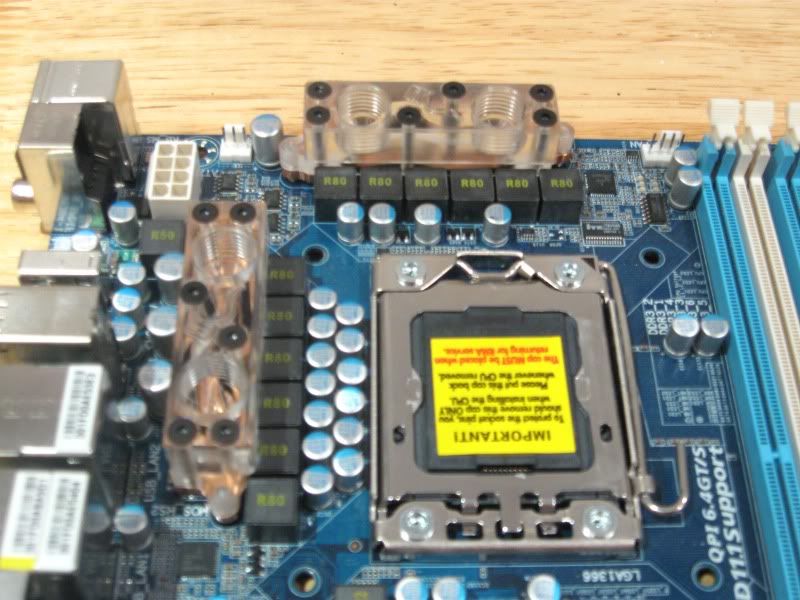
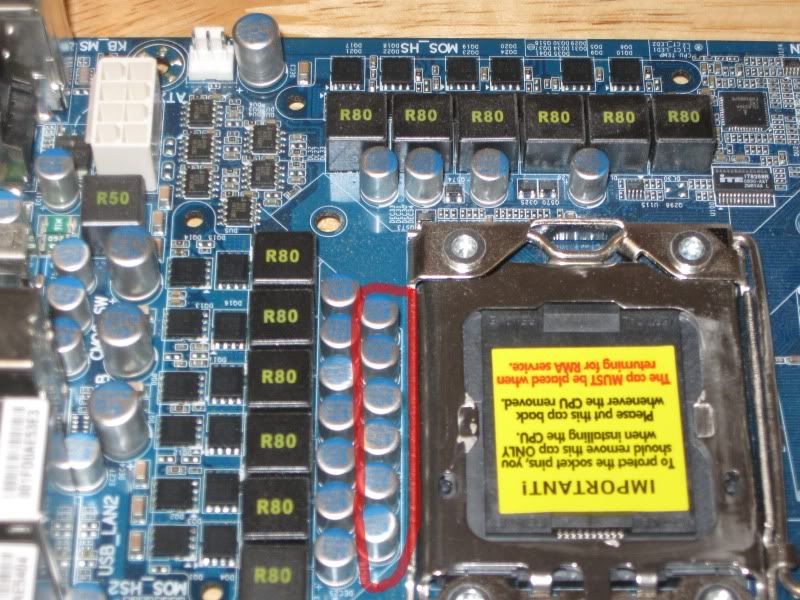
Fitting the CPU block at first presented no problems, however after doing a little research I quickly realised that the Heatkiller block should be fitted horizontally on the UD5 thanks to the row of caps (highlighted below) that prevent a good mount.
The caps are just a smidge to close to the CPU socket so with a little more (very) gentle persuasion, I bent them out of the way to allow vertical fitment of the Heatkiller:
Sorted
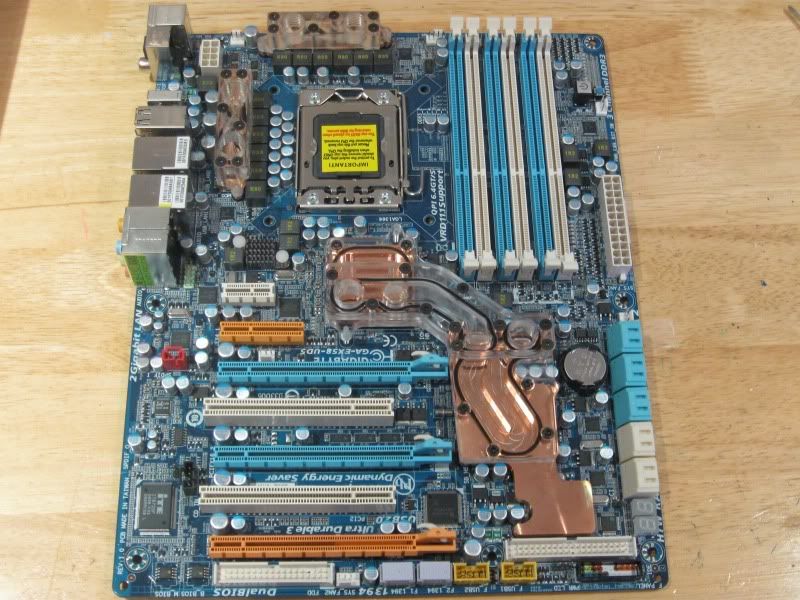
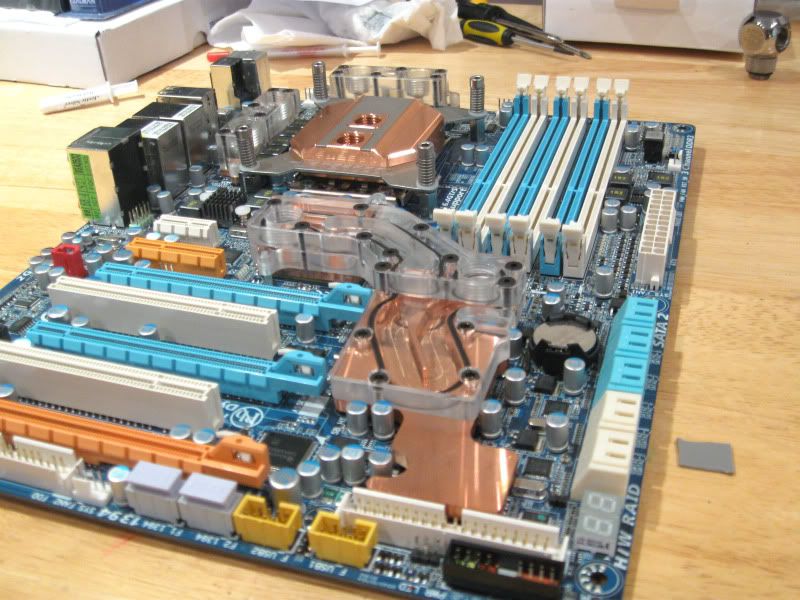
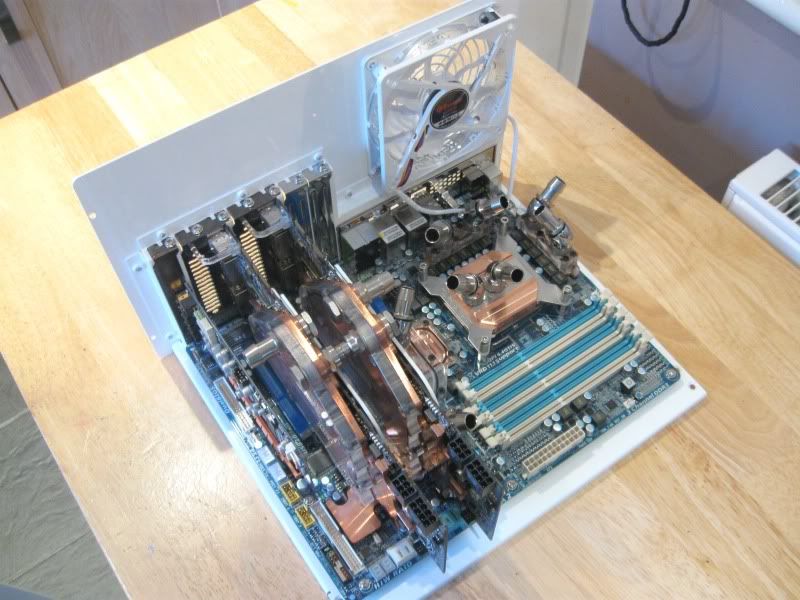
Here's how the board looks now with the blocks fitted:
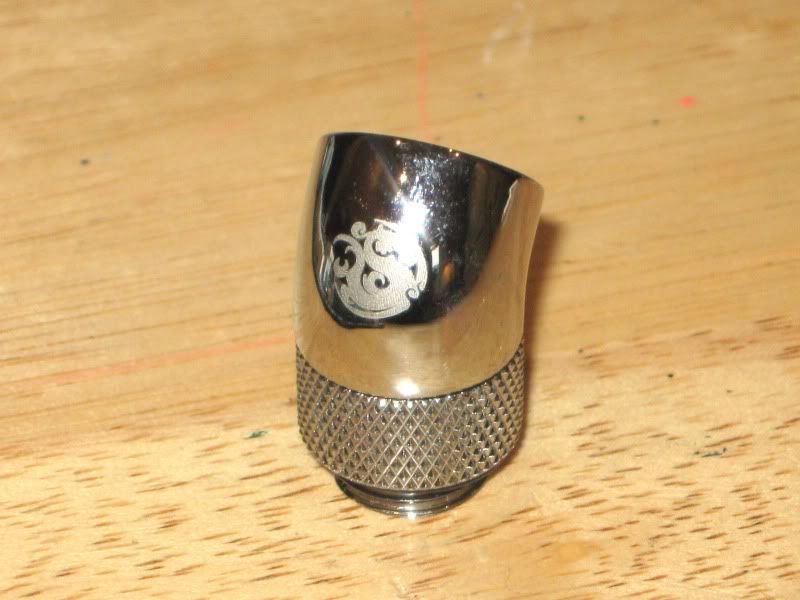
I had a quick play with the 45 angled bitspower fittings and attached the barbs to judge how I'm going to plumb in all up:
So with the motherboard blocks fitted thats pretty much all the prep work done save for the GPU's which I'll come to later in the build.
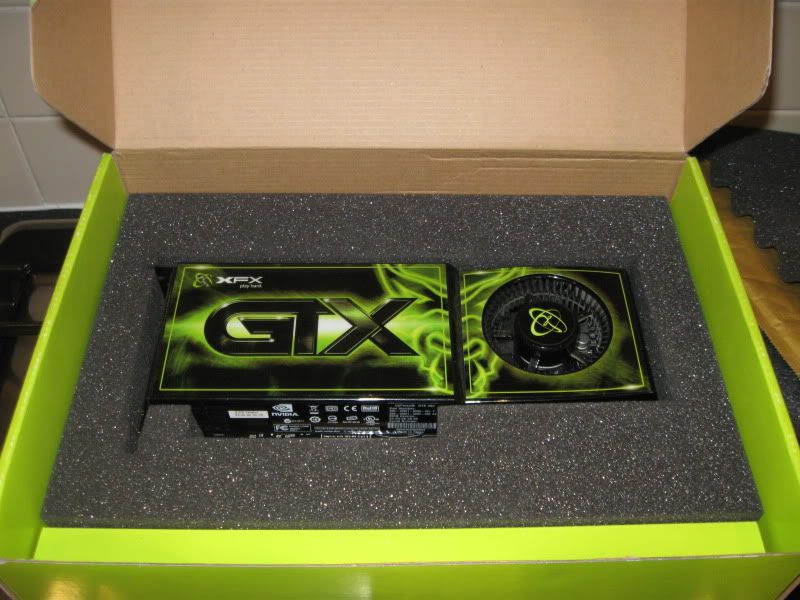
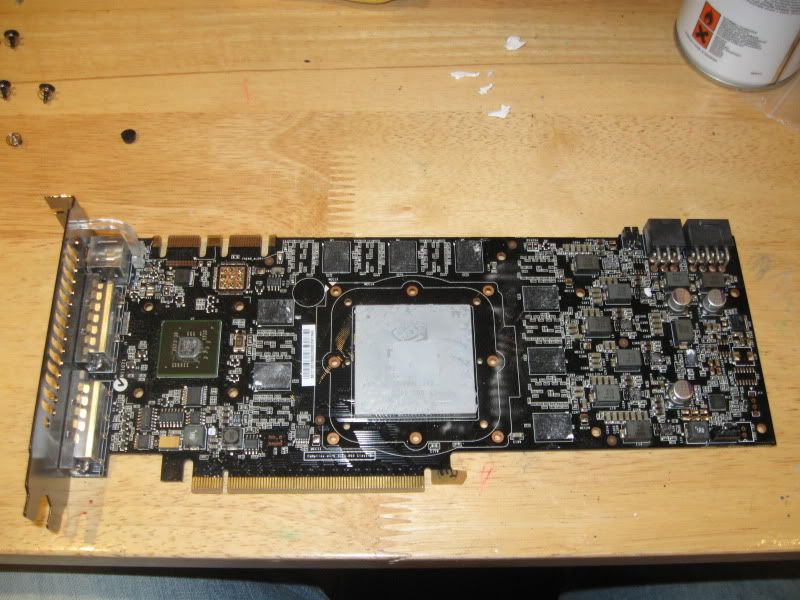
The GPU's I will be using for this build are the GTX280. While they are no longer top dog of the graphics card world, they are still powerfull, especially as the ones I will be using are XXX versions - 2 of
Of course it would be rude not to watercool them and overclock the nuts off them too, we'll see how that goes later. The blocks for the GTX280 I'll be using are EK-FC280GTX. Mine were bought second hand, and while thye were in good nick they needed a bit of spit and polish to bring them back to their former shiny glory:
With the backplate I sprayed earlier:
Stripped the cards back:
and fitted the blocks.
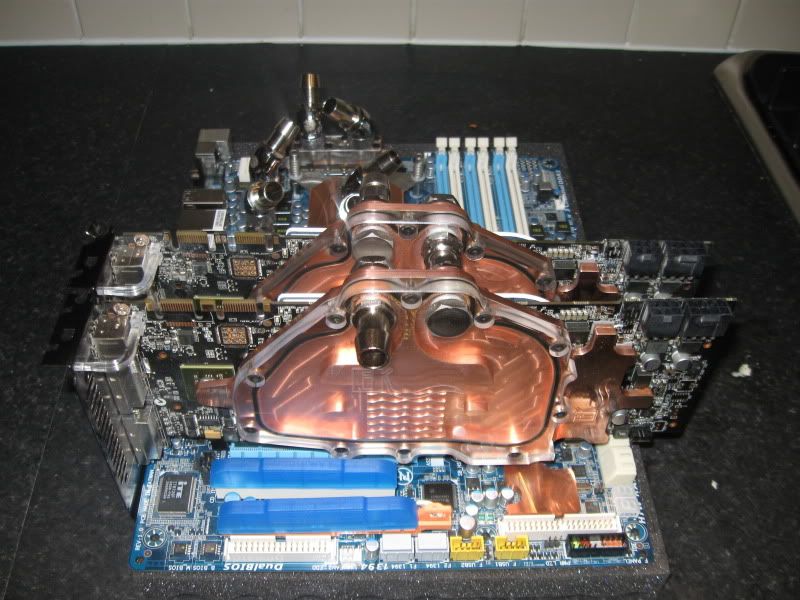
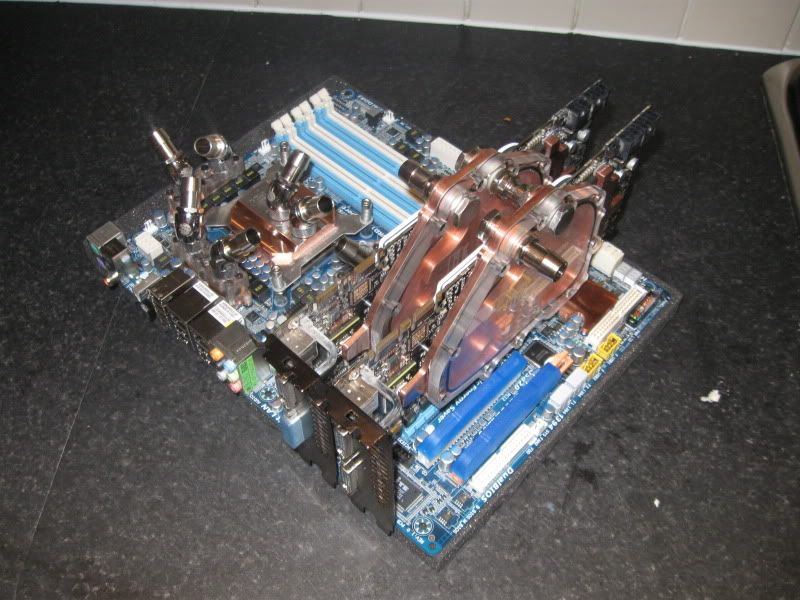
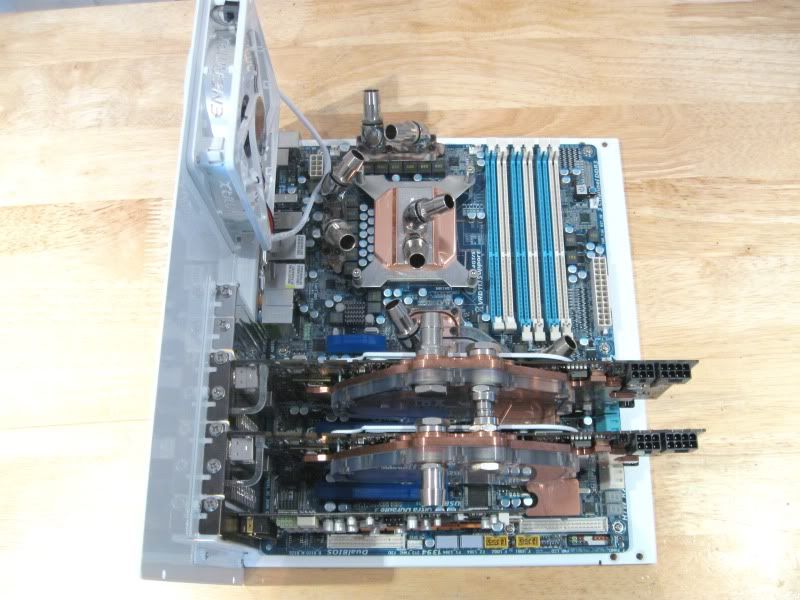
Couldn't resist doing a few mock up shots of how the cards look installed:

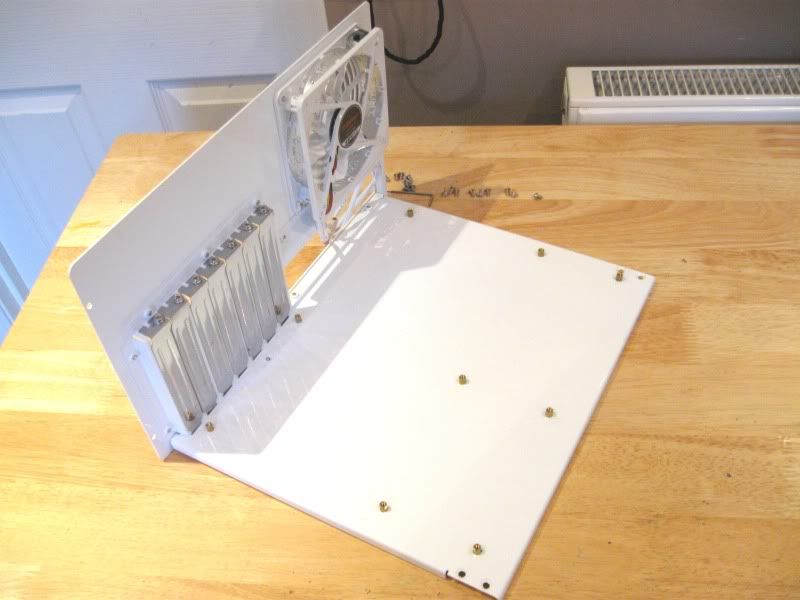
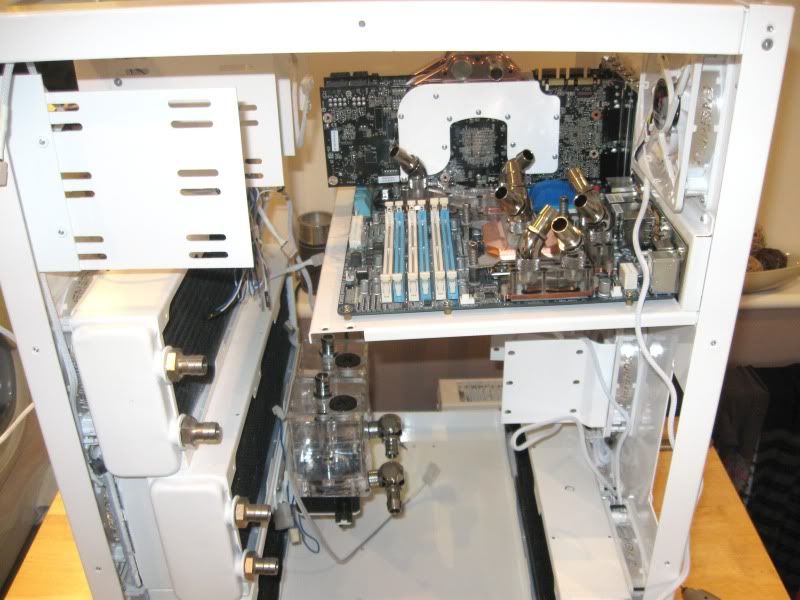
I went for a horizontal fitting with the MM Ascension case but for all intents and purposes, the motherboard tray looks exactly the same as one which would be fitted vertical:
I dunno which way to have the fan yet as there are two more 120mm fans on the case roof so for now ignore the fan orientation:
Fitting both GTX's in situ was a bit of a pain as MM have a nasty habit of placing a pop rivet directly in line with the PCI backplates making it tricky to fit the cards into the 16x PCIe slots at the same time. A little bit of 'jiggling' (technical term) and they slotted right in.
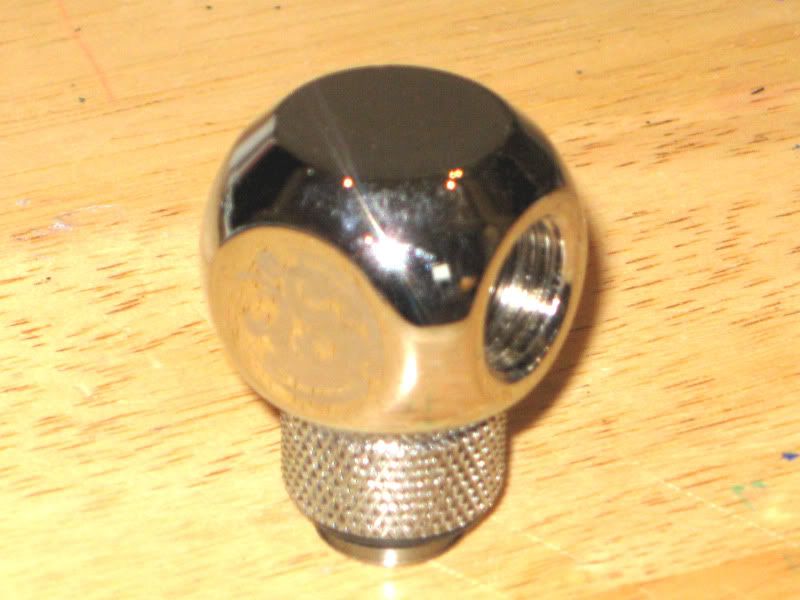
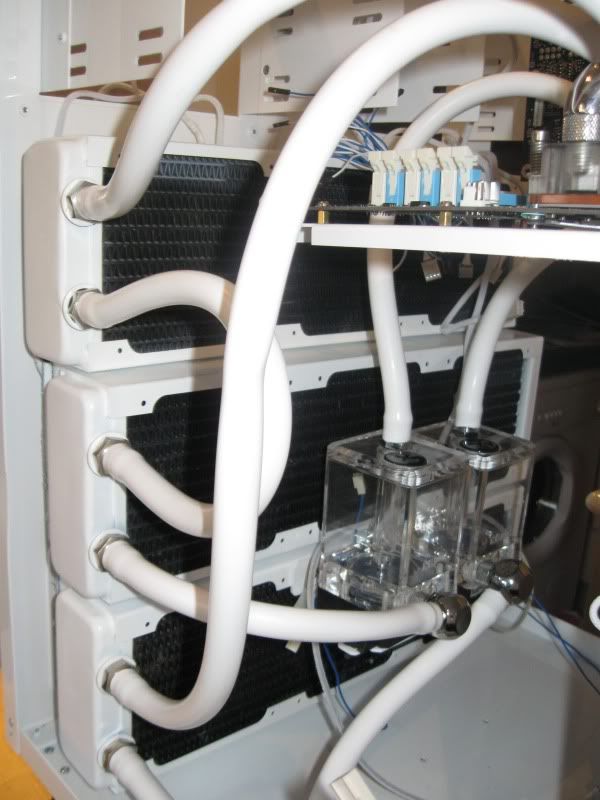
With the pumps sitting directly below the mobo tray, routing the tubing neatly was always going to be difficult so to cut down on the amount of tubing used, I made use of a couple of Bitspower 90 degree connectors:
I'm still not totally sold on them as I generally hate 90 degree bends in any loop, let alone one with 2 rads which is going to be restrictive enough. However I'm also a bit of a magpie when it comes to shiny stuff so I'll give them a go. I restriction is too much then I can easily swap them out.
Here's where I have hit a little snag:
You cant really tell that much from the photo but there is a severe slant on the motherboard tray courtesy of all that copper on the mobo and the fact I have not fitted the supporting strut from MM. The problem with the supplied strut is that it sits directly infront of the window which would dull the effect off the lush engraving there so I am determined not to use that. I plainly do need to use some sort of support though as I can't leave all that weight just hanging there. One to poner while I do a few mock ups of the tubing....
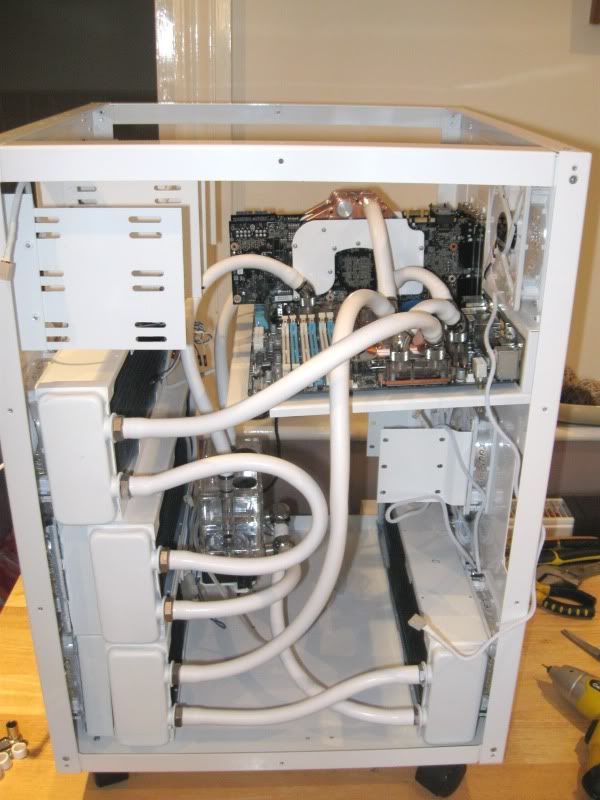
Loop one:
18wDDC -> PA120.3-> PA120.3 -> CPU -> GPU1 -> GPU2
Loop two:
18wDDC -> PA120.3-> PA120.3 -> MOSFET1 -> MOSFET2 -> NB
This is the best way I found to route the tubing, whether or not it is the best regarding heatload is doubtfull as I would prefer to have the GPU's split between the two loops but that is inpractical with this rig really. We'll see how it fairs when its up and running.
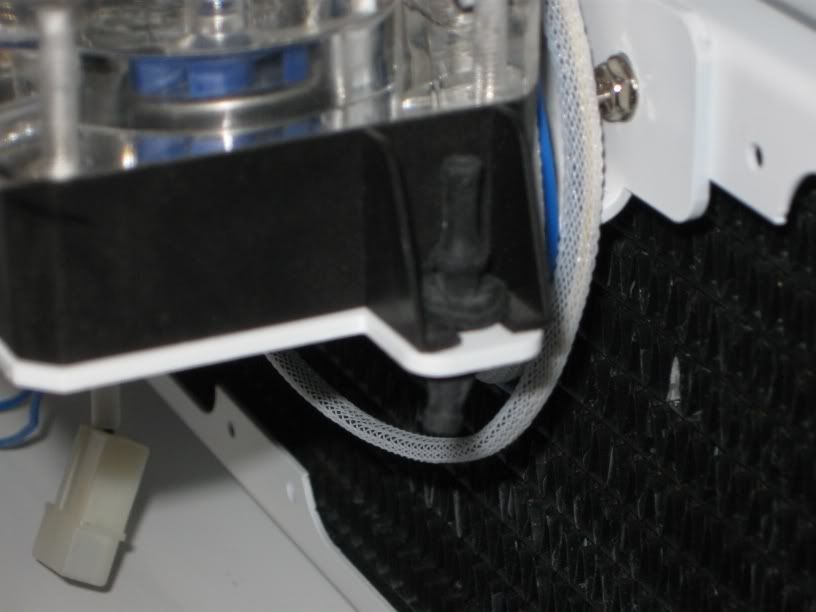
Heres a close up of the business end of the loops:
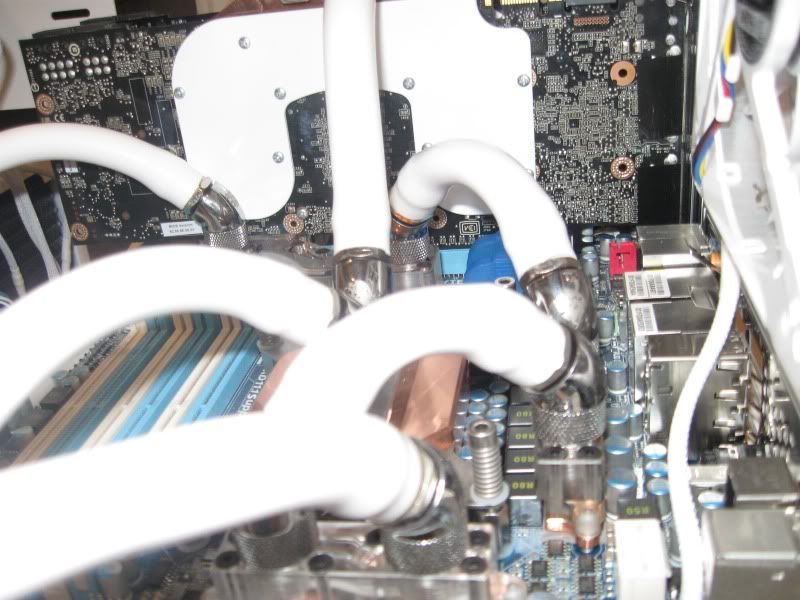
The only real difficulty in routing the tubing was with the MOSFET blocks:
Note that one section of tubing appears flattened. It is slightly flatter but still fairly rounded and certainly not as bad as the photo suggests.
I was quite impressed how easily and painless it all went tbh. With quite a lot of tubing left over I can easily re-dux the loops should it be necessary.
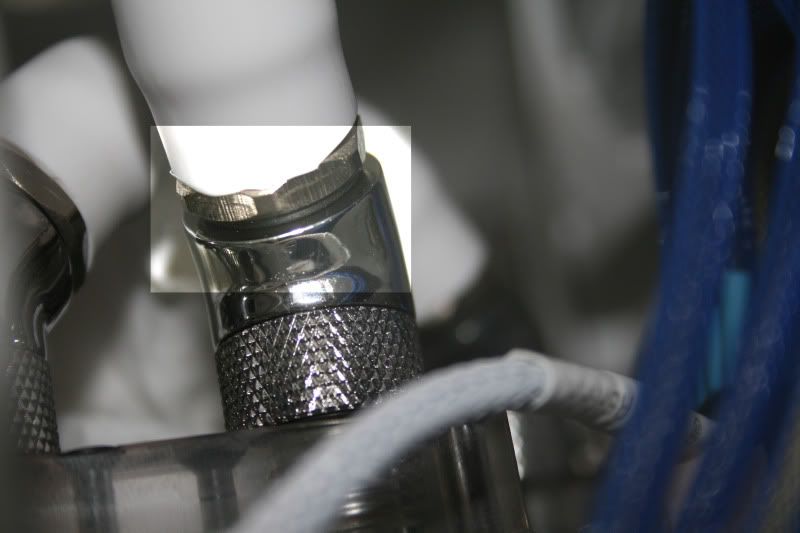
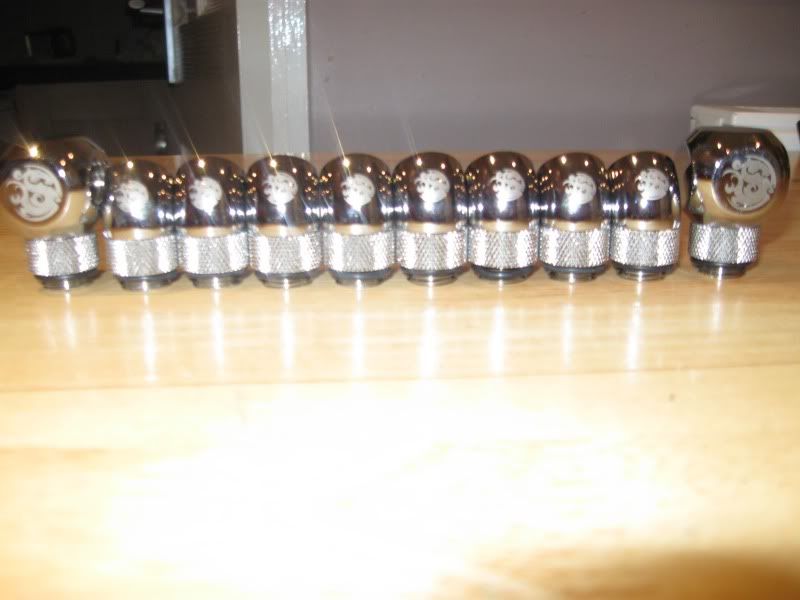
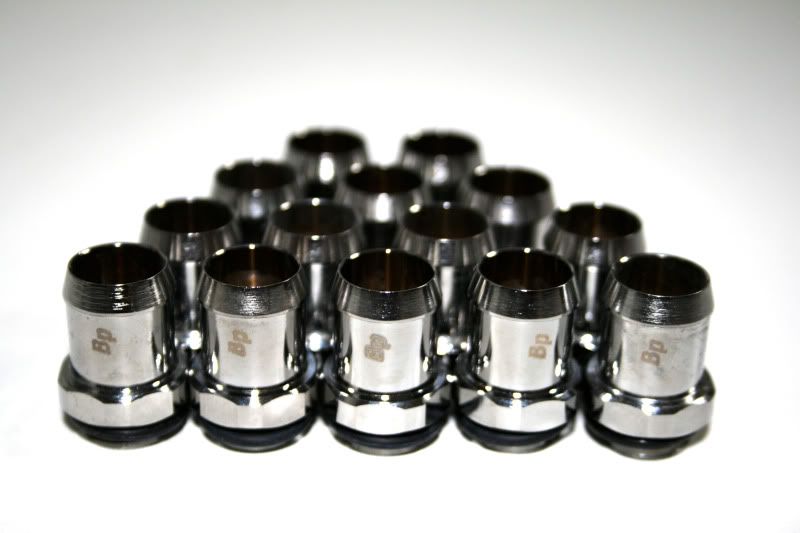
Got the new barbs - bitspower diamond silver:
Hopefully they will solve the leak I had from using the d=tek ones which were a little too long on the thread. On inspection the thread of the d-teks seemed long enough but when everything was plumbed in there were minor leaks on all fittings
Heres a shot of the d-teks:
So I got a little more done this weekend.
The new bitspower barbs sorted out the leaks I was having from the old d-tek barbs:
However, I had issues with one of the rotarys as it sprung a leak too but as it was slightly compressing part of the tubing anyway, I opted to remove it completely from the setup and replace it with a plain barb. So here's the new tubing layout:
Looks a little better than before but I reckon I'll also change the input to the heatkiller as that looks a little stretched and could be smoother, good job I bought plenty of spare tubing eh?
I've also chopped the ikea curtain pole down to size and braced it to the motherboard tray which has evened things out a little and given the tray much more stability:

 Posting Permissions


 Reply With Quote
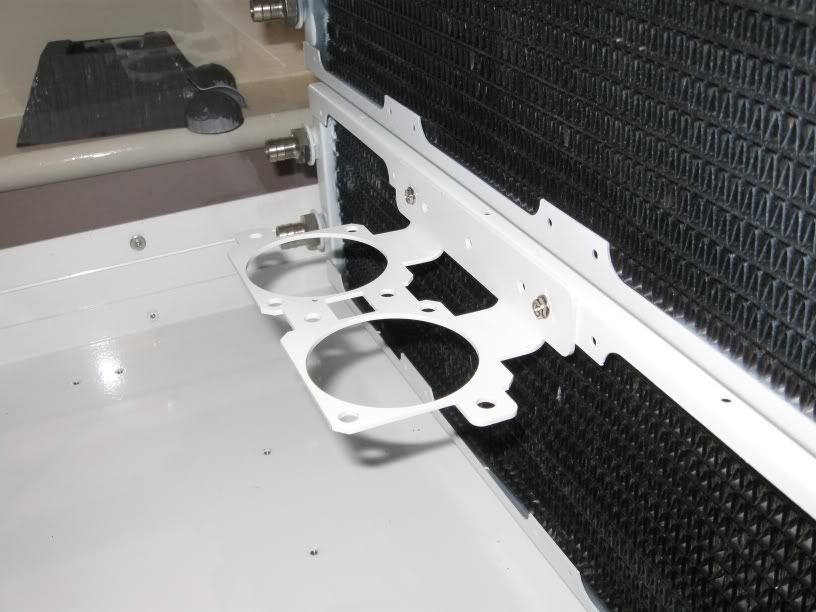


Bookmarks