


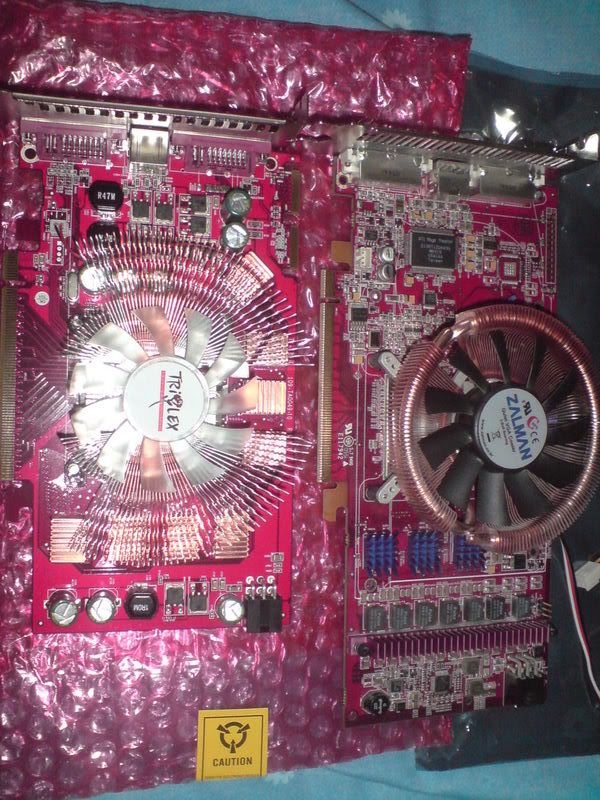
GTS//MXII Mod.....How to HoTRoDMod your GTS512mb Heatsink for under $15.00 and 1hour worth of time.....
Ok Extremers.....Heres a mod I know youll like..
We all know the new GTS512mb overclocks great. Only exception is of the dreaded memory along with a heatsink that could use some help. Anyone who overclocks ,,knows that heat can turn that card intonuclear waste
Overall we will be adding Nylon washers to the spring screws and lightly hand lapping the Copper base...If you feel skilled enuff you can also high polish the copper base as well..It will allow better contact with Any thermal paste to the Bare Core on the GPU..I Only use MXII untill something better comes along!
Its a funny thing that i was expecting to see a seperate Shader GPU as on the older GTS's,,Wtf is it in the GPU//G92 now...Makes me fell robbed ,,you can not see a Shader Gpu anywhere,,and thers even a place where i believe it would of wnet tooAfter a good run through ,,The 8800GTS512mb seems to be a GT with a dual Slot cooler...The only differance between the two cards is the Shader count and some Resitors//Pwm's//Caps.. So We all basicaly paid $100.00 for a dual slot cooler
Time for some Fun
Tools
1x Pair Rubber Gloves//latect what ever..always use protection
1x ,,Small philips screwdriver = to remove springscrews and three screws on cooler.
1x ,,Regular philips screwdriver = to remove three screws on back plate .
1x ,,RazorBlade = for removal of old past and thermal pads.
1x ,,Clean soft rag or cloth/towel = to clean remaing paste pads using Denatured alcohal.
1x ,,Paste Cleaner or Denatured Alchohal = Cleaning of Old paste thermal pads.
1x ,,1000 grit wet/dry sand paper = to gently smooth copper base before polishing.
1x ,,Aluminun Polish//Mothers Polish Compuond// not Brasso! = smoother surface for thermal paste.
1x ,,Roll Blue painters Tape = so you dont dirty the card while lapping/polishing,,allow easy removal and dosnt leave residue behind.
12x ,,Small Nylon Washers = creates more tension on spring screws to close the memory gap by 2mm.
1x Needle nose plyers = to remove the four back plate screws that hold slot plate to the DVI connectors.
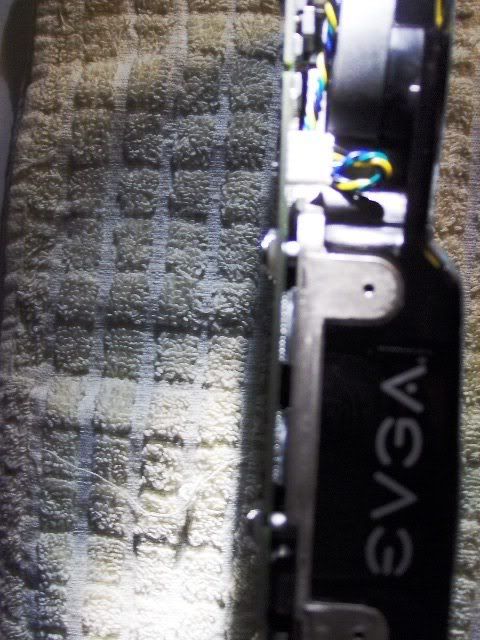
1st step Removing the heatsink
Remove the the Back plate. This consist of Four Dvi nuts and three philips retaining screws..""Do not remove heatsink shroud/cover..you dont need to mess with it at all!""
Next,,Remove the 12x SpringScrews starting from the four in the center working your way around the card . ""This will prevent cracking or warping of board and GPU!""
Finally,,Removing the heatsink,, hold card to where cooler is right side up//thats the pretty side
Here is a pic of what it should look like once its removed succesfully.
2nd Step Cleaning the card.
Using a RazorBlade remove the old thermal paste from the Heatsink Only,, Dont use razor on GPU!.""Dont press the blade into the copper,,gently slide it to remove paste!""
Next ,,Use the razorblade to lift the Edges of Thermal pads off the Memory Only.""Do Not Remove From Pwm's"" We are using the Thermal pads again for the PWM's so dont remove it, if you removed the Heatsink as i said above ,,The pads on the Pwm's should be nicely in its place on the heatsink or board
Razor under themal pads gently lift them off.
Leave these Thermal Pads Alone!!
Leave this Thermal pad in its place too!
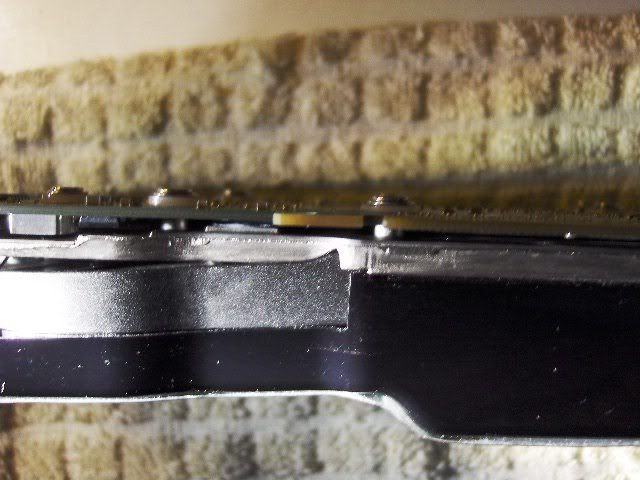
3rd Step lapping and polishing.
Now clean up your card and heatsink with alcohal or thermal paste cleaner and a clean cloth.
Using 1000grit wet/Dry Sand Paper . You will sand in a circular motion using very little pressure ,,Sand the Factory sand lines//finish until the lines are gone. Now if you wish you can also polish the copper base and then reclean with alchohal...Polishing allows for a smoother surface and will contact the Bare CORE the best...I have proved this many times..This step is not for looks,,Just performance!
When done ,, The heatsink and card will look like Picture below.
4th Step Applying the Thermal Paste ,,MXII = best temps and is non conductive!
When you apply the paste ,,Spead a thin layer of MXII//not As5,,On all Memory Chips and GPU,,Then Put a Dot of paste the SIZE OF A BB in the center of each Memory Chip and GPU.Also make shure the Thermal Pads are in the correct place for the PWM's!
Correct method of applying the paste for this mod!
5th Step Remounting the heatsink.
This will be a little scary for first timers...Witn the card in the up right position you will plug in the fan and then gently set the HEATSINK down on the GPU...""Dont APPLY any Pressure while doing this""
Carefully flip the card over on its back and gently push down over GPU with out twisting...
Ok ,,Install the springscrews using the NYLON WASHERS .There are (Four GPU springscrews )and just make them snugg..use a (CrissxCross patern)...when snugging/tightning.
Now intstall the next( Four springscrews//theres two on each side of the GPU screws)that you just put in...Now snugg them up using a (CrissxCross patern)..
Next ,, Install the (Four springscrews for the memory) use a (CrissxCross patern) tighten till snugg...""DO NOT INSTALL the THREE FanShroud Screws yet!!!""
Finnaly ,, Give the heatsink a very slight nudge left and right,, Barely a twist OK...Now go over all the SpringScrews starting at the GPU and compress them all the way down in a (CrissxCross Patern)... This will fully seat the MXII and close the heatsink gap by 2mm,,with out causing harm to the GPU/Board..
You must use the NYLON WASHER's or this part of the MOD with MXII wont work and youll beNow install the three Fans Shroud Screws after the SpringSrews are fully tightened.. you will feel each spring screw stop fully compressed,,""DONT CRANK ON THEM""
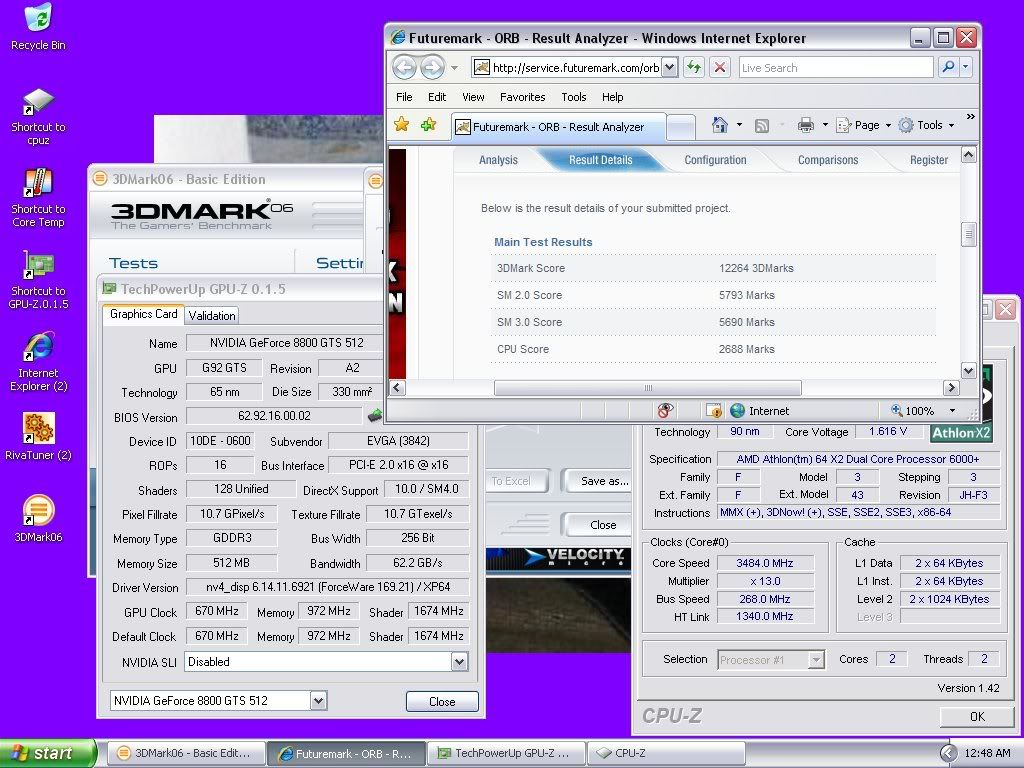
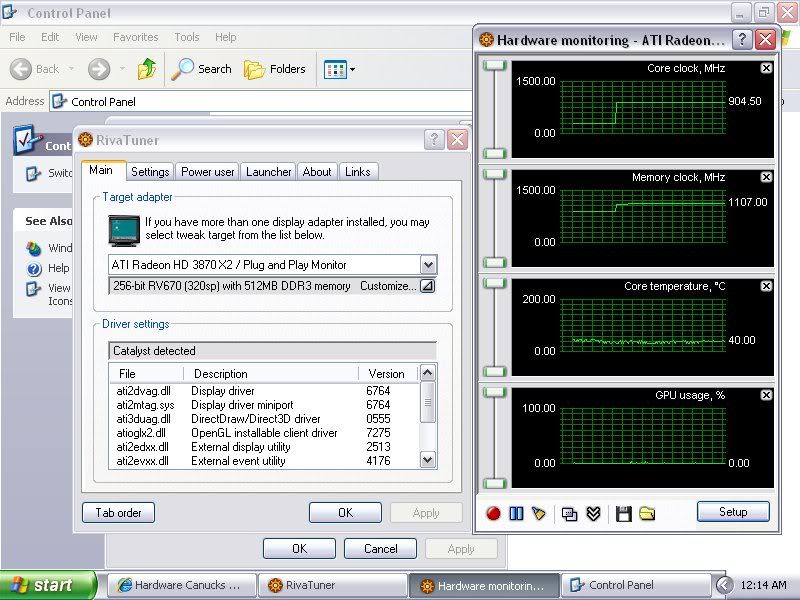
The Screen below is with 100%stock heasink using thermal pads instead of MXII,,This is for comparing your Before and after Mod
MXII Mod propperly Done
Last Step Cut out and install modified Slotplate ..This is optional but if you want the Temps i have you must cut the backplate for more Airflow or buy a single slot plate from Petra's for like $5bucks or steal one off an old GTS like i did
Ok finish up by wiping all those grimmy finger prints and go bench!
Results Anyone
Stock Clocks 3Dmark06 Below..Not bad but i wanted more
OverClock @ StockHeatsink ,,Max oc below was the best i could do with out any mods,Because of heat build up @ the end of 3Dmark06 I could not keep the card 100%stable . Although it idled @33c and was still under 70c loaded..
Max Oc Stock heatsink// No Volt Mods or Heatsink mods!!! Not 100%stable but i managed to sqeek by on a cold run .
GPU//800mhz
Shader//2010mhz
Memory//2000mhz
Stock Fan set 100% Idle 33c @22c room temp.
Stock Fan set 100% Load 68c @22c room temp.
Doing the MX-II Mod and Lap,, allowed me to max everything out including the Factory Vcore and Vmem ...All three cards i Modded last night ran exactly the same..For the most part they are consistant with a volt limit around 820-830mhz on Air,Depending on Ambiant temp.
This ballgame only cost a piece of sandpaper,,some tape and 1/4tube of MXII..Thats fricken cheap!
Way better Stock Style cooling with a simple Mod..I also run the Fan @100% with this Mod!..all cards Clocked so easy to 800mhzStock,,when Modded they did 820/907 Max with out any Extra Volts. I also wouldnt bother with the Qimonda above 2250mhz,,Samsung does 2300+.This Qstuff heats up at that speed in very little time and fails/Squares and pixels,,After prolonged use it will be permanate failure with Ram above 2250mhz!
Your Results may vary ,, you will need to use MXII ,,Nylon Washers and Lap/polish heatsink with a a single slot bracket or moddify your dual slot braket,, For the results i have obtained ..
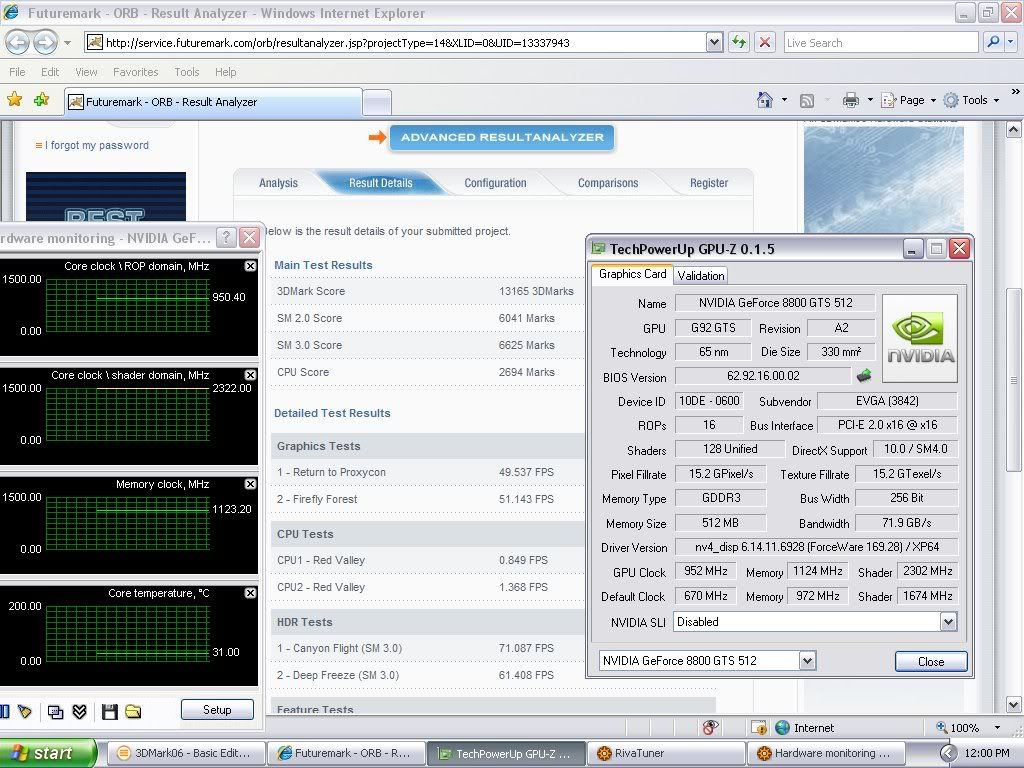
Volt Modded GPU,, 3Dmark06 @50c Max Heatsink Mod
@ 1.27volts max temp was 46c
Max Oc with Heatsink/Air was 907/2160//2250 and Water 950//2304//2250...There is very little gain to be had going from 870mhz to 950mhz+!
Happy Modding ,,
!gOtVolTage!


 ..........


Bookmarks