

Big bucks in the background.
Looking very nice.

![[XC] 2long4u is offline](images/statusicon/user-offline.png)
![Send a message via Yahoo to [XC] 2long4u](images/misc/im_yahoo.gif)
Big bucks in the background.
Looking very nice.
Free Omastar!Originally Posted by [XC] Kayin

[SIGPIC][/SIGPIC]
thanks guys! i made an sli pair of evaps today also. i like them much
sorry for the junk on my desk... just snapped a pic lol
mentally confused and prone to wandering


this one, lol
haha yeah its a pretty darn big bar... i payed way to much for it too. too bad jinu gave me a different source 5 days after i got this lol. o well :|
more pics of the 3 evaps i made today-
Thats how the sleeve goes on... hard to explain the mounting i have in mind but it should work perfectly for what im doing
If you can see how smooth inbetween the steps are, you can see a perfect reflection. i bet sandblasting will really help
SLI gpu evaps
all three from today...
I think next revision will have an extra step on the cpu evap.
Regards
mentally confused and prone to wandering
looks really great. Lets hope it will work as good too
Now to thin down those steps, add a spot for a snap ring, and a braze fill area, and hop me a PM

If you have a cooling question or concern feel free to contact me.
I didn't realise that, shame the X3 is a bit too heavy to ship over from there.
Going to make my own CNC Mill anyway, probably more expensive in the long run but way cooler and 5Axis - Can use a slitting saw horizontally for cutting bar stock to length.
Nice new evap design, would probably make it easier to braze if the cover had something to "sit" on.
Last edited by yngndrw; 06-08-2008 at 06:10 PM.
hey!
thin down the steps? do you mean the area in between where i cut? the copper part(ridge) is only 1.5 mm, and the space between is only 1/16". the base is very thin, after talking to a couple people who recommended it for core temps. base is about 2.5mm.
Btw... there is those thingsthe sleeve barely fits over the evap... it fits snug. the sleeve is about 1/16" shorter on each side then the evap. You braze the bottum, then flip and braze the top. due to the top being shorter, i test-fit a snapring and it works perfectly
andrew: yikes! great luck to you man. 5 axis cnc is very expensive. best of luck to you!
mentally confused and prone to wandering
Yep inbetween cut to make em taller. Does look like a bit of a pain to braze, but we'll see. Mind PM'ing me the normal details I ask for?
If you have a cooling question or concern feel free to contact me.
man something unpractical but really nice, would be a horizontal/vertical milling machine, with r8 threads in both but could fit a faceplate on the horizontal one and use it as a lathe
regards
mentally confused and prone to wandering
Nah, major change of plan. Going to go for an X3 sized mill (But with more mass and rigidity.) and convert it to CNC. Mind I do have all the electronics for 5 axises. Rotary table on rotary table ?
Done any more evap work ? :o
not saying you to do more just it would be a fun project when i have a house to my own and a decent salary(and tear down a couple walls for a huge shop)
what mill is it?
a heads up, the dyna-myte 2400 would be a perfect mill for doing enclosures and evaps, and they go quite cheap for a full cnc solution.
mentally confused and prone to wandering
Probably the XJ20, it's about the same size as the X3 but more rigid, more powerfull and (More importantly
Reason why the home made CNC is scrapped - I want to do some high speed machining, which requires rigidity. These mills are much more rigid than anything I could make. I just need to bolt on a high speed spindle and I'm set. At 138KG it's about on my limit as I've got to carry it up stairs, otherwise I would get the bigger XJ25.
Those dyna-myte 2400's are far too expensive for me. :P
next version of stepper evaps-

mentally confused and prone to wandering
Aren't you going to talk us through the changes and reasons behind them ?
Indeed, I look forward to reading those.
Good looking new design though. Excellent geometry.
Almost all of the changes are in the base, plus an additional step. Its VERY small
Lots of other changes- and i may add something for my personal use but imma keep that secret for now.
Lots of changes in mounting- ill post that when its done being drawn. Still playing with some additional ideas im drawing and throwing away, et cetera.
regards
mentally confused and prone to wandering
You might consider injection in the top and a hole to suction at the bottom. This way you have the refrigerant flowing through the core, which might get you a little better cooling and also you would not have to put the injection line through all of the layers.
Just my 2 cents.
Regards,
Philipp
BTW: Nice evaps
Phase Change Building - made in Germany
Single Stages
Oven brazed Evaps
LianLi V2000 Drop-In Chiller
SC21 Single Stage
i appreciate the advice!
The reason i have it like so is i *ASSUMED* and after talking with somebody from another forum who has tested various evaps, that having the liquid from the cap tube coming closest to the core gives a bit better core temps... No hard facts though here.
also- fixed a couple "oops" in the evap and posting a picture of the mounting kit... keep in mind this won't happen till my mill retrofit is completed.
sorry for no rendering- kerkythea is acting really weird.
regards
mentally confused and prone to wandering
Nice and what I've been wanting, Tey we have to talk now that I'm back.
If you have a cooling question or concern feel free to contact me.
Post pics of your mill setup!
#1
Pentium D805 @ 3.4Ghz on GA-945P-S3
2Gb OCZ Gold 800 with XP Professional SP3
Ati X1800XT
550W Antec TruPower in Antec Sonata II
#2
Core 2 Quad Q9550 on GA-EP45-UD3P
4Gb Corsair Dominator 1066 with Vista Ultimate SP1
Asus 4850 TOP
750W PC Power & Cooling in ????
There is not enough electrical oulets in my room.
Best TF2 Quote:
"tomtom92 : wtf the enemy has a base IN our base"
sure thing mate, im at my dads house ATM though so ill try to get you those pics 2maro.
regards
mentally confused and prone to wandering
i made a video but i ran out of battery mid-way through filming and can't find charger. sweet
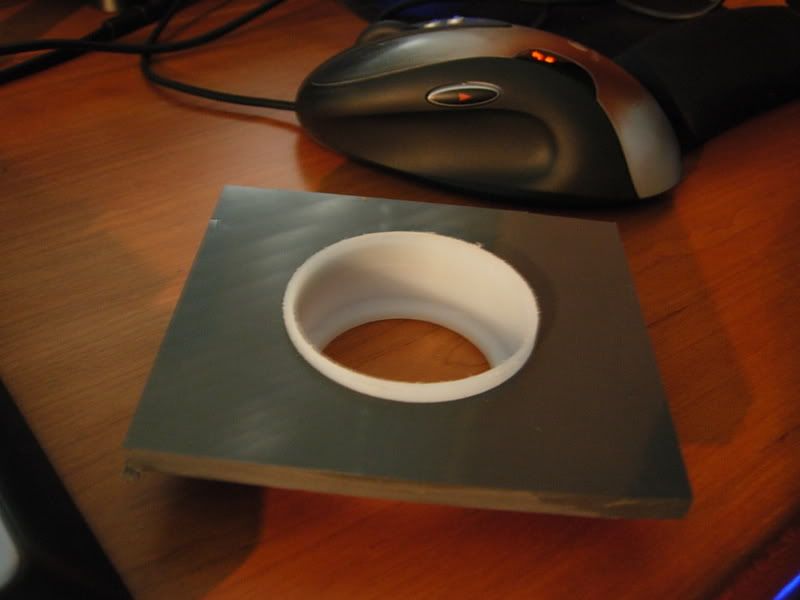
The inner lip pushes down on a snapring on a evap. This is just a test, materials and thicknesses, et cetera will most likely be changed. (i.e- the top mount is not suitable for a mounting... i just had it around just had to bore a hole in it)
the first prototypes of these will bel made with UHMWPE (is that it? might have to many letters) for the round part and PVC for the hold down part. will problalby switch to 3/8" later but this should work fine.
regards
Last edited by teyber; 07-30-2008 at 01:57 PM.
mentally confused and prone to wandering
Next 10 or so mounts i am thining will be this combination. i love prototyping
This is a pretty time efficient combination on the mountings (as compared to my earlier ones... the large 1 peice enclosures- NOT the ones from the first post) and SOMEWHAT cost efficient. (definately not like polyethylene lol ).
Im excited about this. no holes drilled in this yet sorry.
regards
mentally confused and prone to wandering
It isn't bad to breath them as long as you don't do it for a living.
Free Omastar!
[SIGPIC][/SIGPIC]
 Posting Permissions


 Reply With Quote


Bookmarks