-
Motherboard preperation and installation using a LN2/DI unit the clean and easy way
Here is another guide on how I prepare and insulate my motherboards when installing a ln2/di unit. Obviously there are many ways this can be done, some more involved than others. It doesn't have to be overdone, messy, or complicated. Some key things to remember are to isolate and seal off the socket area from outside air both on the top and bottom of the motherboard. Here is how I do it...clean and easy and I can't remeber the last time I have had a mobo die on me due to socket condensation, so most importantly THIS WORKS!
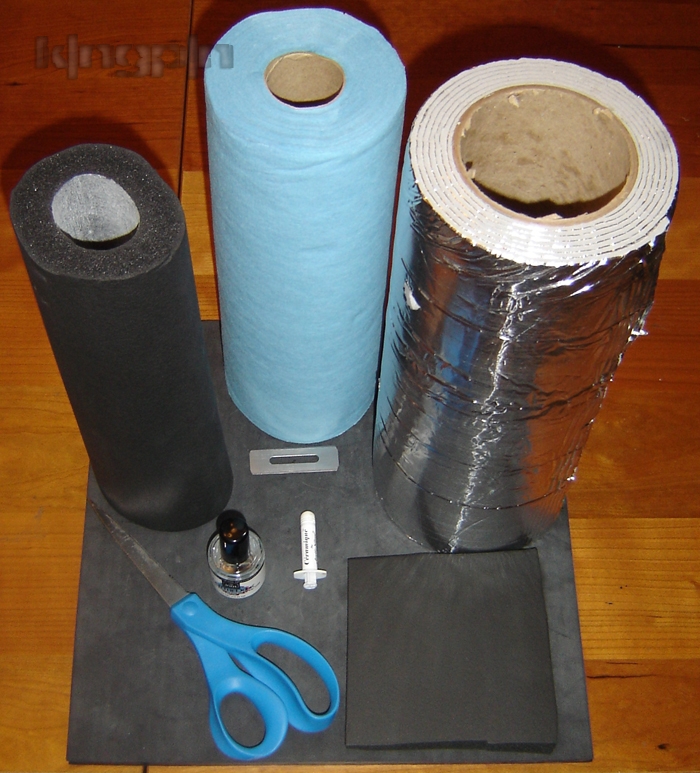
To start you will need these materials:
Pipe wrap insulation with the foil (lowes or home depot), round tube installation 1/2 inch 3/4 inch, scissors and a sharp blade, clear nail polish, "shop rags" or other heavy duty paper towel, and some thermal interface material (I like ceramique the best)
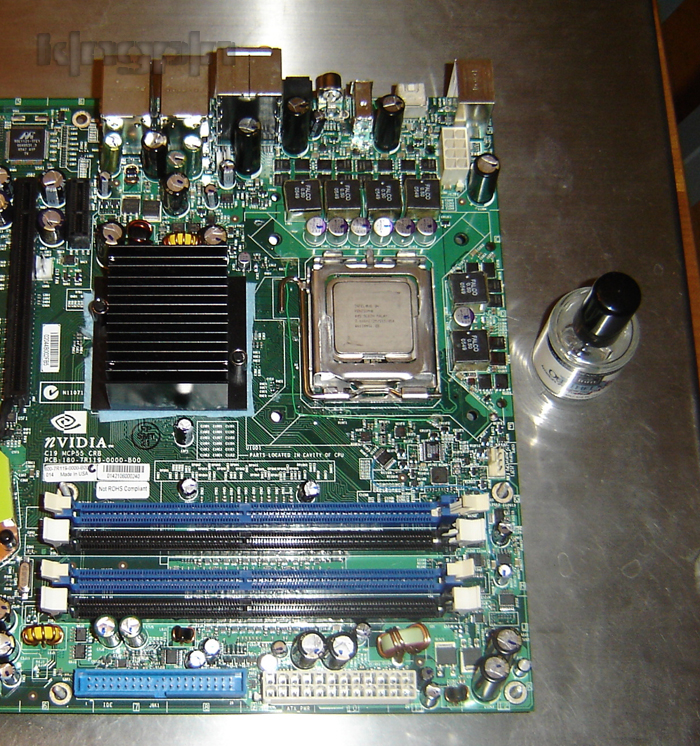
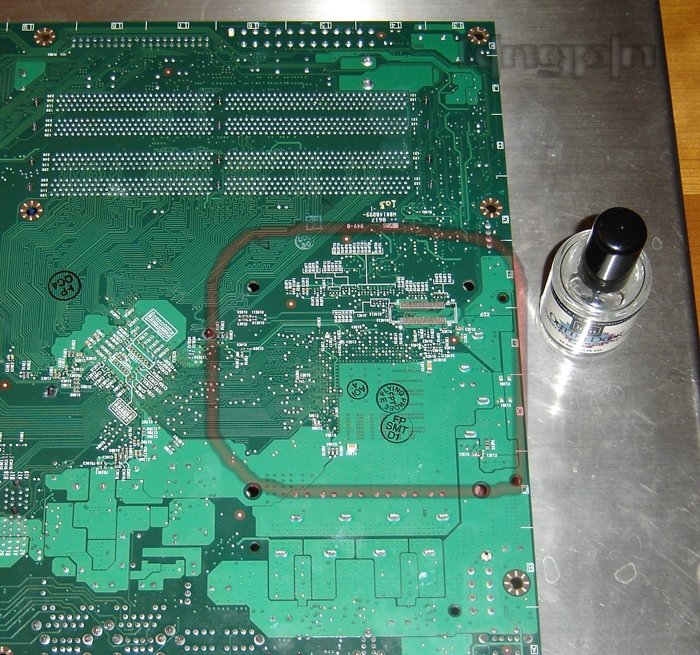
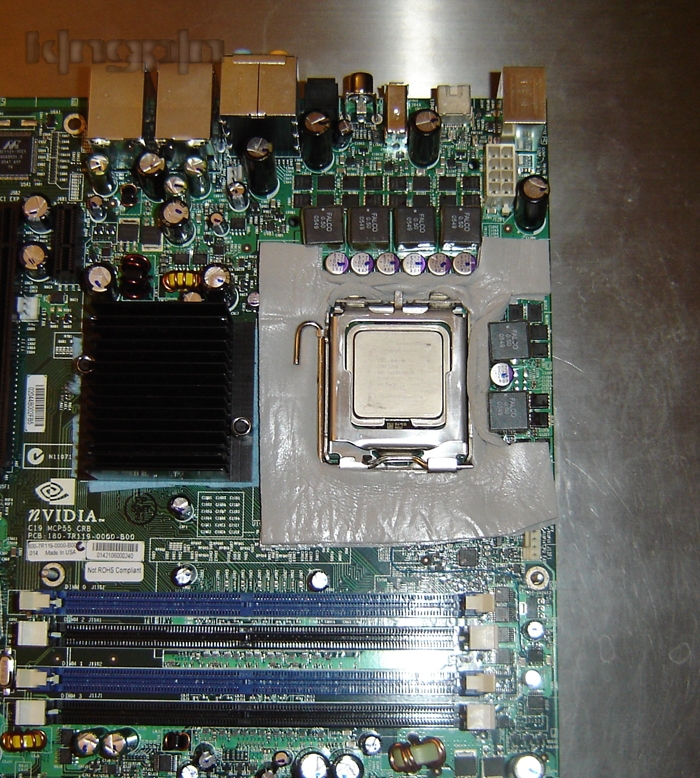
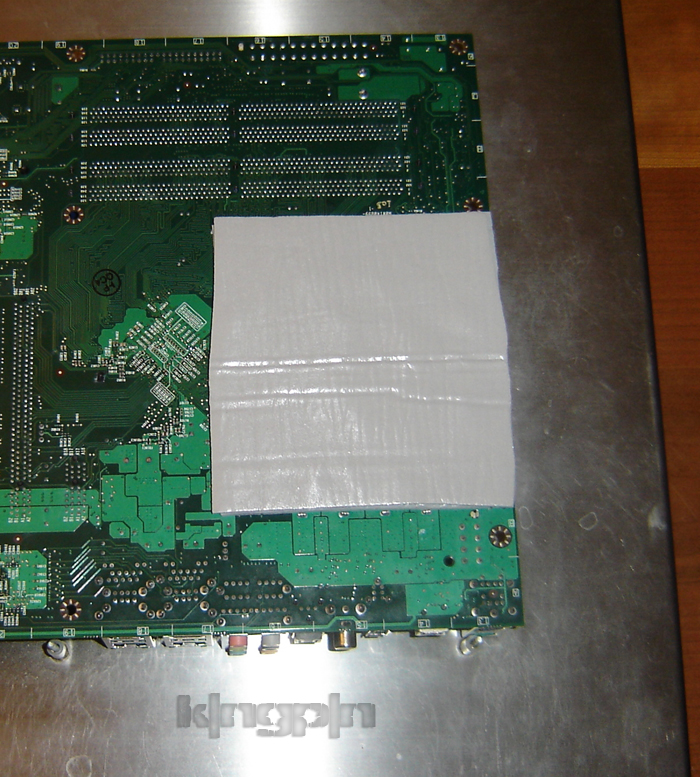
Now take your motherboard and apply the clear nail polish to all surface mount components all around the socket area, both top and bottom of the mobo. I marked off the bottom pic to give a good idea of the size of the area that needs to be considered for this. I will be using a 590sli lga775 board for this example:
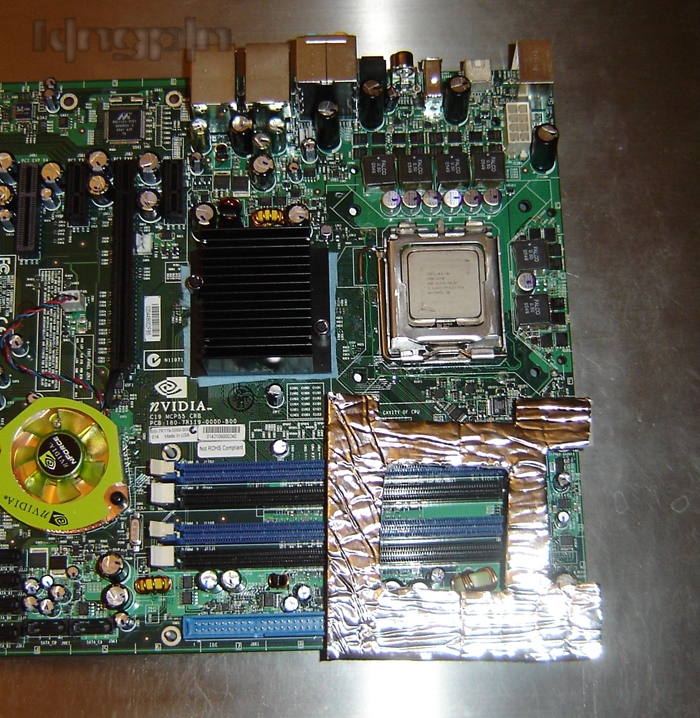
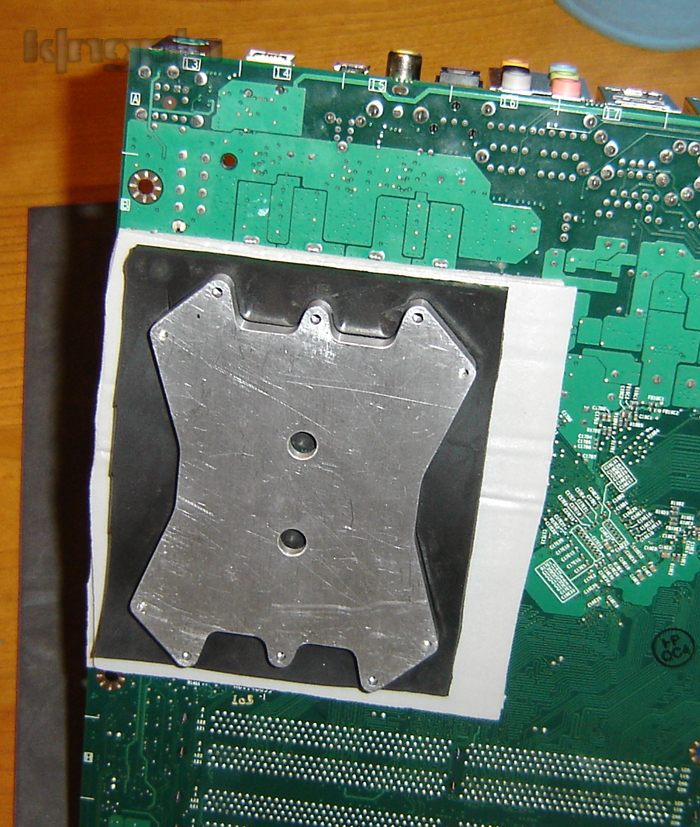
While your waiting for the polish to dry, take your foil pipe wrap and cut out 2 gasket pads which will be used to seal off air from coming into the socket between surface mount componenets around the socket. You will make 2 indentical gaskets and stick them on top of each other, then stick them down and use a small thin tool to push the double gasket down in between the caps, inductors, and socket like in the second pic here:
Do the same for the bottom of the mobo making 2 pieces and sticking them together, then sticking them on the backside of the mobo:
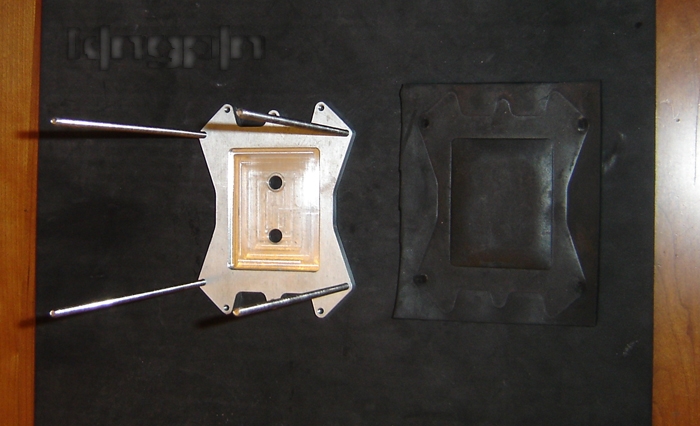
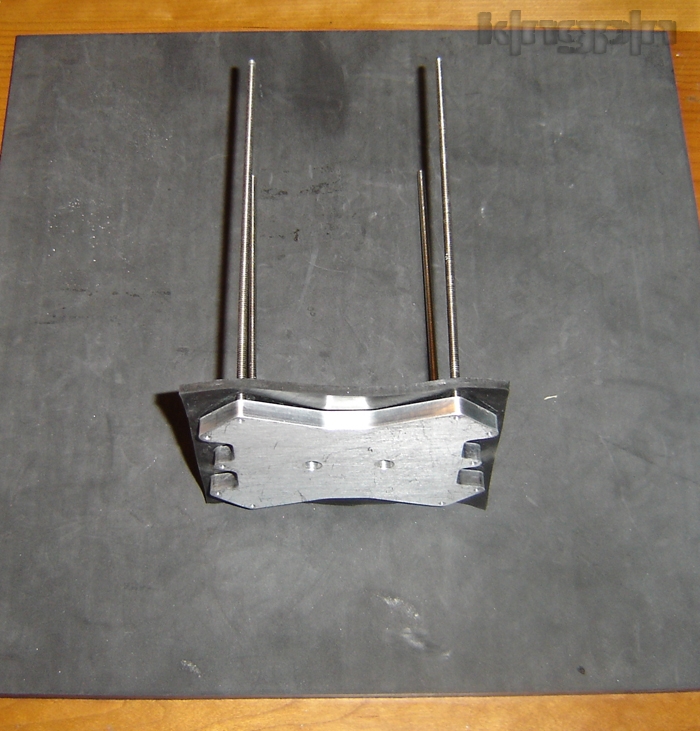
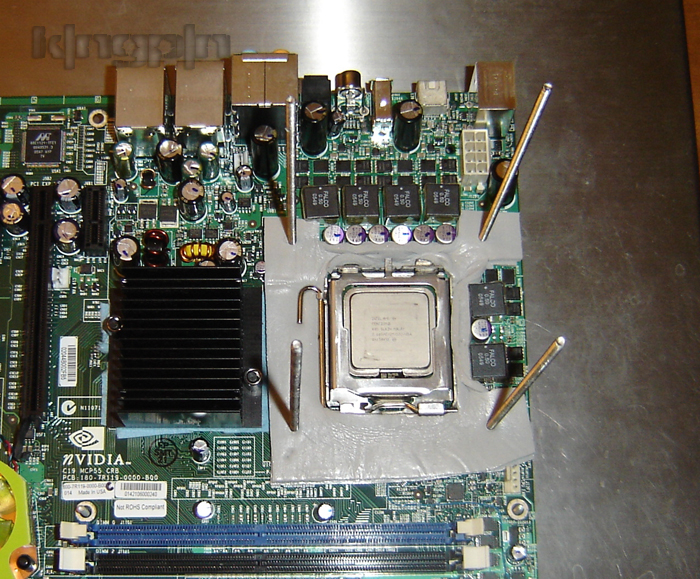
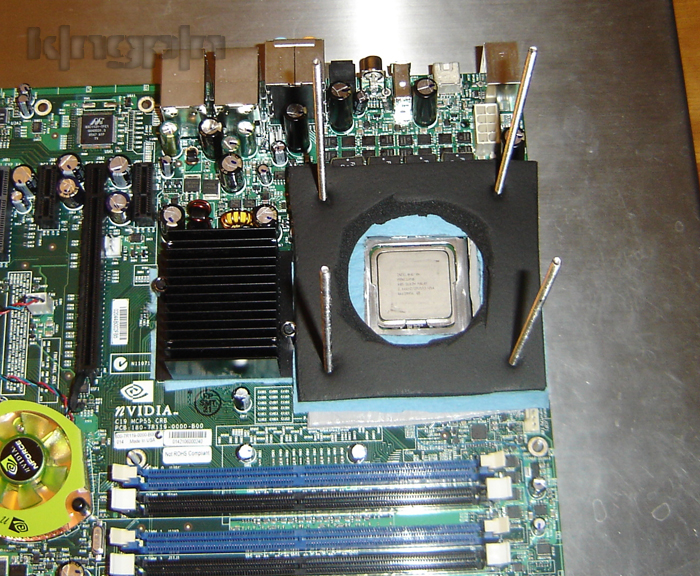
Now depending on what cpu unit you are using the next few steps may vary slightly, but will still be just about the same procedure for mounting most units. Take your backplate and install the support rods for the container as well as the insulating piece of rubber that will seal off the backside socket area and prevent the aluminum plate from shorting out the mobo:
Now slide it through the mobo from the bottom and flip the mobo over to finish the installation:
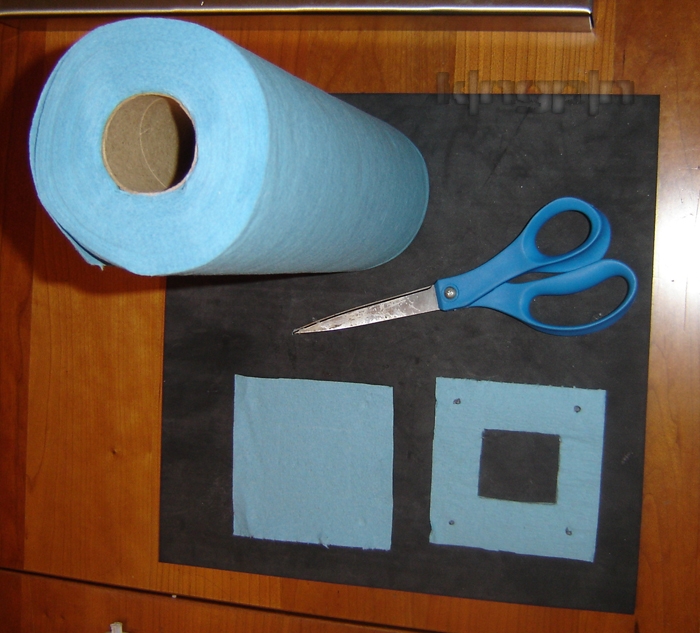
Now we will make 2 more socket gaskets out of the shop rags that will catch and absorb any drips or moisture that might occur around the cpu if there is air getting through somewhere that you can't see. Stack them and slide them down the rods. These shop towels or any other heavy duty paper towel should be on every benchers shelf. They are excellent at wicking away moisture when it arises. I use them every time I bench in various ways:
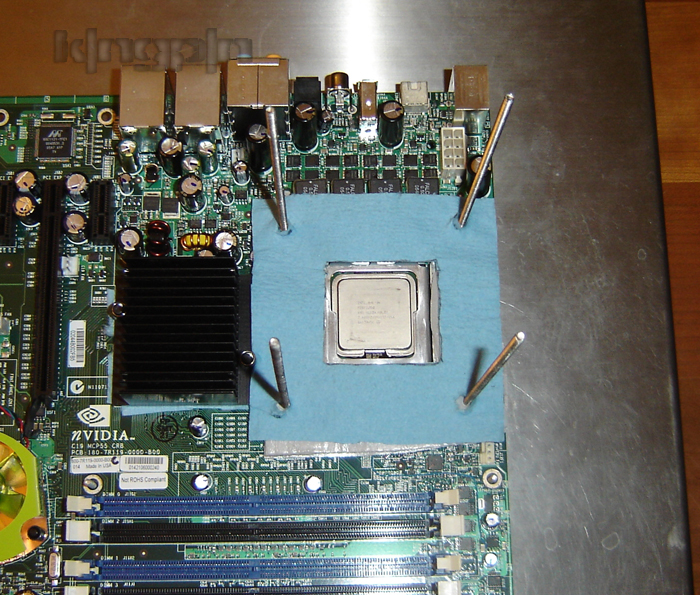
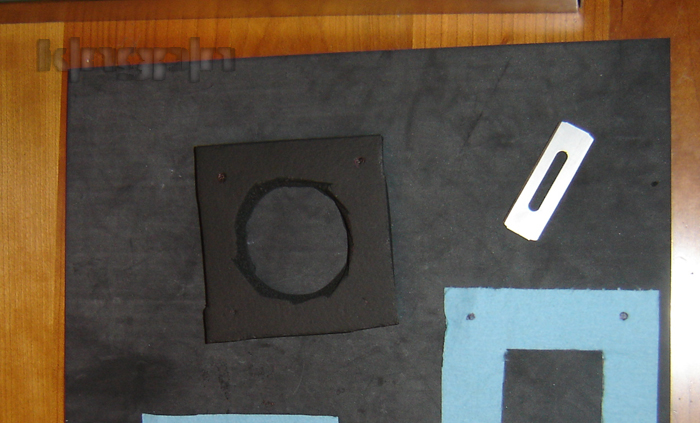
Now we will make the main foam gasket that will surround the socket. Use the 1/2 sheet foam insulation for this step and center the hole for the unit right over the socket and just make sure the hole doesn't exceed the diameter of you cpu unit as we want to minimize any air space:
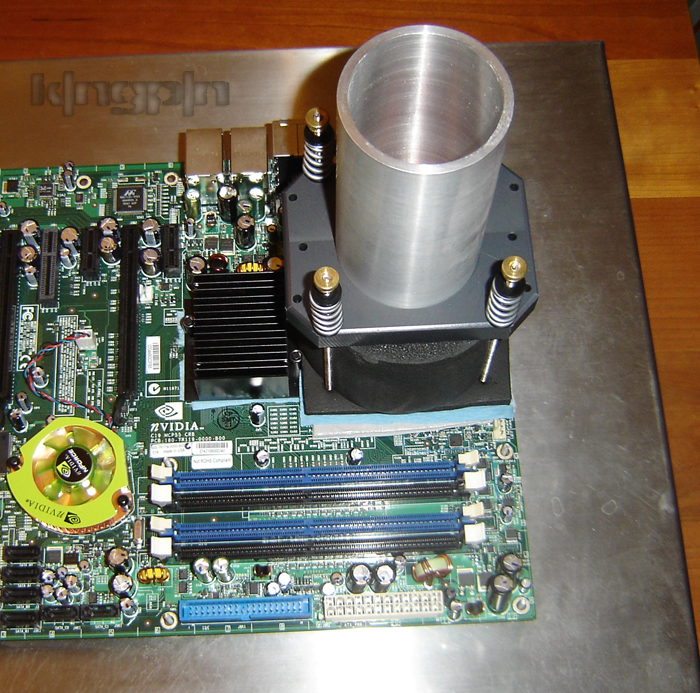
Time to install your cpu unit finally. Cover the speader of the chip with your tim of choice, and set your cpu container down on the center of the chip:
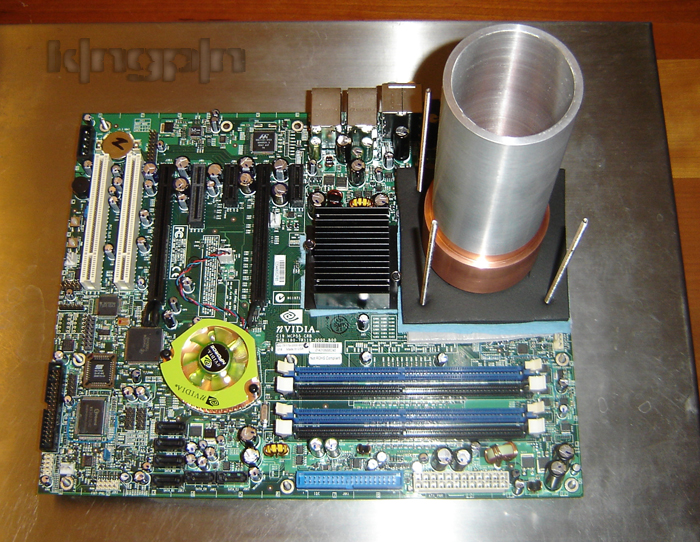
Now take your round pipe insulation that hopefully matches the outer diameter of your unit, and cut the lower piece that will go under the cpu holddown bracket. Make it oversized vertically, so when you slide the holdown bracket on top, it squeezes it down and compesses the foam down on the mobo as to seal off the socket area fom airflow:
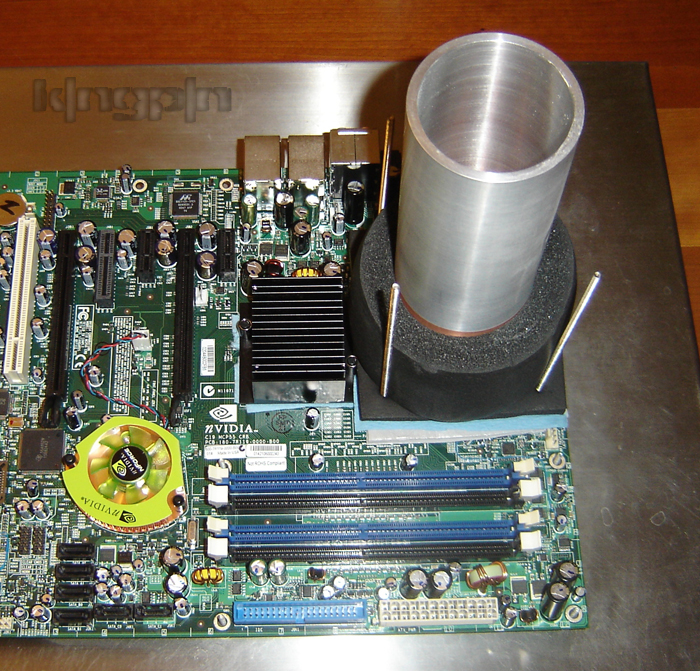
Now slide down your hold down bracket and install the mounting hardware accordingly. In this case put down your shoulder spacers, then springs, top shoulder spacers, and finally thumbnuts:
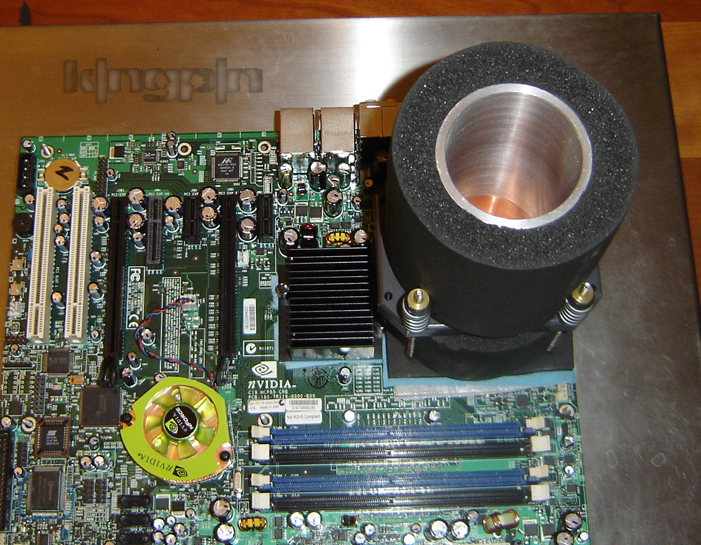
Almost ready to bench now  . Crank down the bracket nice and tight, add your top piece of insulation and your ready to go:
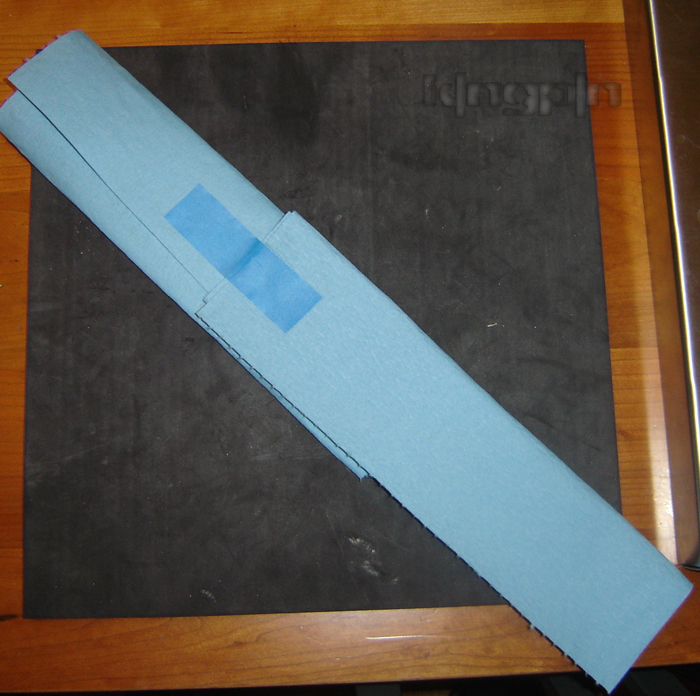
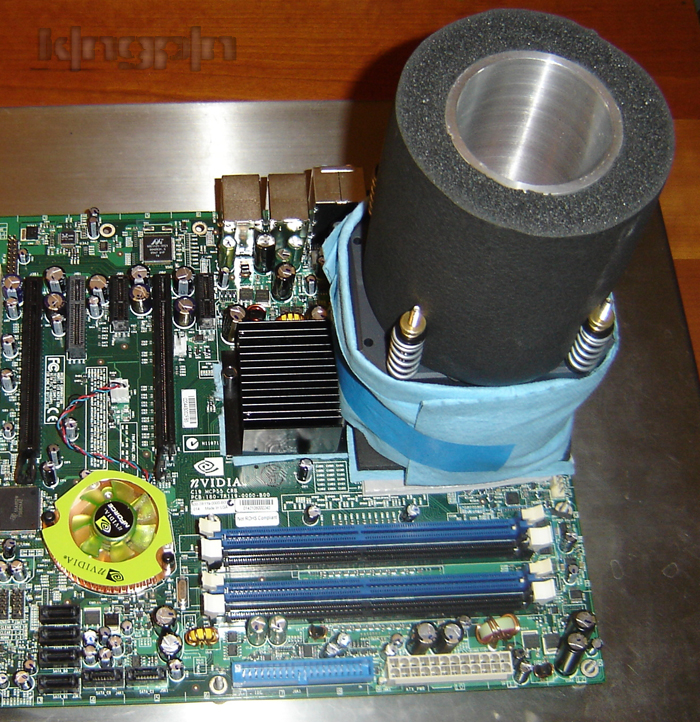
As a final step I will take some paper towel and fold it for a wrap that goes around the lower insulation under the hold down. It willl "catch" any run-off or condensation that forms on the hold down or outer insulation and prevent it from ever reaching the mobo:
Happy benching 
 Posting Permissions
- You may not post new threads
- You may not post replies
- You may not post attachments
- You may not edit your posts
-
Forum Rules


 Reply With Quote
Bookmarks