MMM
Results 1 to 18 of 18

Thread: Linking Fans for Radiator...

  1. #1
    Registered User
    Join Date
    May 2007
    Posts
    34

    Linking Fans for Radiator...

    Hi is there a way to link 3 yate loon fans together so that they can be powered by a single 3 pin connector..? The YL fans i have are the ones with both the 4pin molex connector and the 3pin fan connector...i'll be connecting it to a Zalman Multi fan controller (ZM-MFC1 Plus)...I know i'll need to get rid of the 4 pin connectors, thats not a problem, i don't need em...

  2. #2
    Xtreme Enthusiast
    Join Date
    Feb 2007
    Posts
    790
    Hook them up in parallel, shouldn't be hard at all if you've got a soldering iron and a wire stripper.
    Quote Originally Posted by dengyong View Post
    Started life as a FTW and ended up as a WTF.

  3. #3
    Registered User
    Join Date
    May 2007
    Posts
    34
    hook them up in parallel as in using the 4pin or taking apart the entire wiring and just link them by joining the wires and closing it with a 3pin connector..? You can prob tell i've never done this before...thanks for your fast reply..

  4. #4
    Xtreme Mentor
    Join Date
    Feb 2007
    Posts
    2,588
    You join the black and red wires up in parallel from all three fans but not the yellow rpm wire. The yellow from one fan only is joined to the plug.
    .

    V-Twin WIP


    Q6600 G0
    EVGA680i
    4GB OCZ
    8800GTX
    LC - Dual loops.
    Dual 20.1 monitors.

  5. #5
    Xtreme Enthusiast
    Join Date
    Feb 2007
    Posts
    790
    Poopcakes, forgot about how the damn fan is wired.

    Hook them up with the 4-pin pass-through that's on the fan cable, then buy a 3-pin fan connector (I think female) to stick to the MFC-1 side, 4-pin female (I think) to stick to the fan side, and join the whole shebang together with wires.

    At this point, I'd usually do a quick MS Paint sketch, but my mom won't STFU so I'll do it when she's gone tomorrow.
    Quote Originally Posted by dengyong View Post
    Started life as a FTW and ended up as a WTF.

  6. #6
    Xtreme Mentor
    Join Date
    Feb 2007
    Posts
    2,588
    I'm soldering up three fans now. I'll put a pic up shortly.

    Edit
    Here's how I did these with the three pin plug. I can still rejoin the molex wiring if wanted in the future.

    Last edited by Jedda; 09-17-2007 at 10:59 PM.
    .

    V-Twin WIP


    Q6600 G0
    EVGA680i
    4GB OCZ
    8800GTX
    LC - Dual loops.
    Dual 20.1 monitors.

  7. #7
    Xtreme Mentor
    Join Date
    Feb 2007
    Posts
    2,588
    Or make an extension piece like this.

    .

    V-Twin WIP


    Q6600 G0
    EVGA680i
    4GB OCZ
    8800GTX
    LC - Dual loops.
    Dual 20.1 monitors.

  8. #8
    Xtreme Addict
    Join Date
    May 2007
    Location
    New York City
    Posts
    2,065


    hope it helps.
    "The ultimate measure of a man is not where he stands in moments of comfort and convenience, but where he stands in times challenge and controversy."
    Dr. Martin Luther King Jr.

    DIY: Self Clinching Nuts

    Canon EOS 7D | Tokina 12-24mm f/4 | Canon EF 24-105 f/4 L | Canon EF 70-200 f/2.8 L IS Mk II | Canon EF 35mm f/1.4 L | Canon EF 400mm f/5.6 L | Canon EF 100-400mm f/4-5.6 L

  9. #9
    Moderator
    Join Date
    Aug 2007
    Location
    Back and forth between Florida and Maine
    Posts
    4,097
    Getting ready to give this a try ... a silly question, perhaps - when I snip off the yellow wire on fans 1 and 2 (and the 4-pin connectors on all of the fans), do I need to do anything special to the ends of the wires (the ones that are no longer being used)?

  10. #10
    Xtreme Member
    Join Date
    Feb 2007
    Posts
    126
    If you've got the same fans as me, each fan comes with two 4 pin connectors and one 3 pin connector, so you don't have to do anything.

    Just connect all the fans together using the 4 pins. Then pick (at random) any of the 3 pins connectors and plug it into your fan controller. Easy.
    Lian-Li PC-Q11W mITX - Core i5 4590 - MSI Z97I Gaming AC - 8GB DDR3 RAM - Seasonic 460W fanless - Intel SSD 520 240GB - 2x WD 4TB HDD
    Cooling: XSPC AX480 Quad rad - 4x NB-eLoop B12-1 @ 650 rpm - EK-D5 Vario X-RES 140 - EK-Supremacy CPU block - EK GPU full cover block
    Video: nVidia 670 GTX - Achieva Shimian QH270-IPSB @ 2560x1440 - Ergotron LX LCD arm | Audio: Yamaha RX-V467 receiver (via HDMI) - Tannoy Mercury F1 5.1 speakers

  11. #11
    Moderator
    Join Date
    Aug 2007
    Location
    Back and forth between Florida and Maine
    Posts
    4,097
    I understand how to hook up the fans ... but I want to sleeve them and eliminate the excess connectors, while also using only one point on the fan controller for 3 fans.

  12. #12
    Xtreme Member
    Join Date
    Sep 2007
    Posts
    146
    Quote Originally Posted by kinghong1970 View Post


    hope it helps.
    That's a nice little guide

    Quote Originally Posted by shazza View Post
    I understand how to hook up the fans ... but I want to sleeve them and eliminate the excess connectors, while also using only one point on the fan controller for 3 fans.
    Follow king's diagram. Get some sleeving and sleeve up the parts with heatshink at the ends. Where it splits into a Y, you might need to do those separately.

    Then just plug it into your fan controller. Another way would be Jedda's suggestion which is easier where you can just connect them all via molex adapters and daisy chain them into one leading into your fan controller.
    System
    Intel Core 2 Quad Q6600 G0 Lapped @ 3.4 Ghz
    4GB G.Skill Pi Black DDR2-800
    Asus P5K-Deluxe with WiFi
    ATi Sapphire 4870
    Creative X-Fi XtremeMusic
    Corsair HX620 620W
    Lapped Thermalright Ultra-120 Extreme

  13. #13
    Registered User
    Join Date
    Aug 2007
    Posts
    98
    I am with shazza and the question I think is still open.

    Once the yellow wires have been clipped and the other wires from the 4pin connectors are removed...since you can't remove them completely...what if anything special needs to be done to the ends of the wires. can they just be free floating? do they need to be capped? other?

  14. #14
    Moderator
    Join Date
    Aug 2007
    Location
    Back and forth between Florida and Maine
    Posts
    4,097
    Yep, kohlersc - that's my question. I'm probably just making it too complicated, but I've read several guides and looked at other pics ... just not found any that show what happens to the "extras."

    I did just manage to hook two fans up and get them working okay, altho my sleeving/heatshrink skills need some serious improvement

  15. #15
    Moderator
    Join Date
    Aug 2007
    Location
    Back and forth between Florida and Maine
    Posts
    4,097
    Google is my friend. A bit of searching brought up this brilliant guide by Patriote: http://www.hardwarecanucks.com/guide...k-warning.html

    (I hope it's okay to post a link to another forum).

    I know this stuff is second hand to many of you, but to some of us just starting out at trying to do more than "plug and play," it's not that simple!

  16. #16
    Xtreme Member
    Join Date
    Sep 2007
    Posts
    146
    Heh that's a pretty good guide (especially the pictures) for sleeving.
    System
    Intel Core 2 Quad Q6600 G0 Lapped @ 3.4 Ghz
    4GB G.Skill Pi Black DDR2-800
    Asus P5K-Deluxe with WiFi
    ATi Sapphire 4870
    Creative X-Fi XtremeMusic
    Corsair HX620 620W
    Lapped Thermalright Ultra-120 Extreme

  17. #17
    Xtreme Mentor
    Join Date
    Feb 2007
    Posts
    2,588
    Quote Originally Posted by kohlersc View Post
    I am with shazza and the question I think is still open.

    Once the yellow wires have been clipped and the other wires from the 4pin connectors are removed...since you can't remove them completely...what if anything special needs to be done to the ends of the wires. can they just be free floating? do they need to be capped? other?
    I always leave a stub of the yellow wire, so it can be resoldered to if wanted in the future. I don't bother but you could put a short heat shrink on the end.
    I bought a supply of 3-pin black plugs and the metal fittings, so can just put them on, but if you dont have those and the clamp pliers, just solder together. Cut the 3-pin off with an inch or so, put all the sleeving and heat shrink onto the wires, holding them back with a peg or clamp. Then solder the 3-pin wire stubs on to your fan wires.

    I
    .

    V-Twin WIP


    Q6600 G0
    EVGA680i
    4GB OCZ
    8800GTX
    LC - Dual loops.
    Dual 20.1 monitors.

  18. #18
    Moderator
    Join Date
    Aug 2007
    Location
    Back and forth between Florida and Maine
    Posts
    4,097
    Thanks, Jedda - that helps.

    Well ... I did it! Here's my first attempt:


    Didn't heatshrink the long piece yet, as I have to hook in the RPM wire. But, I wanted to see if it would work. Ta Da ...


    I think the next one will go faster 
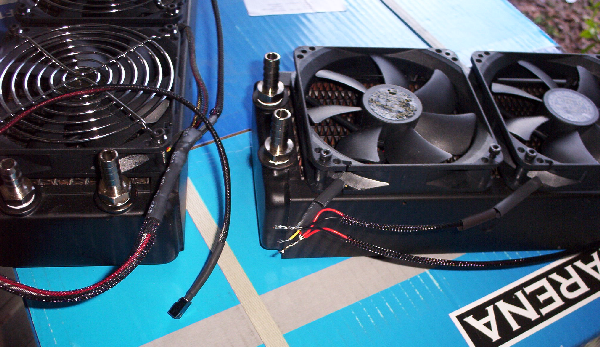
and look better. I used the green sleeve because I couldn't get the black stuff I had over the wires. My connections are soldered. It helps to have a husband who is a model train making guru who has all the tools I needed!

Bookmarks

Bookmarks

Posting Permissions

  • You may not post new threads
  • You may not post replies
  • You may not post attachments
  • You may not edit your posts
  •