MMM
Page 1 of 3 123 LastLast
Results 1 to 25 of 51

Thread: [Work Log] PC-P50 - essence{red}

  1. #1
    Registered User
    Join Date
    Apr 2010
    Posts
    44

    [Work Log] PC-P50 - essence{red}

    essence{red}


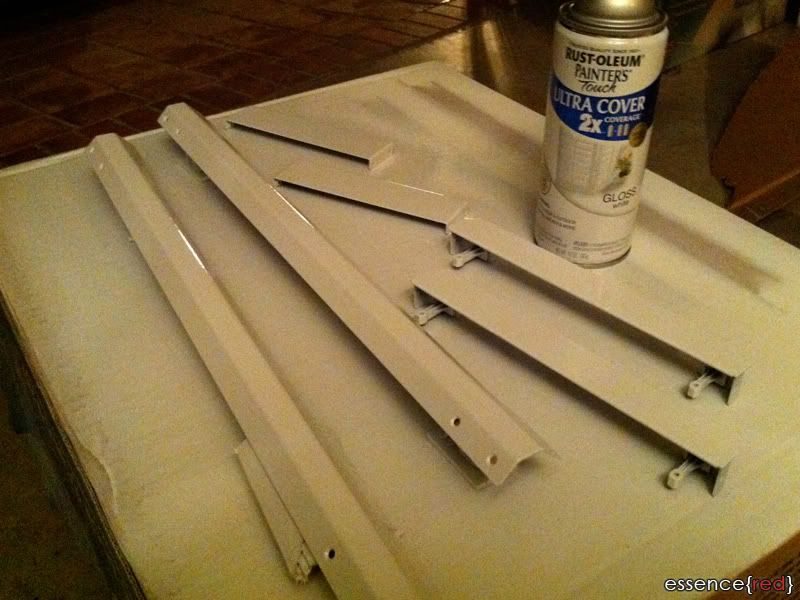
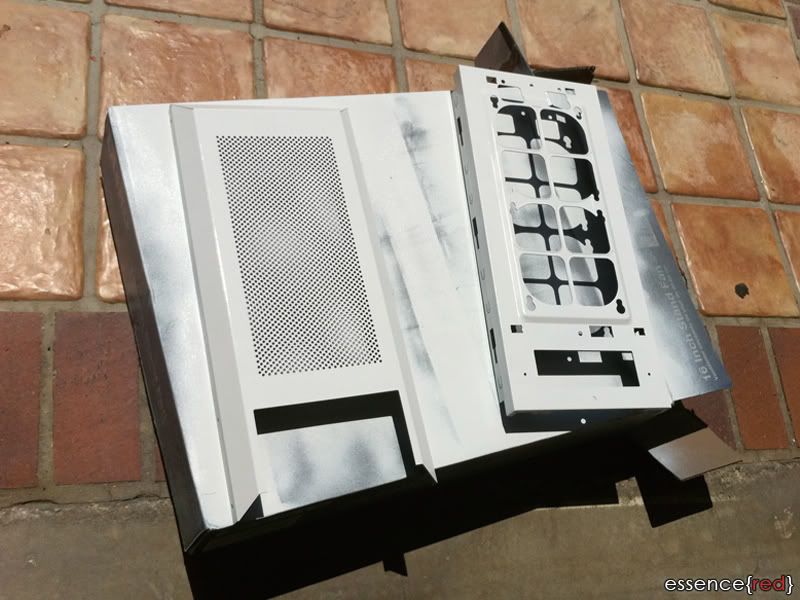
    Hey all. I'm starting a new build using the hardware and water cooling parts from my old build. Most of the hardware will be the same, but I'm going to change some of the water cooling parts. I'll try to update as often as I can. The color scheme is going to be black, white and red. The tubes will be red, while case its self will be black and white.

    Hardware:
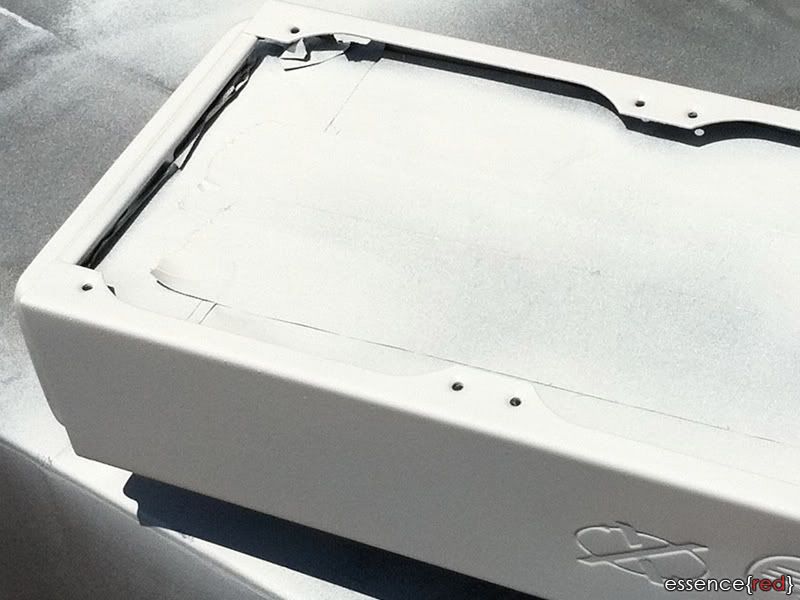
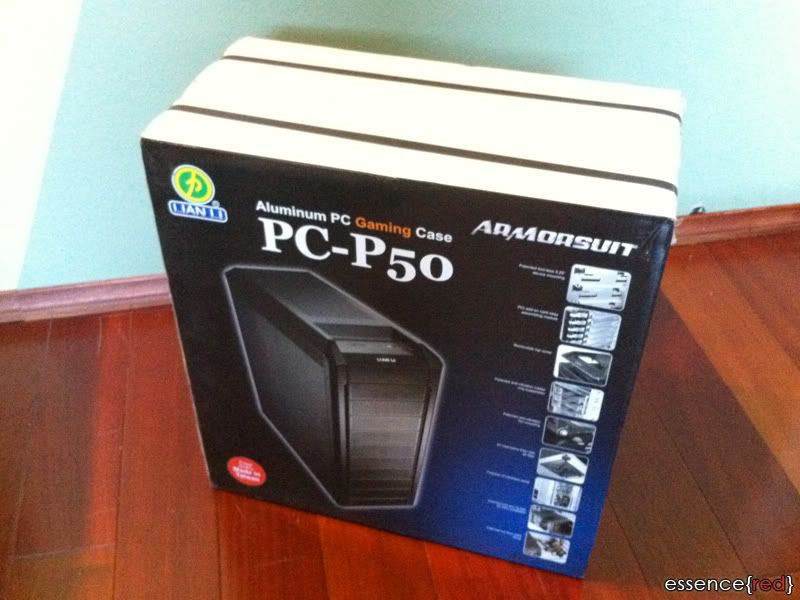
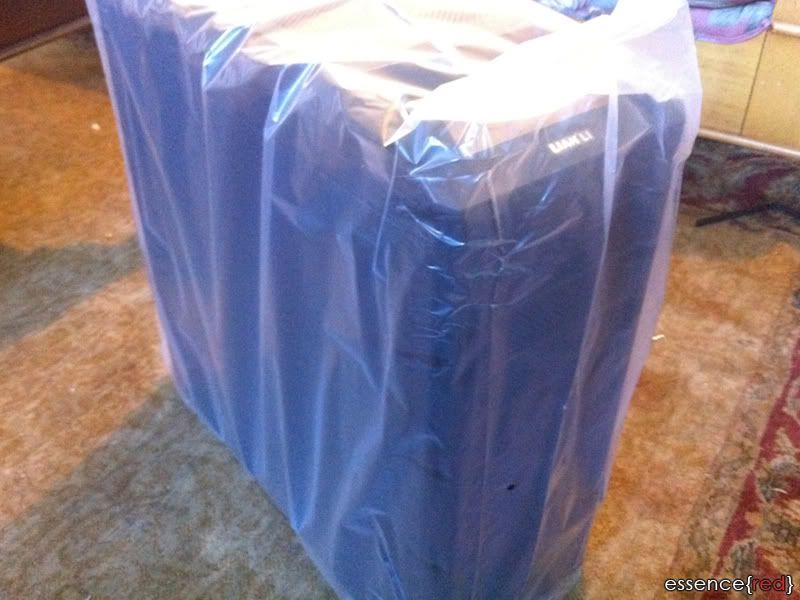
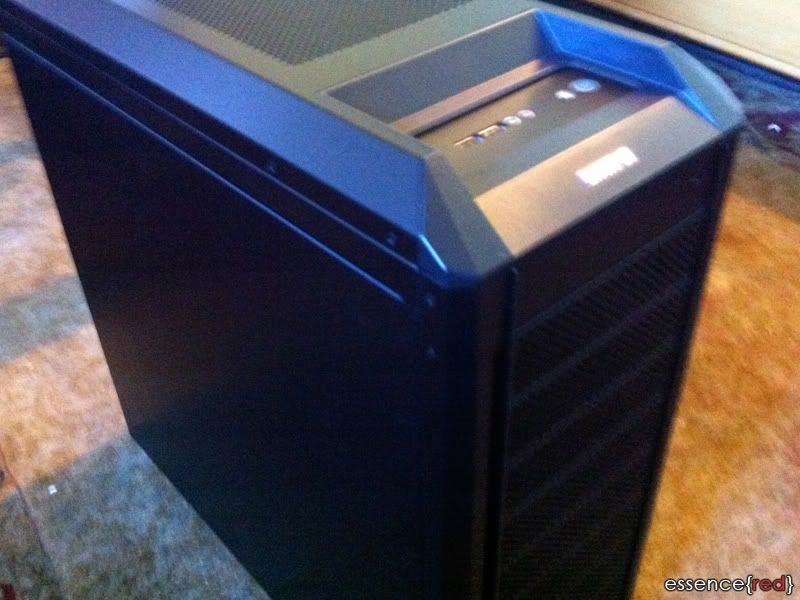
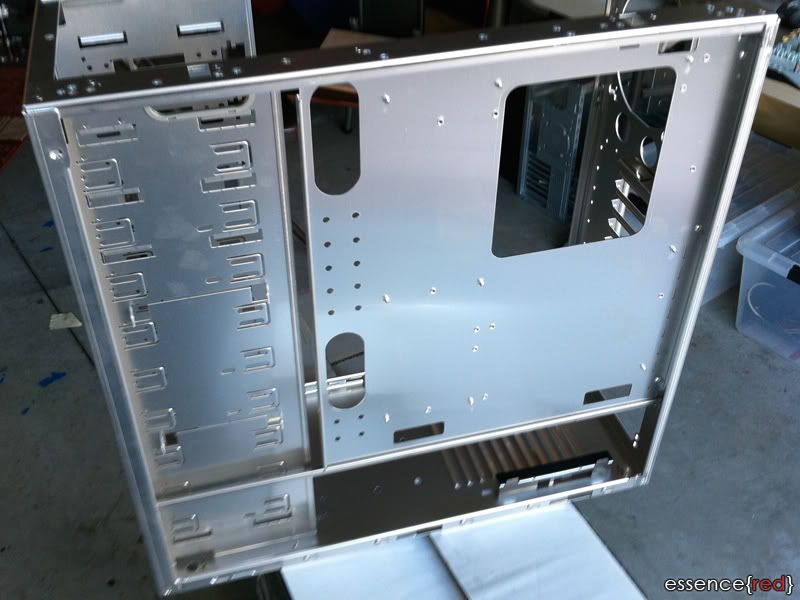
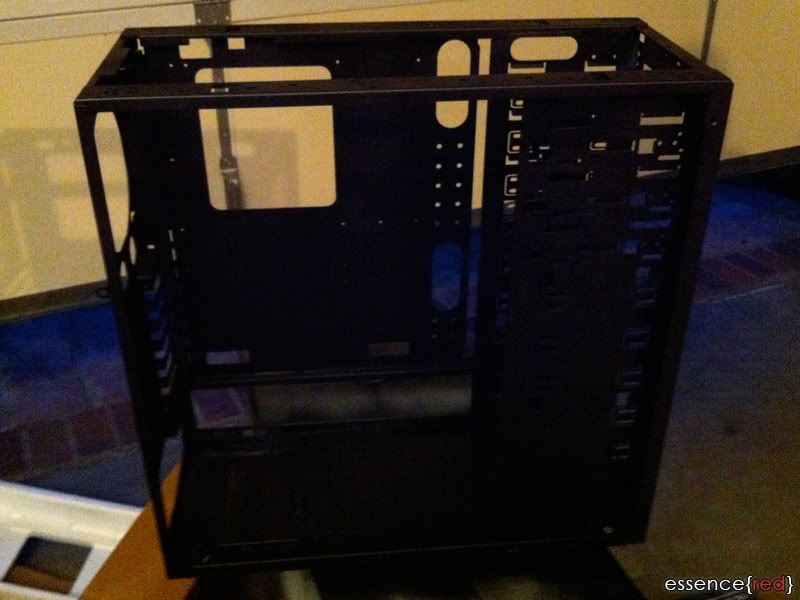
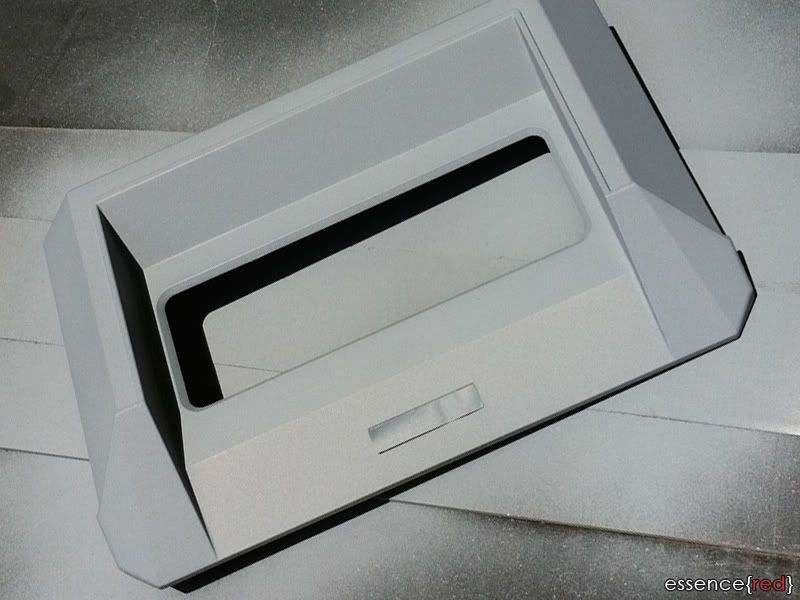
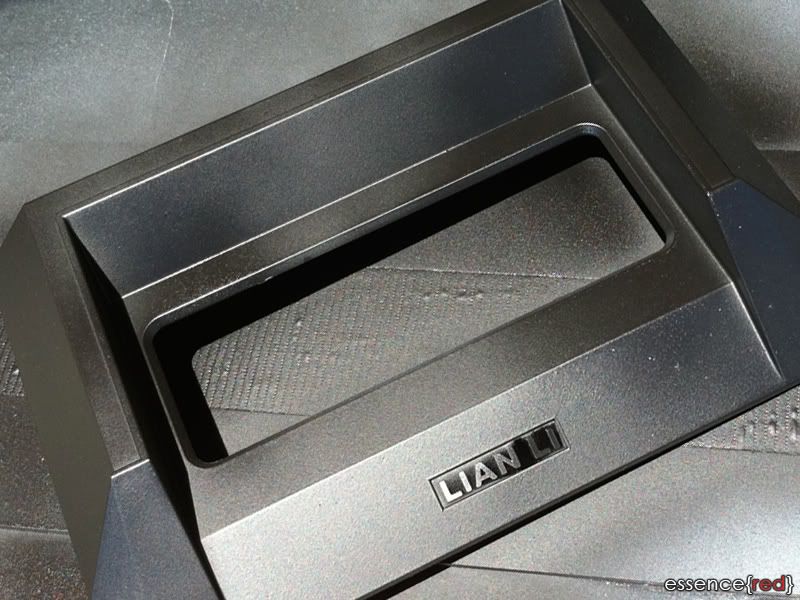
    • [Case] ~Lian Li~ PC-P50
    • [MoBo] ~EVGA~ X58 3-Way Classified SLI
    • [CPU] ~Intel~ Core i7 980X
    • [GPU] ~XFX~ ATI 5970 (Crossfire x2)
    • [RAM] ~Corsair~ Dominator GTX2 (2GB x3: 6GB)
    • [SSD] ~Intel~ X25-M 160GB
    • [HDD] ~WD~ 1TB
    • [PSU] ~Silverstone~ ST1200 1200W

    Water Cooling
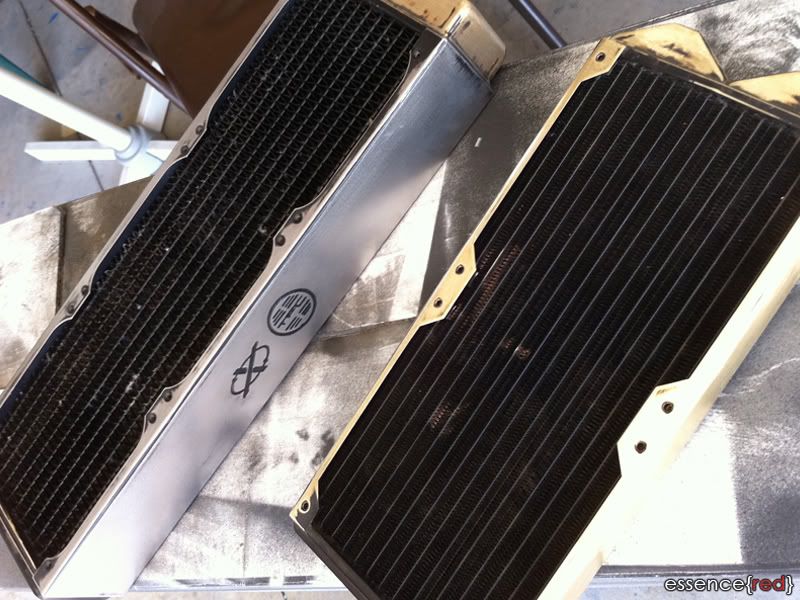
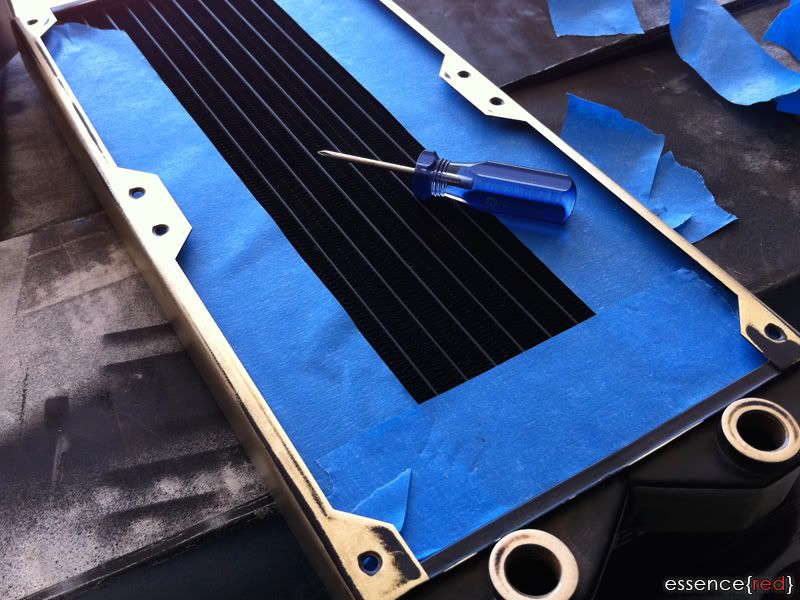
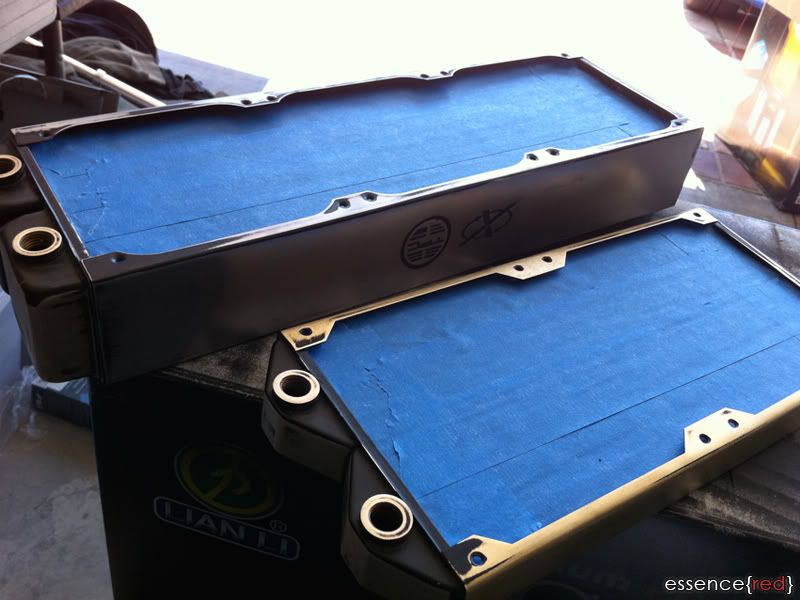
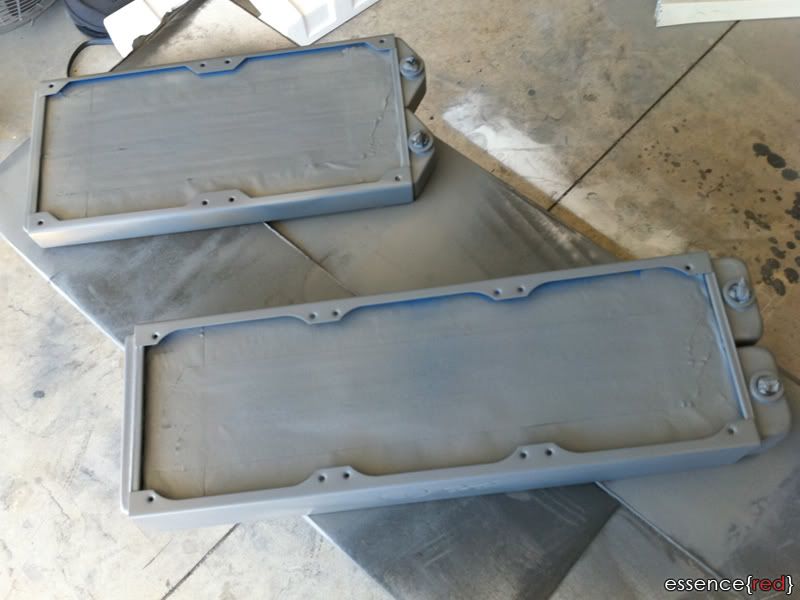
    • [Rad] ~Feser~ XChanger (120mm x3)
    • [Rad2] ~Koolance~ Dual (140mm x2)
    • [CPU] ~EK~ Supreme LT
    • [MoBo] ~Mips~ EVGA X58 Classified Mosfet and Triplechip COOLER POM Black
    • [GPU] ~EK~ Radeon 5970
    • [Res] ~EK~ MultiOption 4 Port
    • [Pump] ~Swiftech~ MCP655 (x2 w/ EK-D5 Dual Top)
    • [Tube] ~Tygon~ 3603 (1/2” ID : 3/4” OD)
    • [Fluid] ~Feser~ Feser One UV Red
    • [Fittings] Bitspower

    Other
    • [Sleeving] ~MDPC~ Sleeving


    Last edited by CroyAlore; 10-26-2010 at 10:07 AM. Reason: Updated Pictures

  2. #2
    Xtreme Enthusiast
    Join Date
    May 2009
    Posts
    952
    Looking forward to this....so is it going to be white and black or black and red?

  3. #3
    Registered User
    Join Date
    Apr 2010
    Posts
    44
    Quote Originally Posted by mav2000 View Post
    Looking forward to this....so is it going to be white and black or black and red?
    Sorry, I forgot to mention the color scheme. XD

    The tubes will be red, and the case its self will be red.

    EDIT: I edited the post with the color scheme.
    Last edited by CroyAlore; 08-25-2010 at 01:37 PM.

  4. #4
    Xtreme Member
    Join Date
    Aug 2010
    Location
    San Jose, California
    Posts
    112
    Nice job with the paint. Especially the rads, they came out great.

  5. #5
    Registered User
    Join Date
    Apr 2010
    Posts
    44
    Update:

    The finished case:


    The radiator with its new coat of paint:


    Some new, as well as some old, water cooling parts:


    Last edited by CroyAlore; 10-11-2010 at 05:33 AM. Reason: Updated Pictures

  6. #6
    Xtreme Enthusiast
    Join Date
    May 2009
    Posts
    952
    So is the plan to have a 240 on top and a 36°c in the front bays? Will there be enough clearance on the top for the mother board?

  7. #7
    Xtreme Enthusiast
    Join Date
    Oct 2004
    Location
    Canada
    Posts
    763
    The paint on the case turned out well, looks like a great start. !
    Lian Dream: i7 2600k @ 4.7Ghz, Asus Maximus IV Gene-z, MSI N680GTX Twin Frozr III, 8GB 2x4GB Mushkin Ridgeback, Crucial M4 128GB x2, Plextor PX-755SA, Seasonic 750 X, Lian-li
    HTPC: E5300@3.8, Asus P5Q Pro Turbo, Gigabyte 5750 Silentcell, Mushkin 2GBx2, 2x 500gb Maxtor Raid 1, 300gb Seagate, 74gb Raptor, Seasonic G series 550 Gold, Silverstone LC16m

    Laptop: XPS15z Crucial M4
    Nikon D700 ~ Nikkor 17-35 F2.8 ~ Nikkor 50mm F1.8
    Lian Dream Work Log
    my smugmug
    Heatware

  8. #8
    Registered User
    Join Date
    Apr 2010
    Posts
    44
    Quote Originally Posted by mav2000 View Post
    So is the plan to have a 240 on top and a 36°c in the front bays? Will there be enough clearance on the top for the mother board?
    That's the plan. I will post what the mobo looks like in the case with the radiator and fans.

  9. #9
    Xtreme Addict
    Join Date
    Jan 2008
    Location
    Bonnie Scotland / Sunny England
    Posts
    1,363
    Looking like a sweet build buddy! Beautiful paint job!

    ~Bex
    PROJECT :: The Xtreme (WET) Dream!!!

    PERSONAL H2O BESTS :
    E8600 @ 4.8GHz
    E6750 @ 4GHz QX9650 @ 4.6GHz
    i7 920 @ 4.6GHz

    PERSONAL AIR BESTS :
    Sempron140 @ 4Ghz (Stock Cooler)
    i7 3960x @ 5.4ghz (Air Cooler)

    Bex : "Who said girls can't play PC games or overclock!? Do I look like your imagination!?"
    Aaron : "TBH, a girl doing all that is a pretty perfect girl!"
    Swift_Wraith : "could someone please check bex for a penis?"

  10. #10
    Registered User
    Join Date
    Apr 2010
    Posts
    44
    I got the motherboard waterblocks installed:


    Last edited by CroyAlore; 10-11-2010 at 05:33 AM. Reason: Updated Pictures

  11. #11
    Xtreme Enthusiast
    Join Date
    May 2009
    Posts
    952
    Awesome...can u show us a mock up of the rads?

  12. #12
    Registered User
    Join Date
    Sep 2009
    Location
    Glasgow, Scotland
    Posts
    94
    Excellent start... looking forward to this.

    Subscribed

  13. #13
    Registered User
    Join Date
    Oct 2008
    Posts
    40
    Looks great! Keep it up.

  14. #14
    Xtreme Member
    Join Date
    Aug 2010
    Location
    Norway
    Posts
    135
    Aww, man, that looks incredible!
    I am just about to start the -exact- same build as you, with a 280 rad up top and a 360 rad in front, haha!
    Your case will end up a lot nicer than mine though, this will be my first water cooling project ever

    As you can see this is my FIRST post on XS, and I registered here to get help with this project, and then I find this thread - amazing!
    I found it while searching around to see if a 280 slim rad will actually fit up top; I've used a cardboard cutout to check, and it seems like it will, but my motherboard has not arrived yet and I don't know about the fittings and tubing, and whether or not it will interfere with the motherboard, rear fan or front 360 rad yet.

    I don't want to order the rads before I am certain they will fit, since I don't swim in money Maybe your thread will give me the answer soon, yay

    How do you plan on fitting in the HDDs after? I was thinking about using some of these on the bottom of the front 360 rad, but I have not decided yet. You can see them in action in one of pinto's builds.

    Also I thought perhaps I should use some (UN)Designs Rad Brackets to mount the 360 rad up front, which should work fine.

    Then there's the pump and res placement; first I thought just put it at the bottom next to the PSU, but that won't look nice I think Perhaps copy what Kippler did for his Project Capella (that build is insane, wish I had his skills!)? But maybe you have another idea?

    Subscribed!
    Last edited by vhaarr; 09-05-2010 at 11:53 AM. Reason: Added link to pintos build.

  15. #15
    Registered User
    Join Date
    Apr 2010
    Posts
    44
    UPDATE

    I got the sleeving from MDPC-X. I still have some more sleeving to do, but I ran out of sleeves (I went through a lot since this is my first time attempting to sleeve all the wires and I ended up cutting a a lot of them the wrong length). I ordered some more and when they come in I will be able to sleeve the 24 pin as well as some other wires around the case. I am still waiting for the top radiator fans to come, so I wasn't able to include it in this update.

    MDPC-X Sleeving.


    I decided to paint the heat sink on the white to match the color scheme.


    I got the pumps and even made a drain port. The drain port was inspired by JoeChuo's NORMANDY build.


    I got the reservoir mounts up.


    Here is the front rad with red led fans.


    The reservoir.


    More updates soon, thanks for reading.
    Last edited by CroyAlore; 10-11-2010 at 07:47 PM. Reason: Updated Pictures

  16. #16
    Registered User
    Join Date
    Apr 2010
    Posts
    44
    Quote Originally Posted by Huww View Post
    Nice job with the paint. Especially the rads, they came out great.
    Quote Originally Posted by Jokester_wild View Post
    The paint on the case turned out well, looks like a great start. !
    Quote Originally Posted by RCG_Bex View Post
    Looking like a sweet build buddy! Beautiful paint job!

    ~Bex
    Quote Originally Posted by Saltire View Post
    Excellent start... looking forward to this.

    Subscribed
    Quote Originally Posted by Fyrelith View Post
    Looks great! Keep it up.
    Thanks a lot everybody.

    Quote Originally Posted by mav2000 View Post
    Awesome...can u show us a mock up of the rads?
    I got the front rad shown, and soon I'll be able to show the second rad.

    Quote Originally Posted by vhaarr View Post
    Aww, man, that looks incredible!
    I am just about to start the -exact- same build as you, with a 280 rad up top and a 360 rad in front, haha!
    Your case will end up a lot nicer than mine though, this will be my first water cooling project ever

    As you can see this is my FIRST post on XS, and I registered here to get help with this project, and then I find this thread - amazing!
    I found it while searching around to see if a 280 slim rad will actually fit up top; I've used a cardboard cutout to check, and it seems like it will, but my motherboard has not arrived yet and I don't know about the fittings and tubing, and whether or not it will interfere with the motherboard, rear fan or front 360 rad yet.

    I don't want to order the rads before I am certain they will fit, since I don't swim in money Maybe your thread will give me the answer soon, yay

    How do you plan on fitting in the HDDs after? I was thinking about using some of these on the bottom of the front 360 rad, but I have not decided yet. You can see them in action in one of pinto's builds.

    Also I thought perhaps I should use some (UN)Designs Rad Brackets to mount the 360 rad up front, which should work fine.

    Then there's the pump and res placement; first I thought just put it at the bottom next to the PSU, but that won't look nice I think Perhaps copy what Kippler did for his Project Capella (that build is insane, wish I had his skills!)? But maybe you have another idea?

    Subscribed!
    Welcome to XS, and good luck on your build man.

    I am actually using the UN Rad Brackets to hold the front rad.

    I am still thinking of where I can place the SSD and HDD, and I just updated the work log showing the res and pump.

  17. #17
    Xtreme Member
    Join Date
    Aug 2010
    Location
    Norway
    Posts
    135
    Quote Originally Posted by Crunic View Post
    Welcome to XS, and good luck on your build man.
    Thank you!

    I like that res placement, seems a lot easier than what Kippler did - think I will copy you there And also the mesh at the bottom, hiding the pumps; that takes care of what I noted in my first post, that it would not look good having the pump down there .. But the mesh hides it and it looks good!

    Where can I get a mesh like that? I suppose you bought a bigger one and cut it out and shaped it to fit? How are you attaching it to the case? Is it just resting on the PSU and supported by that awesome drain pipe?

    Is 2 pumps really necessary?
    I can't wait to see the 280 rad placement!

  18. #18
    Xtreme Member
    Join Date
    Dec 2009
    Location
    Uk Derby
    Posts
    141
    Hello wanted to know where you from....and if your in the uk what kind of import tax you payed on getting the Sleeving into the uk.....as i am looking to use the same companys sleeving....thanks

  19. #19
    Registered User
    Join Date
    Apr 2010
    Posts
    44
    Quote Originally Posted by vhaarr View Post
    Thank you!

    I like that res placement, seems a lot easier than what Kippler did - think I will copy you there And also the mesh at the bottom, hiding the pumps; that takes care of what I noted in my first post, that it would not look good having the pump down there .. But the mesh hides it and it looks good!

    Where can I get a mesh like that? I suppose you bought a bigger one and cut it out and shaped it to fit? How are you attaching it to the case? Is it just resting on the PSU and supported by that awesome drain pipe?

    Is 2 pumps really necessary?
    I can't wait to see the 280 rad placement!
    I got the mesh from FrozenCPU. It is being held by the pass through in between the pump and the reservoir, but I am also going to try put a foam pad or something in between of the mesh and the PSU to give it a good fit.

    At the start I was thinking of putting in three rads in total. I though that my old pump may have not had enough power and the flow rate was going to suffer because of it. But then I decided to only go with two rads and I decided to just go with the two pumps anyways for some better flow rates.

    Quote Originally Posted by Farmerbrown View Post
    Hello wanted to know where you from....and if your in the uk what kind of import tax you payed on getting the Sleeving into the uk.....as i am looking to use the same companys sleeving....thanks
    Sorry, I'm from the USA, so I'm not sure.
    Last edited by CroyAlore; 09-10-2010 at 05:47 AM.

  20. #20
    Registered User
    Join Date
    Apr 2010
    Posts
    44
    UPDATE:
    I just got more sleeves from MDPC-X and I was able to mount the top radiator. I still got a lot of work to do, but here is the progress so far.

    This is the computer with the temporary 24 pin, I will be replacing it with my own sleeved one soon. I did not sleeve this 24 pin, it is a pre-sleeved extension.

    MDPC-X Sleeves


    Tubing


    Top radiator


    The top fans


    Thanks for reading, more updates soon.
    Last edited by CroyAlore; 10-11-2010 at 07:48 PM. Reason: Updated Pictures

  21. #21
    Xtreme Member
    Join Date
    Aug 2010
    Location
    Norway
    Posts
    135
    This is looking better and better, I am really looking forward to getting started on my own build!
    That's not a lot of room between the top fans and the motherboard :P Are those Yate Loon fans? Really hard to see in that photo!
    And that rear fan, is that a Scythe Slip Stream? Doesn't seem to be much room there either, hehe

    So far, for my own build, I've only ordered the 120mm fans I will be using on the front 360 radiator - I am not sure which ones would fit up top and rear?

    I wish that guy would send me the motherboard and CPU already, I've been waiting a month now. Also the webshop I ordered the GFX card, RAM and HDD from were raided by the police, so now I have to get my money back and find another webshop - isn't that fantastic? :P Grrr!

    Looking forward to more updates soon

  22. #22
    Aussie God
    Join Date
    Feb 2005
    Location
    Copenhagen, Denmark
    Posts
    4,596
    Very clean indeed, and awesome red colour!

    EDIT;
    a bit of ashame with the Dom GT heatspreaders, untouched would have looked better IMHO
    Competition ranking;
    2005; Netbyte, Karise/Denmark #1 @ PiFast
    2008; AOCM II, Minfeld/Germany #2 @ 01SE/AM3/8M (w. Oliver)
    2009; AMD-OC, Viborg/Denmark #2 @ max freq Gigabyte TweaKING, Paris/France #4 @ 32M/01SE (w. Vanovich)
    2010: Gigabyte P55, Hamburg/Germany #6 @ wprime 1024/SPI 1M (w. THC) AOCM III, Minfeld/Germany #6 @ 01SE/AM3/1M/8M (w. NeoForce)

    Spectating;
    2010; GOOC 2010 Many thanks to Gigabyte!


  23. #23
    Xtreme Enthusiast
    Join Date
    May 2009
    Posts
    952
    Awesome stuff...following this very closely

    BTW, did you drill the holes uptop for the rad fittings or did it come like that. Also what thickness is that rad. Are the fans going to be inside the case?

  24. #24
    Registered User
    Join Date
    Apr 2010
    Posts
    44
    Quote Originally Posted by vhaarr View Post
    This is looking better and better, I am really looking forward to getting started on my own build!
    That's not a lot of room between the top fans and the motherboard :P Are those Yate Loon fans? Really hard to see in that photo!
    And that rear fan, is that a Scythe Slip Stream? Doesn't seem to be much room there either, hehe

    So far, for my own build, I've only ordered the 120mm fans I will be using on the front 360 radiator - I am not sure which ones would fit up top and rear?

    I wish that guy would send me the motherboard and CPU already, I've been waiting a month now. Also the webshop I ordered the GFX card, RAM and HDD from were raided by the police, so now I have to get my money back and find another webshop - isn't that fantastic? :P Grrr!

    Looking forward to more updates soon
    Thanks, and good luck to you on your build when you get started.
    The fans I used for the back, as well as for both sides of the front radiator, is the Cooler Master Red Led 120 mm fans
    The top are Xigmatek 140 mm fans.

    Sorry to hear about the webshop ><

    Quote Originally Posted by M.Beier View Post
    Very clean indeed, and awesome red colour!

    EDIT;
    a bit of ashame with the Dom GT heatspreaders, untouched would have looked better IMHO
    Thanks alot man, I've been wondering what color to make those, I may try black, and even red again. If i do I'll put all three pictures up and see what people like the most.

    Quote Originally Posted by mav2000 View Post
    Awesome stuff...following this very closely

    BTW, did you drill the holes uptop for the rad fittings or did it come like that. Also what thickness is that rad. Are the fans going to be inside the case?
    Thanks man. The holes were already there, but i did cut away the metal from the fan openings, as you can see on the right side of this image:


    The radiator


    These are not the fans I ended up using. I switched them with the Xigmatek ones. But the fans are inside the case.
    Last edited by CroyAlore; 10-11-2010 at 05:47 AM. Reason: Updated Pictures

  25. #25
    Registered User
    Join Date
    Apr 2010
    Posts
    44
    UPDATE: I got the 24 pin sleeved


    I'll try to get some more updates soon.

    Thanks for reading.
    Last edited by CroyAlore; 10-11-2010 at 05:47 AM. Reason: Updated Pictures

Page 1 of 3 123 LastLast

Bookmarks

Bookmarks

Posting Permissions

  • You may not post new threads
  • You may not post replies
  • You may not post attachments
  • You may not edit your posts
  •