-
-
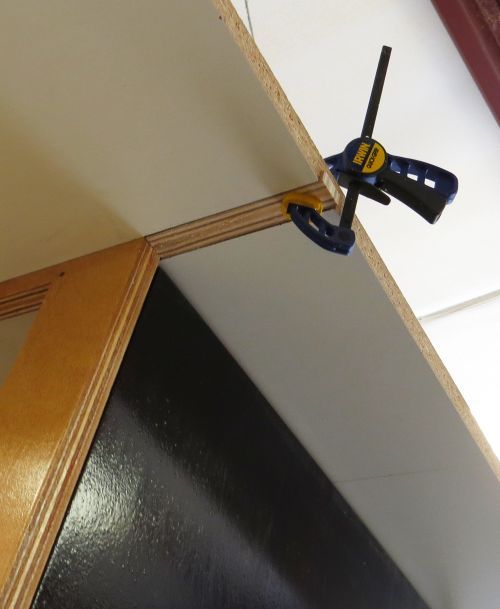
Okay, let’s finalize this structure.
I used a combo of glue, screws, and pin nails to make it make this cabinet furniture strong:

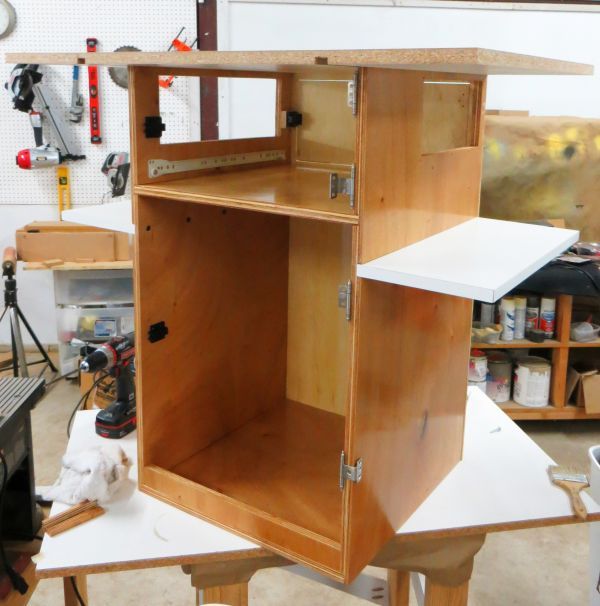
You could dance on top of this case.
Put the final touches on my backer panel:
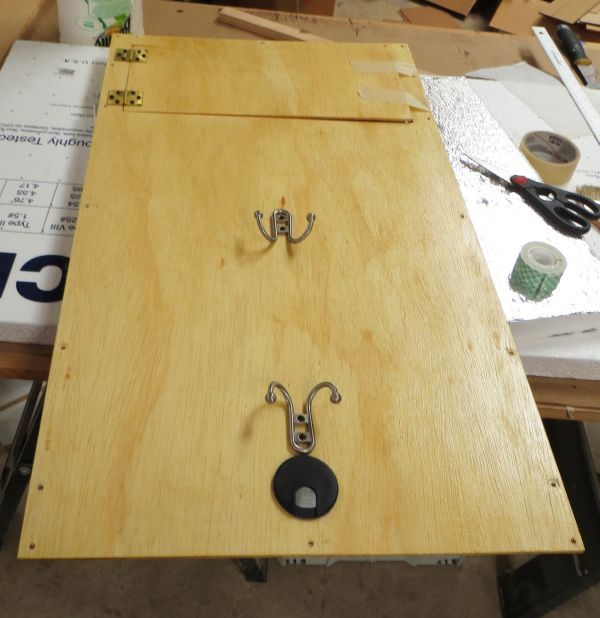
A hole for the cables to exit, and 2 coat hangers (2x $4) to wrap the cables on.
Mounted my fan panels:
And mounted my fans:
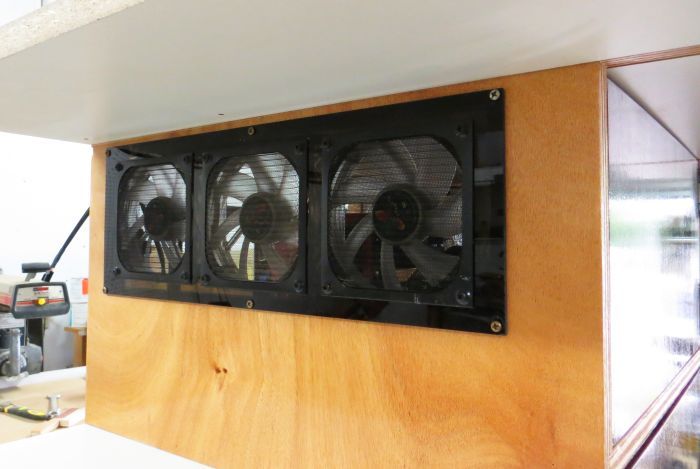
Note, on my triple intakes, I’ve got these mesh dust filters. They do a good job and are easy to clean off as a shop-vac is never far away.
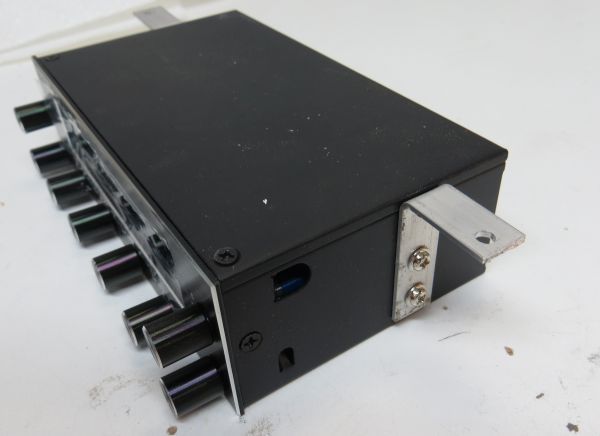
Next, to control the fans, I’ve got a Scythe fan controller, which I put together a simple mounting bracket:
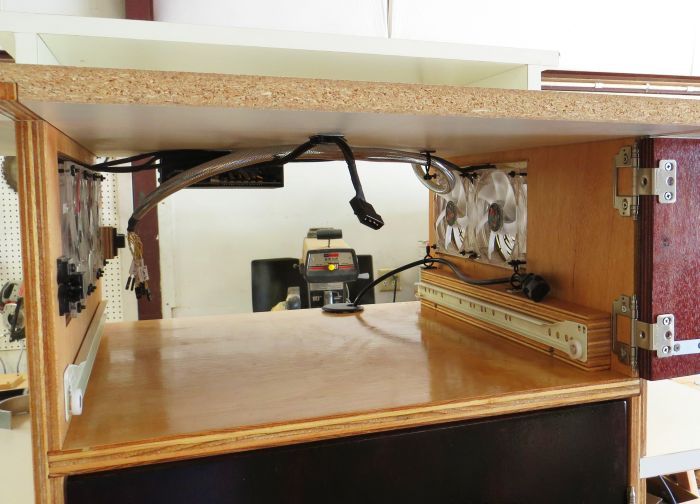
Finally, I carefully routed and mounted all my cables to allow the system tray to easily roll out and/or fully remove.
To completely remove the system tray, these are my steps:
1) From the backside disengage the monitor connection, and i/o cables (USB, audio).
2) From the front side, there are 3 cables to disengage, which are highlighted:
1. PSU cable
2. Cable to power the fan controller
3. Switch panel cables
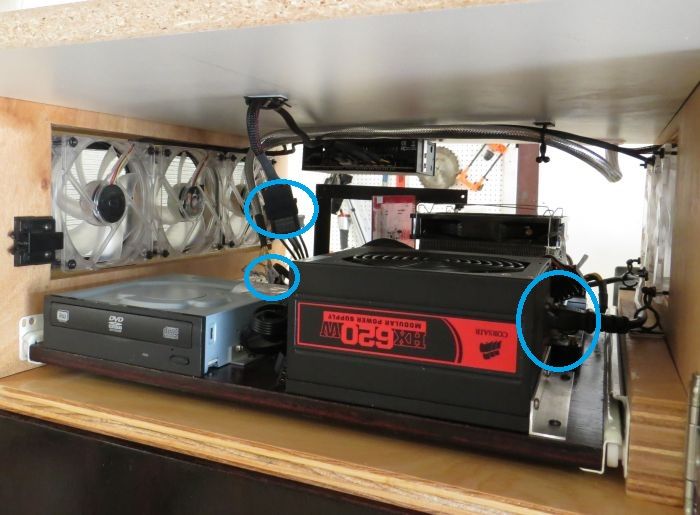
After disconnecting these cables, the whole computer system tray can slide out and even be completely removed.
-
-
Nice result & looks  . Only i have a bit suspicions about white surface being a bit too easily dirtyable, witch pc/cabinet being used in workshop and such.
BTW, why not bolt/hardfix speakers to surfaces or walls of cabinet? +maybe hide cables of speakers to go within or behind walls ..
-
The surface is melamine, which is pretty durable and cleanable. And inexpensive and available. As for surface dust, I will take care of it the old fashion way--clean it! Not like a different colored surface will have less dust, just hide it a little better?
My experience with computer speakers is that give up the ghost every now and then. My thought is that this cabinet will probably outlast the speakers, which is why I'm hesitant to permanently mount them.
Regarding speaker cables, actually I did create some routing tunnels:
-
-
-
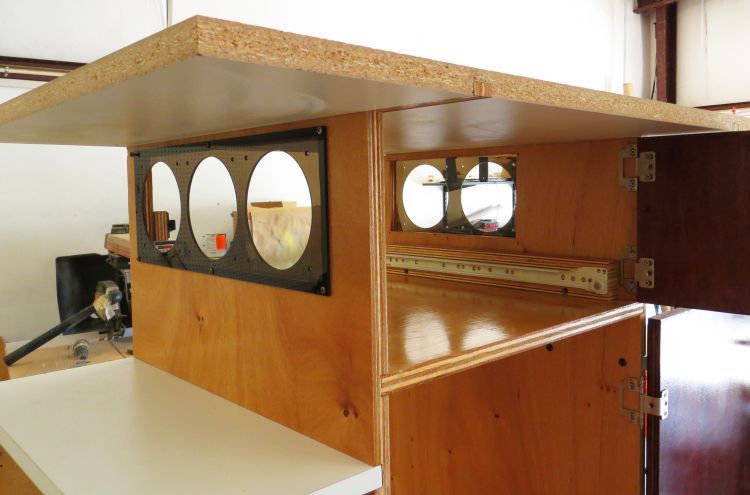
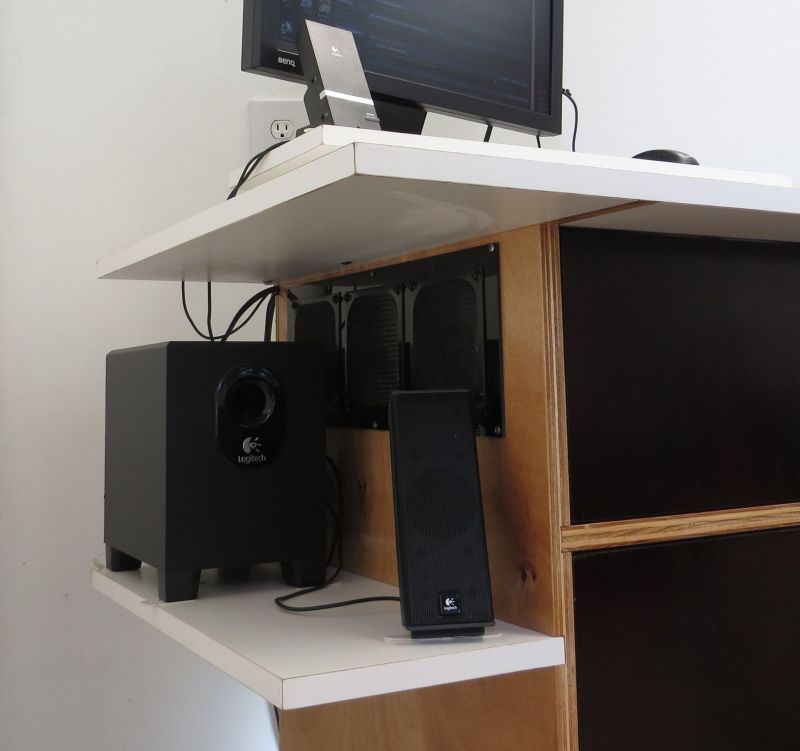
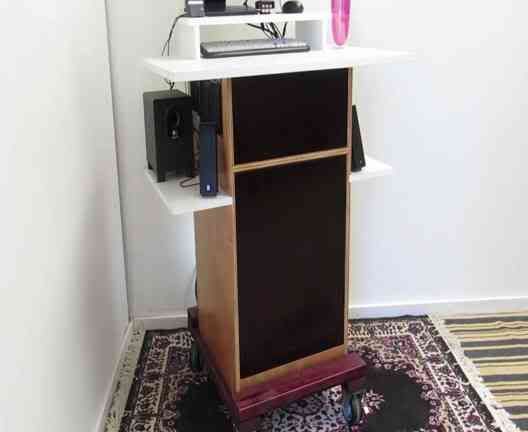
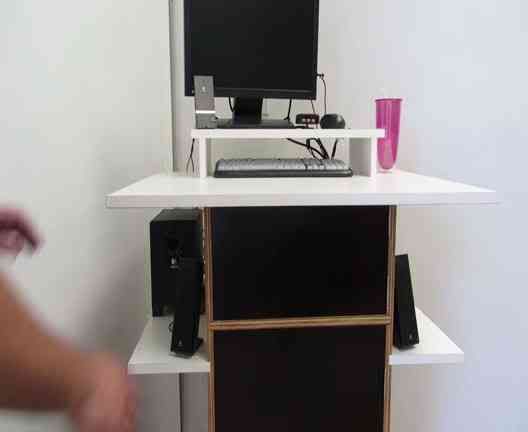
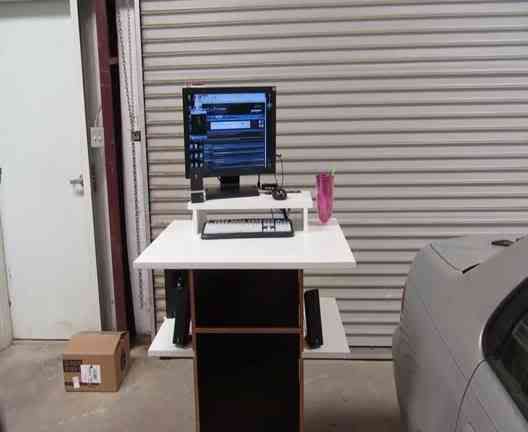
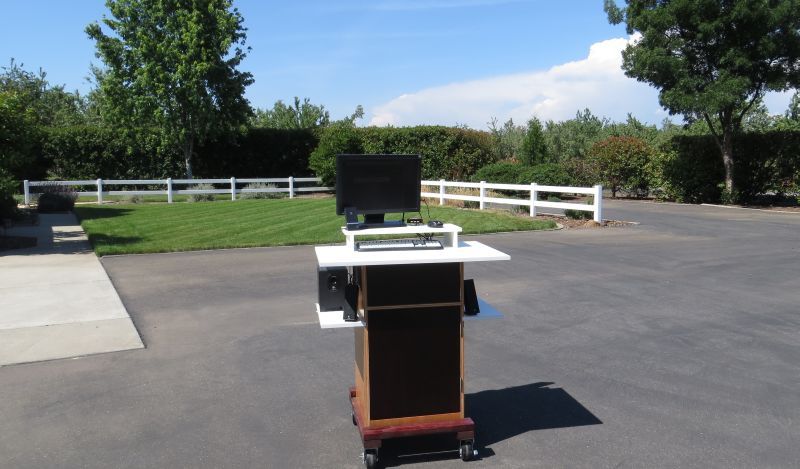
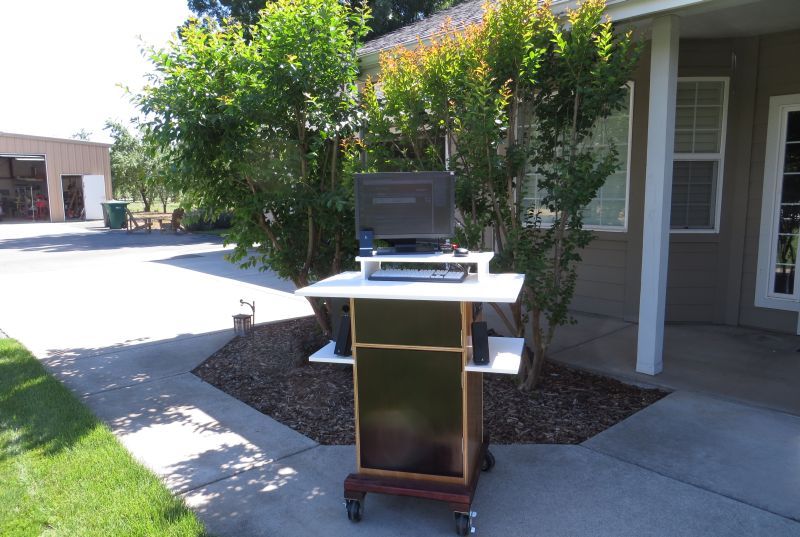
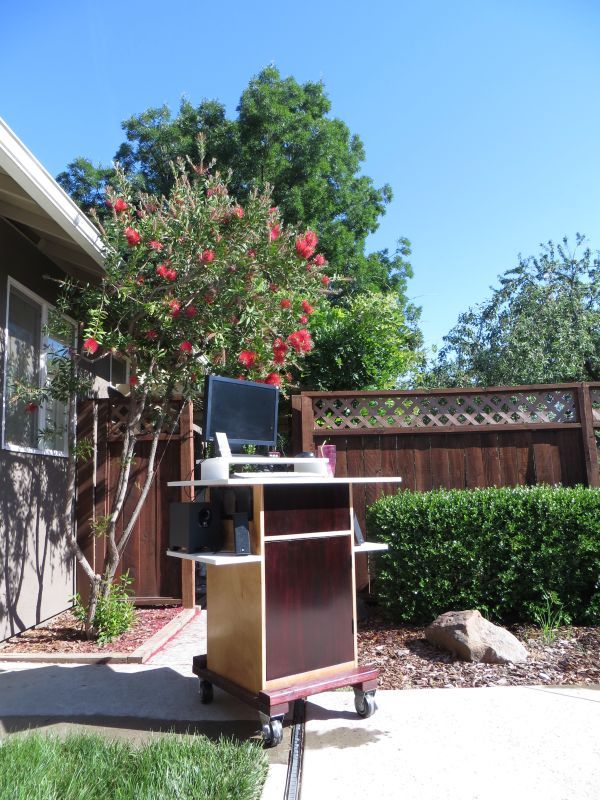
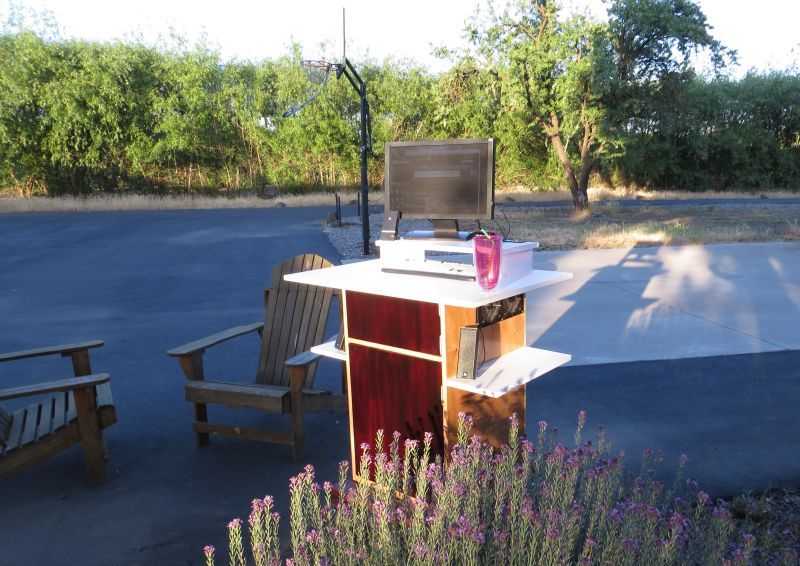
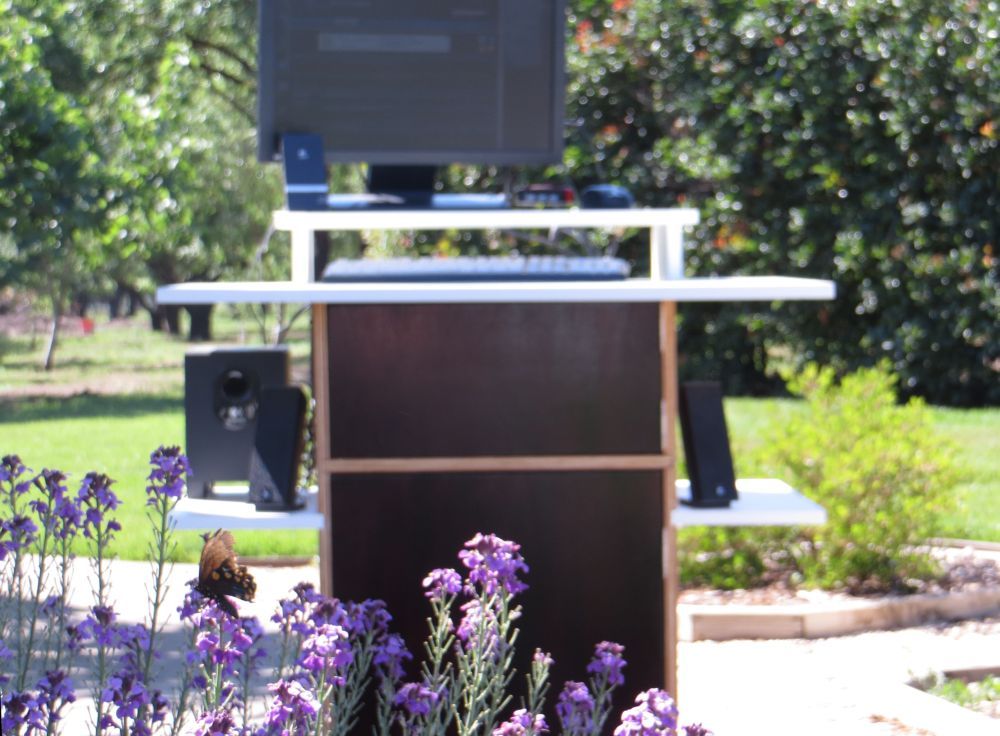
Moving down to under the worktop, I’ve got wing shelves that hold the speakers.
I’ve got a triple 120mm fan intake on this side of the upper box of the cabinet, which houses the PC components. The fans are all on a fan controller, keeping them pretty quiet. They also all have critical dust filters, as this whole system will be spending most of its time in my modding/woodworking shop.
For my speakers, I’ve got a Logitech X240 2.1 system.
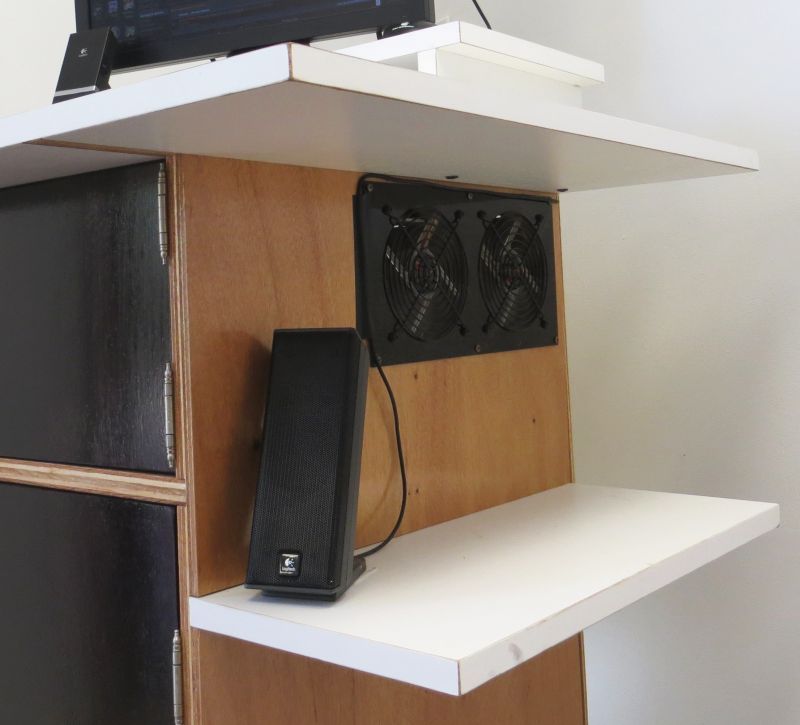
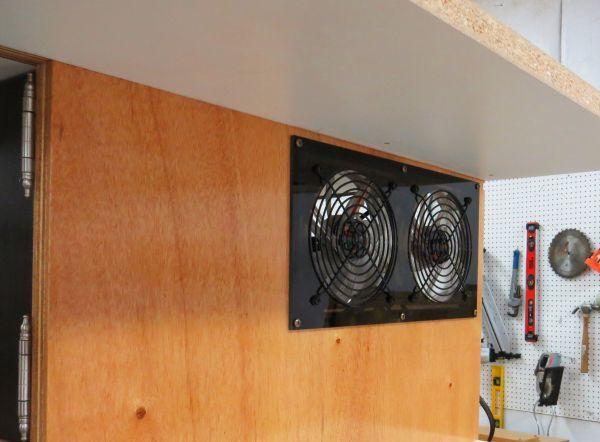
On the other side, at this level, are the 2 120mm fan exhausts.
3 fan intakes, 2 exhausts--I’m try to keep positive pressure as another measure of dust control.
-
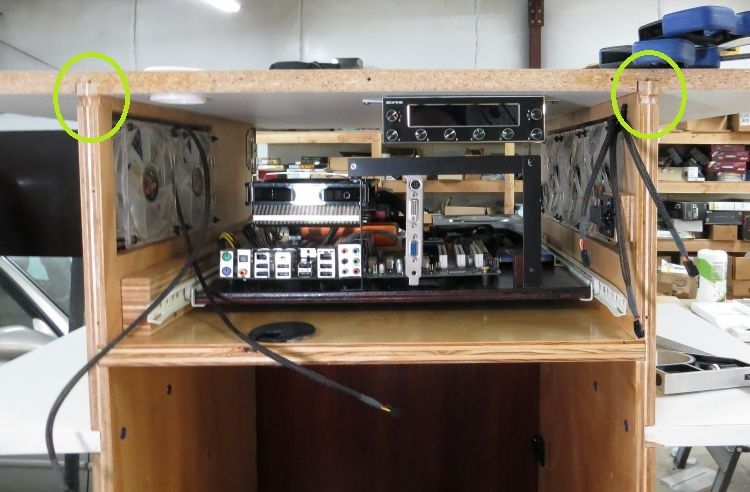
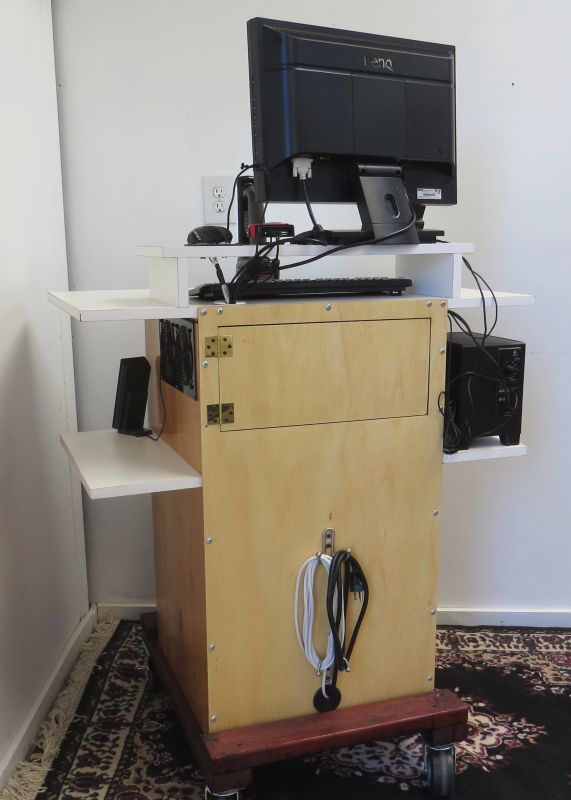
Here you can really see the basic cabinet box base for the project:
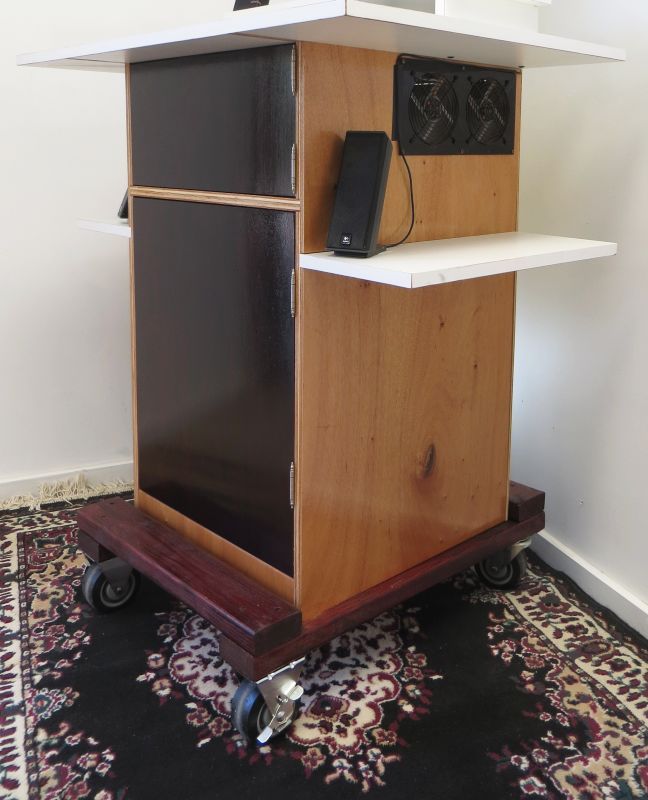
The structure of it all is a box of ?” plywood. There are 2 large side panels, a bottom, a cross shelf, and a backer panel. All the joints are dado/rabbets, glued and nailed, meaning this thing is strong.
Also, the cabinet is mounted to a rolling chasis, which is really just a square of 2x4, stained, and with wheels. The front wheels lock, and the rear wheels turn.
Open the doors and now you can see the internal storage.
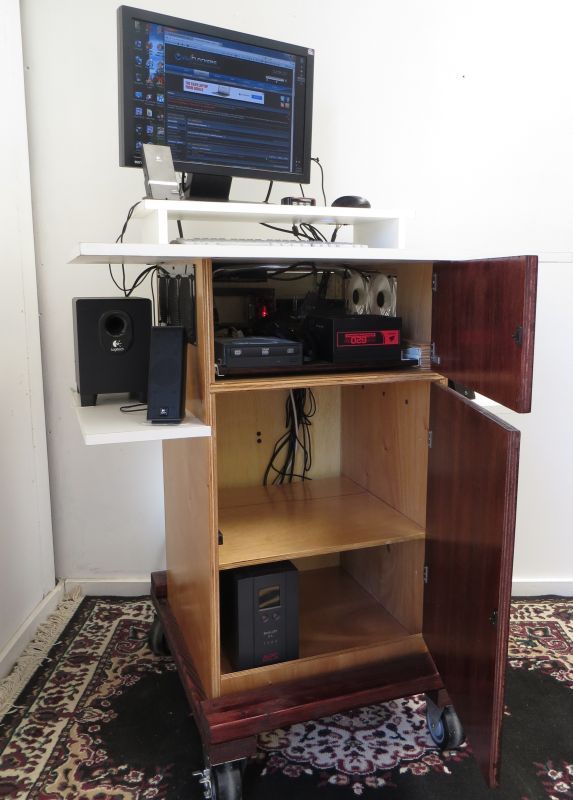
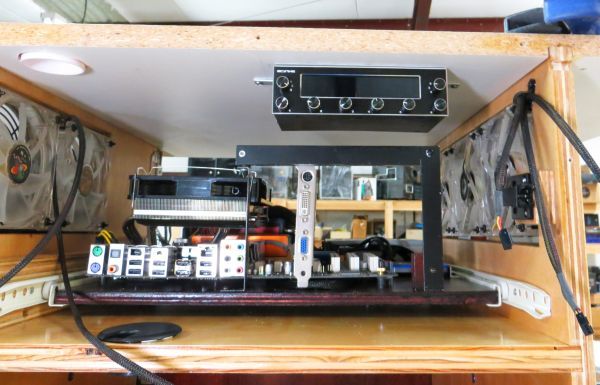
As you can see, the upper box holds my system components.
The larger lower box has shelving, and the UPS, (which truly makes this a mobile workstation).
To open the doors, I used a push-to-open latch, a system I’ve used before on many mods (and so already had the latches sitting on a shelf).
Video:
(Click to Play)
�
-
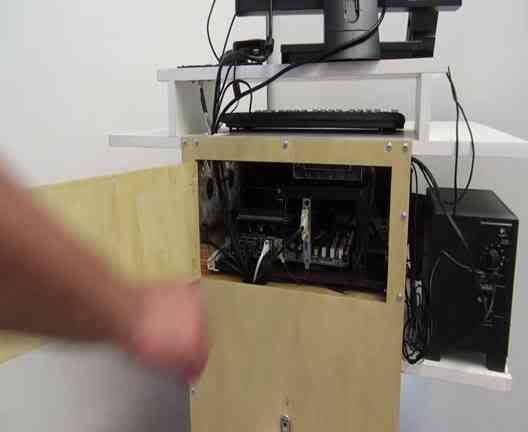
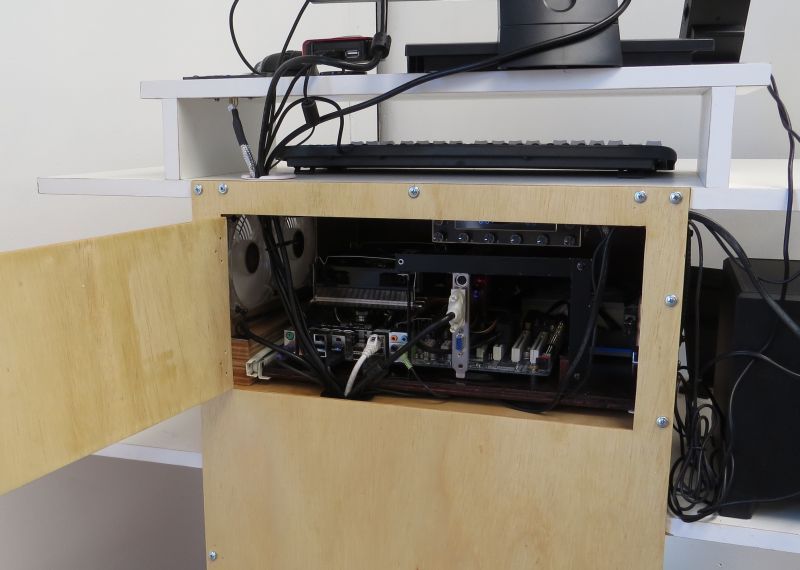
The upper box is an enclosed unit containing my PC components:
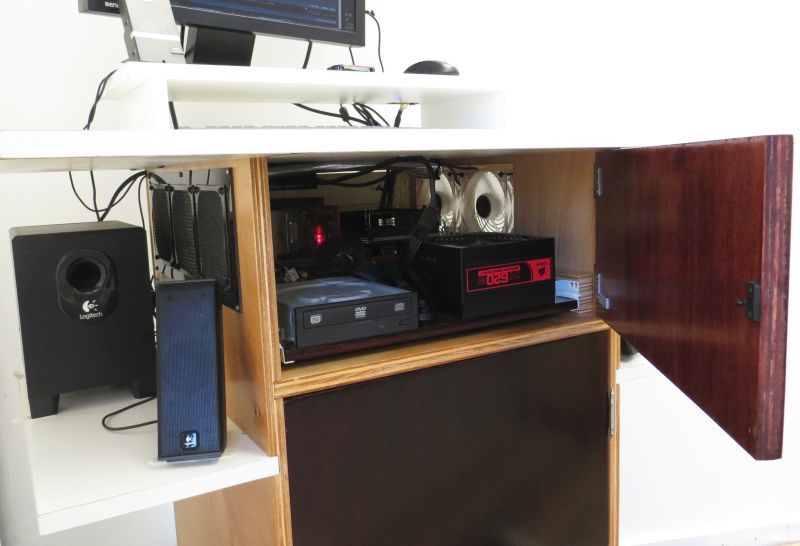
The system is mounted on a single tray, that slides out on kitchen drawer sliders. In fact, just like a kitchen drawer, it can be easily completely removed.
There is a bit of a procedure to do so, however, due to all the cables and whatnot. But it actually only takes a few seconds--in fact here it is in video.
Step 1
Access the back hatch and disconnect all the i/o cables (monitor cable, USB ports, ethernet port, audio):
(Video)
(Click to Play)
Step 2
Open the front cabinet door, and disconnect 3 cables:
1) 4 pin molex to fan controller
2) PSU cable
3) Switch cables (power-on, reset, power LED, HDD activity LED)
Step 3
Slide out tray, and remove
(Video)
(Click to Play)
Here is the system I’ve got mounted, all of which were parts scavenged from previous builds:
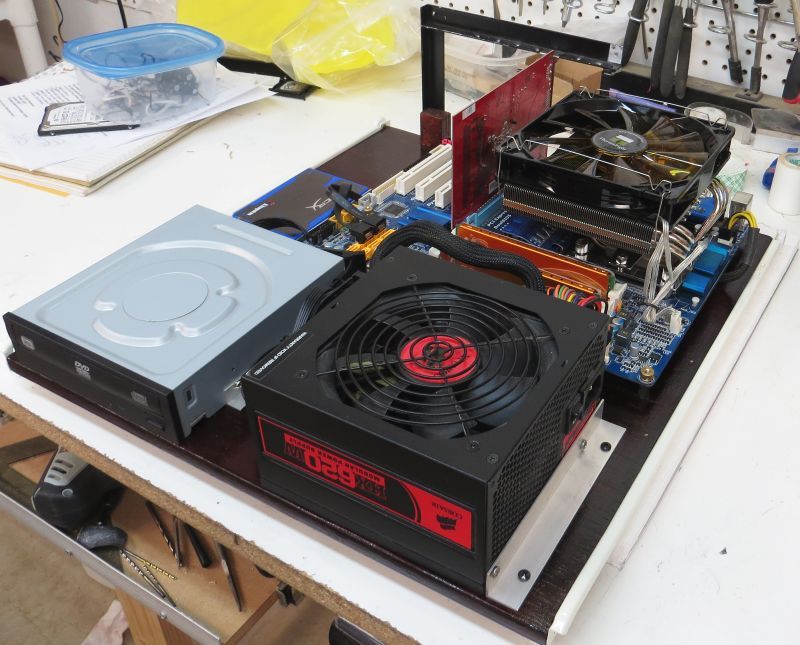
Core 2 Duo e8600
Gigabyte EP45 UD3R
4gb G.skill RAM
Thermalright AXP-140
Corsair HX620 psu
Kingston 128gb SSD
Asus AX550�
-
Let’s push around to the backside
Got cable storage for power to the UPS and ethernet.
The backside hatch opens (push-to-open latch, again).
Fair number of cables, tried my best to keep it clean.
Also you can see the fan controller.
-
-
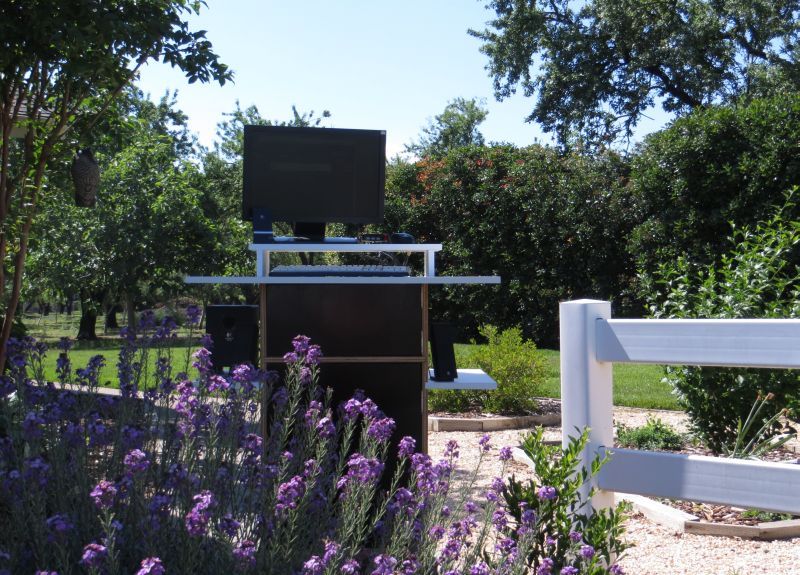
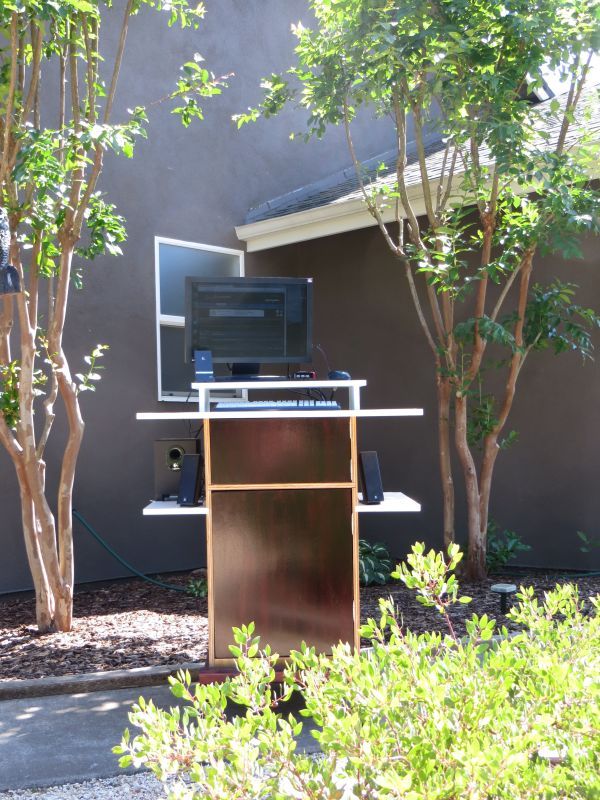
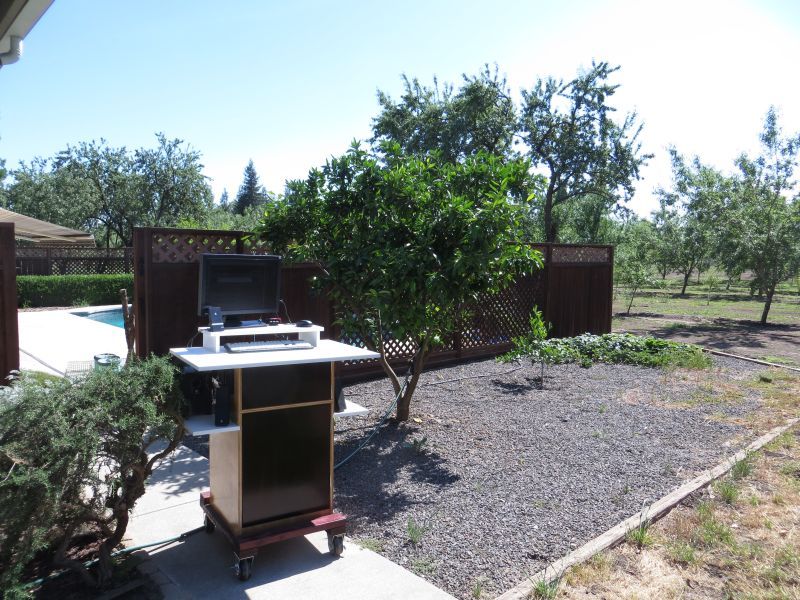
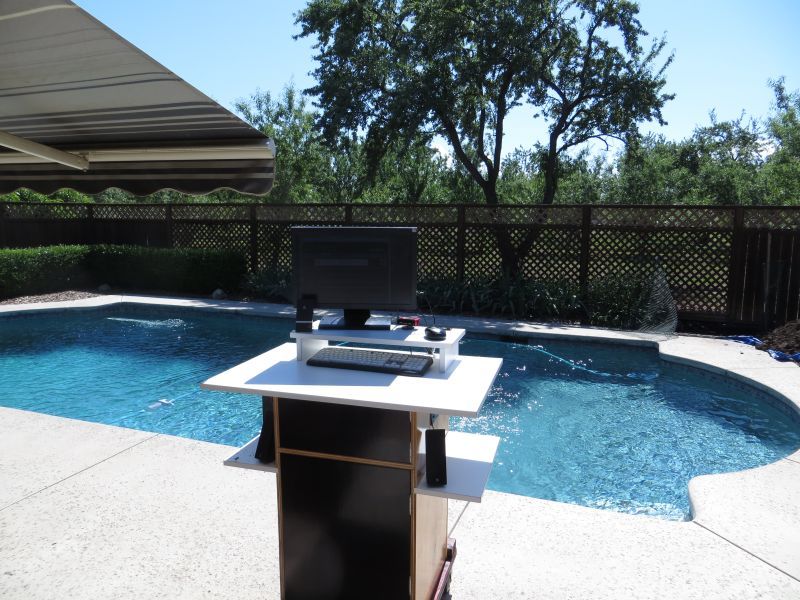
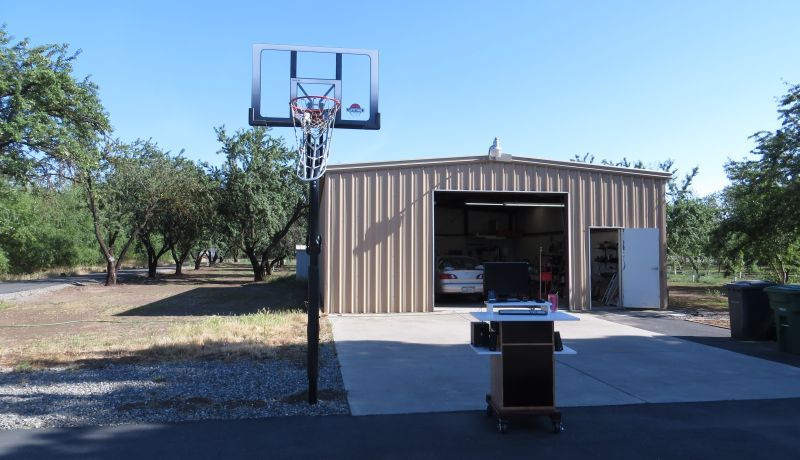
No wait!
Build a rolling PC station?
Got to take it for a ride!
.
-
(Video)
(Click to Play)
-


There you have it.
In case you were curious, with my old UPS APC, I was able to stream Pandora with the speakers on loud for about 1 hour.
Lets get to some lists:
Items I already had:
System components: Core 2 Duo e8600, Gigabyte EP45 UD3R, 4gb G.skill RAM, Thermalright AXP-140, Corsair HX620 psu, Kingston 128gb SSD, Asus AX550, APC UPS, fans, fan controller, mouse, keyboard, USB hub, monitor, Logitech x250 2.1 speakers, switch panel, Edimax USB wireless unit. (~$700)
Screws/nails (~$10)
Plastic fan mount panels + dust filters (~$30)
System tray bracketry ($15)
Melamine stock ($30)
Item purchased:
Stock plywood
3/4” Main structure ($45)
1/2” system tray, floating shelf, shelf pins ($20)
1/4” backer panel ($10)
2x4 lumber ($10)
Caster wheels ($10)
Hinges ($18)
Cable management ($15)
Stain and polyurethane ($30)
Drawer slides ($15)
Push to open latches (~$7)
Cable hooks ($8)
I think that’s about it.
So started with about $785 in components and spent about $188.
And took me about 3 months of work.
No sponsors, but my usual sources:
mcmaster.com
rockler.com
home depot
lowe’s
delvie’s plastics
performance-pcs
frozencpu
jab-tech
Special thanks to my wife, and everyone at ocforums, theraptorpit, and xtremesys forums.
Navig
*** I've just posted my entire Complete Project, for a quick link to the start of the Completed Section, click --> Here <-- ***
Last edited by Navig; 07-07-2013 at 10:42 AM.
-
I wonder if some mod is possible with big capacity auto accumulator batteries in cabinet for lengthy socket&wire free action  . May require some PSU mod though.
 Posting Permissions
- You may not post new threads
- You may not post replies
- You may not post attachments
- You may not edit your posts
-
Forum Rules


 Reply With Quote


Bookmarks