MMM
Results 1 to 22 of 22

Thread: Project MonoBits

  1. #1
    Xtreme Member
    Join Date
    Jan 2011
    Posts
    122

    Project MonoBits

    Hello everyone!

    Now it's time for me to finally start another project!
    I got the idea when I saw a preview image that BitFenix ​​had posted on their Facebook page and I was instantly in love with the case, I thought to my self that I really wanted that case and hopefully do a buildlog from it. I immediately started talking to people on various forums and websites, but also some who posted reviews on Youtube and asked about different dimensions so I could start sketching how I would like to have the build. My goals are extraordinary and should strive to do the best Prodigybuild made so far. I will go with a full setup of watercooling into this project, i will try to make it as highend as i can make it, everything that can be watercooled in this build will be. I will build and mod everything to perfection and having fun throughout the whole project. It will normally include a lot of sleeving and lots of other things and I will keep the project relatively short so it will hopefully be updated at least once or twice a week. That was it for the little speech, and here comes the additional information on the project, I hope you think this is interesting and I wish you pleasant reading!


    Hardware:
    Case: BitFenix ​​Prodigy White
    Power Supply: Silverstone Straider Plus 850w
    Motherboard: Zotac Z68-ITX WiFi
    processor: Inter Sandy Bridge 2500K
    Memory: Corsair Dominator GT 2000MHz
    Graphics Card: Asus GTX570 Direct CU II
    SSD: 2x 120GB Corsair Neutron GTX

    Watercooling
    Fans: Corsair Air Series SP120 High Performance Edition High Static Pressure 120mm Fan
    Controller: mCubed T-balancer MiniNG
    Radiators: 1x Alphacool NexXxoS ST30 Full Copper 120mm, 2x Alphacool NexXxoS ST30 Full Copper 240mm
    CPU-Block: Bitspower CPU Block Summit EF (Intel) (Acrylic Top Version)
    RAM-Block: Bitspower Galaxy Freezer 2
    GPU-Block:
    Reservoir: Single D5 Top Upgrade Kit 150 (Black POM Cap) (Model Name: BP-D5TOPUK150P-BKBKCL)
    Pump: Alphacool VPP655 - Single Edition
    PumpTop: D5 MOD TOP V2 (POM Version) + D5/MCP655 MOD KIT (Model Name: BP-655D5P2-MBK)
    Tube: Primochill 7/16"ID, 5/8"OD Clear
    Fittings & Acessories: Bitspower
    22x G1/4" Bronze Age Compression Fitting CC6 For ID 7/16" OD 5/8" Tube (Model Name: BP-BACPF-CC6)
    10x G1/4" Bronze Age Rotary 45-Degree IG1/4" Extender (Model Name: BP-BA45R)
    10x G1/4" Bronze Age Rotary 90-Degree IG1/4" Extender (Model Name: BP-BA90R)
    2x G1/4" Bronze Age Triple Rotary 90-Degree IG1/4" Extender (Model Name: BP-BA90R3D)
    8x G1/4" Bronze Age Stop Fitting (Model Name: BP-BAWP-C06)
    2x G1/4" Matt Black CaseTop Water-Fill SET (Model Name: BP-MBWP-C04)
    4x Thermal Pad A (94x19x0.5MM) (Model Name: BP-WBTP-A)
    1x Matt Black Mini Valve With Black Handle (Model Name: BP-MVV-MBKBK)
    1x Bitspower Flow Indicator (Model Name: BP-FI-CLBKMBK)


    MonoBits is sponsored by:
    Aqua Tuning
    Bits Power
    BitFenix
    Cooling Tough
    Corsair
    Silverstone

    Please visit and Like my Facebook Page and you will see my news, sneakpeaks, buildlogs, sleeving and much more!

  2. #2
    Xtreme Member
    Join Date
    Jan 2011
    Posts
    122
    Here are the Scetchups, Yes i know...The case hase some improvements today from what i did in the sketchupmodel, i hope you like it so far !


  3. #3
    Xtreme Addict
    Join Date
    Dec 2007
    Location
    Earth
    Posts
    1,787
    Looks good

    Why not put the 120mm rad in the rear 120 vent?
    Sandy Bridge 2500k @ 4.5ghz 1.28v | MSI p67a-gd65 B3 Mobo | Samsung ddr3 8gb |
    Swiftech apogee drive II | Coolgate 120| GTX660ti w/heat killer gpu x| Seasonic x650 PSU

    QX9650 @ 4ghz | P5K-E/WIFI-AP Mobo | Hyperx ddr2 1066 4gb | EVGA GTX560ti 448 core FTW @ 900mhz | OCZ 700w Modular PSU |
    DD MC-TDX CPU block | DD Maze5 GPU block | Black Ice Xtreme II 240 Rad | Laing D5 Pump

  4. #4
    Xtreme Member
    Join Date
    Mar 2012
    Location
    Brisbane,Australia
    Posts
    182
    looking great!

    tiny but mighty!
    Work/Gaming: i7-950|GB X58A-UD7|12GB Trident BBSE/XMS3|460GTX|WD 1TB BLK|Pioneer DVDRW|CM HAF-X|Win 7 Pro 64 bit|U2711|HX850|G500|G510
    Quote Originally Posted by hiwa View Post
    I protect my gskills like how i protect my balls
    Heatware: jimba86
    Bench:Custom Giga-bench|Win 7/XP SP3|WD 36GB Raptor|Dell 22|AX1200|MS intellimouse
    Bench 1:i7 930|water 2.0 performer|Gigabyte X58A-OC | 4GB corsair 1866 CL7|GTX 295 Quad SLI
    Bench 2:E8500|NHD14|P45-UD3P(2nd PCIEx16 slot broken.. )|2GB Corsair 8888 Cl4|GTX 260 SOC
    (Bench 3: In Progress) 4770K|F1EE|Gigabyte Z97X-SOC Force| 4GB GTX1 /8GB Gskill TridentX 2666CL11 ney pro|5870 x3 on KPC tek9 slim 5.0/7.0
    Bench 4 E8600|NHD14|REX|2GB Corsair 1800 Cl7|Asus GTX 280
    Bench 5 (TBC): FX?|990FX-UD7|Gskill Flare 2000 Cl7|6970
    Server/renderbox: G3258|TT Water 2.0|Gigabyte Z87 Sniper M5|8GB Gskill Sniper 2133|gigabyte 5750|FD NODE 804

  5. #5
    Xtreme Member
    Join Date
    Jan 2011
    Posts
    122
    Quote Originally Posted by CrazyNutz View Post
    Looks good

    Why not put the 120mm rad in the rear 120 vent?
    The 3D model was just temporarely, when i got the case yesterday i could mount the rad on the back, thet looks so much better !


    Quote Originally Posted by jimba86 View Post
    looking great!

    tiny but mighty!
    Ohh Yes!

  6. #6
    I am Xtreme
    Join Date
    Dec 2007
    Posts
    7,750
    your spending alot on the watercooling parts, why not go higher on the cpu/gpu?
    2500k @ 4900mhz - Asus Maxiums IV Gene Z - Swiftech Apogee LP
    GTX 680 @ +170 (1267mhz) / +300 (3305mhz) - EK 680 FC EN/Acteal
    Swiftech MCR320 Drive @ 1300rpms - 3x GT 1850s @ 1150rpms
    XS Build Log for: My Latest Custom Case

  7. #7
    Xtreme Member
    Join Date
    Jan 2011
    Posts
    122
    Quote Originally Posted by Manicdan View Post
    your spending alot on the watercooling parts, why not go higher on the cpu/gpu?
    The Cpu are perfect, why go with ivy bridge when sandy is better ?
    The Gpu is enought for thi build actually, with a bit of overclocking it performs great!

  8. #8
    Xtreme Member
    Join Date
    Jan 2011
    Posts
    122
    Time for another update guys!
    Today i bought the Bitfenix Prodigy, The white version because of the very clean looking front
    Some pictures on the beauty


    The case was free from damages and artifacts etc and im glad about it, the swedish delivery firms are not that greatful with the stuff sometimes
    Tomorrow i will take everything down for some prep work but more about that tomorow night as i am going to the workshop

  9. #9
    Xtreme Member
    Join Date
    Jan 2011
    Posts
    122
    Quote Originally Posted by Shurika View Post
    Yes! strip it! Love the design
    Here it comes !

    Hello Guys!
    Today I had time to do a litel bit
    I took down everything from the case, removed the hard drive cages, the 5.25 " bay and the fans, right now it's just the headchasis left and it will be modified a bit. I want to keep this build as clean as possible and I will not over do it somehow...designwise
    Here you have some pictures of the work so far.


    The origginal inside of the case


    I started removing the first harddrive cage which sat in place with a thumbscrew


    The next step was to remove the 240mm fanfilter on the top but also the front which went very fast and had just a simple locking mechaism and some clips, god its easy to work with the case!


    And now at last, the fans and the 5,25" Bay, everything i needed to do here was to remove some more screws and they were gone! I didnt need to use the dremel or my drill !
    I will give my thumbs up for this awsome construktion, this is how it should be !


    An empty naked Prodigy, its some serious eyecandy!


    This was tonights update, i hope that my pacage from Aquatuning arrives tomorrow och the next day after.
    More about that when it arrives and then i will be making another update,
    Dont forget to comment and subscribe please
    Se you until next time !

  10. #10
    Xtreme Member
    Join Date
    Mar 2012
    Location
    Brisbane,Australia
    Posts
    182
    wow,this coming along great!
    Work/Gaming: i7-950|GB X58A-UD7|12GB Trident BBSE/XMS3|460GTX|WD 1TB BLK|Pioneer DVDRW|CM HAF-X|Win 7 Pro 64 bit|U2711|HX850|G500|G510
    Quote Originally Posted by hiwa View Post
    I protect my gskills like how i protect my balls
    Heatware: jimba86
    Bench:Custom Giga-bench|Win 7/XP SP3|WD 36GB Raptor|Dell 22|AX1200|MS intellimouse
    Bench 1:i7 930|water 2.0 performer|Gigabyte X58A-OC | 4GB corsair 1866 CL7|GTX 295 Quad SLI
    Bench 2:E8500|NHD14|P45-UD3P(2nd PCIEx16 slot broken.. )|2GB Corsair 8888 Cl4|GTX 260 SOC
    (Bench 3: In Progress) 4770K|F1EE|Gigabyte Z97X-SOC Force| 4GB GTX1 /8GB Gskill TridentX 2666CL11 ney pro|5870 x3 on KPC tek9 slim 5.0/7.0
    Bench 4 E8600|NHD14|REX|2GB Corsair 1800 Cl7|Asus GTX 280
    Bench 5 (TBC): FX?|990FX-UD7|Gskill Flare 2000 Cl7|6970
    Server/renderbox: G3258|TT Water 2.0|Gigabyte Z87 Sniper M5|8GB Gskill Sniper 2133|gigabyte 5750|FD NODE 804

  11. #11
    Xtreme Member
    Join Date
    Jan 2011
    Posts
    122
    Quote Originally Posted by jimba86 View Post
    wow,this coming along great!
    Thank you jimba!

  12. #12
    Xtreme Member
    Join Date
    Jan 2011
    Posts
    122
    Halloj!
    I received a rather unexpected package yesterday, and it was from Silverstone sponsoring me with a Straider 850w Plus (ST85F-P)
    I thank awful lot for your help and the very quick delivery !


    What can I say about this PSU?
    The power supply is very quiet, it has good efficiency and looks overall very good.
    The only drawback is their multi-colored cables ...
    There will be no problem for me in this case, because I will make my own from scratch instead, so I can get the right length and no hassles inside the case

    It was the update for this time guys!
    / V.B

  13. #13
    Extreme BodyBuilder SnW's Avatar
    Join Date
    Aug 2008
    Location
    Holland,NH
    Posts
    271
    That's different, me likes !

  14. #14
    Xtreme Member
    Join Date
    Jan 2011
    Posts
    122
    Quote Originally Posted by SnW View Post
    That's different, me likes !
    Great to hear my friend...

  15. #15
    Xtreme Member
    Join Date
    Jan 2011
    Posts
    122
    Hey everyone!
    I now have an important package that helps me to see what happens with the water cooling inside the computer.
    This package is from my good friend Andreas Walter who works over at Aquatuning
    The content cinsists the latest full copper radiators from Alphacool who says to cool very well, regardless of their sizes, these radiators can also be found in brutal depths if you are the one who want the best of the best


    I thank Andreas a lot for his support in my project and that he kindly sponsored me with theese following items:
    Alphacool VPP655 - single edition
    Alphacool NexXxoS ST30 Full Copper 120mm
    Alphacool NexXxoS ST30 Full Copper 240mm
    Swiftech ClearFlex60 16/12mm

    A rather big pacage


    Lots cardboard... it protects the stuff good anyway, which only is an advantage for me.


    Now to the content I love those boxes!


    Tomorrow i will be testing if the rads fits inside the case... I'm keeping my fingers crossed right now!

  16. #16
    Xtreme Member
    Join Date
    Jan 2011
    Posts
    122
    Sorry that this update was a little late, do have a lot sleeveworks right now and regret priority over construction of the project.
    It is a bit sad that I get so little feedback here on XS, this is after all one of my english home and favourite forums
    Some more comments, feedback, suggestions, and much more would have been really nice!

    Now on to what i have done:
    -I have been scetching on how I will mount the rads for the most optimal tuberouting
    -Mounted radiators (got a little problem with frontrad)
    -Mounted some hardware

    Plans for what to do:
    -Paint some details in dark gray
    -Moddify the frontplate so that the frontrad fits into place
    -Sleevt the PSU and other wiring
    -Mount the water blocks
    -Mount the hardware
    -Mount the fittings and the tubes
    -Fil the system up and leak test
    -Game the heck out of it in Dreamhack Winter 2012!
    -Photo Shoot in the studio


    Now the radiators are finnaly inside. ... but i had some problems with the frontrad... I need do moddify the baseplate of the frontpanel a little, so that the rad could fit to the bottom of the case as the endtank of the 240mm rad touches the front panel bottom plate , it shall be easy to fix with the dremel

    It took several tries before I found the optimal location for water connection holes ... but damn good it was if one may say so myself


    Now the problem, the radiator cant sit toward the front panel, but it should be fixed pretty fast while those details I have chosen to be prepared for the paintjob.


    I mounted the motherboard inside to get an overview of the whole thing, it looks very good so far!


    Then i mounted an GTX470 and played with a sleevad extension cable of how it would look


    All the radiators are attached with very clean looking 6mm UNC-32 screws from MDPC-X


    Snapcaps for the rear radiator screws... It's the details that make everything


    That's all for this time ... i hope to however to get more comments and feedback from all of you!
    I know you can do better: D!

    Best Regards
    / Venhar

  17. #17
    Xtreme Member
    Join Date
    Nov 2010
    Posts
    140
    Hmm ... some all black mobo would fit here EVGA Z77 miniITX

    Click image for larger version. 

Name:	evga-z77-miniITX.jpg 
Views:	467 
Size:	48.2 KB 
ID:	129877

    Moddify the frontplate so that the frontrad fits into place,ok... or cut it completely and make a new panel.
    The new panel, which is a copy of the solutions that we have on the top Prodigy.
    OFC there are many more of the work, cutting, painting ... but,
    why not take the challenge

  18. #18
    Pie assassin
    Join Date
    Nov 2007
    Location
    Where lights collide
    Posts
    2,275
    overkill on cooling capacity with those 3 rads... overkill is good
    Current Status - Testing & Research

  19. #19
    Xtreme Member
    Join Date
    Jan 2011
    Posts
    122
    Quote Originally Posted by Elder View Post
    Hmm ... some all black mobo would fit here EVGA Z77 miniITX

    Click image for larger version. 

Name:	evga-z77-miniITX.jpg 
Views:	467 
Size:	48.2 KB 
ID:	129877

    Moddify the frontplate so that the frontrad fits into place,ok... or cut it completely and make a new panel.
    The new panel, which is a copy of the solutions that we have on the top Prodigy.
    OFC there are many more of the work, cutting, painting ... but,
    why not take the challenge
    Damn i love that board !
    I will modify it today
    You will see more about it on the next update my friend

    Quote Originally Posted by ZenEffect View Post
    overkill on cooling capacity with those 3 rads... overkill is good
    Ovrekill is awsome

  20. #20
    Xtreme Member
    Join Date
    Jan 2011
    Posts
    122
    Now for todays update!
    I did not do a lot today, but it was much needed for my build and the whole theme ...
    Today I prepared some details from the chassis before the paint began to watersand the metal parts which went very well but quickly... however the plastic front with the soft-touch finish on the took some time... luckily I already knew how to to 100% remove all the paint as it rises if you paint over it. I then got even a little time left over at the end out the day and drove out my newly painted VW Golf MKII out from the paint booth and ran into the details for paint...
    I then went up to our color cabinet and began looking for a dark gray 2K varnish on Stansox's color database ...It didnt went as good as expected, I could not find the color I was looking for. The color I wanted is the MDPC-X Shade 19, which im going to sleeve the psu with.
    I then started mixing my own costumcolor and after about 5-6 minute I got 98% out of the same color as the sleeve and then walked myself down to paint sprayguns and began to mix the paint with thinner and hardener, I sadly dont have pictures when painting the parts :/

    Now on to some pictures, taken with my Sensation XE :/

    Theese case details will be paintes:
    -The front panel (the base of the frontpanel)
    -The 240mm Mesh on the top
    -The motherboard plate
    -The PSU Bracket


    The color looks a little bit foggy, this is due to the quick drying thinner who simply does it job


    Took them out to the outside for a little moment (better light)


    After about 2 hours or so the paint had hardened (cured) completely, i the took the painted details with caution and test fitted them, looks totaly great if i can say so!


    I hope you appreciated the update so far

  21. #21
    Xtreme Member
    Join Date
    Jan 2011
    Posts
    122
    Hi guys !

    Before you get an update on the little modification I made, I will show you what pagece I got lately
    My expensive Taiwanese candy has finally arrived!
    Thank you Bitspower and the whole team for their help and support in yet another project you are the best !


    BP-Pacage! Damn i love em !


    Gues what this is The winner gets a +REP!


  22. #22
    Xtreme Member
    Join Date
    Jan 2011
    Posts
    122
    Hello Guys!

    Sorry for an late update, but better late than never....right ?

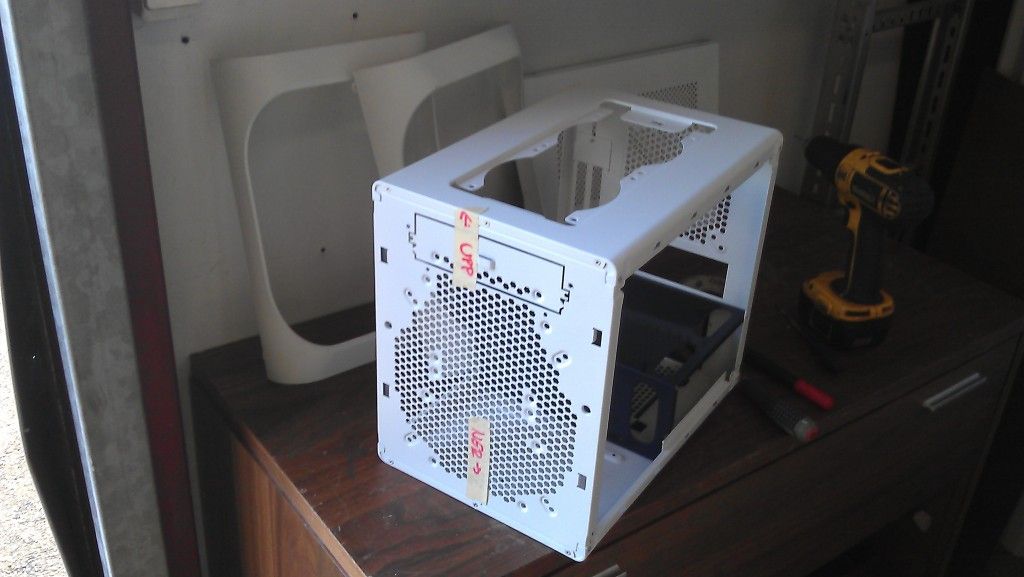
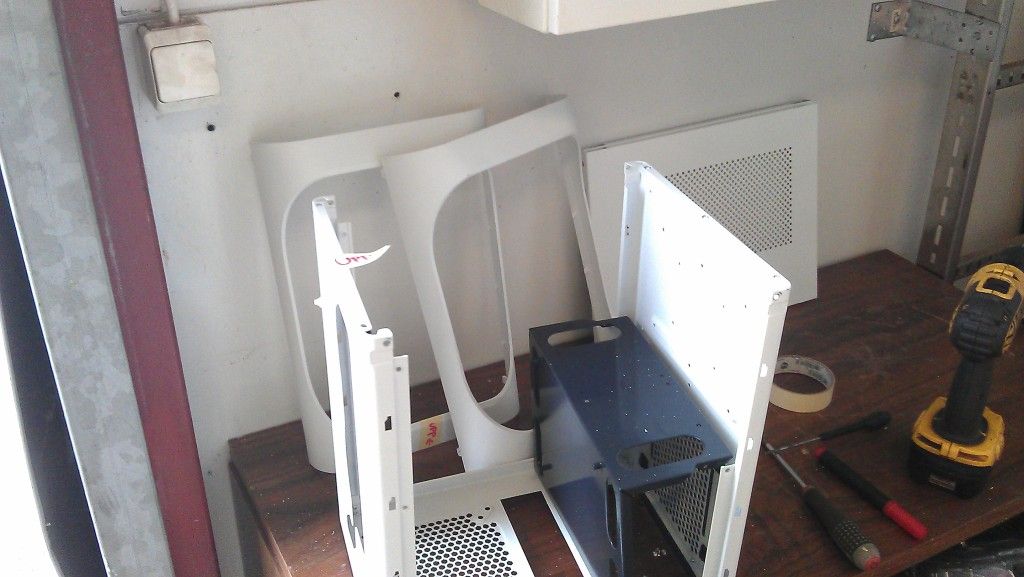
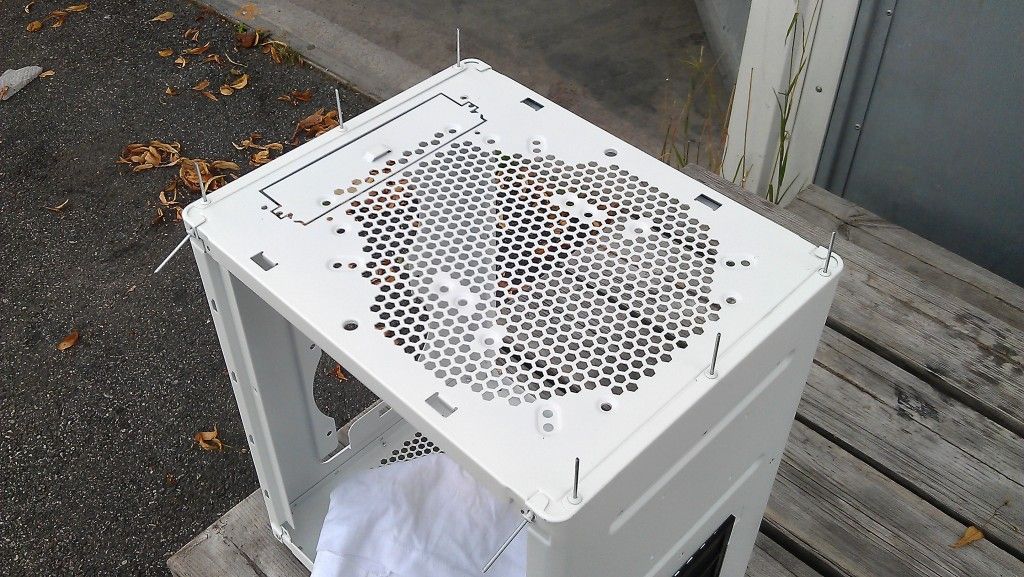
    I started to take the case appart more, this time the case feet and handles. They had to be gone becaose of the rivets who are placed behind them and need to be removed so that i can take the bottom piece appart.


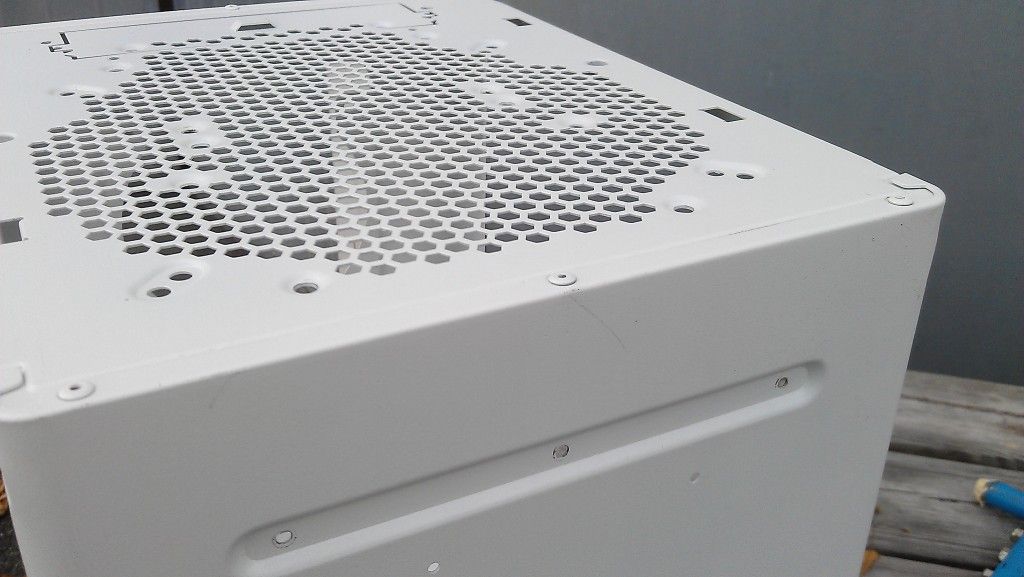
    After the drill it looket like this


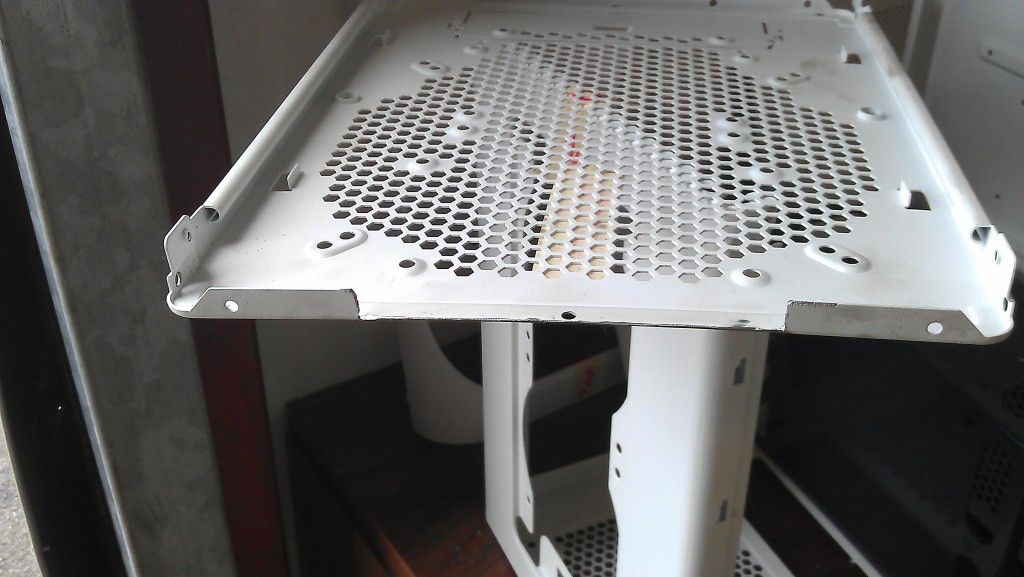
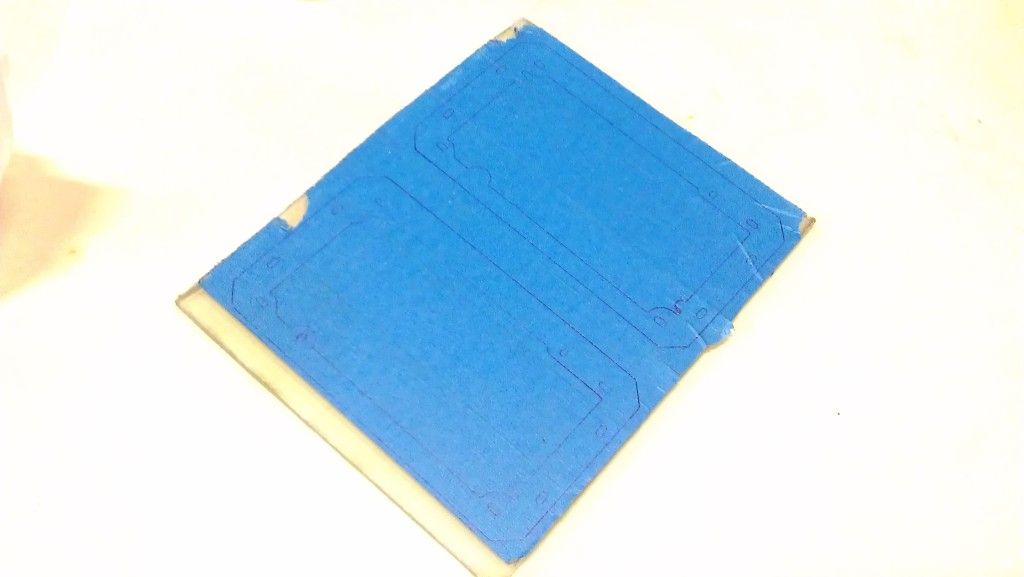
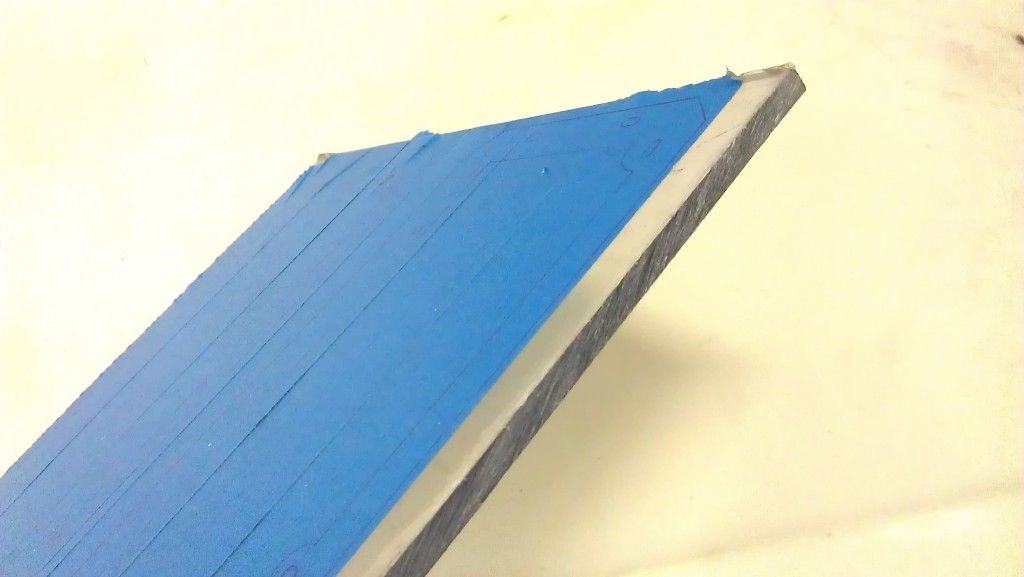
    Here you can take a look at the simple modification that i did, that piece touched the endtank and didnt let me to allign the rad with the holes, it also didnt let the rad to stay flush with the front. Could you think that a 2mm piece of plate could do such difference?


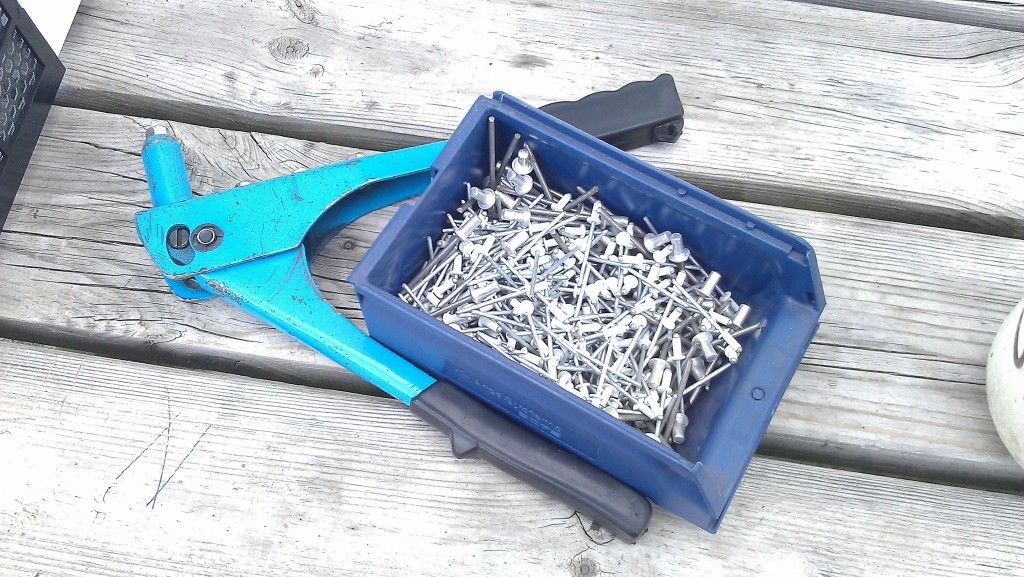
    White rivets fromMDPC-X, a lot of them !


    Then it was time to rivet everything together, i also did the motherboard tray, went like a charm!


    Something i am doing meanwhile!


    That was the update for tonight everyone :dremel:!

Tags for this Thread

Bookmarks

Bookmarks

Posting Permissions

  • You may not post new threads
  • You may not post replies
  • You may not post attachments
  • You may not edit your posts
  •