Page 3 of 3 FirstFirst 123
Results 51 to 72 of 72

Thread: Project: Hush! - A scratch-built passive radiator/case

  1. #51
    Registered User
    Join Date
    Sep 2010
    Posts
    45
    Quote Originally Posted by Utnorris View Post
    Very interesting concept. Can't imagine how much it will weigh completely filled. If you wanted, you could add a large fan on top to circulate more air around the entire case, but based on the temps you have shown I am not sure if it would be necessary or beneficial. Nice work and keep the updates coming.
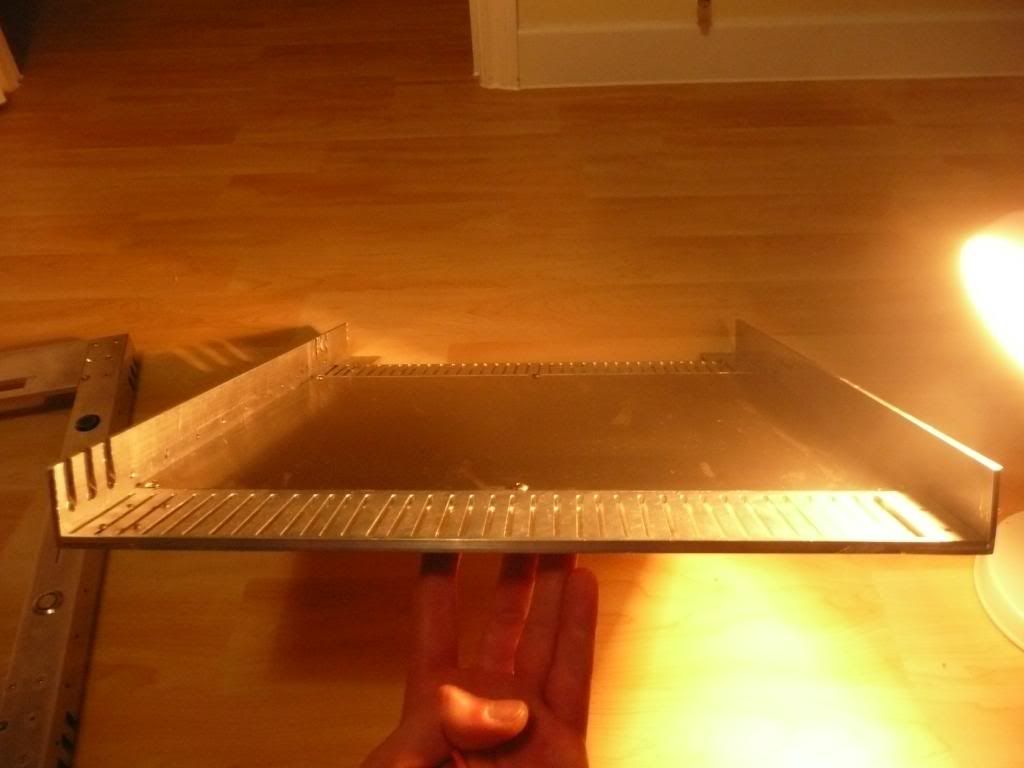
    I think I worked out it weighs around 34-35kg (5st) fully filled with hardware and water (it holds about 1.7 litres of water btw). Weighs about 25kg unfilled. Very heavy but not unmanageable.

    I have dabbled with the idea of running some fans. Would probably go for 9 x 120mm fans on an automated fan controller though as there are much higher quality fans available in that size. I bought a sanyo denki 9S1212L401 1500rpm fan and a 1450rpm Scythe gentle typhoon, and whilst they're both superb fans (if somewhat pricy), they're unnecessary as temps are fine atm. Who knows, might go for that if I start runing multi-GFX cards down the line and temps get out of control. Would be nice to have fans that stay off until temps get dangerously high.

    Quote Originally Posted by Vetalar View Post
    awesome work!!!

    but IMHO 2 car radiators (for engines) with rare fins will cost MUCH less money, time and efforts. and in Your case "warm" air from bottom section goes up, pick some heat from MB/video/ram, and than "cool" upper section?
    any tests with separated airflow for sections (cardboard etc.) possible?
    Thanks Vetalar!
    Two car radiators would suck for passive airflow though. Why would someone design and build their own case from scratch in order to save time and money? besides which, watercooling has come on a bit since car radiators...

    I don't think the heat from the motherboard makes a massive difference tbh. I mean, Mobo cooling blocks are really for aesthetics rather than anything else... I could stick some cardboard around the motherboard, but as the system is designed to run fanless it seems a little pointless as I'm not going to add a fan to cool it! Plus the motherboard etc adds its heat to the water when it is warmest, when it has just entered the radiator..

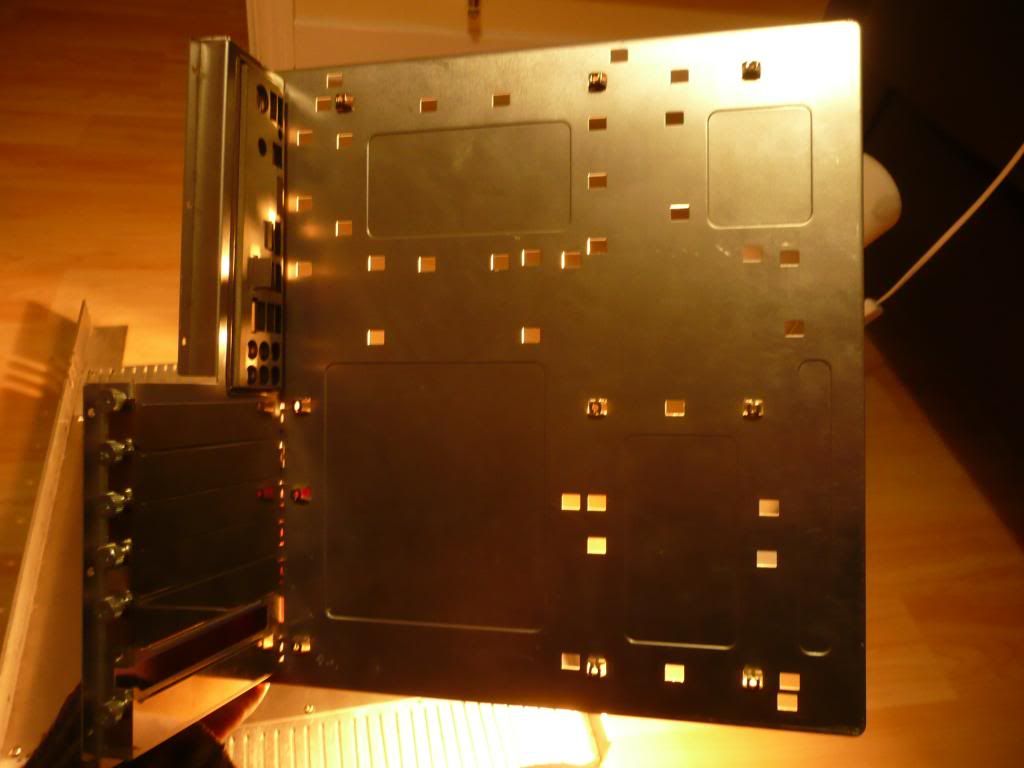
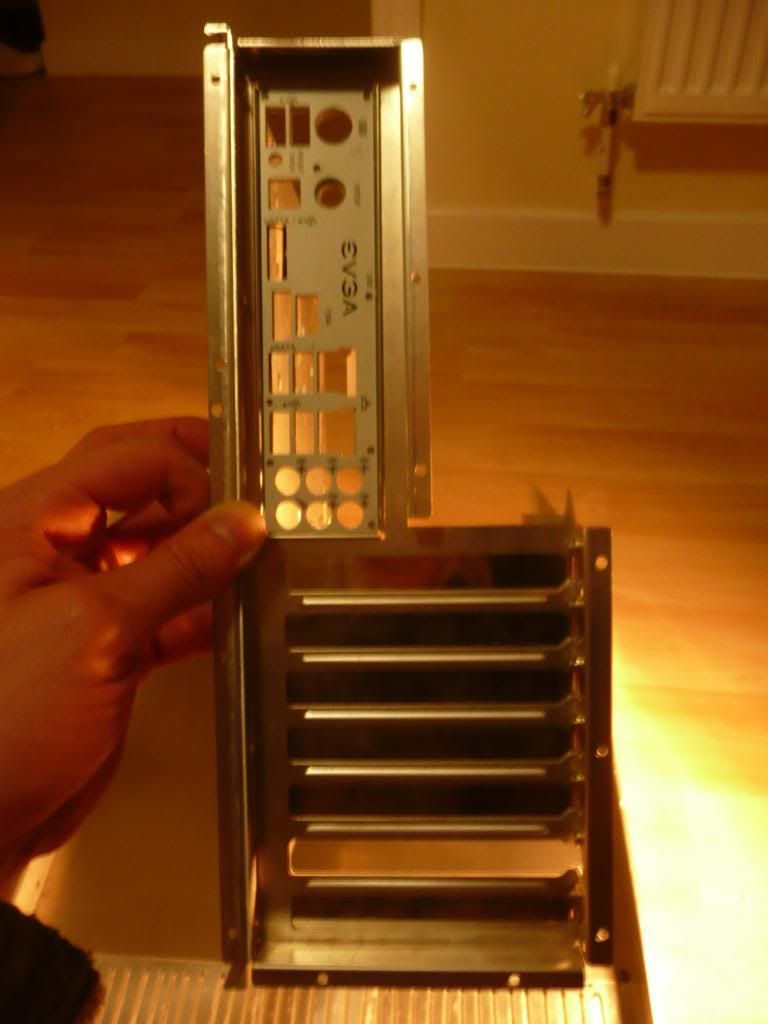
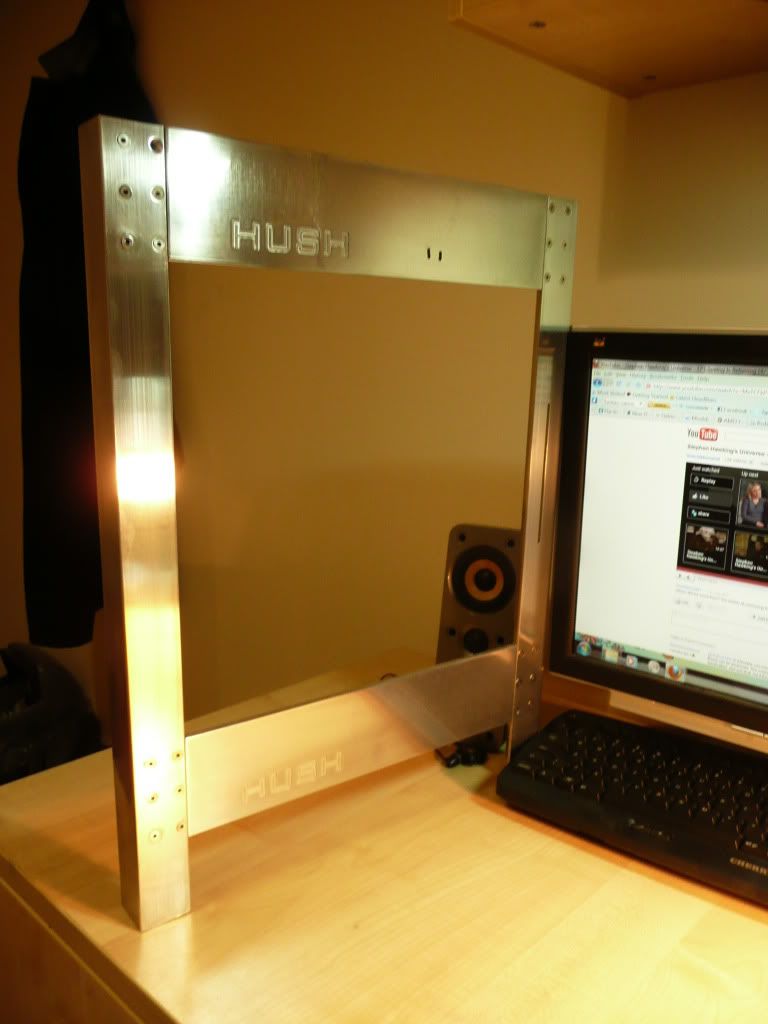
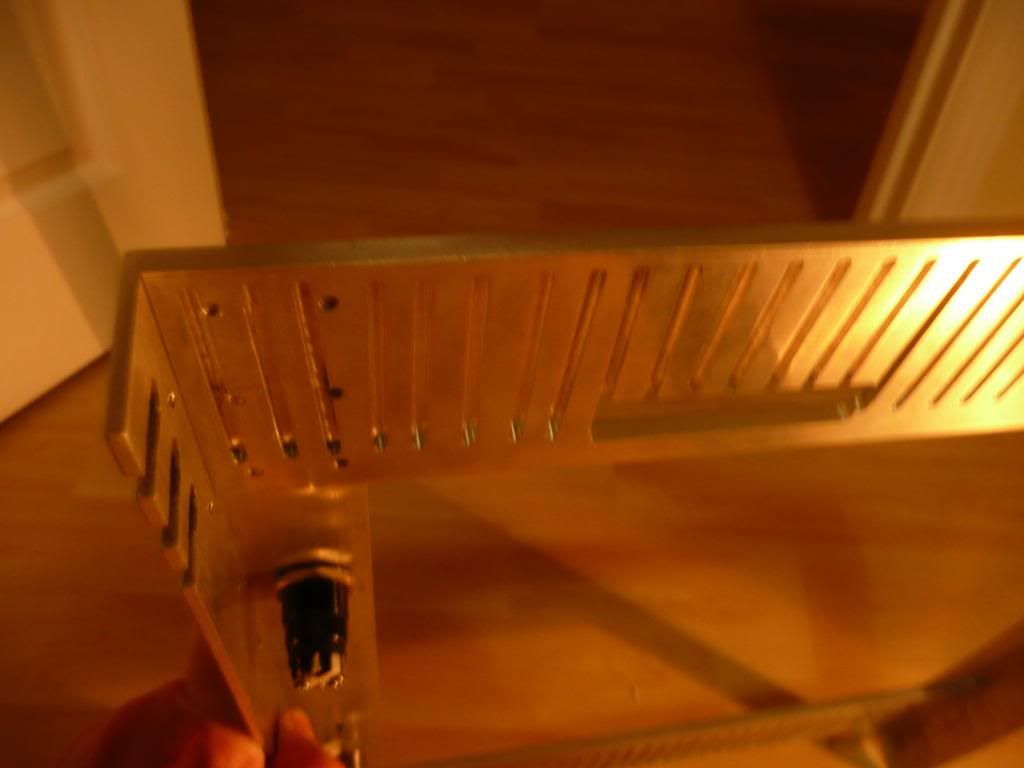
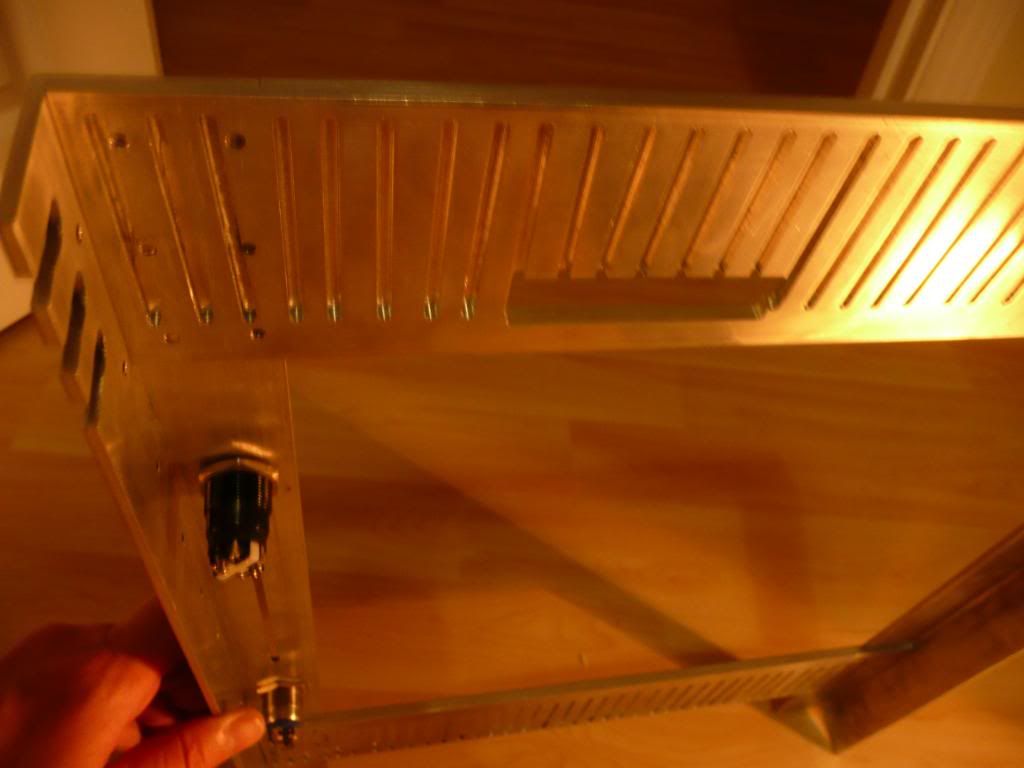
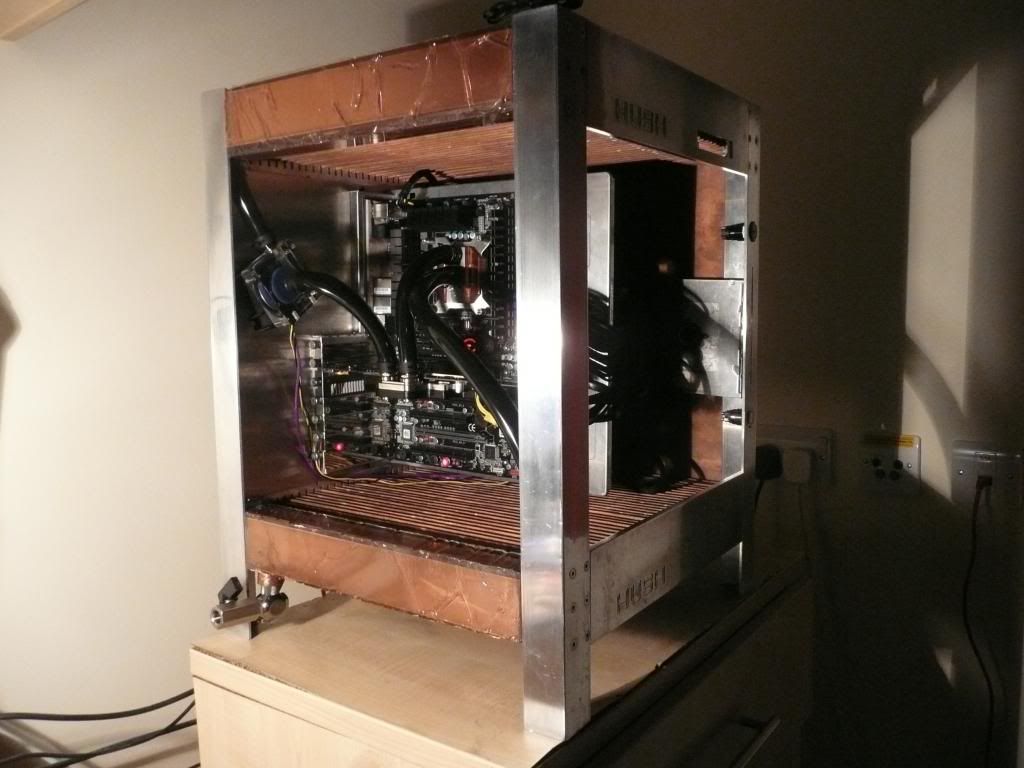
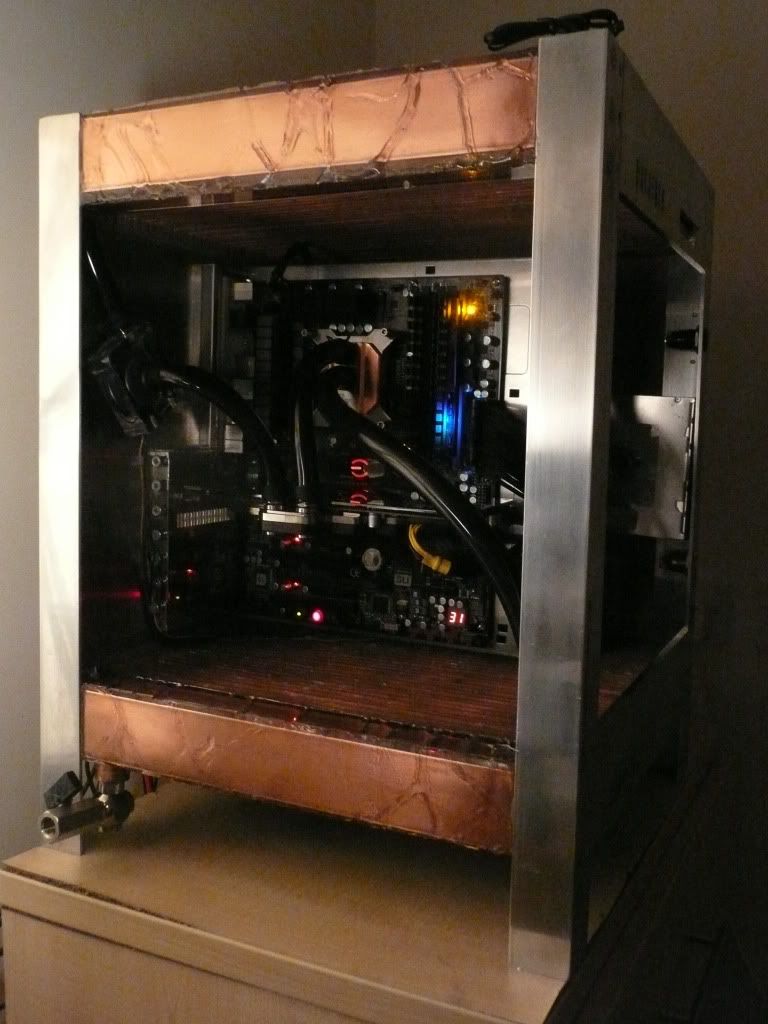
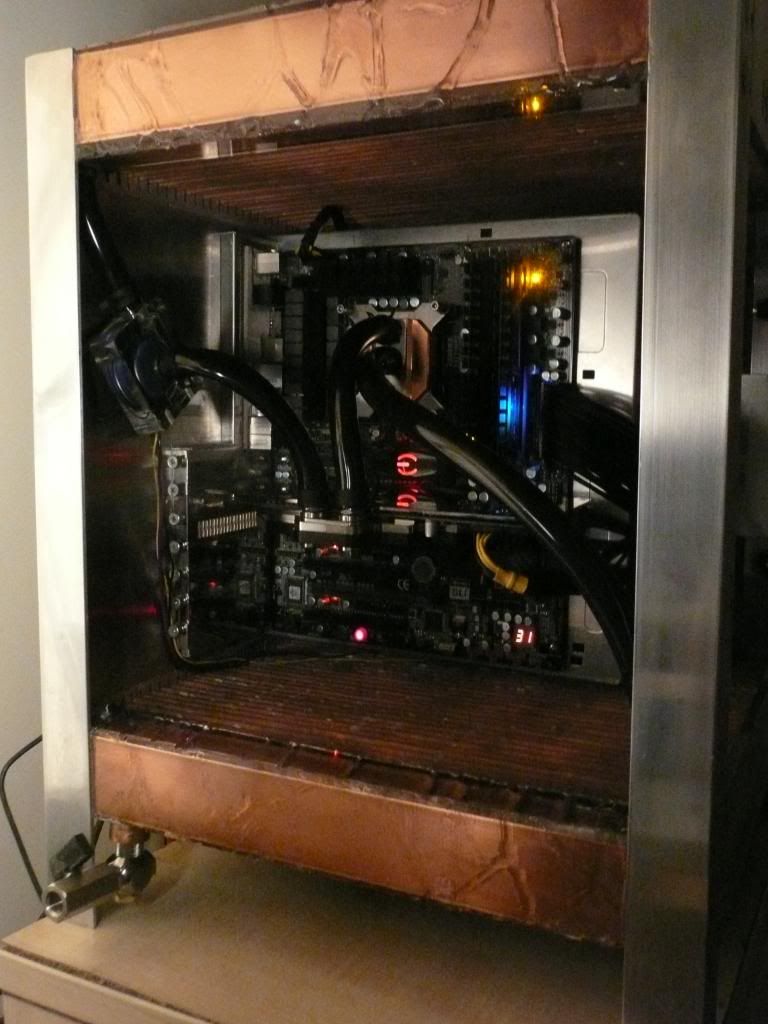
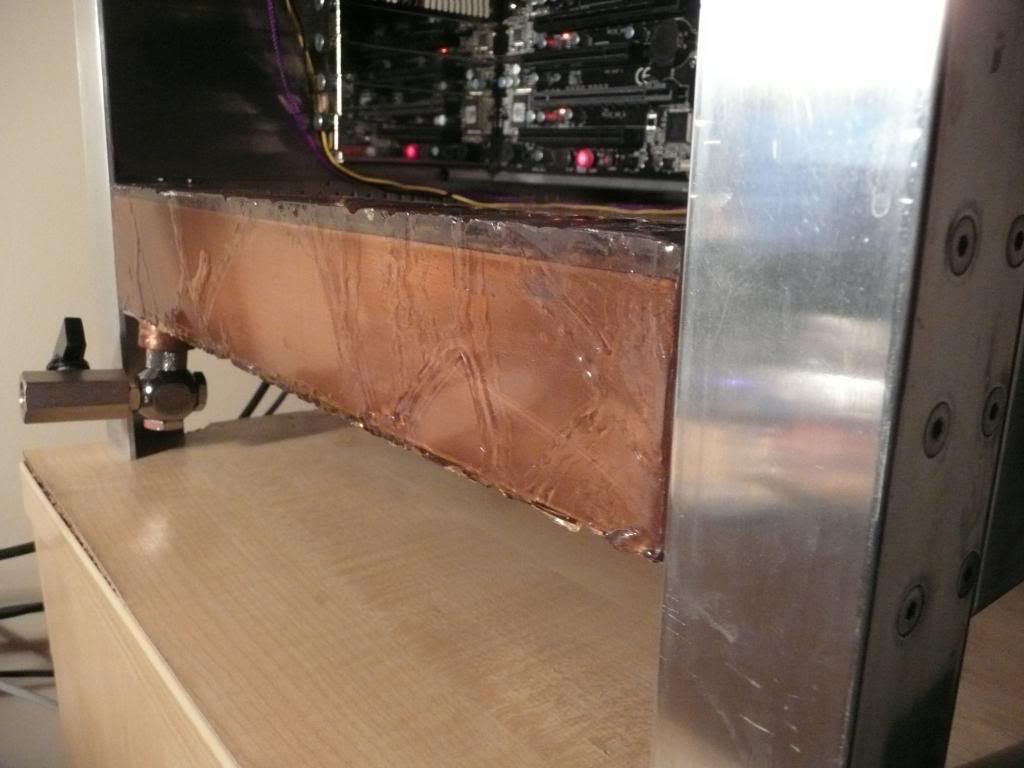
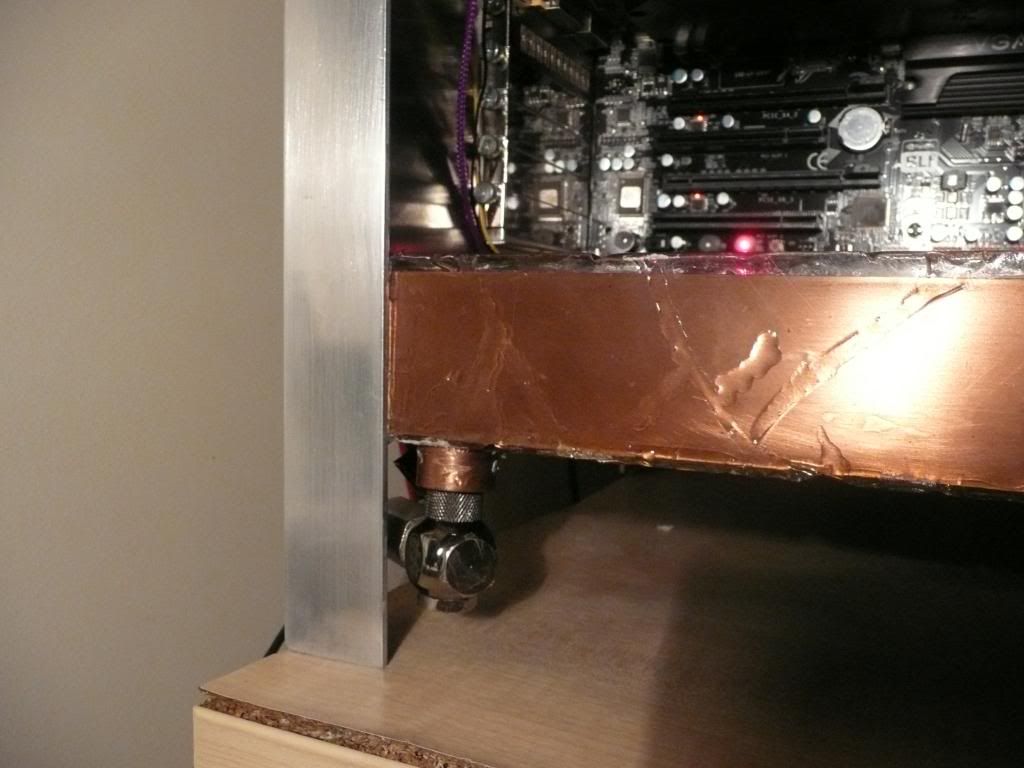
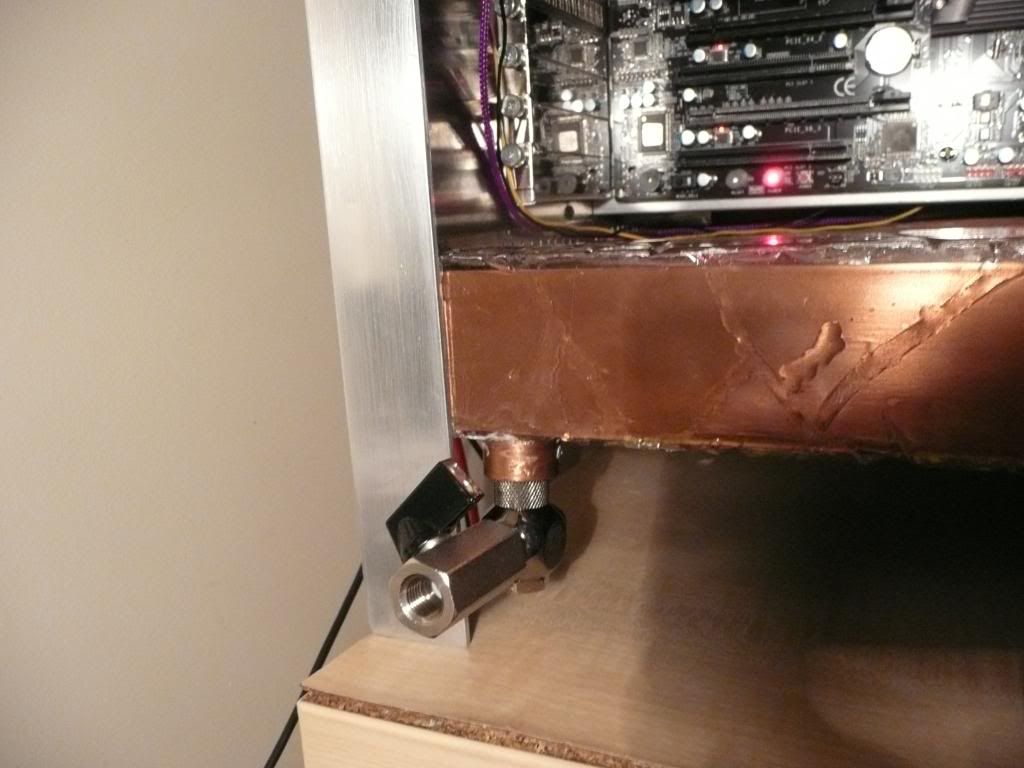
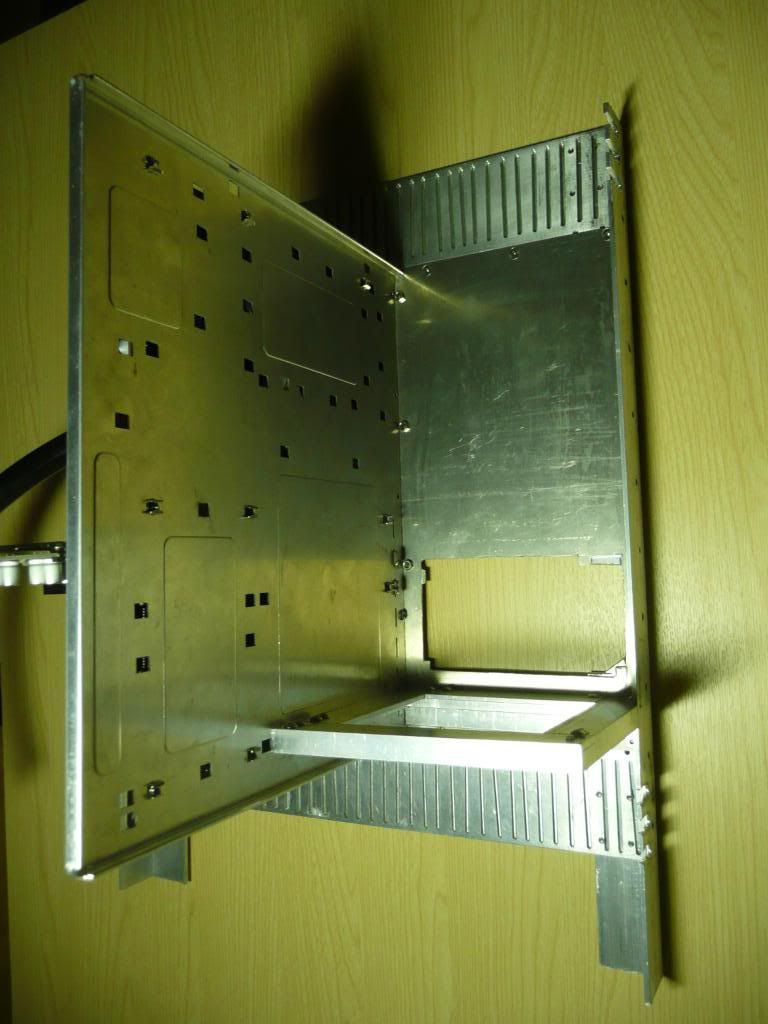
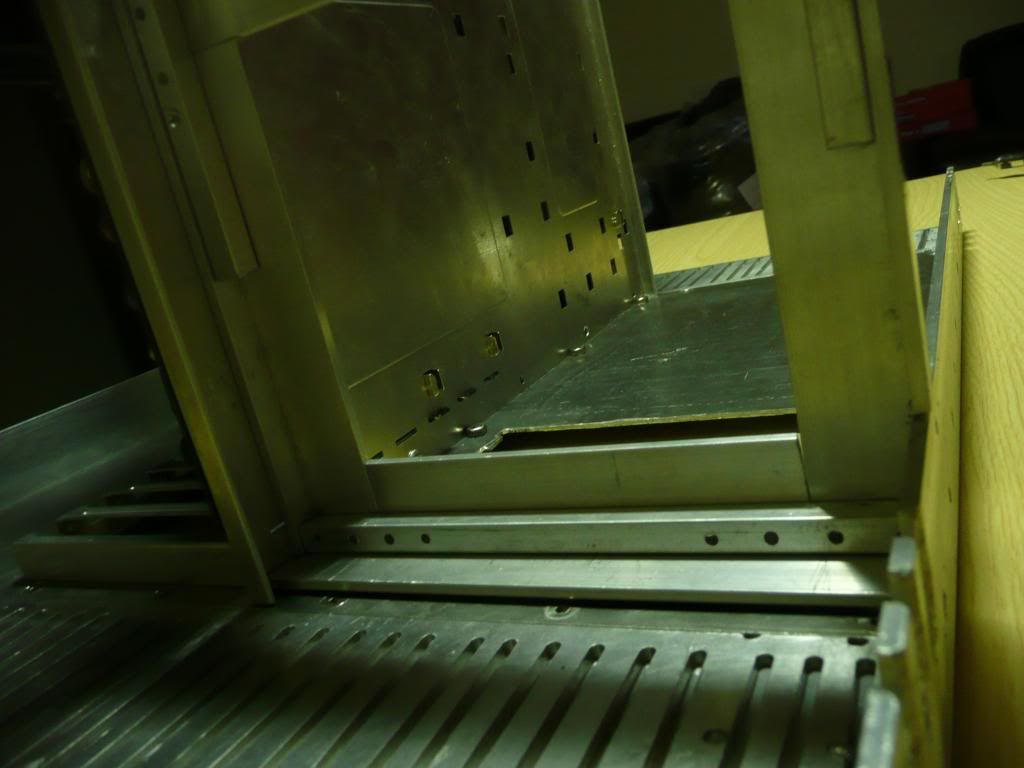
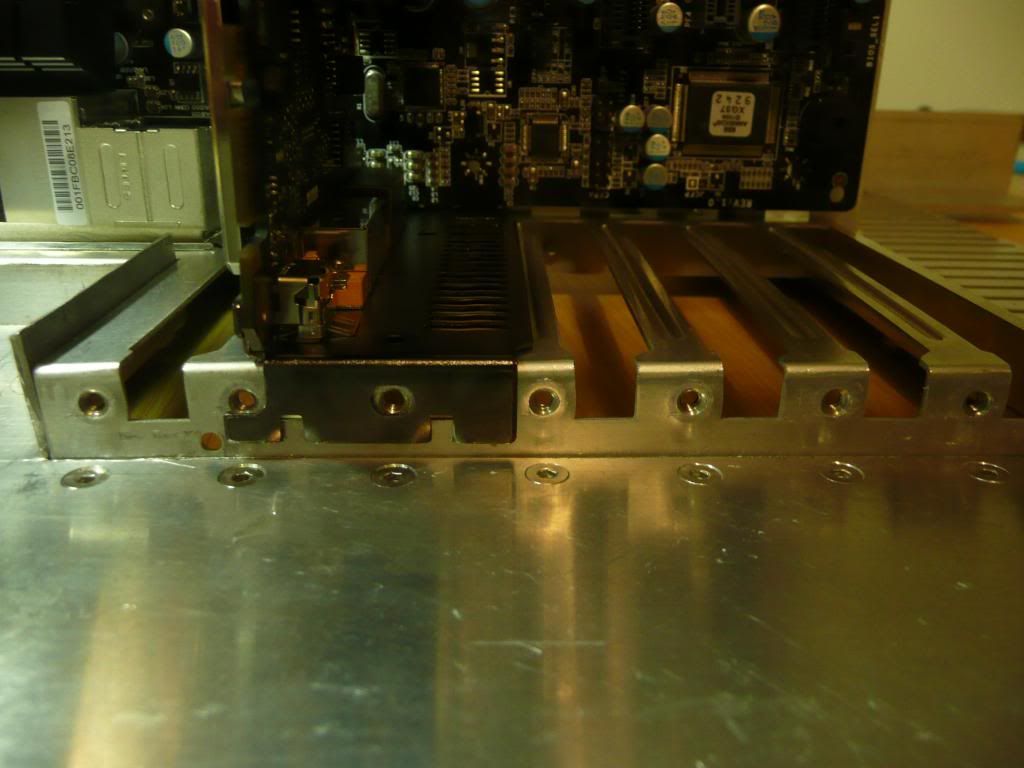
    The case is actually designed to make act as a counter-current exchanger with warm water from the loop entering at the top, getting cooled by air that has already warmed slightly and risen through the case, going down the pipes against the flow of rising air, and then going throught the finned pipes at the bottom and being cooled with the coolest air. Of course, more heat would be transferred to the air if no fins were cooled by any slightly warmed air and only received fresh cool air, but that's not possible in this situation due to space limitations. It's a good solution for transferring heat, chemicals etc used widely in biological and industrial processes and systems. Having said that, as nice an idea as it is, I recently plumbed the loop up with the water going first into the bottom and I'm not sure how much difference it actually made to the temps.

    Quote Originally Posted by jtdigital View Post
    dude you must have put alot of man hours into that thing why not just get some mora 2 or 3 pros for a passive system nice fabrication work nonetheless
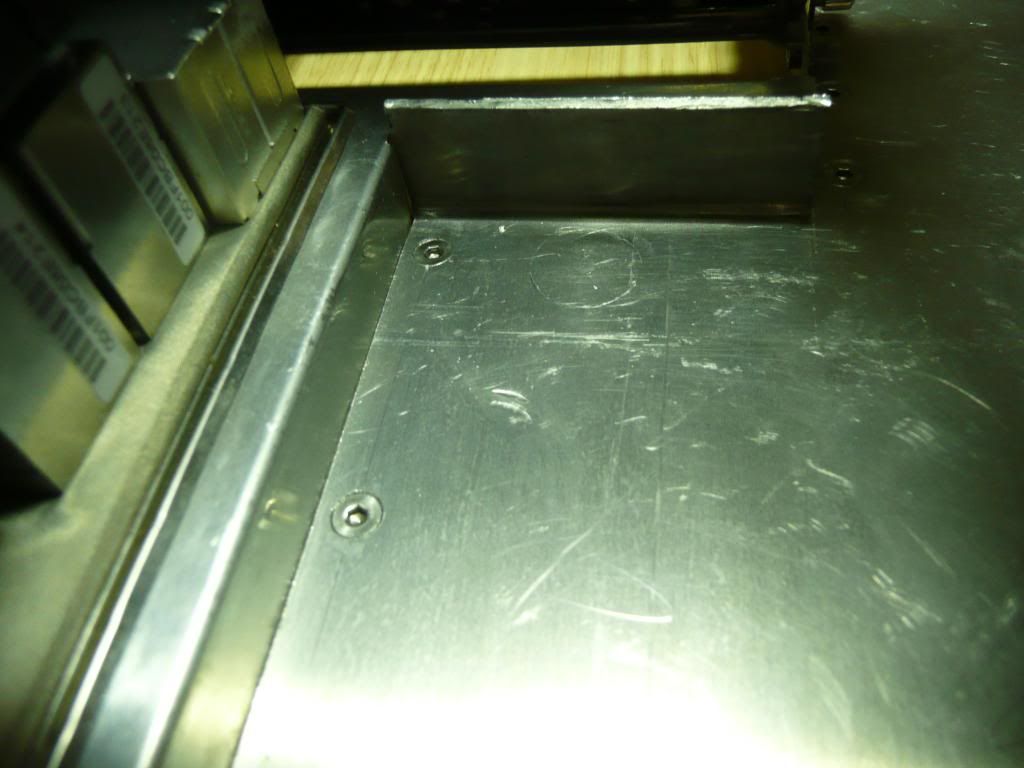
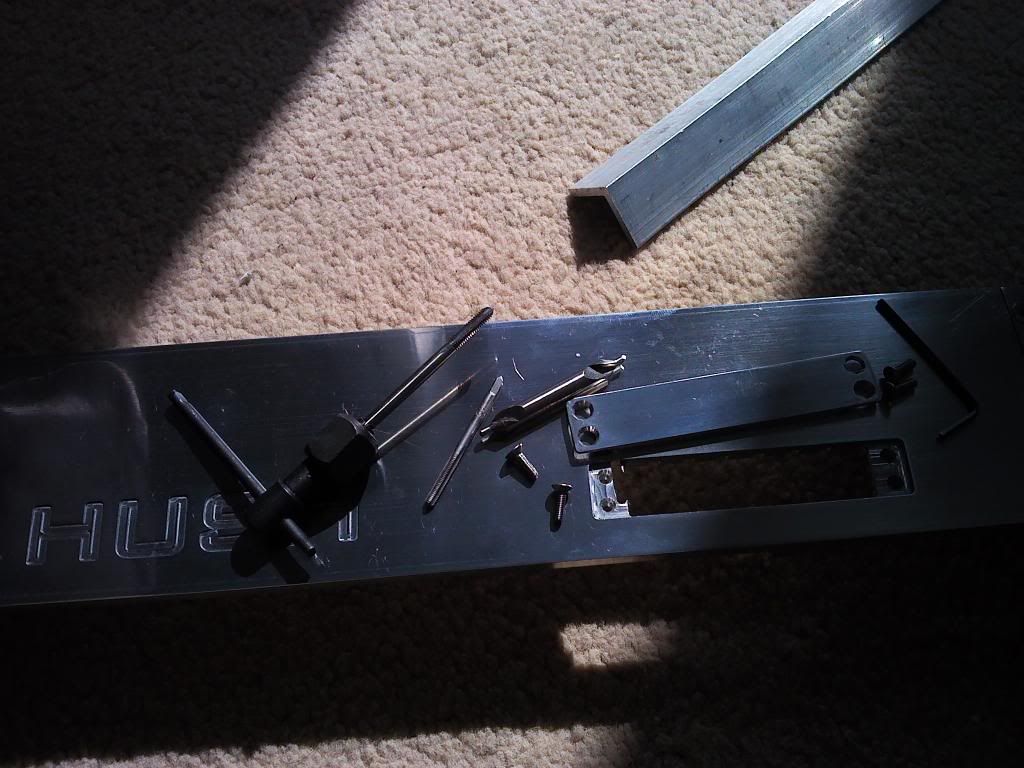
    Yep, a lot of hours. But even though tedious in parts (ahem, soldering 4000 joints), I enjoyed making it. Sort of like people who wax their car. Not much fun, and time-consuming, and that dust and grime isn't actually doing much so what's the point?...

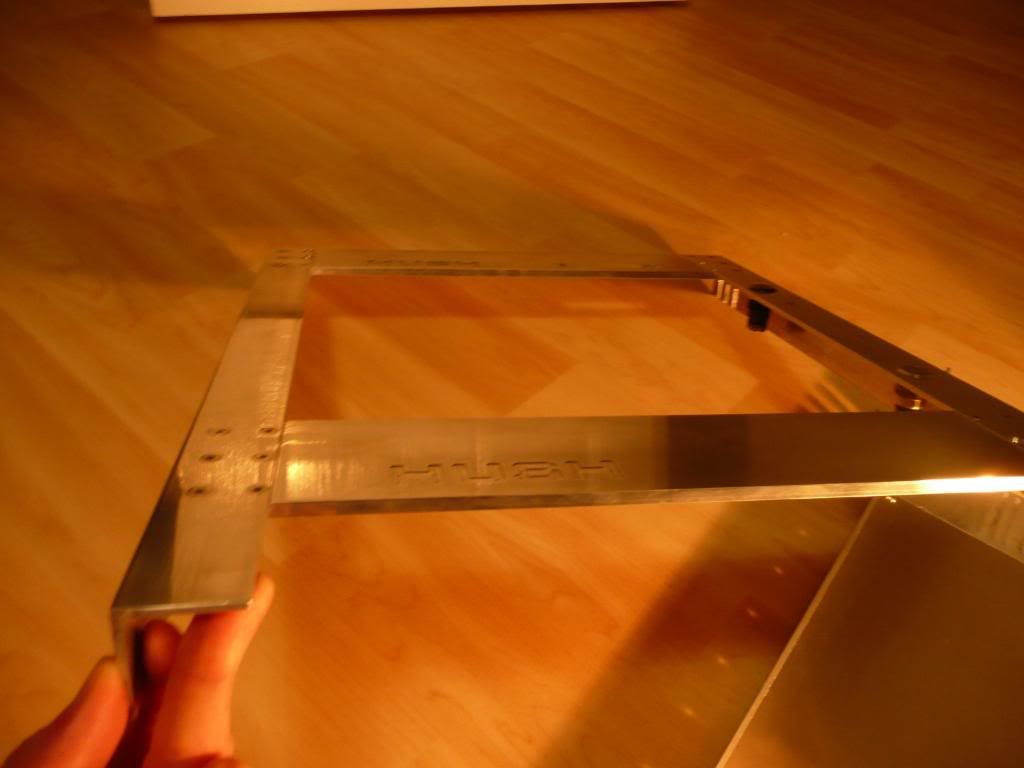
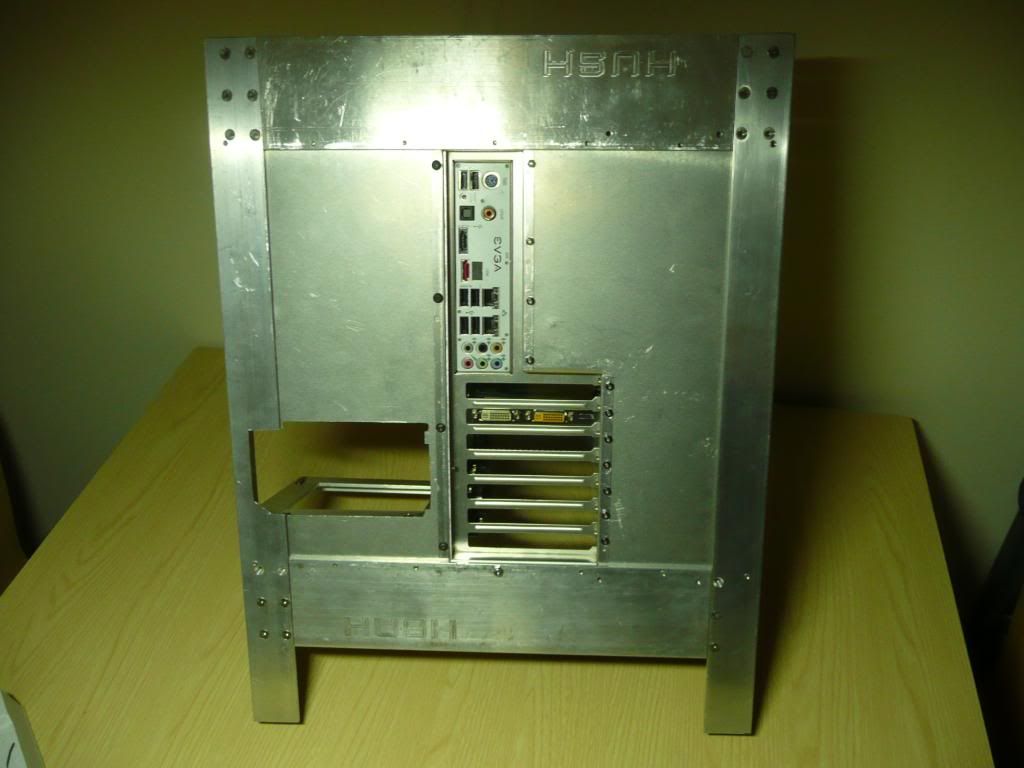
    It's not about costing money really. I naively mentioned when I started this project that current passive-cooling tubes like Innovatek Konvekt-o-matik or Cape Cora tubes cost a lot. The reality is that scratch built cases cost a lot in time and materials. Even with getting copper at much less than what the metal is worth as scrap (I paid about £100 for over 25kg of it already cut to strips for me) the project has still cost over £300 I think for raw materials. But people don't make cases to save money over a case off the shelf. They do it because it's a hobby, just as making your own furniture is an expensive hobby compared to buying a set of chairs from a Swedish furniture warehouse.

    Quote Originally Posted by Manicdan View Post
    my scrolling finger hurts, for a good reason.
    excellent work, you should put a temp probe on some copper to see their temps, relative to your cpu/gpu temp
    Yeah, I'm planning to get an aquaero and have temp probes in the water (before and after rad maybe), simple flat probe for ambient and one stuck for heatfin temp to get an idea of water to heatfin delta and see how much heat is likely being dissipated by radiating and how much by conducting.


    Quote Originally Posted by Vinas View Post
    A lot of problems in this build
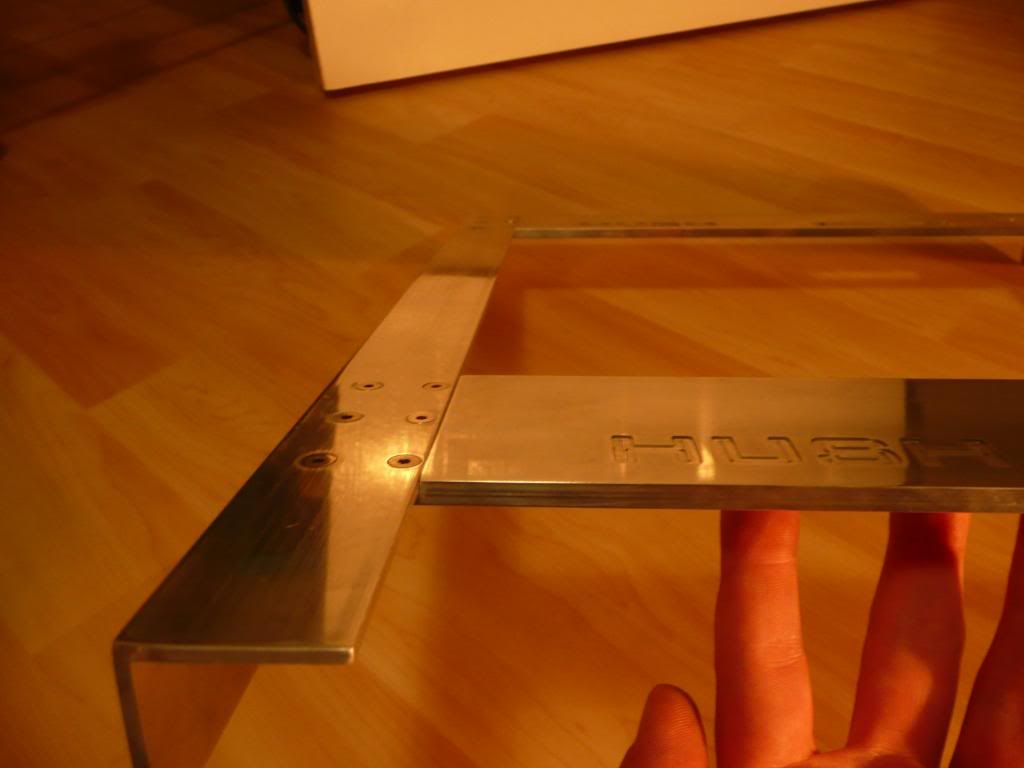
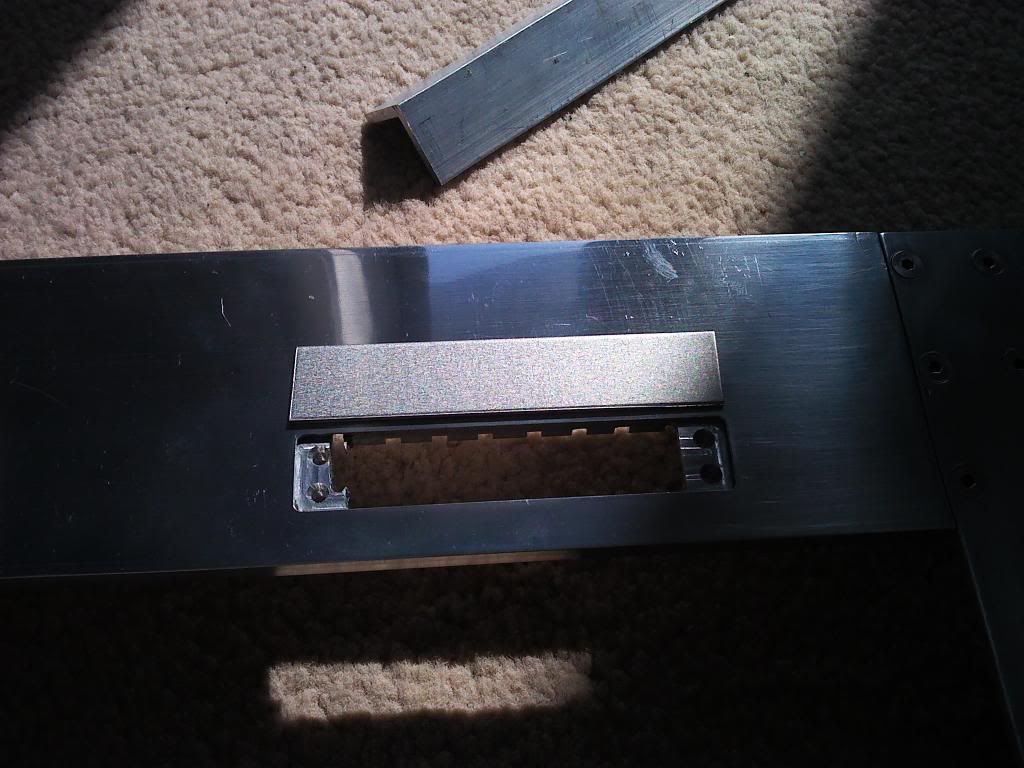
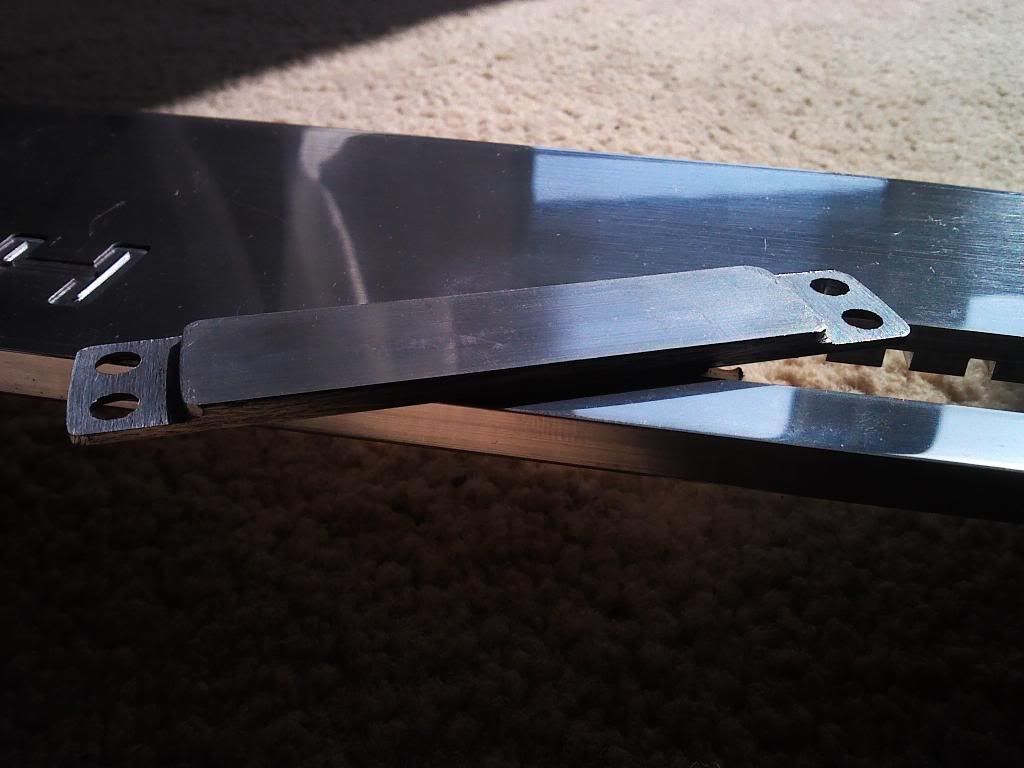
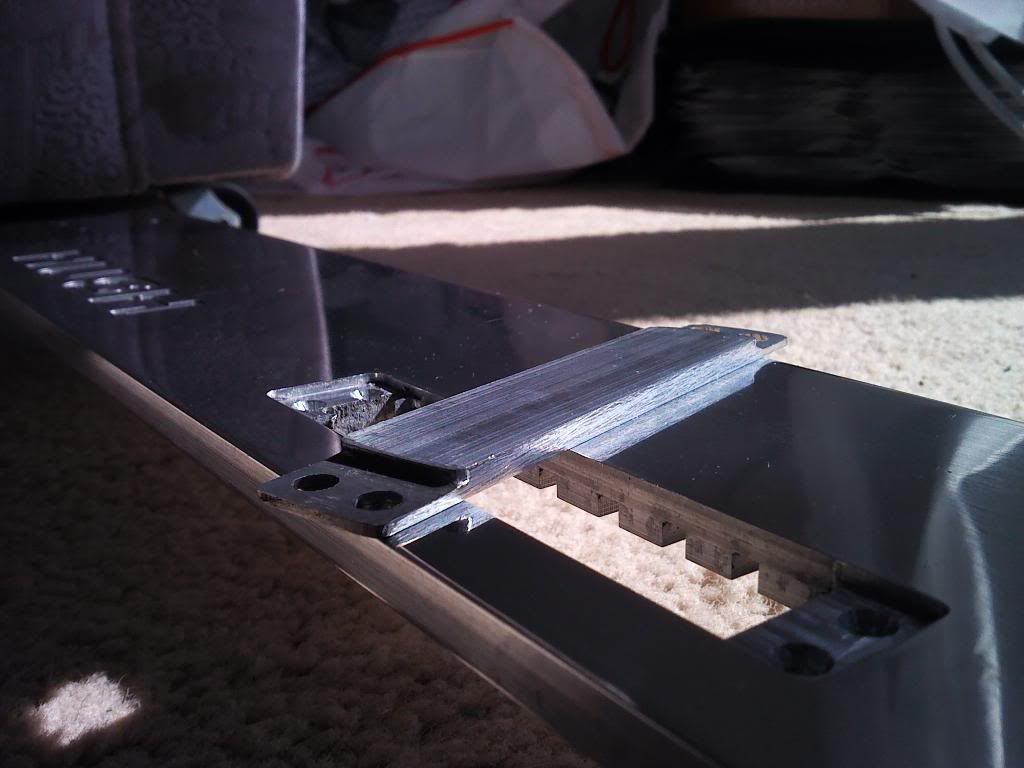
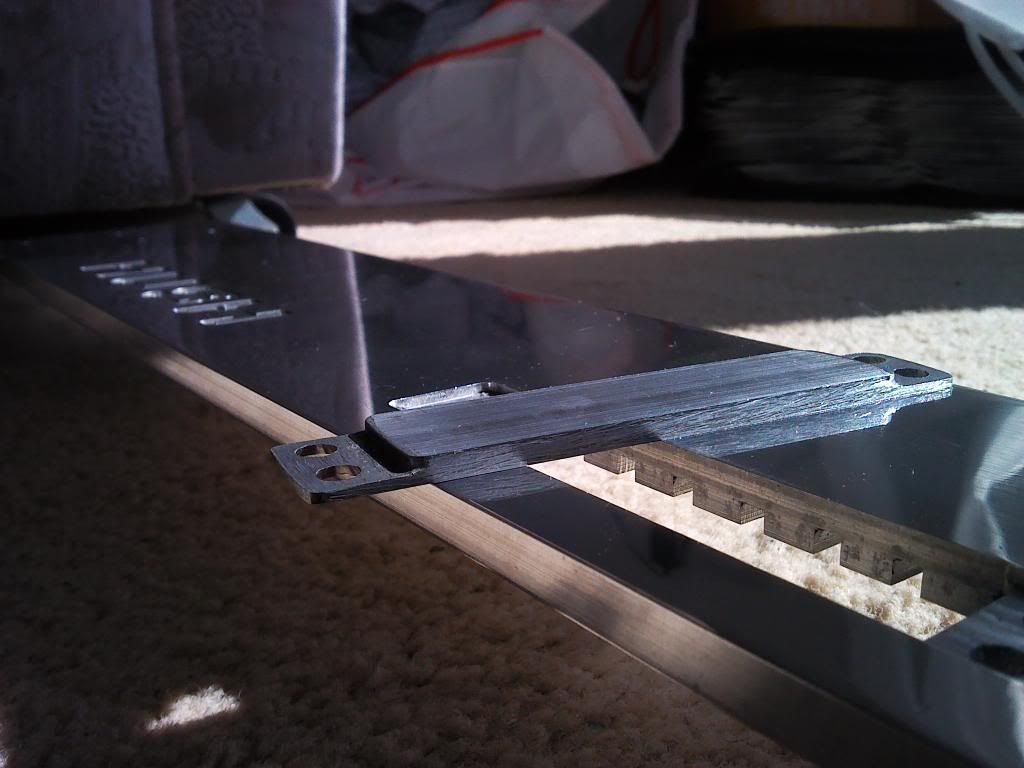
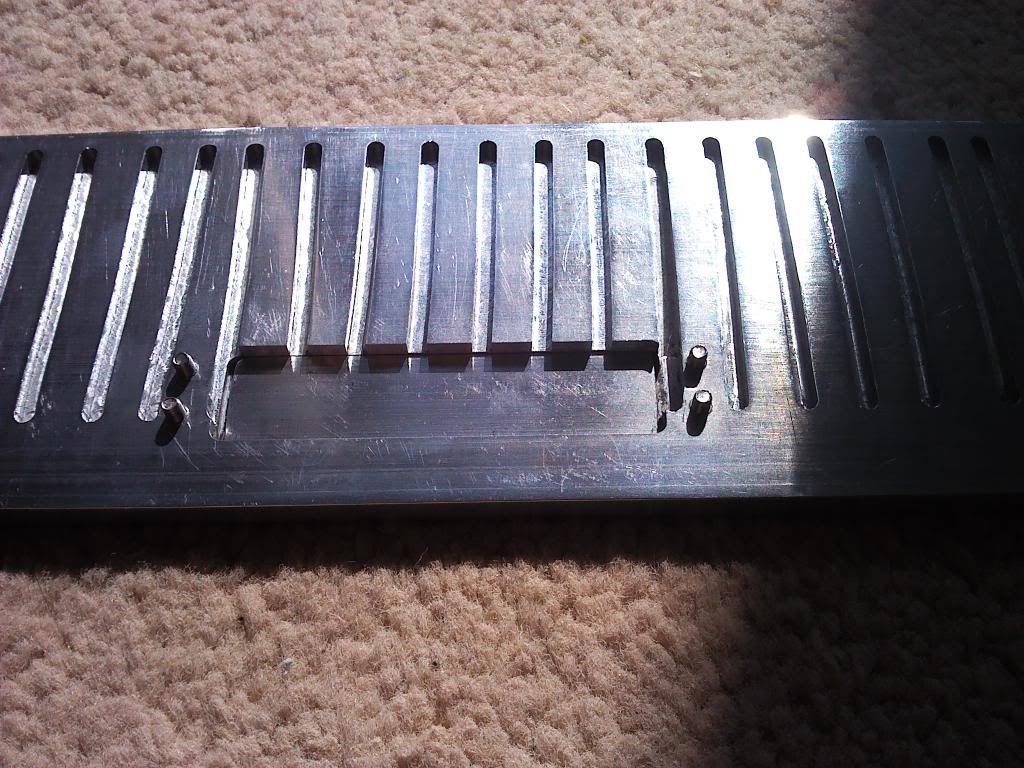
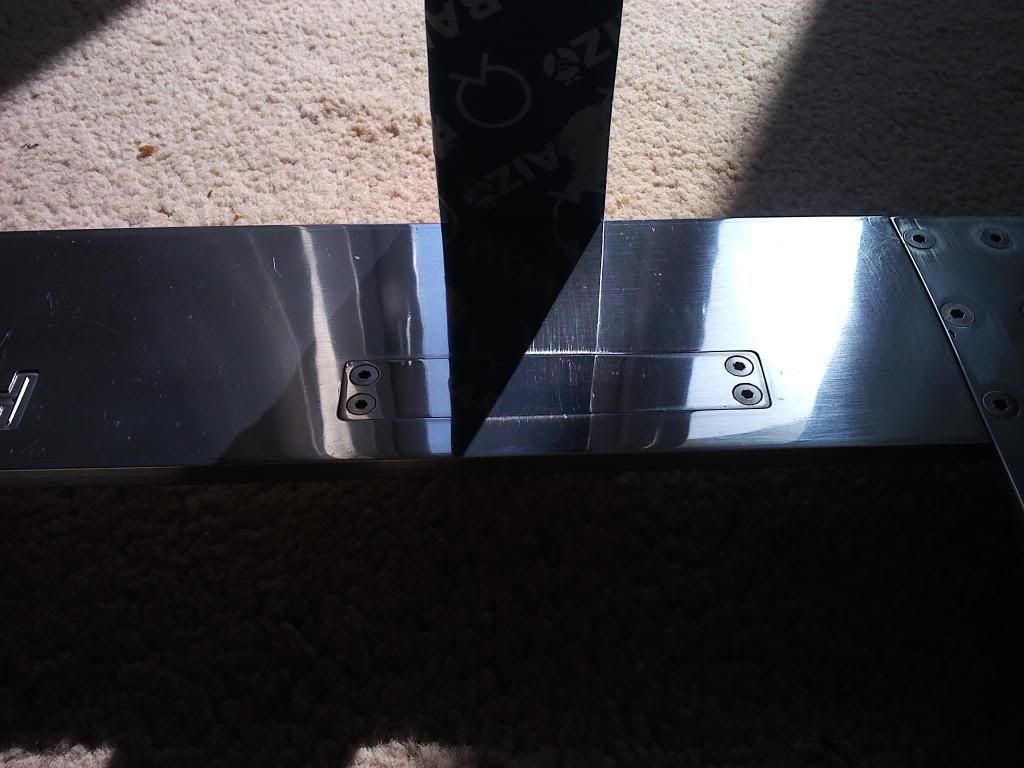
    Yeah, the main problems were from sealing the ends. It's big enough that making molds for sealing the plenums (in polyester resin) and before that keeping bits clamped together for sealing with solder and epoxy is a . Plus I was a litle impatient at times - only recently got it with me and so before that work was restricted to weekends etc. so work did tend to get a bit rushed when I knew I could only get a day or two's work done.

    Quote Originally Posted by EnJoY View Post
    Install an inline filter that uses stainless steel mesh before the loop That will catch and gunk floating around before it gets to your waterblocks. Then you can clean that every now and then if/when you need to.
    Hmm, never liked the idea of filters. There shouldn't be bits of crap in your loop anyway, so a steel sieve causing massive restriction and getting clogged up seems pointless. Even if there is rubbish in the loop, a microfin block will get clogged up and collect it for removal anyhow.

    Quote Originally Posted by Rukks View Post
    Gotta love EES, someones a mech eng. Loving the build, also learning EES in one of my classes right now haha.
    I'm not an engineer, though I did some basic haemodynamics (basic fluid mechanics) covering Poiseuille's law, laminar and turbulent flow etc. at university a few years back. I just stumbled across EES when looking for freely available modelling software. It's a nice little program, though the numbers are out for my set-up and it doesn't explicitly state how it's modelling and what assumptions it's making, which makes interpreting what it says difficult. That's probably my fault though. I just downloaded the free version; I didn't have any classes or the accompanying textbook to explain it.

    Quote Originally Posted by ryan92084 View Post
    Now THAT is a water cooled case. mad props to you.
    Quote Originally Posted by Tetrafluorometh View Post
    Thats pretty dam impressive there! I'm now tempted to make something the same!
    Quote Originally Posted by affiliate13 View Post
    Hats off to you. Great stuff.
    Quote Originally Posted by SuperPhrank View Post
    Very impressive!
    Quote Originally Posted by vhaarr View Post
    Holy smokes that thing is a beauty
    Quote Originally Posted by Huww View Post
    Wow
    Quote Originally Posted by leo_bsb View Post
    really great job, congrats to you mate.
    Quote Originally Posted by meanmoe View Post
    Very nice build...
    Quote Originally Posted by alpha0ne View Post
    The words 'EPIC BUILD' does not even come close to describing this insane build

    LEGEND in the making
    Thanks all!

    Quote Originally Posted by avddreamr View Post
    Wow, that's amazing.
    If this doesn't end up as mod of the month on some website.... man.. i don't know what will.

    I can't even imagine what something like this would cost if it was sold....
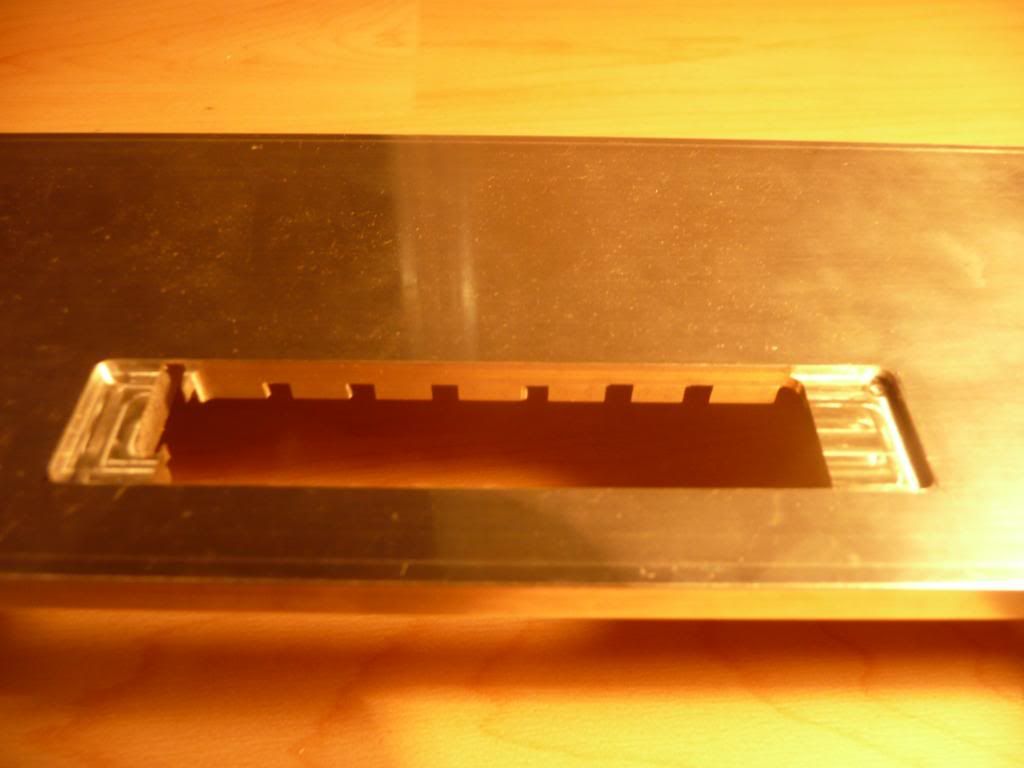
    Sadly not - was entered for Bit-tech's MOTM competition back in January at the stage where it was just burnt-flux-covered heatfins soldered to tubes.

    Quote Originally Posted by jayhall0315 View Post
    Monkey - Congrats, one of the very few projects here at XS, that was actually designed from a true heat transfer point of view. For a week or so, I was doing a worklog of my most recent build when a poster asked me about passive heat flow and radiance. I didnt want to besiege him with math, so I had intended to answer that is a column standard radiator form (what you have), you need something like 28,400 grams of thin copper to conduct a roughly 500 watt radiance and stay at 50 deg C. (of course, as you read from the heat transfer text, 3D configuration is utmost in passive radiance)

    Now I wish I would have had your pictures to show instead , LOL. Much simpler.
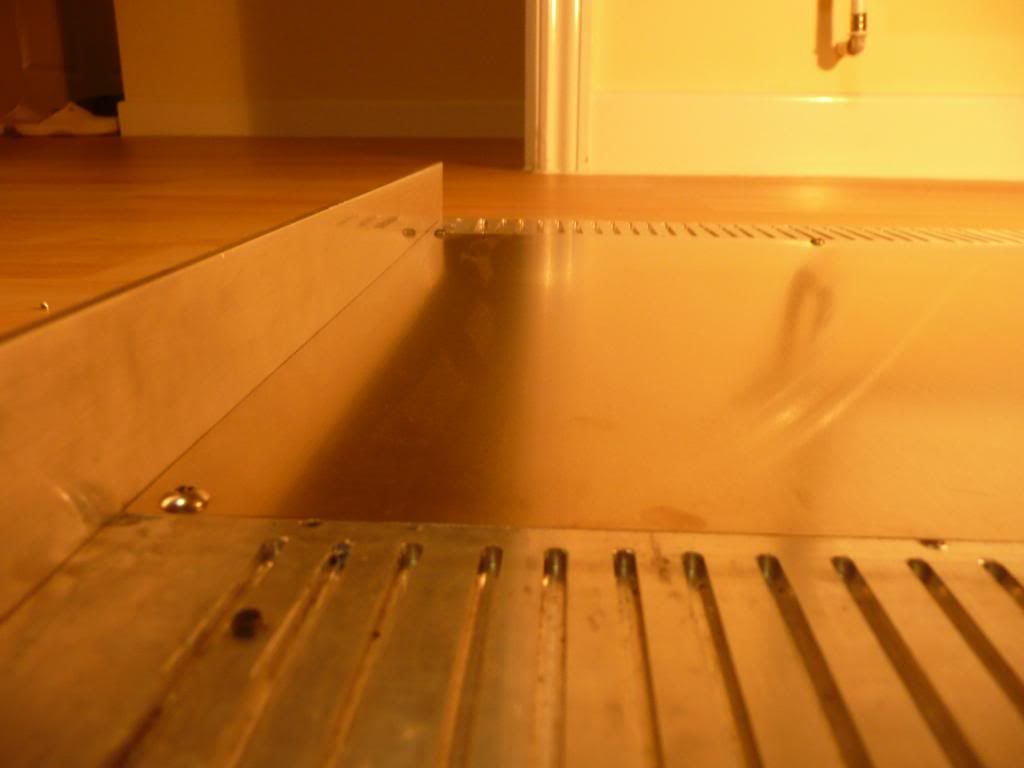
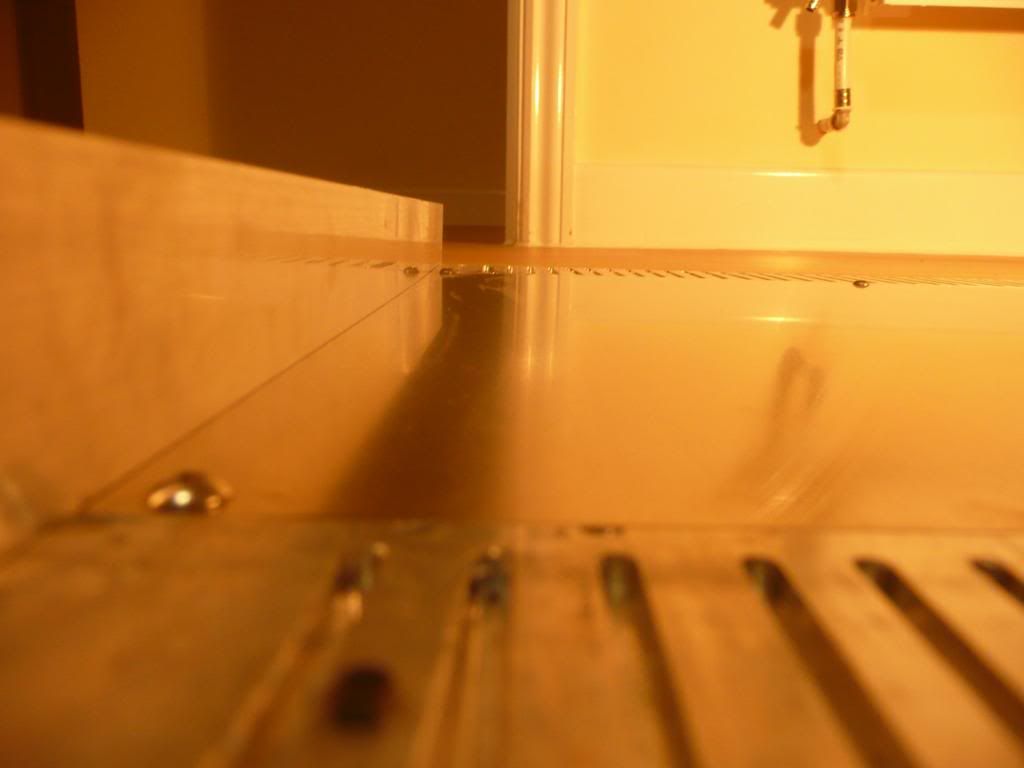
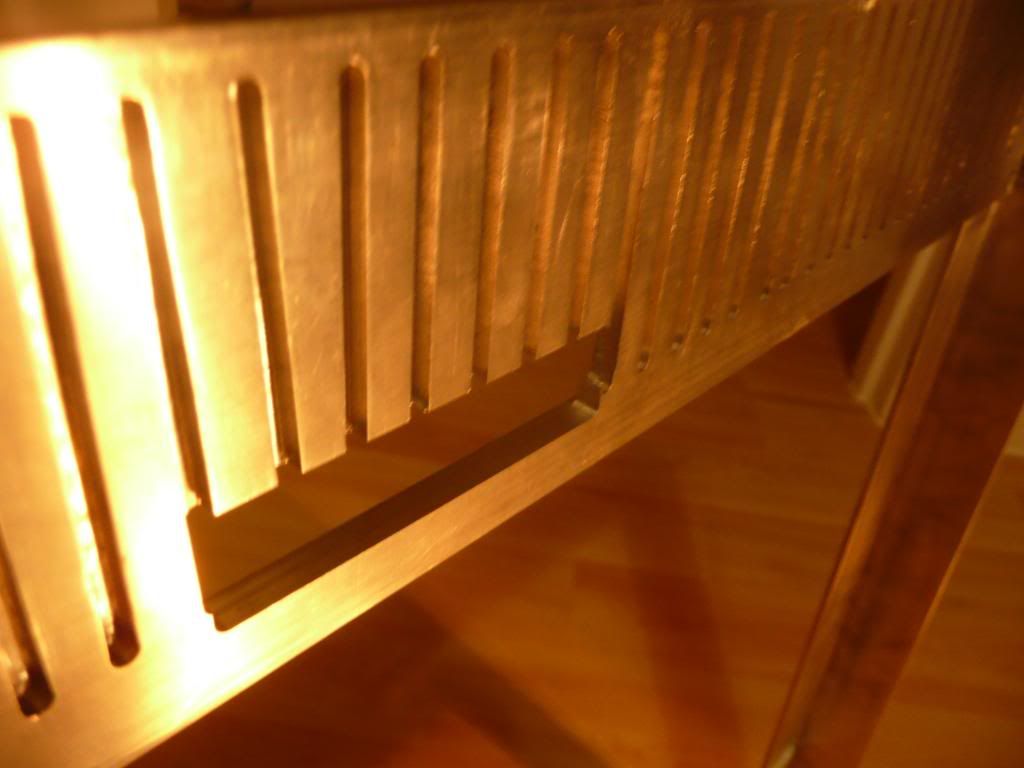
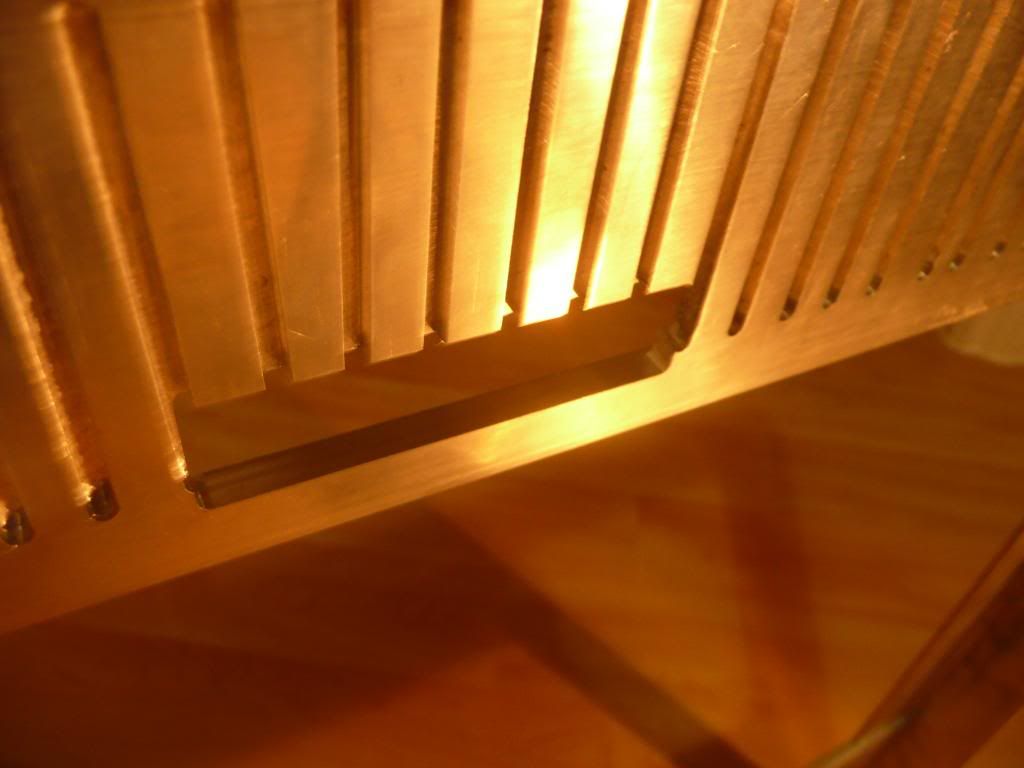
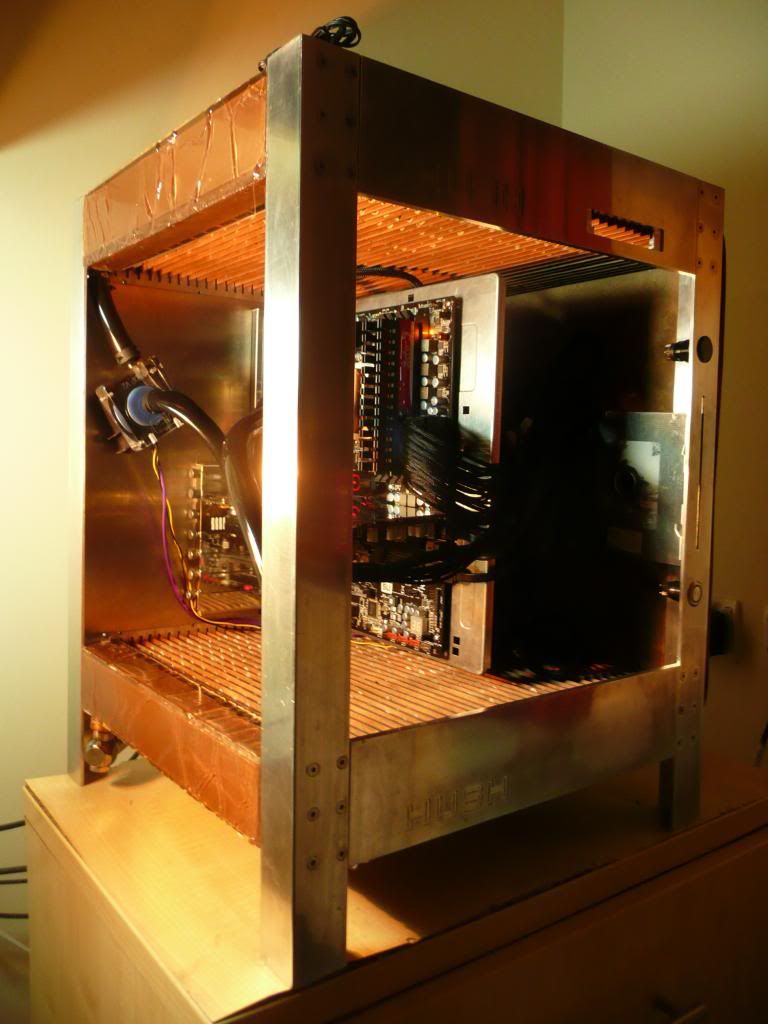
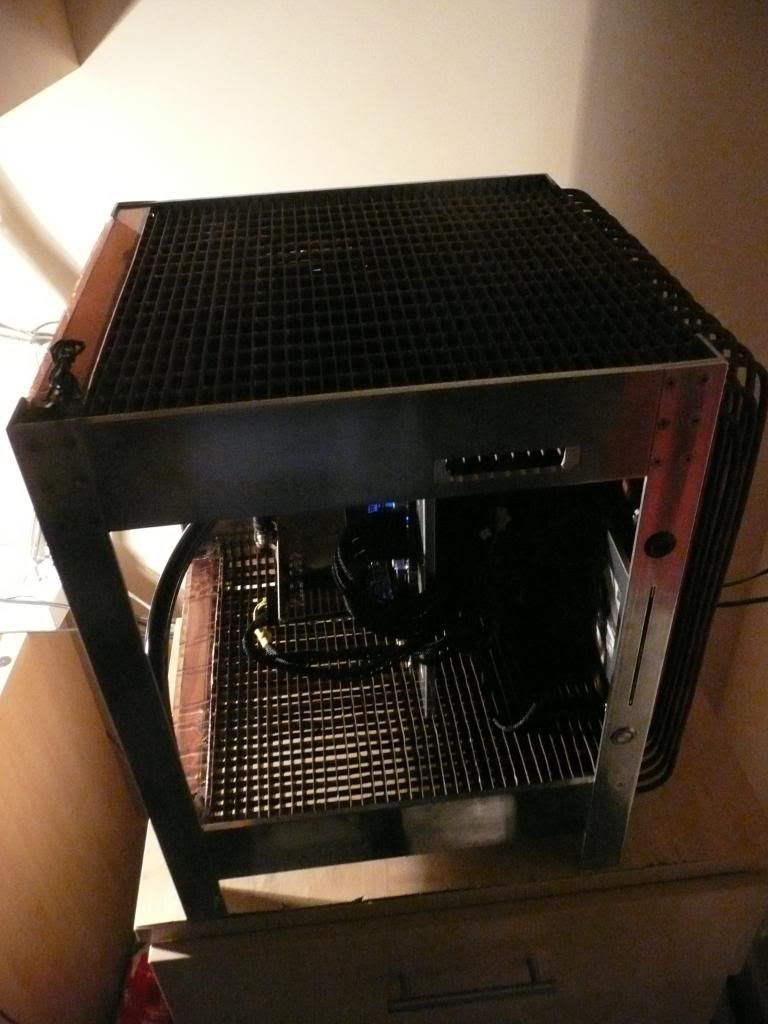
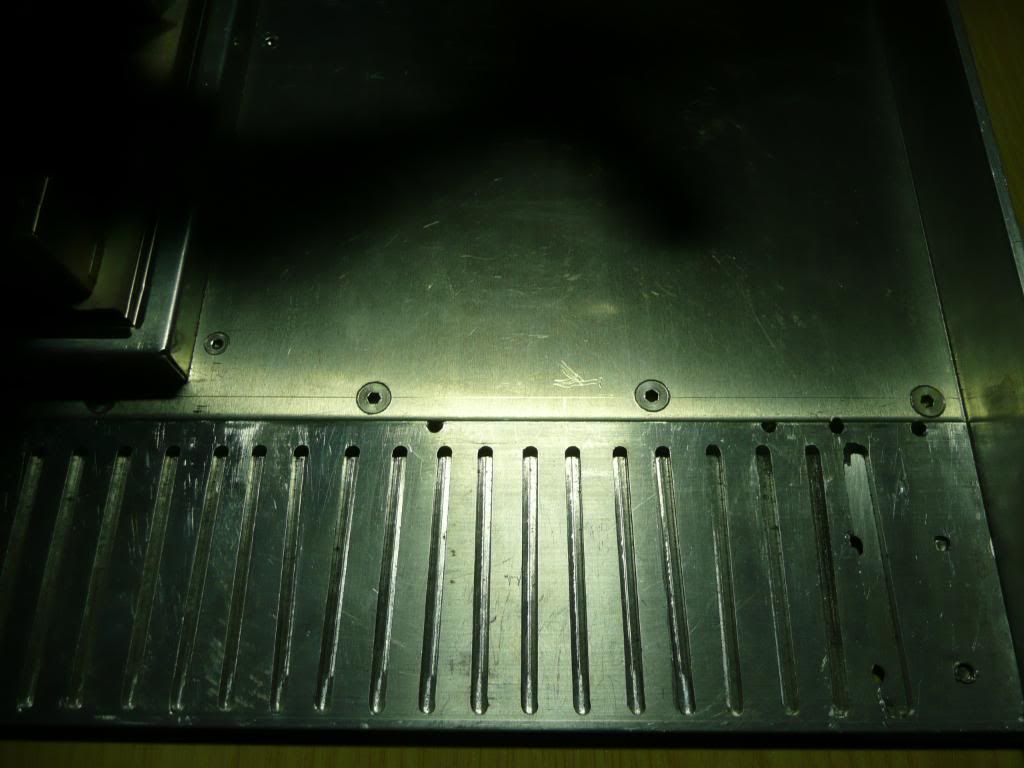
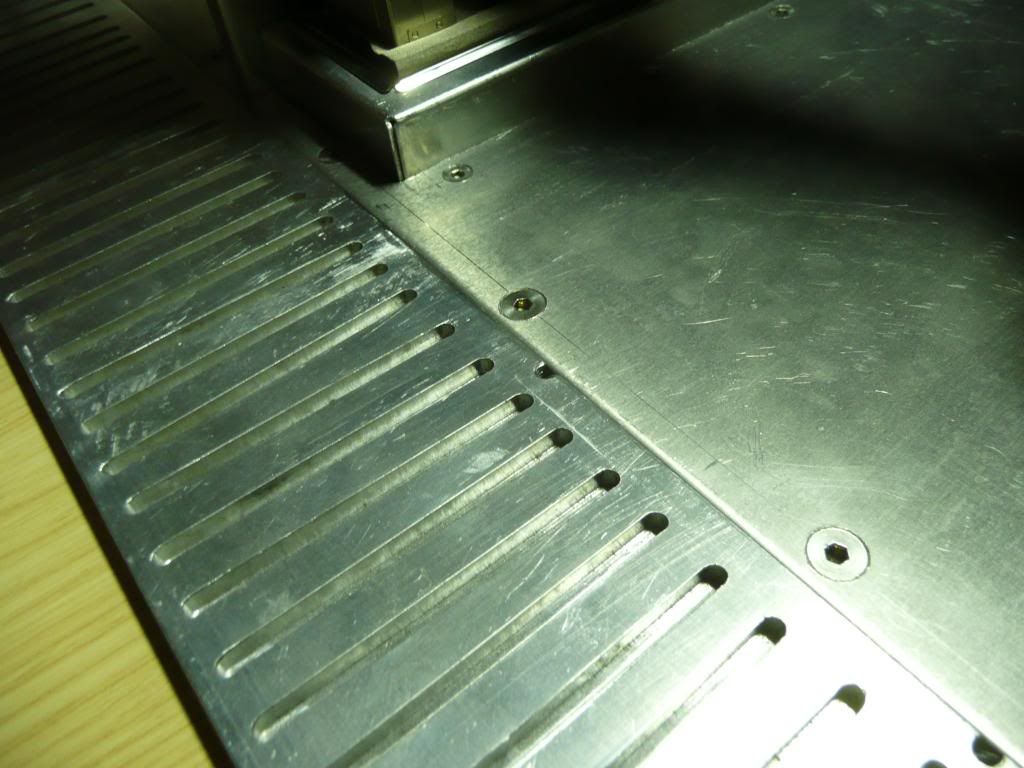
    Cheers Jay. I don't think the mass of copper's important other than allowing heat to flow throughout it - I'm using 0.9mm thick copper and I'm sure that's massive overkill for ensuring heat is spread easily and evenly throughout the heatfin surface, akin to cabling up an LED with pylon cable.. Commercial watercooling radiators use incredibly thin fins... As it happens those figures happen to be pretty similar to what I calculated though - I have 4.3m^2 of radiative surface area which gives a figure of 630W of purely radiative cooling (for a black painted surface; emissivity 0.95 and with a surface temp of 40C and an ambient of 20C IIRC)... Wish I could find the online heat radiation calculator I was using..
    Last edited by Monkey Puzzled; 09-24-2010 at 08:20 AM.

  2. #52
    Registered User
    Join Date
    Sep 2010
    Posts
    45
    Update time!

    Not a massive update, but took quite a bit of time. I've been tidying up the aluminium frame. It had been covered in polyester resin, which was a nightmare to get rid of. I've sanded the frame down , though it still needs more work and there are still some small blemishes and scratches that I need to get rid of. I'm not 100% how necessary a mirror-shine is, since I plan on anodising the frame either gun-metal/carbon grey or black.

    Anyhow, here's some pictures. Enjoy!


    And here's the back of it. The slits are for the 37 copper heatfins to sit in. They'll later be set into these groves, probably using polyester resin.


    Here's the right-sided upright aluminium angle leg. The row of 9 holes is to attach to the copper wall of the radiator. The 3 finger cuts set into the top and bottom are to accommodate the copper pipes of the radiator.

    The slit is for a slimline slot-loading DVD drive to sit behind. Still planning on a no-5.25" design for the front.


    Here it is with the counter-sunk screws in. The one on the bottom left is stuck in place - think I must have forgotten to tap all the way through and it's got caught in the aluminium. I'll have to drill it out on the bench press next time I go visit my folks. Until then I can't sand around it or disassemle those two pieces. I still need to adjust the countersunk holes slightly to get the screws exactly flush, but most of them are level with the surface.


    And here it is assembled:


    Might take some better photos later on.

  3. #53
    Xtreme Addict
    Join Date
    Feb 2008
    Location
    Russia
    Posts
    1,910
    sick bravo mate

    Intel Q9650 @500x9MHz/1,3V
    Asus Maximus II Formula @Performance Level=7
    OCZ OCZ2B1200LV4GK 4x2GB @1200MHz/5-5-5-15/1,8V
    OCZ SSD Vertex 3 120Gb
    Seagate RAID0 2x ST1000DM003
    XFX HD7970 3GB @1111MHz
    Thermaltake Xaser VI BWS
    Seasonic Platinum SS-1000XP
    M-Audio Audiophile 192
    LG W2486L
    Liquid Cooling System :
    ThermoChill PA120.3 + Coolgate 4x120
    Swiftech Apogee XT, Swiftech MCW-NBMAX Northbridge
    Watercool HeatKiller GPU-X3 79X0 Ni-Bl + HeatKiller GPU Backplate 79X0
    Laing 12V DDC-1Plus with XSPC Laing DDC Reservoir Top
    3x Scythe S-FLEX "F", 4x Scythe Gentle Typhoon "15", Scythe Kaze Master Ace 5,25''

    Apple MacBook Pro 17` Early 2011:
    CPU: Sandy Bridge Intel Core i7 2720QM
    RAM: Crucial 2x4GB DDR3 1333
    SSD: Samsung 840 Pro 256 GB SSD
    HDD: ADATA Nobility NH13 1GB White
    OS: Mac OS X Mavericks

  4. #54
    Registered User
    Join Date
    Sep 2010
    Posts
    45
    Time for an update.

    I decided to replace the backpanel I'd used from another case that has the fan hole. It's a bit dusty.


    I wanted to have a simple aluminium back panel.

    To have it sit flush with the aluminium frame a 10mm x 1.5mm step was milled from the inside side of the aluminium top and bottom frame and a 1.5mm sheet of aluminium cut and filed to leave the 1.5mm back panel sitting flush with the frame on the inside:


    Next thing will be to cut out the hole for the I/O and PCI bracket to sit it in. This is going to be inserted from the back so you can't see the folded aluminium of the motherboard tray where it attaches to give a cleaner look when viewing from the inside of the case.

    I used a stepped drill to make the 2 19mm holes for the antivandal switches; one for power, and one will be wired up to replace for the button of the slot-loading slimline dvd drive.


    There had previously been holes in the 1/4 aluminium frame that were made from machining bits breaking when milling the slots the copper fins sit in as so:


    To hide these I had a 1.5mm deep stepped section cut out for an aluminium cover plate to sit in. This will have front panel ports; USB (USB 3 if I can find some), audio, eSATA and firewire ports, and will allow me to make a new cover panel for different ports etc in future after the 1/4" thick aluminium bit of the frame is permanently secured to the copper radiator.


    I also did a little more countersinking to make the screwheads sit nice and flush.


    Still a bit more to do on some of them though.
    Last edited by Monkey Puzzled; 11-02-2010 at 12:29 PM.

  5. #55
    Xtreme Member
    Join Date
    Jul 2009
    Location
    Atlanta, GA
    Posts
    404
    Everytime you do an update I feel the need to look over every single photo from the previous posts. Which is fine, but I cant help but spend an hour or two because it puts me into some sort of geek trance, lol.

    ^_^
    At Xtremesystems.org we don't help you save money on your cooling gear, instead we try to make you feel better about the insane ammount you've spent.

  6. #56
    Registered User
    Join Date
    Aug 2010
    Posts
    18
    Still amazed by this build

    I haven't looked back but it would be cool if the every component was watercooled (you may have it that way)

    EES is a semi-good program, useful for fluids and thermodynamics. I'll definitely be using it on my next builds. Check out the built in functions if you haven't already, they will give you some useful feedback.

  7. #57
    Xtreme Addict
    Join Date
    Mar 2009
    Posts
    1,233
    Yep ... its really some geek :banana::banana::banana::banana: here !

    BRAVO !
    BTTB - Gigabyte Z87X-OC - WCed I7 4770k - 2x8gb Ballistix 1600mhz - Zotac GTX 780
    Asus Xonar Pheobus - OS -> Toshiba Q 256gb - Games -> 2x Agility 4 256gb Raid0
    Corsair HX850 - Tecnofront HWD BenchTable - Asus VE278Q 5760x1080

    Serveur - Asus Z77m PRO - 2500K - NH-C12P - 4x4gb G.Skill Ares 1600mhz
    Agility 4 128gb - Corsair CX430M - 1TB Black - 2TB green - 2TB Red

    KatPat - Gigabyte 990FXA-UD3 - FX-8320 - PH-TC14CS - 2x4gb Viper 1600mhz - GTS 450
    Samsung Evo 120gb - Corsair HX750 - Bitfenix Survivor White - Asus VE247H

  8. #58
    V3 Xeons coming soon!
    Join Date
    Nov 2005
    Location
    New Hampshire
    Posts
    36,363
    All I can say after reading and looking thru this is:
    God Bless your pointy little head!
    You my friend have moved the hobby a step forward..or 10..
    Crunch with us, the XS WCG team
    The XS WCG team needs your support.
    A good project with good goals.
    Come join us,get that warm fuzzy feeling that you've done something good for mankind.

    Quote Originally Posted by Frisch View Post
    If you have lost faith in humanity, then hold a newborn in your hands.

  9. #59
    Xtreme X.I.P.
    Join Date
    Jun 2007
    Location
    Bend, Oregon
    Posts
    5,693
    WOW!!

  10. #60
    Registered User
    Join Date
    Sep 2010
    Posts
    45
    Bit of an update: upgraded my graphics card to a GTX 480 with full cover block. I was a little concerned it might screw up my temps but only seems to have bumped up idle temps 4 or 5C to 32-33C with the GTX480 set to 900MHz core and 2200 for memory at max volts (1.138Vcore). The i5 750 processor is at 4.2Ghz, 1.42Vcore. With Intel Burn Test and Furmark running together I'm getting temps of 49-50C on the GPU and max of 63C on the CPU.

    The eagle-eyed may spot the severe kink in the primochill 1/2" ID, 3/4"OD tubing between the GPU block and the pump. Think I may need to go for some 45 degree rotary fittings to solve that.


    Here's the 1.5mm thick aluminium backplate. I've cut a hole for the pci/io bracket and an extra 1mm width to allow for the motherboard tray. There's also a hole for the PSU to vent through, though I still need to cut slightly into one of the supporting legs for the PSU kettle plug to go through

    The PCI&IO backplate is attached from the back - it's not attached by screws yet - it'll have some countersunk screws hidden behind the pci bracket thumbscrews.


    I don't have a metal break, so I clamped aluminium angle with G clamps and bent the flap of the backplate above the PCI bracket to a right angle with a hammer against the clamped alminium angle. Unfortunately I missed a few times, and theres two small dents. I'll try getting rid of them with by clamping the backplate between two flat plates, but if that doesn't work I might need to use filler and spraypaint the backplate...


    Here's a poor photo of the back of the case:


    Not that easy to see, but I've filled in the irregular creases in the polyester coat on the ends. Still needs filling with polyester resin on the top and bottom of the bottom plenum, and then I can sand it down. I'll probably end up spraying the plenums black.


    I added a ball valve for draining the loop, attached to a bitspower rotary adapter. I had tried a less compact rotary fitting but it leaked. :/

    Hidden away...


    Swiveled round for draining. A 90 degree turn of the black tap and the system drains.


  11. #61
    Xtreme Member
    Join Date
    Dec 2006
    Posts
    106
    Wow, now that's massive!!!
    /_/_/_ | Intel Core i7 920 @ 4.2GHz | Swiftech Apogee GTZ | Gigabyte EX58-UD5 | CORSAIR DOMINATOR 6GB DDR3 1600 | 2 x ATI 4850 Crossfire Enabled | WD Velociraptor 300GB | Creative Sound Blaster X-Fi Titanium Fatal1ty Pro | Corsair HX1000W | Antec P182 | _\_\_\

  12. #62
    Xtreme Enthusiast
    Join Date
    Feb 2005
    Location
    T.O.
    Posts
    528
    This is one of the coolest worklogs I've seen in a while. Mad props.

  13. #63
    Xtreme Mentor
    Join Date
    Sep 2007
    Location
    Dallas
    Posts
    4,467
    You should resubmit it to Bit-Tech, this is would win easily. Congrats on such a great job! You have some mad skills and the patience and fortitude to go with it. Awesome job!! One thing that would be utterly over the top would be to polish all the copper to a mirror finish. That would be just friggin awesome.
    CPUID http://valid.canardpc.com/show_oc.php?id=484051
    http://valid.canardpc.com/show_oc.php?id=484051
    http://valid.canardpc.com/show_oc.php?id=554982
    New DO Stepping http://valid.canardpc.com/show_oc.php?id=555012
    4.8Ghz - http://valid.canardpc.com/show_oc.php?id=794165

    Desk Build
    FX8120 @ 4.6Ghz 24/7 / Asus Crosshair V /HD7970/ 8Gb (4x2Gb) Gskill 2133Mhz / Intel 320 160Gb OS Drive, WD 256GB Game Storage

    W/C System
    (CPU) Swiftech HD (GPU) EK HD7970 with backplate (RAM) MIPS Ram block (Rad/Pump) 3 x Thermochill 120.3 triple rads and Dual MCP355's with Heatkiller dual top and Cyberdruid Prism res / B*P/Koolance Compression Fittings and Quick Disconnects.

  14. #64
    Xtreme Member
    Join Date
    May 2010
    Posts
    123
    +1 for polishing the copper. Though unless you want to make re-cleaing it every month a chore you'll need to lacquer it after it's shiny!

  15. #65
    Xtreme Enthusiast
    Join Date
    Feb 2009
    Posts
    723
    That's awesome!

    Get your friend to cut you another logo the right way up! You'll want this perfect when it's all done If you do stick with polished aluminium, then totally see if it is possible to nickel plate the copper, would look absolutely amazing.

    Great work!
    Last edited by dreamaxx; 02-22-2011 at 03:52 AM.
    sigh

  16. #66
    Registered User
    Join Date
    Sep 2010
    Posts
    45
    Quote Originally Posted by Utnorris View Post
    You should resubmit it to Bit-Tech, this is would win easily. Congrats on such a great job! You have some mad skills and the patience and fortitude to go with it. Awesome job!! One thing that would be utterly over the top would be to polish all the copper to a mirror finish. That would be just friggin awesome.
    Cheers buddy - though I don't think I can resubmit it.

    The copper would be a nightmare to try and polish - it's been sandblasted for one thing, and it's too fiddly to get between the fins and pipes.

    Quote Originally Posted by asura View Post
    +1 for polishing the copper. Though unless you want to make re-cleaing it every month a chore you'll need to lacquer it after it's shiny!
    I'm thinking of using liver of sulphur to blacken the copper - creates a black reasonably durable finish. The thing is that shiny copper radiates very little heat, whereas a black thin coating will still allow convective/conductive cooling with the air and radiate hundreds of watts more energy (for a water temp of around 35C and air 20C) compared to a shiny surface.

    Quote Originally Posted by dreamaxx View Post
    That's awesome!

    Get your friend to cut you another logo the right way up! You'll want this perfect when it's all done If you do stick with polished aluminium, then totally see if it is possible to nickel plate the copper, would look absolutely amazing.

    Great work!
    Cheers, but I don't think I'll bother remaking the plate- it's a lot of work; milling 37 slits for the fins, milling an 1/8" deep x 2" step at each end, milling a 1.5mm x 10mm strip on the inside edge for the backplate to sit flush with, countersinking 12 m4 holes and then drilling more holes inside to attach the backplate. That's quite a bit of work to correct something that's not normally seen anyhow. Besides which, he's sold his CNC!

  17. #67
    Registered User
    Join Date
    Sep 2010
    Posts
    45


    Here's a PSU bracket I've made. Not secured in to the rest of the case yet.


    It's a little ugly with the screw-heads, but they'll sit hidden under 1cm thick neoprene cushioning. Still undecided on whether to remake the PSU bracket from thick aluminium plate (~1cm thick), and simply cut out the fan hole.


    Here's the back of the case from the back


    Here's the back of the case - Using countersunk screws inside means I need to have nuts on this side. The I/O bracket is inserted from the back to unclutter the look inside. However, the 1mm aluminium IO&PCI bracket has flaps to attach to the case. One of these extends down at the bottom where the nut is at the bottom of this pic. To get everything sitting flush a 1mm step was cut into the inside of the thick aluminium frame with a dremel milling bit.


    I decided to use more countersunk screws for a nice clean finish inside.


    IC cooling are kind enough to send out free samples of their Thermal interface material if you agree to test it against your previous paste and send them the results.


    So after sorting out the kink in the watercooling loop and testing my previous paste, MX-3, using Intel Burn Test, and using InterBurnTest and MSI Kombustor/Furmark simultaneously (to produce as much heat as possible - around 550W!) I swapped out the TIM and remounted the blocks.


  18. #68
    Registered User
    Join Date
    Sep 2010
    Posts
    45
    I've made a replaceable front plate for usb, eSATA, audio etc. Still need to get my hands on some USB 3 ports though, so leaving it as just a flat plate for the moment without holes for the ports for now. Anyhow, the plate is removable so I can attach the aluminium plates (the bits with HUSH milled in) to the 37 copper fins with resin (in the 37 slots in the back) once they're ready and anodised, and take out the plate to adapt to attach new ports (or replace) in future if needed. Only a small piece, but filing it to just the right size and the tabs to the right depth by hand took a while!


    I did have a small tab of aluminium cut almost to size, but it's a different grade of aluminium and I expect it wouldn't anodise to be an indistinguishable colour, so instead I cut and filed a section from the piece of aluminium angle in the picture.


    The finished piece with some of the tools used to make it... missing the big file...


    The finished plate (upside down).


    In place, viewed from the back:- I'll need to cut into some of the fins for the USB/eSATA/headphone ports to attach the the little inset plate....


    In place and screwed down:


    Thanks for reading.

  19. #69
    Xtreme Enthusiast
    Join Date
    Feb 2010
    Location
    Northern California
    Posts
    615
    I've been in love with this case when it was an unpolished turd. this this is beaaaaaautiful!
    If your annoyed by sigs telling you to put things in your sig, then put this in your sig
    you know you're addicted to watercooling when:
    Quote Originally Posted by Onoff312 View Post
    You started with a $200-400 budget and have ended up spending over $1000-2000

  20. #70
    Xtreme Cruncher
    Join Date
    Dec 2005
    Location
    L.A. ( Latin America)/ 4socket wannabe
    Posts
    2,756
    no more teasers?
    "Study hard my young friend"[/B].
    ---------------------------------------
    Woody: It's not a laser! It's a... [sighs in frustration]

  21. #71
    Xtreme Addict
    Join Date
    Apr 2011
    Location
    North Queensland Australia
    Posts
    1,445
    I shudder to think of the cost of all that copper!

    Amazing work!

    -PB
    -Project Sakura-
    Intel i7 860 @ 4.0Ghz, Asus Maximus III Formula, 8GB G-Skill Ripjaws X F3 (@ 1600Mhz), 2x GTX 295 Quad SLI
    2x 120GB OCZ Vertex 2 RAID 0, OCZ ZX 1000W, NZXT Phantom (Pink), Dell SX2210T Touch Screen, Windows 8.1 Pro

    Koolance RP-401X2 1.1 (w/ Swiftech MCP35X), XSPC EX420, XSPC X-Flow 240, DT Sniper, EK-FC 295s (w/ RAM Blocks), Enzotech M3F Mosfet+NB/SB

  22. #72
    Xtreme Member
    Join Date
    Nov 2010
    Location
    Brazil
    Posts
    161
    I don't know if somebody said it defore, and I don't know if you're on this project yet, but the DDC pump works better with high restriction loops. It would be nice to test your little MONSTER with a couple of D5s...
    PC:
    MOBO: Maximus VI Extreme
    CPU: Core i7-4770k
    RAM: 2x4gb Dominator Platinum 2133
    GPU: GeForce GTX Titan

    Greetings from Brazil!

Page 3 of 3 FirstFirst 123

Tags for this Thread

Bookmarks

Bookmarks

Posting Permissions

  • You may not post new threads
  • You may not post replies
  • You may not post attachments
  • You may not edit your posts
  •