Page 1 of 2 12 LastLast
Results 1 to 25 of 38

Thread: Project [E] - update 04/10 - Carbon Fiber Finish Done

  1. #1
    Xtreme Enthusiast
    Join Date
    May 2009
    Posts
    952

    Project [E] - update 04/10 - Carbon Fiber Finish Done

    Hi guys,

    Welcome to my new build thread all the way from India...the land of snake charmers, elephants and cows on the roads...and outsourcing...


    After Evolution 1 (link in sig), I admit, I am completely addicted to water cooling and upgrading (damn these forums). And the result of that is.....


    And I keep justifying it to myself, saying that every man needs a hobby, which can block out the tensions of daily life.

    With that introduction out of the way, lets get down to what we plan to do in Project [E] 2. Project [E] 2 is going to be pretty long drawn out, as I want to take the time to think and work on each and every part before I go for the final build.

    As of now only a few of the main components are with me and some more is on the way. The rest of the parts will be ordered as and when time permits and as and when ideas keep coming up from you guys. So please feel free to chip in with as many ideas as possible and I will try and discuss what is possible and incorporate it to the best of my ability.

    I want to first thank our sponsors for helping out on this build and for always supporting our work:


    I spoke to Asus about this build a couple of days back, while discussing forth coming reviews. Asus came back to me a few days later with an offer I just could not refuse.

    So enter, the two main components of this build

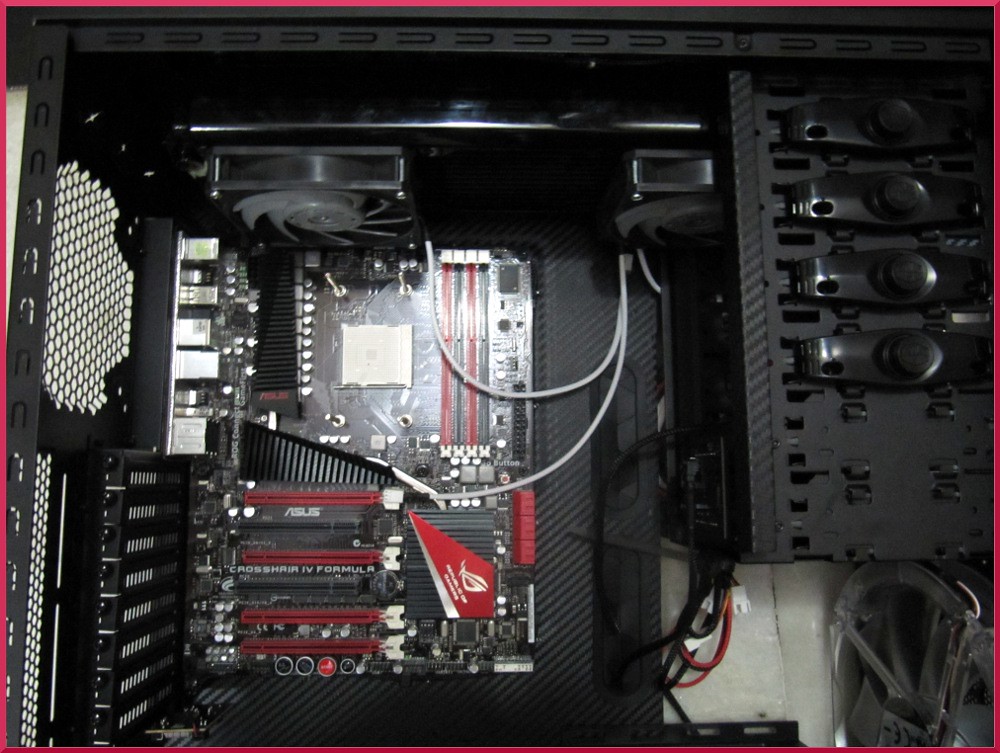
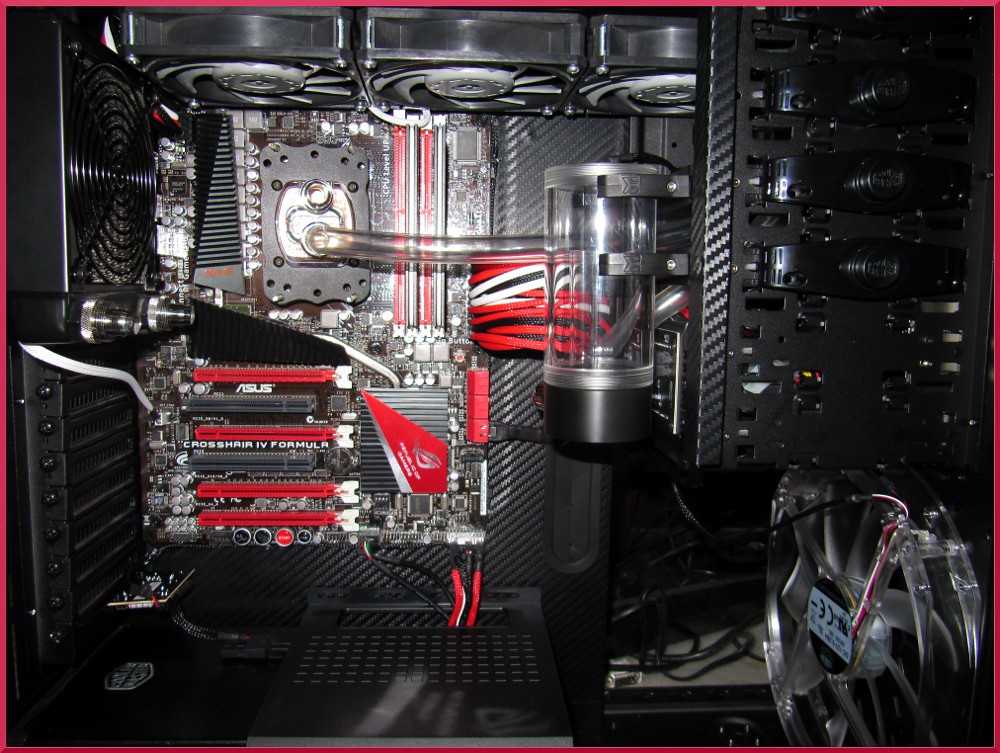
    The Asus Crosshair IV Formula


    AND

    ASUS 5850 Voltage Tweak


    The second sponsor of this build is Coolermaster. I have worked closely with CM in the past on a number of reviews and I hope I can grow this relationship further with this build.


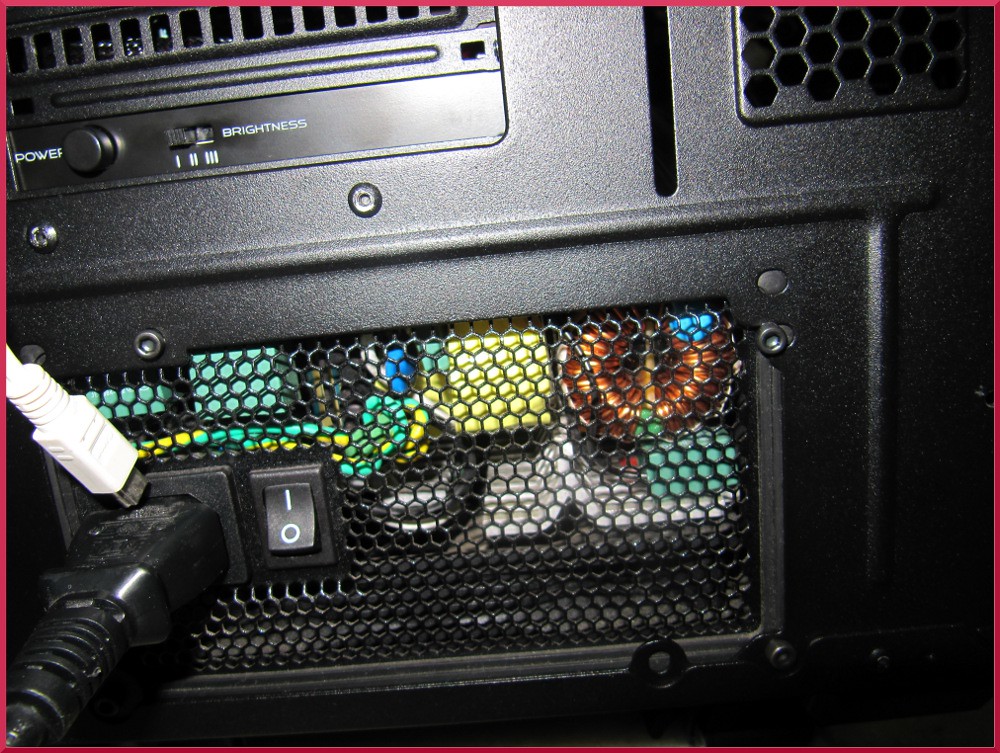
    Cooler master Silent Pro 700W


    AND

    ???????


    We are still to decide on the chassis and I will update it as soon as I am clear on this.

    The rest of the main components will consist of:

    1. AMD 1090T 125 W - AMD Phenom

    2. Team Xtreem 2000 Mhz CL9 - Team Group Inc

    3. Scythe Gentle Typhoons 1850 - Scythe "GentleTyphoon" 120 mm Silent Case Fan

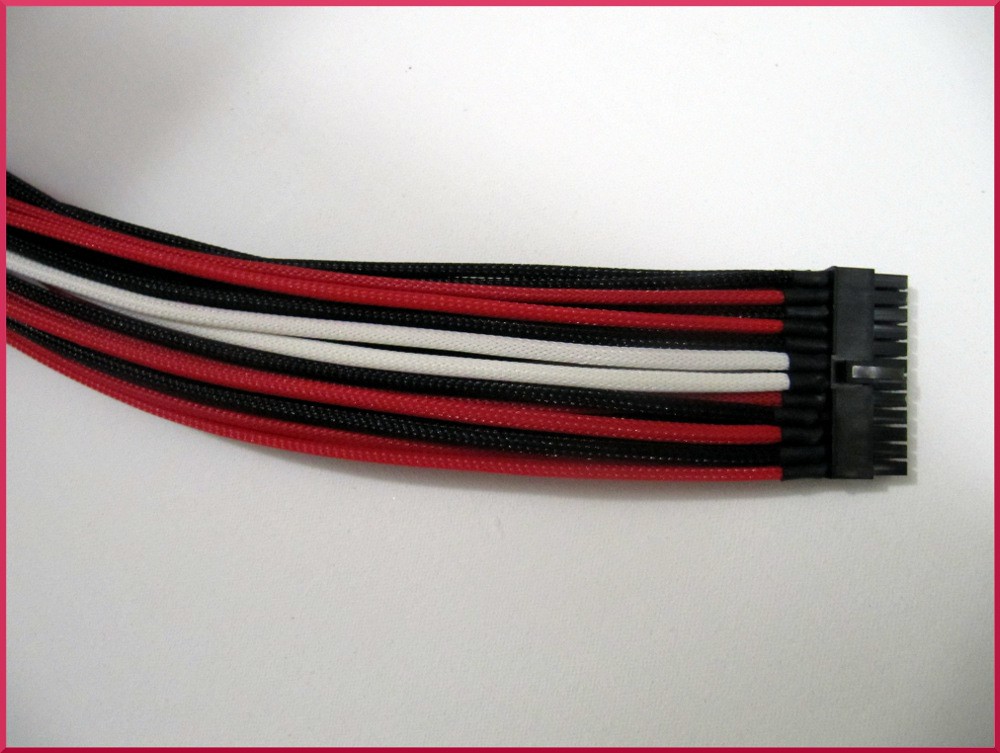
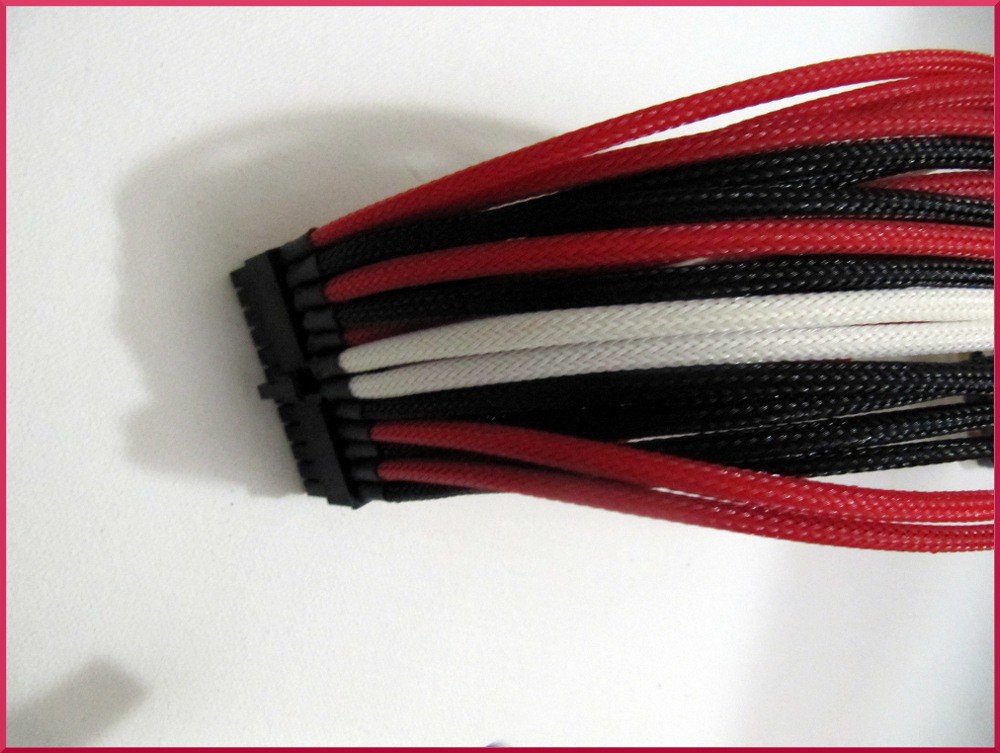
    4. MDPC X Sleeving - MDPC-X International


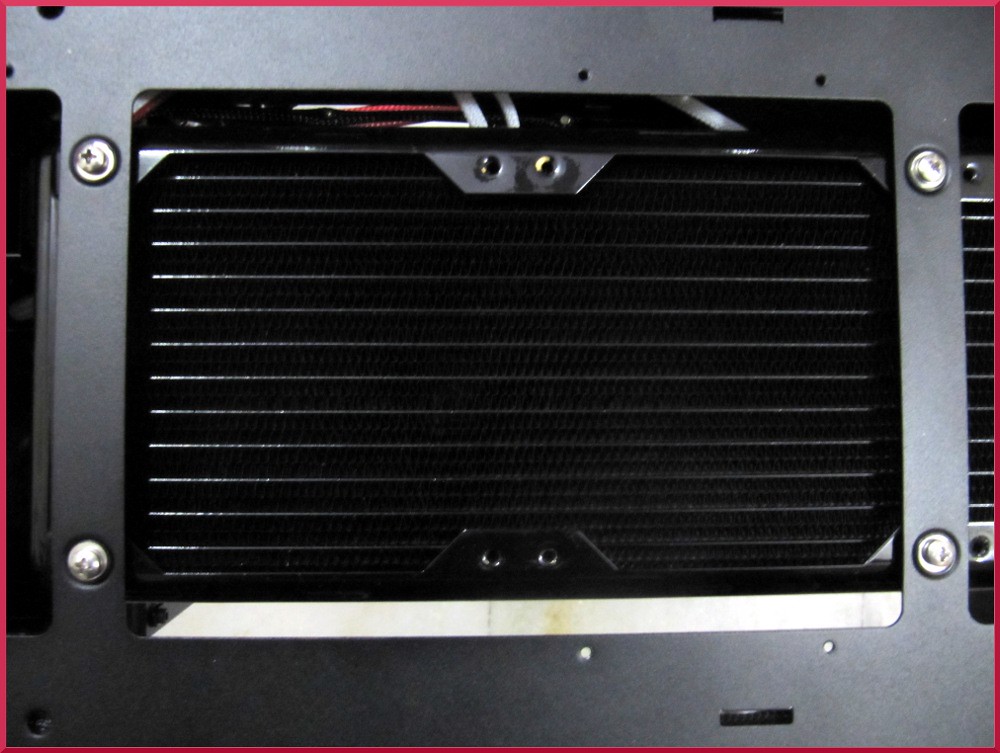
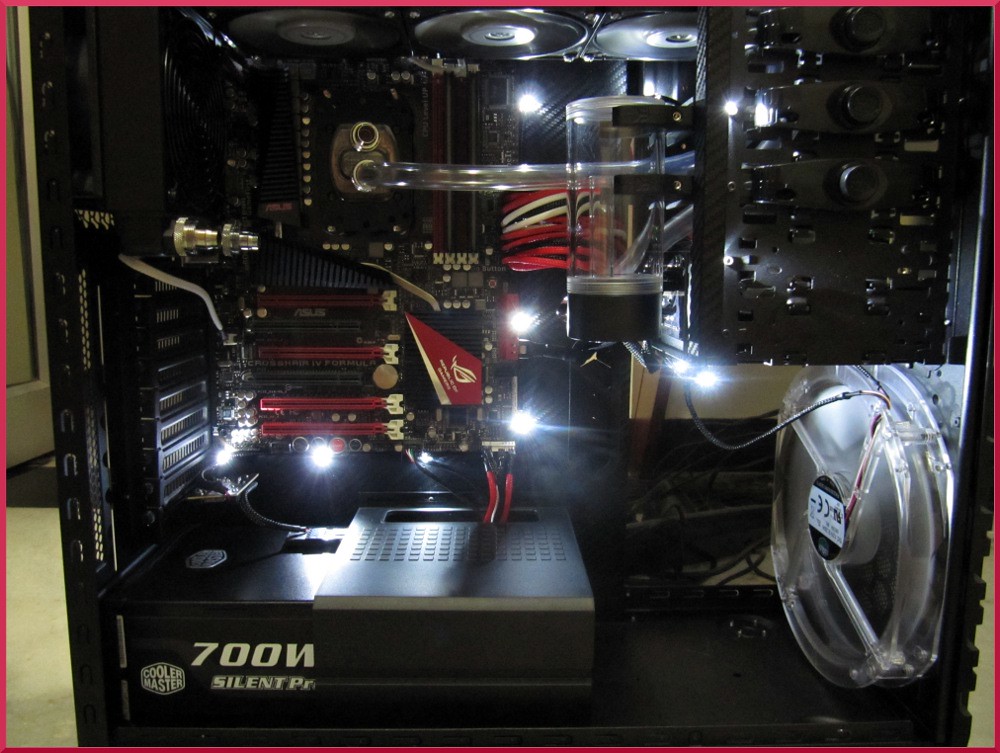
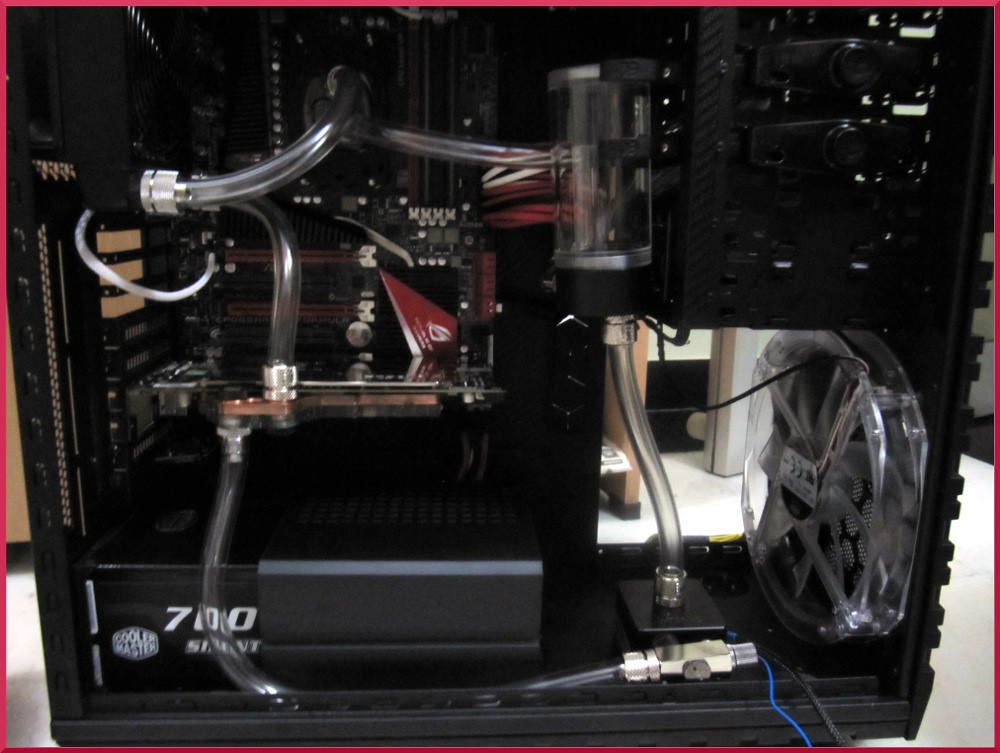
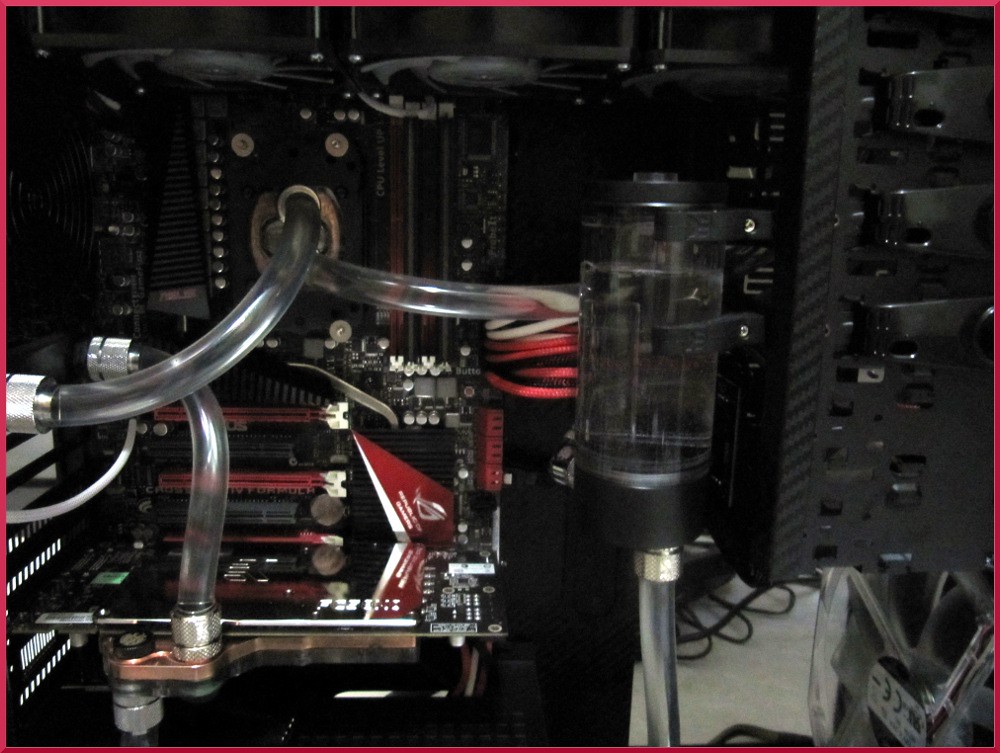
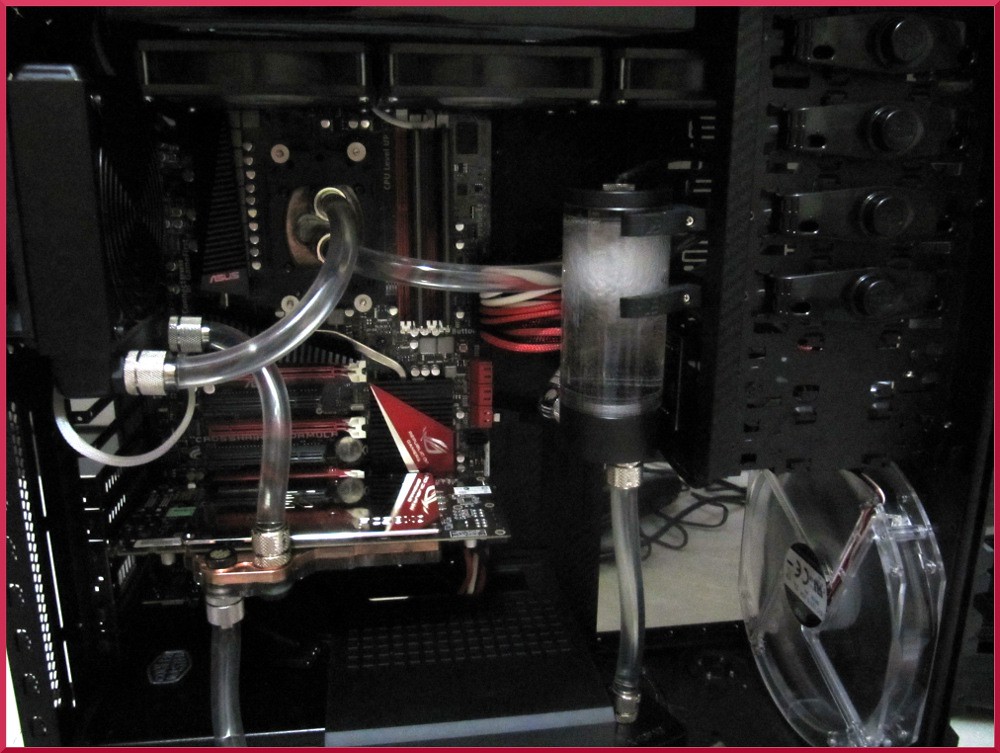
    Most of the water cooling will be taken from my existing rig but there will be a few new additions. I will keep you guys posted on it as soon as I get some more clarity and the final look and feel that I would like to go with.

    I don't want to spoil the surprise, so I have purposely left out the color scheme for the time being. I think it makes more sense to show it to you guys once its in.

    Please feel free to post your opinions and lets get this build started soon.....

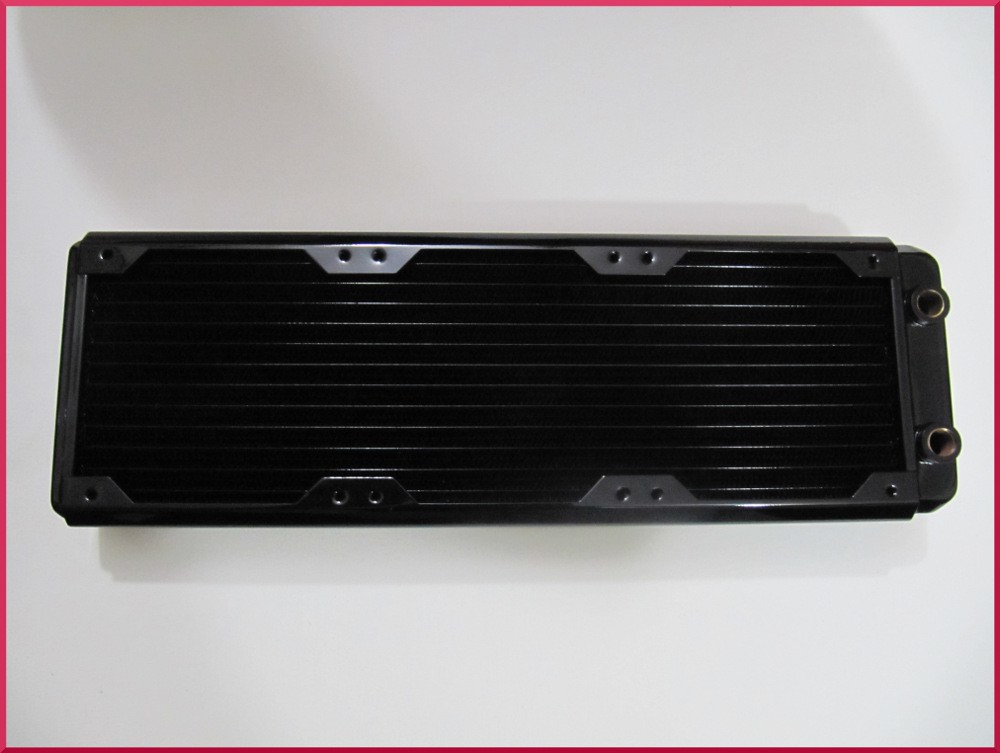
    But first need help to choose a rad. I dont plan to run the GT's at full tilt all the time and am not averse to using a push pull setup. I will be using a 3x120 and a 1x120. I need help on the 3x120 rad as of now.
    Last edited by mav2000; 11-03-2010 at 09:52 PM. Reason: Chane of title

  2. #2
    Xtreme Enthusiast
    Join Date
    May 2009
    Posts
    952
    Now getting back to the work at hand. I am sure a lot of you would have read about the NB/PWM area heating issues that Asus had with the CH IV when it first came out. Now, we being in India, the newer batches never landed here and I thought I would take a quick look beneath the heatsinks to make sure that all was fine.


    A quick look at the heatsink contact areas told me that it was not and I could have had a potential problem somewhere down the line.


    So off came the old thermal pad and I replaced it with some stuff that I had got from EK earlier. I also shaved down the contact nuts a bit, to make sure that it fit like it was supposed to. Also changed the stuff on the NB and SB and added some MX2.


    And screwed the heatsink back in.


    Then got on to removing a few stickers.


    And that my friends completes the update for day 1.

  3. #3
    Xtreme Member
    Join Date
    Aug 2010
    Location
    San Jose, California
    Posts
    112
    Nice hardware.

    Red and black color theme I'm assuming?

  4. #4
    Xtreme Enthusiast
    Join Date
    May 2009
    Posts
    952
    Quote Originally Posted by Huww View Post
    Nice hardware.

    Red and black color theme I'm assuming?
    Thanks....on the colors, am not giving anything away right now...

  5. #5
    Xtreme Enthusiast
    Join Date
    May 2009
    Posts
    952
    Hey guys, anyone have an idea on this rad:

    Black Ice Xtreme 3 High Performance Radiator

    I am actually stuck between deciding on the BI GTX Rev2 360 and the XSPC RX 360. Thats when i saw this. Seems to be a slimmer rad with high FPI. Anyone have any data on this one. Thanks.

    Am mainly going to be running the GT's at around 1000-1200 rpm and speed it up while gaming to the full 1850. So any help on the choice of rads will be great.

  6. #6
    Xtreme Enthusiast
    Join Date
    May 2009
    Posts
    952
    Hi,

    Just a samll update. All the parts have been ordered and the case is most probably going to be a HAF X. Now I to am really confused as to how the tubing runs should be...some ideas I had are as follows. The CPU and GPU will be under water and I have an MCP 355 with an EK 150 Res, going to use a male to male rotary to connect these two. And two rads, a 360 BIX on top and a 240 GTS on the HDD area...let me know your thoughts.


  7. #7
    Xtreme Enthusiast
    Join Date
    Mar 2009
    Location
    Toronto ON
    Posts
    907
    Quote Originally Posted by mav2000 View Post
    Hi,

    Just a samll update. All the parts have been ordered and the case is most probably going to be a HAF X. Now I to am really confused as to how the tubing runs should be...some ideas I had are as follows. The CPU and GPU will be under water and I have an MCP 355 with an EK 150 Res, going to use a male to male rotary to connect these two. And two rads, a 360 BIX on top and a 240 GTS on the HDD area...let me know your thoughts.


    The top.rad barbs front will make for a much cleaner tubing run.

    But if you put the pump res in the optical bays it can be even cleaner, and be able to mouth top rad barbs back. Pump >cpu >top rad >gpu> bottom rad >res.
    You know you have to mount the res anyway right the male to male won't support it.

    Sent from my X10a using Tapatalk
    MagisD
    ____________________________
    Lurker, Dreamer, Planner, Noob


    6 Quad rads 1 case Maybe I went a little overboard....Overkill Cube

  8. #8
    Xtreme Enthusiast
    Join Date
    May 2009
    Posts
    952
    I dont know if the res will fit in the drive bays, or I will have to get another res. But seeing as there is this much of a tubing issue, would it probably make more sense to go with a 360 uptop and a 120 at the rear fan??

  9. #9
    Xtreme Enthusiast
    Join Date
    May 2009
    Posts
    952
    800 views and no comments...come on guys a bit of help here.So today, I tried to improve on my photography skills, and all these were taken in the night, under normal room lights... heres the 8 Pin...DONE:


    This is hopefully much better. And a pic of the tools:


    The pliers are side cutting pliers and help to cut the sleeve very cleanly. And my trusty staples and flat head screwdriver for those pins that wont come out with the tool. This works very smoothly as well.

  10. #10
    Xtreme Enthusiast
    Join Date
    May 2009
    Posts
    952
    So the case finally came in today.

    First removed all the extra plastic parts. To basically see how this is going to work. Removed each and every thing that could be done with a screw driver and also attached the wheels. This makes it much more convenient when modding. Though it does not fit under my desk...will have to see about that. I also removed all the extra wiring that I will not be using for the time being.


    Then a quick look at one sleeved wire on the top panel:


    Quite a few wires to sleeve, but since we dont have to remove any pins, it went quite fast.

    So heres the finished job:


    Was not able to finish off the USB ones today...but will work on that soon. Also a big update coming hopefully later today.

  11. #11
    Xtreme Enthusiast
    Join Date
    May 2009
    Posts
    952
    Ok quick question guys...do you think a 1090T/965BE ad a 5850 should be ok with a Black Ice Extreme 360, or should I add a 120mm XSPC RS120 to that loop?

    The 965 will be running 4 ghz at around 1.475 and the 5850 will be running 900/1000 at stock volts. The fans will be GT 1850's.

    Am looking for a 5 degree delta...any help will be great.

  12. #12
    Xtreme Enthusiast
    Join Date
    May 2009
    Posts
    952
    Ok so here goes the update:

    First off a fan filter that I got made for the bottom area. Now this build is going to be a negative pressure build, so all areas where air can enter need to be properly covered. This is DEMC Filters made by and can be directly ordered from them in South Africa. One of the best filters that I have used till date.


    And for the main update of the day.

    Heres a roll of what was used. This is some nice Carbon Fiber Vinyl. As you can see its some good quality stuff with a 3D effect.


    And it was a real PITA to get it all in:


    I have done the bar near the ODD's and the main mobo tray.


    Now to wait for the rest of the stuff to come. My package from PPCS has reached India, but is still stuck with customs....hopefully this weekend we should be able to finish most of it.

  13. #13
    Xtreme Enthusiast
    Join Date
    May 2009
    Posts
    952
    So here is the update:

    I removed the HDD bays. Like I said earlier this was the first time that I actually used a power drill. Anyway, here are the screws that I will be using as much as I can in the build. Nice screws and most of them are black.


    Here are the screws being used:


    And here is the HDD bay removed. And the filter I showed you guys earlier.


    Anyway got a little mroe work done. Sleeded the Fan controller, all the fans and the 24 pin. Expect photos soon. I also got a lot of my stuff for the build. FINALLY....

    On another note, I was not able to fit the rad with the barbs in front, as the tubing was fouling with the DVD rom drive. Also I needed to mount my res up there and was using the holes that are there in the 5 1/4" bays. So I have bought a new external USB DVD drive, which I will keep on my desk. This will make it more accessible as well as give me the space to mount the rad and res easily.

    This is what I have bought:

    http://go.iomega.com/en/products/mul.../?partner=4750

    Since I barely use the DVD drive anyway, I dont think it will be too much of a hassle.

    Sorry there are no pics, but will try and get something up this weekend. And just a heads up for guys wanting to water cool, getting fans to fit on top of the case, pulling air thru the rad is a pain, as the top has only four fan holes, which are divided between two fan spots. so two holes per fan for two fans and no holes for the third. Now what happens is that the fans when attached are uneven and therefore loose a lot of the pressure and airflow that is required. So luckily I had enough space to fit the fans inside, though that was not the original plan. And am lucky it fit. I thought I was screwed for a moment.

  14. #14
    Xtreme Member
    Join Date
    Feb 2010
    Location
    Barcelona, Spain
    Posts
    210
    Amazing look with the Carbon Fiber !

    Where did you buy it?

  15. #15
    Xtreme Addict
    Join Date
    Feb 2010
    Location
    Wisconsin
    Posts
    1,634
    I don't know if he bought it here, but Sidewinders has it: http://www.sidewindercomputers.com/
    Signatures make my posts look huge... but I'm not humble enough to completely remove my signature, so I kept this note explaining it.

  16. #16
    Registered User
    Join Date
    Sep 2009
    Location
    Glasgow, Scotland
    Posts
    94
    Very nice !

    Thinking of using carbon fibre for my new build too... Any details of where you got it, and was it easy enough to apply ?


    *Edit* Subscribed

  17. #17
    Banned
    Join Date
    Dec 2009
    Posts
    244
    Looks really good mate

  18. #18
    Xtreme Enthusiast
    Join Date
    May 2009
    Posts
    952
    Thanks guys. I got this from Ebay. Was 25 USD shipped from HK. So not very expensive and could afford it if I screwed up.

    Will be using GT 1850's all around for the rads..have four of them. Spent some time cleaning out the fans as best I could. The issue with the light color on the blades is that it gets dirty very very fast.

    SO a quick update. Like I said some of the stuff arrievd a few days back. Here it is:

    GT Extreme 360. Beautifully made and finished. Probably the best I have seen.


    This in conjunction with the 120 will run the whole system.

    Sleeved the 24 pin:


    Then decided to test fit things and this is when I ran into a whole lot of trouble:


    Rad in.....and then I realise that to fit the top fans is going to be a pain. Basically, there are 4 rad support holes on the top. I was planning to keep the fans outside the metal part of the case and under the plastic. But unluckily, there seems to be an issue with doing this. The rad holes are a bit raised from the rest of the case frame, so the screws will not got through. And when the screws go through, the fans are not level as half of the fan is on the rad bar and the rest is directly on the rad. So had to put the fans inside and then faced another problem:


    With the fans and barbs mounted, the rear 120 cannot be mounted....crap.....anyway thats all for today. More updates tomorrow as I am now running at full speed to finish this off.

  19. #19
    Xtreme Enthusiast
    Join Date
    May 2009
    Posts
    952
    Update for the day. First off I was a little bit tired with fighting with the rad, so I thought, why not leave it for a while. SO I decided to work on the lighting. I got a strip of this from NZXT and started on routing the stuff. Let me say that this is very good quality stuff, other than the sleeving. The PCIE bracket controller is very well made and does not stand out with funny colors. It integrates into the whole look of what I am trying to get done.

    The bracket has an On/Off button as well as a switch to change between three levels of brightness.


    You can just about see the LED's all around the board.

    Got the PSU mounted with the same screws as well. This screws are awesome.


    Anyway after this I went back to the rad work and decided to turn the rad around to put the barbs in front. Since the Res has to come on the front as well, I had to get rid of my DVD rom drive and get an external one. But this way I could fit both the rads, with their fans and not have an issue. The only fall out of this is that the 8 Pin which I had sleeved with so much attention is barely seen.

    I also used some rubber grommets along with the screws to fit the rad as it would damp any vibrations.


    Then tested out the lights to give you guys an idea, as well as the fans. I also got the thermal probe stuck into the res and the reading for it will be from the Scythe up front. I will show a pic of that later. SO here are the rads fit and also one length of tubing.


    Then got the HDD installed in the Hot Swap Bracket. I must say that this is a brilliant feature and one I never much cared about in the past. It has helped me with moving the HDD in and out easily during the build process.


    Again I have used the same screws as earlier. And this is the state of my study as of now.....


  20. #20
    Xtreme Enthusiast
    Join Date
    May 2009
    Posts
    952
    So now time for the final build pics:


    Tubing and wiring done. Ready for leak testing. The bottom near the pump has a Koolance 5 way fitting to which is attached the drain port. This also reduces one 90 degree fitting that I would have to otherwise buy. I have already used the drain once as I found both the EK fittings on the rad to leak. Have changed these out to BP Black 1/2" barbs and they are fine now. This is really convenient way to drain the water, compared to emptying the res that I was doing earlier.

    On to leak testing:


    I also felt that the PT Nuke was frothing too much, so maybe I put as bit too much in there, so anyway had to drain, since the compression fittings were leaking and this time put in only 2 drops for the approx half liter of water I was using. I will put up final build pics, including the wire management and front a bit later.

  21. #21
    Xtreme Enthusiast
    Join Date
    May 2009
    Posts
    952
    Well here it is guys. All done. Project E is now complete:


    Going a bit closer:


    This is the drain fitting.


    Now lets start her up, with only the front LED fan on:


    And now with the white lights as well:


    Now the front:


    And finally the rear.

    Last edited by mav2000; 11-17-2010 at 02:51 AM.

  22. #22
    Xtreme Enthusiast
    Join Date
    May 2009
    Posts
    952
    Double post

  23. #23
    Registered User
    Join Date
    Sep 2009
    Location
    Glasgow, Scotland
    Posts
    94
    Turned out extremely well...

    Definately gonna steal the carbon look on the interior.

  24. #24
    Xtreme Enthusiast
    Join Date
    May 2009
    Posts
    952
    Thanks man.,

  25. #25
    Banned
    Join Date
    Feb 2010
    Location
    Coimbra - Portugal
    Posts
    257
    Yeh very well done!

    But the EK block screws are so ugly,

    in my project i put them to squeeze behind the board and it worked really well, the front was enough to put some snap caps @ MDPC-X to cover the screw head

Page 1 of 2 12 LastLast

Bookmarks

Bookmarks

Posting Permissions

  • You may not post new threads
  • You may not post replies
  • You may not post attachments
  • You may not edit your posts
  •