Page 9 of 15 FirstFirst ... 6789101112 ... LastLast
Results 201 to 225 of 368

Thread: Project: Lian-Li P80 & PA140.3

  1. #201
    Xtreme Member
    Join Date
    Nov 2008
    Location
    Eagle Rock, Ca.
    Posts
    398
    Nice pics, GK! I particularly like the the o-ringies party pic.

    Quote Originally Posted by aka_GK View Post
    ...mx-3 is so damn hard to apply - it is very thick, you can only put a piece of it on the CPU (or somewhere else) and then just press it with your finger, almost impossible to smear it...
    When I applied my M3, I more or less followed the plastic spoon circular situation method. I also placed the syringe/tube in a cup of warm water for 10 -15 minutes before applying...kinda makes it a little easier to spread.

    EDIT: But I wouldn't do this in the outside snowy Moscow whether. lolz

    Hope I helped any.
    Last edited by CptDreadFlint; 02-01-2010 at 08:57 PM.
    [SIGPIC][/SIGPIC]

    Now Playing

    black freighter: i7 920 | evga classified | mm extended ascension pedestal | 2 x 300gb vraps
    dead men tell no tales build: q9770 | asus striker 2 extreme | 2x4gb ddr3 ocz reaper | 2 x gtx 280 oc2 | 2x 300gb vraps | mm ufo-cyo | pcp&c 1200W

  2. #202
    Xtreme Enthusiast
    Join Date
    Aug 2006
    Location
    North Carolina, USA
    Posts
    839
    Quote Originally Posted by aka_GK View Post

    I've heard that Heatkiller lapping doesn't improve anything, but not about CPU lapping (while using HK) My temps didn't went higher after lapping though
    Hey, GK. You have to match them. Usually, if you're going to lap your CPU then it's a good idea to lap the heatsink/waterblock as well. This way, you ensure that both are flat and will have optimal contact.

    To test, take a straight razor and hold it against the base of both your CPU and the HK, and see if you can see any space inbetween the edge of the blade and the base of the heatsink/IHS.

    Also, if the MX-3 is anything like the old Arctic Silver, you're not supposed to spread it yourself. Arctic provides specific instructions on how to apply it based on whether you have a dual or quad core. You're supposed to line it up over the cores:

    http://www.arcticsilver.com/arctic_s...structions.htm
    Last edited by Xion X2; 02-01-2010 at 09:31 PM.

  3. #203
    Xtreme Enthusiast
    Join Date
    Jul 2009
    Location
    Perth Australia
    Posts
    651
    Have you tried Vapors Q-Tips and silicone caulk mod for the HK?
    http://skinneelabs.com/143.html
    (I am thinking/guessing that Q-Tips, are cotton swabs/balls??? Please let me know if I am wrong!)
    This should also help if the HK block has a bow.

    Keep us posted GK.

  4. #204
    Xtreme Enthusiast
    Join Date
    Jan 2009
    Location
    Moscow, Russia
    Posts
    685
    Quote Originally Posted by CptDreadFlint View Post
    Nice pics, GK! I particularly like the the o-ringies party pic.

    When I applied my M3, I more or less followed the plastic spoon circular situation method. I also placed the syringe/tube in a cup of warm water for 10 -15 minutes before applying...kinda makes it a little easier to spread.

    EDIT: But I wouldn't do this in the outside snowy Moscow whether. lolz

    Hope I helped any.
    Thank Captain, I like it too

    hmm, that warm water hint might really help, I'll try it

    LOL you're right about the weather Yesterday I was going to sleep and ocassionally spotted that there is awesome snow fallng in the street, took my camera to make some pics, but it said "Change battery"

    Quote Originally Posted by Xion X2 View Post
    Hey, GK. You have to match them. Usually, if you're going to lap your CPU then it's a good idea to lap the heatsink/waterblock as well. This way, you ensure that both are flat and will have optimal contact.

    To test, take a straight razor and hold it against the base of both your CPU and the HK, and see if you can see any space inbetween the edge of the blade and the base of the heatsink/IHS.

    Also, if the MX-3 is anything like the old Arctic Silver, you're not supposed to spread it yourself. Arctic provides specific instructions on how to apply it based on whether you have a dual or quad core. You're supposed to line it up over the cores:

    http://www.arcticsilver.com/arctic_s...structions.htm
    Well, I need to research this situation a bit, probably I will end up with HK lapping

    And about MX3, isn't it too thick to spread by itself under the pressure?

    Quote Originally Posted by kgtiger View Post
    Have you tried Vapors Q-Tips and silicone caulk mod for the HK?
    http://skinneelabs.com/143.html
    (I am thinking/guessing that Q-Tips, are cotton swabs/balls??? Please let me know if I am wrong!)
    This should also help if the HK block has a bow.

    Keep us posted GK.
    I didn't. This mod decreases flow in HK, I am a bit afraid to do this because I have weaker version of DDC and trying to keep all my loop as less restrictive as possible. But who knows what will be tomorrow

    ==================================================
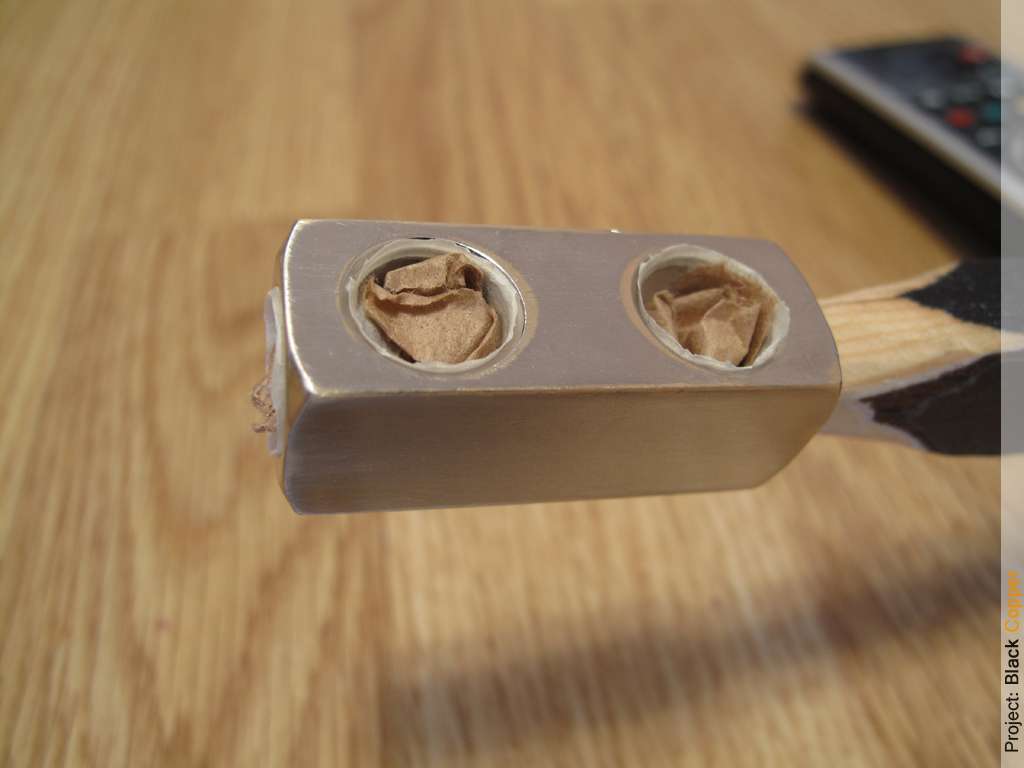
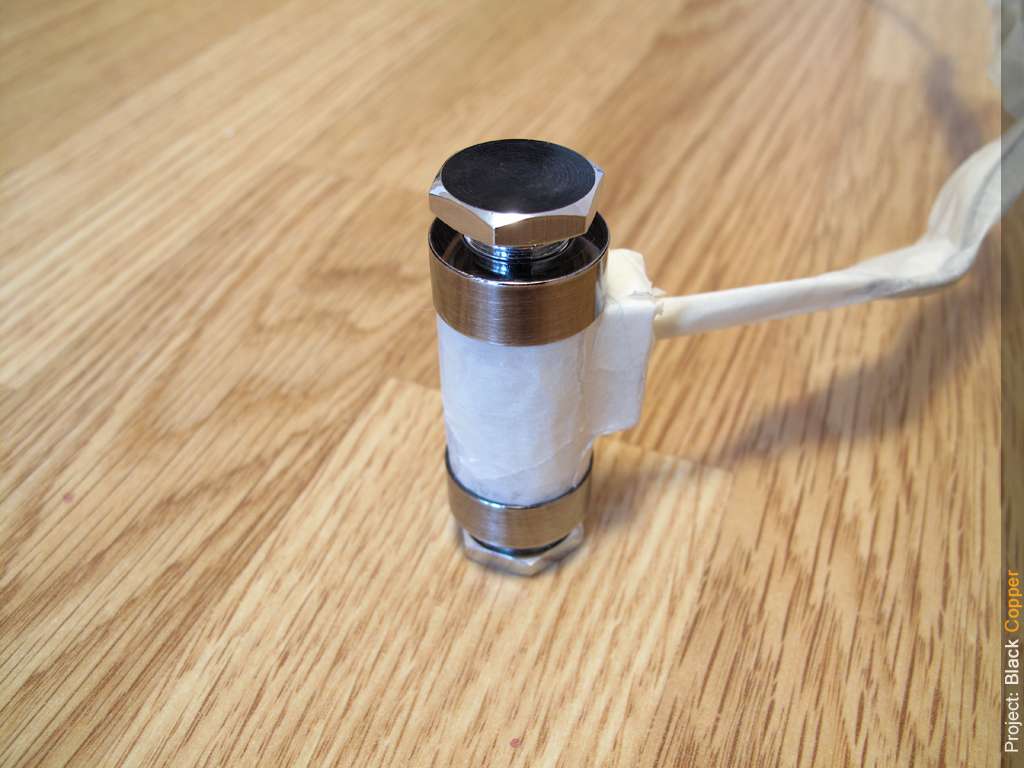
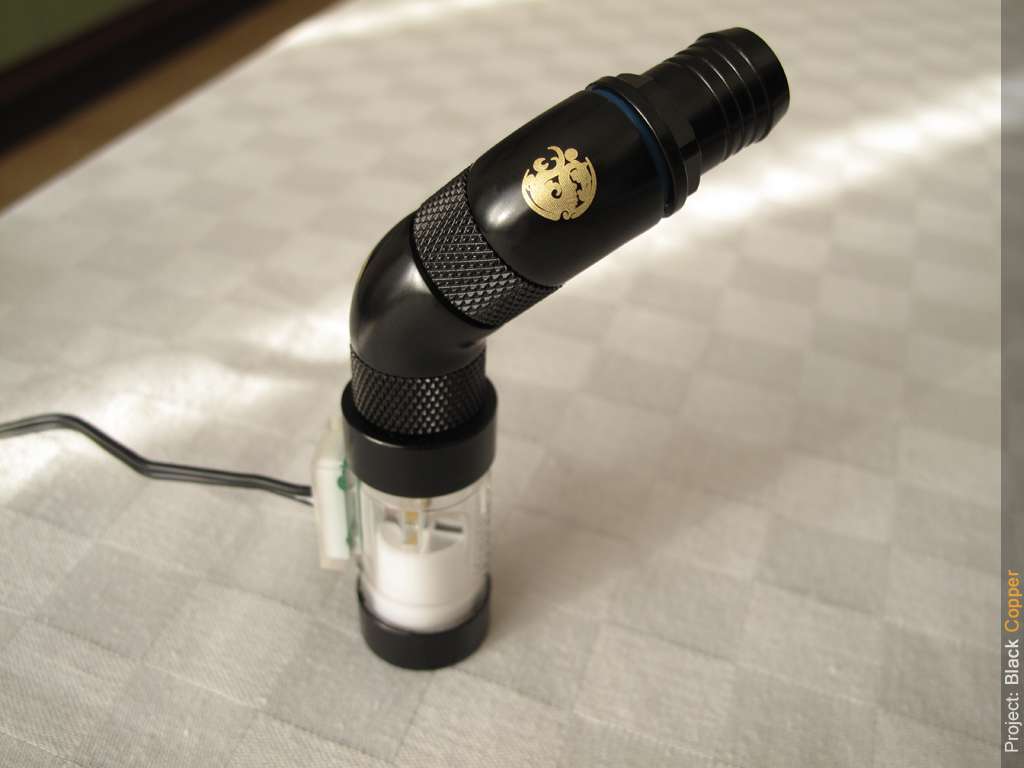
    Time to bring some build colors in Koolance toys I received yesterday:
    Brass body, you'll see later what is it for


    Slightly sanded and thread protected


    same with flowmeter


    They were primed by now, I left them to dry.
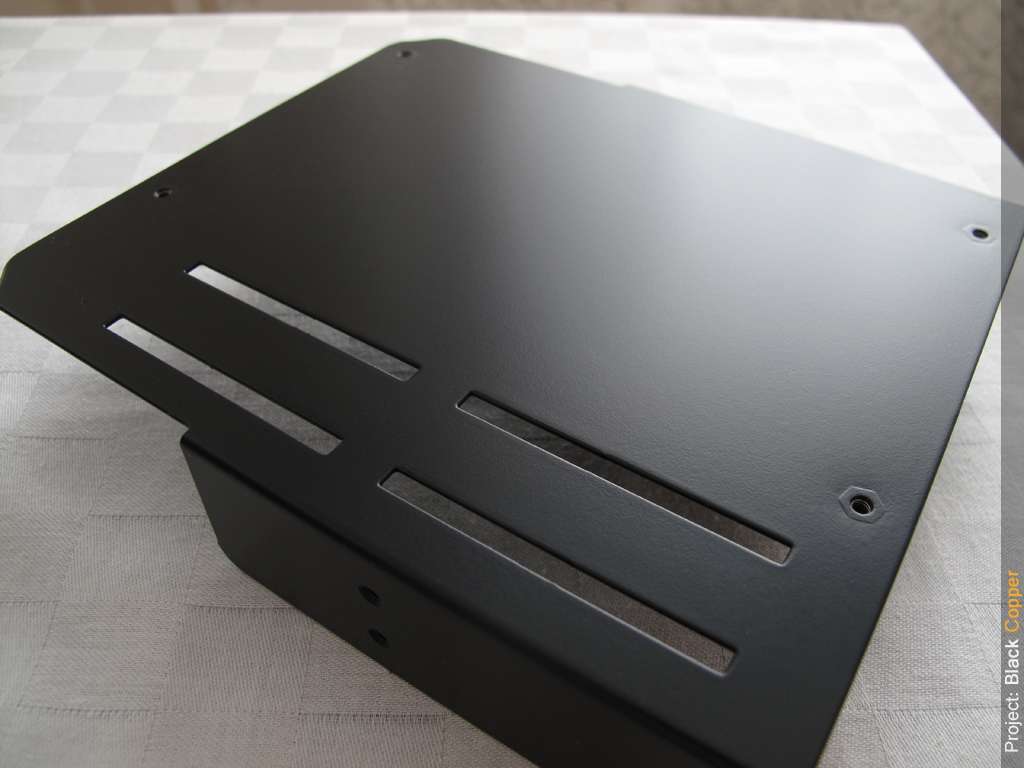
    And also I've finally applied last black coat to TMS-200 bracket, I've heated it in oven just before painting as kgtiger adviced to me previously and it turned out wonderfully nice and smooth, I'll show it later once it is dryed.
    Worklog: Project Black Copper
    Lian Li PC-P80 | Thermochill PA140.3 | Noiseblocker fans | mdpc-x stuff

  5. #205
    Xtreme Enthusiast
    Join Date
    Aug 2006
    Location
    North Carolina, USA
    Posts
    839
    Quote Originally Posted by aka_GK View Post

    And about MX3, isn't it too thick to spread by itself under the pressure?
    The heat from the IHS will cause it to become more viscous once the CPU is under normal operation and at higher temps.

    The thickness you're seeing right now is at room temperature.

    Here's some more reading if you're interested. It's long been Arctic's recommendation to use the linear application across the cores. Just be sure that you locate the cores correctly. I don't remember for certain, but I believe the orientation of them can change from one gen to the next.

    http://forums.guru3d.com/showthread.php?t=284229
    Last edited by Xion X2; 02-02-2010 at 09:03 AM.

  6. #206
    Xtreme Enthusiast
    Join Date
    Jan 2009
    Location
    Moscow, Russia
    Posts
    685
    Quote Originally Posted by Xion X2 View Post
    The heat from the IHS will cause it to become more viscous once the CPU is under normal operation and at higher temps.

    The thickness you're seeing right now is at room temperature.

    Here's some more reading if you're interested. It's long been Arctic's recommendation to use the linear application across the cores. Just be sure that you locate the cores correctly. I don't remember for certain, but I believe the orientation of them can change from one gen to the next.

    http://forums.guru3d.com/showthread.php?t=284229
    Thanks for the tips

    ===============================
    Well, as promised, bracket is finally ready:
    sigh, that was hard, but I am happy with the result


    Thing named "Koolance Brass Body"


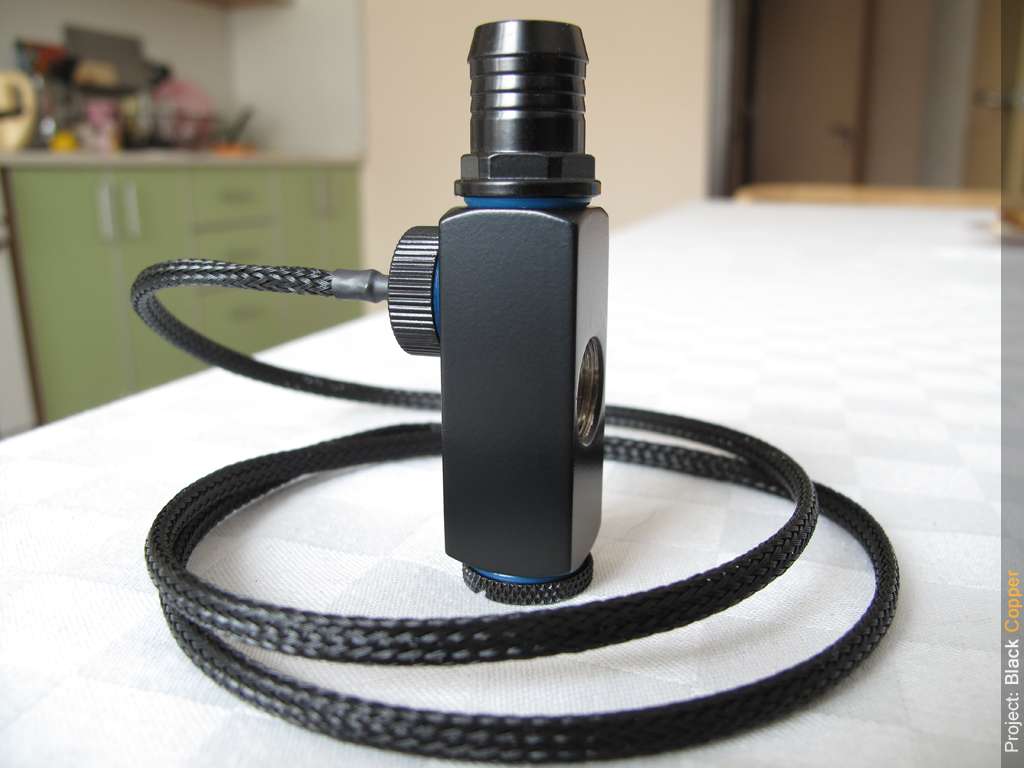
    Flow meter is ready to go too, but I want to let it completely dry before peeling off all that masking tape.
    Worklog: Project Black Copper
    Lian Li PC-P80 | Thermochill PA140.3 | Noiseblocker fans | mdpc-x stuff

  7. #207
    Xtreme Member
    Join Date
    Jun 2004
    Posts
    262
    Quote Originally Posted by aka_GK View Post
    Thing named "Koolance Brass Body"


    Flow meter is ready to go too, but I want to let it completely dry before peeling off all that masking tape.
    I really like it alot bro, great painting. Show us more pics.
    Extreme ways I know will part the colors of my sea, perfect color me | Arthur's WC Worklog with Lian Li PC-9

  8. #208
    Xtreme Member
    Join Date
    Nov 2009
    Location
    Portugal
    Posts
    463
    Very good painting skills Aka_gk

  9. #209
    Xtreme Enthusiast
    Join Date
    Jul 2008
    Location
    kibbler the nibbler
    Posts
    984
    Damn you are good with a can of paint, what was that I said about painting my stuff for me? Yeah I still want that.

  10. #210
    Moderator
    Join Date
    Aug 2007
    Location
    Back and forth between Florida and Maine
    Posts
    4,097
    Quote Originally Posted by Kibbler View Post
    Damn you are good with a can of paint, what was that I said about painting my stuff for me? Yeah I still want that.
    Yeah - I'm thinking road trip to Moscow? On second thought, probably easier to bring aka_GK here for a little sunshine


    Great progress, aka - you sure do nice work.

  11. #211
    Xtreme Addict
    Join Date
    May 2007
    Location
    New York City
    Posts
    2,065
    wait a minute, he did that with a can of spray paint?

    damn... you're uber...
    "The ultimate measure of a man is not where he stands in moments of comfort and convenience, but where he stands in times challenge and controversy."
    Dr. Martin Luther King Jr.

    DIY: Self Clinching Nuts

    Canon EOS 7D | Tokina 12-24mm f/4 | Canon EF 24-105 f/4 L | Canon EF 70-200 f/2.8 L IS Mk II | Canon EF 35mm f/1.4 L | Canon EF 400mm f/5.6 L | Canon EF 100-400mm f/4-5.6 L

  12. #212
    Xtreme Enthusiast
    Join Date
    Jul 2009
    Location
    Perth Australia
    Posts
    651
    Excellent work GK, the "Koolance Brass Body" and the bracket look perfect, very neat work.

    You will find in most cases but not all, by remove the masking tap when the paint is still slightly wet.
    The edges along the tape will soffen out more and will look smoother when dried.
    The reall challenge comes in removing the tape, without touching the paint when it's still not quite touch dry.
    Humm I still need more practice with that.

    Looking forward to seeing the flow meter.

  13. #213
    Xtreme Member
    Join Date
    Jan 2009
    Location
    Google Maps
    Posts
    314
    nice work!!!

    SORRY FOR MY BAD ENGLISH!


  14. #214
    Xtreme Enthusiast
    Join Date
    Jan 2009
    Location
    Moscow, Russia
    Posts
    685
    Arthur, Raiden, Kibbler, shazza, kinghong, kgtiger, LeandroJVarini, thank you all for your kind words, I was smiling as wide as my face is when seen this

    Quote Originally Posted by Kibbler View Post
    Damn you are good with a can of paint, what was that I said about painting my stuff for me? Yeah I still want that.
    Quote Originally Posted by shazza View Post
    Yeah - I'm thinking road trip to Moscow? On second thought, probably easier to bring aka_GK here for a little sunshine
    Great progress, aka - you sure do nice work.
    Well, I am afraid my girlfriend won't let me go to Singapore without her Just listen to this :"Ann, I am going to Singapore to help my friend to paint his parts", sounds strange

    Quote Originally Posted by kgtiger View Post
    Excellent work GK, the "Koolance Brass Body" and the bracket look perfect, very neat work.

    You will find in most cases but not all, by remove the masking tap when the paint is still slightly wet.
    The edges along the tape will soffen out more and will look smoother when dried.
    The reall challenge comes in removing the tape, without touching the paint when it's still not quite touch dry.
    Humm I still need more practice with that.

    Looking forward to seeing the flow meter.
    I do not have jedi skills

    ===============================
    Time to show the flowmeter, I've catched the sunrise today
    it's not that perfect as koolance thing, and no sleeving yet, sorry


    this fitting configuration will be used in system
    Last edited by aka_GK; 02-04-2010 at 01:13 AM.
    Worklog: Project Black Copper
    Lian Li PC-P80 | Thermochill PA140.3 | Noiseblocker fans | mdpc-x stuff

  15. #215
    Xtreme Enthusiast
    Join Date
    Jul 2009
    Location
    Perth Australia
    Posts
    651
    Well done GK that flow meter blends in well with the matt black BP fittings.

  16. #216
    Xtreme Enthusiast
    Join Date
    Jan 2009
    Location
    Moscow, Russia
    Posts
    685
    Quote Originally Posted by kgtiger View Post
    Well done GK that flow meter blends in well with the matt black BP fittings.
    thanks mate

    ==================================================
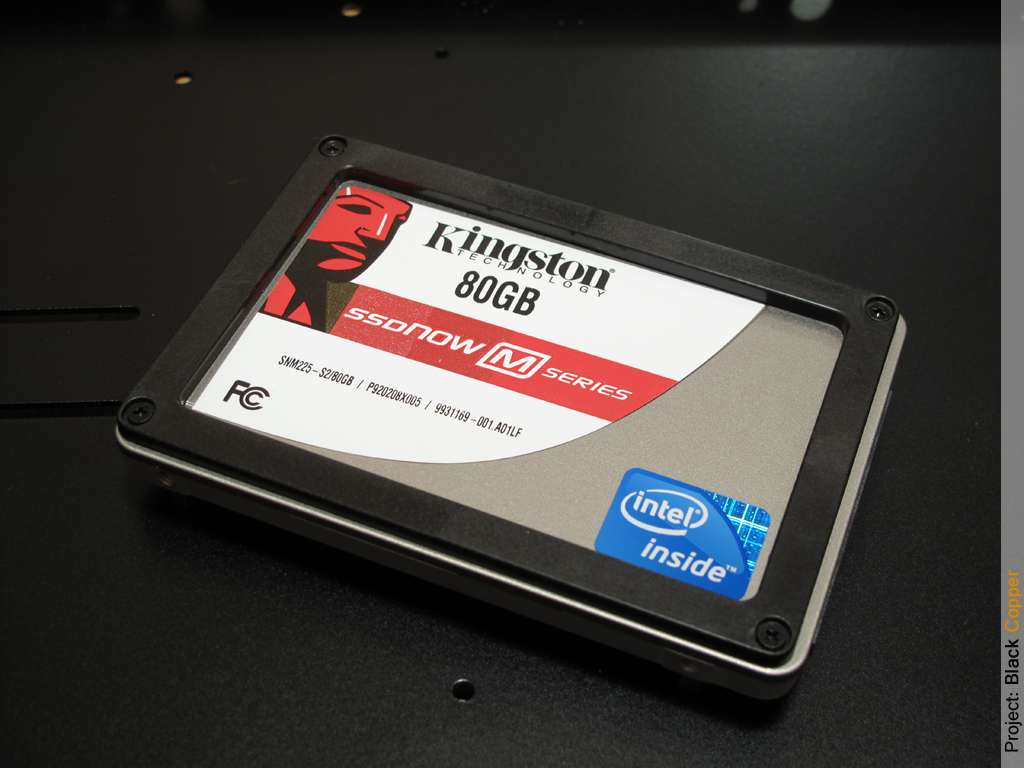
    Well, time to show an SSD (finally managed to buy it )
    it is Kingston SNM225, carbon copy of Intel X25-M (I can just peel that red sticker off and say that I have Intel )


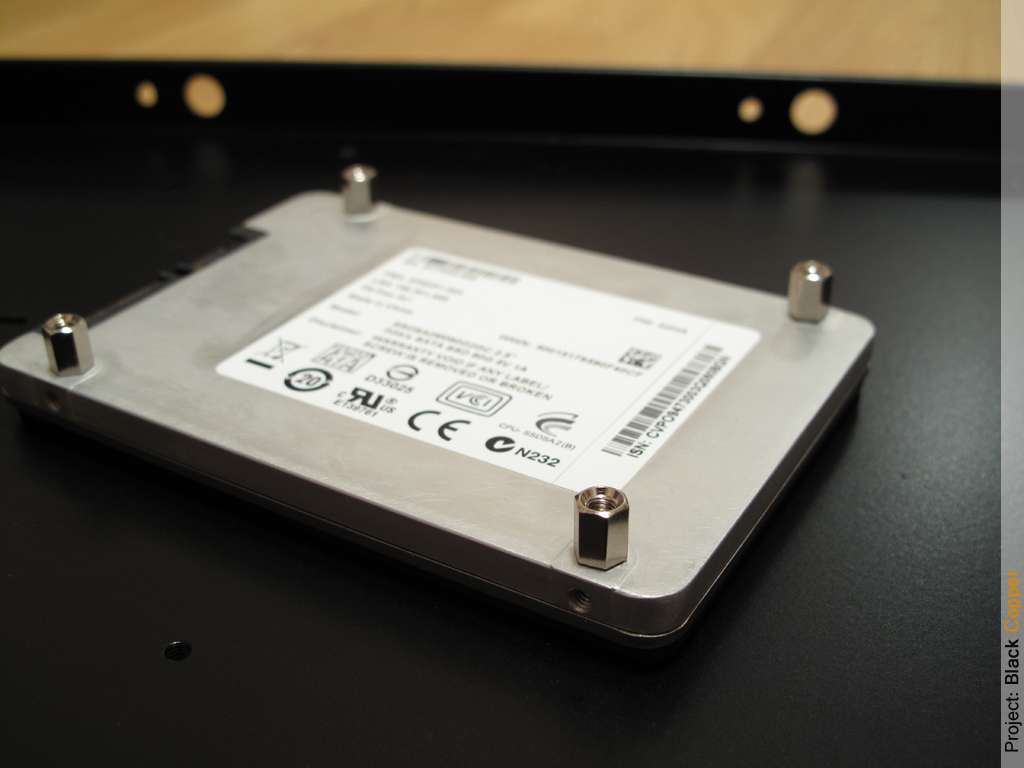
    It has M3 threads on the bottom (fortunately not usual HDD's UNC 6-32). Thanks to Lian Li, they put some spare motherboard stand offs.


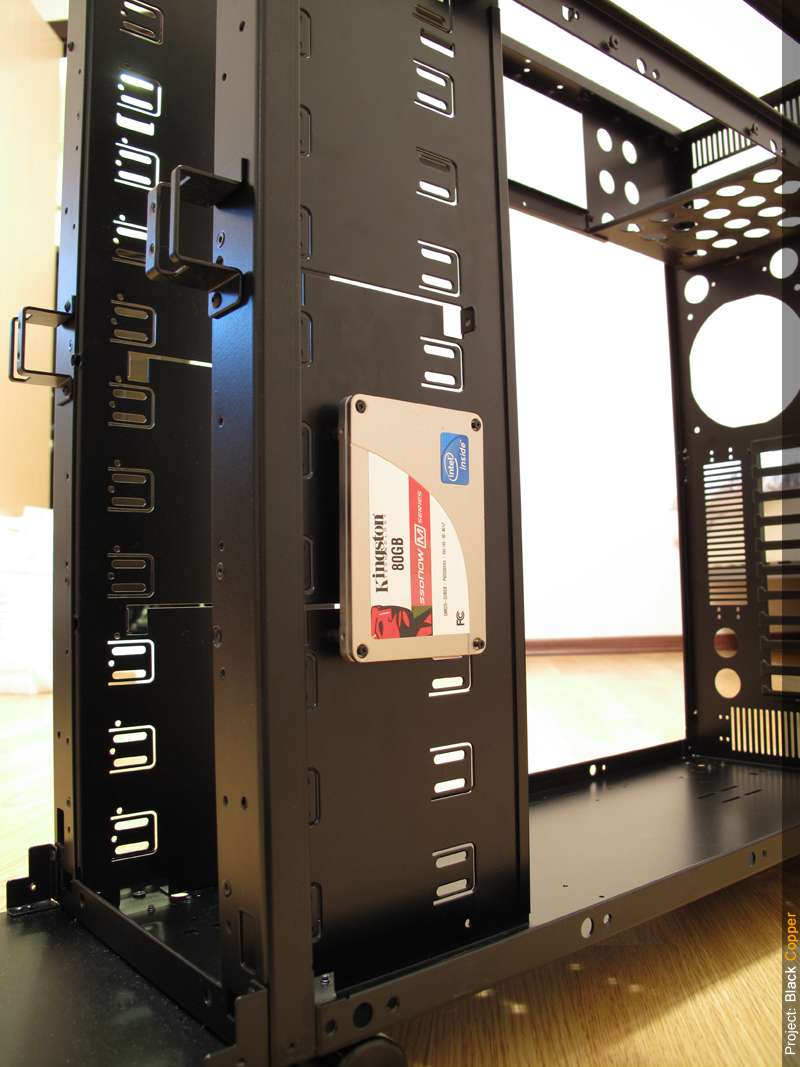
    And mounted with M3 screws, that easy it will finally be mounted a bit lower, I guess.
    oh, and got rid of that ugly black plastic frame


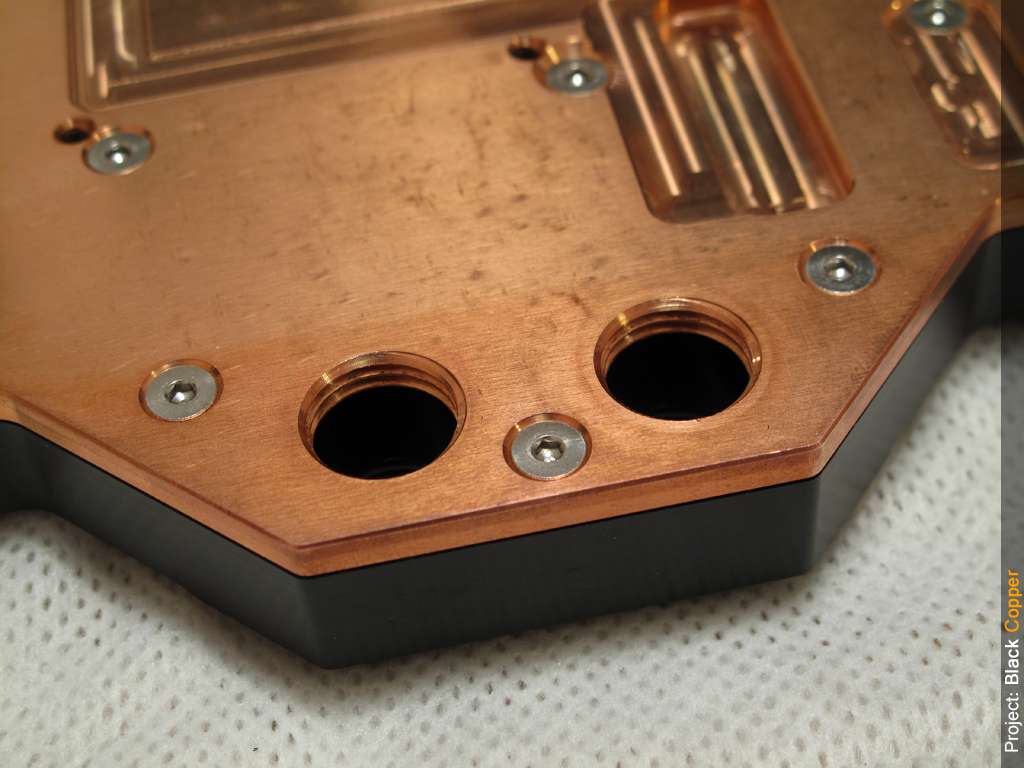
    High time to dress up the GPU, discovered very good solution to clean copper oxidation, fingerprints etc. (Thanks to my mate Gre4ka)
    Before (nasty and yellowish):


    After (nice, pinkish and shiny):


    Worklog: Project Black Copper
    Lian Li PC-P80 | Thermochill PA140.3 | Noiseblocker fans | mdpc-x stuff

  17. #217
    Xtreme Enthusiast
    Join Date
    Jan 2009
    Location
    Moscow, Russia
    Posts
    685
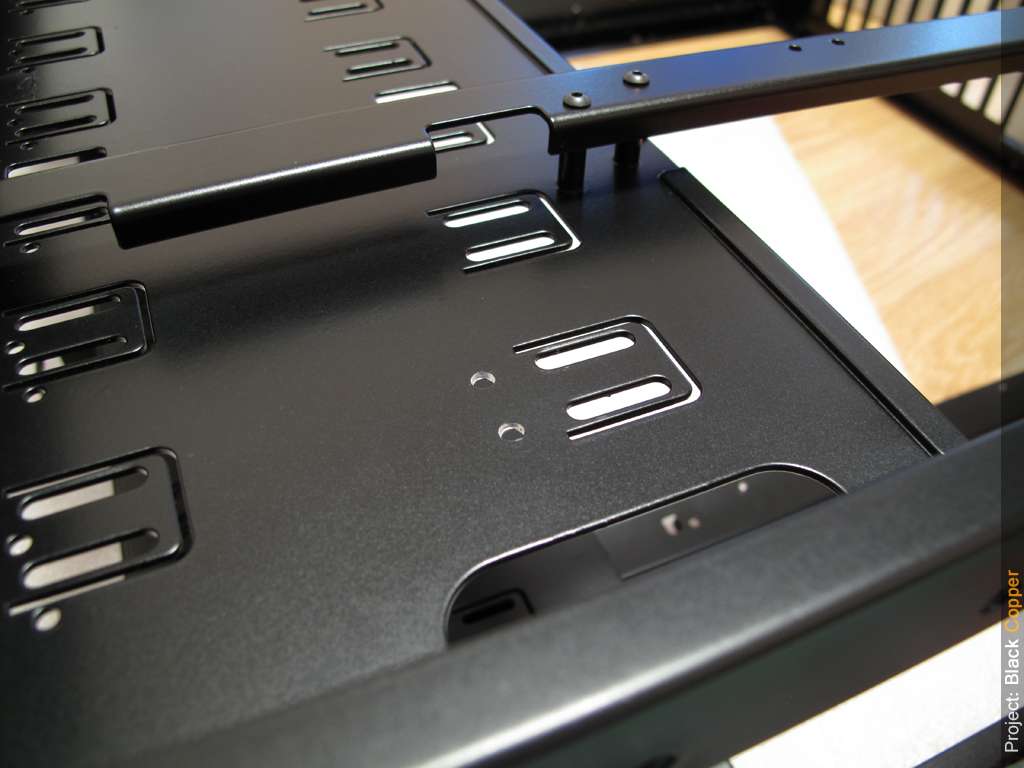
    As you probably remember TMS-200 bracket doesn't sit perfectly in stock drive bay holes, I am not quite happy with that so I took out my trusted drill and made some new holes


    Now bracket is completely inside the drive bay (no thumbscrews later for sure)


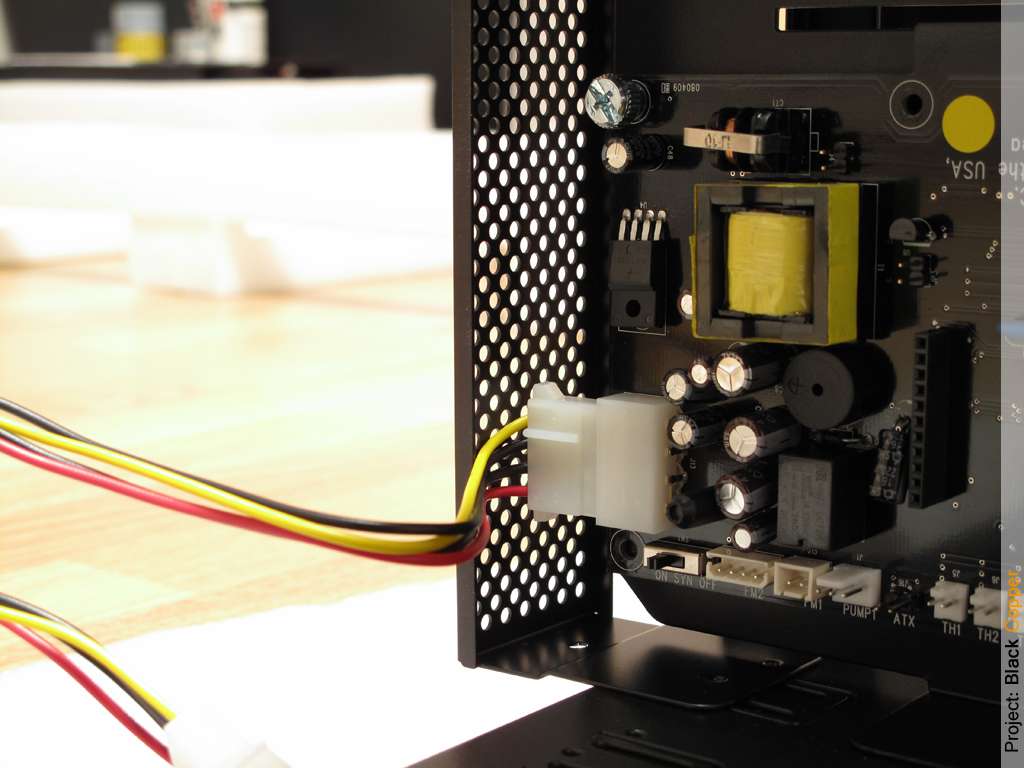
    Power cables now fit tight, but doesn't really matter as they are not visible


    And today in the evening I found notification in my mailbox that something awaits me in the post office, I am pretty sure it is fan stickers as the weight of the package is only 86 gramms Once again, thanks Captain for providing me with such a beautiful link
    Worklog: Project Black Copper
    Lian Li PC-P80 | Thermochill PA140.3 | Noiseblocker fans | mdpc-x stuff

  18. #218
    Xtreme Enthusiast
    Join Date
    Aug 2006
    Location
    North Carolina, USA
    Posts
    839
    Looking good, GK. I sure wish that I had your skill with paint.

  19. #219
    Registered User
    Join Date
    Aug 2009
    Posts
    588
    I actually think the thumb-screws break up the lines just the right way. Of course, they need some expert painting done by none-other than yourself first...

  20. #220
    Xtreme Enthusiast
    Join Date
    Jan 2009
    Location
    Moscow, Russia
    Posts
    685
    Quote Originally Posted by Xion X2 View Post
    Looking good, GK. I sure wish that I had your skill with paint.
    LOL thanks Nothing to worry about, you have tons of other crazy skills

    Quote Originally Posted by Wezly View Post
    I actually think the thumb-screws break up the lines just the right way. Of course, they need some expert painting done by none-other than yourself first...
    hmm, I have some black Lian Li thumbscrews but intended to use them on the backside to secure doors and PSU, but I like you suggestion need to think about it
    Worklog: Project Black Copper
    Lian Li PC-P80 | Thermochill PA140.3 | Noiseblocker fans | mdpc-x stuff

  21. #221
    Xtreme Enthusiast
    Join Date
    Jul 2009
    Location
    Perth Australia
    Posts
    651
    Excellent work GK, as per the norm with you.

  22. #222
    Xtreme Member
    Join Date
    Nov 2008
    Location
    Eagle Rock, Ca.
    Posts
    398
    GK, do you have a mechancal bionic painting attachment in place for arms? Thats seriously some amazing paint skills.

    P.S. Cant wait to see your stickers!
    [SIGPIC][/SIGPIC]

    Now Playing

    black freighter: i7 920 | evga classified | mm extended ascension pedestal | 2 x 300gb vraps
    dead men tell no tales build: q9770 | asus striker 2 extreme | 2x4gb ddr3 ocz reaper | 2 x gtx 280 oc2 | 2x 300gb vraps | mm ufo-cyo | pcp&c 1200W

  23. #223
    Xtreme Enthusiast
    Join Date
    Jan 2009
    Location
    Moscow, Russia
    Posts
    685
    Quote Originally Posted by kgtiger View Post
    Excellent work GK, as per the norm with you.
    Thanks, appreciate it

    Quote Originally Posted by CptDreadFlint View Post
    GK, do you have a mechancal bionic painting attachment in place for arms? Thats seriously some amazing paint skills.

    P.S. Cant wait to see your stickers!
    LOL thanks, I think everyone could do this if payed some patience and accuracy

    And btw that were not stickers in the mailbox That was a bunch of Mayhem dyes, didn't expect they are so lightweight
    Mick was kind enough to provide me with them, I am gonna make little overview. No longlasting stain testing though, I'll just try to make some good pictures and may be vids to show this colors.
    I will probably be using deep blue in the front to fill the system, but haven't decided yet.


    =====================================
    Well, slowly moving forward...
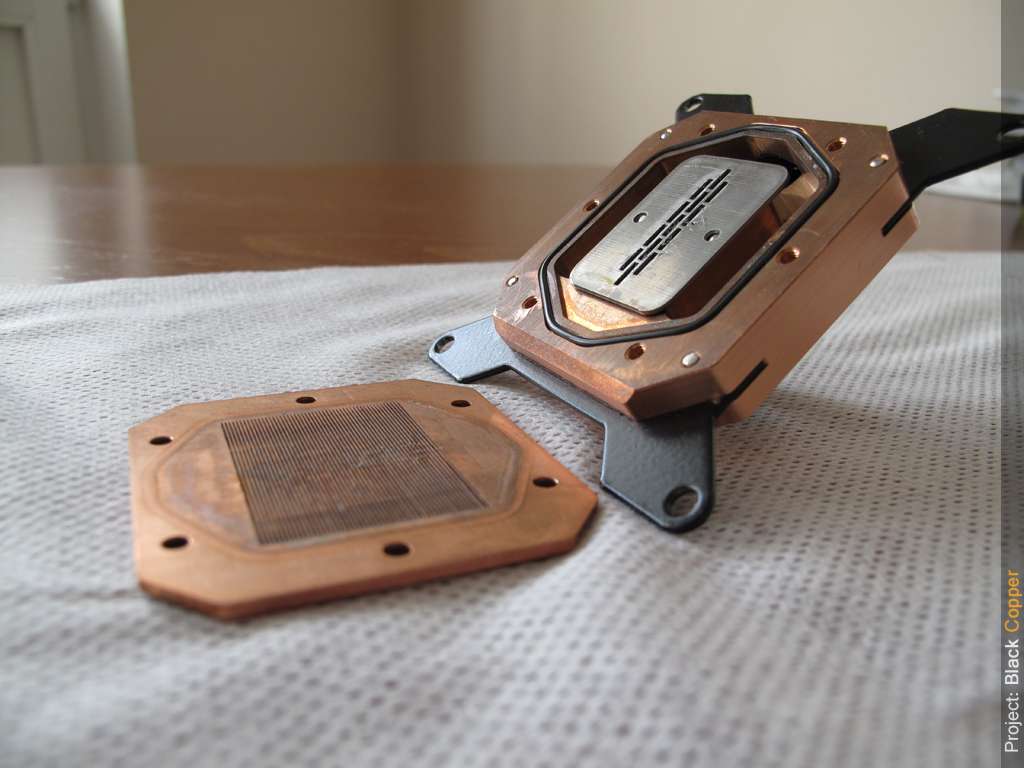
    Cleaned old TIM from the GPUs


    Put thermal pads, MX-2 and finally the block on, leak tested and checked the temps - everything is fine Some of us here is gonna put 4x more GPU power in their rigs, but anyway this thing is still looks powerfull
    (I am sorry for horrible picture )


    Now trying to make everything look like just out of the box brand new ones.
    Took this dirty boy to clean


    ew nasty


    Much better after


    Thanks for checkin in
    Worklog: Project Black Copper
    Lian Li PC-P80 | Thermochill PA140.3 | Noiseblocker fans | mdpc-x stuff

  24. #224
    Xtreme Enthusiast
    Join Date
    Jan 2008
    Location
    Athens -> Hellas
    Posts
    944
    What did you use to clean the block's surface ?

  25. #225
    Xtreme Enthusiast
    Join Date
    Jul 2009
    Location
    Perth Australia
    Posts
    651
    OOOh Mayhem dyes, now thats something I need to look into, would love to see the blue.

    Not sure if I missed it or not but what was the secret to cleaning the copper blocks, was it tomato sauce by any chance?
    Block look sweet again as good as new.

Page 9 of 15 FirstFirst ... 6789101112 ... LastLast

Tags for this Thread

Bookmarks

Bookmarks

Posting Permissions

  • You may not post new threads
  • You may not post replies
  • You may not post attachments
  • You may not edit your posts
  •