Page 1 of 3 123 LastLast
Results 1 to 25 of 53

Thread: Project: Mark1 [Build Log]

  1. #1
    Registered User
    Join Date
    Mar 2009
    Location
    Az
    Posts
    44

    Project: Mark1 [Build Log]

    This is my first mod, and consequently my first worklog. I will try to keep my story congruent and cohesive, as I don't always work in the most organized fashion. I tend to work on several things at once.
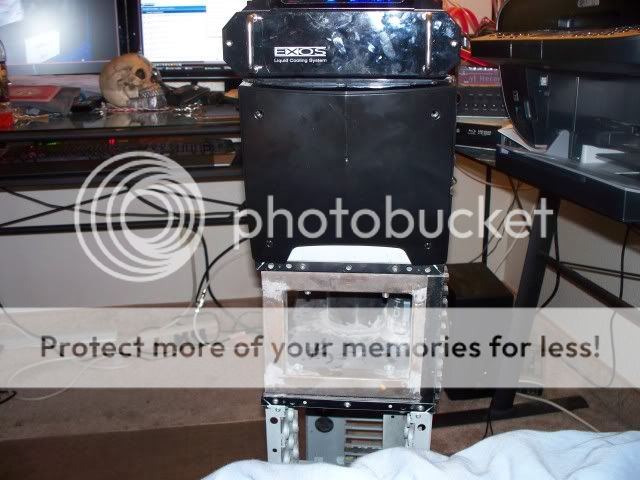
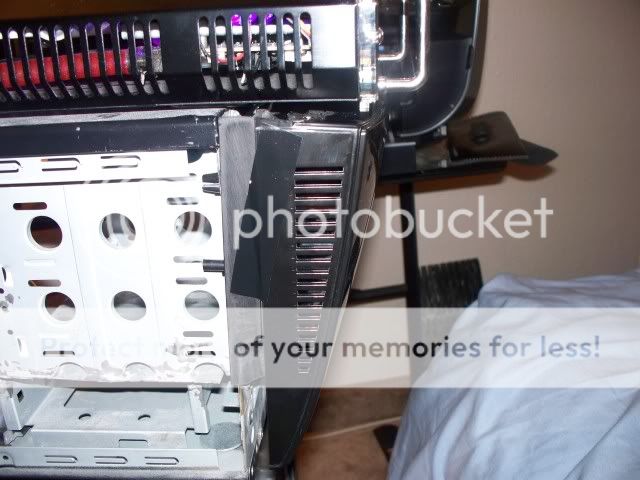
    The case I'm using is the NZXT Lexa Blackline, with the red lights. It's a very nice looking case even by it's self. Here's some of the hardware I will be using;
    eVGA 790i ftw digital motherboard,
    Intel QX9770,
    OCZ 4GB DDR3 1800 PC3 14400 RAM,
    Tagan BZ 1100w psu,
    eVGA GTX285 ftw graphics card,
    Koolance Exos 2.5 watercooling system, with a Swiftech Apogee GTZ cpu block,
    Hauppage winTV HVR-2250 TV card,
    Western Digital Velociraptor 300GB 10K rpm HDD,
    (5) WD 2TB HDDs,
    (2) LG GGW-H20L bluray drives,
    Antec Multi-Station Premier,
    Fan controller, and sound card have not been decided yet.

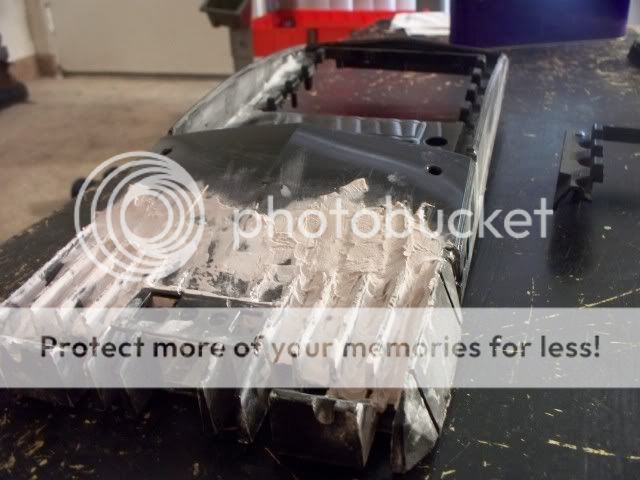
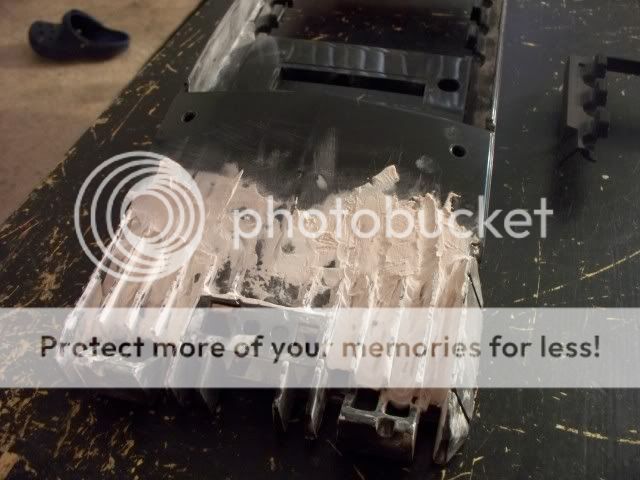
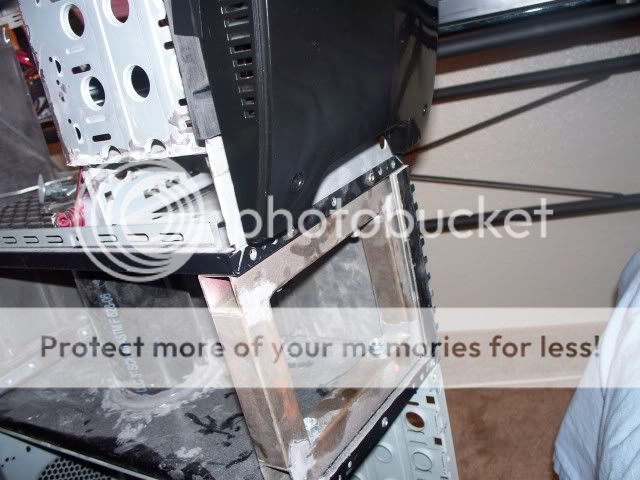
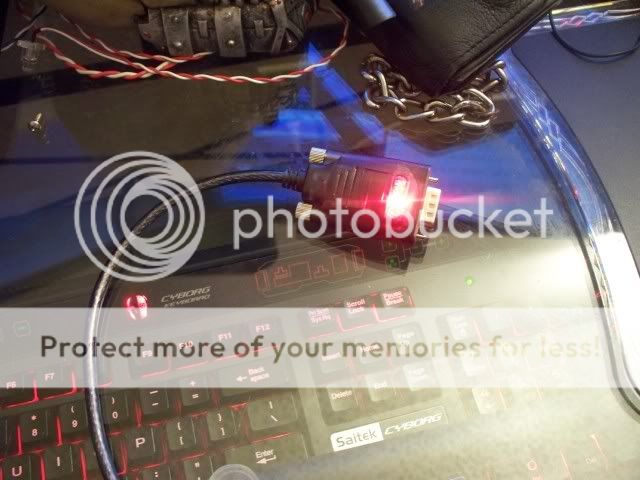
    Ok, a few generic before shots;

    By hardware_mark1 at 2009-06-15

    By hardware_mark1 at 2009-06-15

    By hardware_mark1 at 2009-06-15

    Sorry, I forgot to take the before shots.

  2. #2
    Xtreme Addict
    Join Date
    Feb 2007
    Posts
    1,674
    welcome to xs! good luck with this mod. When you say mod, what exactly are you going to do to this case?

  3. #3
    Registered User
    Join Date
    Mar 2009
    Location
    Az
    Posts
    44
    OK so I have to apologize, the first few steps are not that well documented. You see, this mod came about in steps. When I got the case, I didn't even have any plans to mod it! Then I started getting ideas. First was a way to hide wires, with some simple sheet metal next to the mobo. Also, I was going to build a rack out of 1/2" square tubing for the Koolance to sit on. Then I ran into a bit of a problem. You see, the Imon is a dual bay device, plus two disc drives, plus a fan controller... Well that is more than the supplied 5 drive bays. So, the idea changed a little, to add a drive bay into the rack. But then I needed a way to cover it. And after days and days of trying to figure something out, I came accross a material that I knew would work.

    By hardware_mark1, shot with KODAK Z1285 ZOOM DIGITAL CAMERA at 2009-06-18
    About this time, The design changed a little bit. Grew, you could say. I decided to use these panels to encase a metal frame, and on top of that would be a smaller case that will house the imon and perhaps a few other things. I refer to this as the minicase.
    OK, a few hardware shots, goodies that the ups man brought


    By hardware_mark1, shot with KODAK Z1285 ZOOM DIGITAL CAMERA at 2009-06-15

    By Hardware_Mark1 at 2009-06-15

    By hardware_mark1, shot with KODAK Z1285 ZOOM DIGITAL CAMERA at 2009-06-15
    And the first chops,

    I also cut off the metal that was rolled over along the edge of the drive bays.

    By hardware_mark1, shot with KODAK Z1285 ZOOM DIGITAL CAMERA at 2009-06-15
    That'll be all for today, have to go to work. I apologize if things are a bit unclear, I promise it gets better!!!

  4. #4
    Registered User
    Join Date
    Mar 2009
    Location
    Az
    Posts
    44
    Quote Originally Posted by Boogerlad View Post
    welcome to xs! good luck with this mod. When you say mod, what exactly are you going to do to this case?
    Thank you! And to answer your question, I don't have an "exact." I will ne making more room, as well as doing whatever I can to hide every wire....
    Never trust a computer you can't throw out a window.
    Steve Wozniak
    Why is it drug addicts and computer afficionados are both called users?
    Clifford Stoll

    Project;Mark1

  5. #5
    Xtreme Addict
    Join Date
    Feb 2007
    Posts
    1,674
    you could use a dremel and cut the sides of your mobo tray to route wires through there. There are some great posts on xs with this wire hiding guide.

  6. #6
    Registered User
    Join Date
    Mar 2009
    Location
    Az
    Posts
    44
    lol already did that. Thanks for the quick feedback though!!
    Never trust a computer you can't throw out a window.
    Steve Wozniak
    Why is it drug addicts and computer afficionados are both called users?
    Clifford Stoll

    Project;Mark1

  7. #7
    Registered User
    Join Date
    Mar 2009
    Location
    Az
    Posts
    44
    Holy crap! So I um, haven't been updating this log as I should have been. Oopsie :blush: So I will post several updates over the next few days, get everything up to speed. I'm sorry ppl!
    Never trust a computer you can't throw out a window.
    Steve Wozniak
    Why is it drug addicts and computer afficionados are both called users?
    Clifford Stoll

    Project;Mark1

  8. #8
    Registered User
    Join Date
    Mar 2009
    Location
    Az
    Posts
    44
    Hey I did get a little bit of a before shot.

    By hardware_mark1, shot with KODAK Z1285 ZOOM DIGITAL CAMERA at 2009-06-18


    By hardware_mark1 at 2009-06-19
    OK, first, the blue lights have to go.


    By hardware_mark1, shot with KODAK Z1285 ZOOM DIGITAL CAMERA at 2009-06-19
    Thats better.

    Originally, the idea was to use sheet metal, flush with the motherboard, to hide the wires. Well it became evident fairly quickly that that wasn't going to work. So I decided to make it stand out more, as well as overhang the mobo to hide the power connector and sata connectors. Also, I decided to make it go over the graphics card, instead of underneath it. This will hide the power wires to the card. I call this the "wire channel." Sounds confusing, you'll see what I mean.
    Other ideas I had from the beginning was to use sheet metal to make a psu cover, and drive bay cover.
    Instead of sheet metal I am going to use these panels.

    By hardware_mark1, shot with KODAK Z1285 ZOOM DIGITAL CAMERA at 2009-06-14

    By hardware_mark1, shot with KODAK Z1285 ZOOM DIGITAL CAMERA at 2009-06-14


    This is why I cut the metal off the side of the drive bays.
    This is was the first attempt;

    By hardware_mark1, shot with KODAK Z1285 ZOOM DIGITAL CAMERA at 2009-06-14
    I don't like it. I recut it, using straighter lines. Also, I wanted to be able to see the lights on the front of the psu, without seeing the wires. I came up with the idea of of putting holes in that area, effectively creating a grate, sorta.

    By hardware_mark1, shot with KODAK Z1285 ZOOM DIGITAL CAMERA at 2009-06-14
    Then I took a micro file and filed all the holes square, as you see I started there.
    Here is the final result of that.

    By hardware_mark1, shot with KODAK Z1285 ZOOM DIGITAL CAMERA at 2009-06-19

    I also started cutting a piece for the bottom.
    Warranties voided so far; 2.
    Never trust a computer you can't throw out a window.
    Steve Wozniak
    Why is it drug addicts and computer afficionados are both called users?
    Clifford Stoll

    Project;Mark1

  9. #9
    Registered User
    Join Date
    Mar 2009
    Location
    Az
    Posts
    44
    OK, so once again, I started on the side panel. This is the last one of these I am cutting, dangit. Here is the third, and final revision. I am still going to cut something in the panel to let som light through, but I haven't decided what yet. And, until I know for sure, I'm not doing any cutting! I also cut a smaller piece for the 3.5" bays. Here you see those two pieces, plus, you can see where I cut out the material on the backside of the HDD cage.


    Here is a shot of the piece cut to cover the bottom of the case.

    The square hole is for the fan on the bottom. The edge on the top that is uneven will be under the motherboard.
    Speaking of the bottom.... I am working on building a 'skirt' to go around the bottom.
    Here are the bolts I am using. I love these bolts! I believe they are called "elevator bolts."

    By hardware_mark1, shot with KODAK Z1285 ZOOM DIGITAL CAMERA at 2009-06-19

    I started out using 1/2" square tubing. Eventually, I figured that 1" would be much easier to work with. Yeah, it will add some weight, But oh well, this baby is gonna be hefty by the time I'm done anyway.

    By hardware_mark1, shot with KODAK Z1285 ZOOM DIGITAL CAMERA at 2009-06-20

    I had been trying to figure out something to use to fill up some space, as well as add a little something extra. I have this skull,

    By hardware_mark1 at 2009-06-20
    that I want to incorporate into the case. I thought about several different avenues, then I saw this, and I knew that was it.

    By Hardware_Mark1 at 2009-06-19
    It's a heatsink, from the same place I got the panels. I am going to cut and file away a lot of the material in between the fins. The idea is to see the skull, but only kinda. I want the reaction not to be, "Oh, another skull," instead, "What's that? Oh wow"
    Never trust a computer you can't throw out a window.
    Steve Wozniak
    Why is it drug addicts and computer afficionados are both called users?
    Clifford Stoll

    Project;Mark1

  10. #10
    Registered User
    Join Date
    Mar 2009
    Location
    Az
    Posts
    44
    Here is another picture of the HDD cage.

    By hardware_mark1, shot with KODAK Z1285 ZOOM DIGITAL CAMERA at 2009-06-20
    I did this so I can flip the hard drives around, so the cables will be on the backside, instead of on the window side.
    I will have to mod the HD rails so they line up right, but I will do that later.


    Also, I am thinking of building some kind of a box onto the back, to hide the hundred or so wires that go to the back of the computer. Haven't quite decided exactly how I want that to look. Something like this....

    By hardware_mark1, shot with KODAK Z1285 ZOOM DIGITAL CAMERA at 2009-06-18

    By hardware_mark1, shot with KODAK Z1285 ZOOM DIGITAL CAMERA at 2009-06-18
    Now you can start to see a little bit of a bigger picture. eh?
    In that pic, you can see the rivets I had originally used to mount the panels to the case. I pitched that idea with the newer panel, in favor of a method resulting in a cleaner finish.

    OK, so some progess on the skirt. Here you will see why I switched to the 1" tube.

    By hardware_mark1, shot with KODAK Z1285 ZOOM DIGITAL CAMERA at 2009-06-20
    I can screw the bolts right into the bars! And this makes mounting the skirt to the case a snap.

    By hardware_mark1, shot with KODAK Z1285 ZOOM DIGITAL CAMERA at 2009-06-21


    Also, here is part of that heatsink I showed you earlier. I am so happy with the way it turned out!


    I still haven't decided how I am going to style the front part though. The back, however, is pretty simple. I took the back leg, which also held on the curved piece of plastic that goes on the back of the case. Well, the leg won't work with the skirt, but I need to hold on the rear piece.


    Easy fix, just cut off the superfluous plastic!

    By hardware_mark1, shot with KODAK Z1285 ZOOM DIGITAL CAMERA at 2009-06-18


    Here is a couple more pictures showing some progress

    By hardware_mark1, shot with KODAK Z1285 ZOOM DIGITAL CAMERA at 2009-06-18

    By hardware_mark1, shot with KODAK Z1285 ZOOM DIGITAL CAMERA at 2009-06-18

    I made a psu cover, as well. Nothing too fancy...

    The metal tabs will let me screw it onto the back of the case.
    Next update, I start building up!
    Never trust a computer you can't throw out a window.
    Steve Wozniak
    Why is it drug addicts and computer afficionados are both called users?
    Clifford Stoll

    Project;Mark1

  11. #11
    Registered User
    Join Date
    Mar 2009
    Location
    Az
    Posts
    44
    Now I cast my eyes upward.
    Originally, the idea was to use the 1/2" square tubing to build a frame. Again, I pitched that in favor of 1" tube. So I made these two simple square frames.

    JB weld, plus angle irons. Should be sturdy. I wish they could be welded, but I don't have any means to get that done. The piece of panelling on the side is just to get it square.


    More of the elevator bolts will mount them to the case. These are especially useful where the rear frame is, since it's right above the psu, and there is limited clearance.
    I also cut out the fan grill on the top of the case. I am going to put a piece of 3" pvc pipe here, as a "ventilation shaft."


    This whole area will be enclosed with panelling, with the "vent" on the left side. This will house the skull I showed you earlier.
    The right side, nothing too complicated.


    The back will be a simple panel.
    Another simple panel will close off the area where the skull sits. I had a picture of those panels, but they didn't turn out very good.
    Speaking of the skull, I gave it some life.
    My new hard drive activity lights!
    Never trust a computer you can't throw out a window.
    Steve Wozniak
    Why is it drug addicts and computer afficionados are both called users?
    Clifford Stoll

    Project;Mark1

  12. #12
    Registered User
    Join Date
    Mar 2009
    Location
    Az
    Posts
    44
    Yay delivery!


    Hmm deja vu....


    Now why, oh why would I be showing pictures of a new case now? Because it's Lexa case number 2!!!
    I know it doesn't seem to make sense to buy a whole 'nother case, but I have several reasons for doing this. 1, it will save me a lot of work if I use pre-existing drive cage, as opposed to building my own. 2, in an effort to help, my desk was cleaned for me, resulting in most of the screws that came with the case getting lost, or mixed in with all my other similiar hardware, thus becoming hopelessly confused.
    So basically what I am going to do is take this case, and shrink it down to about half size. I need the two drive bays for my Imon controller. I also decided to give myself one more extra 5.25" bay, just in case. I also went ahead and put in a cage for one HDD, just for the heck of it.
    Sooo, some quality time with ye olde power drill, and it's presto, yet another warranty voided. This one within five minutes of taking delivery!!
    And here we go, a nice pile o' parts.


    Now I'll keep the top and bottom intact, obviously. Also, I am keeping the mobo tray and back panel intact. I won't be using it in this build.
    Cut the right side panel.


    OK, so my big plan for this part; I am calling this the minicase. The idea here is to make it look like the regular case, just, uh, smaller.

    So I chopped the the 5.25" cage down to size. I chopped down the corresponding front panel, as well as thee HDD cage, for one hard drive. Here are those pieces mocked up together.

    Made a psuedo rear panel.


    I actually am planning on putting a couple things in there like regular pci slots. One thing will be the video capture inputs that came with my Hauppauge TV card.
    Of course I will have to lengthen the wires.

    And now I leave you with this (teaser?) shot:
    Never trust a computer you can't throw out a window.
    Steve Wozniak
    Why is it drug addicts and computer afficionados are both called users?
    Clifford Stoll

    Project;Mark1

  13. #13
    Registered User
    Join Date
    Mar 2009
    Location
    Az
    Posts
    44
    Alright, did some work on the minicase. Like I said, it's supposed to just be a smaller version of the case.
    JB Welded the pieces of the drive bays together. It looks like crap. I'm going to make sure as much of it is hidden as possible.


    Riveted the cage to the front panel.


    Cut a new side panel.


    Now in the minicase, there are no 3.5" bays, so there is no "step down." So I cut the edge off, and kept the ridges, to replicate the edge of the other side panel.


    Also cut a panel to "cover the psu" Obviously there is no psu in here, this is just to keep the look going.


    And we have a problem. The fan is in the way.


    I don't want to put the panel in front of the fan, cause then you wouldn't even be able to see the fan. So, I'm going to redo the rear panel. That will have to wait until I get more sheet metal. I need to get a heavier gauge. I will remake it with fewer pci slots, I'm thinkin just 2. That will let me lower the fan, and I think it will help make it look more to scale.

    Cut a bottom panel.


    lol I promise the smaller pvc pipe in the back lines up better with the hole. That was just a mockup. And of course the 3" is directly underneath that fan grill.

    Installed a length of 1.5" pvc, to act as a conduit to run wires back and forth between the cases.


    I am going to have the Imon in the minicase, as well as the video capture device, one hard drive, and Idk what else. I am going to have some servo controlled parts, so I am thinking of mounting the servo controller to the right side, like a simulated motherboard.

    Here we go, a couple of progress shots.....


    Maybe this will clear up some confusion


    Confusing? I prefer 'Enigmatic'
    Never trust a computer you can't throw out a window.
    Steve Wozniak
    Why is it drug addicts and computer afficionados are both called users?
    Clifford Stoll

    Project;Mark1

  14. #14
    Registered User
    Join Date
    Mar 2009
    Location
    Az
    Posts
    44
    Alright, a couple smaller things...
    As I got to looking at the HDD cage, I noticed that when it's full, the bottom hard drive won't really get any air from the fan in front. (yes, it will be full, eventually.) So, I decided to fix this by adding a fan on the bottom. 80mm fan fits right in there.

    Drilled holes in the bottom panel of the case. Can you guess which one I did and which one is stock?


    Yeah looks like garbage. I'm just gonna take the 3" hole saw and use mesh. Even though that won't get seen, I know it's there....

    Also, the door sans hinge is annoying. I'll fix that. I'll start by cutting off the rolled over metal.


    Jeezas that was a pain.
    I cut off the corresponding rolled metal on the case. I don't seem to have a picture of that part right now....

    I used a solid hinge, mainly because I knew that if I used a few smaller hinges, I wouldn't get them all lined up right and it would just piss me off.

    Cut a few areas in the hinge to get around rivets and such.

    Good ol' JB Weld to the door.


    Yeah, so the picture isn't all that great, cause I ahem kinda goofed. I used wax paper when I clamped the hinge to the door, to keep the clamps from getting glued to the door. Well, it wasn't wax paper like I thought, so the paper stuck to the door. Nice.
    I will sand this all down, and if im not happy with how it looks, I'll just cover it in some bondo. Same with the half that's in the case. I have to figure out some way to cover that up, maybe another piece of that panelling, mebbe just simple sheet metal, idk yet.

    I'll do the same for the minicase.
    Never trust a computer you can't throw out a window.
    Steve Wozniak
    Why is it drug addicts and computer afficionados are both called users?
    Clifford Stoll

    Project;Mark1

  15. #15
    Registered User
    Join Date
    Mar 2009
    Location
    Az
    Posts
    44
    So I finally decided what I am going to do with the front, or at least the part on the bottom.


    It's a large heatsink, this one with the edges and such still intact. I had to cut it down, it was a bit too wide. This left it asymmetrical. Dammit. Oh well, I will just cut off one fin, and maybe glue it back on in the center.
    I cut the plastic so that it runs down into the fins. I will use JB Weld and bondo to make a smooth transition, and hopefully get it to look like one solid piece.


    Nah, I'll just leave the middle like it is. I like that body line, and I think I want to keep it.
    At the same time, I am having issues with the left side panel. I had it all together once, but then I found two things wrong with it, so I broke it apart and am redo-ing it, step by step. Here is an ugly picture showing the progress on that.


    I am also notching out a space for the front audio header. I cut out the plastic surround from the factory location.


    Yeah I screwed up. It got rubbed by the collet on the dremel. I'll have to sand that out.
    Here is progress on that notch.


    But my last cut off wheel broke, so I'll have to get more later. Happy 4th, for those it applies to!
    Never trust a computer you can't throw out a window.
    Steve Wozniak
    Why is it drug addicts and computer afficionados are both called users?
    Clifford Stoll

    Project;Mark1

  16. #16
    Registered User
    Join Date
    Mar 2009
    Location
    Az
    Posts
    44
    OK, a quick update today, not too much to report.
    Got the front header area cut away.


    Let me tell you friends, that was the exact opposite of fun. No room to move a file, no room for any dremel attachments... Ugh

    Still needs some finish filing though...

    Next I need to cut down the fins a little bit so the plastic cover will fit and be flush with the front of the fins.


    Thats all for now, gotta go to work!
    Never trust a computer you can't throw out a window.
    Steve Wozniak
    Why is it drug addicts and computer afficionados are both called users?
    Clifford Stoll

    Project;Mark1

  17. #17
    Registered User
    Join Date
    Mar 2009
    Location
    Az
    Posts
    44
    OK, another small update. Just been working on this front header more. Got more of the filing done.


    Sits down in there nice now.


    I am going to cut down the pcb a little so it doesn't hang over,


    Been really busy, so haven't had time to do much.
    This weekend I will drill a couple holes for wires and start filling in the gaps.
    Never trust a computer you can't throw out a window.
    Steve Wozniak
    Why is it drug addicts and computer afficionados are both called users?
    Clifford Stoll

    Project;Mark1

  18. #18
    Registered User
    Join Date
    Mar 2009
    Location
    Az
    Posts
    44
    Sooo.... Let's take a look at the material I'm using, as well as some of the methodology as it's evolved.


    Here is the source of the material.


    They are data recorder boxes. "The little black boxes." On the end you'll see where the heatsinks come from.


    The boxes are made from some kind of aluminum (alloy?) cast, hard as hell (hardened?) and a nightmare to work with sometimes. So far I've ruined my (really nice) jigsaw, dulled three files, and gone through more jigsaw and sawzall blades than I can count.
    Speaking of sawzalls... When I started, I didn't have a sawzall. See this lip?


    It's not possible to cut with a jigsaw. Solution? Drill a hundred holes then file down all the ridges.


    Sweet baby Jesus that did suck. Also it resulted in piles and piles of metal shavings, which my wife was just thrilled about.


    I don't have a workshop, I live in a crummy little apartment, so I work in my living room. (in case you haven't figured that out by the backgrounds in my pictures lol) Something else my wife is thrilled about.
    Here is the result of the drill/file method


    I am happy to report that I finally made the trip to my friendly neighborhood Harbour Freight and got a sawzall and a new jigsaw.


    Much better. Still, each cut is a pain, and I have to file and file and file..... Gawd I am sick of filing. I don't even want to use my filing cabinet anymore. filing.....
    Never trust a computer you can't throw out a window.
    Steve Wozniak
    Why is it drug addicts and computer afficionados are both called users?
    Clifford Stoll

    Project;Mark1

  19. #19
    Registered User
    Join Date
    Mar 2009
    Location
    Az
    Posts
    44
    Here we go, nother update.
    Got the front piece glued together. This weekend I will be working on filling all the gaps. I cut down the pcb,


    Well crap. I cut it down to the point where I didn't need to cut the groove in the second fin. Oh well.
    Anyway, I figure I won't be using the plastic piece I cut out. I will just make my own cover. Here is a test piece. This is not the final piece, but something to give me an idea of what to do. First, I apologize, I had a hard time getting good pictures.


    Here you can kinda see what I am going to be doing to match and blend that bodyline of the case.


    Here is something that will boggle everybodies minds.


    That's right, door. Permanently glued shut.

    Made some cuts...


    and we have access again.


    Sanded down the edges, to clean it up a bit.


    The cover still fits nice.


    Never trust a computer you can't throw out a window.
    Steve Wozniak
    Why is it drug addicts and computer afficionados are both called users?
    Clifford Stoll

    Project;Mark1

  20. #20
    Registered User
    Join Date
    Mar 2009
    Location
    Az
    Posts
    44
    OK, so it has come to my attention (more than once) that people may feel a lack of direction in this build, hence a lack of enthusiasm.
    I admit I did not undertake this project with a concrete plan. I had a general idea, a few things I wanted to do, then I let the inspiration come to me. I took an artistic approach to this whole project. Da Vinci reworked his ideas many times before realizing a final result. And just like Da Vinci, I have a few things I know for sure and hold to, and let the rest come to me as the pieces speak to me.
    K enough art teacher speak.
    I have a few ideas that I've had from the beginning, and that I know for sure that I am going to implement. Namely, Largely, the doors.
    Ahh the doors. Something that can make or break a case. Or just plain break and screw the whole deal up. This case has a neat looking door. Sharp body line that I love, cool lighting....
    Now how can I make it better. How can I make it, different.
    You saw that I glued part of the door on, then cut part off
    Here's the idea, presented in no-talent sketchup.

    This is the front piece to the door.

    The whole front of the case has these matching pieces with this beautiful finish.

    I am going to cut that in half. I will mount a servo that will open the door as such,


    then another servo, mounted on the inside of the door, will "slide" the door back, as so;


    this of course will be mimicked on the other side. (and remember, that door will be cut in half)
    There are three places this will occur.
    On the mini-case, where the Imon holds it's place of honor,
    Of course the main drive bay area,
    and...

    On this bottom section,


    Those are some progress shots showing the bondo work coming along.

    Think armoire doors,
    Never trust a computer you can't throw out a window.
    Steve Wozniak
    Why is it drug addicts and computer afficionados are both called users?
    Clifford Stoll

    Project;Mark1

  21. #21
    Registered User
    Join Date
    Mar 2009
    Location
    Az
    Posts
    44
    OK ladies and germs, here we go....

    Not much of an update today, but I promised I'd get something out this week.
    This piece has been kicking my butt all week.


    Hopefully you can kinda see where I'm going with this. I have to sand down all the bondo in between all the fins, for one. The problem is, it's very difficult to do by hand. I used a dremel with this attachment,


    But that left a rough finish. Btw I know that's not the designed use for that attachment, but it actually worked really great for that. I still use it, but only to take the bondo down a little, not all the way.


    I have come up with a potential solution to this problem, a simple block of wood, sanded to the size to get in between the fins.


    Here's the other problem area.


    I am trying to get a smooth transition between the plastic cover for the front header, and the rest of the cover. This really is the area I am having the most trouble with. I can't quite figure out how to attain the look I'm going for.
    I'm thinkin I will just take a break from this part and work on a different area for a while....

    Here is the front of the minicase. The plastic there is cut off the front bezel from the second case.


    Here is the piece I am thinking I will attach here.


    I know it seems a bit odd, or backwards to attach the bottom piece here. My reasoning for that is twofold; one, I it will make the plastic level with the front of the Koolance unit. Two, it is longer, so it comes down to about where I want it. One other thing (ok so it's threefold) is this gap will be a great spot to mount this remote control reciever that came with my Hauppauge tv tuner.


    One other thing, got a surprise in the mail today, the data cable I ordered. It's a usb to serial cable. I have to give a quick shout out to bestlinknetware.com. I searched and searched for this cable, and I would find a 12" one for $13, but the wouldn't work. Then I would find a 6' cable for $30 plus. That wouldn't work either lol. Plus, they were all blue. Yeah, so, anyway..... But this site had this cable, in black, 40" long, and for 8 bucks. Oh hell yeah. And it got here really quick, I was surprised! [/schelling].

    Never trust a computer you can't throw out a window.
    Steve Wozniak
    Why is it drug addicts and computer afficionados are both called users?
    Clifford Stoll

    Project;Mark1

  22. #22
    Registered User
    Join Date
    Mar 2009
    Location
    Az
    Posts
    44
    Hello all again just a quick text update today....
    So starts the beginning of my weekend today. Gonna run a few errands, including a trip to ye olde Harbour Freight as well the my freindly local neighborhood Home Depot for supplies.
    Quick stop by the doctors office (always fun) then it's on to modding! Oh yes I plan on getting some serious work done this weekend. It's on like Donkey Kong.
    Gonna do some (more) work to the front piece, as well as an idea I recently came up with, a place to stash my ipod.
    I got my servo controller in the mail, and I only got one servo (lame) cause I'm perpetually broke these days.
    But I plan on figuring out how to mount one of the servos for the doors, and hopefully get those going in the right direction.
    We'll see!
    Never trust a computer you can't throw out a window.
    Steve Wozniak
    Why is it drug addicts and computer afficionados are both called users?
    Clifford Stoll

    Project;Mark1

  23. #23
    Registered User
    Join Date
    Jan 2009
    Posts
    88
    This mod sounds like it has been nothing but absolute hell thus far.

    I really like the concept and look so far though.
    Q6600 @ 3.5ghz - 26c idle and 38c load
    XFX 4890 - 960/1200
    ASUS 4350 cut to PCIe x1
    OCZ Solid Series SSD, 30GB
    Black Ice II Radiator
    MCP655 Pump (setting 2)
    GA-EP45-UD3R
    1x250GB WD
    1x500GB WD
    1x1TB Hitachi

  24. #24
    Xtreme Enthusiast
    Join Date
    Jan 2008
    Posts
    614
    Crazy mad scientist. I'd have to come back to check out the result though, but right now, the progress is just absolutely hellish.
    Modded Cosmos. | Maximus II Formula. Bios 1307| 2x2 Mushkin XP ASCENT 8500 | Q9550-E0- 4.10 + TRUE | Visiontek HD4870X2 | LN32A550 1920x1080 | X-FI Extreme Gamer | Z5300E | G15v.1 | G7 | MX518 | Corsair HX1000 | X25-MG2 80G | 5xHDD
    ____________________________________
    Quote Originally Posted by saaya View Post
    most people dont care about opencl, physix, folding at home and direct compute... they want cool explosions and things blowing up and boobs jumping around realistically... .

  25. #25
    Registered User
    Join Date
    Mar 2009
    Location
    Az
    Posts
    44
    So just got back from running around... Got cleared for surgery (yay) and a trip to Harbour Freight resulted in a little more than just sawzall blades.


    Oh yeah. It's not huge or anything, but hey it's a friggin drill press heck yeah! I'm super excited I've wanted one for a long time. This will definitely come in handy!
    Never trust a computer you can't throw out a window.
    Steve Wozniak
    Why is it drug addicts and computer afficionados are both called users?
    Clifford Stoll

    Project;Mark1

Page 1 of 3 123 LastLast

Bookmarks

Bookmarks

Posting Permissions

  • You may not post new threads
  • You may not post replies
  • You may not post attachments
  • You may not edit your posts
  •