

Hmm.... no pics on your latest post


Hmm.... no pics on your latest post

can't see anything tooOriginally Posted by ButtSprinkles


Worklog: Project Black Copper
Lian Li PC-P80 | Thermochill PA140.3 | Noiseblocker fans | mdpc-x stuff
sorry, I fixed those links, working ok now...
rig ::: i5 2500K :: GTX780 :: 250GB + 128GB 840 PRO :: Gigabyte Z77 mATX :: 4GB Ballistix :: Hazro 27" :::
input devices ::: Topre Realforce 45g TKL :: QFR w/browns :: Zowie EC2 Evo :::
modding ::: ?PHINIX CUBE? ::: "PHINIX NANO TOWER" ::: "PHINIX AURORA" ::: "PHINIX CHIMERA" :::
star citizen ::: ARBITER: Origin Jumpworks 325A LTI
agree with you Mike, new EK packaging looks sweet!
Last edited by aka_GK; 12-26-2009 at 01:51 AM.
Worklog: Project Black Copper
Lian Li PC-P80 | Thermochill PA140.3 | Noiseblocker fans | mdpc-x stuff
Looks good mate, I am interested to hear what you think of that EK pump.
Also looking forward to reading Skinnee's test review of the new EK rads, really hope there excellent!!
OK. I've been running this loop for last couple of days. EK pump is alright. Its very heavy, like 5 times heavier than DCC. At the beginning it was loud but only because of the air in the loop. Now after about 2 hours of running all air got out and its silent like DCC pump. My GTX295 in loop with EK triple XT rad is 28C idle/45C load during Crysis play. That is with slim version of Yate Loons fans on very slow speed, like 5-7V, so it is silent and cool, perfect for my NanoTower...
I will add new update soon
rig ::: i5 2500K :: GTX780 :: 250GB + 128GB 840 PRO :: Gigabyte Z77 mATX :: 4GB Ballistix :: Hazro 27" :::
input devices ::: Topre Realforce 45g TKL :: QFR w/browns :: Zowie EC2 Evo :::
modding ::: ?PHINIX CUBE? ::: "PHINIX NANO TOWER" ::: "PHINIX AURORA" ::: "PHINIX CHIMERA" :::
star citizen ::: ARBITER: Origin Jumpworks 325A LTI
hey Mike, don't leave us without updates for so long
Worklog: Project Black Copper
Lian Li PC-P80 | Thermochill PA140.3 | Noiseblocker fans | mdpc-x stuff
OK guys, time for new update. YAY!!
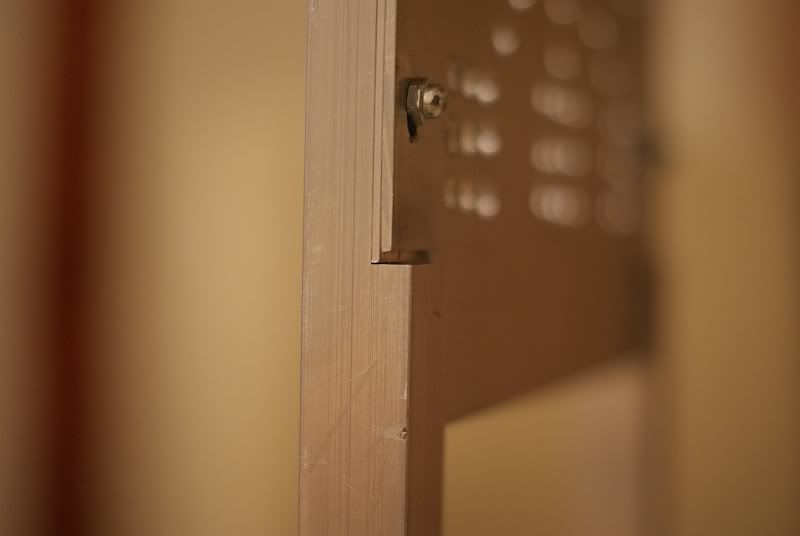
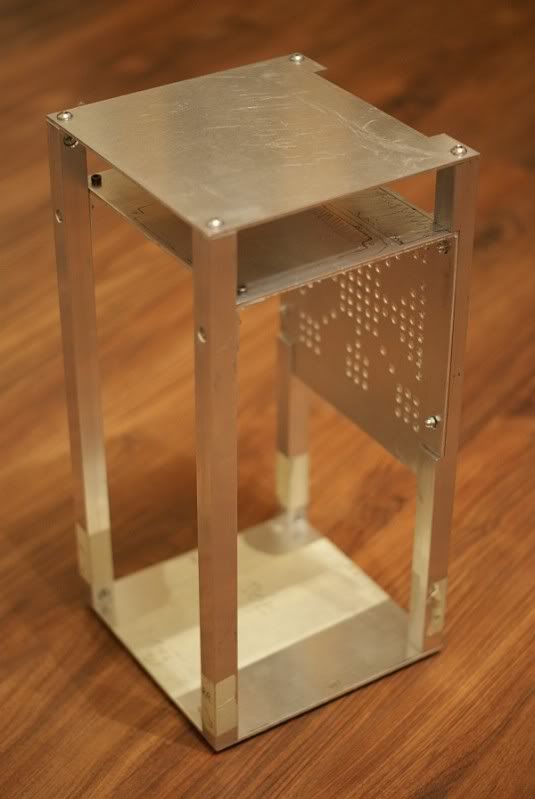
First thing I did was to make L shape spacers to mount it under mobo tray. Exactly, between mobo tray and alu rods. It will push mobo a bit to the center of the case and give me something to work with when I'm going to mount drive cage.
You can see it on this photo: there is rod, then L shape spacer and then mobo tray.
Other side is showing up on the left from the rod - this will be used to install drive cage... pretty helpful solution...
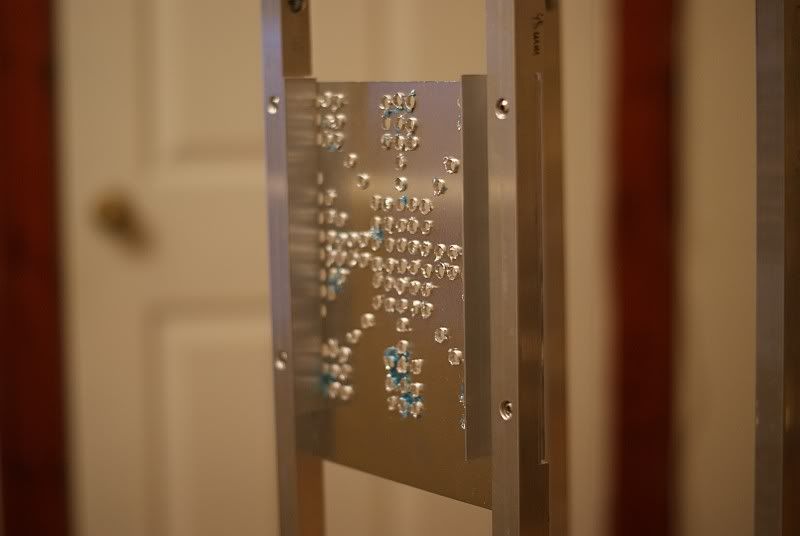
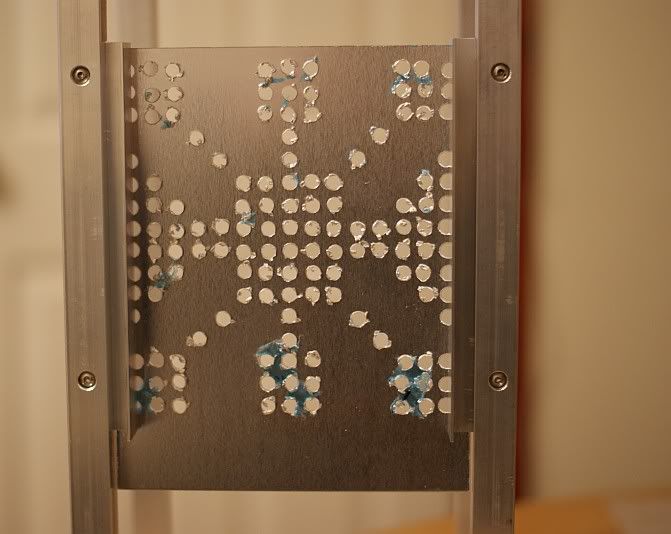
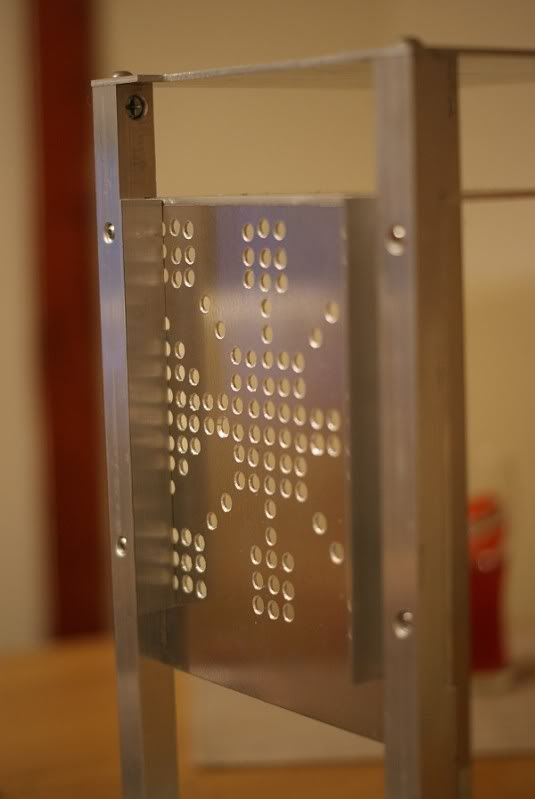
I was thinking how I'm going to decorate mobo tray with some ornaments, but at the end I thought, it will be covered with mobo from one side and drive tray from other side, so there is no point of working on beautiful shapesSo I drilled few.. well.. about a hundred of holes to make some air ventilation under the mobo.
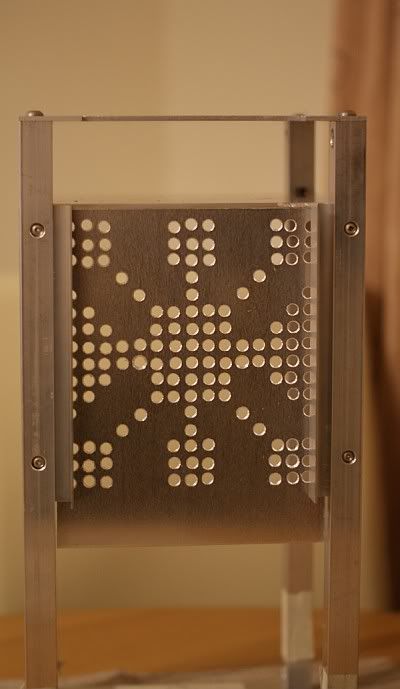
Here's the shape I ended up with... all holes are pretty rough...
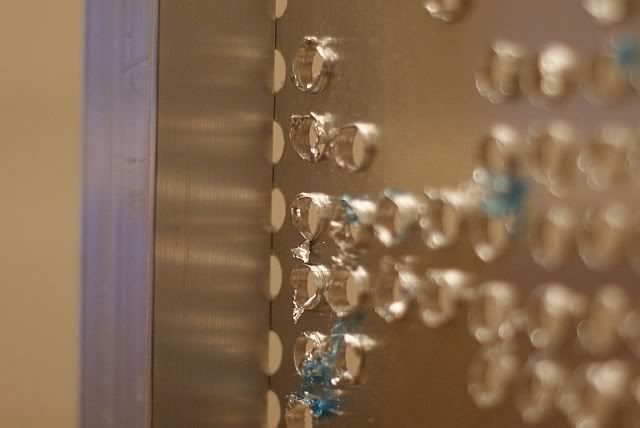
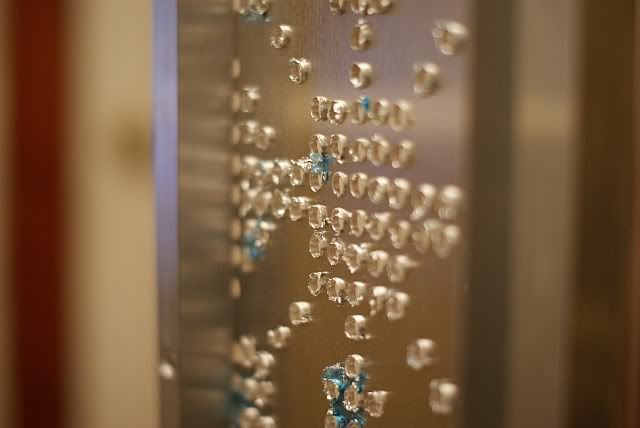
This is the final effect, after using countersunk drill bit to clean those drilling bits from every hole.. on both sides.. so its like drilling 100 holes, then drilling their edges on both sides another 200 times... Pleasure to do that :waah:
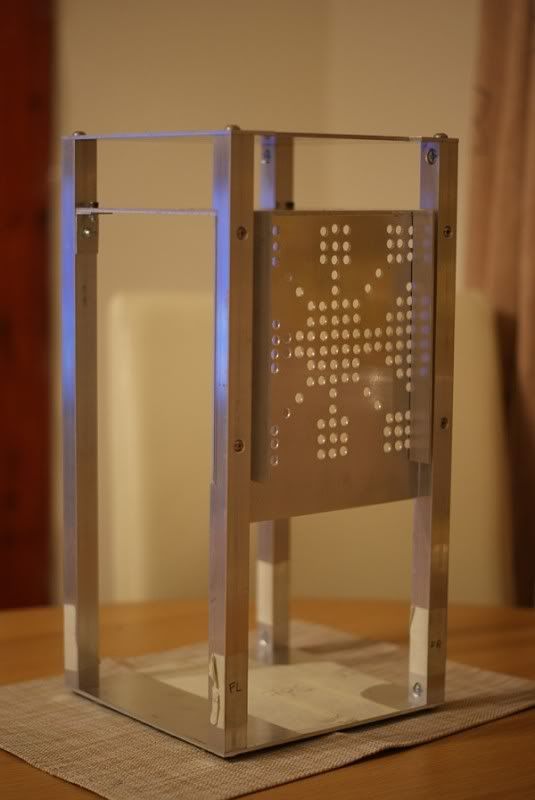
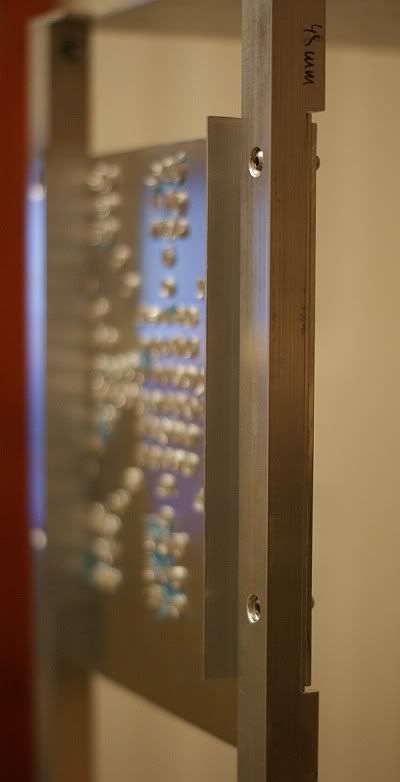
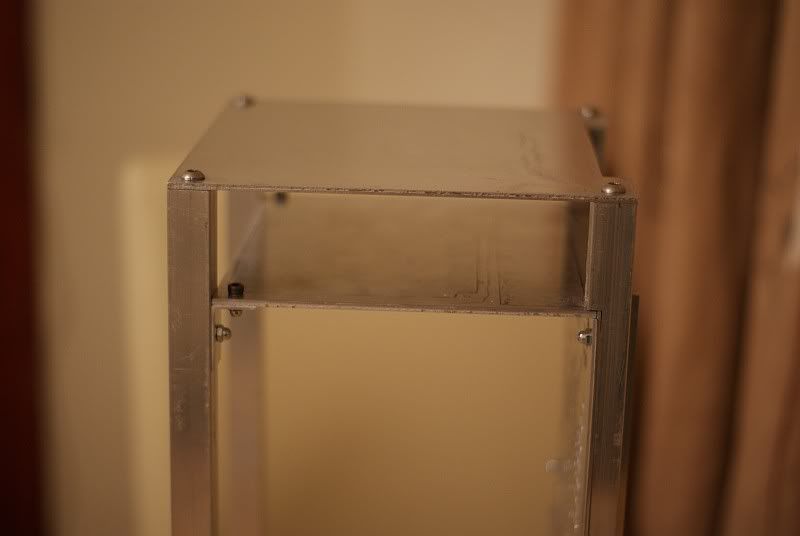
Second thing I did lately was the middle panel installation. To do that I had to fabricate angle L shape support brackets from L shape aluminium profile, drill two holes in them, then measure and drill holes in front alu rods, drill holes in middle panel, cut that middle panel to shape and fit it in. To fit it in, it had to be exactly 166mm long, cause it was pushed above the mobo tray on one side and screwed to L sahpe support brackets on other side. It took me some time to cut it and sand and polish that 3mm thick aluminum panel, but final result is nice, like I wanted it to be, so I'm happy
You can see those small space below the mobo tray - 2mm for "power cage" top panel. Power Cage will be explained later
Here you can see how I cleaned up all holes with this countersunk drill bit...
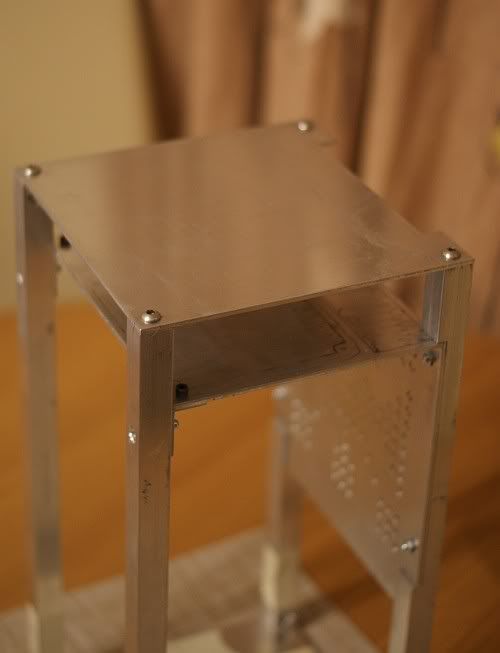
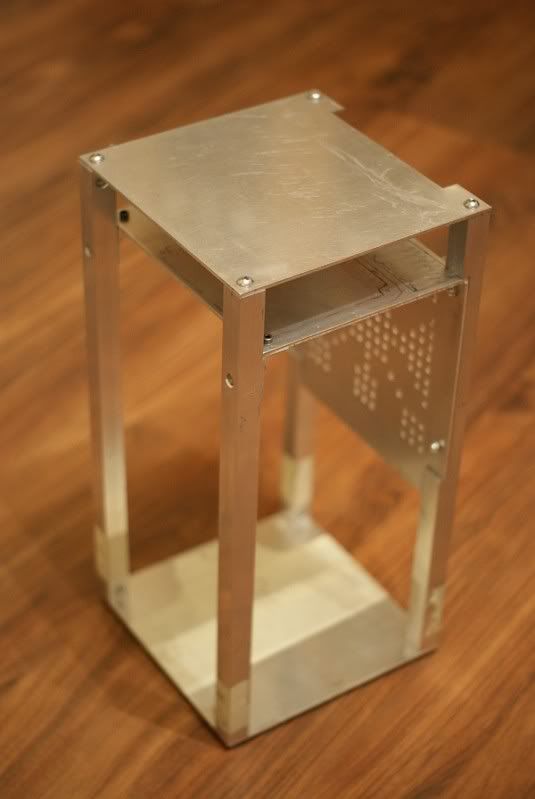
Now, few more shots of the whole structure...
Til next time! Stay tuned!!! :dremel:
rig ::: i5 2500K :: GTX780 :: 250GB + 128GB 840 PRO :: Gigabyte Z77 mATX :: 4GB Ballistix :: Hazro 27" :::
input devices ::: Topre Realforce 45g TKL :: QFR w/browns :: Zowie EC2 Evo :::
modding ::: ?PHINIX CUBE? ::: "PHINIX NANO TOWER" ::: "PHINIX AURORA" ::: "PHINIX CHIMERA" :::
star citizen ::: ARBITER: Origin Jumpworks 325A LTI
Looking good! Nice job on the holes, even if a couple are just a hair off it adds character because we know you did this the hard way -- by hand.
Congrats on the frame, your PC is coming together really nice so keep up the good work.
Current: AMD Threadripper 1950X @ 4.2GHz / EK Supremacy/ 360 EK Rad, EK-DBAY D5 PWM, 32GB G.Skill 3000MHz DDR4, AMD Vega 64 Wave, Samsung nVME SSDs
Prior Build: Core i7 7700K @ 4.9GHz / Apogee XT/120.2 Magicool rad, 16GB G.Skill 3000MHz DDR4, AMD Saphire rx580 8GB, Samsung 850 Pro SSD
Intel 4.5GHz LinX Stable Club
Crunch with us, the XS WCG team

Thanks They're not perfect, some of them are misaligned, but its not that important, cause it will be covered by mobo and drive cage from both sides, so its cool. I drilled them by hand with my new cordless drill I got so excited and started to drill holes in everything around me
Plus that countersunk drill bit makes great finish compared what I got after standard drill bit
rig ::: i5 2500K :: GTX780 :: 250GB + 128GB 840 PRO :: Gigabyte Z77 mATX :: 4GB Ballistix :: Hazro 27" :::
input devices ::: Topre Realforce 45g TKL :: QFR w/browns :: Zowie EC2 Evo :::
modding ::: ?PHINIX CUBE? ::: "PHINIX NANO TOWER" ::: "PHINIX AURORA" ::: "PHINIX CHIMERA" :::
star citizen ::: ARBITER: Origin Jumpworks 325A LTI
I've followed your previous project. If this turns out to be near as good as that one was, you definitely got my attention
hey Mike, really like this update! nice ornament too even if it is not perfectly aligned
Worklog: Project Black Copper
Lian Li PC-P80 | Thermochill PA140.3 | Noiseblocker fans | mdpc-x stuff
First update of the year is sweet Mike, nice work.
I like the way you have fitted the top panel into the recess in the side, nice work , very cool idea.
I totaly know where your coming from when it comes to drilling crap loads of hole, can be a total PITA.
Re-drilling them all with the countersinking bit is also a PITA, but totally worth it.
Nice work champ.
Thank you guys!
I'm ordering some more elements and some more aluminium. Right now I'm in the middle of designing side panels. Next big step will be making "power cage" - separated space where PSU and pump will take place. All cables will be also hidden there.
rig ::: i5 2500K :: GTX780 :: 250GB + 128GB 840 PRO :: Gigabyte Z77 mATX :: 4GB Ballistix :: Hazro 27" :::
input devices ::: Topre Realforce 45g TKL :: QFR w/browns :: Zowie EC2 Evo :::
modding ::: ?PHINIX CUBE? ::: "PHINIX NANO TOWER" ::: "PHINIX AURORA" ::: "PHINIX CHIMERA" :::
star citizen ::: ARBITER: Origin Jumpworks 325A LTI
Small update guys!
Sketches of hardware placement. I haven't showed you before how all will be placed.
Here you can see the whole insides from every angle. I didn't draw graphix card and its block, so used some GTX280 from Sketchup warehouse. As you already know it will be dual chip card with EK block.
Also didn't find H50 sketchup model, so just created a "brick" with fan - I hope you are not dissapointed
First, view on left side - there's GPU card in the back, rear radiator and its fans on the left and basically whole layout inside. This picture has two walls of "power cage" - top and left. There will be a hole for pump reservoir combo, so the tube will stick out nicely from the power cage top and will go almost to the top of the "internal chamber"
Actually this was the initial plan, now I know that I got longer tube so you won't see that black bottom part of reservoir. Higher level chamber includes H50 cooler, mobo I/O panel and GPU I/O, which will be seen on other picture later below...
Here's another angle of left and front side of the NanoTower:
Here's the front - I took out the front panel of "power cage" so you could see how the PSU will stand and where the pump will go... this is older picture with DDC pump, but now we know that it will have new EK 4.0 pump! Which is also thinner, so will be easier to mount it between PSU and GPU card.
...and right side of the NanoTower. It will have big window so even when covered with main external panel, you still will be able to see huge graphic card
The picture below is showing the parts in higher level chamber - you can see graphic card mounting, mobo I/O and of course H50, which takes most of the space there...
Again, right side of the case, showing how rear radiator is placed and how the fans are situated inside the case. Notice barbs coming in at the bottom, where from the tubing will be routed to the pump and card.
Now, picture below shows where the drive tray kicks in - you can see now how the dvd will be mounted and it will stick out at the top of the case. Then you have 3x 2.5" drives.
Pretty cool thing is that the whole drive tray has 2cm of depth, so it actually comes in the space between two front aluminium rods! It has hole below every drive for cables. All planned before dremel and jigsaw walks in:dremel:
Last picture shows a little close-up of the "main internal chamber"
OK. That is it for now. Tomorrow is a nice cold Saturday, I will try to do some work. Have few things planned so I hope I find some time to make physical update
Till then....
rig ::: i5 2500K :: GTX780 :: 250GB + 128GB 840 PRO :: Gigabyte Z77 mATX :: 4GB Ballistix :: Hazro 27" :::
input devices ::: Topre Realforce 45g TKL :: QFR w/browns :: Zowie EC2 Evo :::
modding ::: ?PHINIX CUBE? ::: "PHINIX NANO TOWER" ::: "PHINIX AURORA" ::: "PHINIX CHIMERA" :::
star citizen ::: ARBITER: Origin Jumpworks 325A LTI
I wish i could do that, so much easier for planning and to find out if something fits. The setup looks great too, it's so compact
Looks great - can't wait to see it take shape and get a nice paint job
Looks great Mike.
I am not sure if Swiftech had released there MCR320Drive when you designed this, It would have fitted in we with this rig.
http://www.sidewindercomputers.com/swmc2.html
Thanks! Its pretty easy, you should try it! You can create anything part you want plus there is huge amount of ready parts in Warehouse!
Thanks man, it will be powdercoated with matte black.. cant wait too!
Thanks mate. WOW! Haven't seen that! Bummer.. now I got another idea for a case..
rig ::: i5 2500K :: GTX780 :: 250GB + 128GB 840 PRO :: Gigabyte Z77 mATX :: 4GB Ballistix :: Hazro 27" :::
input devices ::: Topre Realforce 45g TKL :: QFR w/browns :: Zowie EC2 Evo :::
modding ::: ?PHINIX CUBE? ::: "PHINIX NANO TOWER" ::: "PHINIX AURORA" ::: "PHINIX CHIMERA" :::
star citizen ::: ARBITER: Origin Jumpworks 325A LTI
Just a small heads up for this weekend and next update.
I ordered and received two big sheets of 1.5mm aluminium - I will slice them up really nicely this weekened One will be cut up for that "power-cage/chamber". This will need 3 panels/walls - one on the left side of the case, one on top right below the mobo and one on the front. Rear part will be opened cause the bottom fans from rear radaitor will suck air there... I will also use L shape alu profiles to attach panels to the frame.
I also got yellow sleeveing for power and fan cables and SATA cables, some black 3:1 heatshrinks for them and a nice small 16mm vandal switch - black with yellow ring.
I made some sketchups to show that power chamber, will add them today....
I also bought acrylic sheets for top and bottom panels - I haven't mentioned them yet - I have an idea of making top and bottom panels out of 10mm thick acrylic. There already are panels made of aluminium, but to make it look more massive I will add thick acrylic panels top and bottom. I have them already, now what I need to do is shape them (maybe make round corners, dont know yet) and paint them with matt black spray paint. ALuminium will be powdercoated in matt black so to match the color I will paint those acrylic with similar paint (or should I use different?).
I think best way will be to sand them a bit with 800 grit sandpaper and then paint them with plastic etch-primer, then matt black... Any thoughts on that process?
Another question: how would you guys mount this pump there? This is how the pump will be mounted - under the that panel, right next to the PSU. Should it be mounted from the bottom of it on some kind of stand, or from the top, hanging? Any ideas?

Last edited by phinix_mike; 01-14-2010 at 05:34 AM.
rig ::: i5 2500K :: GTX780 :: 250GB + 128GB 840 PRO :: Gigabyte Z77 mATX :: 4GB Ballistix :: Hazro 27" :::
input devices ::: Topre Realforce 45g TKL :: QFR w/browns :: Zowie EC2 Evo :::
modding ::: ?PHINIX CUBE? ::: "PHINIX NANO TOWER" ::: "PHINIX AURORA" ::: "PHINIX CHIMERA" :::
star citizen ::: ARBITER: Origin Jumpworks 325A LTI
Well.. I'm in a good mood for the weekend... so wanted to give you just a small teaser

rig ::: i5 2500K :: GTX780 :: 250GB + 128GB 840 PRO :: Gigabyte Z77 mATX :: 4GB Ballistix :: Hazro 27" :::
input devices ::: Topre Realforce 45g TKL :: QFR w/browns :: Zowie EC2 Evo :::
modding ::: ?PHINIX CUBE? ::: "PHINIX NANO TOWER" ::: "PHINIX AURORA" ::: "PHINIX CHIMERA" :::
star citizen ::: ARBITER: Origin Jumpworks 325A LTI
nice.
amazing
Macbook: 2x2,4GHz . 4 GB RAM . 9400M GT . 250GB HDD
Desktop: Casemod - Orange Crush @ TJ07
I'm missing something here...
Wait, I know!
Bees!
Lol, rename it to 'The Hive' Phinix :P
Looks good mate.
What are the yellow heatsink fin's that wrap arounf the side there on the botton of the render?
Are they just there for looks and made out of yellow perspex?
I think some, say 6mm perspex would be excellent to use as a mounting bracket under the pump, either clear or even yellow would look good too.
Or you could just use some aluminium thats been pressed up to sit the pump on, now having a small amount of highly polished, mirror like finish on it would also look sweet.
Add just a bit of bling to the inside, hay.
But I don't like the idea of having the pump look like it's just hanging. That to me would really give me the feeling that it is unstable and not quite finished.
Let us know what you come up with mate, really all come together now.
 Posting Permissions


 Reply With Quote


Bookmarks