Page 29 of 74 FirstFirst ... 192627282930313239 ... LastLast
Results 701 to 725 of 1833

Thread: A Positive Look at the Antec Nine Hundred (900) Case

  1. #701
    Xtreme Member
    Join Date
    Feb 2007
    Posts
    144
    Quote Originally Posted by kleppy View Post
    Can anyone post a few simple pictures of how to take this beast apart so i dont break my case :X

    EDIT:

    Few quick questions as well -
    1. Where can I get plexiglass?! acrylic glass w/e name it goes by
    2. Should I get a modular powersupply so i can get longer power cords or is there a way around that
    3. What do I use to cut though the mobo tray?:X

    thank you in advance
    I'll have to see about the disassembling photos. They are notes regarding it in this thread.

    Edit: Here is the best I can come up with on the disassembly:


    The "A" in red show the locations of the split-pins holding the front bezel on each side. Use needle-nose pliers to GENTLY pinch them and push them back through the holes.

    The "B" in purple sjow the location of the pins holding on the top. There are also two screws in the middle of the case ceiling.

    1. It would help if you'd identitified your location, but if its US, try Homedepot.
    2. There are cable extensions:
    http://store.pchcables.com/inpocayatxad.html
    3. I prefer a 3/4" chassis punch and a nibbler to create slots. You can also use a step drill or a deminal.

    The step drill probably the cheapest, (assuming you have a drill). The down side is you need clearance behind the hole.
    http://www.harborfreight.com/cpi/cta...emnumber=96275
    The Dremel is the standard tool, but it's noisey and dusty. Wear goggles or glasses for when you break the cutting wheels. It can't cut round corners.
    http://www.amazon.com/Dremel-395D-Mu...0?ie=UTF8&s=hi
    The chassis punch can be expensive, (but for computer cases you can get by with cheap ones). I find the 3/4 dia. about the smallest I can easily fit the u-channel on.
    http://www.harborfreight.com/cpi/cta...emnumber=91201

  2. #702
    Registered User
    Join Date
    Jan 2008
    Posts
    3
    I took a trip up to Lowe's and I found most of what I need right after I posted i did this so i feel dumb :X

    anyways.....
    1. There is a circular(gives a perfect circle ) attachment I use for drilling holes in the tiles at schools for mounting projectors and I found a metal/wood one at Lowe's.
    2. I FOUND PLEXIGLASS GOOOOOOOOOOOOOOOOOOOOOOOOOOOOO! and they will cut it for free which is the nice thing, but QUESTION


    i want my case to look like that without the metal grill :X so you can get a better view of the inside(I attend lan tournaments so wanna show my comp off :X)
    POINT - i noticed the factory glass is "embossed" if you will into the sidepanel

    3. For the cable extensions is this what the majority of the people who use this forum would recommend to use?

  3. #703
    Registered User
    Join Date
    Feb 2008
    Posts
    13
    Quote Originally Posted by kleppy View Post
    i want my case to look like that without the metal grill :X so you can get a better view of the inside(I attend lan tournaments so wanna show my comp off :X)
    POINT - i noticed the factory glass is "embossed" if you will into the sidepanel
    Just follow the embossed part until you get to the back side corners using a jig saw with a metal cutting blade, a metal blade with more than 18 teeth per inch. File the edges and you will have a nice straight cut. Then you can either use edge trim or if it is clean enough don't use anything. To hold the plexy use tape of the gods from 3m. Here is a great video tut on how to do this by Bill Owen: http://youtube.com/watch?v=WpZoE-zj0-k.
    Here is a video on the tape of the gods: http://youtube.com/watch?v=4ktMsp2dFIM

    Quote Originally Posted by kleppy View Post
    For the cable extensions is this what the majority of the people who use this forum would recommend to use?
    Depends on power supply length. There are many sources for 6 inch, 12 inch or longer. You can get them at almost any mod store like frozenCPU, Xoxide, even ebay. I just find the one who has one on sale or the best price. One thing when looking for an extension, make sure you get the right cable. What I mean by that is the 20 pin or 24 pin version, just make sure you order the right one.
    Last edited by mbrocketry; 03-01-2008 at 05:31 AM.

  4. #704
    Registered User
    Join Date
    Feb 2008
    Posts
    13
    So here are a few more pictures on my build, it is almost complete. I just need to do a little airbrush work on the side panel but I can use the computer, Woohoo. Anyway here is how the power supply came out as well as everything else.

    Here is how I did some of the cabling to keep the clean look.


    Here is the rest of the case.


  5. #705
    Registered User
    Join Date
    Feb 2007
    Posts
    51
    Well, I'd gotten away from this post for a while, but catching up on it has given me the inspiration to tear my machine down and get back to work on it. LAN party in 2 weeks, then I'll tear it down for upgrades. Photos to come...

    MBRocketry, did you anchor the carry handle to the top metal of the case? Was it just nuts and bolts, and do you have any pictures? Cool idea for LAN parties.

    Nice work everyone!

  6. #706
    Registered User
    Join Date
    Jan 2008
    Posts
    3
    after watching many mod vids and seeing some pictures im debating on ordering another right panel so i can make a custom window instead of just extended the factory one

  7. #707
    Registered User
    Join Date
    Feb 2008
    Posts
    13
    Quote Originally Posted by DaIceMan View Post
    Well, I'd gotten away from this post for a while, but catching up on it has given me the inspiration to tear my machine down and get back to work on it. LAN party in 2 weeks, then I'll tear it down for upgrades. Photos to come...

    MBRocketry, did you anchor the carry handle to the top metal of the case? Was it just nuts and bolts, and do you have any pictures? Cool idea for LAN parties.

    Nice work everyone!
    Hey Daiceman I saw the post. I will write something up with pictures tomorrow.

  8. #708
    Registered User
    Join Date
    Feb 2008
    Posts
    13
    Quote Originally Posted by kleppy View Post
    after watching many mod vids and seeing some pictures im debating on ordering another right panel so i can make a custom window instead of just extended the factory one
    I bought my extra panel direct from Antec. I believe with shipping it was around $20-$24.

  9. #709
    Registered User
    Join Date
    May 2007
    Location
    South Africa, Cape Town
    Posts
    36
    @ mbrocketry: how did you get the PSU so clean, how did you change the side of the connector's ? can you post some pics because that is one kick-xxxx mod n1
    Antec 900 BTX aka 009 owner

    Project Suitcase PC
    Project Antec 009
    Project Liquid Server : Coming soon

  10. #710
    Registered User
    Join Date
    Apr 2007
    Location
    Toyama,Japan
    Posts
    32
    mbrocketry the PSU looks interesting!


    By looking at it,
    you have just cut a hole in the back panel and rotated the PSU 90 degrees?
    great idea...But does that mean can`t slide the back cover on? as the cables wouldn`t bend that much?


    Cheers

    V D R

  11. #711
    Xtreme Mentor
    Join Date
    Sep 2007
    Location
    Monterey Bay, Calif.
    Posts
    2,864
    Interesting PSU, how did you do that?

  12. #712
    Registered User
    Join Date
    Feb 2008
    Location
    Miami, Fl
    Posts
    8

    Tuniq towers?!?

    Ok I've been watching this thread for months now I'm within a few days of being done with my setup . Now that I'm almost done I've noticed people that have posted on this thred have their Tuniq Towers in different positions.... 
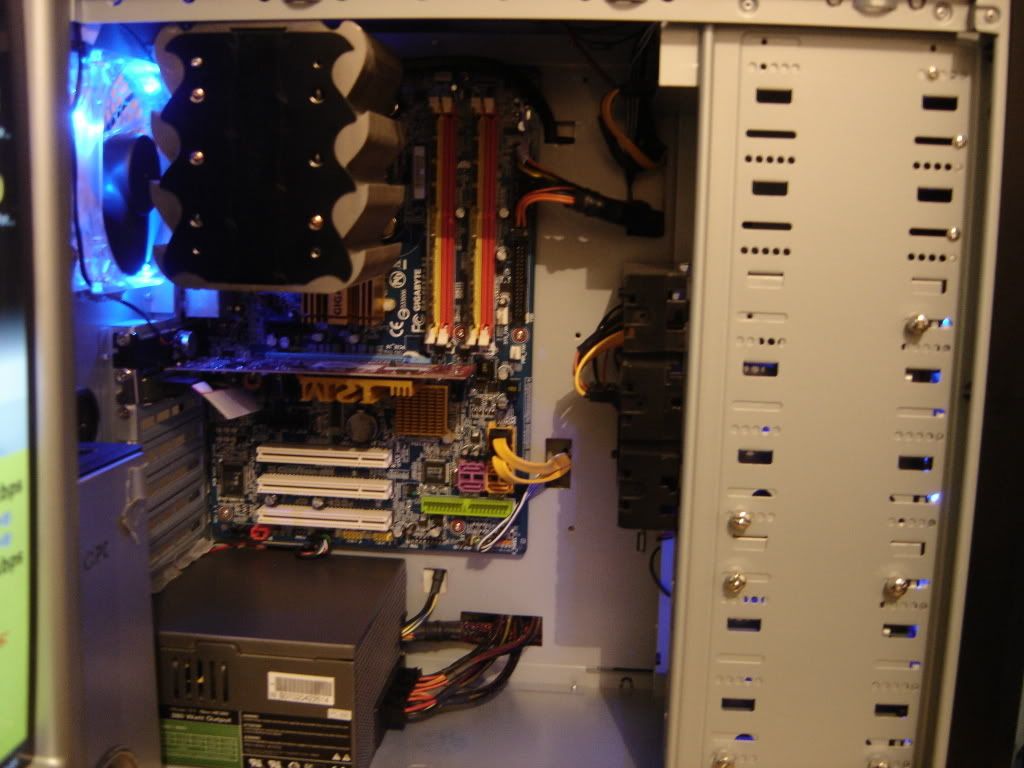
I have mine setup so the fan in the tuniq is pushing air out the rear exhaust, but some people have it pushing air out of the top exhaust and I've seen some pictures on this thread that have the air either pushing to the front or bottom of the pc... The way I have it set up makes it a little harder to put the mobo back in so I might change it. Since I'm not use to having an exhaust fan on top I totally forgot about it when i was setting up the heatsink.. Any input on this?

    Blowing air down


    Blowing Air up through blow hole exhaust


    This guy had it blowing foward but flipped the fan to blow out the rear


    This is how i have it. Blowing air out the rear.
    Last edited by ReyS739; 03-03-2008 at 07:26 AM.

  13. #713
    Registered User
    Join Date
    Feb 2008
    Posts
    13

    Antec 900 PSU mod

    Ok to answer all the questions about the PSU mod here you go. First off I have an entire worklog at "themodnation-forums.com" with pictures and you can see the process there. The project is called Fly-N-High under the Citizens worklogs.

    Warning first, I have a lot of experience with electronics. It is possible to touch one of the big caps on the PSU board and get a big surprise. So please be careful. There are no mods to the board itself but you do have to remove it to make this mod work.

    So here goes. You cannot turn the PSU case 90 degrees for this mod to work PSU cases are not square in shape and size. so turning it 90 degrees will not work. So what I did was to cut a hole on the left side (when looking at the back vented side of the PSU close to the back plate. Next I filled the front side hole with fiberglass/epoxy and then used a little bondo to sand it smooth. On the first PSU I did this to I was able to just rotate the PSU board 180 degrees and the mounting holes lined up. the second PSU mod I did which was the Corsair TX750W that I used in my build I needed to cut out the old mounting nuts and weld in news ones. Then I painted and reinstalled the PDU board, ran the wires through the hole I cut and through the motherboard mounting tray. Done.
    Last edited by mbrocketry; 03-03-2008 at 02:49 PM.

  14. #714
    Registered User
    Join Date
    Jan 2008
    Posts
    30

    Cool Nine Hundred Slimline mod final final

    OK boys and girls! Here is the final final build 3 & 4 mega post! Build 3 is changing to a slot loading DVDRW. Build 4 adds taller blue feet for airflow to the PS, a blue CCFL, lots more blue fans.


    Added a blue backlit kyb, now I have to order a matching Belkin N52TE!


    I agree with deees.. get a step drill. It is easier than the knockout punch and leaves just as clean a hole. Much better than a std drill for thin sheet metal. Time to tear this down again:


    Here is the new slot loading Pioneer DVR-K06RS DVDRW (I cannot recommend this drive due to the flimsy front bezel. I had to RMA the 1st as it wouldn't stay on. I superglued the replacement in place) and the Slimline Optical to Desktop IDE Adapter Conversion Board. I really liked the clean minimalist look of build #1. I had to hold my nose at the thought of putting an IDE cable in this rig. A shot of flat black on the cable end helps hide it.


    Need some spare parts for your build? Just get another case Got another on sale for cheap. Cheaper than buying the fans etc. seperate:


    Cutting slot and fitting the slim DVDRW. Props to Ch3ck5um for the kickass idea!


    Here are some random wiring shots, extending / sleeving the front panel & piezo speaker cables, wiring blue feet / switch etc.


    pustbunker here is your diagram edited with the airflow in this build.. I went with #3 and a few more fans lol:


    Shots of the interior with the eleven fans etc. The Abit IN9 32X-MAX is backlit with blue leds all over.. looks cool! During the day or with the lights on the blue is not overpowering, but turn the lights out and the music up to get the thumper going and WOW!!


    Final final shots:


    NineHundred.avi (DIVX)


    -Sailrabbit


    Build #1
    Build #2

  15. #715
    Registered User
    Join Date
    Feb 2008
    Posts
    13
    Sweet mod Sailrabbit, love the sig too.

  16. #716
    Registered User
    Join Date
    Nov 2007
    Posts
    8
    good god that's a lot of fans. verrr nniiiccce!!!

  17. #717
    Registered User
    Join Date
    Mar 2008
    Posts
    59
    sailrabbit, your case is pretty much perfect! Just the look I would go for, I love the black paint, it really sets off the blue lights, so I must ask what type of paint did you use and what was the process, did you prime it first? How many coats? I would love to do this to my 900, which I just recently picked up. Thanks much in advance.

  18. #718
    Xtreme Enthusiast
    Join Date
    Dec 2007
    Posts
    751
    Wow sailrabbit! Extremely nice build!

    But no VGA card though?? Or are you just trying to keep the wires to a minimum

    What are your temps?
    i7 860 @ 4.2Ghz | ASUS Maximus III Formula | 8GB Corsair Dominator DDR3 1600 | ATi 5970 | 3x WD Raptor X HDD's | NZXT Khaos Case | Corsair 1000w PSU | Swiftech H20 Cooling CPU | Windows 7 x64 | Sony Bravia 52" LCD Display


    3DMark06 Score - 20k Club | Youtube Account

  19. #719
    Registered User
    Join Date
    Jan 2008
    Posts
    30

    Smile

    heh..thanks all! It was fun to build.

    Smithdogg1 - I used the cheapest paint I could find. "NOW" paint from Ace Hardware. Used "Wrought Iron Flat Black" and "All Purpose Grey Primer". Yes I primered.. it came out blotchy without it. For a matte finish stay at least 12" away. I went a little more in depth on paniting in this post Build #2.

    Waymon3X6 - Look closer lol.. there is a eVga card in there. Got it FAR. The mobo will hold 3 PCI-E X16 cards $OUCH$. I would like to see them drop in price a LOT more. There are physical limitations too.. The 8800GTX is too long for this case. I can only fit 1 8800GTX (by removing the middle fan) or more by removing HDDs and notching the dual height card to fit around a molex connection on the mobo. Then there is the matter of hiding 2 or 3 more power cables I haven't decided what to do yet. I will eventually run at least SLI. I will need a new PS for that and a mbrocketry mod is a must I think I'll just use screws and standoffs instead of welding. Anyway my kids PC died and I have to fix it next and I have a few more pressing projects. I haven't played around OCing it yet. I used to race the HDDs on my old gamer. It was fun. This idles at 80˚. The goal at some point is to use it for Crysis.. guess i'll go with a XP64 partition instead of vista Those are some cool vids you have on youtube! Nice rig!


  20. #720
    Registered User
    Join Date
    Mar 2003
    Location
    Dallas, TX
    Posts
    45
    Nice job sailrabbit. Where'd ya get those feet?

    EDIT: Never mind, I found them Here.
    Last edited by Obitus; 03-03-2008 at 10:38 PM.
    CPU.......E8400 @ 3.6Ghz
    Board.....GA-EX38-DS4
    RAM.......4x1Gb Hyper-X @ DDR2 1066 5-5-5-16
    Video.....Gigabyte 8800GT @ 700/1700/1900
    HDD.......2x74Gb Raptor in RAID 0 + Maxtor 500Gb
    PSU.......Corsair HX620W
    Cooling...Xigmatek HDT-S1283
    Case......Antec 900
    Display...Acer X243W 24" LCD
    OS.........Vista 64 Home Premium

  21. #721
    Registered User
    Join Date
    Mar 2003
    Location
    Dallas, TX
    Posts
    45
    Here are a few pics of my 900 as is.

    My build:

    E8400
    GA-EX38-DS4
    8800GT
    2x 74Gb Raptor
    320Gb SATA II
    DVD recorder
    Blu-Ray player
    Corsair HX620W PSU

    I am going for tidy wires and to that end, I am turning over the PSU, cutting a hole in the bottom of the case and installing casters.

    Here are some pics

    Working diagrams of possible placement for the casters.


    My final solution. I actually left a cross brace in but then cut it out later.


    Front casters were alot easier.


    Here is the PSU hole and view of the caster mounts. I will be adding rubber spacers back in when I am all done with cutting. You can also see a couple of marks where I plan on cutting a couple more holes. (My mobo arrives tomorrow so I can make all the final wiring plans.)


    Here are the cuts in the mobo tray from the back. If you look at the HDD cages, you can see where I plan to cut a couple more holes.


    Here is the slot I cut so I can run my top panel wires down to the side of the HDD cages.


    At this point, Any suggestions are welcome. I may end up getting some u-channel for the holes, but they are smooth enough now that they couldn't cut any wires run through them.
    CPU.......E8400 @ 3.6Ghz
    Board.....GA-EX38-DS4
    RAM.......4x1Gb Hyper-X @ DDR2 1066 5-5-5-16
    Video.....Gigabyte 8800GT @ 700/1700/1900
    HDD.......2x74Gb Raptor in RAID 0 + Maxtor 500Gb
    PSU.......Corsair HX620W
    Cooling...Xigmatek HDT-S1283
    Case......Antec 900
    Display...Acer X243W 24" LCD
    OS.........Vista 64 Home Premium

  22. #722
    Registered User
    Join Date
    Feb 2008
    Location
    Miami, Fl
    Posts
    8
    Well after watching this forum for months and slowly getting all my parts in I've build this thing that a friend called a refrigerator lol. Here are the quick specs I'm still installing software and tweaking....
    Intel q6600, 2GB Corsair DDR2 1066 ram, Abit ix38 quad gt board, BFG 8800gt w/ thermalright hr-03, Tuniq Tower, 2 WD 160GB raptor drives, SATA CD/DVD DL RW, OCZ 600 watt PSU.
    I tried running all the cables behind the board, worked out pretty well. I put the mesh on the cd rom so it looks stealth like.
    I want to thank everyone that's posted on this thread cause I've gotten so many ideas and inputs. Next few things I'm gonna do is add some 40mm fans to the chipsets change the psu plug to black and i want to change the heatsinks that came with the thermalright with these http://www.sidewindercomputers.com/cu88mecokitb.html


    Last edited by ReyS739; 03-04-2008 at 06:27 AM.

  23. #723
    Xtreme Enthusiast
    Join Date
    Dec 2007
    Posts
    751
    Quote Originally Posted by sailrabbit View Post

    Those are some cool vids you have on youtube! Nice rig!

    Thanks man! Sorry the quality sucks, I had to use a standard camera that really isn't meant to take video....

    I will try to get some pics of my watercooled Antec 900 up here in a bit... I am using the Swiftech H20-220 watercooling kit and that's cooling the chipset, CPU, and 2 3870s.

    EDIT: @ Rey, very nice cable management! It is very hard to make a 900 look good - but all you need it just a dremel.
    Last edited by Waymon3X6; 03-04-2008 at 06:33 AM.
    i7 860 @ 4.2Ghz | ASUS Maximus III Formula | 8GB Corsair Dominator DDR3 1600 | ATi 5970 | 3x WD Raptor X HDD's | NZXT Khaos Case | Corsair 1000w PSU | Swiftech H20 Cooling CPU | Windows 7 x64 | Sony Bravia 52" LCD Display


    3DMark06 Score - 20k Club | Youtube Account

  24. #724
    Registered User
    Join Date
    Mar 2003
    Location
    Dallas, TX
    Posts
    45
    Quote Originally Posted by mbrocketry View Post
    Any plans to paint the front of the DVD or the fan bus? They look a bit out of place.
    CPU.......E8400 @ 3.6Ghz
    Board.....GA-EX38-DS4
    RAM.......4x1Gb Hyper-X @ DDR2 1066 5-5-5-16
    Video.....Gigabyte 8800GT @ 700/1700/1900
    HDD.......2x74Gb Raptor in RAID 0 + Maxtor 500Gb
    PSU.......Corsair HX620W
    Cooling...Xigmatek HDT-S1283
    Case......Antec 900
    Display...Acer X243W 24" LCD
    OS.........Vista 64 Home Premium

  25. #725
    Registered User
    Join Date
    Feb 2008
    Posts
    13
    Quote Originally Posted by Obitus View Post
    Any plans to paint the front of the DVD or the fan bus? They look a bit out of place.
    Well really there is a front plate I made but with some last minute issues I omitted the front panel for now. As far as painting the fan controller and the DVDROM they really match up with the black handle and black switches. With the front panel I made once I get around to making it work should make it fit much better.

    The first panel:


    The second one:


    And the finished painted panel next to the top panel:


    The blue will go much nicer with the black so the black items will not look so out of place.

Page 29 of 74 FirstFirst ... 192627282930313239 ... LastLast

Tags for this Thread

Bookmarks

Bookmarks

Posting Permissions

  • You may not post new threads
  • You may not post replies
  • You may not post attachments
  • You may not edit your posts
  •