Results 1 to 10 of 10

Thread: Q6600, ultra 120-extreme, Max.formula NB/SB lapping with photos

  1. #1
    Registered User
    Join Date
    Nov 2007
    Posts
    75

    Q6600, ultra 120-extreme, Max.formula NB/SB lapping with photos

    Back from the new years eve on south of portugal (which i strongly recommend of course) and back at the forums i noticed my good old pal grnfinger also electric and a few others are going into lapping. So iīll post my exp last month at it with pics, although thereīs a zillion walkthroughs on internet (update-fusion block removal and lapping).


    So i ordered the lapping kit from friendly Davidīs easy pckits (little note David: i would be willing to pay some extra for larger sheets of sanding paper, maybe you could create a larger dimension optional kit?).
    I got a free extra sheet of nano-size grit which in fact i didnt use, and some cable tighteners of various sizes.

    Next up is to buy a a piece of glass at least 5mm thick and 25x25cm (or higher) to have a propper working surface (or just order the easy pc kits with glass, although i feel itīs too small in size for my taste).

    Also helpful at hand is a cleaning air spray which you can find on almost any pc shop, a piece of sponge, and one or two extra new or washed clean cloths (cotton only, or micro-fiber). In fact, best place to do this is in the kitchen..

    Cleaned the glass with a soft cloth and glass cleaner which your mom or wife will surelly have at home.

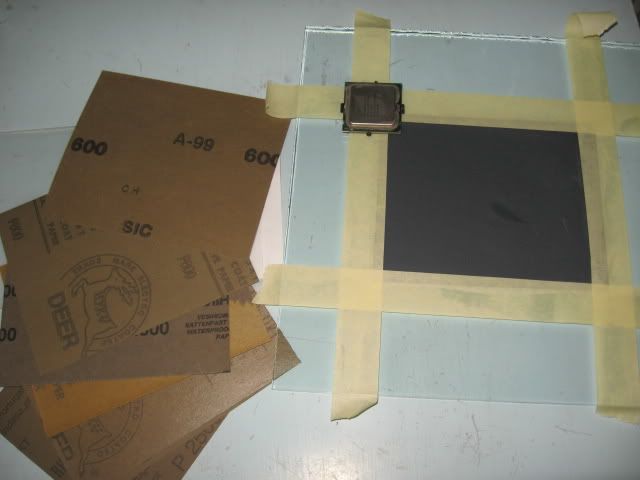
    Then used tape (paint job tape is easier to remove, but whichever is good enough) to tape in the sanding paper, i started with 600 grit.

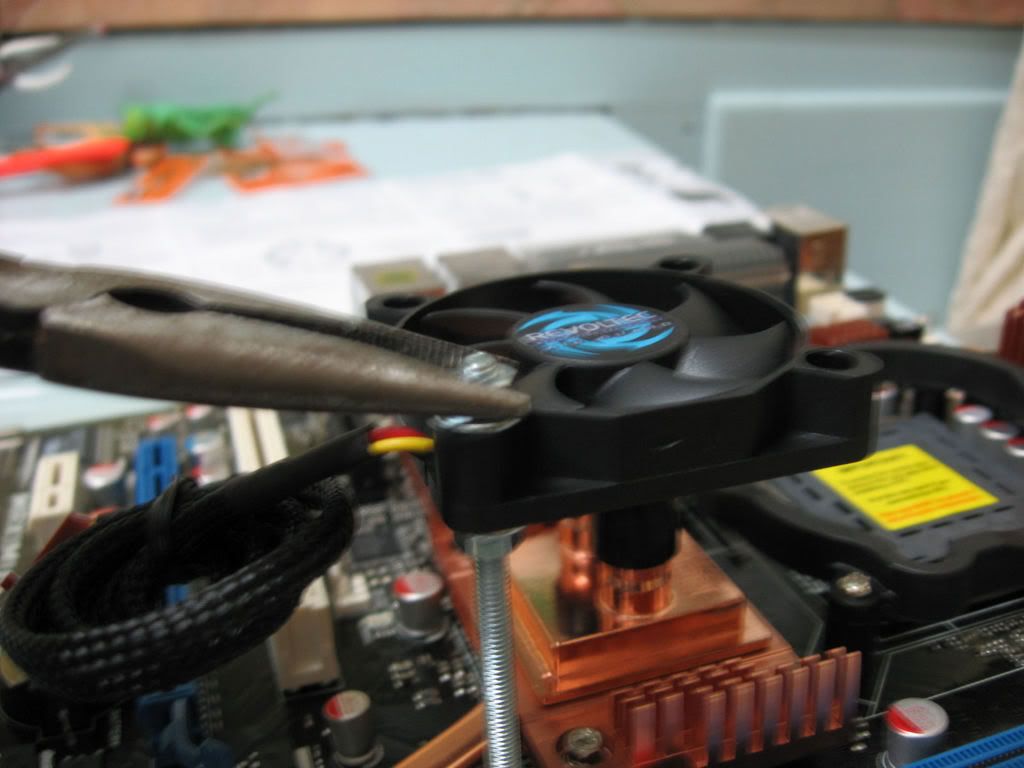
    This is how the setup will look like:


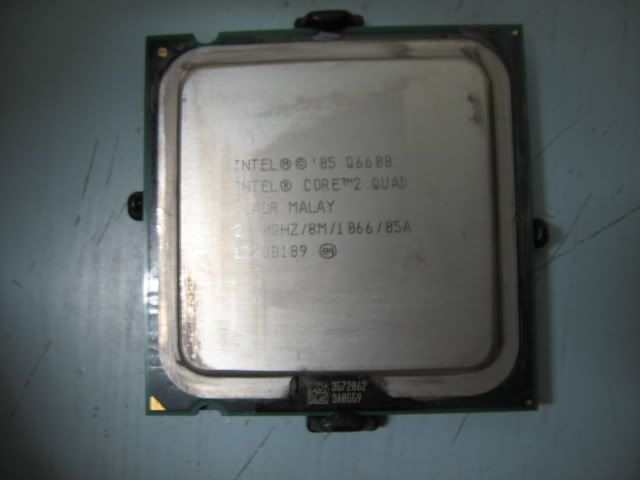
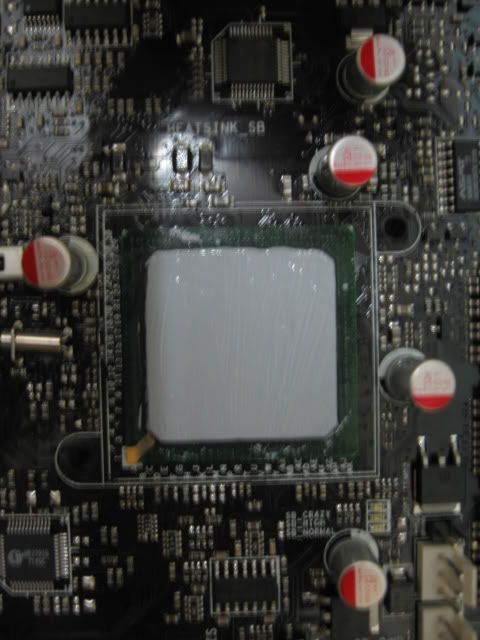
    cpu with thermal tape cleaned (i use arctic 1-2 kit) bye bye intel lettering! of course it

    will void your warranty:


    You will notice the cpu is also in the photo, and you should take EXTRA CARE to have the protective plastic cover onto it, to avoid bending the delicate pins. Donīt worry later if some water gets inside, as you will not be connecting it anytime soon (of course i donīt expect you to get the cpu under a lot of water, right?).


    Now get the sponge slightly water wet, and drop a few water droplets onto the sanding paper, which of course should be on the kitchen table. Spread them slightly and gently with your own fingers.

    Get yourself in a seated confortable position and start lapping the cpu, front to back or back to front, whichever you feel more confortable at, holding it firmly with your mid finger and thumb so that both fingers hold simultaneously the plastic cover and the side of the cpu itself. Be gentle but firm, with just a slight pressure down (i used the ponting finger for it, as it becomes natural)! if the cover snaps out just insert it in the cpu again. After something like 10-20 laps on one direction you will notice a deposit appearing in the paper. Thatīs good, meaning the process has started. use the sponge to gently clean the paper and leave it again slightly wet. Now rotate the cpu 90 degrees and sand some more 15-20 passes. Also rotate the sanding paper 180 degress so to take advantage of the whole paper surface. After each 4x90 degree turn and lapping gently clean the IHS with the spare cotton cloth.

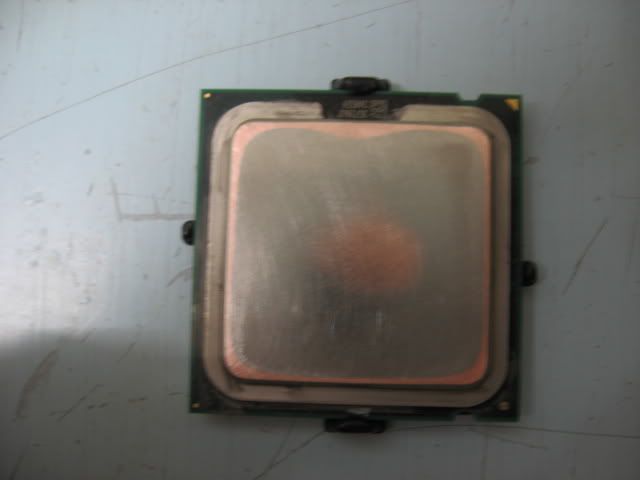
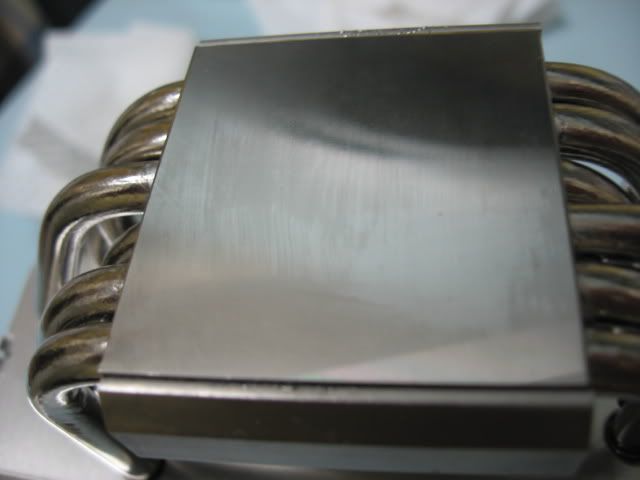
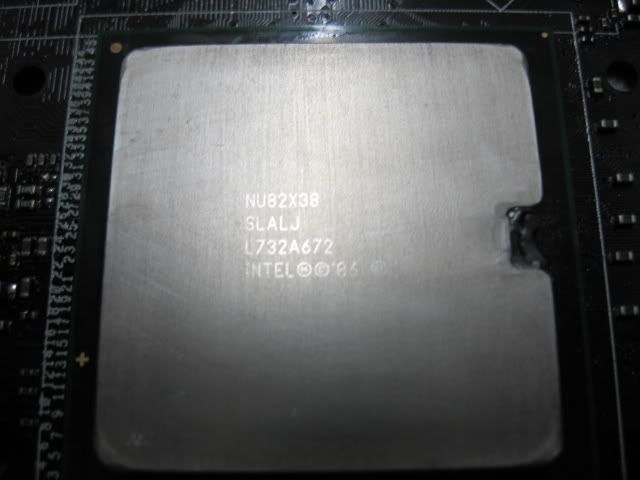
    After you do at least 2 times the whole 4x90 degree turn lapping you will notice the IHS copper being removed:


    when you feel most of the copper has been removed (maybe 4 or 6 times the whole 4x90 degree turn lapping) put the cpu aside, remove the tape and the paper, wash it out with clean running water and put it aside to dry out on the dish-hanging kitchen dryer (sorry my bad english!).

    Dry the glass and insert the 800 paper, again using the tape to get it properly seated, and repeat the whole proccess. When the 800 grit is done all the copper should be out, leaving a flat copper color surface.

    Now repeat the process with the 1000, 1200, 1500 and 200 grit to remove all the scratches.

    As you go up it will take longer, so have some spare time and order your pizza lolol and do not rush. If you feel you went up and did not remove the copper previously, just repeaty the process going down on the grit. In the end use the air spray to carefully expel any water residues, and leave it to dry for 1 or 2 hours (now you can eat your pizza meanwhile!) or... get it in the microwave for 2 or 3 mins.

    I didnīt use the 2500 grit, but you can do it, i personally saw no advantage in it. A total mirror surface is no real advantage, it is better to have a flat unpolished surface, will give you better heat surface / transfer and in the end thats what thermal paste is intended for.

    this is what it should look like, give or take:


    Of course you can (and in fact should) do the whole process for the cpu cooler. I did that for my ultra 120 extreme to good results. If so, before switching paper grits repeat the steps for the cooler. You will notice it is harder to keep it flat because of its weight and cumbersome profile, look in youtube link

    http://www.youtube.com/watch?v=rO5gk6mZuso

    for a video on that, its nicely done, and on the side you will laugh looking at this guyīs nail sizes lolol

    final result:


    For the thermal compound i personaly used MX-2. It specs are non-curing compound, but whatever people say i notice lower temps after it is seated down and fully working for a few days.

    In the end i got avg 3-5 šC lower temps, not a lot, but most important i notice the cpu does not get to such high temps on full load it got before the whole lapping operation.


    Update:

    NB/SB removal, cleaning and lapping


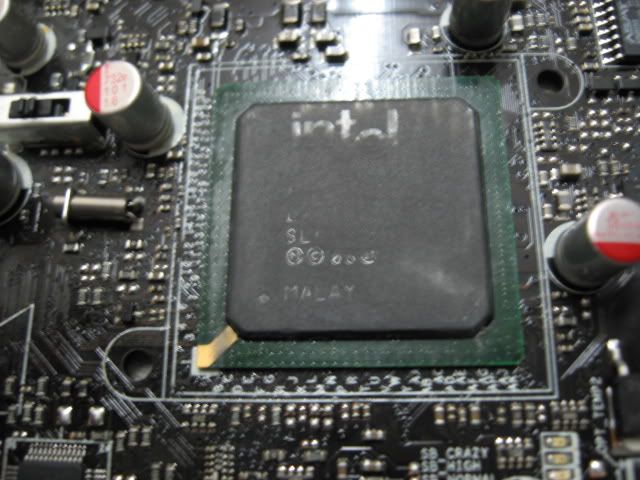
    Ok, so i got the Special Edition Maximus formula.. no water cooling here, so taking advantage that your setup is unmounted you should reseat the NB/SB/mosfet block.

    To avoid the risk of cracking the NB, i used hair drier on hot, blowing into the NB and SB from the sides. After a 4 or 5 mins it should be hot enough.

    I used a regular large size screwdriver covered with a piece of newspaper to avoid scratches in the motherboard, and after removal of all the bolts (not going into that right now) i inserted the screwdriver on the side of the NB so it touches both the NB and the MB, turn it gently around and it popped out from each side. SB is easier to pop out. The mosfet is not really glued in, so they are not hard to come out.
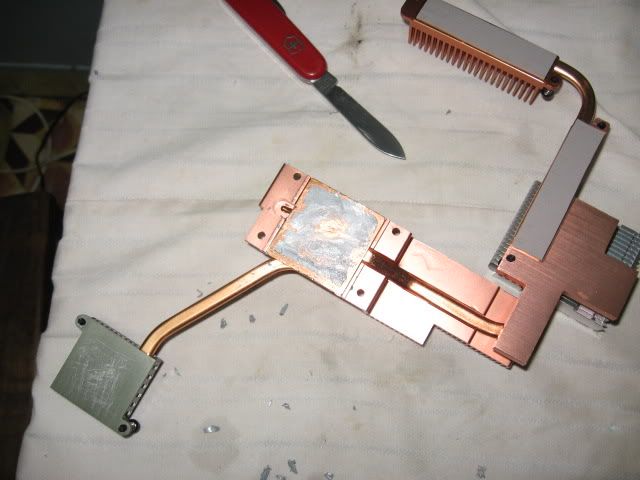
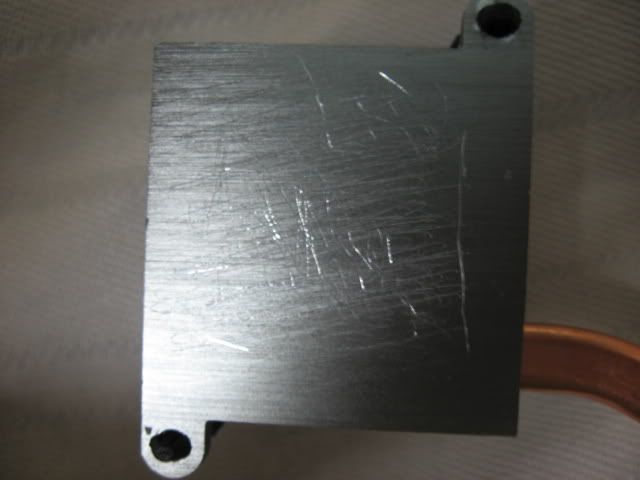
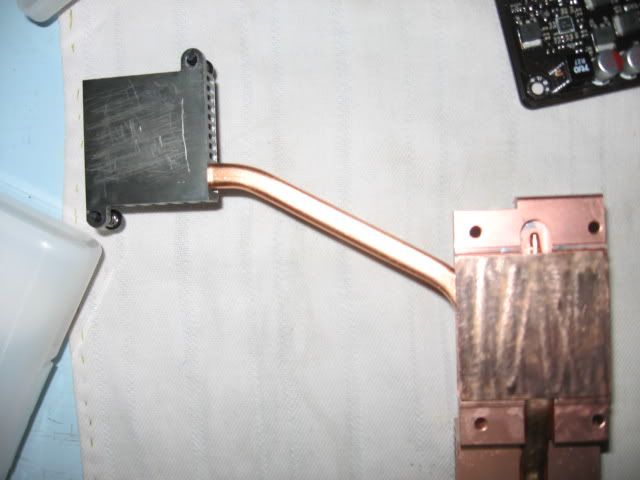
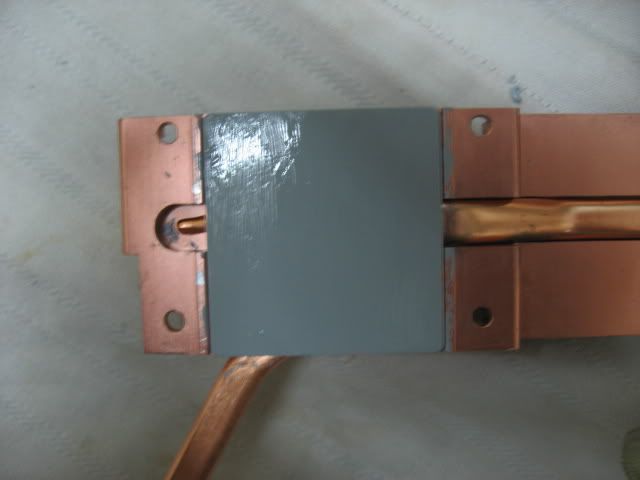
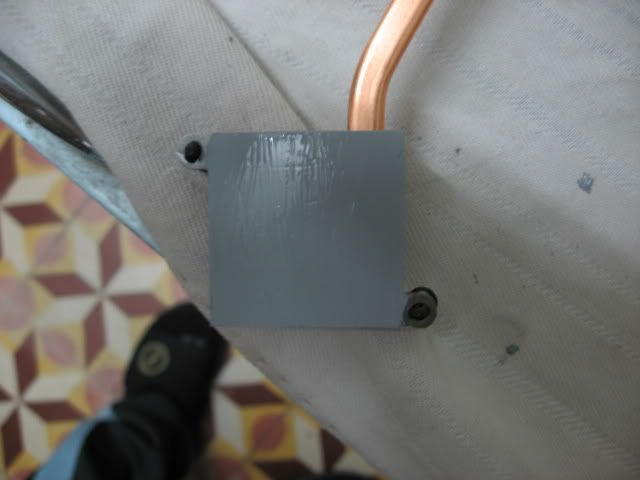
    fusion block out:


    Asus fusion block thermal compound is a deadly trap!! watch out because it is really hard to come out, if your MB has been reunning for some time. Use the arctic kit 1-2, used amonia, used tetrachloride carbon, eter.. so i am left to simply scratch it patiently with a portable knife, also did it gently on the NB surface itself.

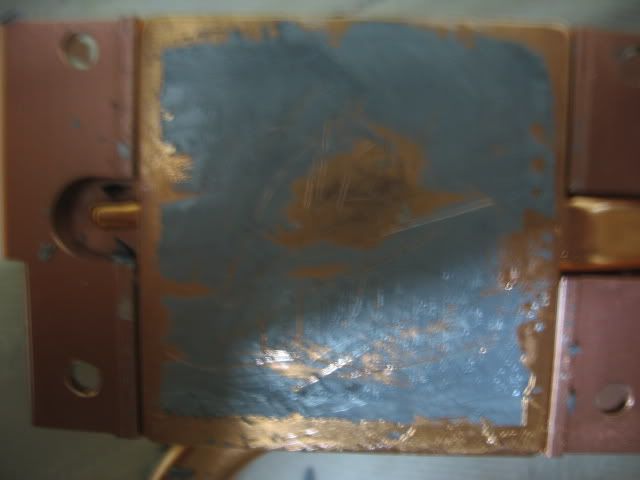
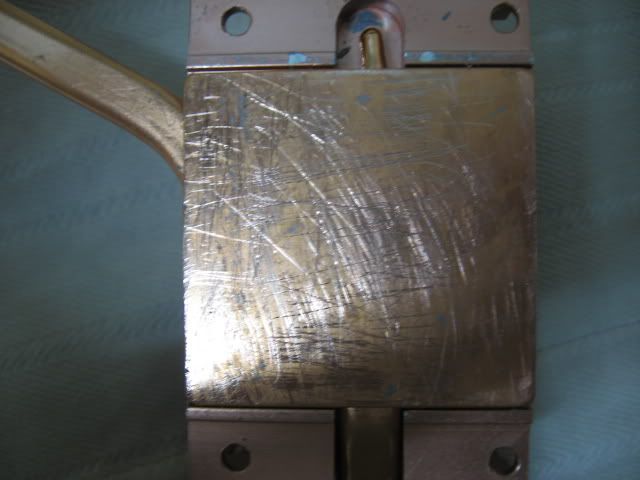
    look how the NB looked before scrapping:


    the SB:


    both after scrapping:


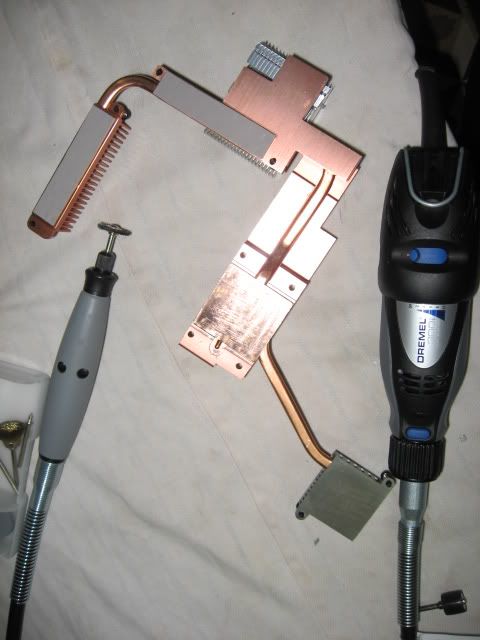
    surelly i can put the dremel to good use! after some manual knive scrapping i used the dremel with the metal brush to remove any leftovers


    And then did some NB and SB mild lapping just with grit 1000 and 1200 using the process described before. Donīt lap them a lot, because they might loose surface contact.

    Also had to use the dremel brush on the NB and SB surface themselves, but no harm done.

    Again, used the airspray to expel any residues from the area.


    For compound i used the zalman, because of the included brush:


    Thats it..! feel free to post any questions or issues.


    greets
    Maximus Formula Rampage modded SE all air bios 0308
    Thermalright ultra120 extreme lapped+1 scythe sflex1600 push
    Q6600 GO lapped p. code: BX80562Q6600SLACR FSB400x9=3.61ghz
    Fpo: L728B189,Vid: 1,2875
    2x50mm revoltec fan mod on NB, 2 on ram
    2x1GB transcend axeram pc1200 white slots,
    1200 5-5-5-15 ctwist=strong perf. level 5!! pullins disab. volt=2.24bios
    1x Gigabyte 8800 Ultra thermaltake 3 fan cooler
    SoundBlaster X-fi ext. music
    sharkoon full tower btx mounting, fan mod 120mm titan side out
    2xscythe sflex 1600rpm cpu tunnel push-pull
    1xnoiseblocker 80mm add. mid-front in
    Kama meter
    gigabyte odin power GT 550w
    2x seagate 7200.12 2x500GB on raid 0 mode-win vista sp2
    1x seagate 7200.11 500GB on AHCI mode-win7
    1x plextor 802SA, flashed bios into sony optiarc AD-7200S
    1x plextor 760A

  2. #2
    Banned
    Join Date
    Jun 2006
    Location
    Durham, NC
    Posts
    2,877
    I was expecting to see a lapped NB IHS.

  3. #3
    Xtreme Member
    Join Date
    Mar 2005
    Location
    Florida, USA
    Posts
    129
    Kinda OT but thats a nice dremel dude! I didn't know they made ones with a free floating head like that! Looks like I may have to throw my regular dremel up on ebay and get one of those haha.

    EDIT : On further inspection it looks like thats just an additional attachment onto the regular dremel right?
    Last edited by darkone414; 01-08-2008 at 03:49 PM.

  4. #4
    Xtreme Addict
    Join Date
    May 2004
    Posts
    1,755
    You did ok on the cpu and cpu's heatsink but honestly you did a horrible job on NB/SB chips and heatsinks

  5. #5
    Banned
    Join Date
    Nov 2007
    Posts
    1,941
    I orderd the same kit , just waiting for it to arrive

  6. #6
    Xtreme Member
    Join Date
    Dec 2007
    Location
    Thailand
    Posts
    373
    So Good
    • i7 920 D0
    • Gigabyte X58A-UD3R
    • Corsair Dominator 12GB
    • MSI GTX 660 Ti Power Edition OC 2GB
    • OCZ Vertex 4 128GB
    • WD1002FAEX 1TB
    • Corsair HX850W
    • CaseLabs Magnum TH10
    • Dell UltraSharp U2410
    • Logitech G500
    • SteelSeries QcK Mass
    • Klipsch ProMedia 2.1 THX

  7. #7
    Dave's Mentor!
    Join Date
    May 2007
    Location
    montreal
    Posts
    5,247
    nive job on cpu i saw that it really needed a lapping
    you should @ least do a better job on nb

    maximus IV extreme gtx580
    gigabut p67-ud7
    p67 sabertooth
    2500k+2600k
    antec 1200watt
    EVGA classified 760
    920 Batch# 3849B018 4.985ghz@1.52v gtx285 ftw sli
    OCZ3RPR1866LV6GK hypers
    dfi ut p35 rampage extreme
    gigabut p35c-ds3r bios suks
    gigabut x38-d6q dead thank god
    ballistix 8500 1240mhz@2.02v

  8. #8
    Registered User
    Join Date
    Nov 2007
    Posts
    75
    Quote Originally Posted by Omastar View Post
    I was expecting to see a lapped NB IHS.
    Quote Originally Posted by darkone414 View Post
    Kinda OT but thats a nice dremel dude! I didn't know they made ones with a free floating head like that! Looks like I may have to throw my regular dremel up on ebay and get one of those haha.

    EDIT : On further inspection it looks like thats just an additional attachment onto the regular dremel right?
    Quote Originally Posted by LowRun View Post
    You did ok on the cpu and cpu's heatsink but honestly you did a horrible job on NB/SB chips and heatsinks
    Quote Originally Posted by zsamz_ View Post
    nive job on cpu i saw that it really needed a lapping
    you should @ least do a better job on nb


    Hi there,

    yes, u are all right guys.. but i lapped the nb and sb latter in tha evenin after scrapping and dremeling and forgot to take pics.. thatīs why i said

    "And then did some NB and SB mild lapping just with grit 1000 and 1200 using the process described before. Donīt lap them a lot, because they might loose surface contact."

    I mean.. not crazy here to just leave it like that right? lolol

    and then intha morning applied the paste.


    For the dremel guy thatīs an accessory u can buy to attach to yours, cost about 30 euros.


    greets
    Maximus Formula Rampage modded SE all air bios 0308
    Thermalright ultra120 extreme lapped+1 scythe sflex1600 push
    Q6600 GO lapped p. code: BX80562Q6600SLACR FSB400x9=3.61ghz
    Fpo: L728B189,Vid: 1,2875
    2x50mm revoltec fan mod on NB, 2 on ram
    2x1GB transcend axeram pc1200 white slots,
    1200 5-5-5-15 ctwist=strong perf. level 5!! pullins disab. volt=2.24bios
    1x Gigabyte 8800 Ultra thermaltake 3 fan cooler
    SoundBlaster X-fi ext. music
    sharkoon full tower btx mounting, fan mod 120mm titan side out
    2xscythe sflex 1600rpm cpu tunnel push-pull
    1xnoiseblocker 80mm add. mid-front in
    Kama meter
    gigabyte odin power GT 550w
    2x seagate 7200.12 2x500GB on raid 0 mode-win vista sp2
    1x seagate 7200.11 500GB on AHCI mode-win7
    1x plextor 802SA, flashed bios into sony optiarc AD-7200S
    1x plextor 760A

  9. #9
    Xtreme Addict
    Join Date
    Nov 2005
    Location
    PHX
    Posts
    1,494
    I hit it with a heatgun and there was no need for knife. And that was after it had been turned on.

    Also, did you coat both IHS and Heatsink w/ paste? Given these things don't always wreak of quality like an Enzo, that might not be a bad idea.

    Also, what kind of temp decrease did you see? I didn't get much until I added a small 40mm 5cfm fan on top...that gave me a 7C drop.

  10. #10
    Registered User
    Join Date
    Nov 2007
    Posts
    75
    Quote Originally Posted by Jodiuh View Post
    I hit it with a heatgun and there was no need for knife. And that was after it had been turned on.

    Ok... i just didnt want to pull the NB out too hard, iīve seen around photos of what can happen (NB totally coming out, thus destroying the board)


    Also, did you coat both IHS and Heatsink w/ paste? Given these things don't always wreak of quality like an Enzo, that might not be a bad idea.

    Yes i did, quite a thin layer on both

    Also, what kind of temp decrease did you see? I didn't get much until I added a small 40mm 5cfm fan on top...that gave me a 7C drop.

    fsb 430x8=3.440Mhz cpuvolt=1.392
    room temp=18-20šC
    cpu idle=36šC
    cpu full load=58šC (fans max)
    cpu full load=62šC (fans low-close to silent system)

    meaning avg 4-5šC drop.

    and yes i have a fan on top of NB, 2 smaller ones on RAM, using a mod:


    Maximus Formula Rampage modded SE all air bios 0308
    Thermalright ultra120 extreme lapped+1 scythe sflex1600 push
    Q6600 GO lapped p. code: BX80562Q6600SLACR FSB400x9=3.61ghz
    Fpo: L728B189,Vid: 1,2875
    2x50mm revoltec fan mod on NB, 2 on ram
    2x1GB transcend axeram pc1200 white slots,
    1200 5-5-5-15 ctwist=strong perf. level 5!! pullins disab. volt=2.24bios
    1x Gigabyte 8800 Ultra thermaltake 3 fan cooler
    SoundBlaster X-fi ext. music
    sharkoon full tower btx mounting, fan mod 120mm titan side out
    2xscythe sflex 1600rpm cpu tunnel push-pull
    1xnoiseblocker 80mm add. mid-front in
    Kama meter
    gigabyte odin power GT 550w
    2x seagate 7200.12 2x500GB on raid 0 mode-win vista sp2
    1x seagate 7200.11 500GB on AHCI mode-win7
    1x plextor 802SA, flashed bios into sony optiarc AD-7200S
    1x plextor 760A

Bookmarks

Bookmarks

Posting Permissions

  • You may not post new threads
  • You may not post replies
  • You may not post attachments
  • You may not edit your posts
  •