Results 1 to 22 of 22

Thread: As Yet To Be Named Build........

  1. #1
    Xtreme Enthusiast
    Join Date
    Mar 2006
    Location
    Central VA, USA
    Posts
    731

    As Yet To Be Named Build...Now Called KestrelFlight

    This is one of three projects that I’m trying to work on at the same time, so it will be referenced in other work logs. This is my first build in a long time where I’m not “recycling” an existing case. It’ll have a time line to bring everything up to date.

    06/06/10

    Originally this was to be a re-boxed "Kermit" with a bit more room to play. However my nemesis (eBay) and a desire to go SLI changed it all. That is why the MSI 785 mATX was replaced with the NF750. Other wise you would have seen some "building" going on. The other goal was to have a “max’ed out” Zalman build as I’ve only used them for CPU coolers and hadn’t realized the scope of their products.

    Besides waiting for the mobo from eBay, the flu has slowed me down big-time!! Anyway here are the "known" specs:

    CASE: Zalman Z7 Plus
    PSU: TBD until something by Zalman can be acquired
    MOBO: MSI NF750-G55
    CPU: PII X4 955 BE
    HSF: Zalman CNPS9900-NT
    GPU: XFX GTX 285 w/ Zalman VF3000N
    MEMORY: TBD w/ Zalman ZM-RC1000
    HDD 1: 2 x WD Raptor 74GB (Primary RAID1)
    HDD 2: 2 x TBD(RAID0)
    Optical Drive 1: TBD
    Fan Controller: Zalman ZM-MFC3

    Another issue that dictated the move to a larger case was the acquisition of a VF3000N cooler for the XFX GTX 285 that is/was in Kermit. Being of the open style it would not vent the heat out the rear of the case and would require more internal space as well as fans to dissipate the heat. As usual what is happening with another build also impacts things. With the death of the mobo in DreamCatcher and waiting on the RMA from BFG for the 280, I made the other “accidental” purchase of a second 285 with the idea of using that in DC v4. However it seems in the back of my mind was how nice it would be to have 2 x SLI’ed 285! Hence the accidentally win of the NF750 mobo.

    As the “bigger case” is the Zalman Z7 Plus it has a very nice drive cage that will hold 5 HDDs……….which caused me to drop the idea of an external dual bay drive box for file sharing and just put it in here. Then I started thinking again (BIG trouble) about how to do the hard drives. With another win on eBay that I hadn’t planned on I found myself with a second 74GB Raptor (currently one in the defunct BluHaz build). With out a window to see Kermit’s RaptorX window I started wondering what it would be like to have the 74s in RAID1 for the OS, etc. Worse than a set of dominoes!!

    Anyway to show that there is some “progress” I’ll shortly toss out a picture or two of what I have and we can go from there!

    Later in The Day

    As I need to wait on the motherboard, not much will happen for a while on this build. Need to get DreamCatcher figured out so I can get some of the mess out of the floor…….besides it is inheriting Kermit’s MSI 785GX-E65.

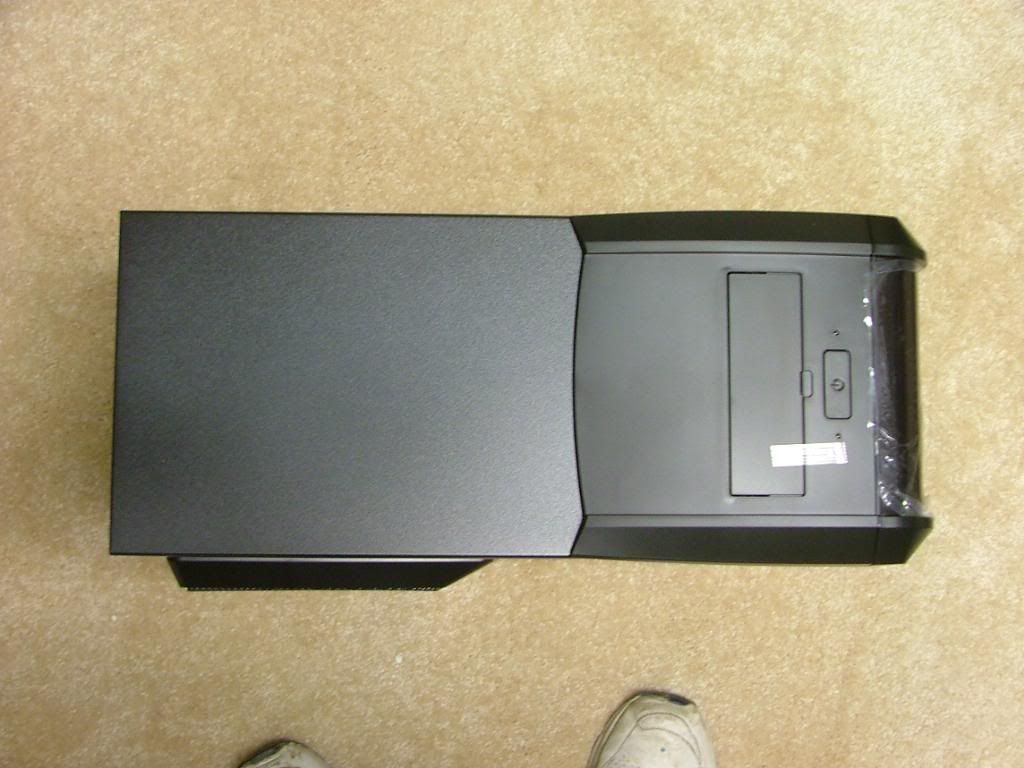
    I’ll toss out these pix and give you a little “initial thought” first of the case and then modify those as necessary as things go together!! Starting with “the arrival”
    and then go through the customary Case shots first…….oh yeah and by the way got lazy and didn’t edit my toes out of the pix either!
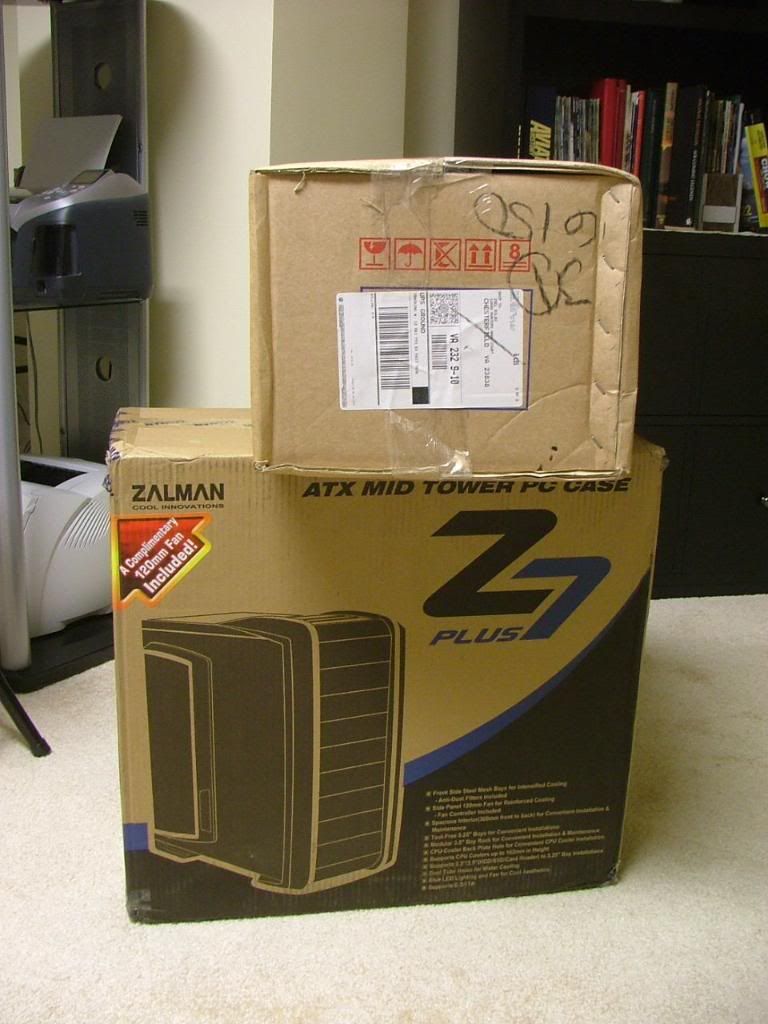
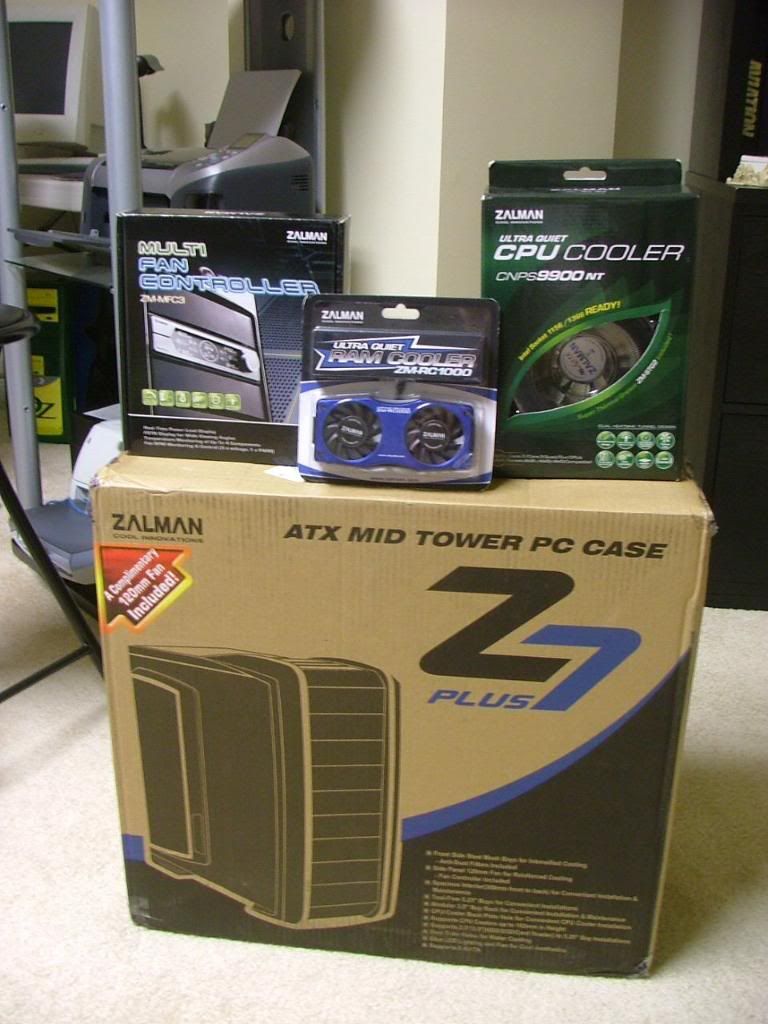
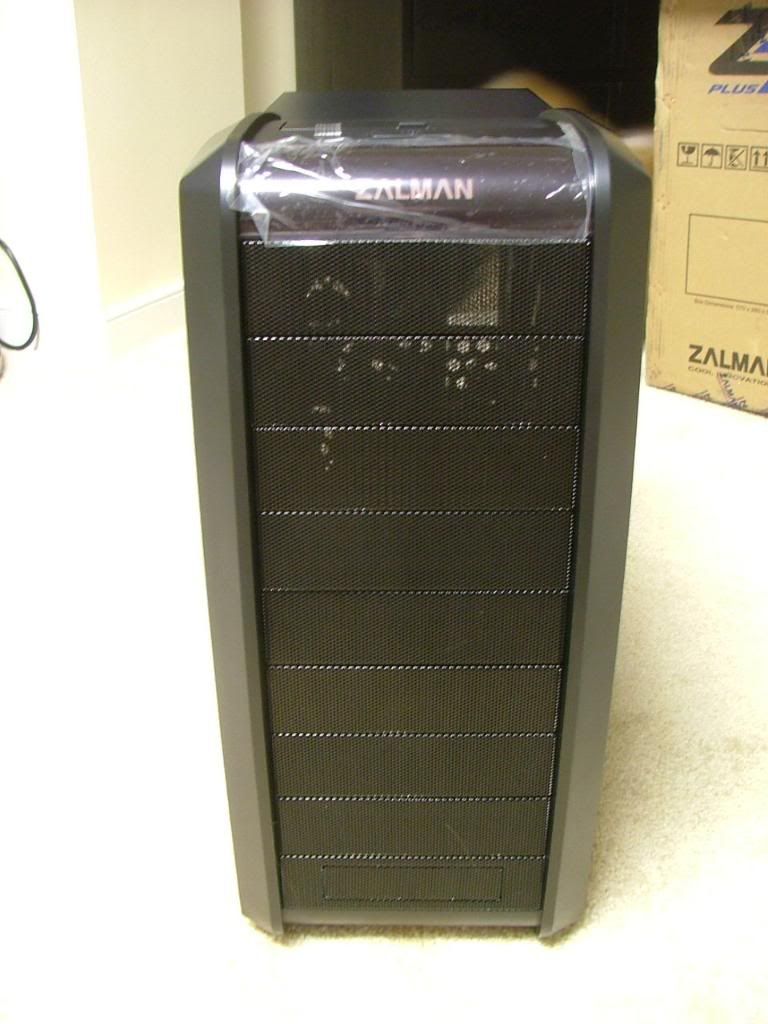
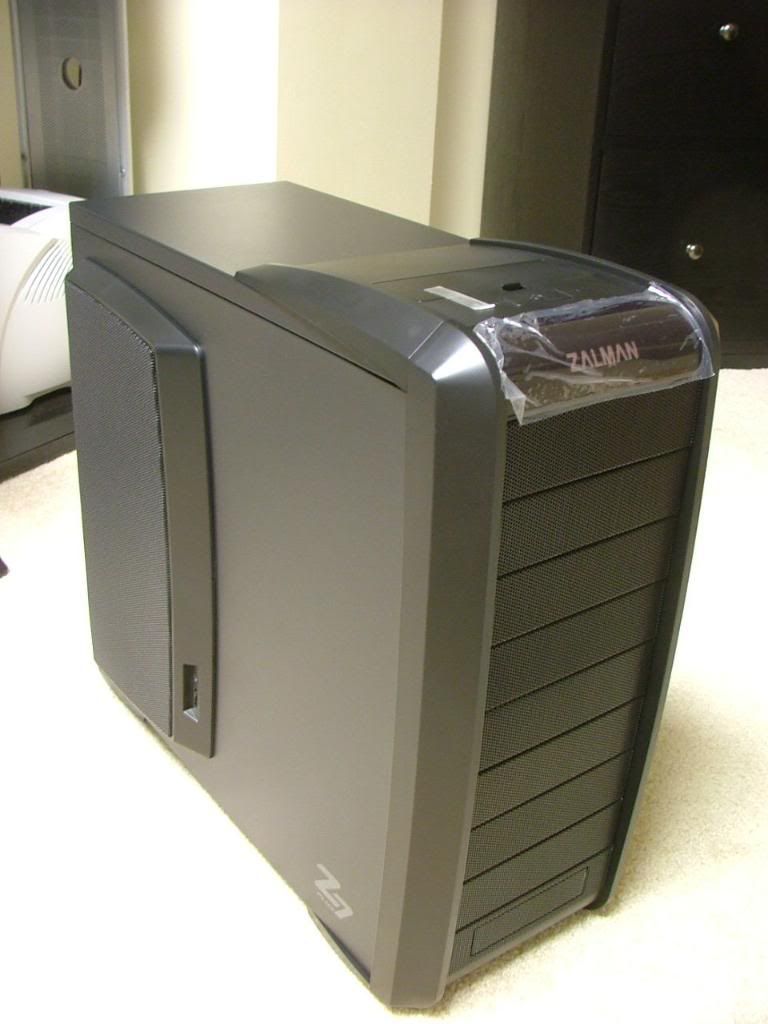
    First off these initial thoughts are going to make me sound like a Zalman fanboy (I am) and part of their PR folder…………however that is how it stands until I get a chance to really get into things! And yes as typical of my logs, this one will be long winded with lots of pictures.

    You have the “arrival” of the packages after being brought down into the office and then un-boxing the less obvious items. So for now we have the case, a fan controller, the HSF, and a memory cooler. The GPU cooler arrived earlier and can be seen in more detail in a “user review” that I putting together. After that the 285 will join the pile.

    Please realize (other than making changes to Oz1a) I’ve only been building mATX systems for over 8 years.

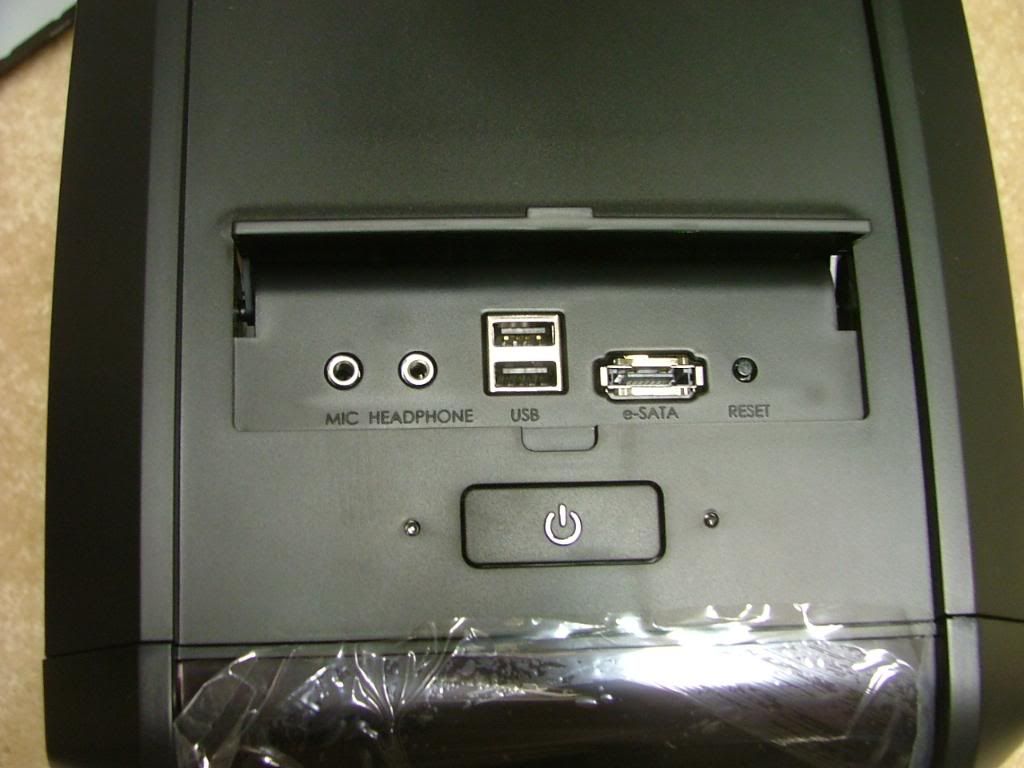
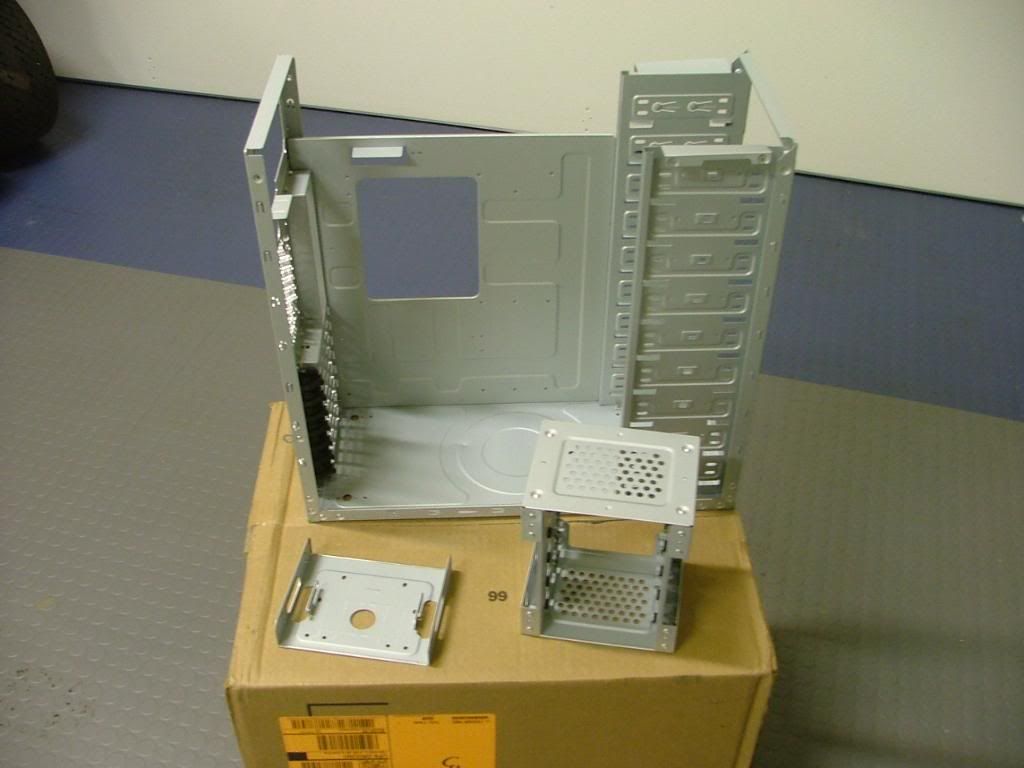
    Part of the deciding on this case is the fact that while a full size case it isn’t too tall to sit on top of my desk as opposed to under it. However with the location of the front ports on top, I’ll have to mod my reach a little!

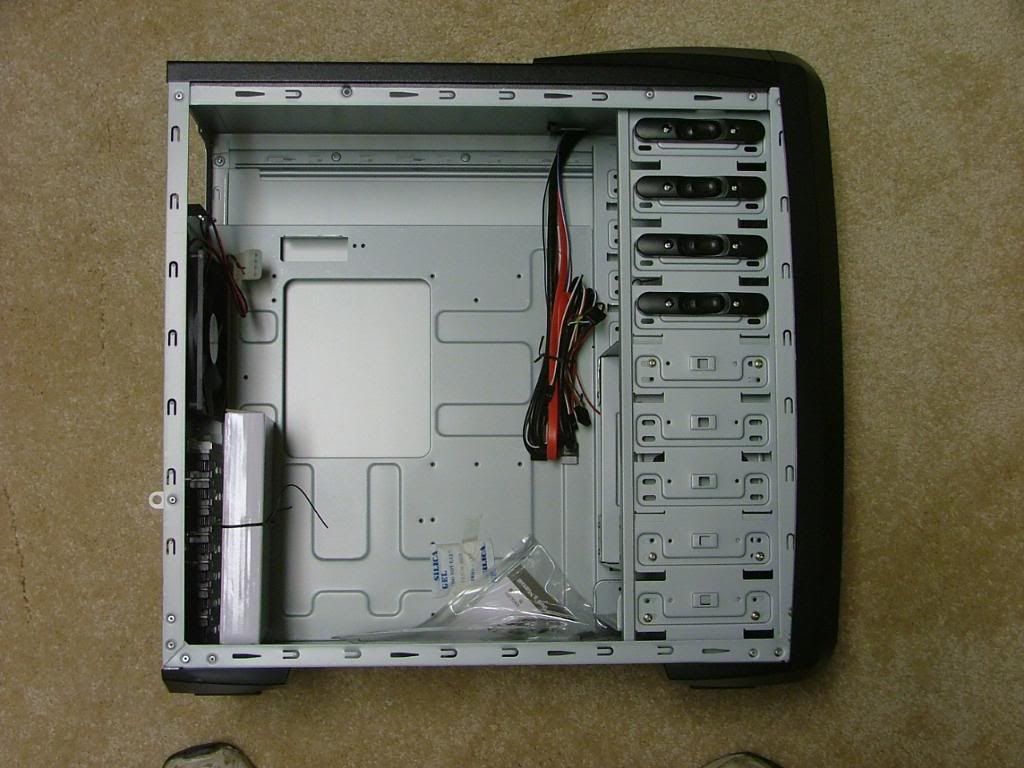
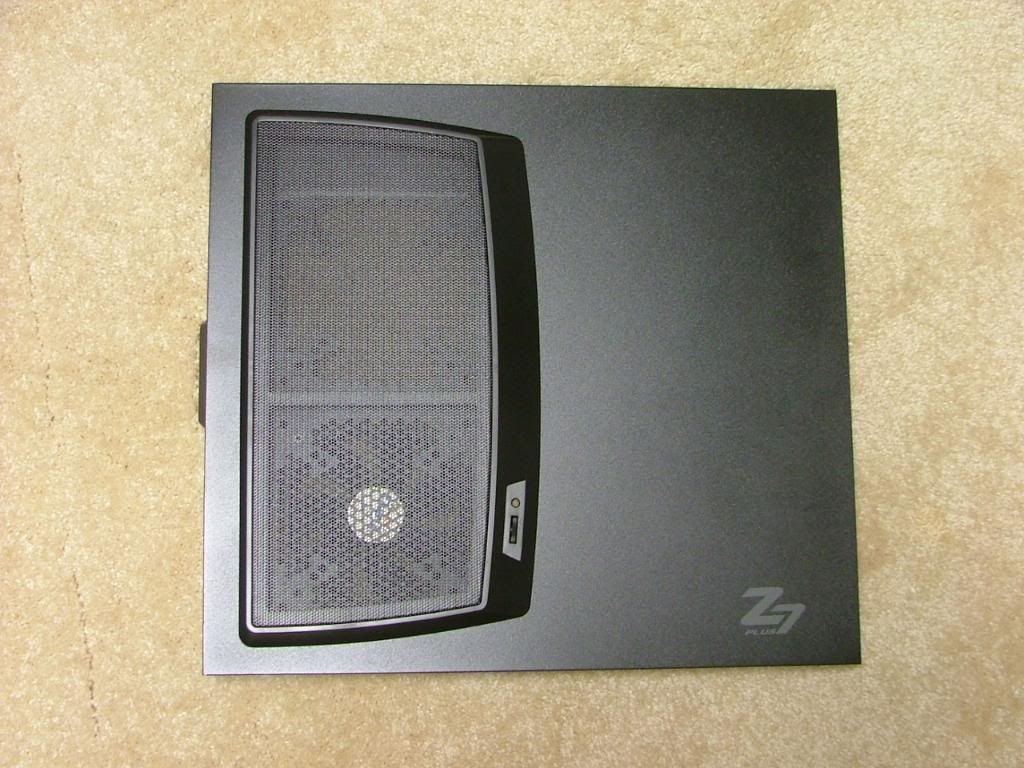
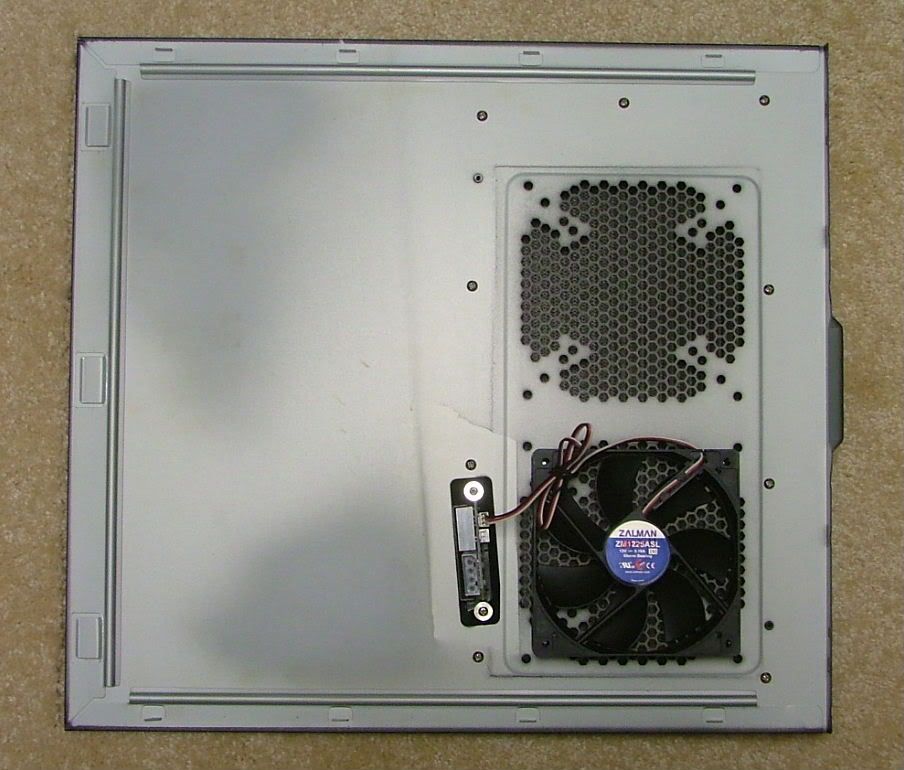
    Component cooling has always been an issue with mATX so all the fans that come with this case is cool….literally. The Z7 Plus come with provision to mount three 120mm OR 140mm fans and 1 120mm on the rear. Matter of fact Zalman provides 1 120mm LED in the front (mounted to the HDD drive cage), the 120 for the rear, one mounted on the door, and had one in a box inside. That one would be the second one on the door. Also all intake areas come with filters to help keep dust bunnies and their relatives out. Having the bay covers basically vents with removable filters adds to the air flow. Believe most give Antec the credit for coming up with this idea.

    There are two versions of this case and the only difference I can find between the “plain” Z7 and the Plus is the Plus gets a neat fan cover on the door that comes with a speed control. For me it would have been better to have gotten just the Z7 as there is a window in the works that will remove that part.

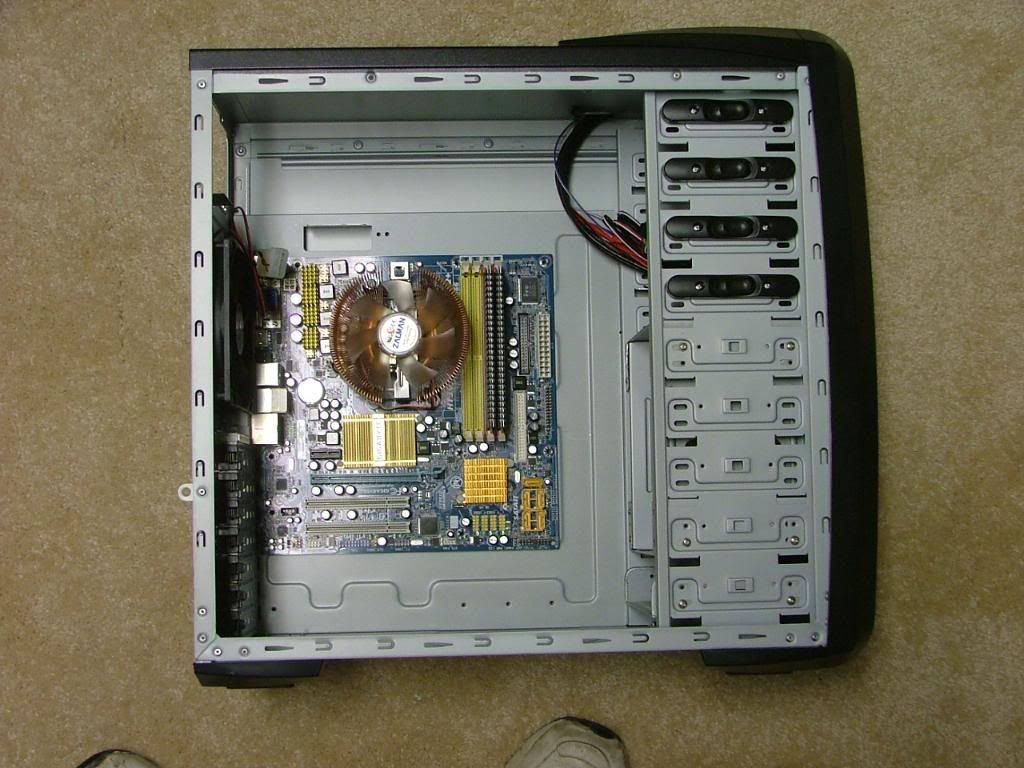
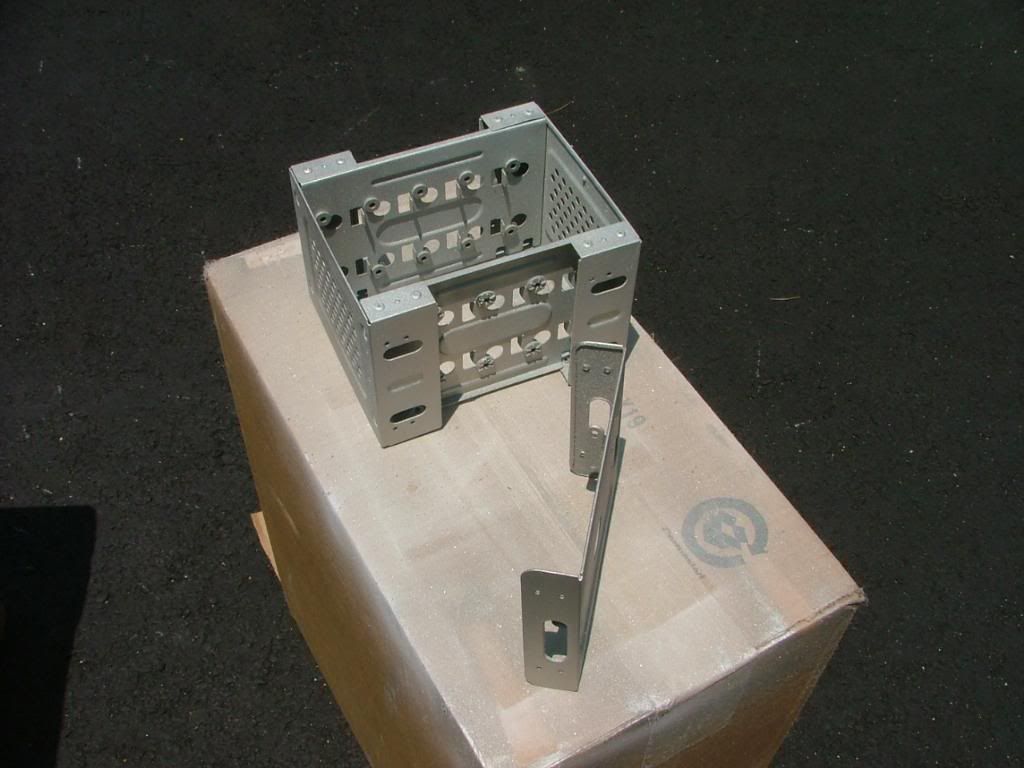
    On the inside, for me, I love all the room as shown by the interior view with a mATX mobo. Zalman’s “tool-less” system seems fairly simple and functional, the only exception is while the hard drives are mounted tool-less it requires one to remove four screws for the cage to be taken out. I need to work up some pix to show that later.

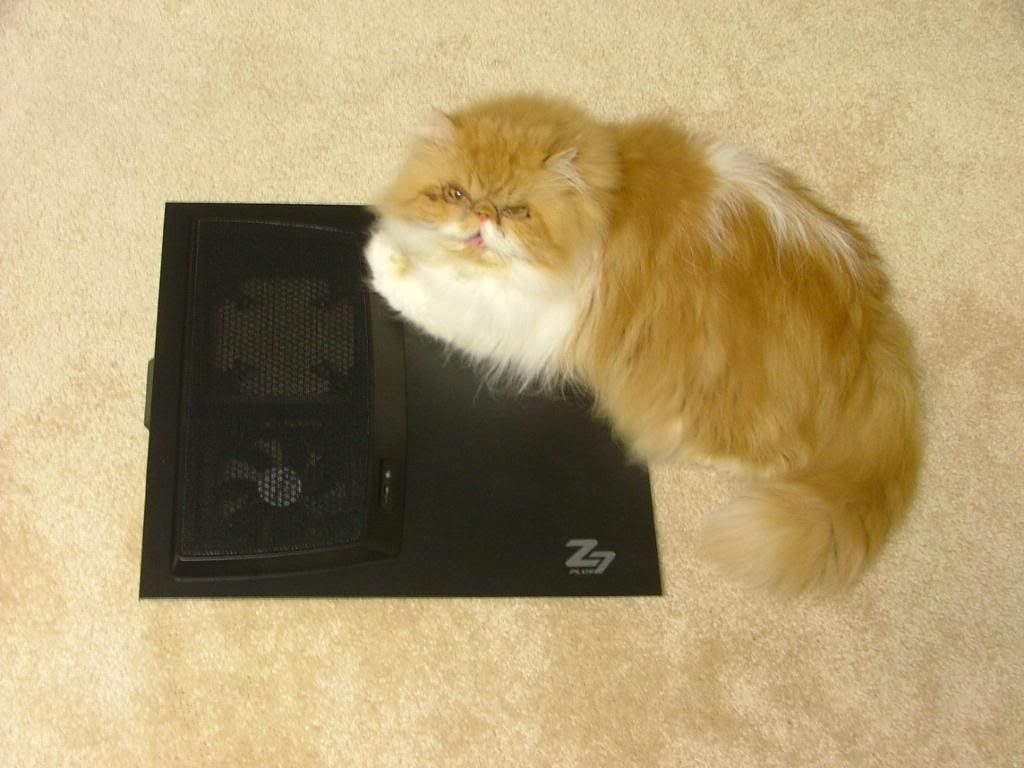
    Finally where you see the plastic covering is the Zalman logo that lights up blue when powered up. Also in closing it looks like assistant #2 approves as he decided to bed down on the left panel.


    To The Wee Hours & Through the Day 06/27/10

    Finally picked a paint color but don’t know how well it’ll work as it might just look like the natural aluminum. Keep gravitating to white but that has already been used. Going to throw at a few pictures to show that I am doing something (mainly working on DreamCatcher AM3). We have the chassis rear stamped fan grill marked for cutting, the chassis after de-milling the top for painting, and then all the parts waiting for the first coat of primer.
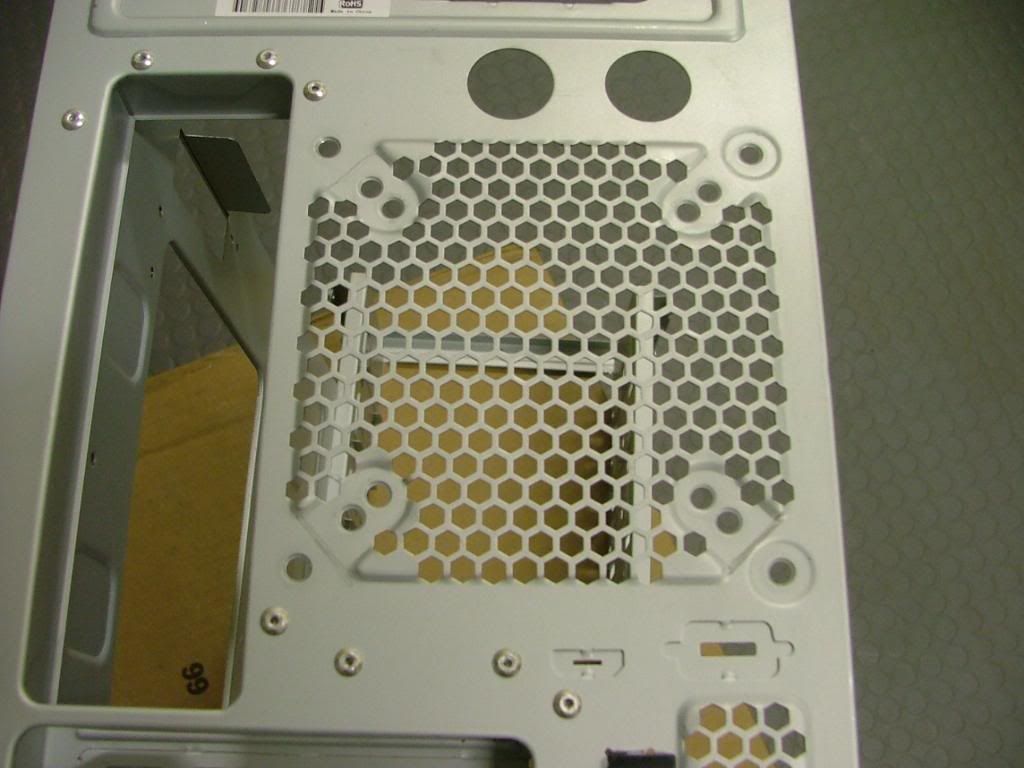
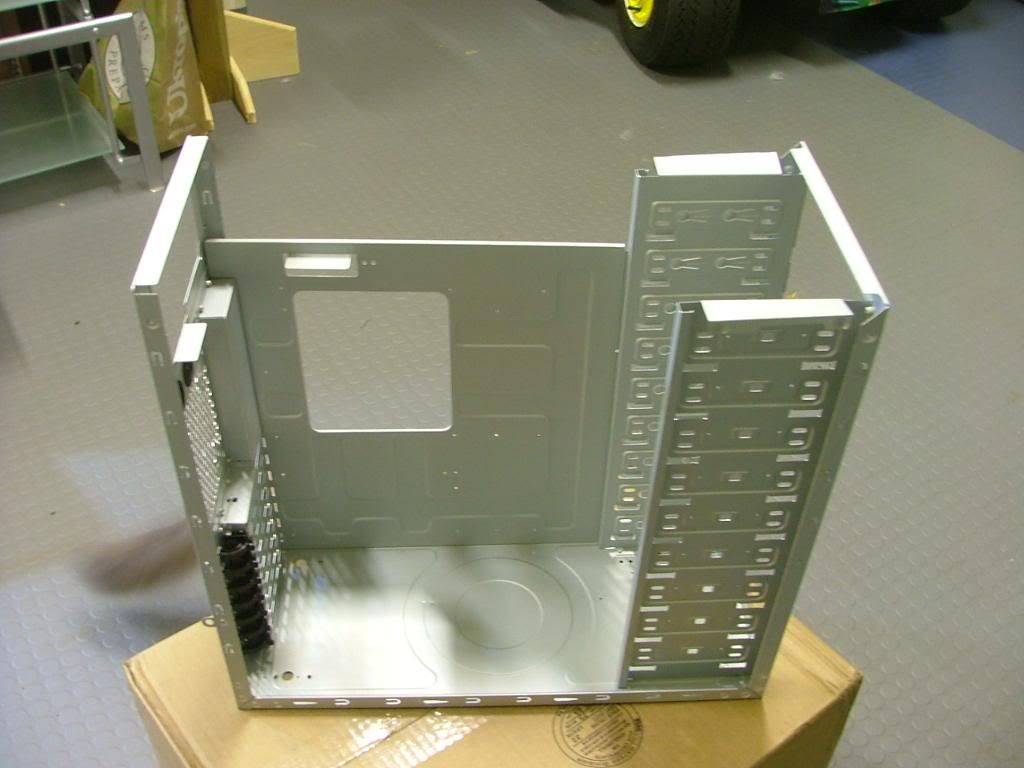

    Haven’t done the grill yet or anything as these shots were taken just before crashing at 03:20 EDST.


    Today was a total bust on the painting between the humidity, "breeze", and whatevers, back to square one as I'll have to sand and do whatever to undo the mess.

    Present

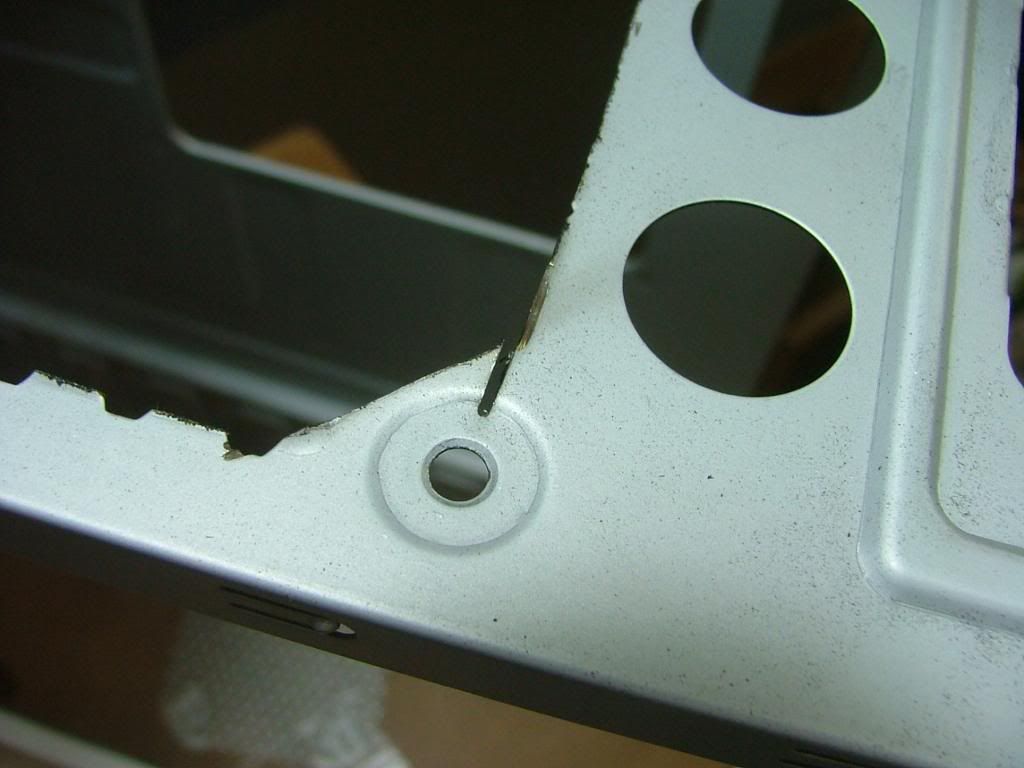
    Well with the fiasco that was my painting attempt I’ll throw out these pics associated with it. Also managed to do one of my worst grill cutouts so this thing seems to be jinxed!

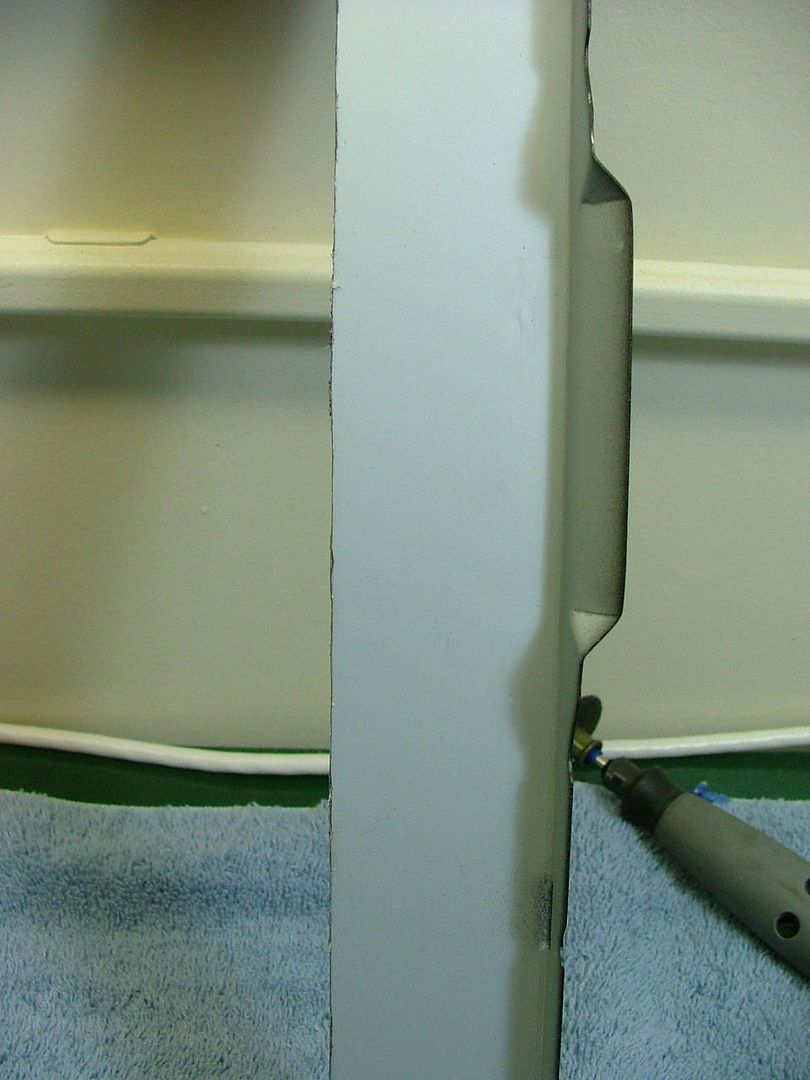
    I’m used to working with round stamped grills but Zalman has done “square” on both the side panel and the rear of the case. This allows for going with the different size fans. I bought that new “quick release” type mandrel and cutting disk for the dremel. Also managed a nice oops when the disk grabbed and it went the wrong direction.
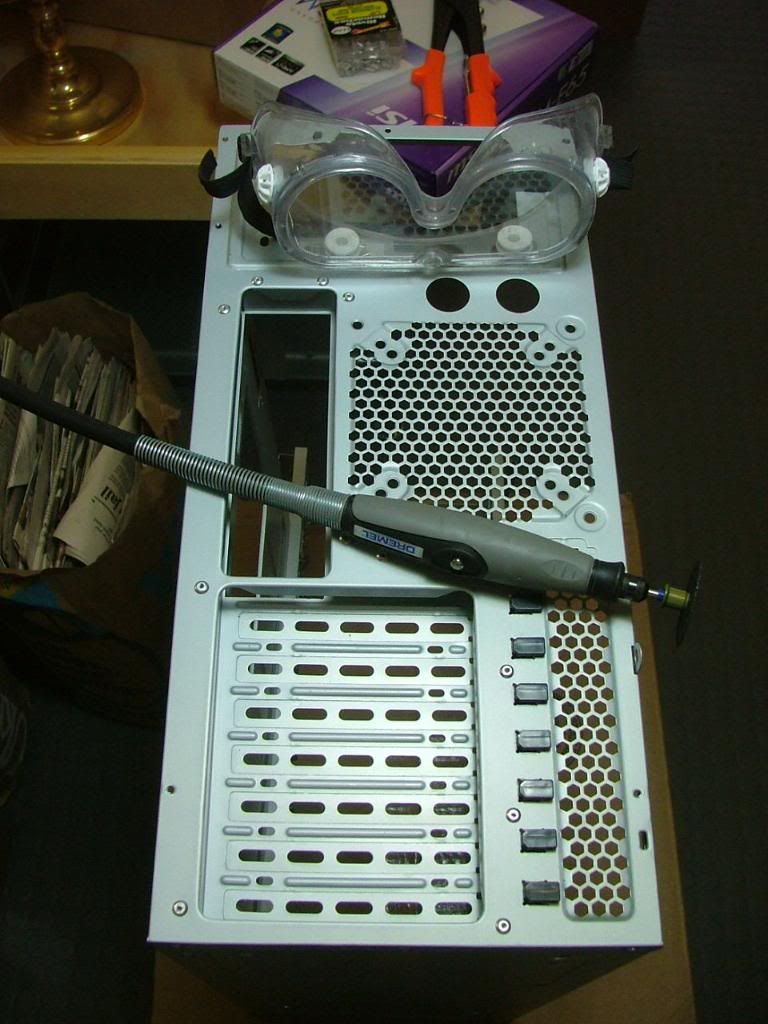
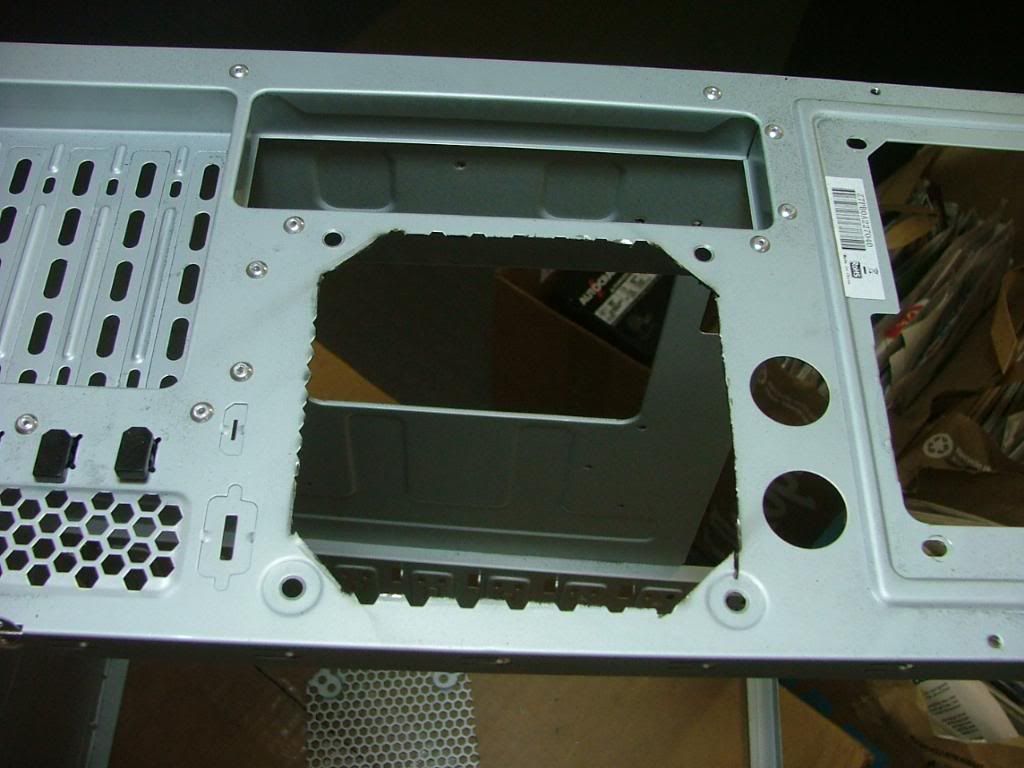

    The color I thought I’d try is Krylon’s “Brushed Metallic Satin Nickel” to keep with the theme of the coolers on the mobo as well as the 9900-NT Max. Not sure what I may have done mechanically to mess up the pain as I primed first and then painted. However I did what I said I wouldn’t and rushed the time between coats. While they stated 10 minutes between coats (I did 20+) not sure if I should have waited longer. At any rate not only was the color uneven but felt like sandpaper. When I tried rubbing it with a cloth in case the roughness was just stuck overspray in came off all the way down to the primer.

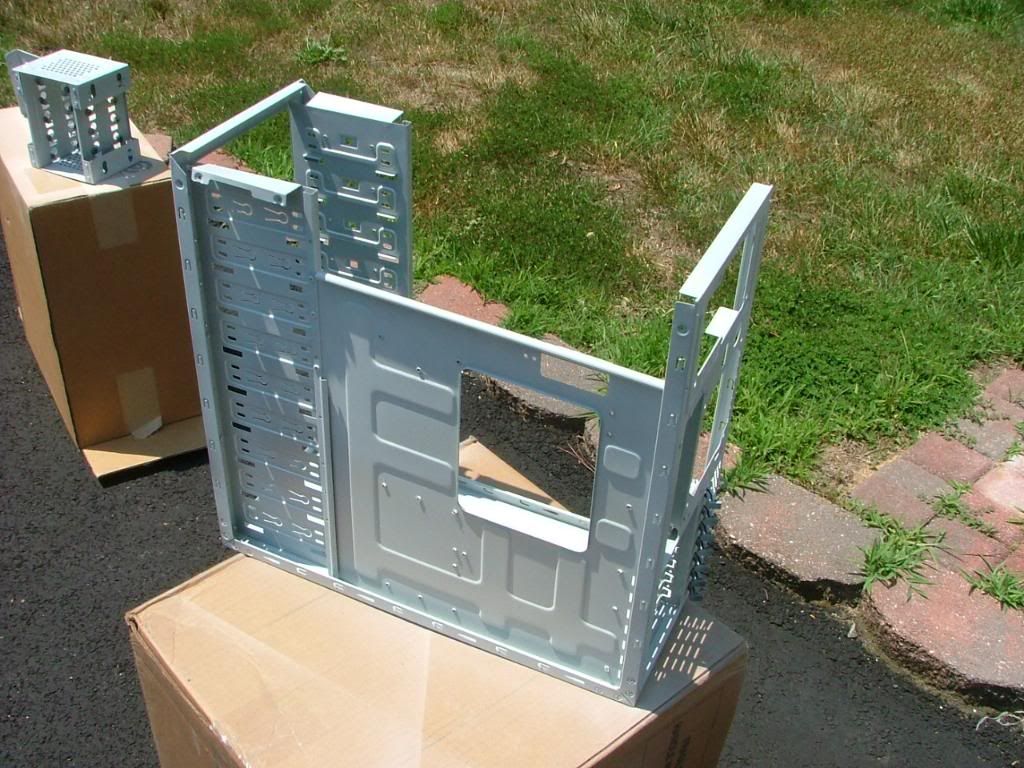
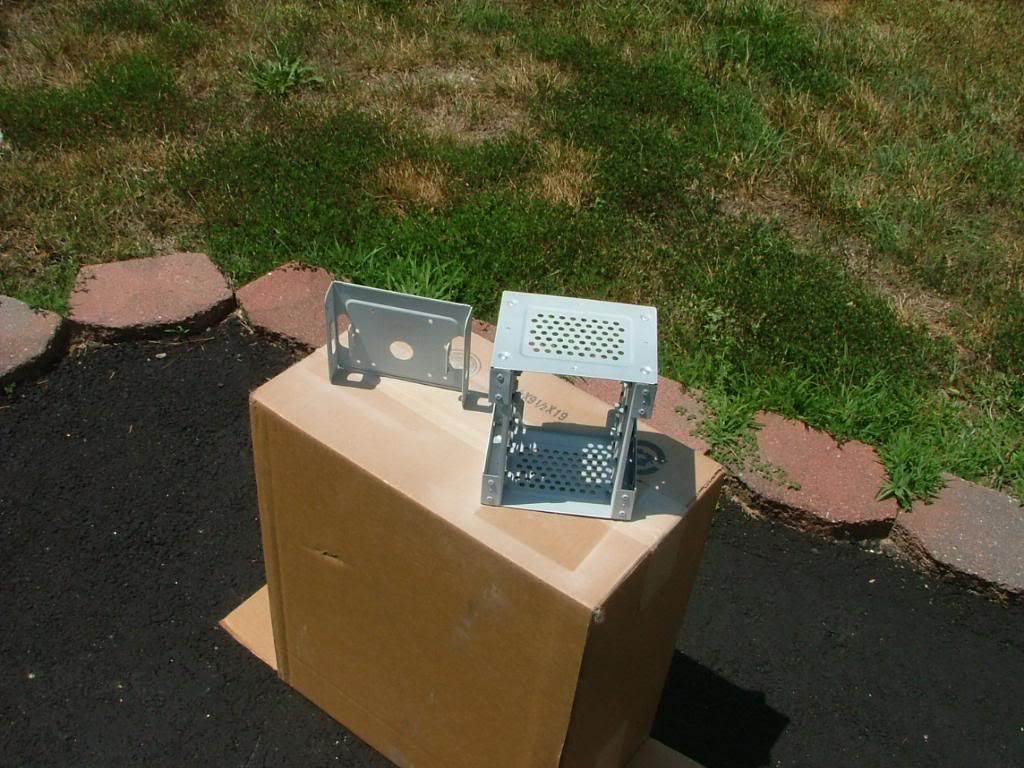
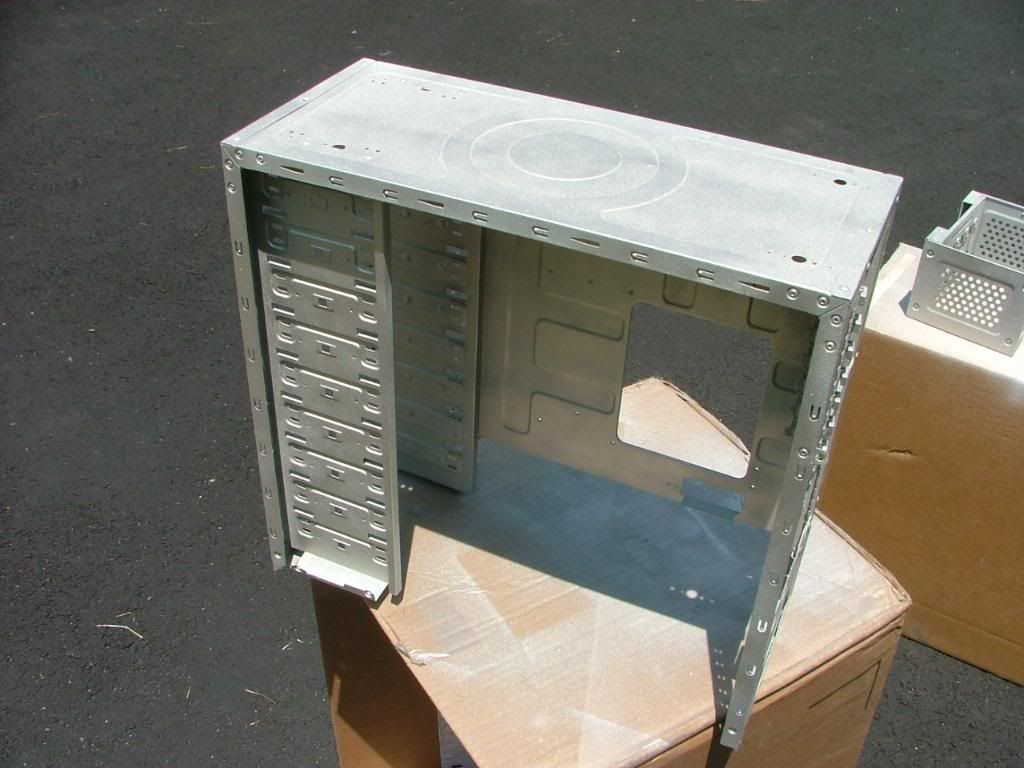
    So the plan is (if I get the gumption) will be to de-mill the whole thing, hit is with steel wool, wipe it down, prime, and try the paint again!

    Additional Information.......

    According to UPS I have a delivery from the 'egg tomorrow so will post a pic or two of a major change then!
    Last edited by jedihobbit; 01-09-2011 at 06:32 PM.
    As of 04/29/11
    Celtic Spirit >> (Under Construction / WC’ed) >> Antec SX1200, MSI 890GXM-E65, PII X6 1055T, 2 x GTX 285s, HDDs (TBD), 2 x G.S. F3-12800CL7D-2GBPI, OCZ 700W Modular, XP Pro SP2
    KestrelFlight v1.0 >> (To Be WC’ed v2.0) Zalman Z7+, MSI NF980-G65, PII X4 1055T, 2 x Galaxy 580GTXs, Zalman 32GB SSD, WD V'Raptor 300GB, G.S. F3-16000CL9D-4GBTD, Zalman ZM1000-HP Plus , Win7
    Oz1a v2.0 >> XFX MDA72P7509 750a, PI X2 8870BE, 2 x XFX GTS250, WD 250GB, F2-8500CL5D-2GBPK, Tt TR2 600W, XP Pro SP3

  2. #2
    Registered User
    Join Date
    Jan 2010
    Posts
    5
    maybe you can call it "Project Zalman"???

  3. #3
    Xtreme Enthusiast
    Join Date
    Mar 2006
    Location
    Central VA, USA
    Posts
    731
    Wanted to originally call it "The Z Machine" but Zalman has used that for one of their cases!!

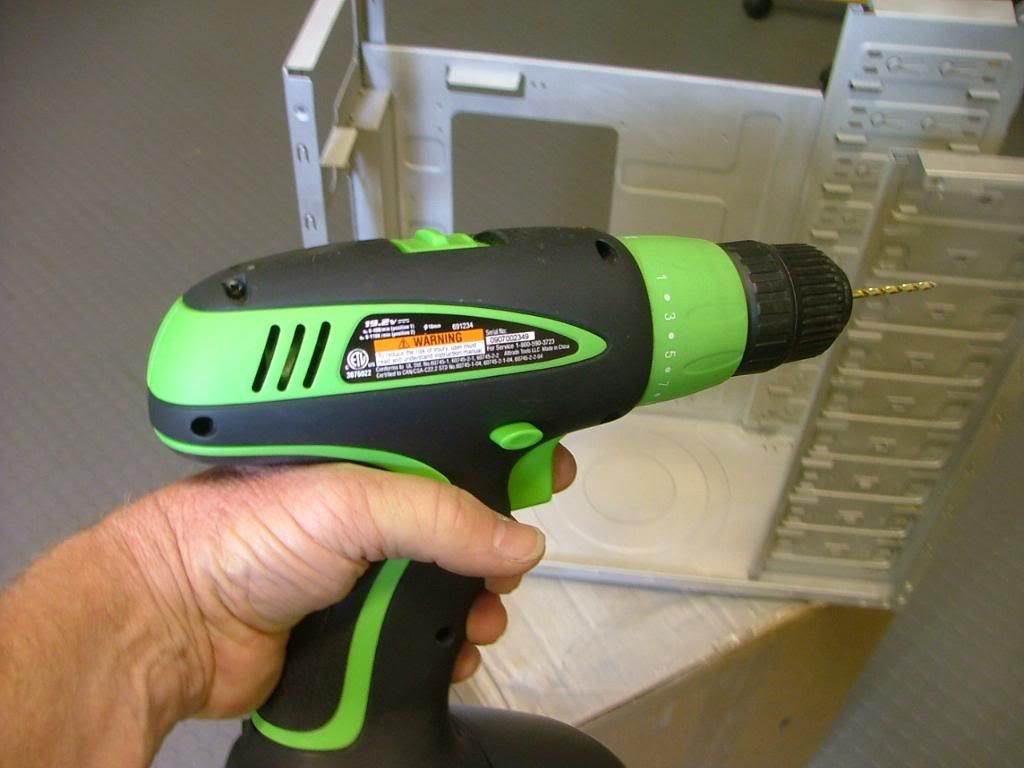
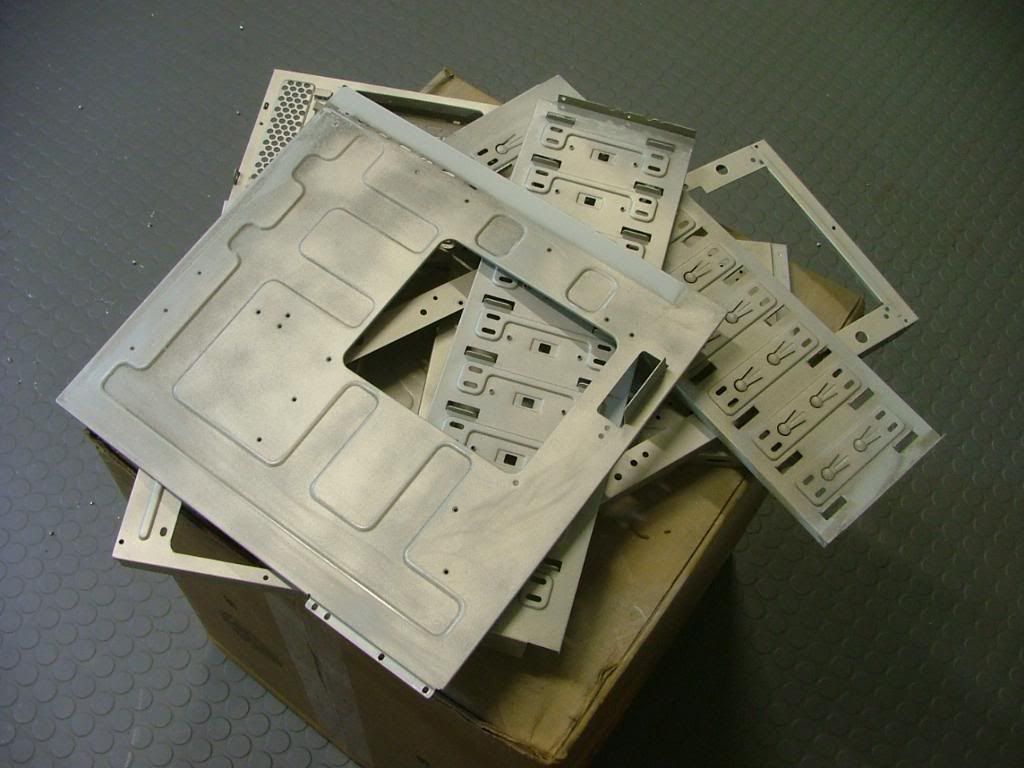
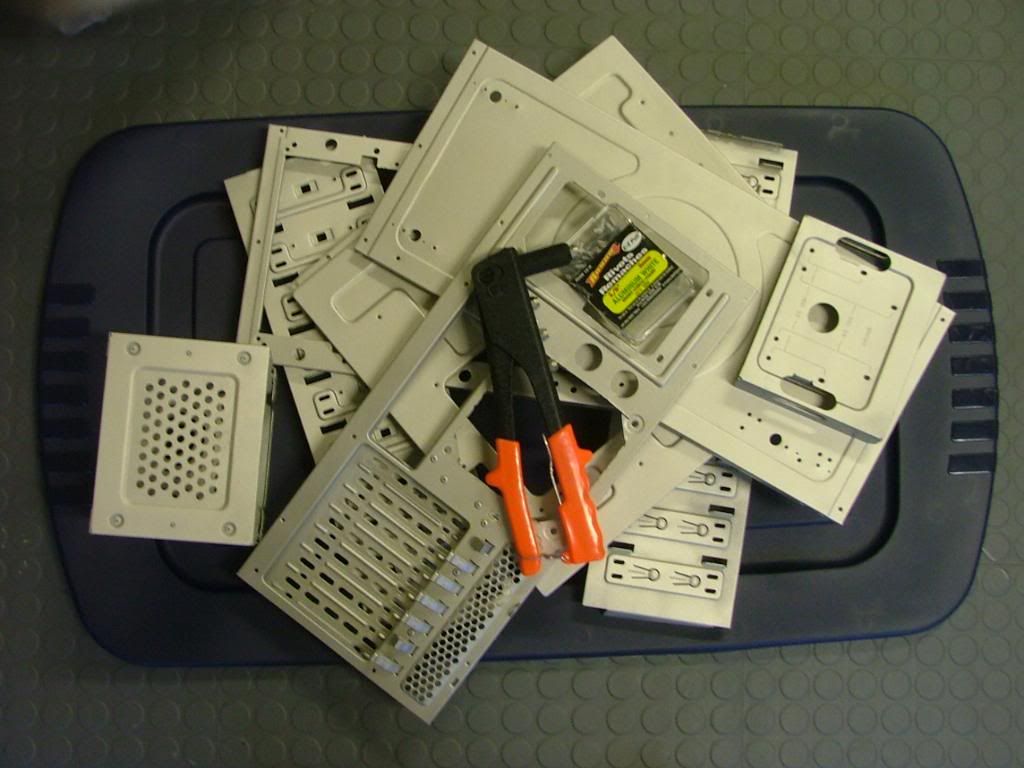
    Grabbed the drill and dismantled the chassis………this thing is well engineered and fabricated. Meaning it was a bit more to take apart than planned and had to take it down further than I wanted. Now I need to find what the wife did with the steel wool and sandpaper as she has plans to move with the house on the market and has been getting rid of stuff “we” don’t need. The drill is ready to attach and then like a house of cards the pieces are in a pile ready to be sanded, primed, and repainted. Two things need to happen to make this work…….. a drop in the humidity and remembering how the stuff goes back together!!


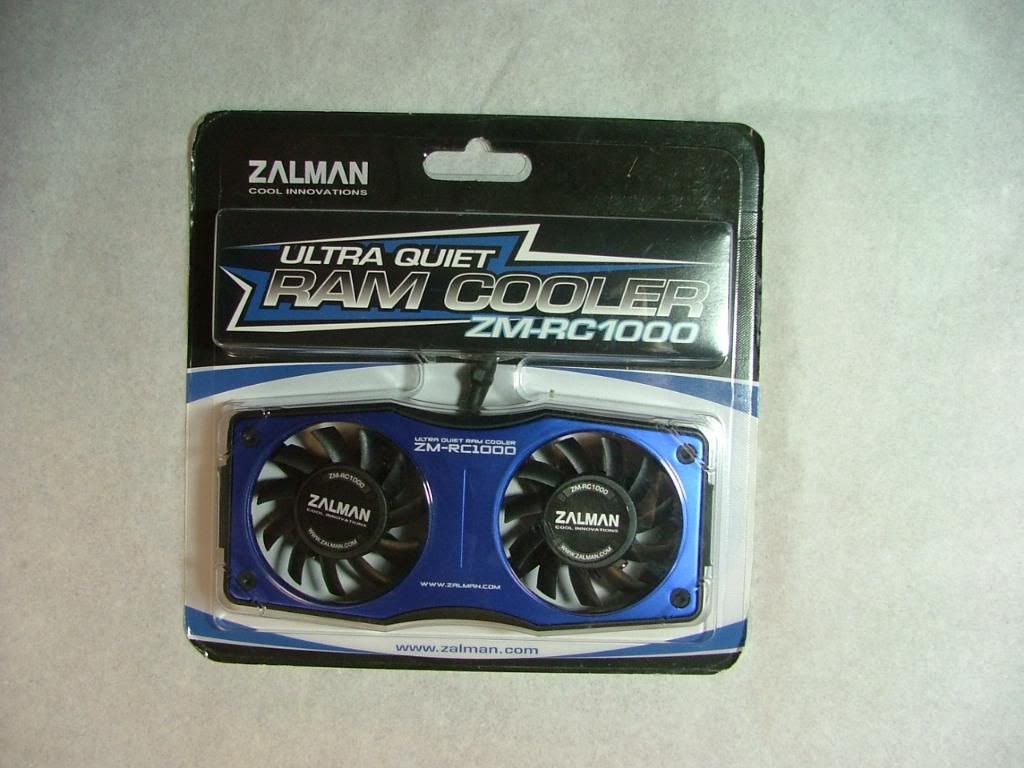
    We’ll also take time to look at one of the components that will be part of the assembly, the RC1000 memory cooler. While probably not needed with all the case fans it still looked kinda neat and was another piece of Zalman to add to the build.

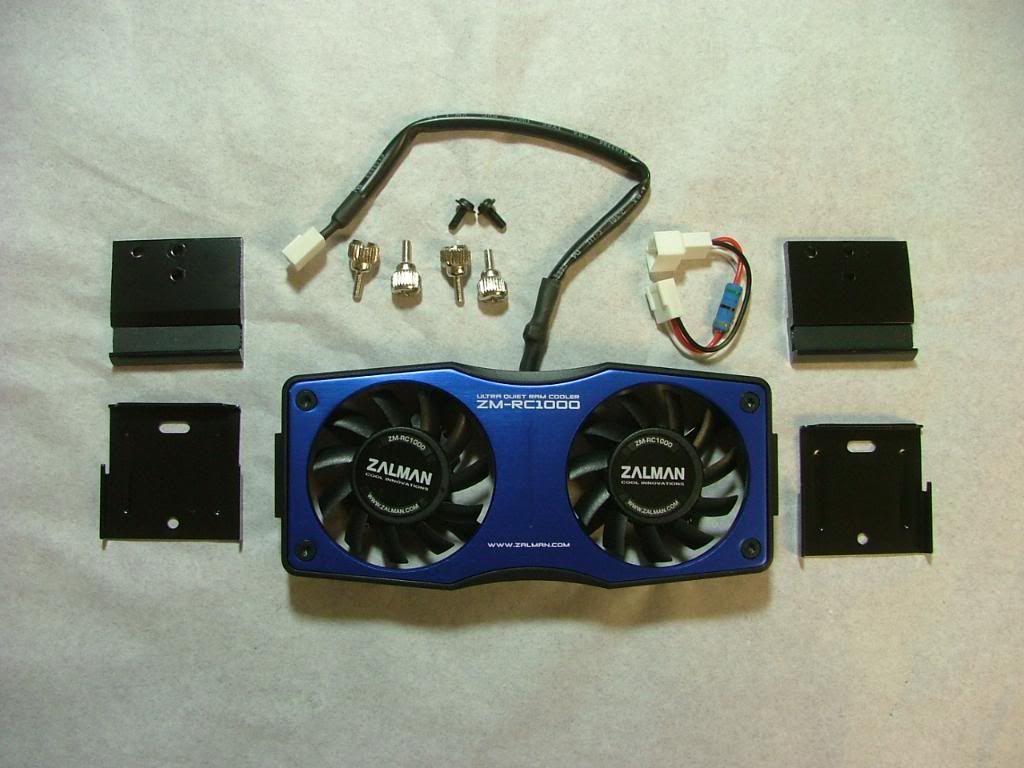
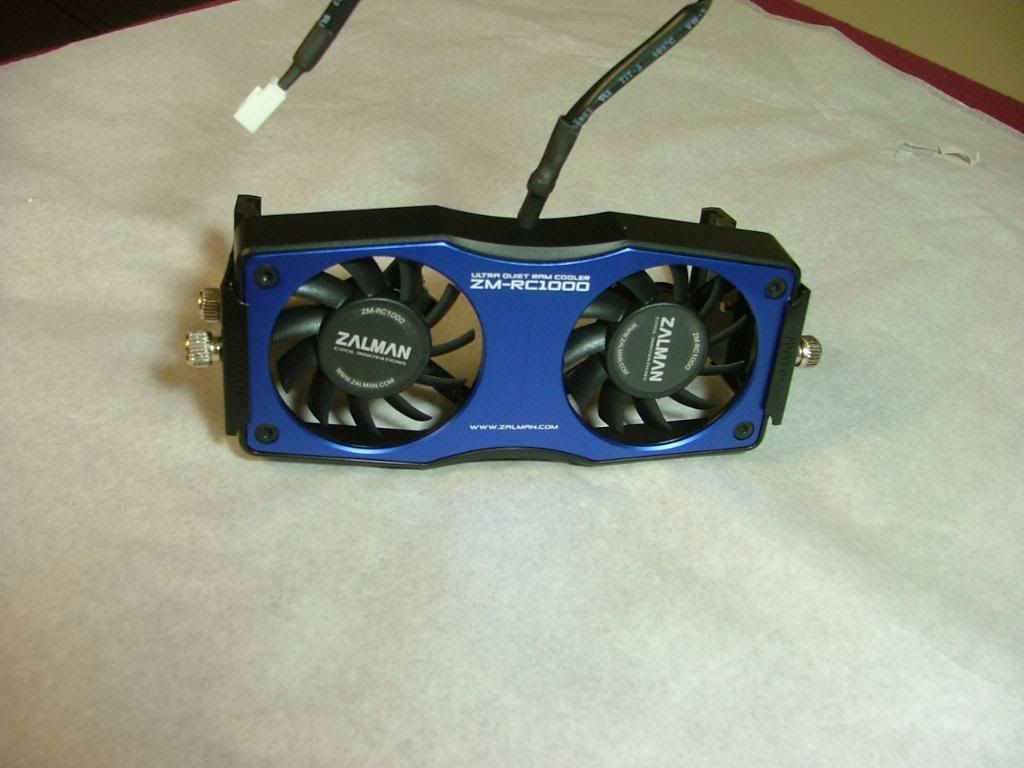
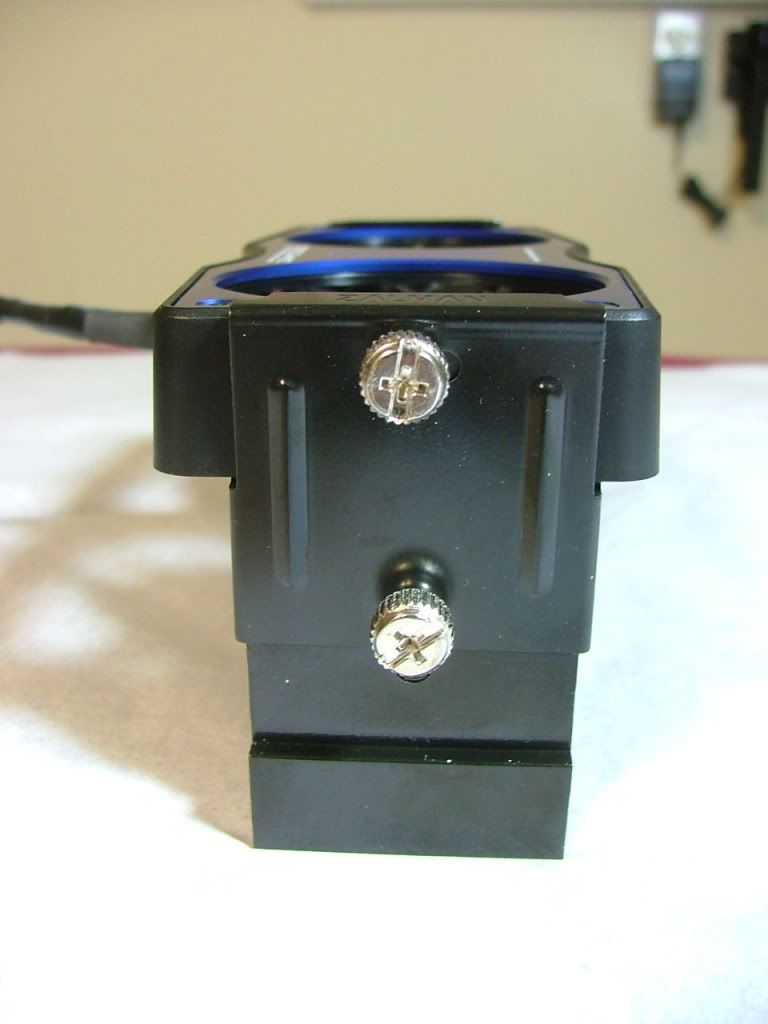
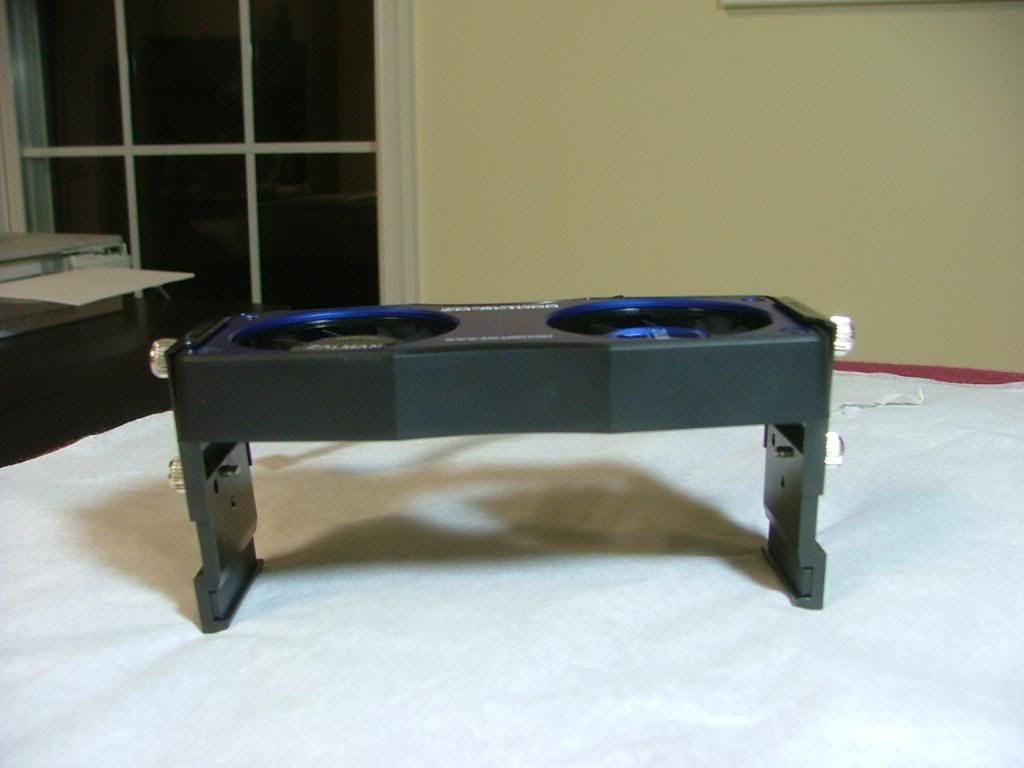
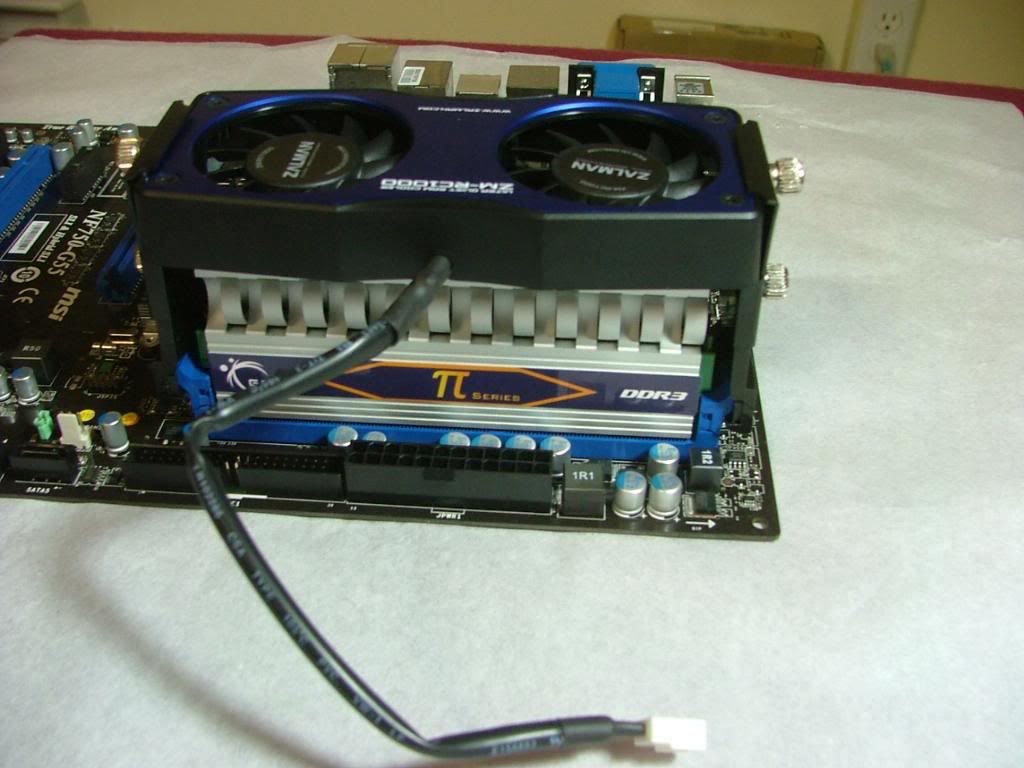
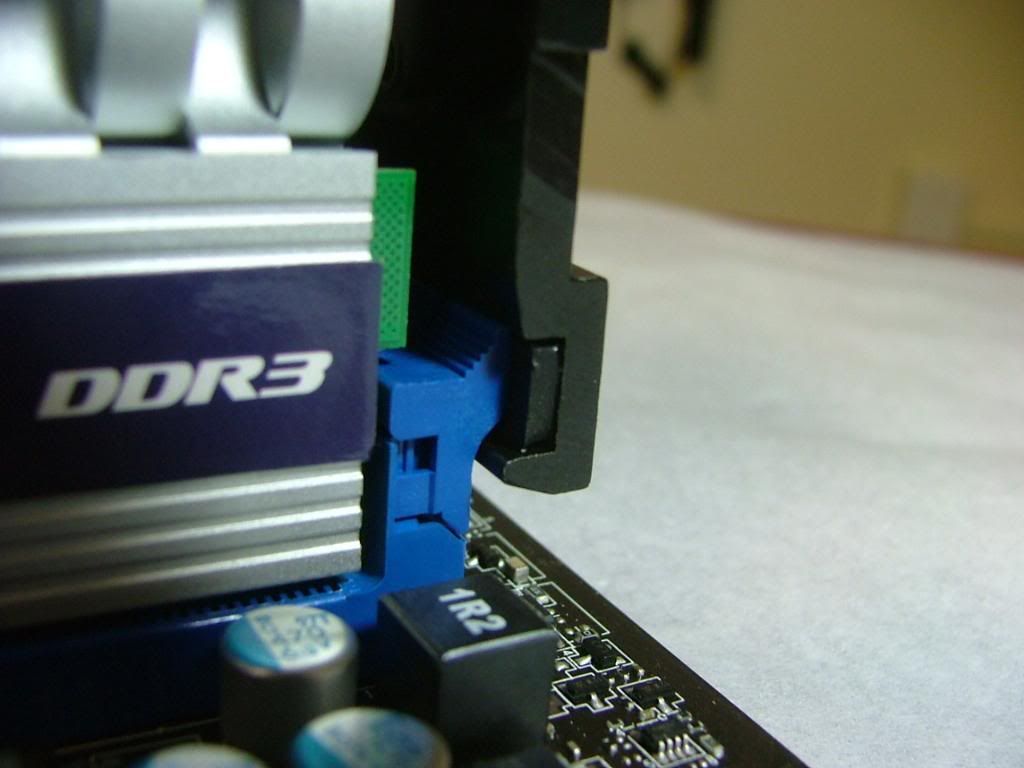
    For those of you that may have used Corsair’s memory cooler for the Dominator series this should seem familiar. However where the ones I’ve used have 3 x 40mm fans the RC1000 has 2 x 60mm. While the attachment method looks like a rehash of the Corsair design, Zalman did a few things different. Where as Corsair used two thumb screws at the top, Zalman uses just one but also has a second one that allows the height of the unit to be adjusted. The part that I really like the best about the Zalman is where it clips to the mem slot locks. They’ve put in a rubber pad to grip better.

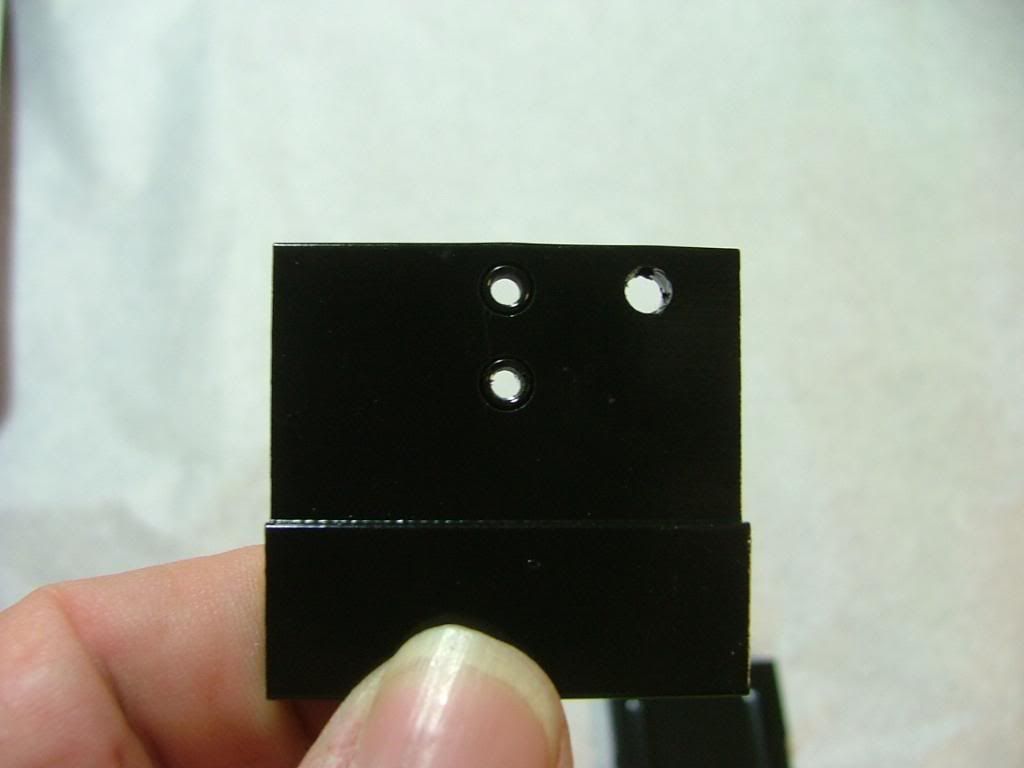
    With the attached pictures I’ll show the retail package, what come in the package, and how it went together. Note in the “leg” pic the two holes that allow one to adjust the height. One of the things I found was being careful when threading the thumb screw in as the threads tend to be filled with paint and may cross thread. I just screwed the thumb screw in first before trying to assemble it.


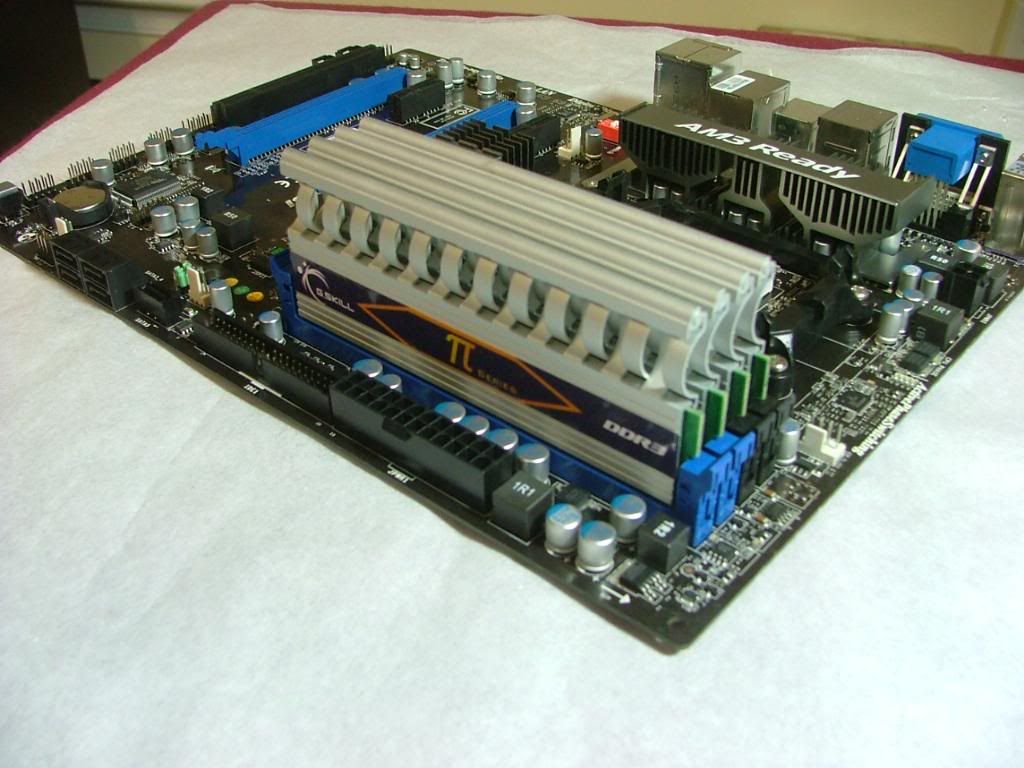
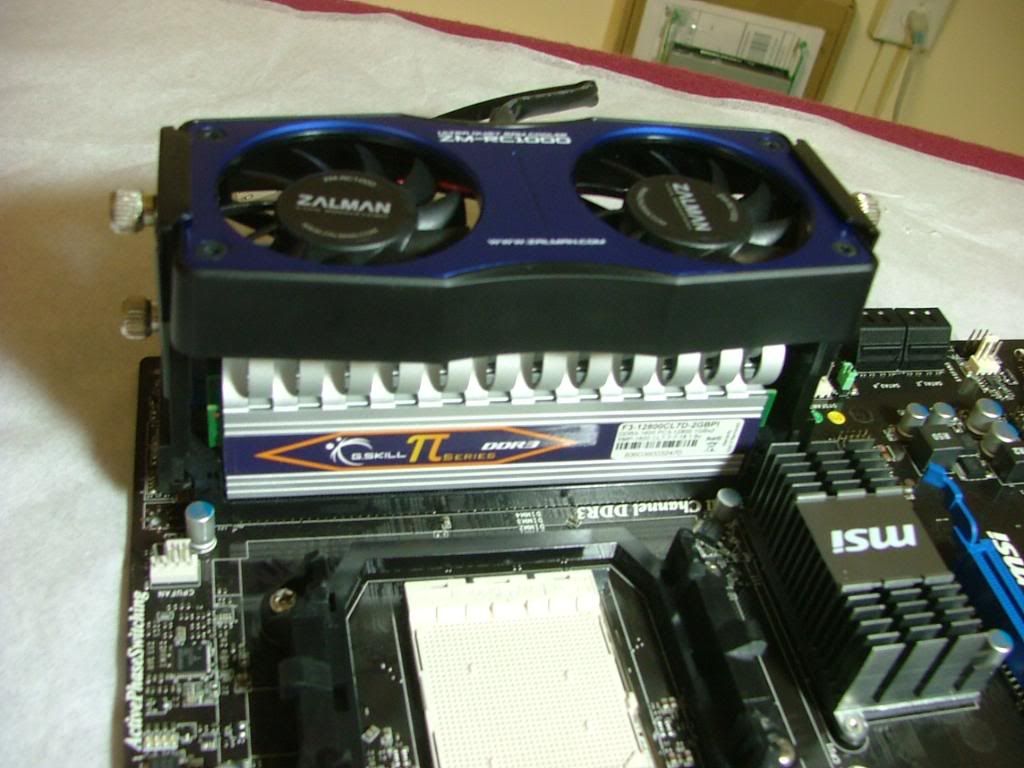
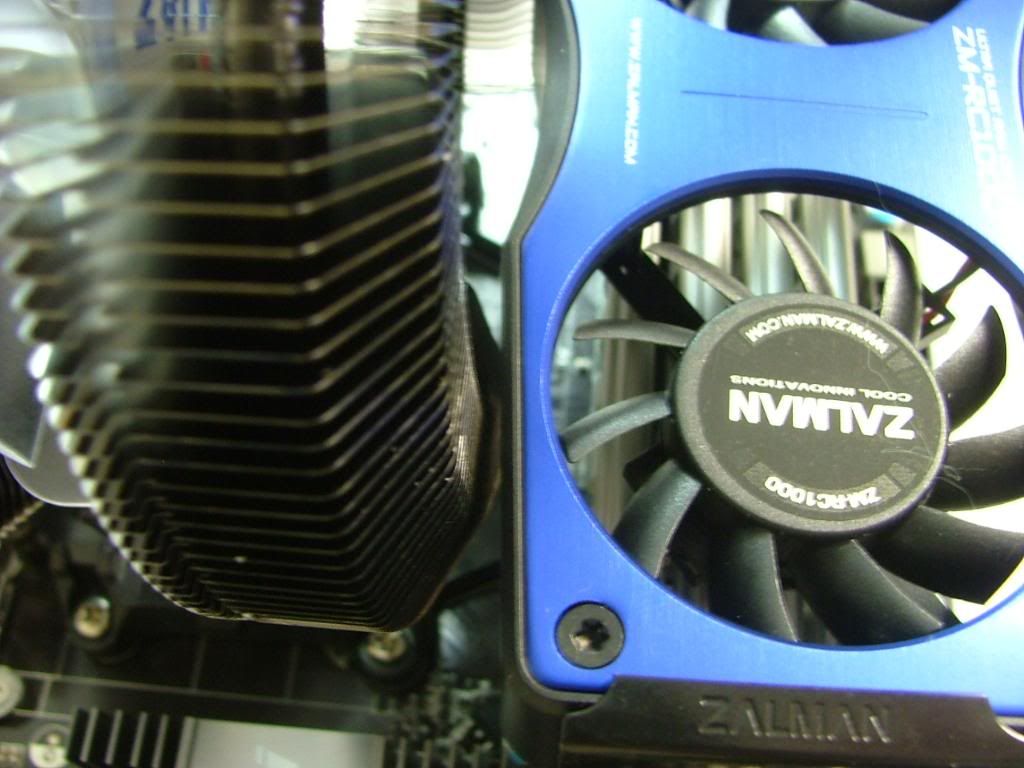
    I did some test fitting using 4 x 1GB sticks of G. Skill mounted in the MSI NF750. Then for S & Gs I just sat the CNPS9900-NT that is for the cpu to see spacing. Here is where having 60mm vs. 40mm fans come into play. When it is all said and done, it’ll be a close fit!


    If there is a drawback it would be size (wanted to use one in another build but it was too wide) and for my bling purposes I should of held out for the silver color!
    As of 04/29/11
    Celtic Spirit >> (Under Construction / WC’ed) >> Antec SX1200, MSI 890GXM-E65, PII X6 1055T, 2 x GTX 285s, HDDs (TBD), 2 x G.S. F3-12800CL7D-2GBPI, OCZ 700W Modular, XP Pro SP2
    KestrelFlight v1.0 >> (To Be WC’ed v2.0) Zalman Z7+, MSI NF980-G65, PII X4 1055T, 2 x Galaxy 580GTXs, Zalman 32GB SSD, WD V'Raptor 300GB, G.S. F3-16000CL9D-4GBTD, Zalman ZM1000-HP Plus , Win7
    Oz1a v2.0 >> XFX MDA72P7509 750a, PI X2 8870BE, 2 x XFX GTS250, WD 250GB, F2-8500CL5D-2GBPK, Tt TR2 600W, XP Pro SP3

  4. #4
    Xtreme Enthusiast
    Join Date
    Mar 2006
    Location
    Central VA, USA
    Posts
    731
    As my "user's review" is not of the quality of Asmola's 3000A (http://www.xtremesystems.org/forums/...d.php?t=252982) review, I'll just use it as part of my worklog. After all it is going into this system!

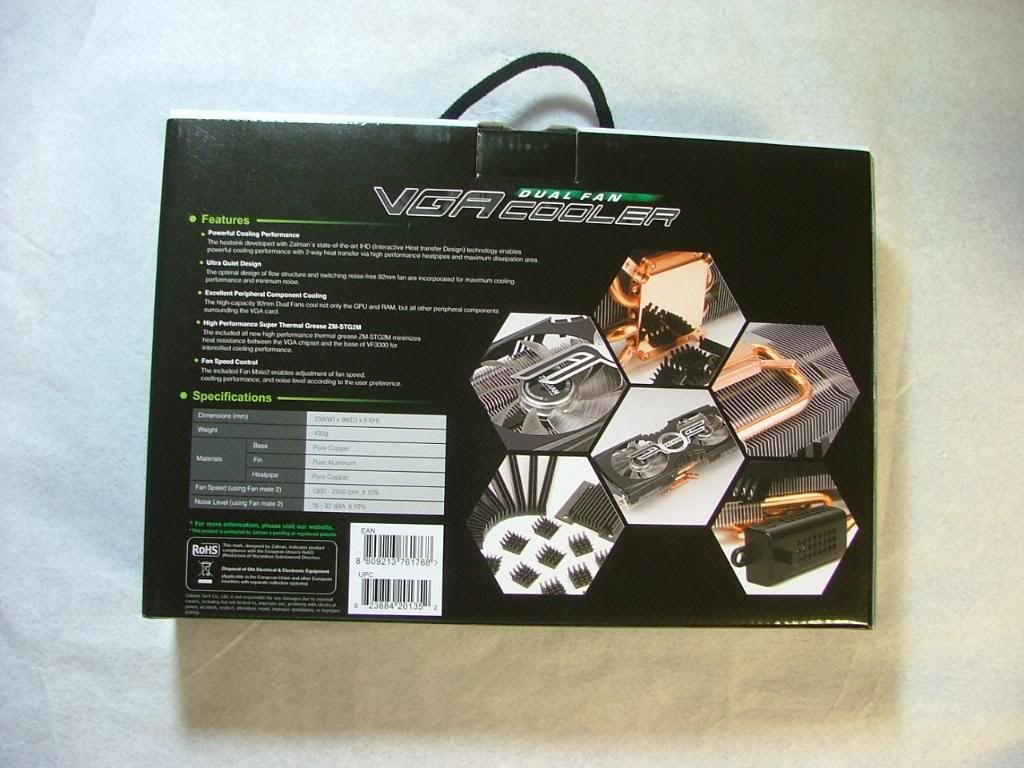
    From the first time I saw a picture of this cooler (it was the ATI red version) I thought that it was one neat looking cooler and had my fingers crossed that it would come out for nvidia!!! I wanted so badly to use it with my XFX GTX 260 BE….my how things change for me. I finally managed to pick one up but it will not go on the 260, instead it was headed for a XFX GTX 285.

    I’m an admitted Zalman fanboy when it comes to their “flower” style CPU coolers as I’ve only been doing mATX builds for the last 8 or so years. This will be my first venture into GPU cooling since I did an ATI 9800 Pro.

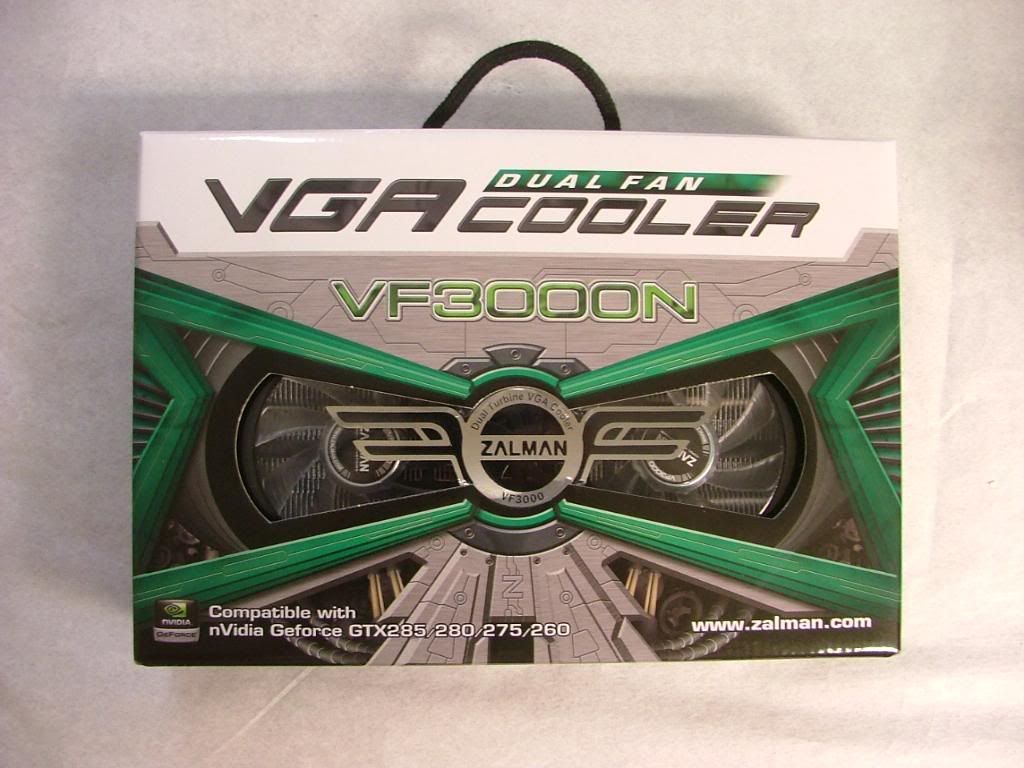
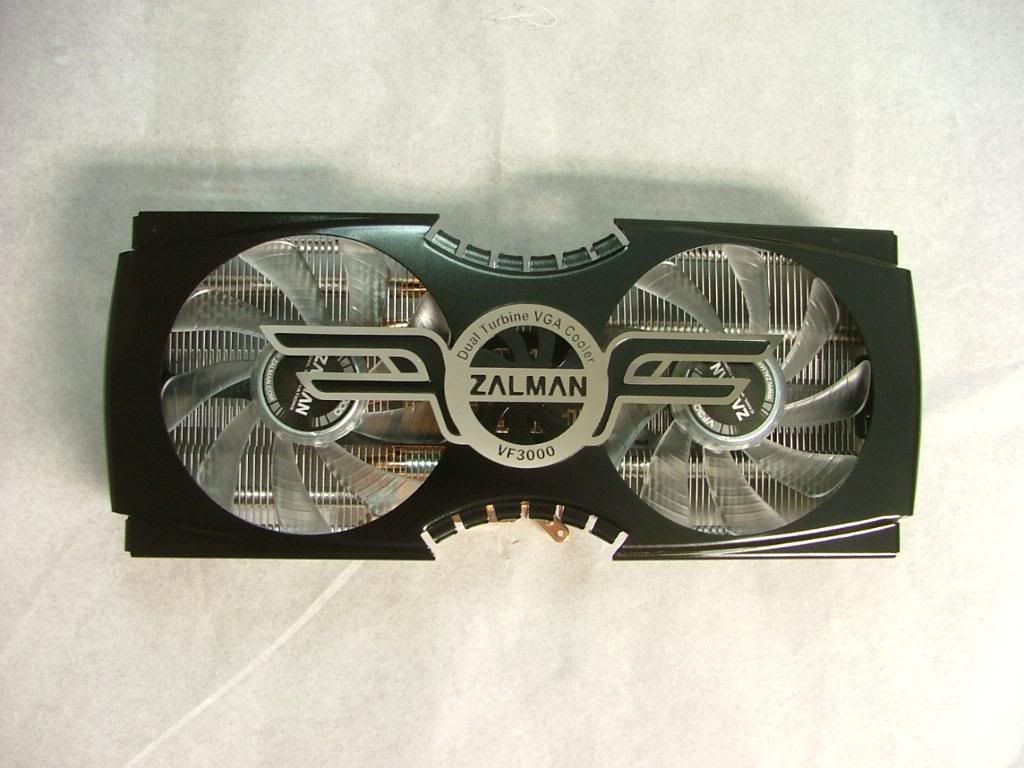
    When I opened the shipping box I was greeted with what I consider one of the “sexiest” looking product boxes. I know, but that is what happens when you’re an old fart……..here you have it front and back.


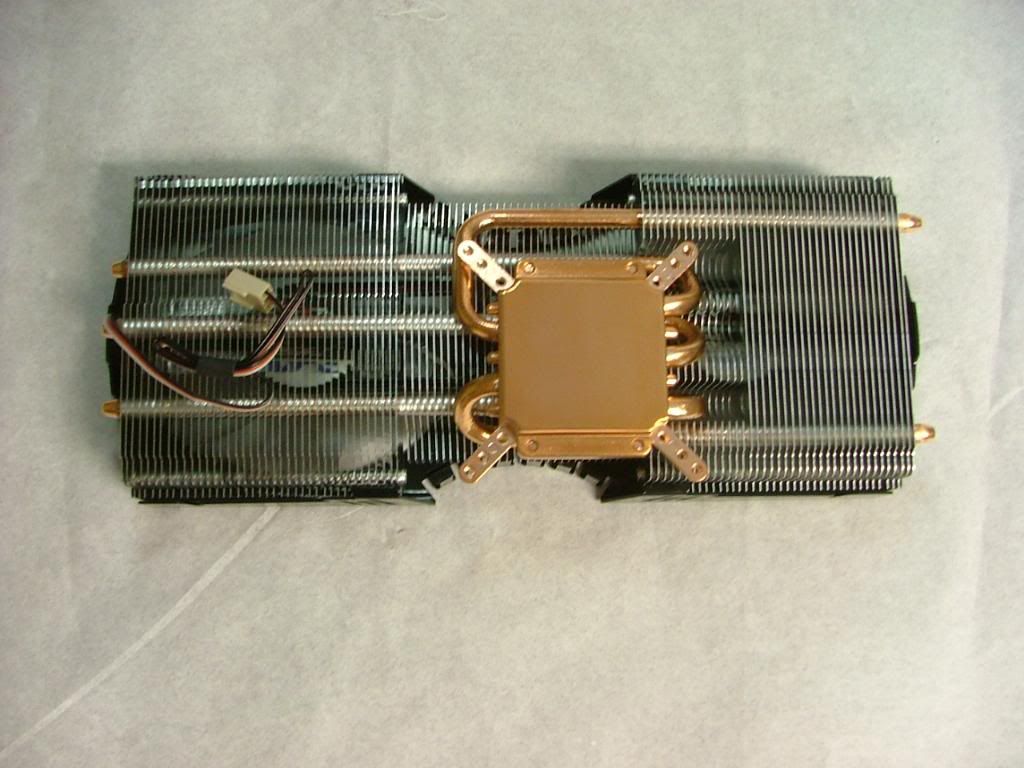
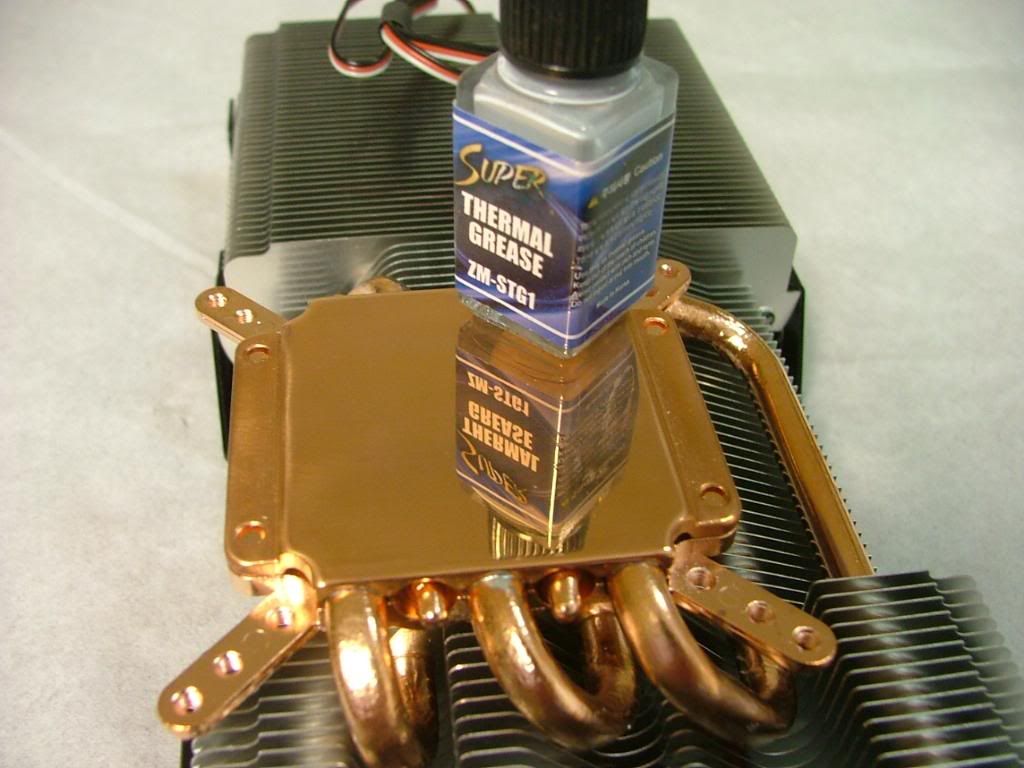
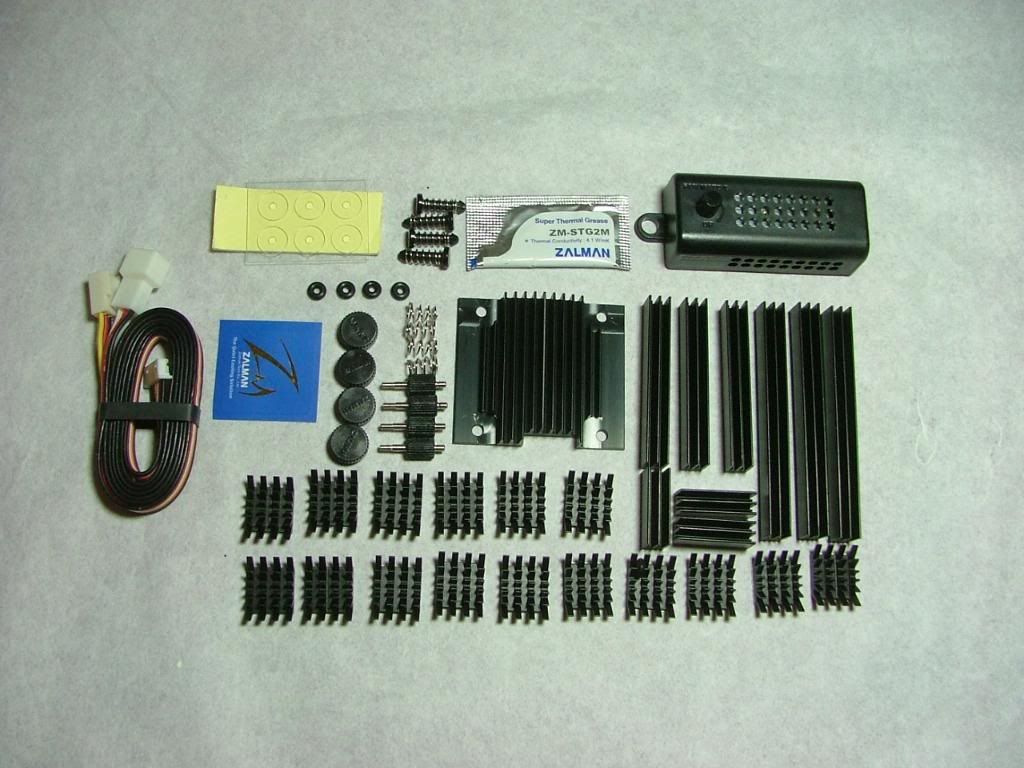
    When I removed the unit from the box it was held in their usual vac formed style container to protect the fins and base. Also included was a stuffed goodie bag and manual. Here we have some pix of the unit and what comes in the goodie bag. After this I’ll go into mounting the hardware, my thoughts of the assembly and some very “rough” comparison testing.


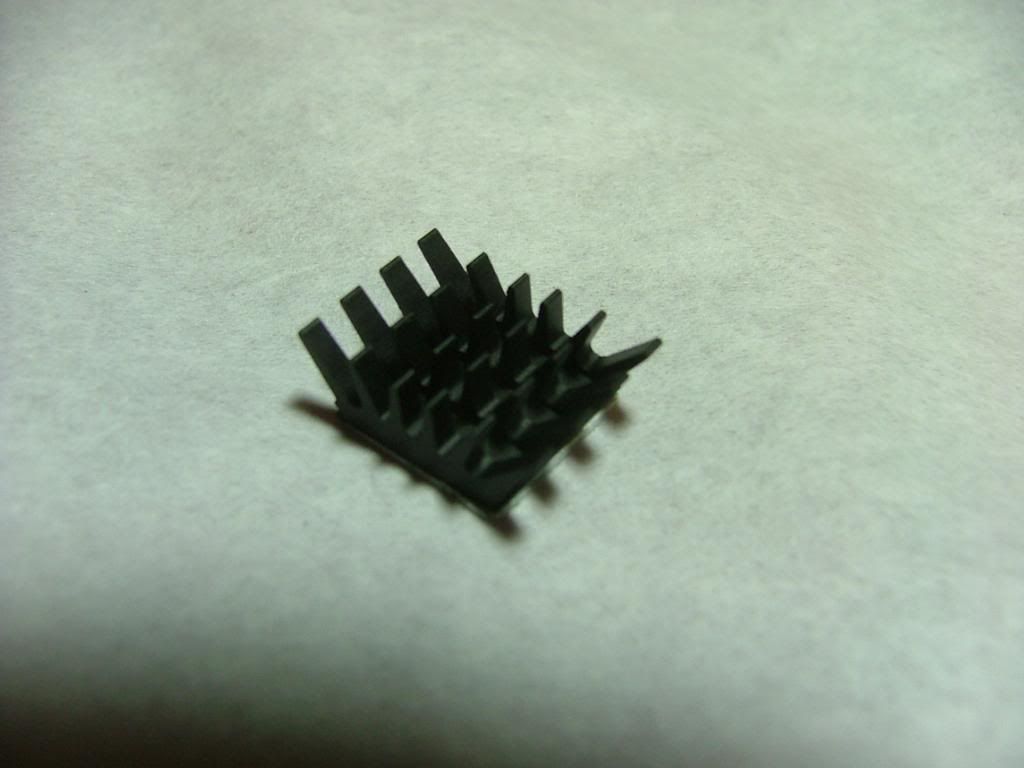
    As shown the goodie bag contained all of the mounting hardware and heat sinks. As a side note for those ATI guys, what you see in black is in red for you guys.

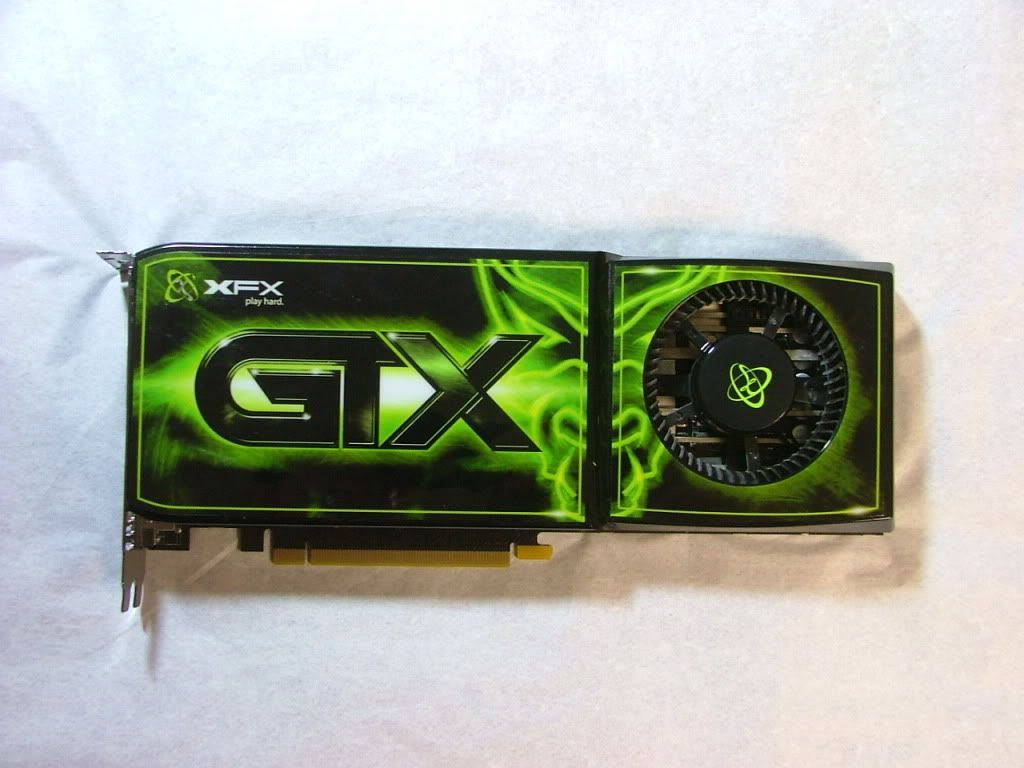
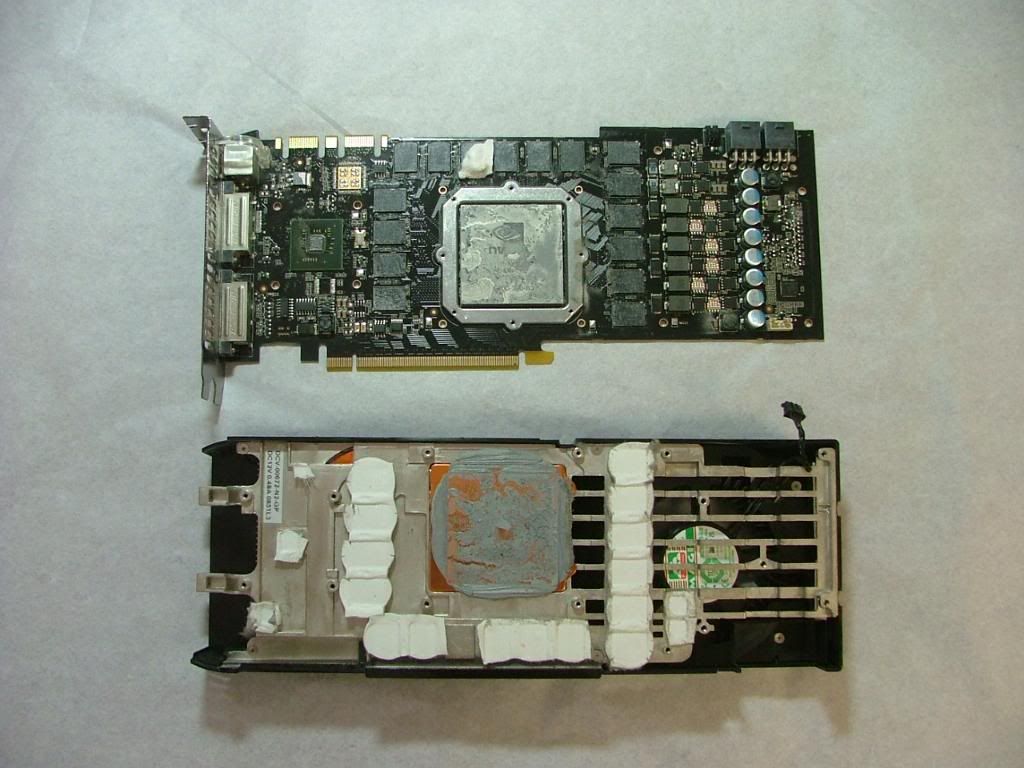
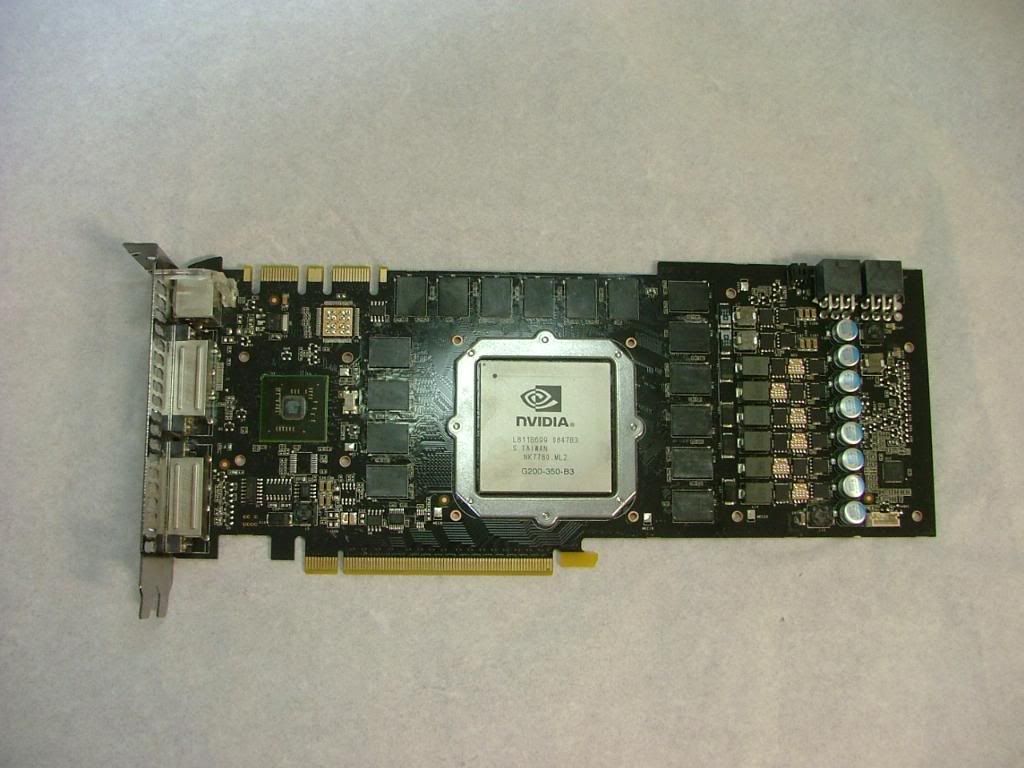
    Here is the victim, what it looked like when the cooler was pull off, and what appears to be a clean and ready necked 285.


    I initially laid out all of the sinks to see if yes there were enough and if yes they fit as shown in the manual. With exception of the NVIO Chipset sink all memory and FET sinks are mounted with thermal tape. The NVIO is mounted with push pins and a little dab of TM.

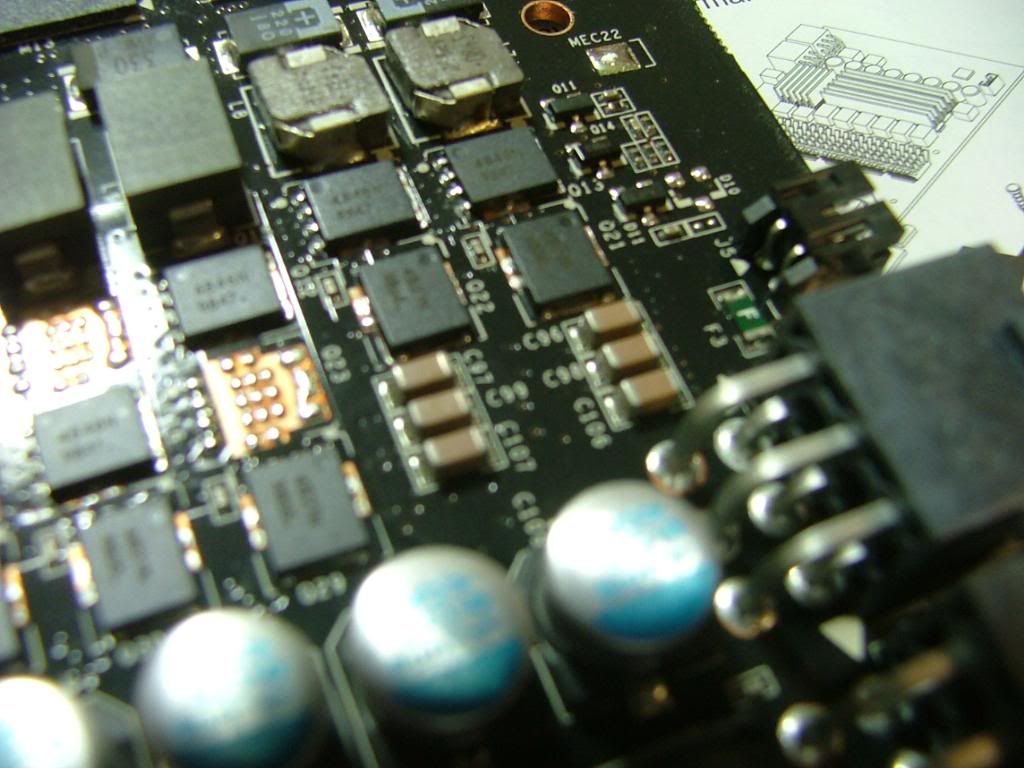
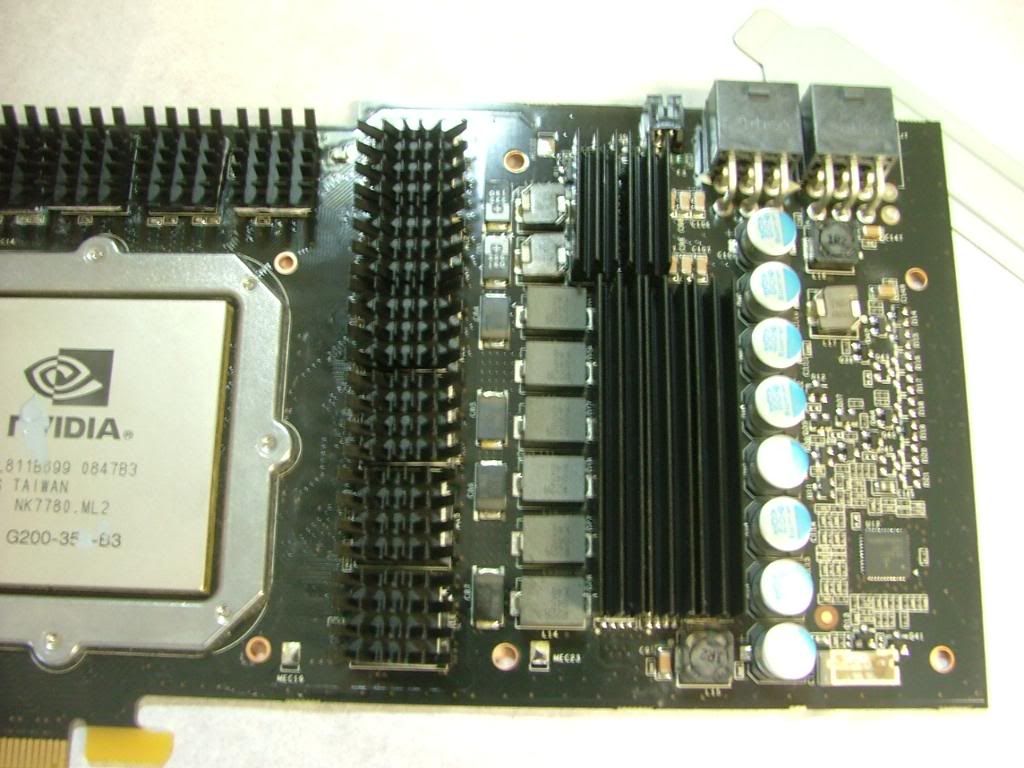
    Good thing for test fitting as there was one small area that required a change……a couple of the FET sink would not go as shown. Zalman provides three different lengths to aid in the universal fit mentality. Where the difference lay was the two pairs of FETs shown to the upper middle of the pic.


    The manual shows these two of the short lengths running parallel with the top edge of the card. However what appear to be two banks of three resistors does not let this happen as they are taller. So plop, plop, fizz, fizz (showing my age here) the sinks were turned 90 degrees.


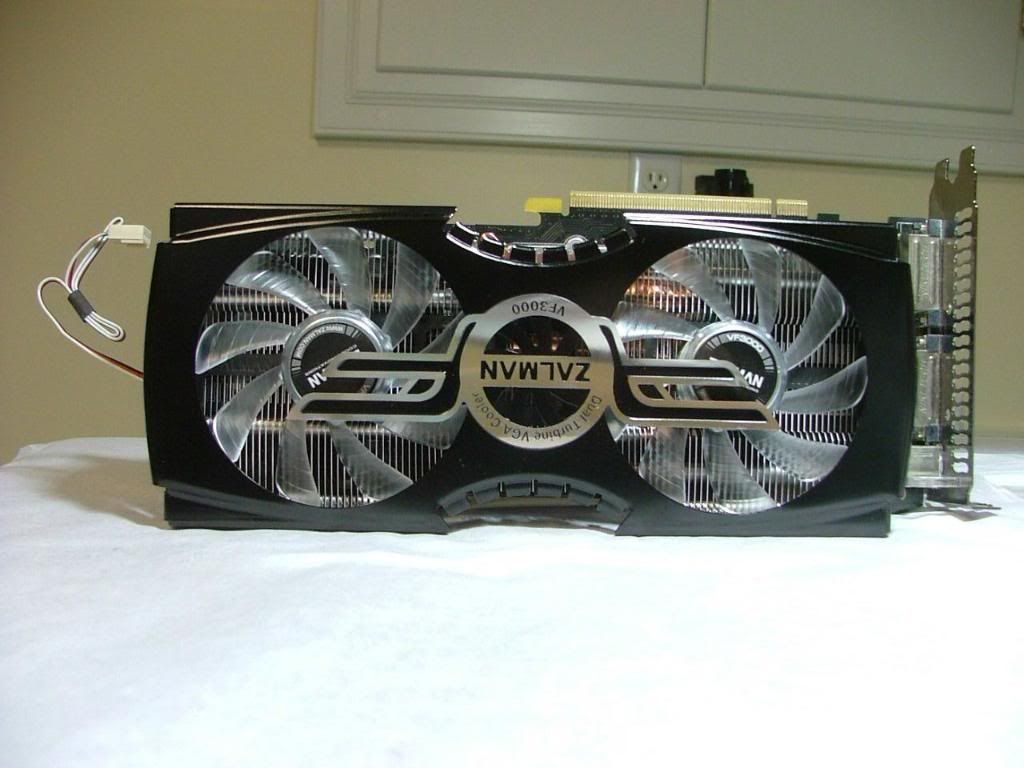
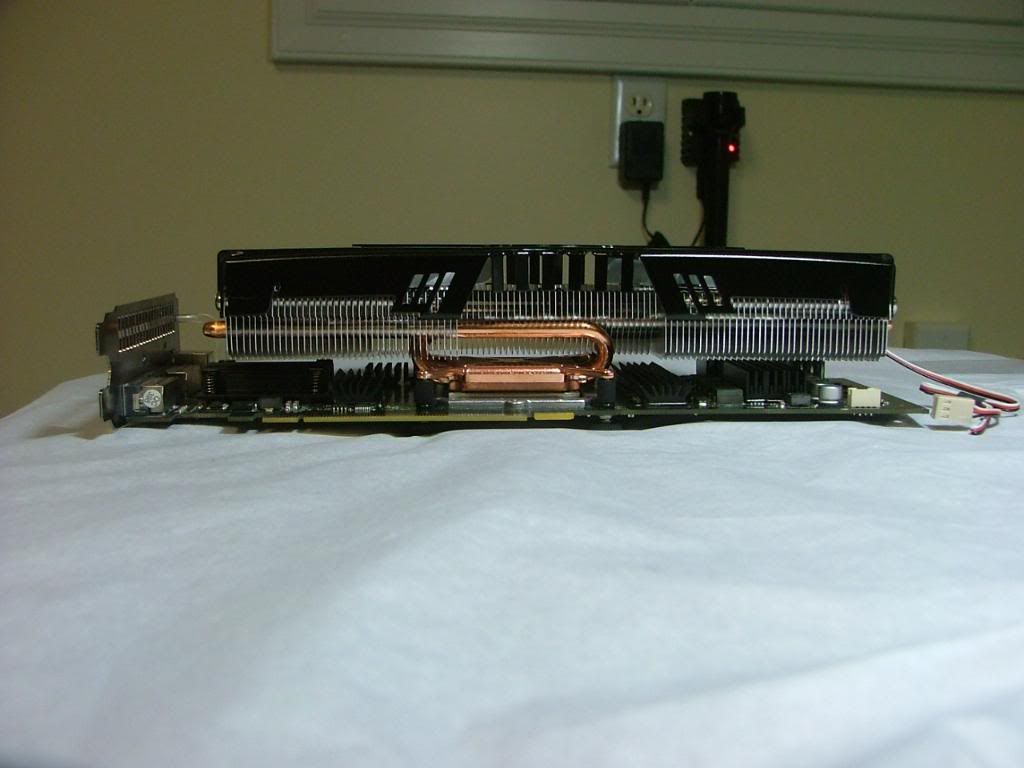
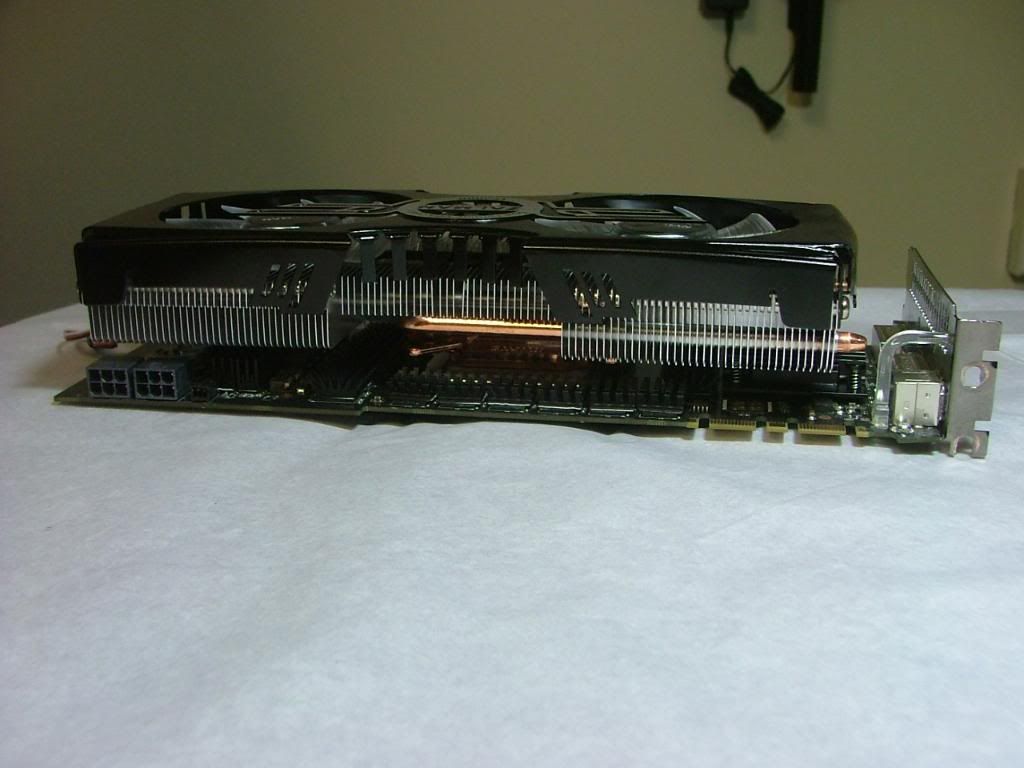
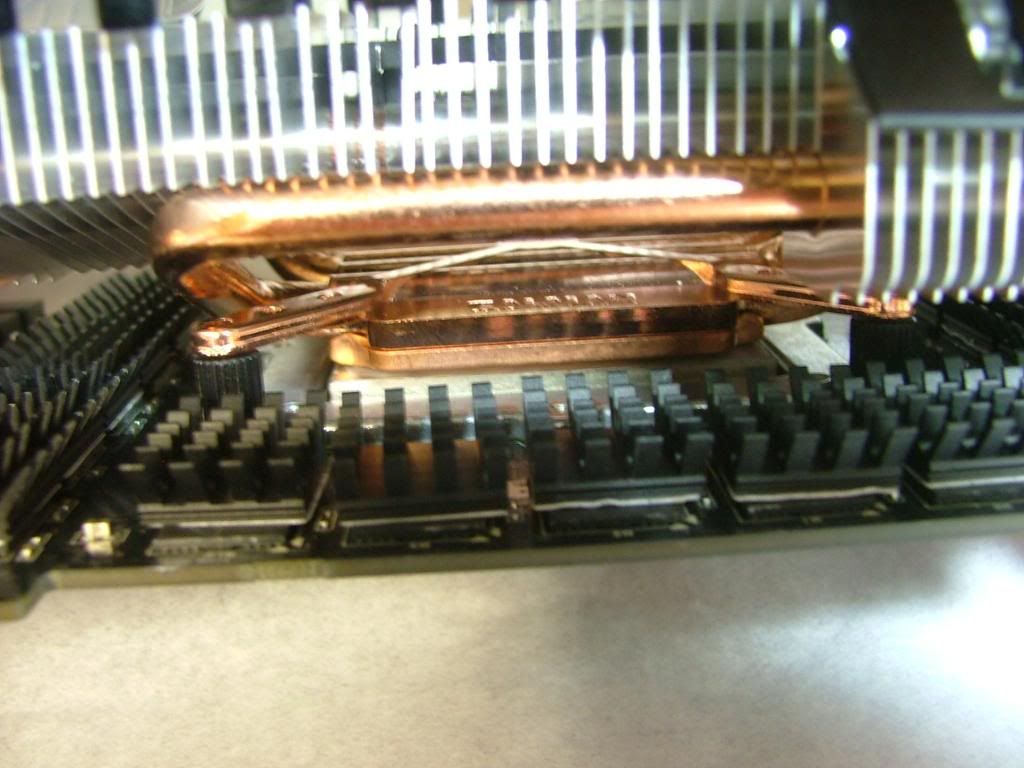
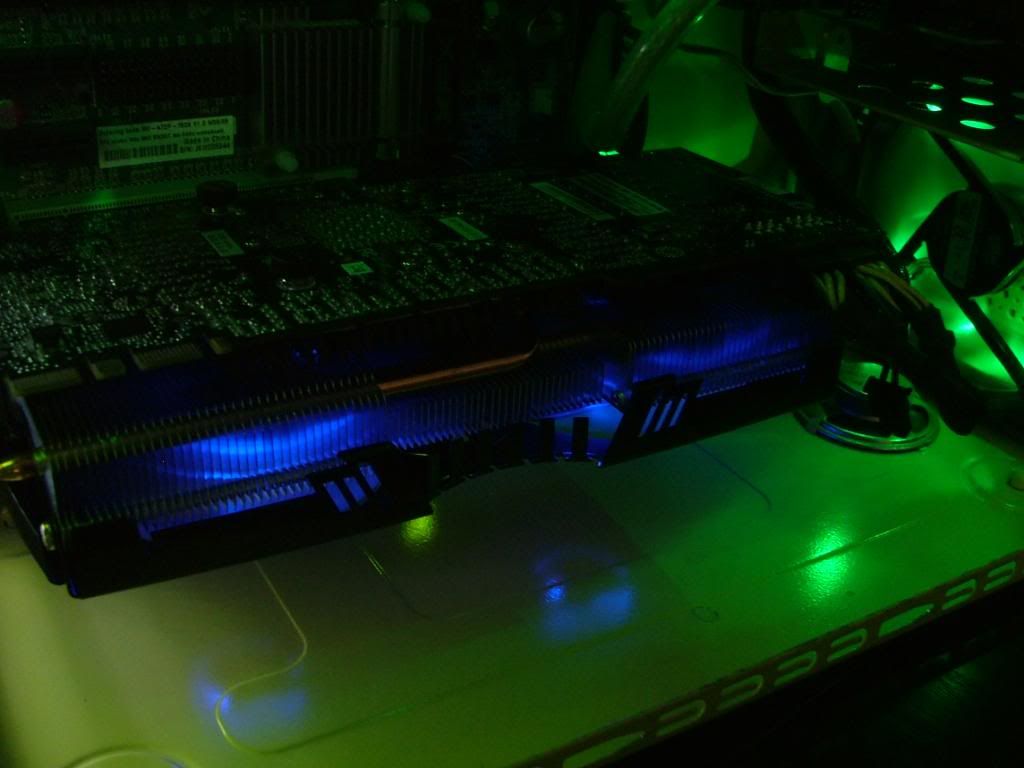
    Here we have the sinks in place ready to have the cooler installed, then the cooler in place showing the top (albeit upside down LOL), bottom, and top of the assembly. Then you see a close up of the bottom showing memory sinks and the base….more on that after the pictures.


    Mounting the cooler itself is fairly straight forward as shown in the manual. Sorry but I didn’t take any pictures of this phase. While an easy assembly, here is where I ran into my most frustrating part. When placing the cooler onto the GPU be very careful of how you grip the graphics card. My fat fingers kept pushing the mem sinks loose and remember when I said earlier that the card appeared clean? It seems that after loosening the sinks the whole bottom row (close up pic above) would not stick. I must have replaced the thermal tape at least 4 times and tried cleaning the memory the same amount. I was finally able to get them to stick long enough to let them “cook” in place.

    Let me make a suggestion……….borrow the wife’s hairdryer and hit the thermal tape with high heat while the GPU is lying flat and you’re able to confirm adherence.

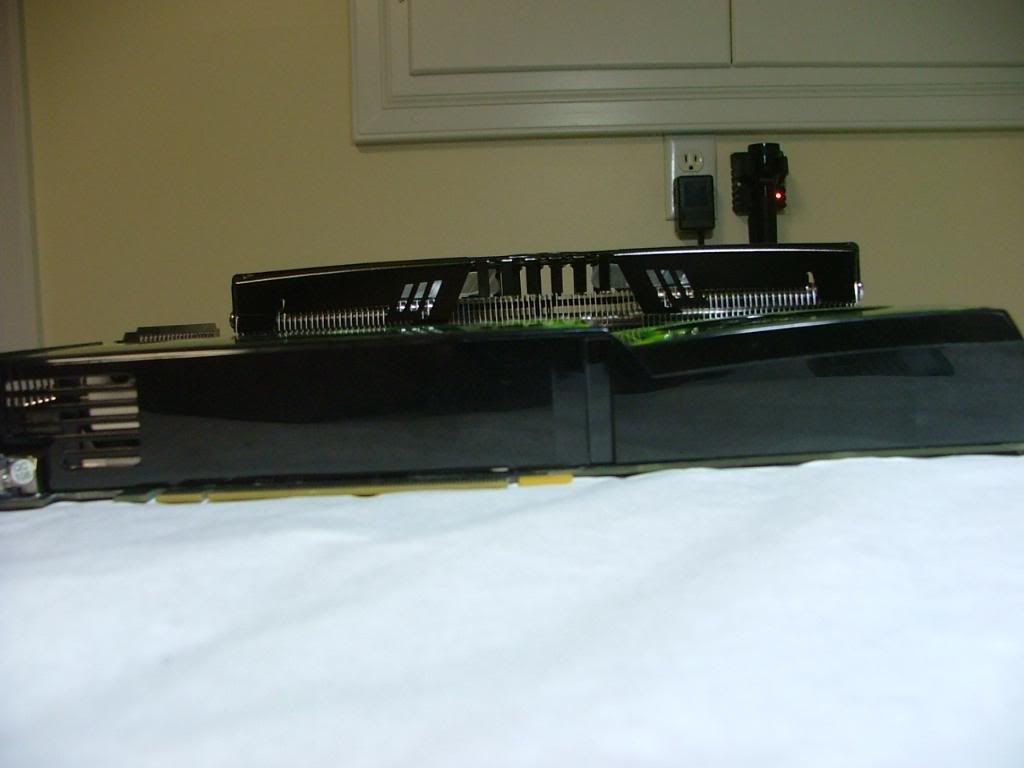
    After getting this assembly together something became very obvious, the VF3000 series cooler (yes one is coming out for the 470 / 480) makes the vid card a 2 - 1/2 slot solution. Here you have a stock 285 with the Zalman cooled unit behind.


    This is something I had not expected and if I indeed decide to go SLI with my next build I better not want to add anything else to the mobo!!!

    For testing efficiency I was very barbaric in methodology as my resources right now are scattered across the floor and in boxes. All builds are mATX with the exception of Oz1a and would NOT give a fair chance to the Zalman cooled unit as one needs space and a lot of air movement for this style of cooler.

    So I first stuffed the stock config into the bottom slot of Oz1a’s XFX 750a and let it fold. I watched temps using HWMon, GPUz, and Evga’s Precision. And made an interesting observation…….the stock cooler was quite efficient!! Under the same conditions as the 250GTS cards in Oz1a it ran cooler. Which didn’t bode well for the Zalman…….in certain situations it actually seemed the stock cooler ran cooler as it was sending the heat out the rear and the VF3000 was recirculation the heat.


    In the poor ventilation and air movement of Oz1a’s 10 year old case they were pretty much “tied” as far as how well the card was kept cool. The VF3000 just did it more quietly. Sooooooooooo…………

    What I liked:

    1. Bling factor (including the typical Zalman blue leds)
    2. Quietness
    3. Workmanship

    What I didn’t like

    1. Extra “thickness” – 2 ˝ slots
    2. Wasn’t all that much more efficient than stock cooling
    3. Did I mention size??

    However the final verdict will be made when it makes it into the Zalman Z7 Plus case with its four 120mm fans, more interior space, and cooling intakes.
    Last edited by jedihobbit; 06-29-2010 at 07:52 PM.
    As of 04/29/11
    Celtic Spirit >> (Under Construction / WC’ed) >> Antec SX1200, MSI 890GXM-E65, PII X6 1055T, 2 x GTX 285s, HDDs (TBD), 2 x G.S. F3-12800CL7D-2GBPI, OCZ 700W Modular, XP Pro SP2
    KestrelFlight v1.0 >> (To Be WC’ed v2.0) Zalman Z7+, MSI NF980-G65, PII X4 1055T, 2 x Galaxy 580GTXs, Zalman 32GB SSD, WD V'Raptor 300GB, G.S. F3-16000CL9D-4GBTD, Zalman ZM1000-HP Plus , Win7
    Oz1a v2.0 >> XFX MDA72P7509 750a, PI X2 8870BE, 2 x XFX GTS250, WD 250GB, F2-8500CL5D-2GBPK, Tt TR2 600W, XP Pro SP3

  5. #5
    Xtreme Enthusiast
    Join Date
    Mar 2006
    Location
    Central VA, USA
    Posts
    731
    Think I may have come up with the name for this system….. “Death Wish”!!

    Couldn’t find the steel wool I wanted to use on the chassis, but did find one of those “sponge sanding blocks” that did almost as well. There are so many nooks, crannies, and whatnot that it won’t be perfect and the one thing I don’t have that would let me be my nic has taken over!!! “God grant me patience NOW!!!”

    Anyway started priming some of the parts but ran out of daylight and primer.

    Now on to why this should be named Death Wish………remember the original specs??? I was just supposed to lift the contents of an existing computer and just re-box it. As a reminder >>

    CASE: Zalman Z7 Plus
    PSU: TBD until something by Zalman can be acquired
    MOBO: MSI NF750-G55 (was supposed to be the MSI 785GM-E65)
    CPU: PII X4 955 BE
    HSF: Zalman CNPS9900-NT
    GPU: XFX GTX 285 w/ Zalman VF3000N
    MEMORY: TBD w/ Zalman ZM-RC1000 (was to use F3-12800CL7D-2GBPI)
    HDD 1: 2 x WD Raptor 74GB (Primary RAID1)
    HDD 2: 2 x TBD(RAID0)
    Optical Drive 1: TBD
    Fan Controller: Zalman ZM-MFC3

    Well that has changed a bit…………..the final two items arrived today!


    Good night, hope I live long enough to build this!
    As of 04/29/11
    Celtic Spirit >> (Under Construction / WC’ed) >> Antec SX1200, MSI 890GXM-E65, PII X6 1055T, 2 x GTX 285s, HDDs (TBD), 2 x G.S. F3-12800CL7D-2GBPI, OCZ 700W Modular, XP Pro SP2
    KestrelFlight v1.0 >> (To Be WC’ed v2.0) Zalman Z7+, MSI NF980-G65, PII X4 1055T, 2 x Galaxy 580GTXs, Zalman 32GB SSD, WD V'Raptor 300GB, G.S. F3-16000CL9D-4GBTD, Zalman ZM1000-HP Plus , Win7
    Oz1a v2.0 >> XFX MDA72P7509 750a, PI X2 8870BE, 2 x XFX GTS250, WD 250GB, F2-8500CL5D-2GBPK, Tt TR2 600W, XP Pro SP3

  6. #6
    Xtreme Enthusiast
    Join Date
    Mar 2006
    Location
    Central VA, USA
    Posts
    731
    Managed to sand down most of the parts yesterday, re-prime, and get almost a full coat of paint on everything. Finished up one can and grabbed the second on and .........nothing. Had a brand new can of spray paint without any air.


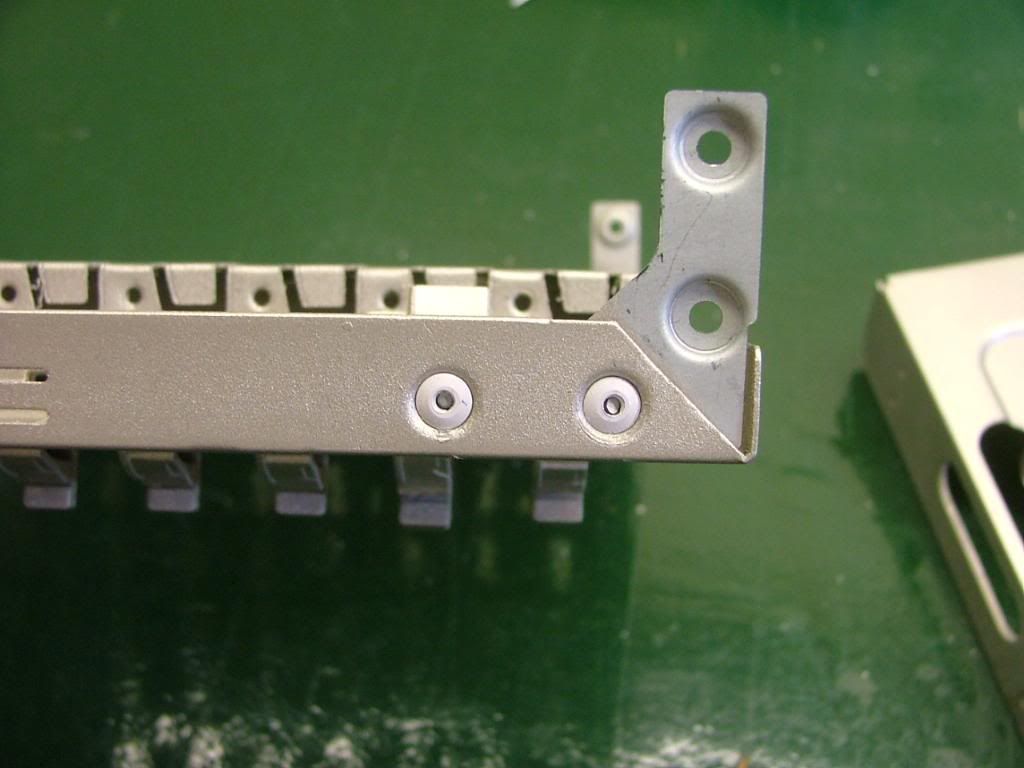
    SO swapped it out at the store on the way home from work and finished it up. Now comes a decision before riveting back together, this is a "satin" finish so need to figure out if I want to clear coat it for protection and gloss or not. Also turns out the darn rivits are white not natual as I thought.
    As of 04/29/11
    Celtic Spirit >> (Under Construction / WC’ed) >> Antec SX1200, MSI 890GXM-E65, PII X6 1055T, 2 x GTX 285s, HDDs (TBD), 2 x G.S. F3-12800CL7D-2GBPI, OCZ 700W Modular, XP Pro SP2
    KestrelFlight v1.0 >> (To Be WC’ed v2.0) Zalman Z7+, MSI NF980-G65, PII X4 1055T, 2 x Galaxy 580GTXs, Zalman 32GB SSD, WD V'Raptor 300GB, G.S. F3-16000CL9D-4GBTD, Zalman ZM1000-HP Plus , Win7
    Oz1a v2.0 >> XFX MDA72P7509 750a, PI X2 8870BE, 2 x XFX GTS250, WD 250GB, F2-8500CL5D-2GBPK, Tt TR2 600W, XP Pro SP3

  7. #7
    Xtreme Enthusiast
    Join Date
    Mar 2006
    Location
    Central VA, USA
    Posts
    731
    Now that I’ve gotten DC AM3 to run on to trying to get this together!! First we have the pieces of the puzzle and the start are I did a bracket I didn’t have to remove. Guess the white rivet heads won’t be too bad. Have to wait to see what it looks like on the rear.


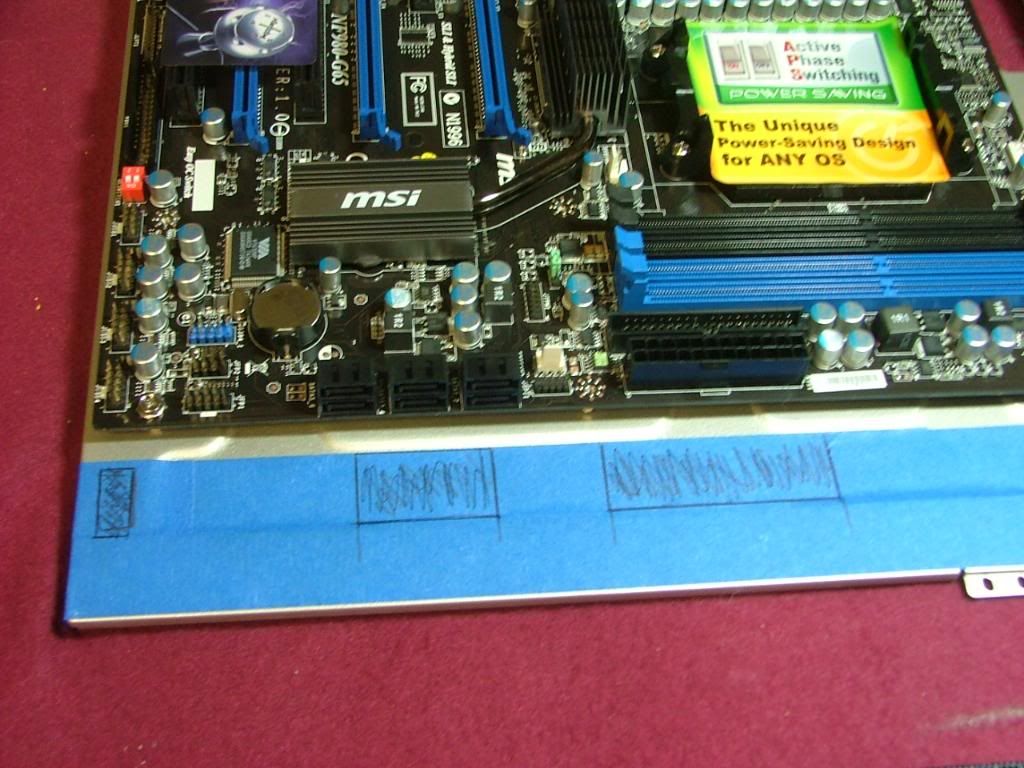
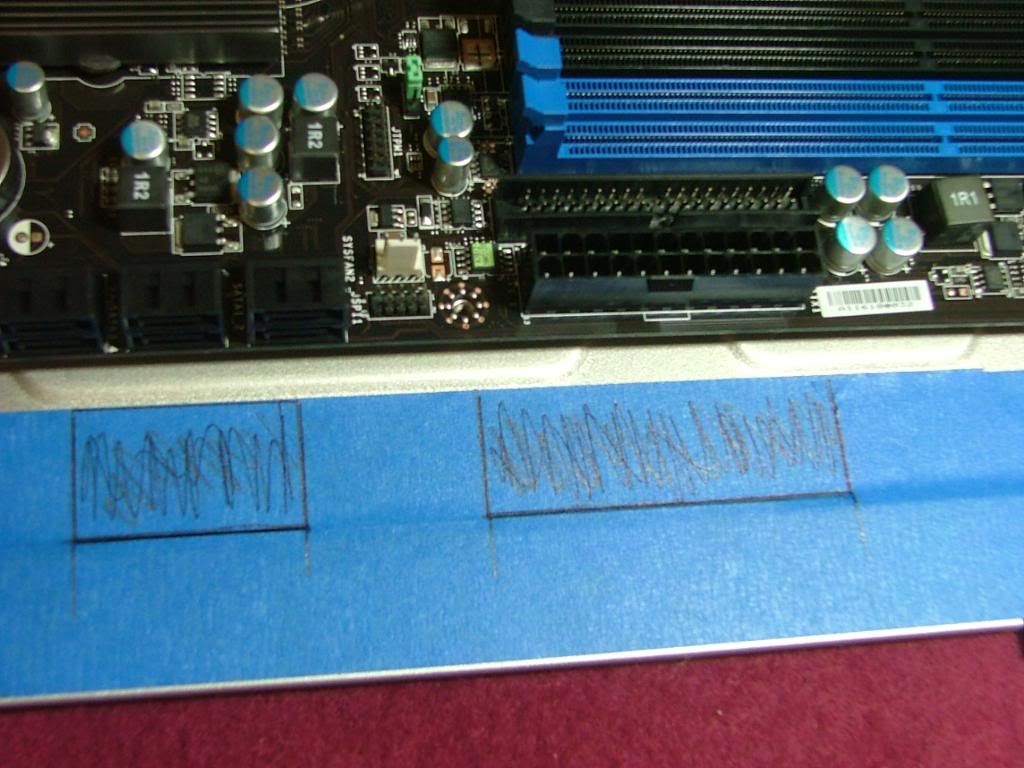
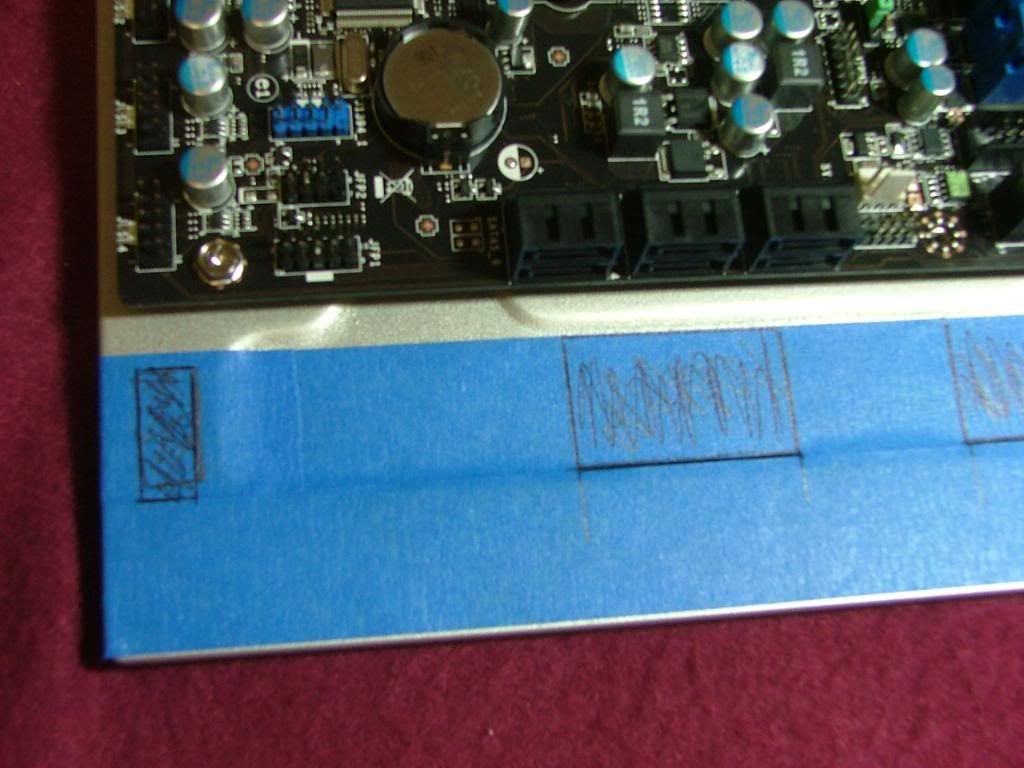
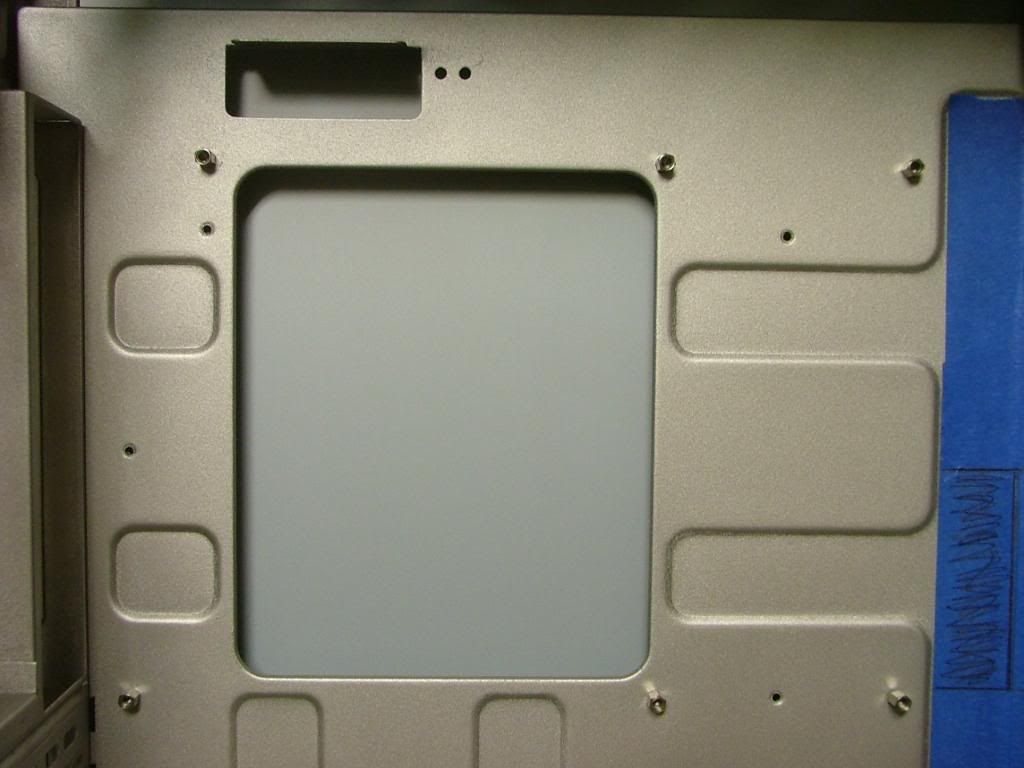
    Then remembered something I wanted to look at. In the world of cable management several of the big guns have been putting cutouts on the mobo plate to allow the cables and wires to be hidden behind it. So thought I’d get an idea of what I might want to do.


    What do you think??

    Now it is time to take a break and feed myself and the two assistants before starting the riveting!
    As of 04/29/11
    Celtic Spirit >> (Under Construction / WC’ed) >> Antec SX1200, MSI 890GXM-E65, PII X6 1055T, 2 x GTX 285s, HDDs (TBD), 2 x G.S. F3-12800CL7D-2GBPI, OCZ 700W Modular, XP Pro SP2
    KestrelFlight v1.0 >> (To Be WC’ed v2.0) Zalman Z7+, MSI NF980-G65, PII X4 1055T, 2 x Galaxy 580GTXs, Zalman 32GB SSD, WD V'Raptor 300GB, G.S. F3-16000CL9D-4GBTD, Zalman ZM1000-HP Plus , Win7
    Oz1a v2.0 >> XFX MDA72P7509 750a, PI X2 8870BE, 2 x XFX GTS250, WD 250GB, F2-8500CL5D-2GBPK, Tt TR2 600W, XP Pro SP3

  8. #8
    Xtreme Enthusiast
    Join Date
    Mar 2006
    Location
    Central VA, USA
    Posts
    731
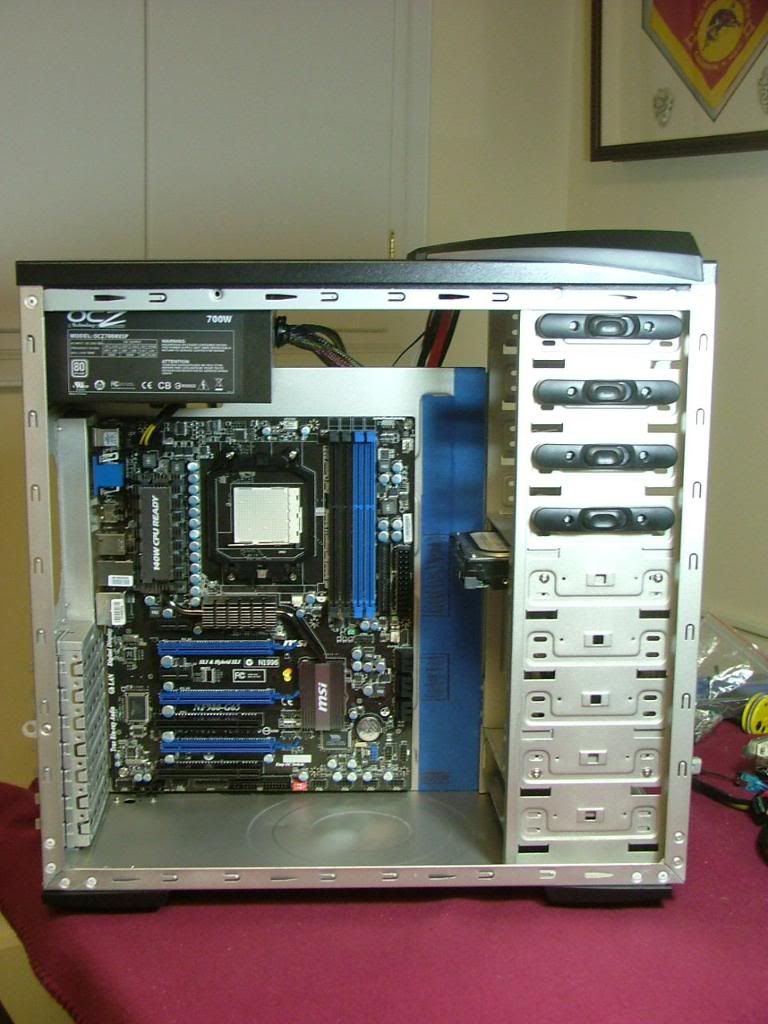
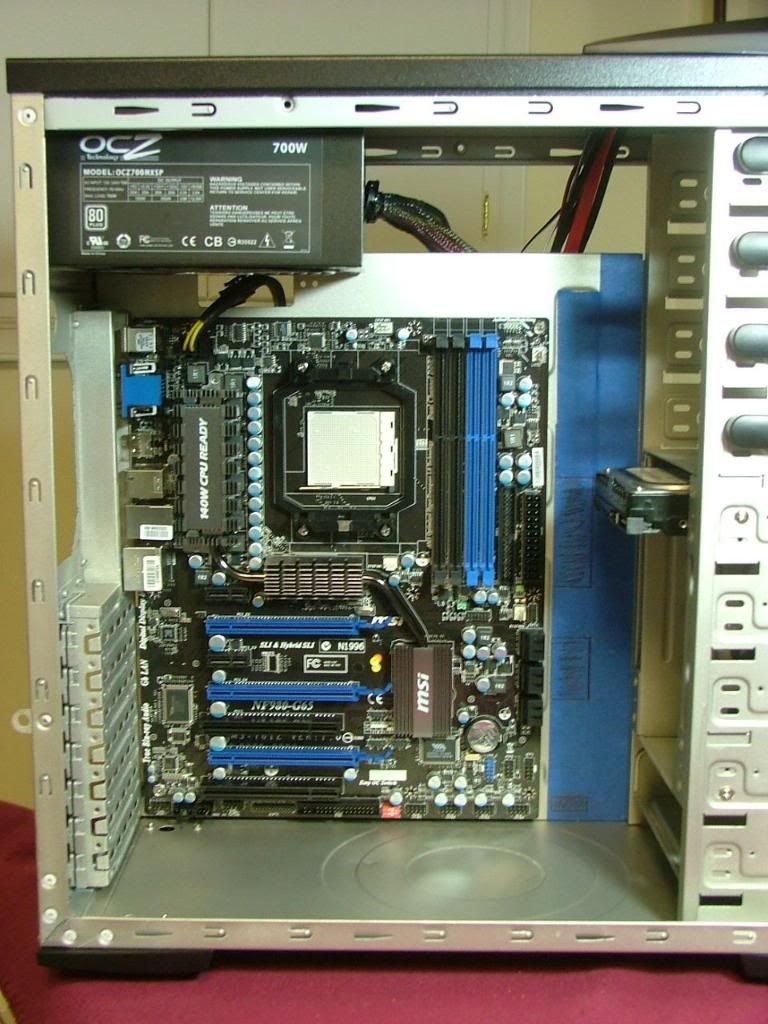
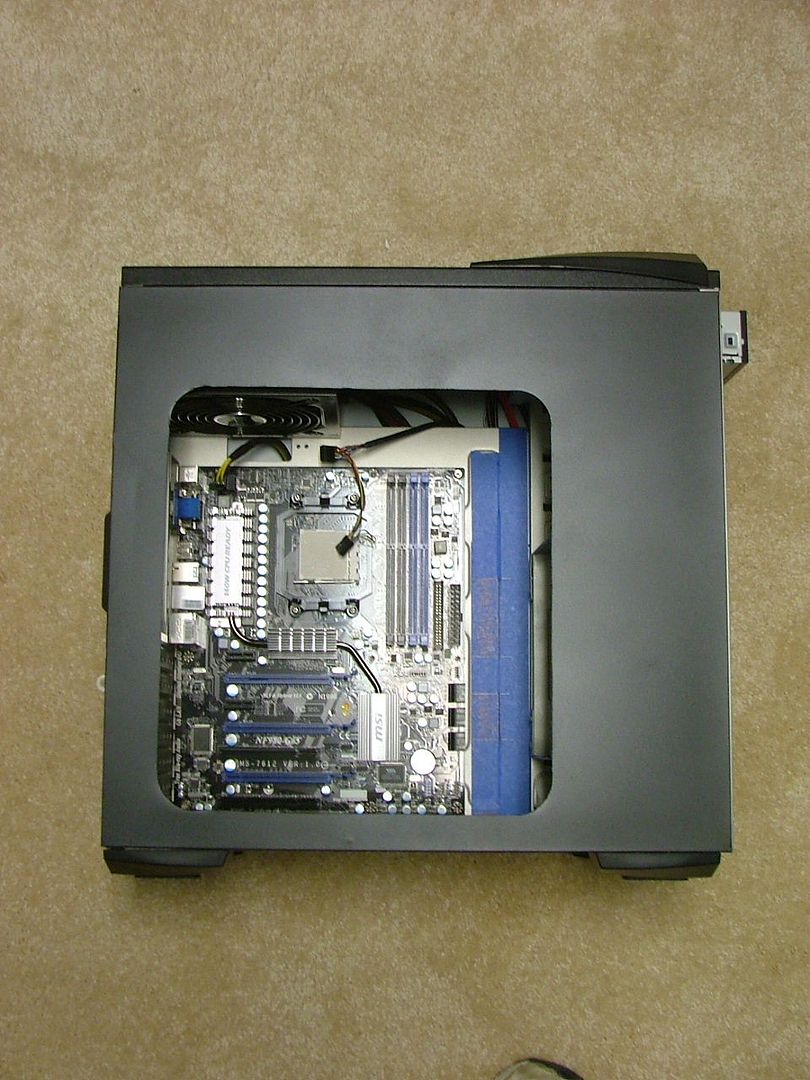
    Didn’t bother taking pix of putting it together. It didn’t quit go the way I wanted as there is a bit of warp in the case that I hope will go away once stuff is in place. Anyway first off is a pic of the left panel in place showing the color of the chassis. It is not as dark as I had hopped, as a matter of fact it comes across more “brownish” to me. Then it is on to figure out if I do indeed what to do the cable cut outs….about 75% sure I want to. Will end up using the 700W OCZ as the temporary PSU until the Zalman materializes. Also need to figure out if I am also going with green led fans.

    As of 04/29/11
    Celtic Spirit >> (Under Construction / WC’ed) >> Antec SX1200, MSI 890GXM-E65, PII X6 1055T, 2 x GTX 285s, HDDs (TBD), 2 x G.S. F3-12800CL7D-2GBPI, OCZ 700W Modular, XP Pro SP2
    KestrelFlight v1.0 >> (To Be WC’ed v2.0) Zalman Z7+, MSI NF980-G65, PII X4 1055T, 2 x Galaxy 580GTXs, Zalman 32GB SSD, WD V'Raptor 300GB, G.S. F3-16000CL9D-4GBTD, Zalman ZM1000-HP Plus , Win7
    Oz1a v2.0 >> XFX MDA72P7509 750a, PI X2 8870BE, 2 x XFX GTS250, WD 250GB, F2-8500CL5D-2GBPK, Tt TR2 600W, XP Pro SP3

  9. #9
    Xtreme Enthusiast
    Join Date
    Mar 2006
    Location
    Central VA, USA
    Posts
    731
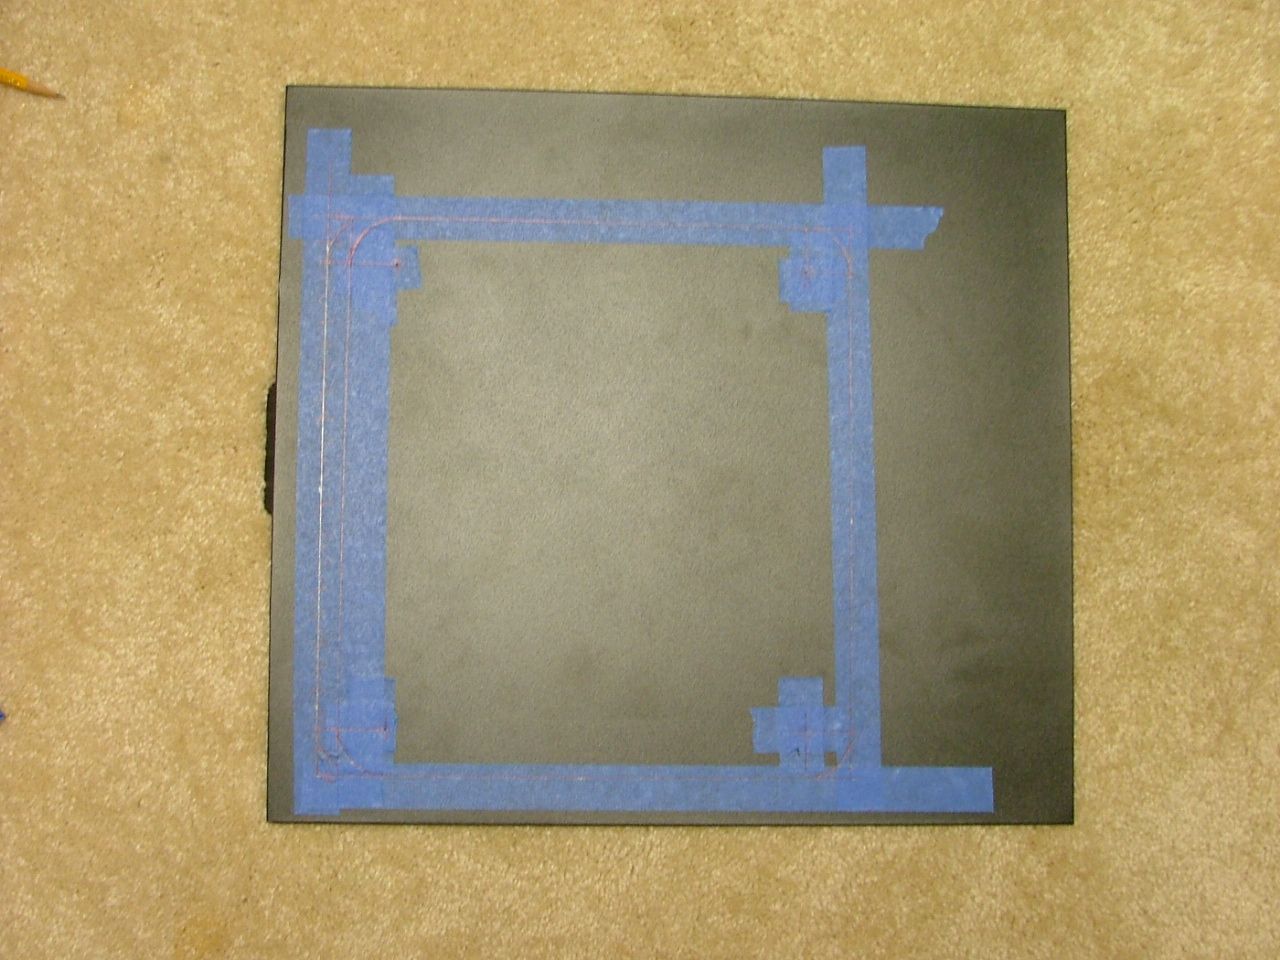
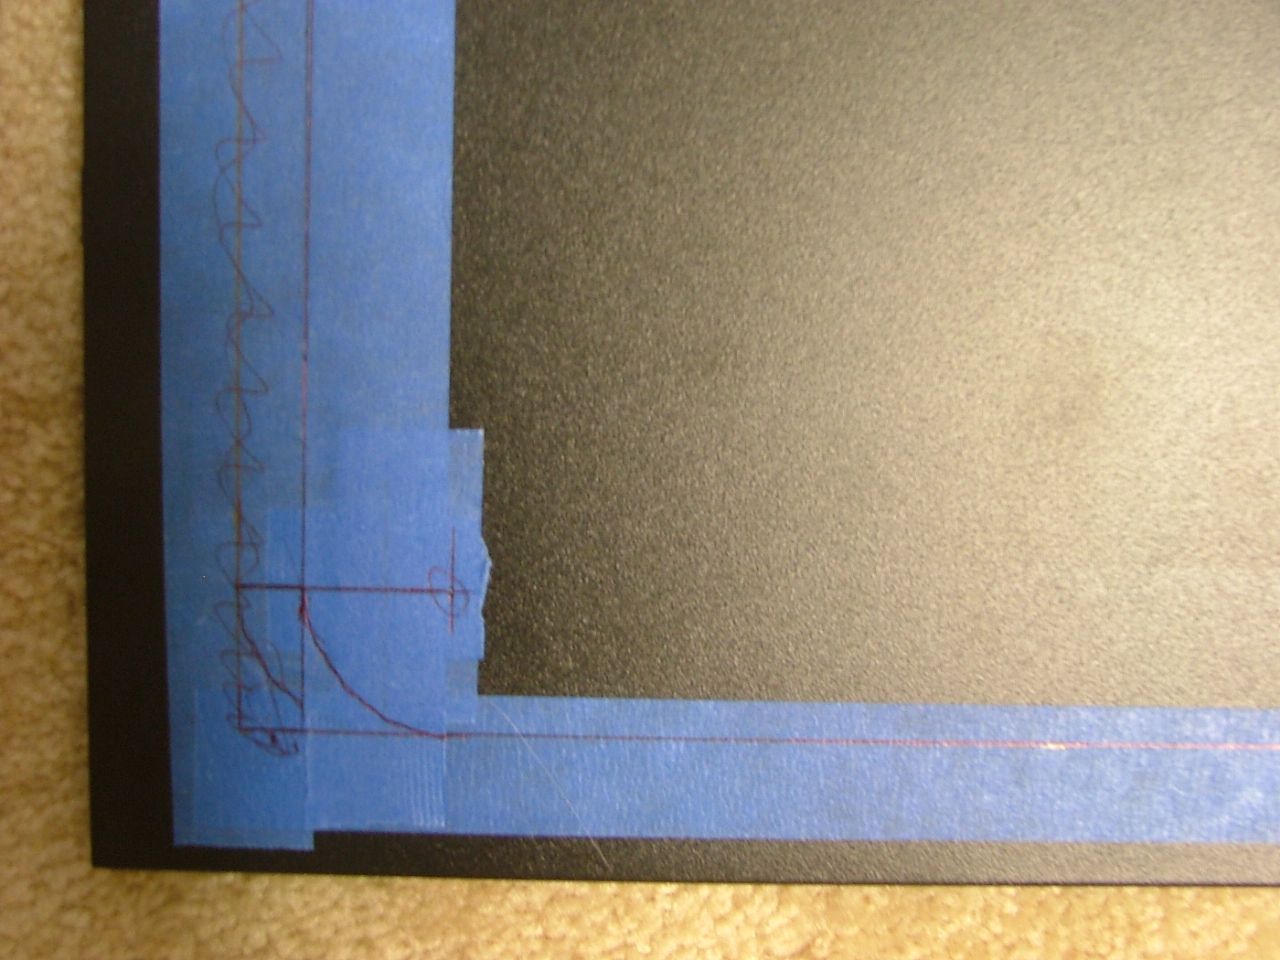
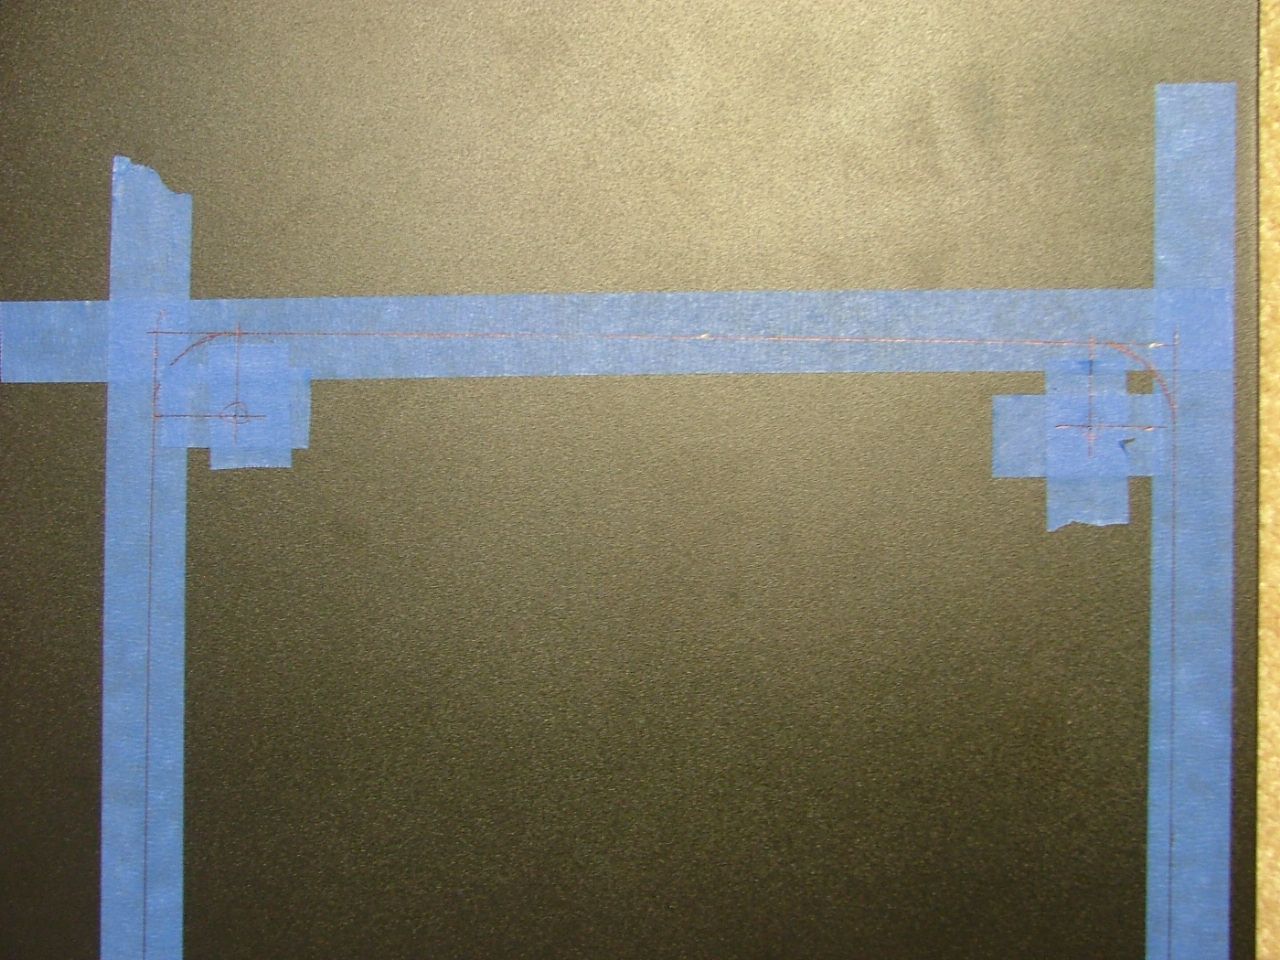
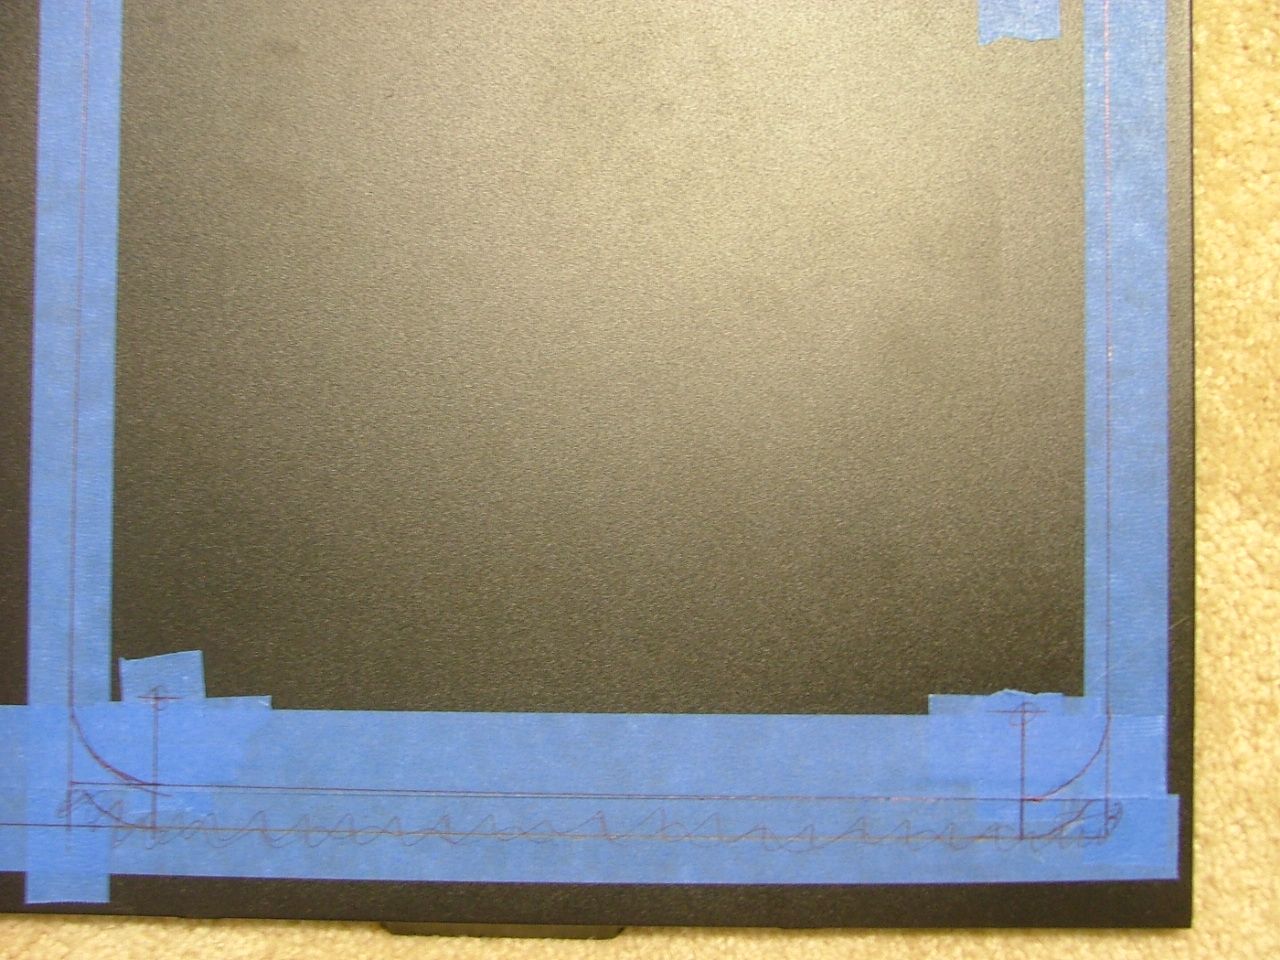
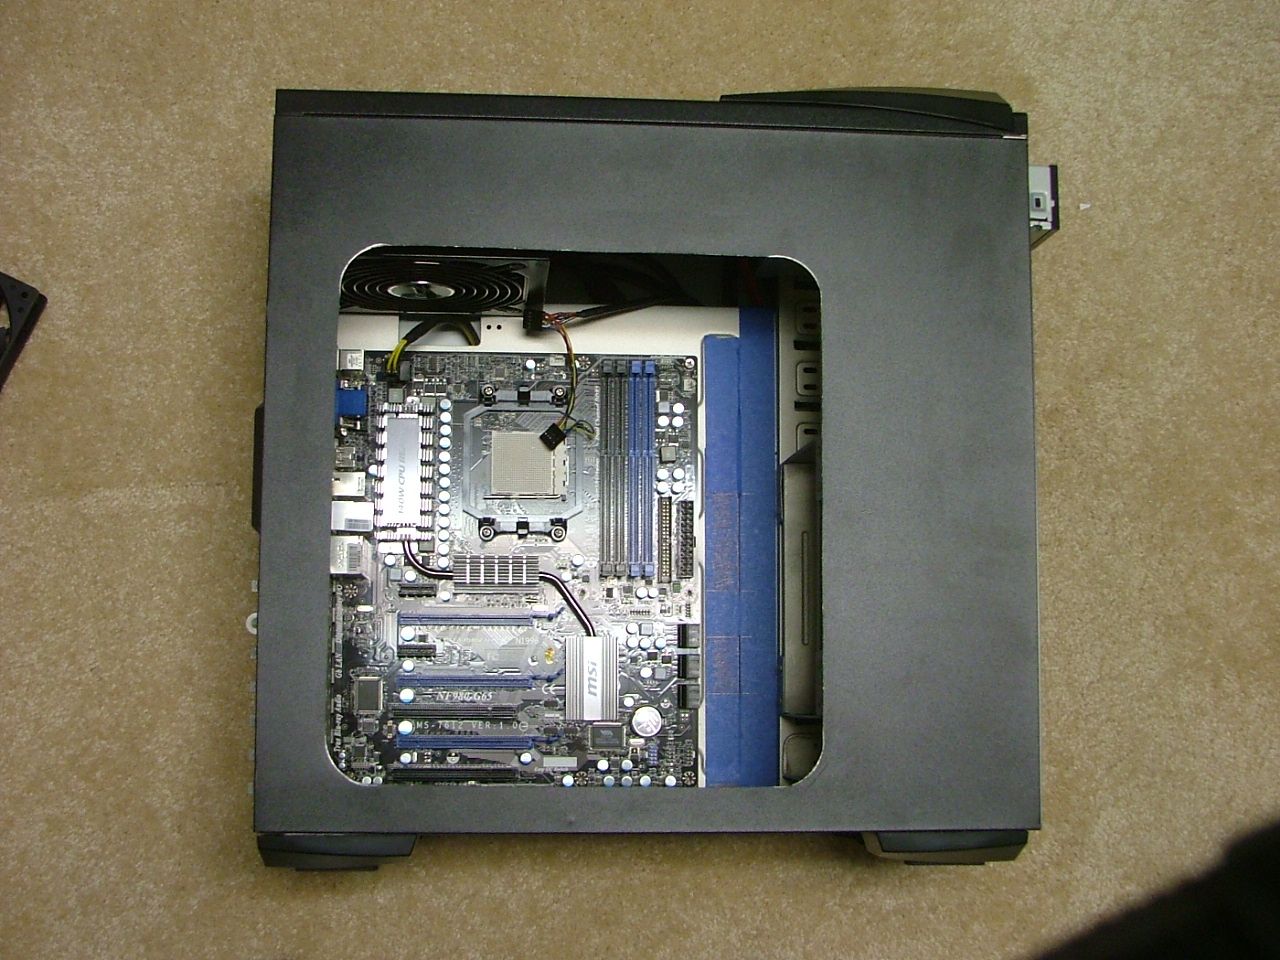
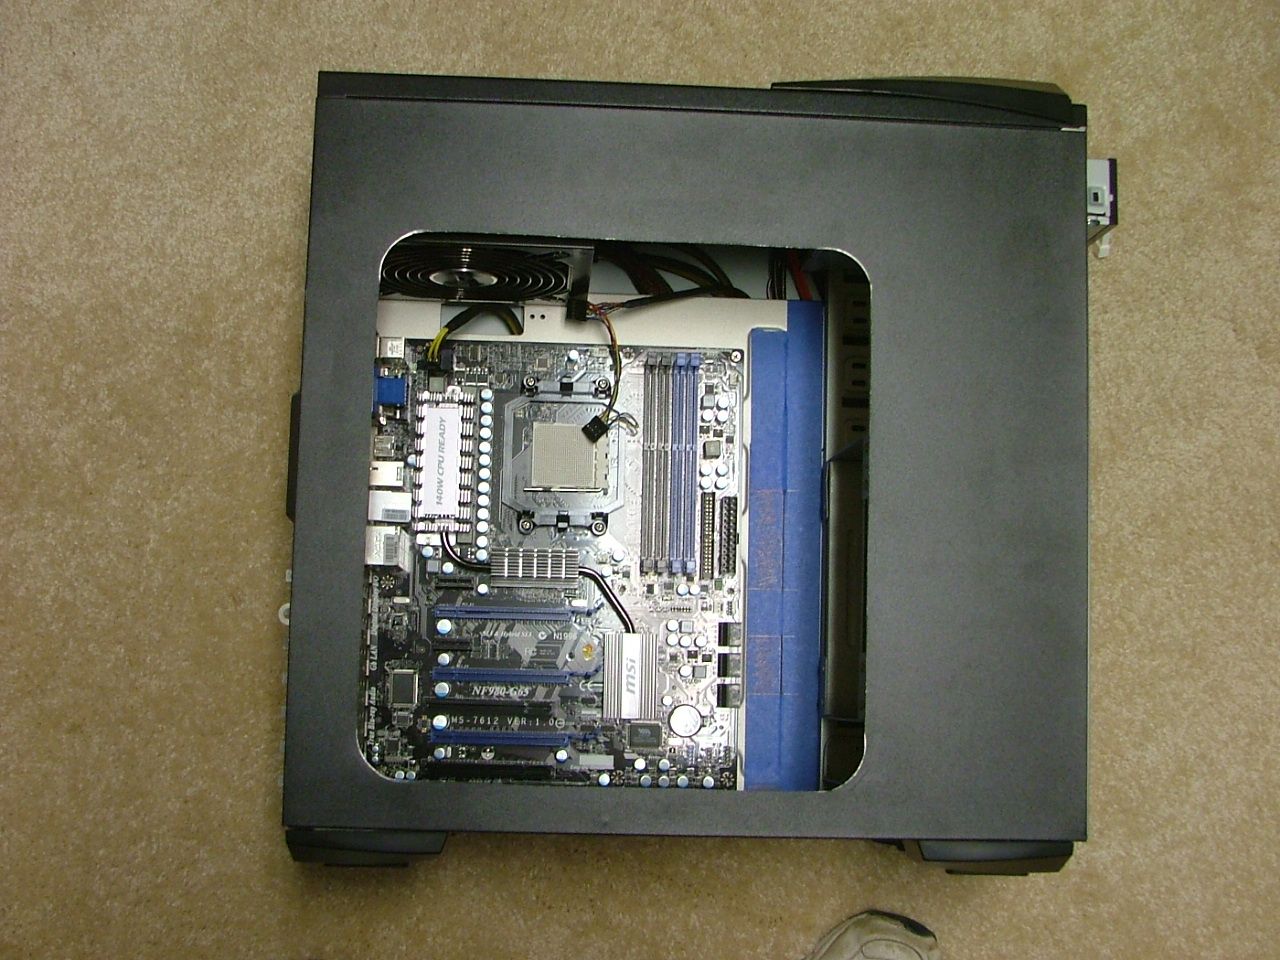
    Finally got some time, a spare panel, and desire to start laying out the window. As a side note the side panels are interchangeable….meaning by just turning them “upside down” they will fit either side (excluding the fan of course). Managed to pick up a spare right side panel as I didn’t want to ruin the “fancy” Z7 Plus left side.

    Started laying out a “simple” window as I’ll need to at least have room for 1 x 120mm if not two fans. While doing some initial layout I’m really not sure I want to do two fans as even with the window they will cover one third if not a half of what I’m trying to show.

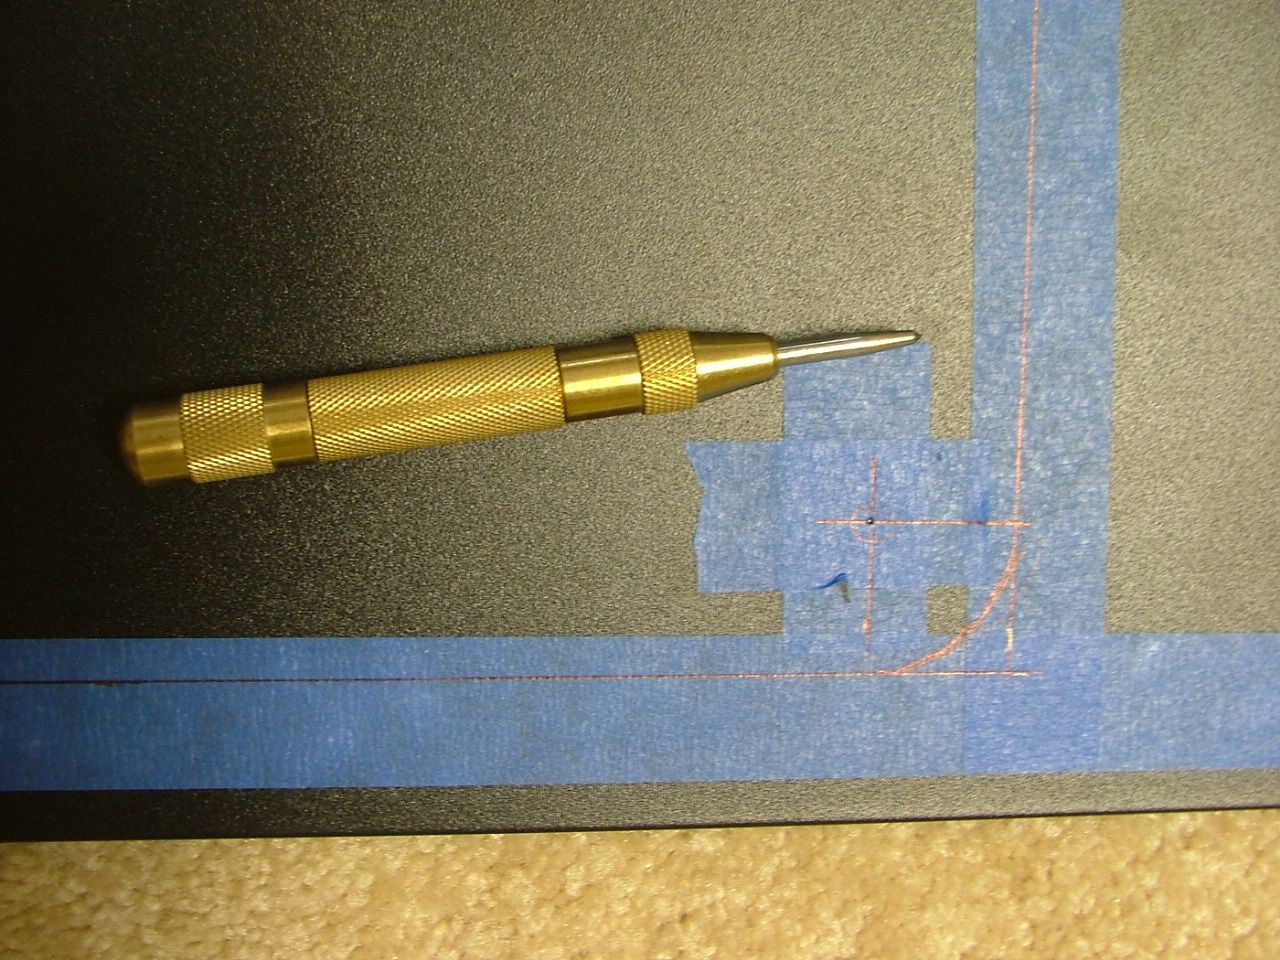
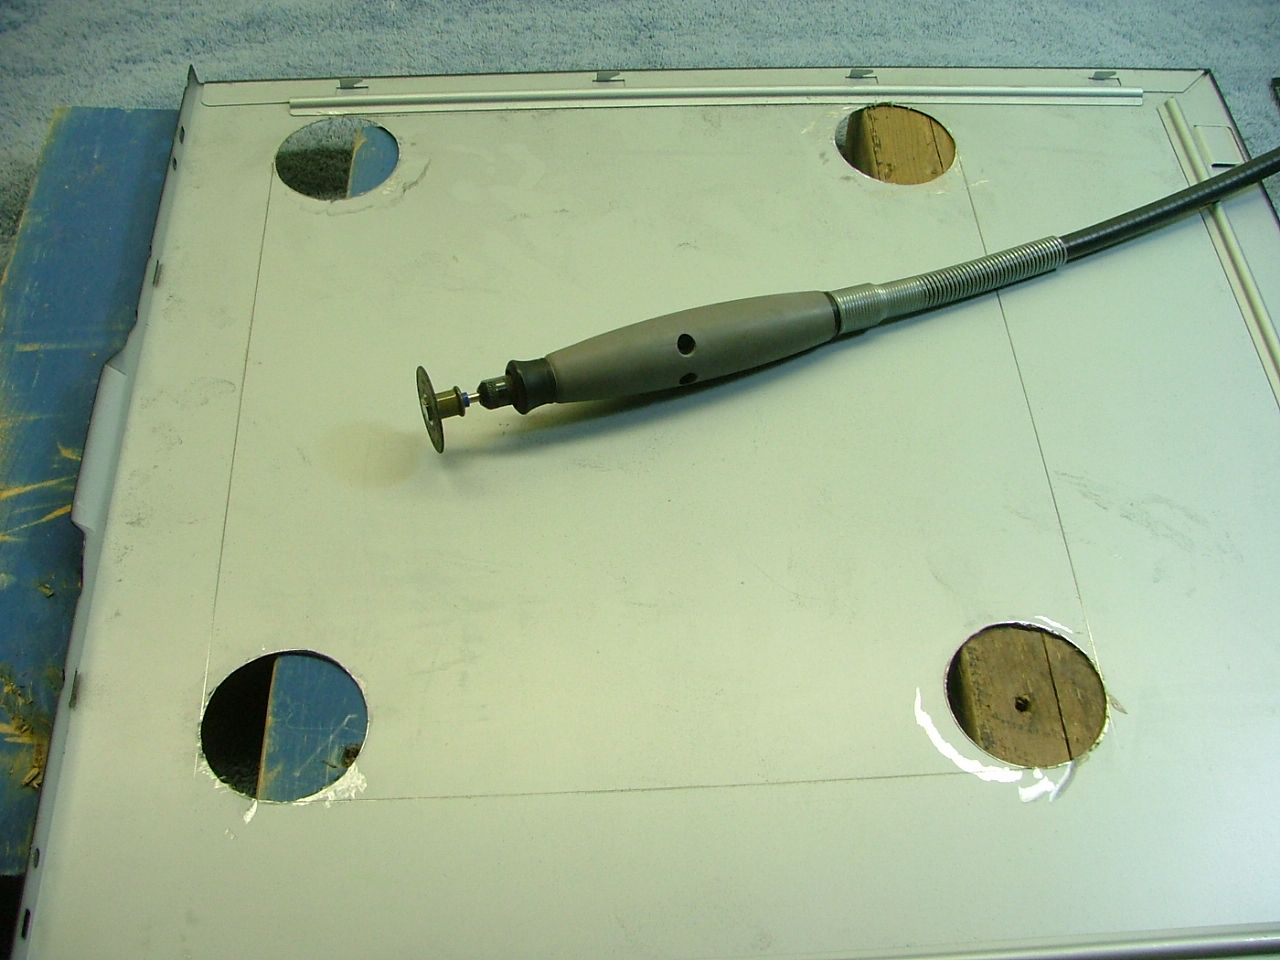
    Here we have the initial layout and then some closer look at the corners.


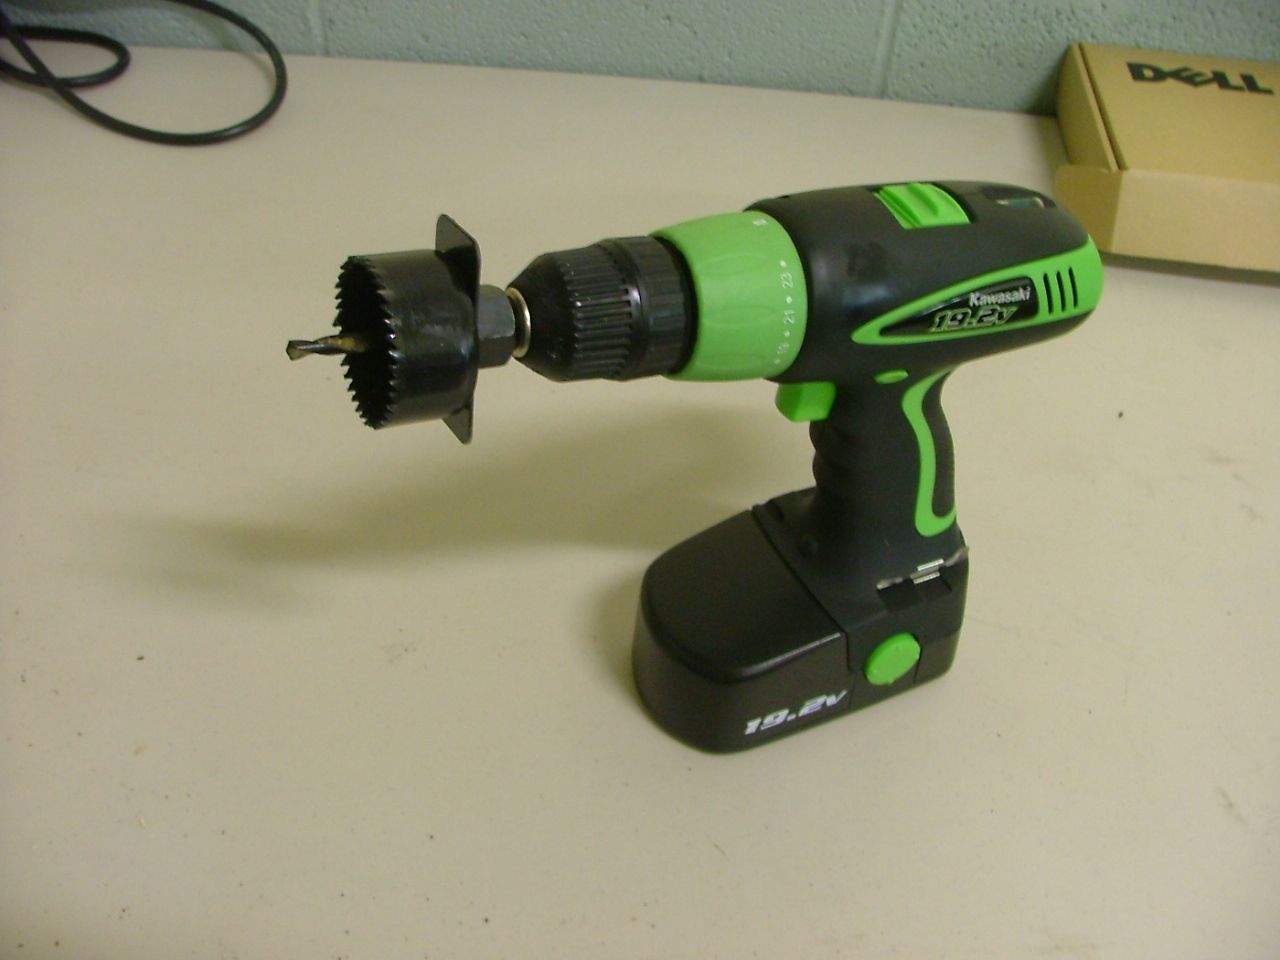
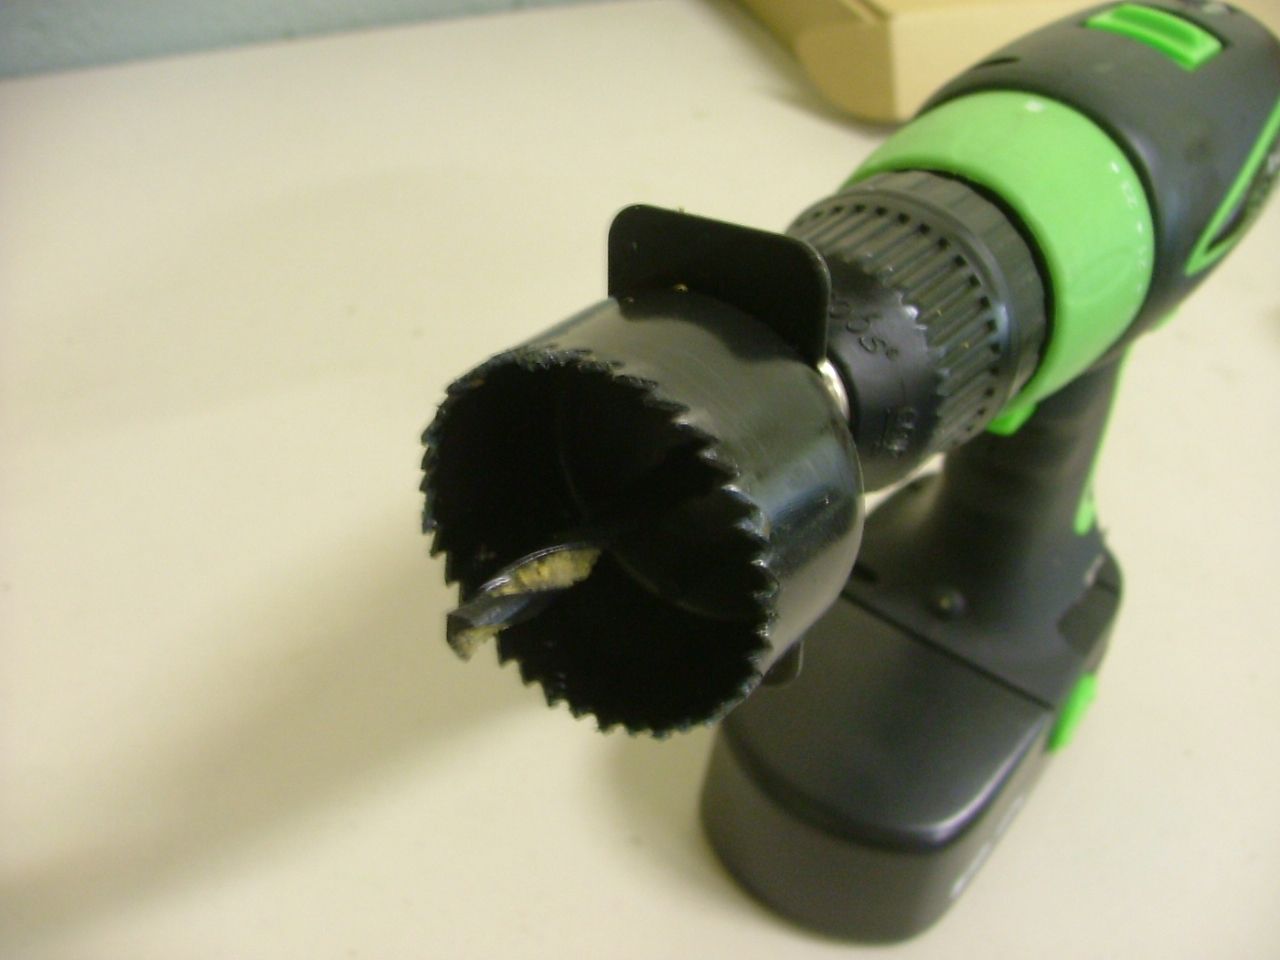
    And of course the weapon of choice with a 2” multi-material hole saw……


    Now for the attack….


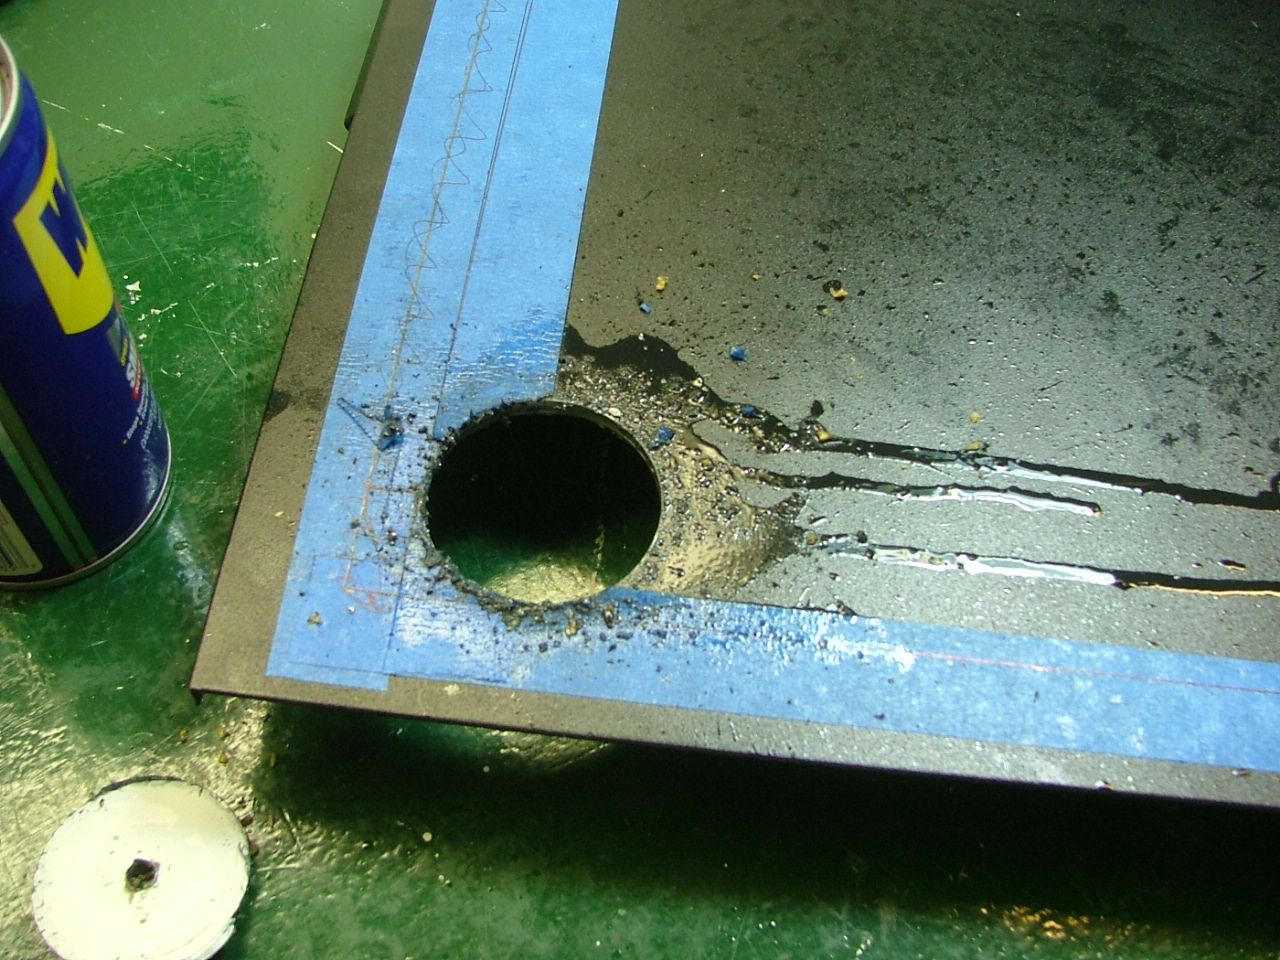
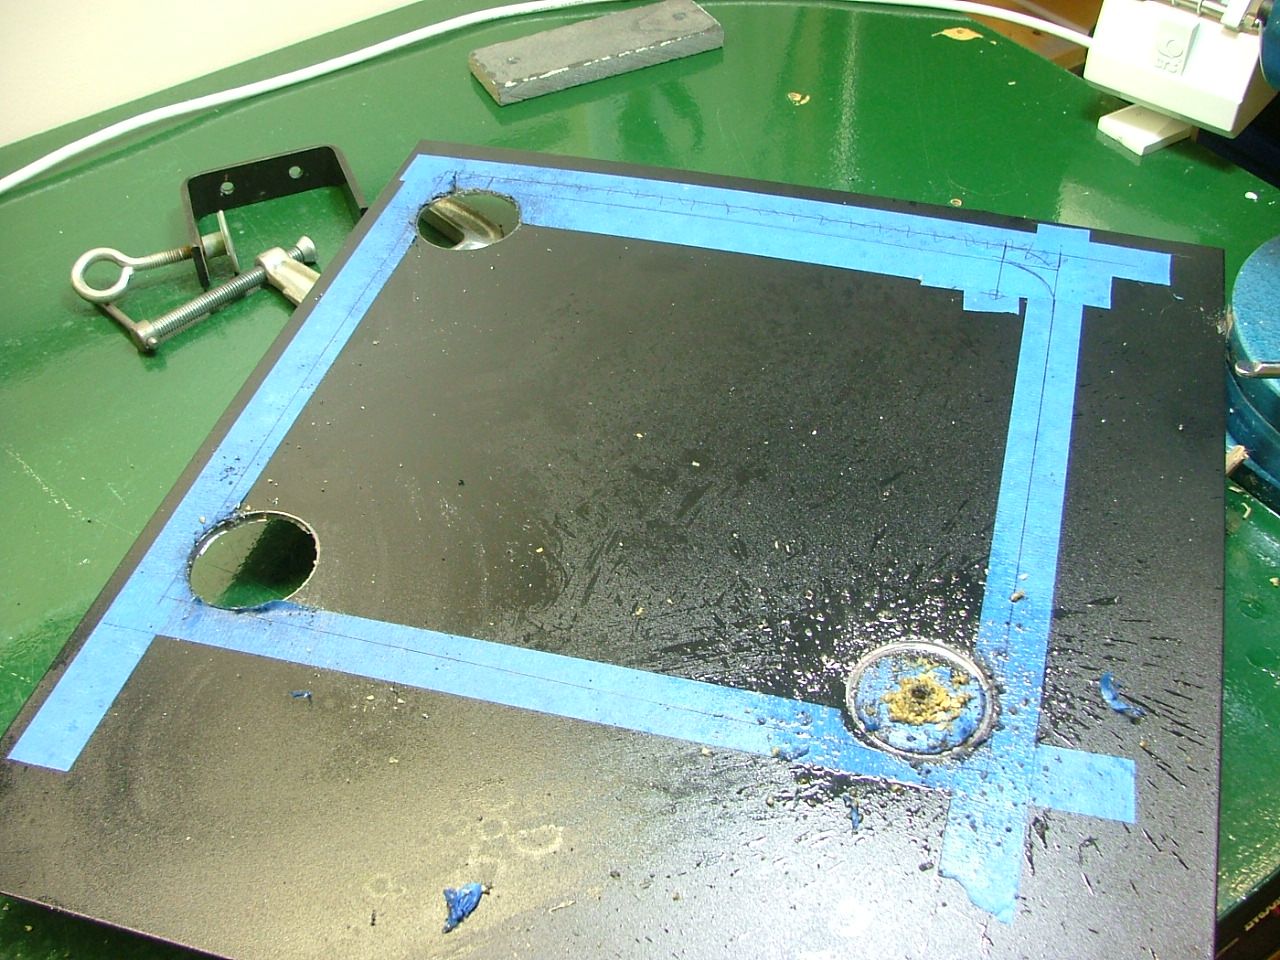
    And here is where it sits as several things were brought to my attention. When using a cordless drill confirm both batters are fully charged. Make sure you’ve remember to select the correct speed. As far as the hole saw is concerned, buy a decent setup. The cheapie (borrowed) set’s set screw for the centering drill bit won’t tighten down. As the Allen wrench provided is too small and it needs to be tighten after every cut. Also it is not really cutting the metal cleanly, meaning it is really more wood that “then sheet metal”.

    So now I’m charging the batteries for the drill (4 hours) so it won’t get done tonight!
    As of 04/29/11
    Celtic Spirit >> (Under Construction / WC’ed) >> Antec SX1200, MSI 890GXM-E65, PII X6 1055T, 2 x GTX 285s, HDDs (TBD), 2 x G.S. F3-12800CL7D-2GBPI, OCZ 700W Modular, XP Pro SP2
    KestrelFlight v1.0 >> (To Be WC’ed v2.0) Zalman Z7+, MSI NF980-G65, PII X4 1055T, 2 x Galaxy 580GTXs, Zalman 32GB SSD, WD V'Raptor 300GB, G.S. F3-16000CL9D-4GBTD, Zalman ZM1000-HP Plus , Win7
    Oz1a v2.0 >> XFX MDA72P7509 750a, PI X2 8870BE, 2 x XFX GTS250, WD 250GB, F2-8500CL5D-2GBPK, Tt TR2 600W, XP Pro SP3

  10. #10
    Xtreme Enthusiast
    Join Date
    Mar 2006
    Location
    Central VA, USA
    Posts
    731
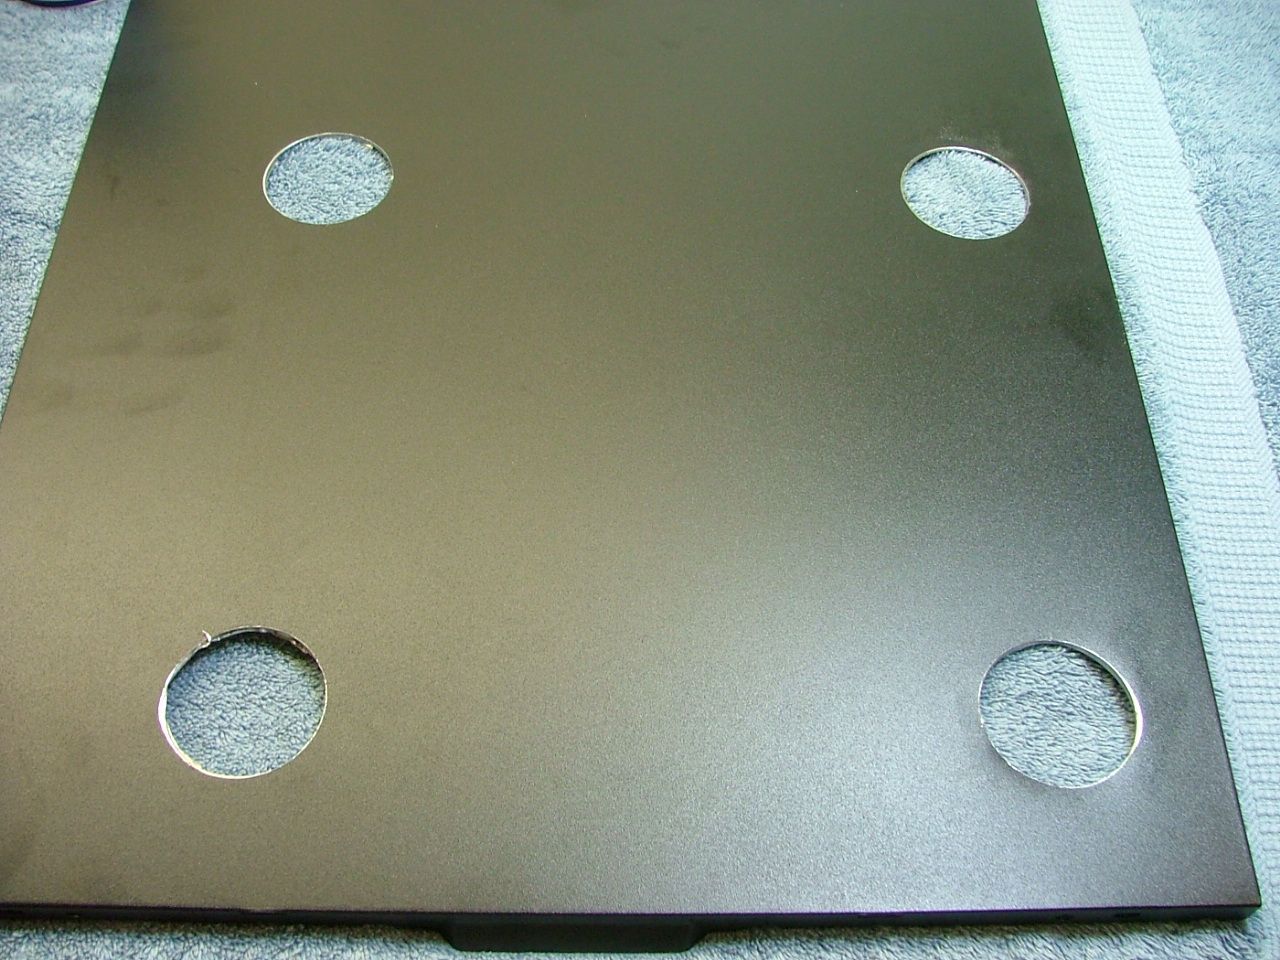
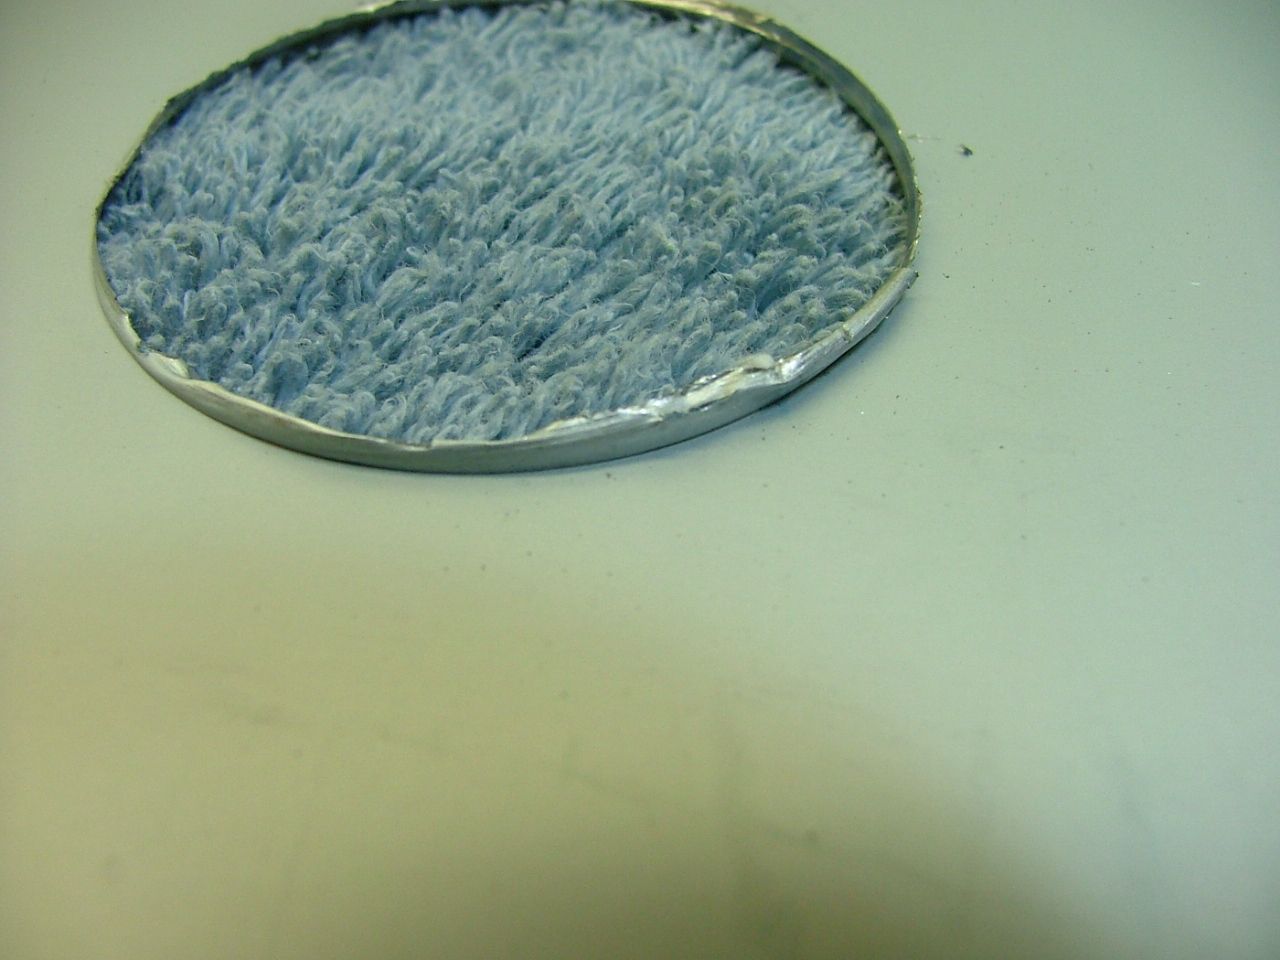
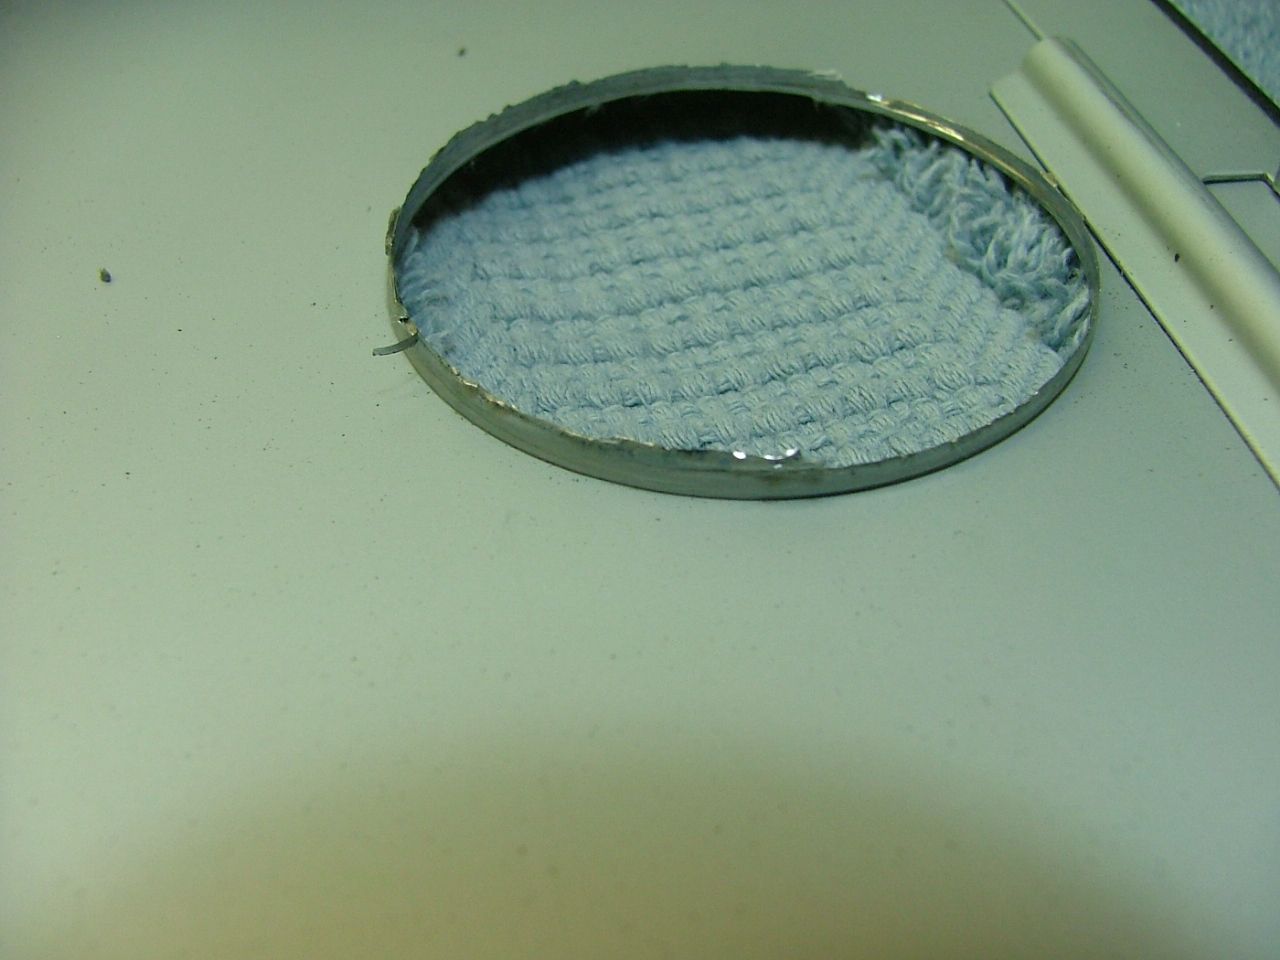
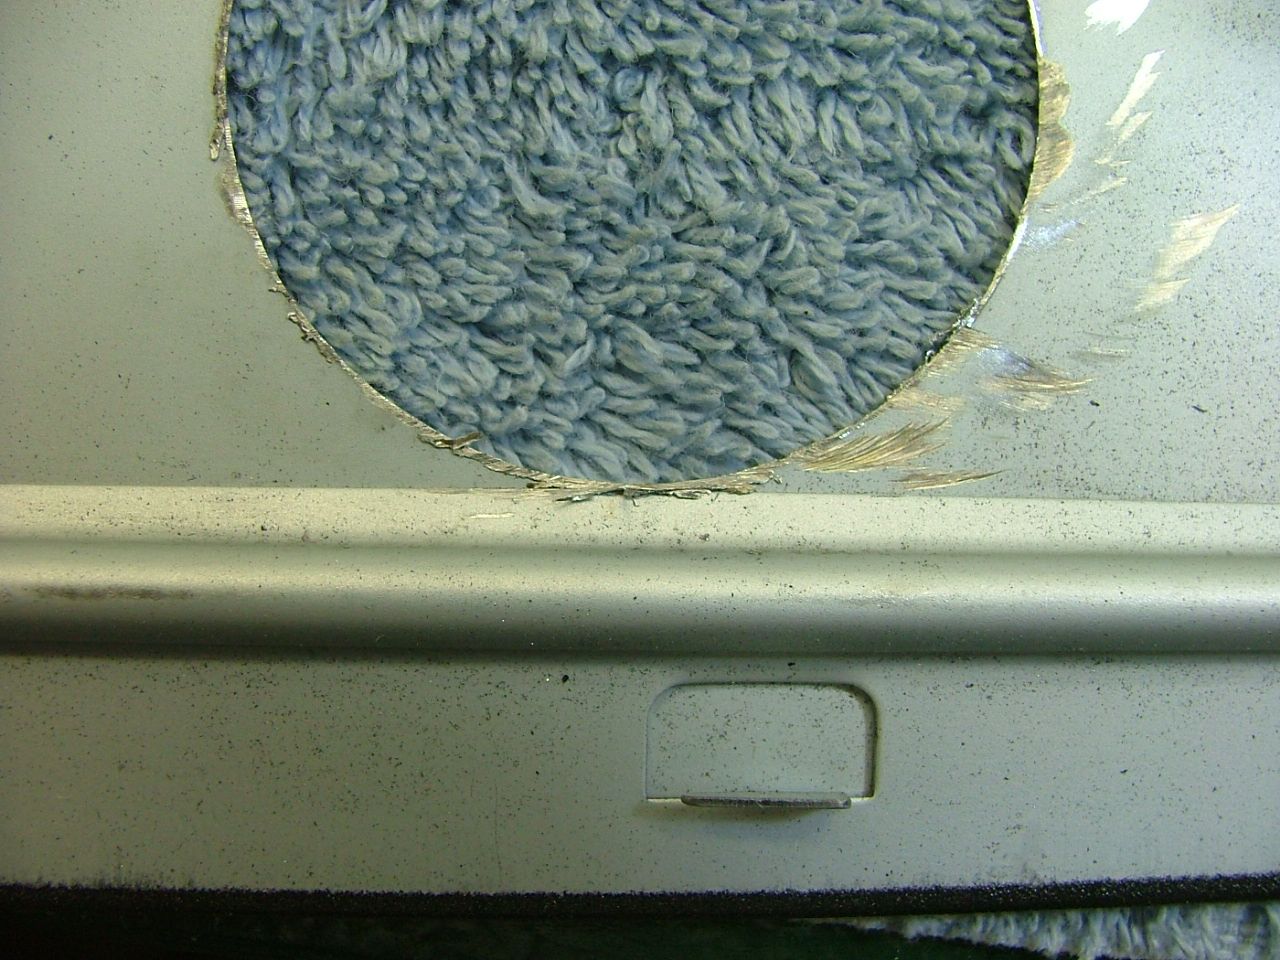
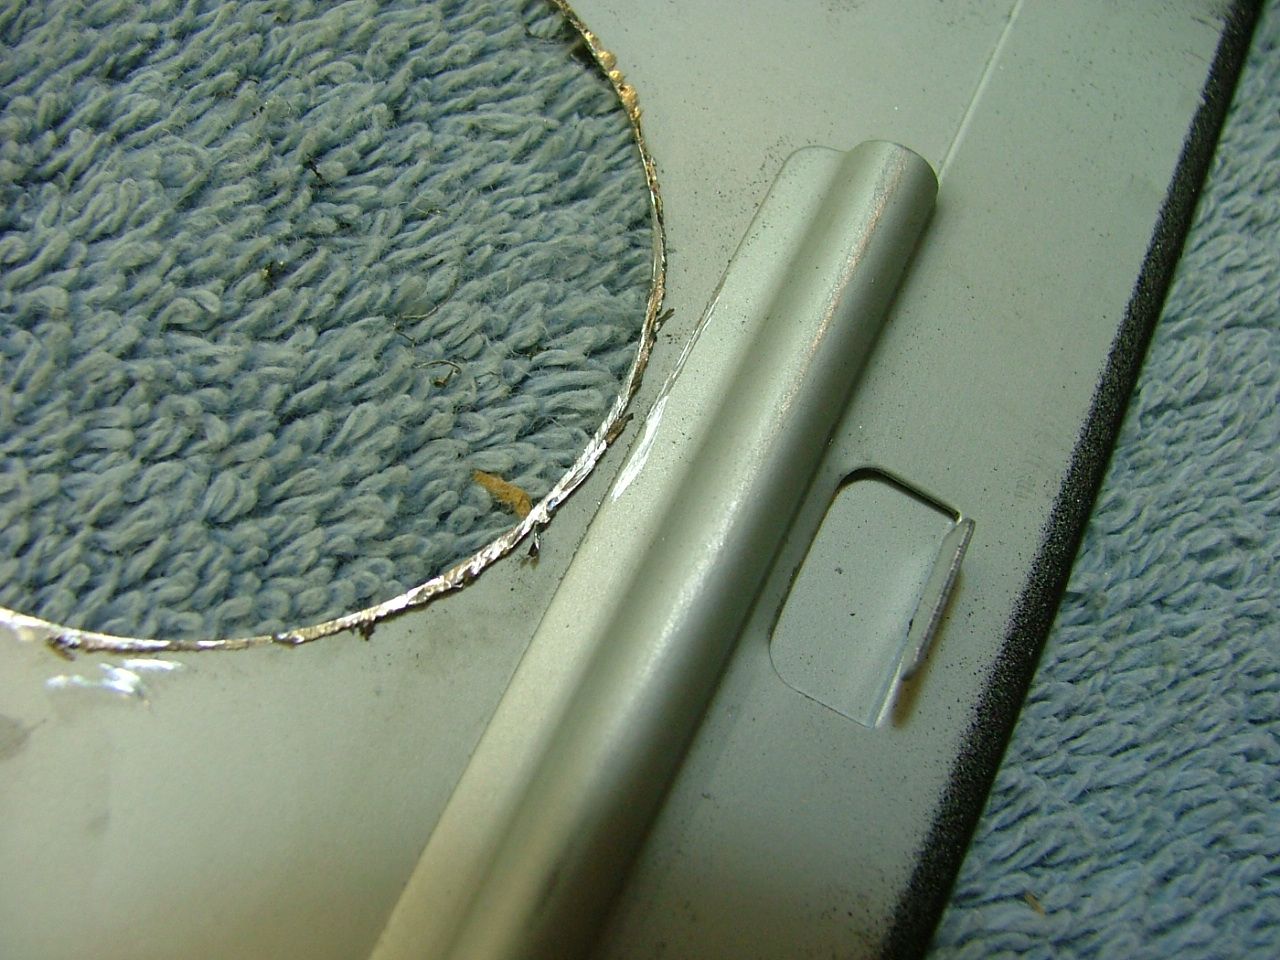
    As it turns out I diddled around and eventually went back out to the garage to finish…….bad idea! The drill was up to it but the hole saw wasn’t, cheap (not inexpensive) is – cheap what you get. The drill bit in the mandrel had gotten so loose and the cutting ability of the hole saw so poor that the last hole was wallowed out. Also instead of a clean cut it actually “curled” in the metal.


    Now On to Tonight….

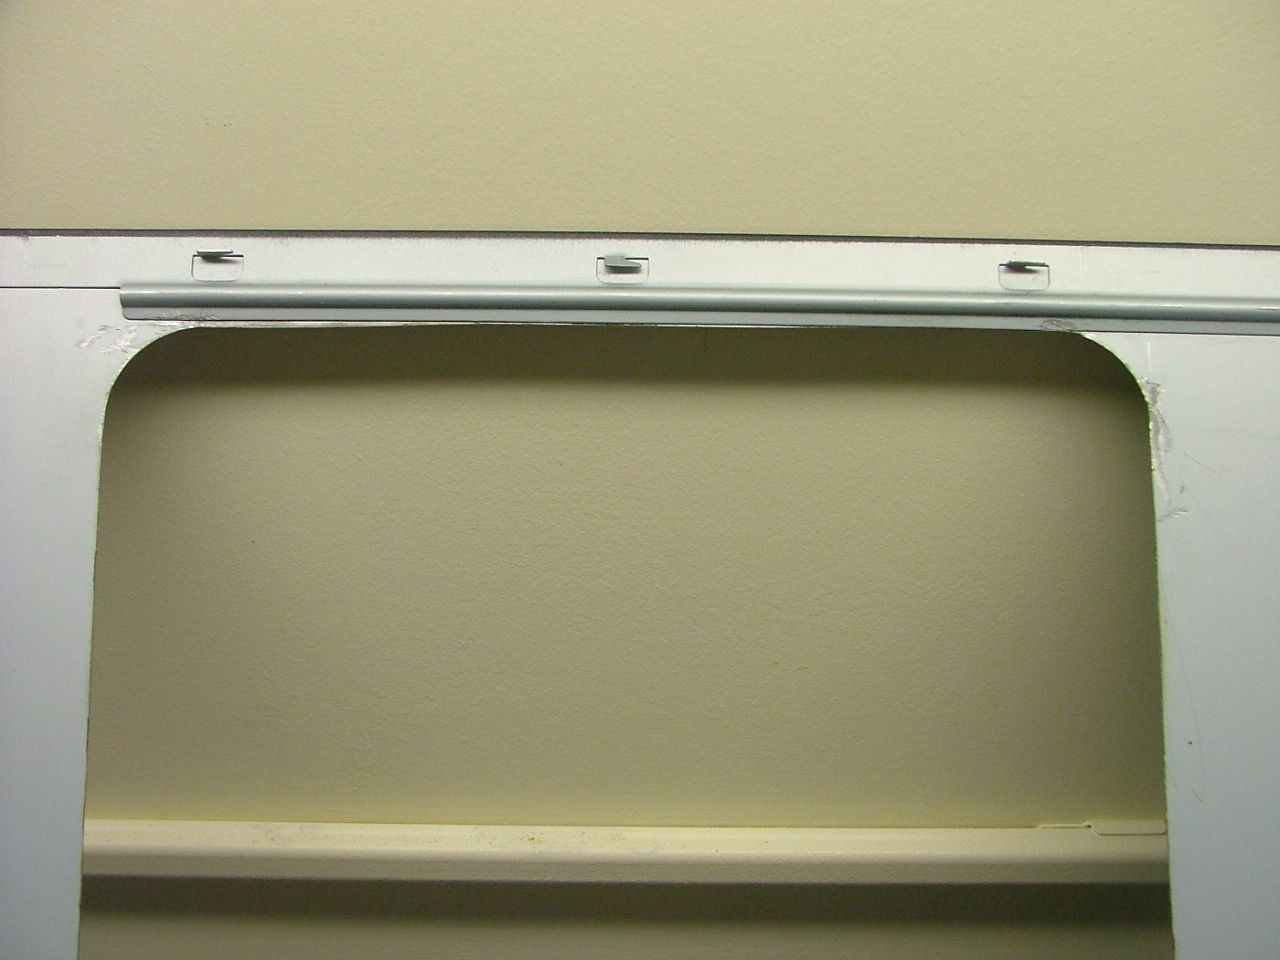
    Then to add insult to injury I made a major “engineering” layout error. While laying out the centers for the corner hole and the cut on the exterior, an interior fit issue was missed…….


    By not paying attention to where that edge brace/stop was located I don’t have any interior edge to lay the lexan on. Also in the two hole shots you can see where the wobble of the hole saw went off center. The only “lucky” thing about it is it is at the bottom.

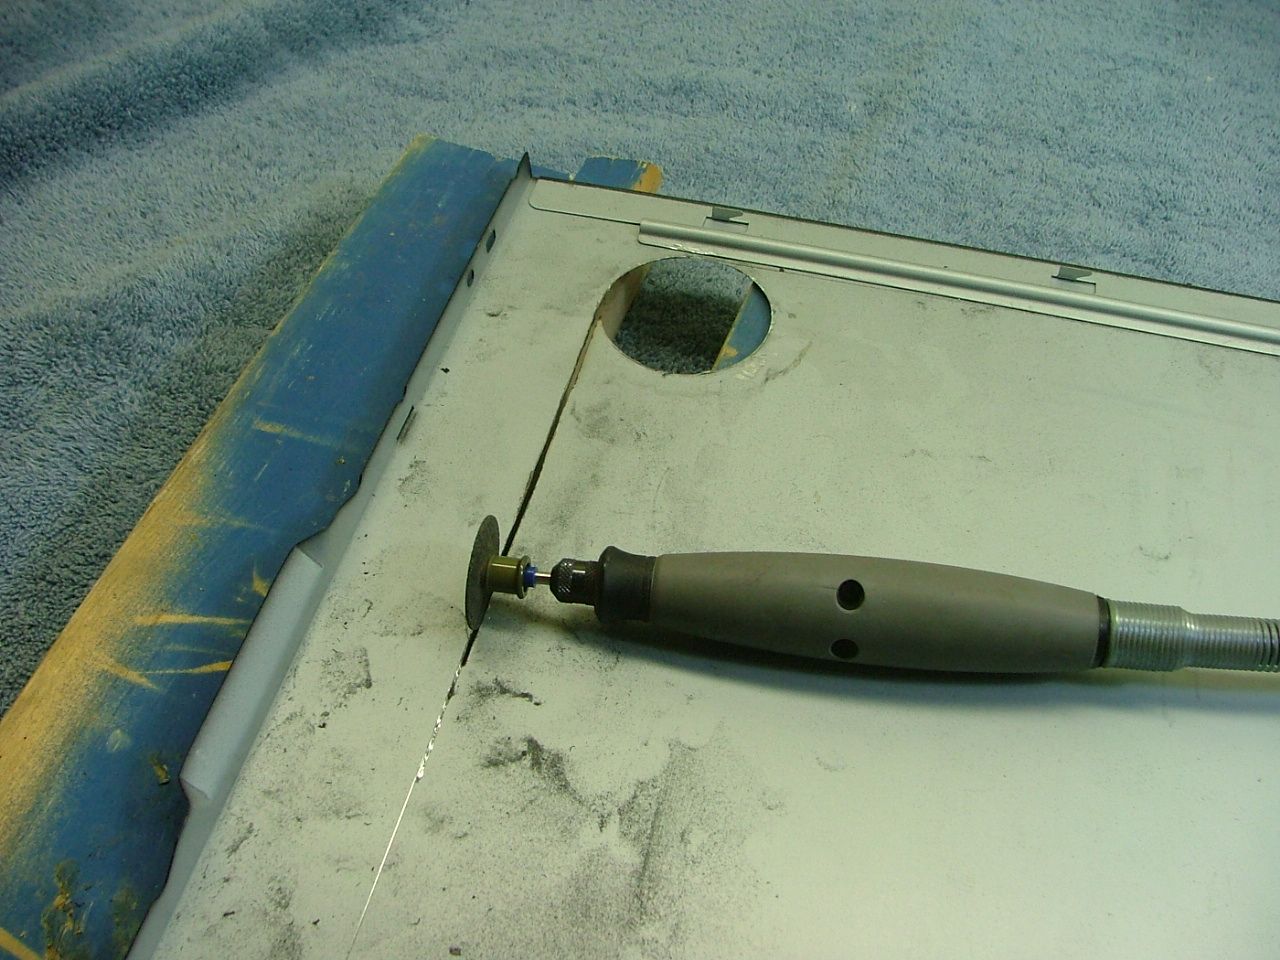
    Up next is laying out the tangent lines to cut by. I’m cutting from the inside this time so if I have a “skid” with the cutting disk it won’t be all that noticeable. Also this will be the first time, other than the fan grill removal, that I’ve used this particular cutting disk.


    I stopped at this point for a couple of reasons….. 1. With the other style cutting disks I used I would “score” the cut line a couple of time before doing the final cut. The down side of this is the ref line disappears and can lead to a “wavy navy’ cut. Found out this disk can cut in one pass which allows better control for matching the cut line. 2. Don’t give a rat’s ars if it is 85 (degrees & % humidity) one needs to ware a long sleeved shirt and button the collar! Them sparkies are hotter!!!!

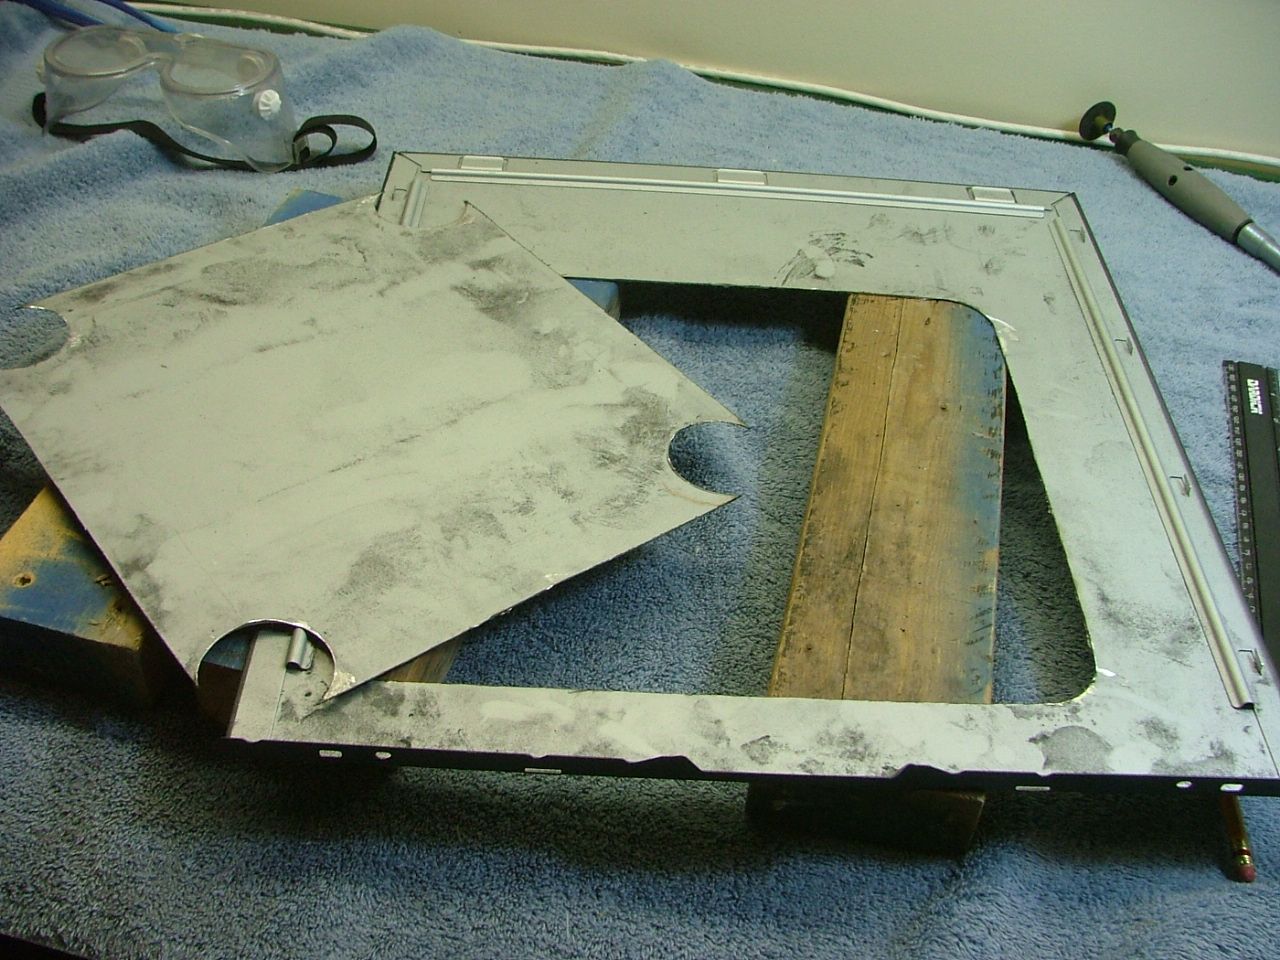
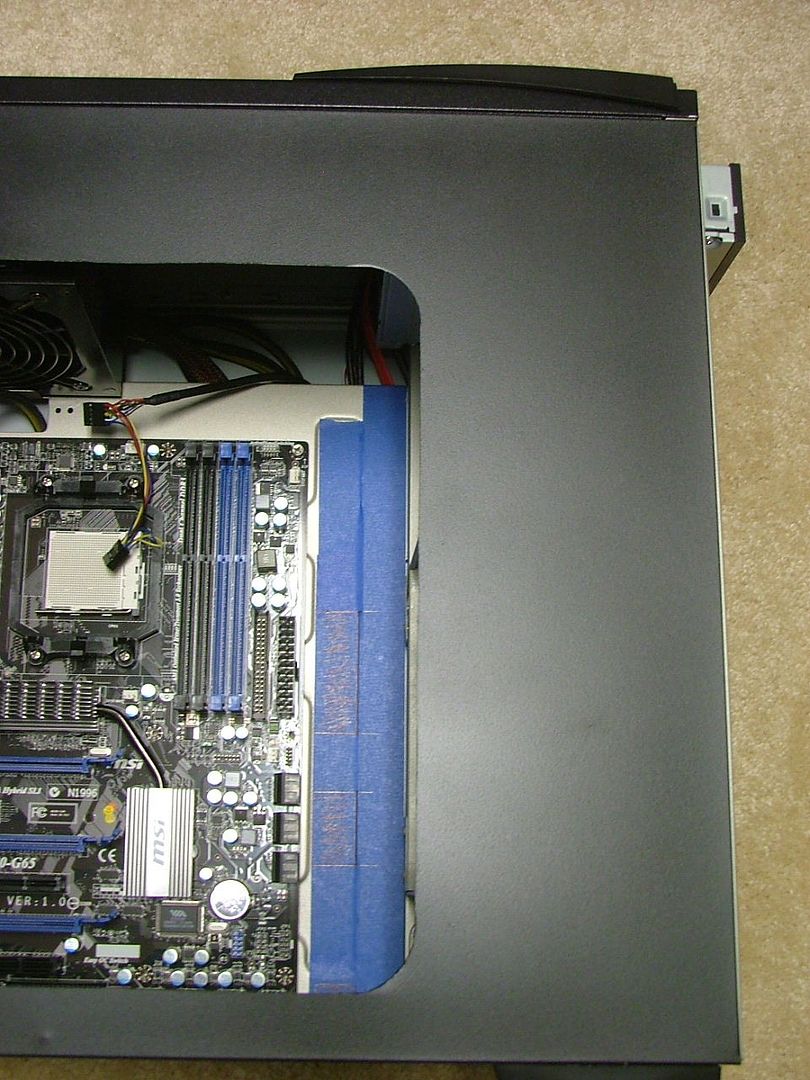
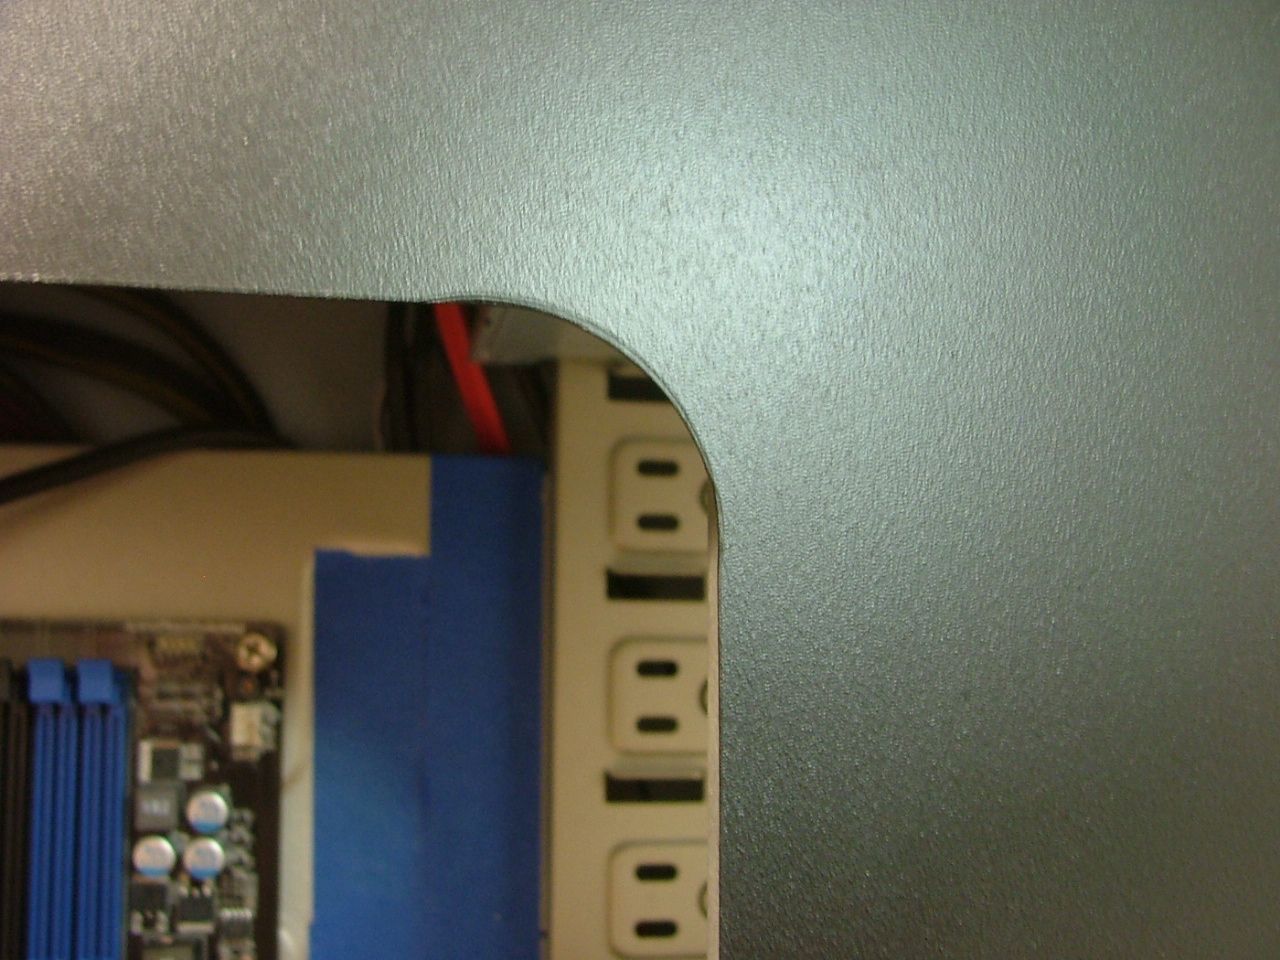
    Finished making the rough cut of the window and only used 2 to 2-1/2 disks and was done in fairly quick time. I’m really starting to like the cutoff wheel as it makes a fairly clean cut that only requires a minimal of filing. Think from start to finish (1st cut to final filing) was less than an hour. Which is quit fast for me.

    We’ll start with the rough cut out and a few close ups.


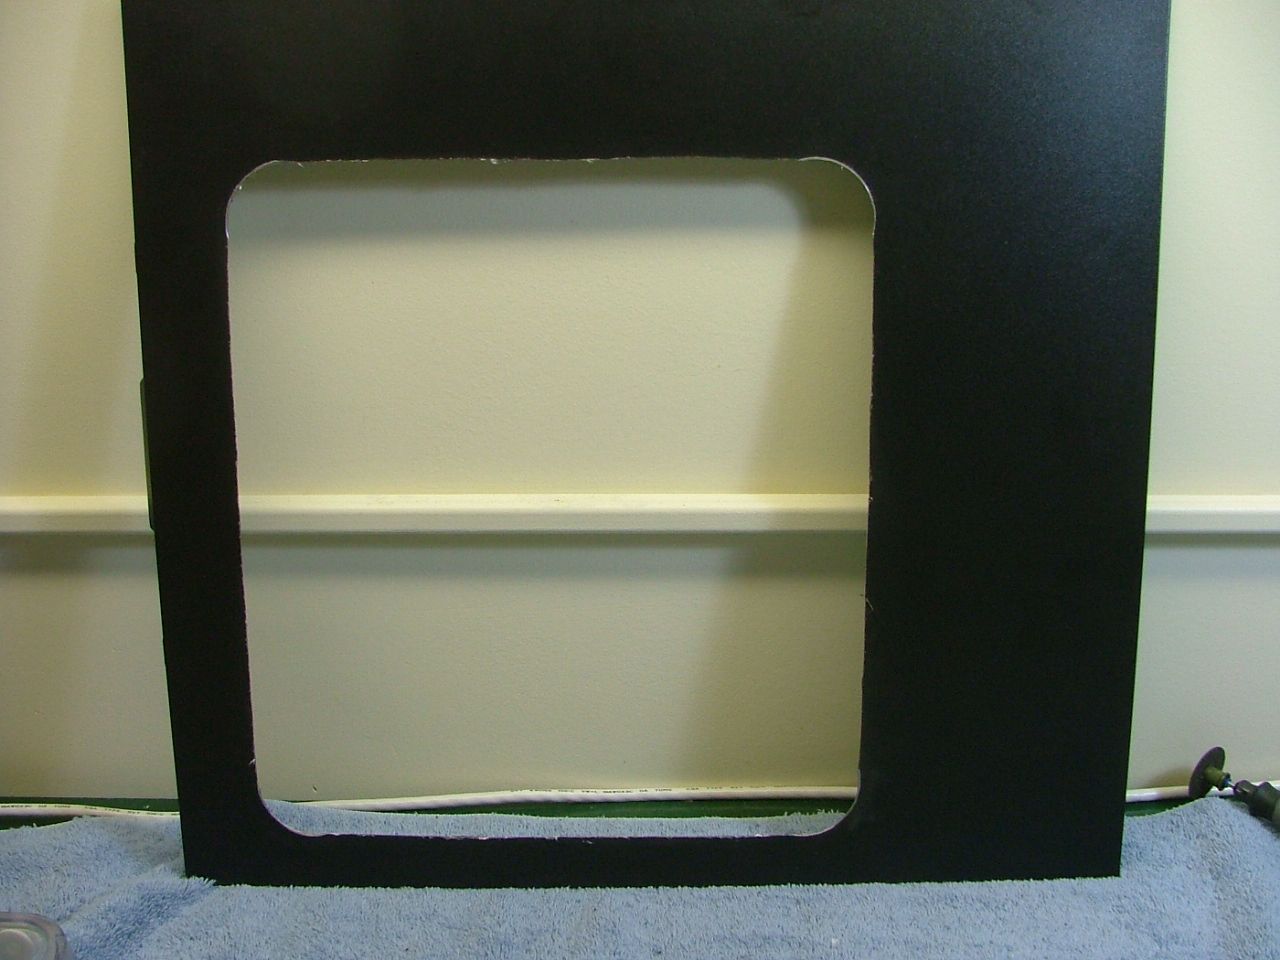
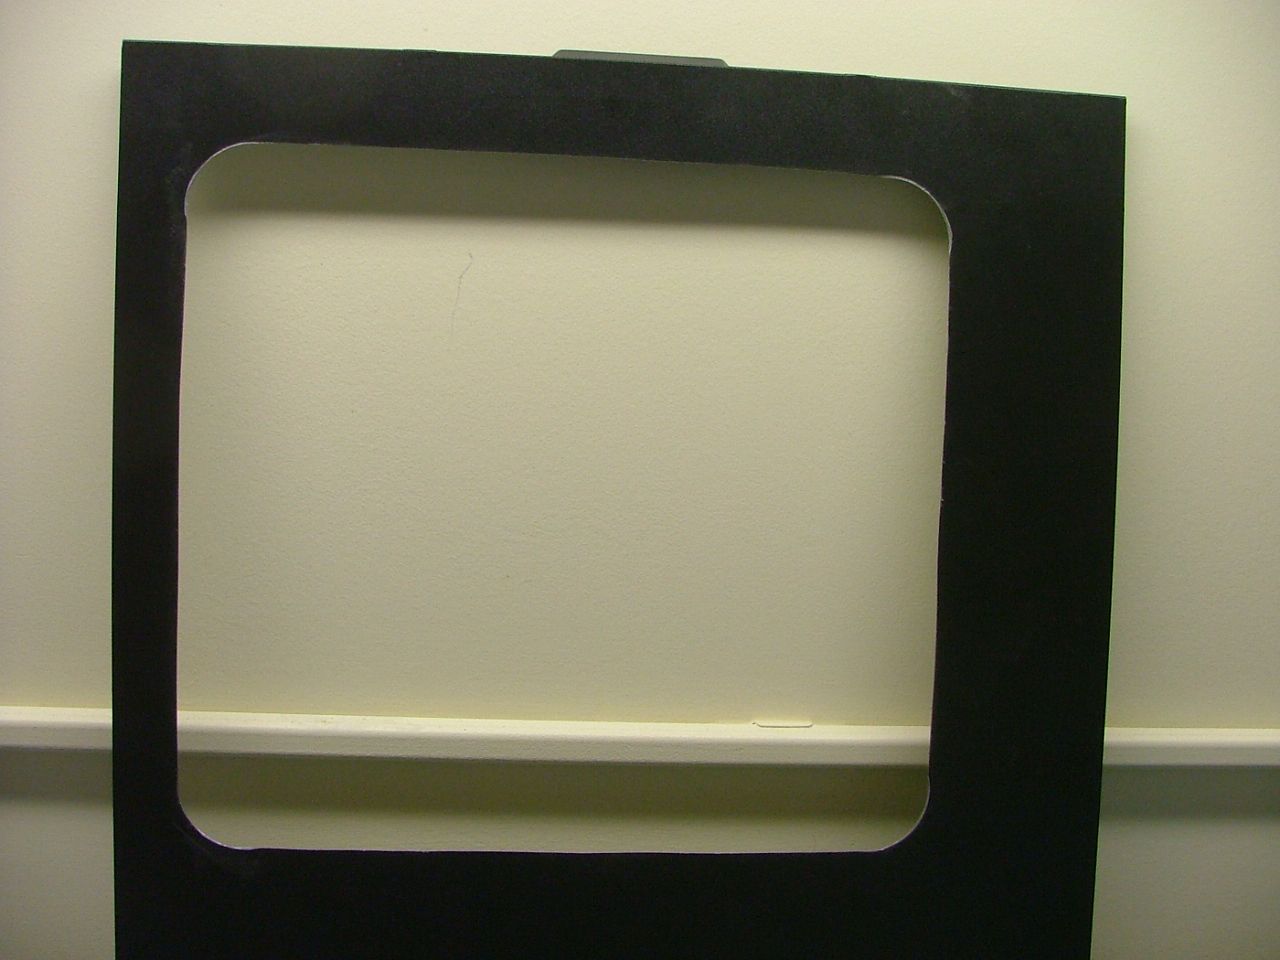
    After the filing and some sanding of the corners I declared it finished and placed on the case to see if the opening did what I wanted – it did!!


    Now I need to figure out how to paint the exterior to match the stock flat / textured surface. Then go shopping for the lexan, and work on how I want to cut and mount one possibly two 120mm fans in the window.
    As of 04/29/11
    Celtic Spirit >> (Under Construction / WC’ed) >> Antec SX1200, MSI 890GXM-E65, PII X6 1055T, 2 x GTX 285s, HDDs (TBD), 2 x G.S. F3-12800CL7D-2GBPI, OCZ 700W Modular, XP Pro SP2
    KestrelFlight v1.0 >> (To Be WC’ed v2.0) Zalman Z7+, MSI NF980-G65, PII X4 1055T, 2 x Galaxy 580GTXs, Zalman 32GB SSD, WD V'Raptor 300GB, G.S. F3-16000CL9D-4GBTD, Zalman ZM1000-HP Plus , Win7
    Oz1a v2.0 >> XFX MDA72P7509 750a, PI X2 8870BE, 2 x XFX GTS250, WD 250GB, F2-8500CL5D-2GBPK, Tt TR2 600W, XP Pro SP3

  11. #11
    Xtreme Enthusiast
    Join Date
    Mar 2006
    Location
    Central VA, USA
    Posts
    731
    In my usual rush I did the paint job and despite the humidity it didn’t do all that bad. It seems Krylon not only makes a gloss and flat black but also one called “Satin”. Guess that would be their name for Semi-Gloss?????

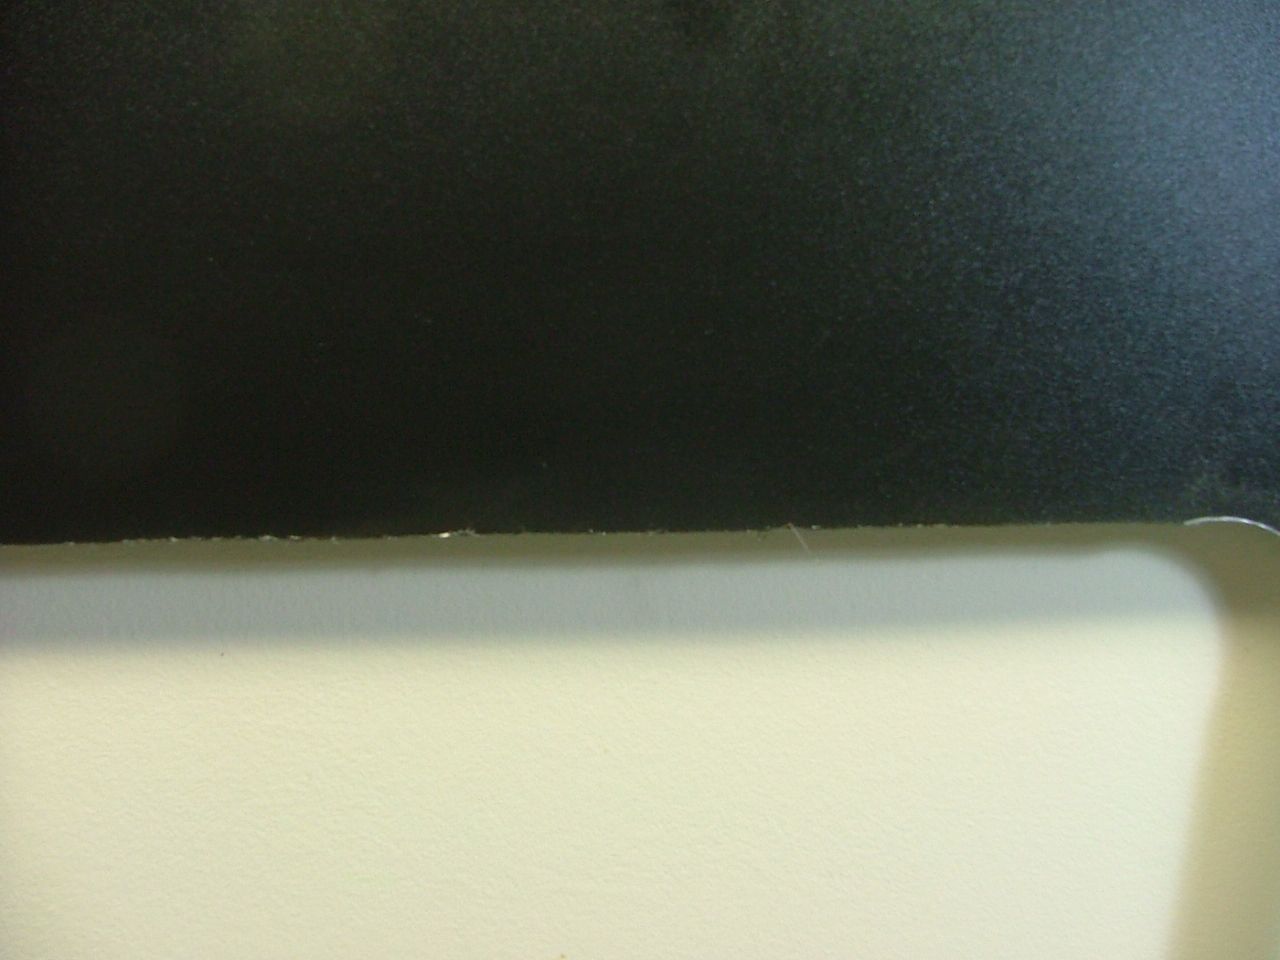
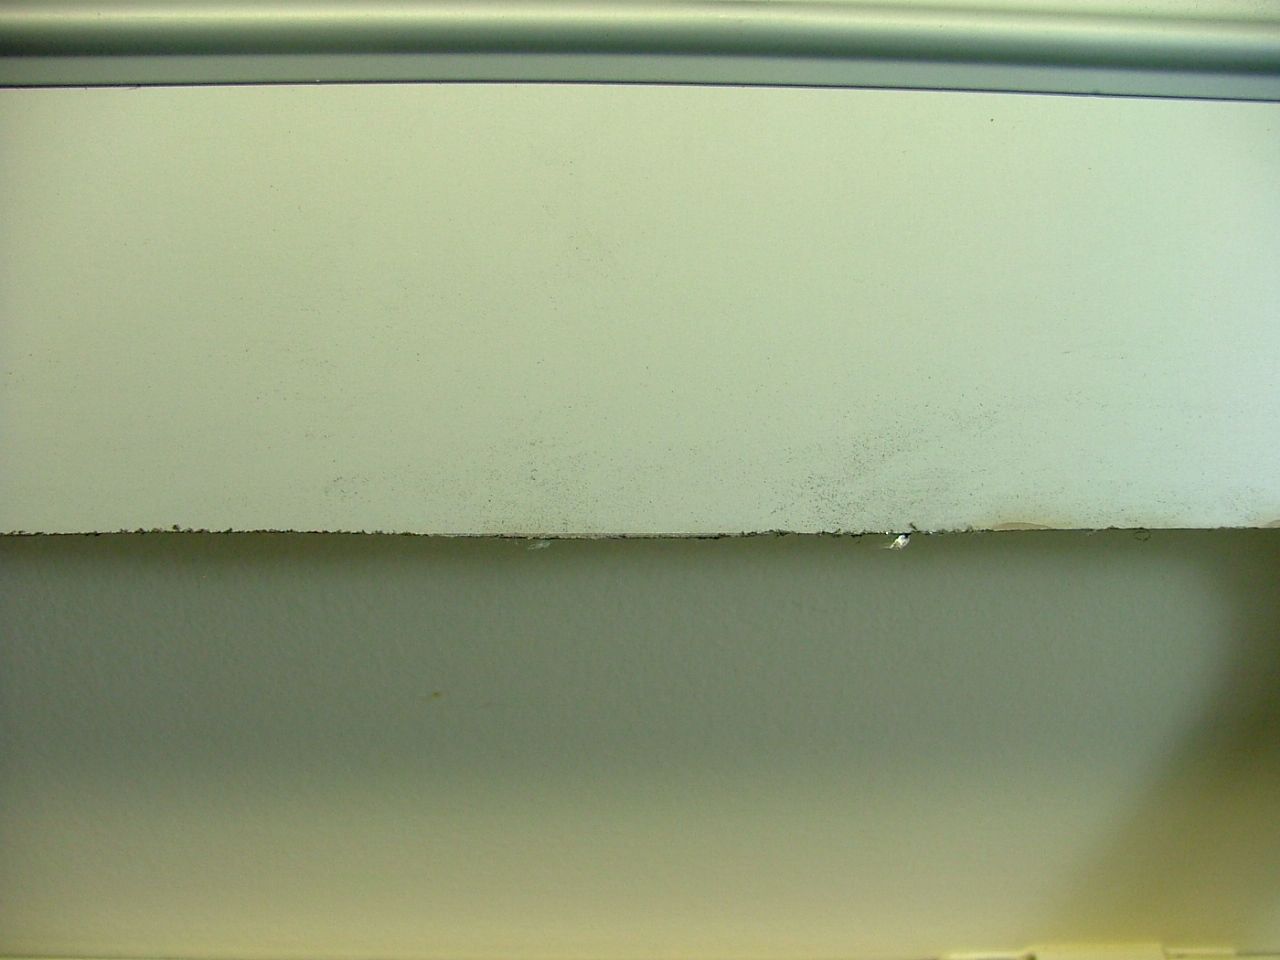
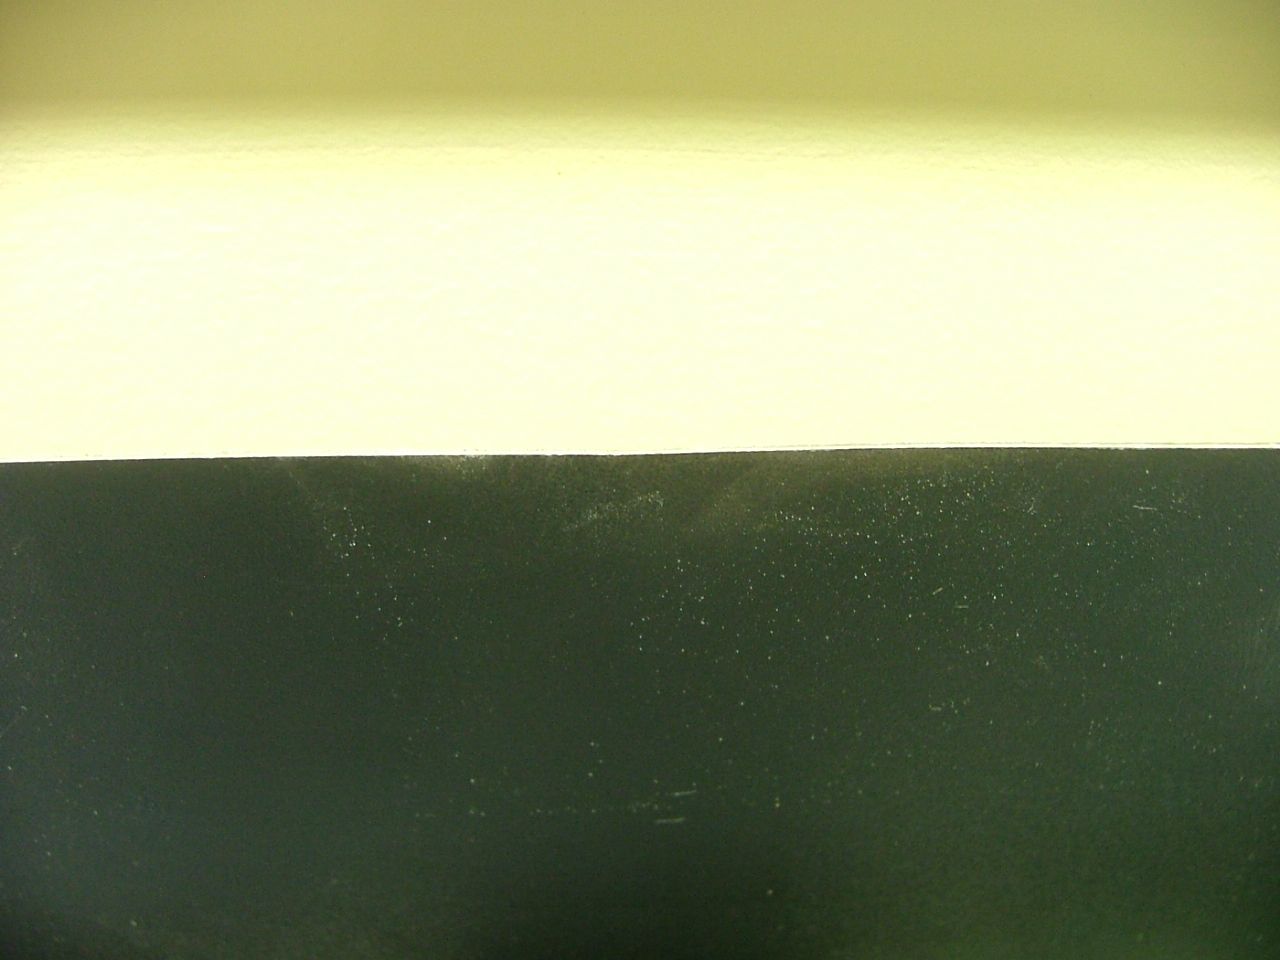
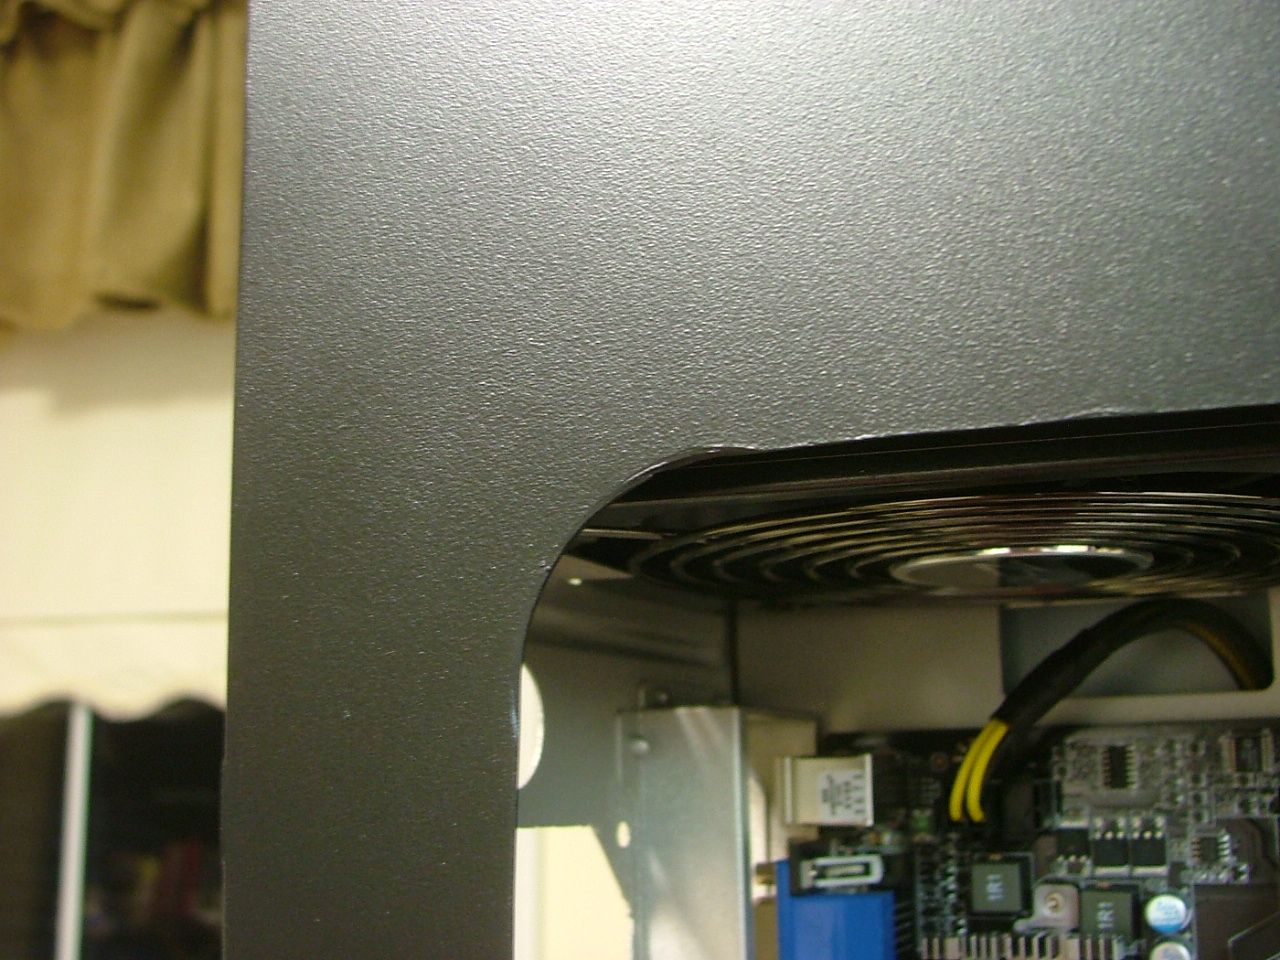
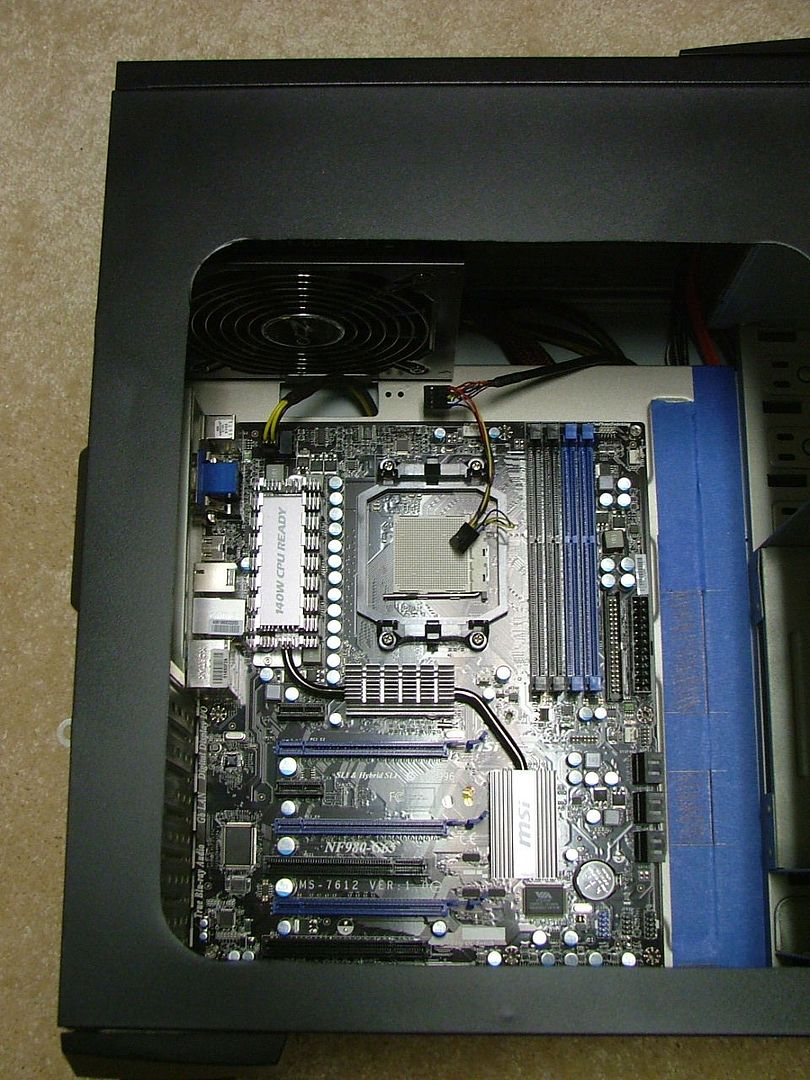
    Anyway the color looks good but the cutout was rougher than I thought….just hope people will be too busy looking inside to notice the rough edges.


    The texture and uneven cutting of the hole saw is a lot more noticeable than I would like. Now on to getting the lex and figure what to do about fans.
    As of 04/29/11
    Celtic Spirit >> (Under Construction / WC’ed) >> Antec SX1200, MSI 890GXM-E65, PII X6 1055T, 2 x GTX 285s, HDDs (TBD), 2 x G.S. F3-12800CL7D-2GBPI, OCZ 700W Modular, XP Pro SP2
    KestrelFlight v1.0 >> (To Be WC’ed v2.0) Zalman Z7+, MSI NF980-G65, PII X4 1055T, 2 x Galaxy 580GTXs, Zalman 32GB SSD, WD V'Raptor 300GB, G.S. F3-16000CL9D-4GBTD, Zalman ZM1000-HP Plus , Win7
    Oz1a v2.0 >> XFX MDA72P7509 750a, PI X2 8870BE, 2 x XFX GTS250, WD 250GB, F2-8500CL5D-2GBPK, Tt TR2 600W, XP Pro SP3

  12. #12
    Registered User
    Join Date
    Jun 2009
    Location
    In Germany
    Posts
    14
    wow looks really great. The new MSI board is really nice. I hate the 890FX from MSI because there are white Sata connectors. And the window fits really good. You see only the hardware. I like that

  13. #13
    Xtreme Enthusiast
    Join Date
    Mar 2006
    Location
    Central VA, USA
    Posts
    731
    Yes I do find the mobo "attractive" (kind of sad when hardware is picked for bling before performance! ) and liked the looks of them when I first saw the 790FX-GD70.

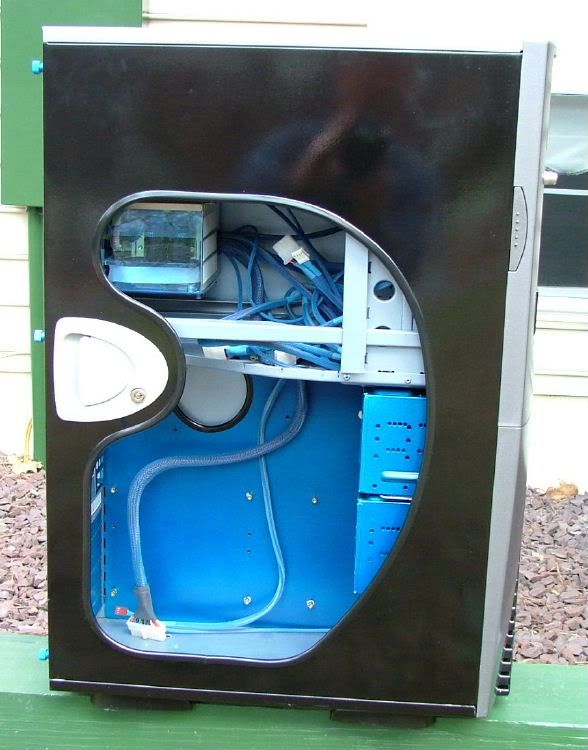
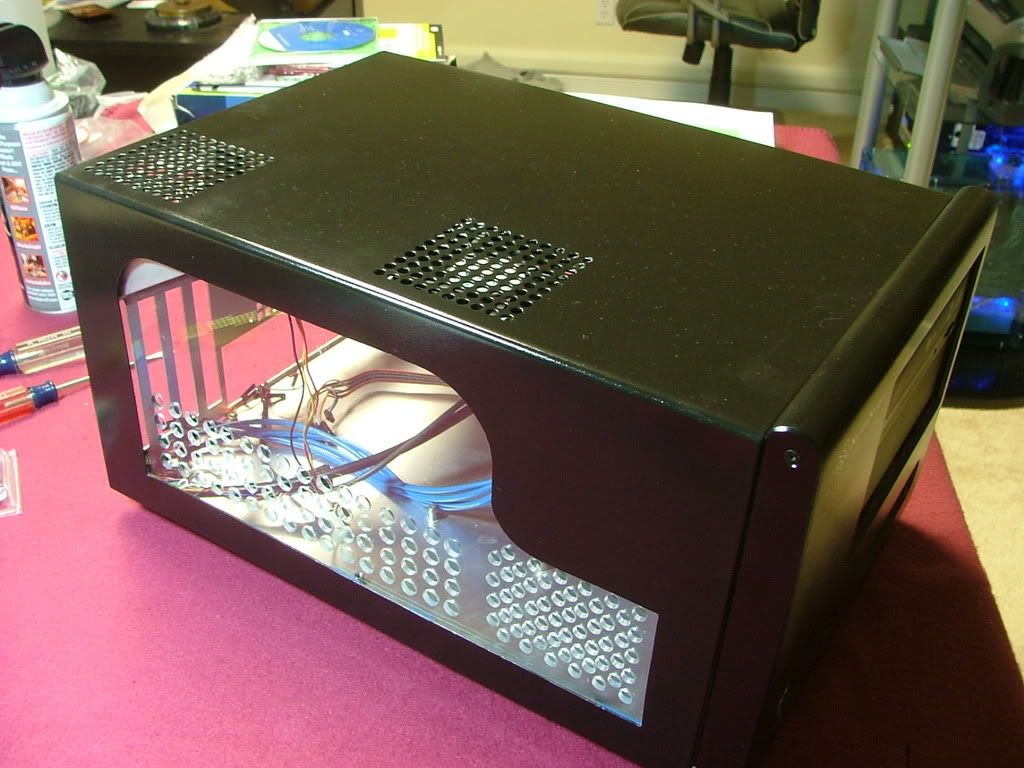
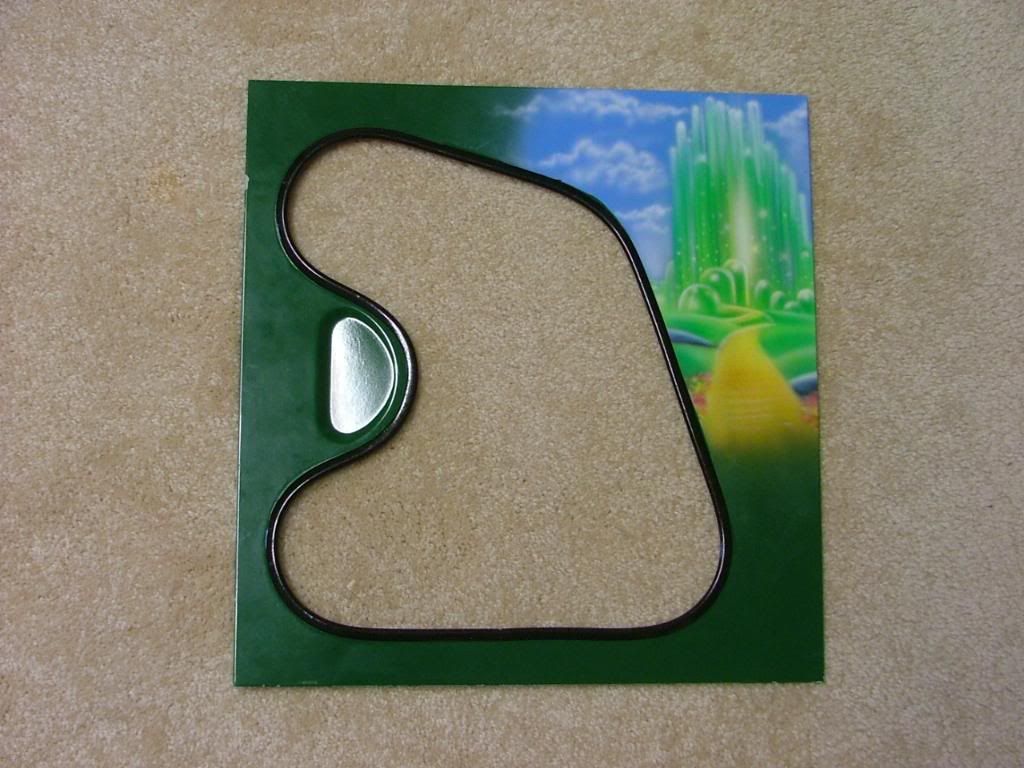
    This is the first time I've limited my window to just the mobo tray, but makes me wonder why I went to the trouble of painting the chassis though.

    Here are some examples of my windows from prior projects.......


    Of couse the ones that go up into the PSU area are because of having acrylic covers and leds on the power supplies.
    As of 04/29/11
    Celtic Spirit >> (Under Construction / WC’ed) >> Antec SX1200, MSI 890GXM-E65, PII X6 1055T, 2 x GTX 285s, HDDs (TBD), 2 x G.S. F3-12800CL7D-2GBPI, OCZ 700W Modular, XP Pro SP2
    KestrelFlight v1.0 >> (To Be WC’ed v2.0) Zalman Z7+, MSI NF980-G65, PII X4 1055T, 2 x Galaxy 580GTXs, Zalman 32GB SSD, WD V'Raptor 300GB, G.S. F3-16000CL9D-4GBTD, Zalman ZM1000-HP Plus , Win7
    Oz1a v2.0 >> XFX MDA72P7509 750a, PI X2 8870BE, 2 x XFX GTS250, WD 250GB, F2-8500CL5D-2GBPK, Tt TR2 600W, XP Pro SP3

  14. #14
    Xtreme Member
    Join Date
    Jan 2008
    Location
    Irving, Texas.
    Posts
    423
    Looks good. I've been considering doing something similar with the Xigmatek lineup of parts; psu, case, fans, heatsink, etc. If only I had the money to do so.
    ==========================================
    XClio 1000, Gigabye GA-MA790XT-UD4P
    AMD Phenom II 955BE @3.2 GHz, Noctua NH-D14
    CORSAIR 950TX 950W, 4GB Corsair XMS3 DDR3 1600
    Sapphire 4850x2 CFX
    Win7 Ultimate


    Quote Originally Posted by stangracin3 View Post
    and the more i type the more BS comes out of my keyboard. LOL

  15. #15
    Xtreme Enthusiast
    Join Date
    Mar 2006
    Location
    Central VA, USA
    Posts
    731
    Quote Originally Posted by aythrea View Post
    Looks good. I've been considering doing something similar with the Xigmatek lineup of parts; psu, case, fans, heatsink, etc. If only I had the money to do so.
    Amazing how that always comes into play!!!


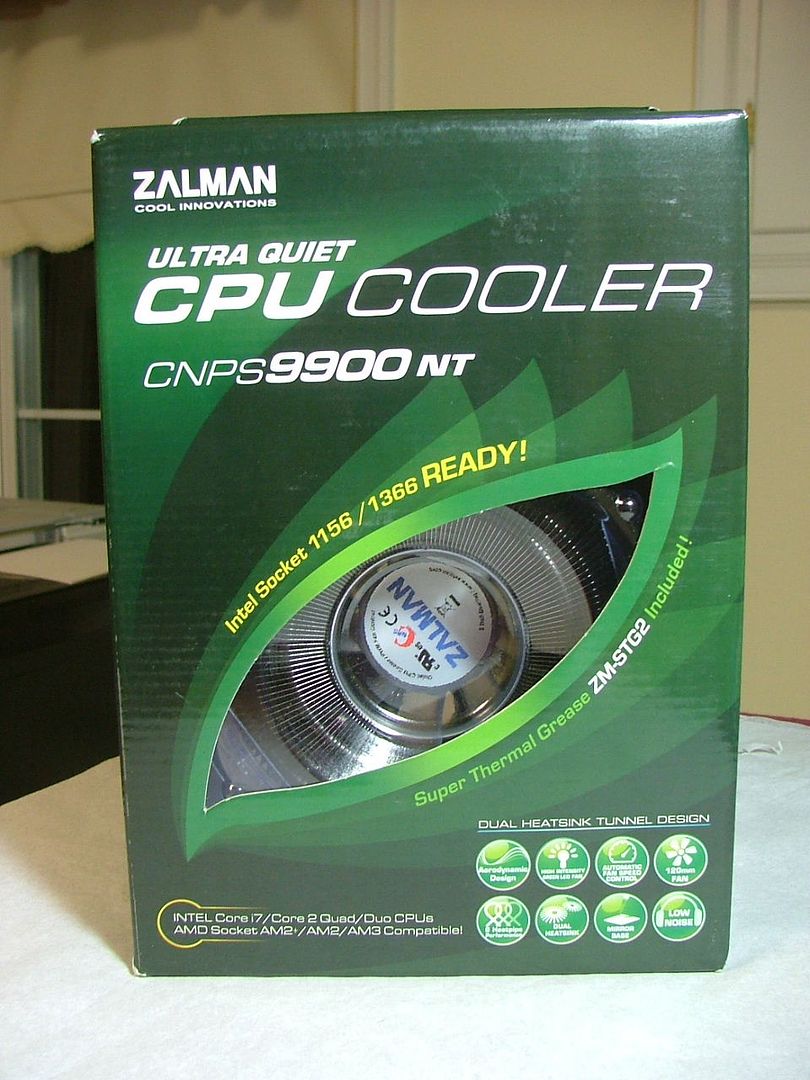
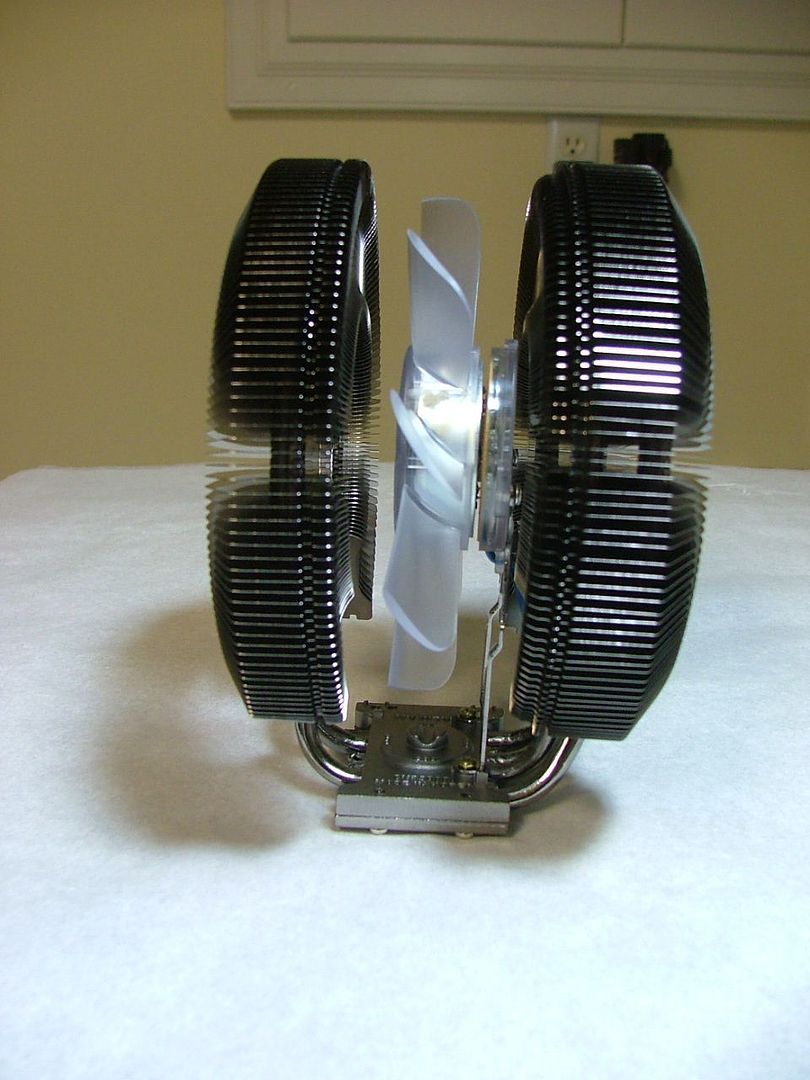
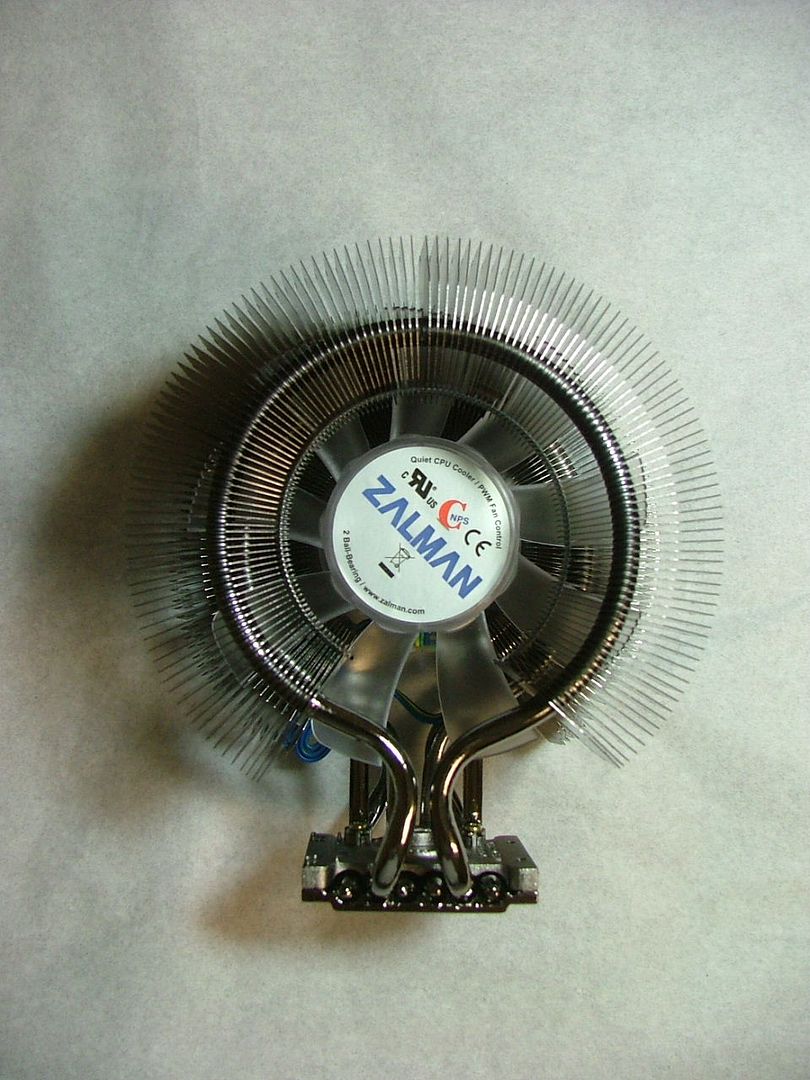
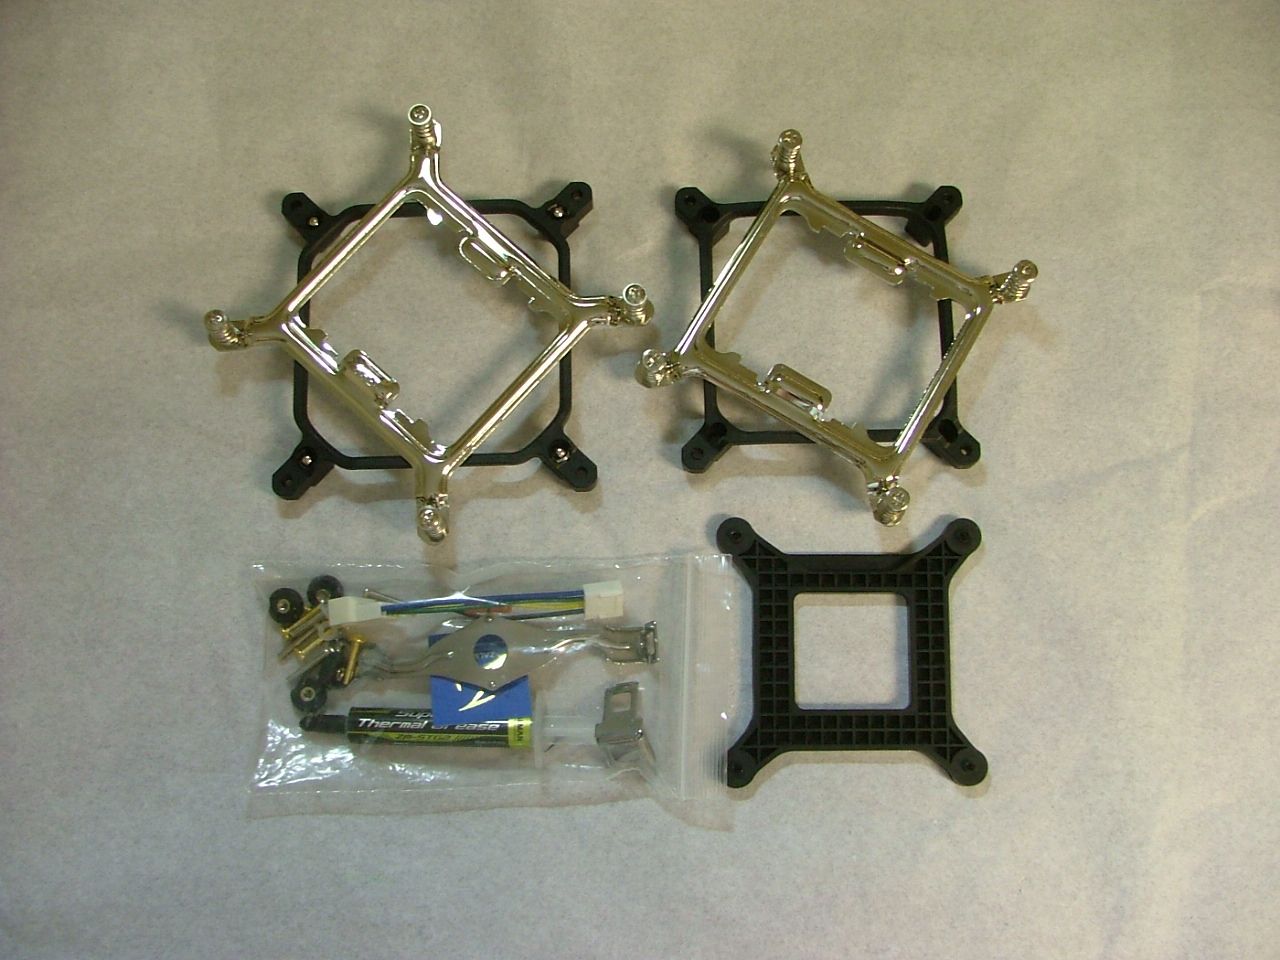
    On another note, for S & Gs I decided to take a look at the HSF for the build. It is a Zalman CNPS9900-NT, which is the latest incarnation of HSF started with the 9500 series. The big difference here is instead of a fan in a large finned cooler the fan is placed between to sets of circular fins. And it is one huge cooler. I just can’t get into condo style of cooler yet and may run a few degrees warmer because of it. Also being the –NT version it is a burnished nickel instead of copper and has a green fan.

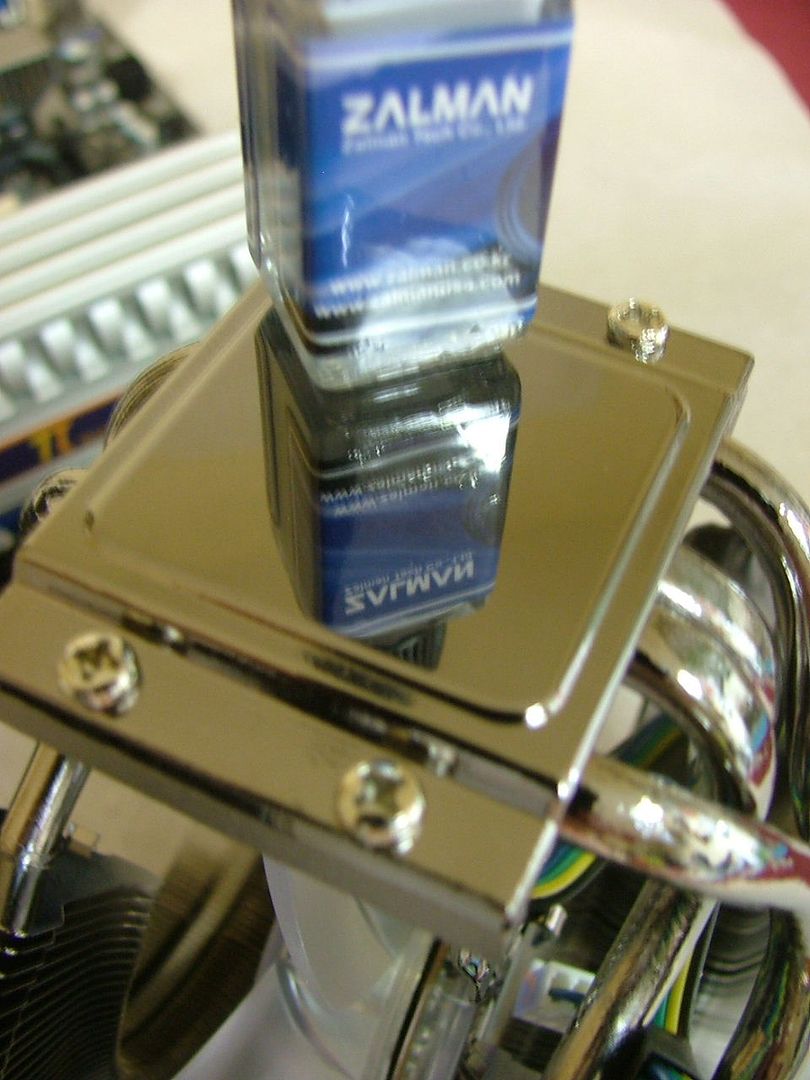
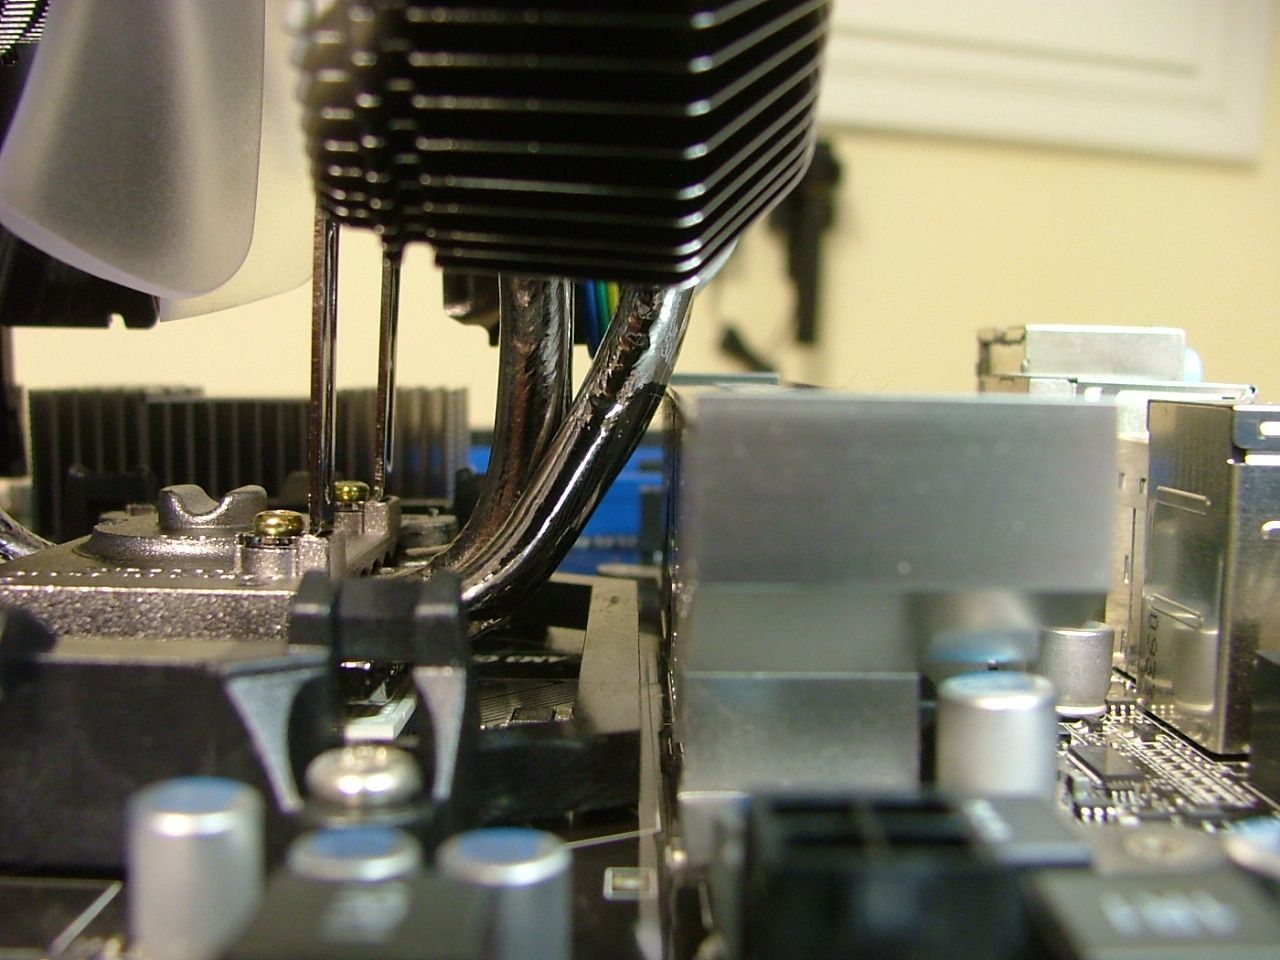
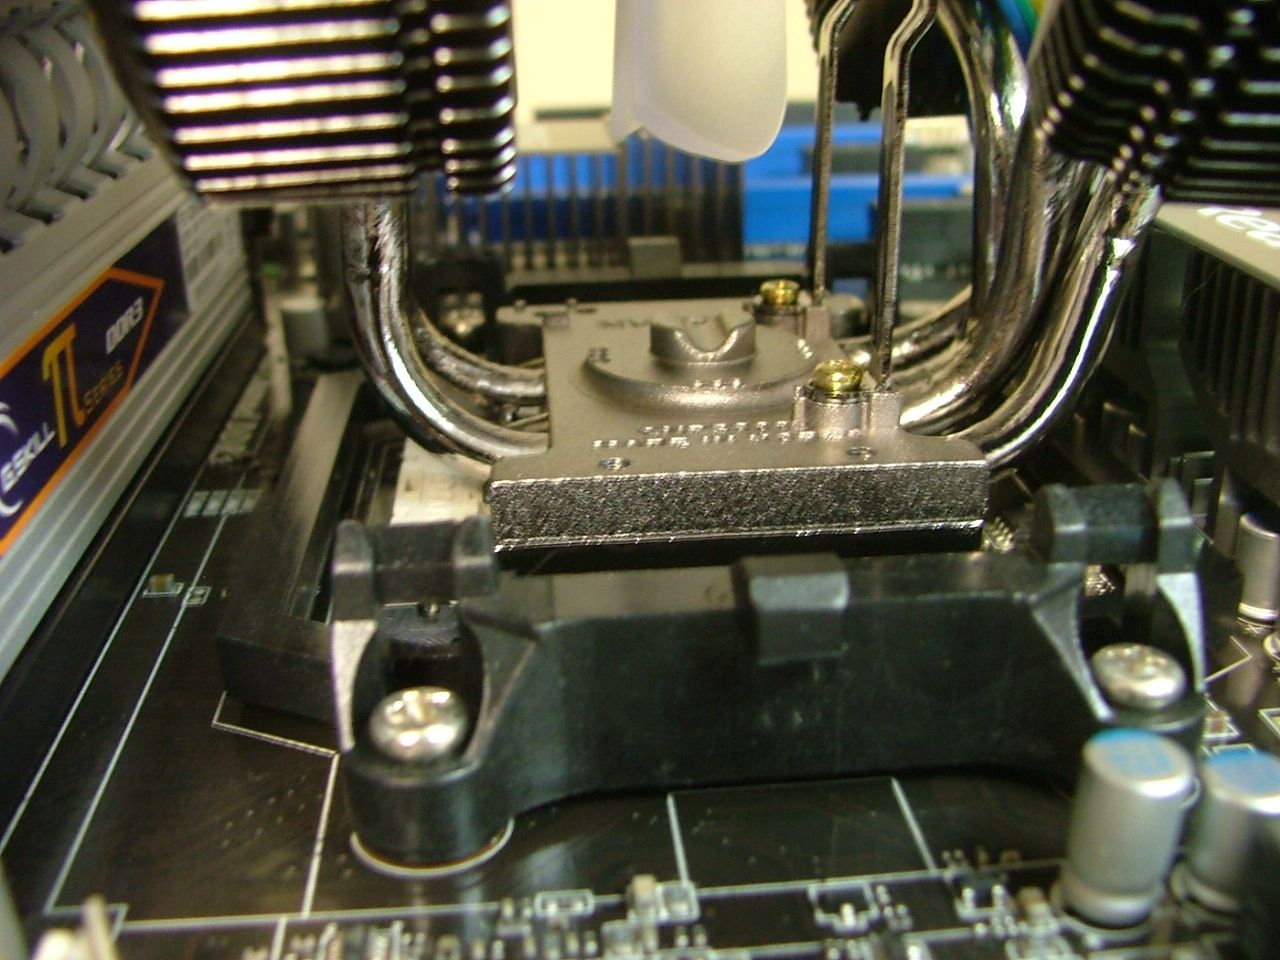
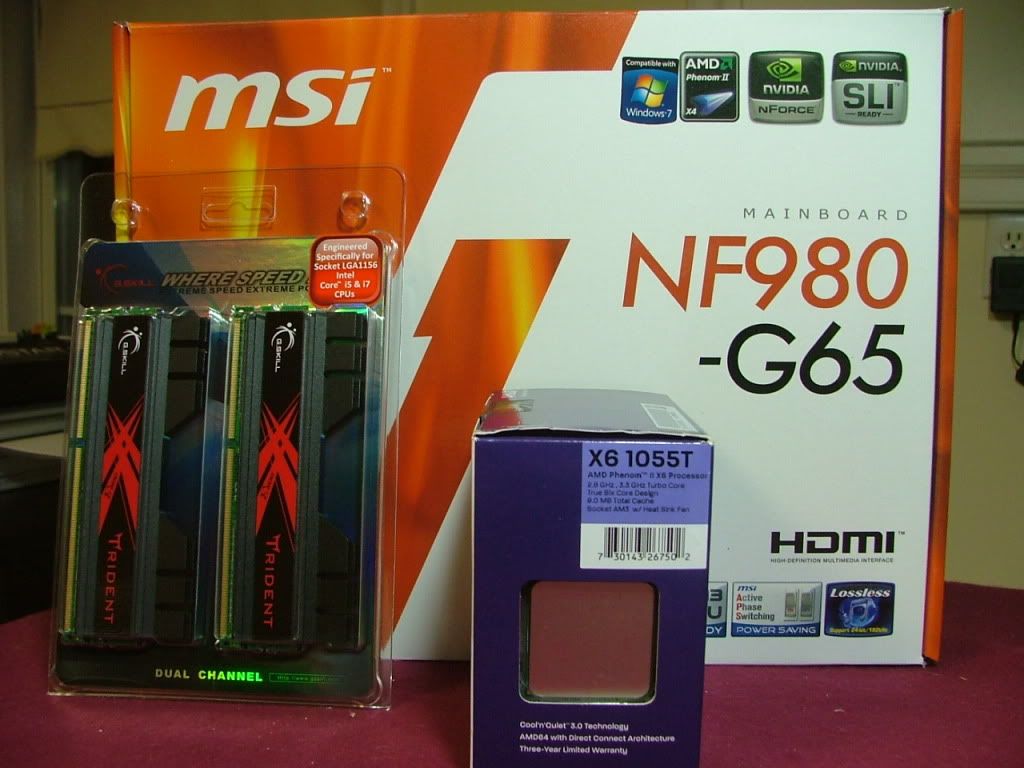
    Here are the usual shots of the box, front, side, mounting hardware, base, along with some shots showing fit. These were taken before the Trident memory came in but the earlier DDR3 is the same height. The 9900 was placed in the socket without the proc in place so I should be able to clear the mosfet cooler with issue……..fingers crossed!


    This’ll be it for a while until I work with the mobo assembly on the tech station to see if I need to flash the bios to get it to work with the 1055T. Also want to get a little overclocking in with DC AM3, the main delay however will be the wife coming home and honey do catch up time!
    As of 04/29/11
    Celtic Spirit >> (Under Construction / WC’ed) >> Antec SX1200, MSI 890GXM-E65, PII X6 1055T, 2 x GTX 285s, HDDs (TBD), 2 x G.S. F3-12800CL7D-2GBPI, OCZ 700W Modular, XP Pro SP2
    KestrelFlight v1.0 >> (To Be WC’ed v2.0) Zalman Z7+, MSI NF980-G65, PII X4 1055T, 2 x Galaxy 580GTXs, Zalman 32GB SSD, WD V'Raptor 300GB, G.S. F3-16000CL9D-4GBTD, Zalman ZM1000-HP Plus , Win7
    Oz1a v2.0 >> XFX MDA72P7509 750a, PI X2 8870BE, 2 x XFX GTS250, WD 250GB, F2-8500CL5D-2GBPK, Tt TR2 600W, XP Pro SP3

  16. #16
    Xtreme Enthusiast
    Join Date
    Mar 2006
    Location
    Central VA, USA
    Posts
    731
    While everything that can has gotten in the way of getting back on this unit, delays always cause me big trouble........ more time to look at different parts and play with ebay.

    So this is what we have now, but one acquisistion may have kilt a new part.

    CASE: Zalman Z7 Plus
    PSU: Zalman ZM850-HP Plus (http://www.zalman.com/ENG/product/Pr...ad.asp?Idx=404)
    MOBO: MSI NF980-G65 (bumped up from the 750)
    CPU: PII X4 1055T (bumped up from the 955 BE)
    HSF: Zalman CNPS9900-NT
    GPU: 3 x Evga GTX 470 SC (this is what may kill the PSU!!)
    MEMORY: F3-16000CL9D-4GBTD w/ Zalman ZM-RC1000
    HDD 1: 2 x WD Raptor 74GB (Primary RAID1)
    HDD 2: 2 x WD1001FALS 1TB (RAID0)
    Optical Drive 1: TBD
    Fan Controller: Zalman ZM-MFC3

    Big issue holding me up now (besides worry on the PSU) is getting the bios flashed so the mobo will work with the 1055!
    As of 04/29/11
    Celtic Spirit >> (Under Construction / WC’ed) >> Antec SX1200, MSI 890GXM-E65, PII X6 1055T, 2 x GTX 285s, HDDs (TBD), 2 x G.S. F3-12800CL7D-2GBPI, OCZ 700W Modular, XP Pro SP2
    KestrelFlight v1.0 >> (To Be WC’ed v2.0) Zalman Z7+, MSI NF980-G65, PII X4 1055T, 2 x Galaxy 580GTXs, Zalman 32GB SSD, WD V'Raptor 300GB, G.S. F3-16000CL9D-4GBTD, Zalman ZM1000-HP Plus , Win7
    Oz1a v2.0 >> XFX MDA72P7509 750a, PI X2 8870BE, 2 x XFX GTS250, WD 250GB, F2-8500CL5D-2GBPK, Tt TR2 600W, XP Pro SP3

  17. #17
    Xtreme Enthusiast
    Join Date
    Mar 2006
    Location
    Central VA, USA
    Posts
    731
    Okay after much "gnashing of teeth" I've managed to get the bios updated and the 1055T mounted, HOWEVER as usual with time on my hands things have changed......... PSU, GPU, and HDD arrangement has changed.

    CASE: Zalman Z7 Plus
    PSU: Zalman ZM1000-HP Plus
    CPU: PII X4 1055T
    HSF: Zalman CNPS9900-NT
    GPU: 2 x Galaxy GTX 580
    MEMORY: F3-16000CL9D-4GBTD w/ Zalman ZM-RC1000
    HDD 1: Zalman SSD0032S1 32GB SSD (Primary)
    HDD 2: WD V’Raptor 300GB[/COLOR] (Misc Apps etc)
    HDD 3: 2 x WD1001FALS 1TB (RAID 0 Storage)
    Optical Drive 1: Pioneer DVR-S18MBK
    Fan Controller: Zalman ZM-MFC3

    The biggy right now is I'm waiting on the PSU to come in so running it on the Tec Station with an OCZ 700W and the original 285. Trying to get the HDD loaded with the OS and it has been a total bomb........

    http://www.xtremesystems.org/forums/...d.php?t=264146
    As of 04/29/11
    Celtic Spirit >> (Under Construction / WC’ed) >> Antec SX1200, MSI 890GXM-E65, PII X6 1055T, 2 x GTX 285s, HDDs (TBD), 2 x G.S. F3-12800CL7D-2GBPI, OCZ 700W Modular, XP Pro SP2
    KestrelFlight v1.0 >> (To Be WC’ed v2.0) Zalman Z7+, MSI NF980-G65, PII X4 1055T, 2 x Galaxy 580GTXs, Zalman 32GB SSD, WD V'Raptor 300GB, G.S. F3-16000CL9D-4GBTD, Zalman ZM1000-HP Plus , Win7
    Oz1a v2.0 >> XFX MDA72P7509 750a, PI X2 8870BE, 2 x XFX GTS250, WD 250GB, F2-8500CL5D-2GBPK, Tt TR2 600W, XP Pro SP3

  18. #18
    Xtreme Enthusiast
    Join Date
    Mar 2006
    Location
    Central VA, USA
    Posts
    731
    Starting the New Year….2011

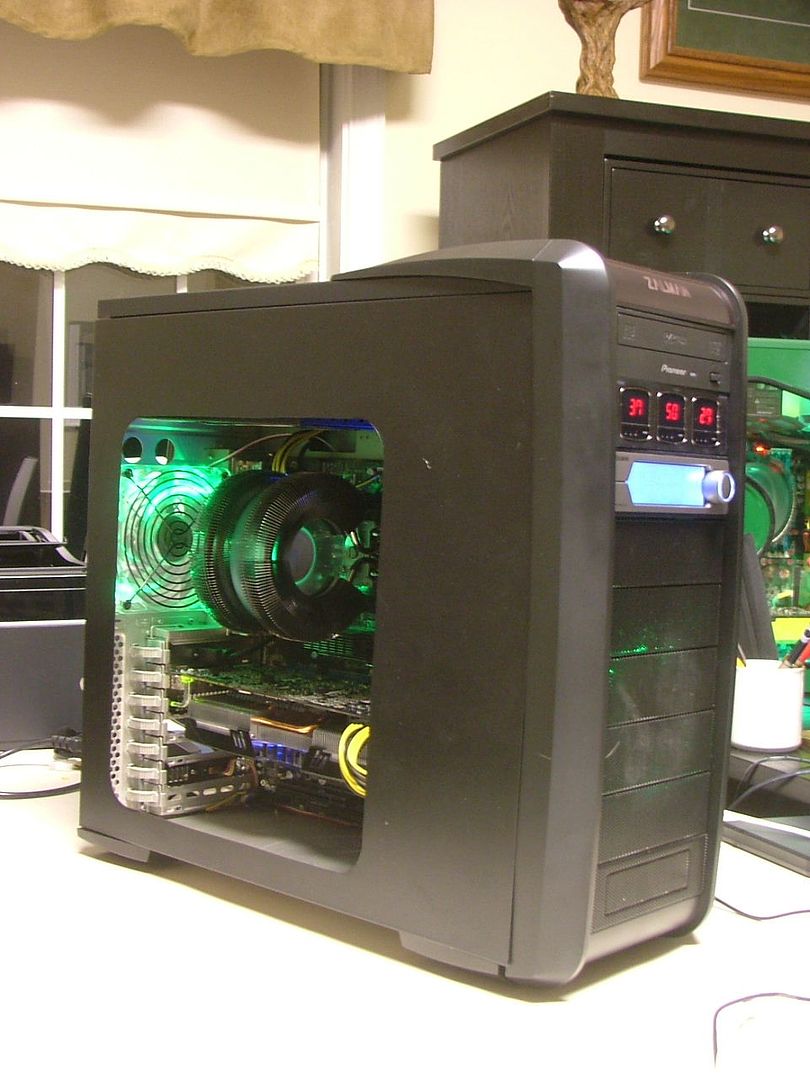
    Okay got the flash issue out of the way so now on with building!! Almost like starting at the beginning, and the build now has a name……KestrelFlight.

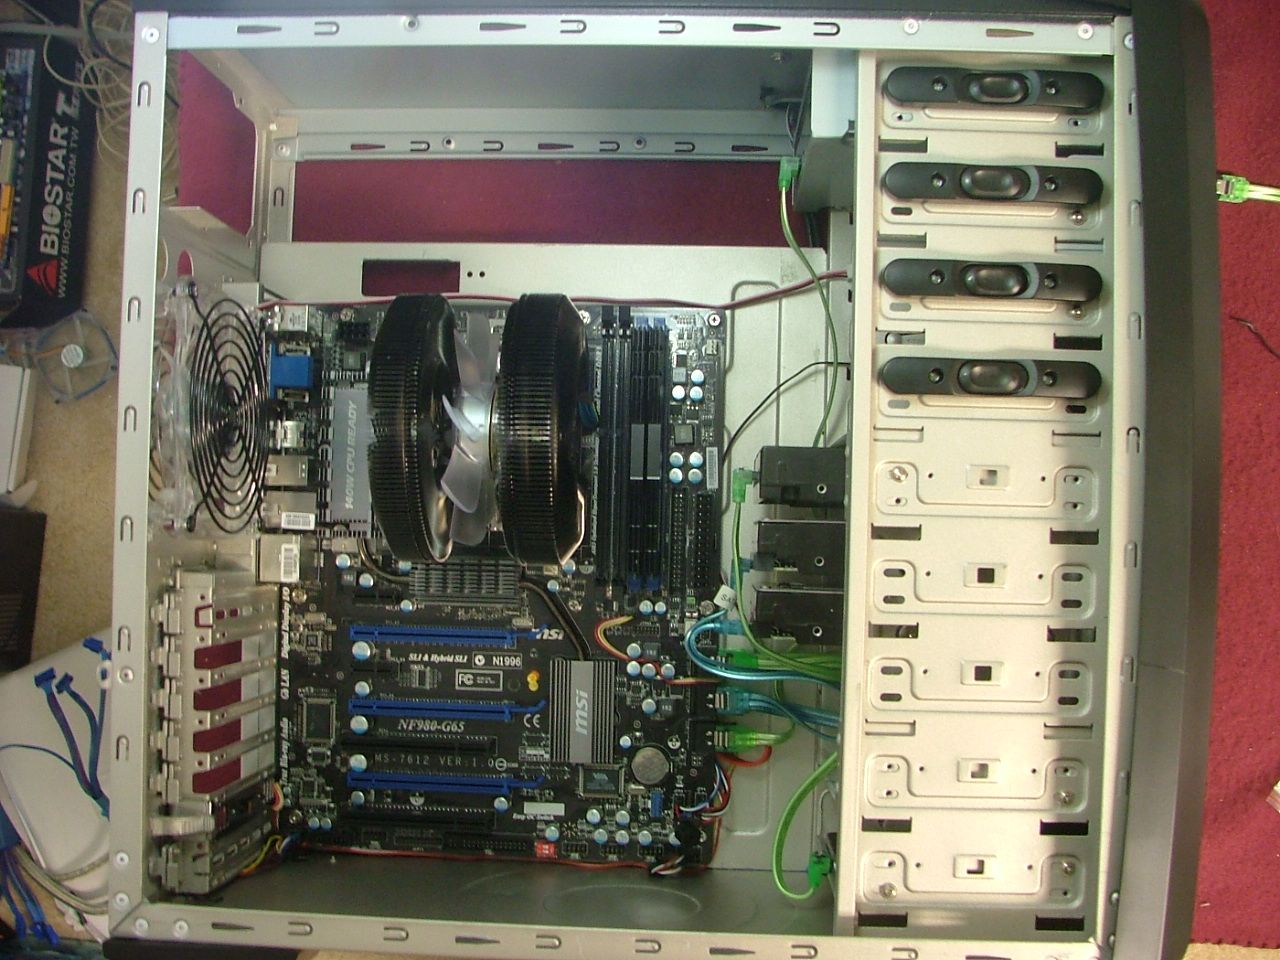
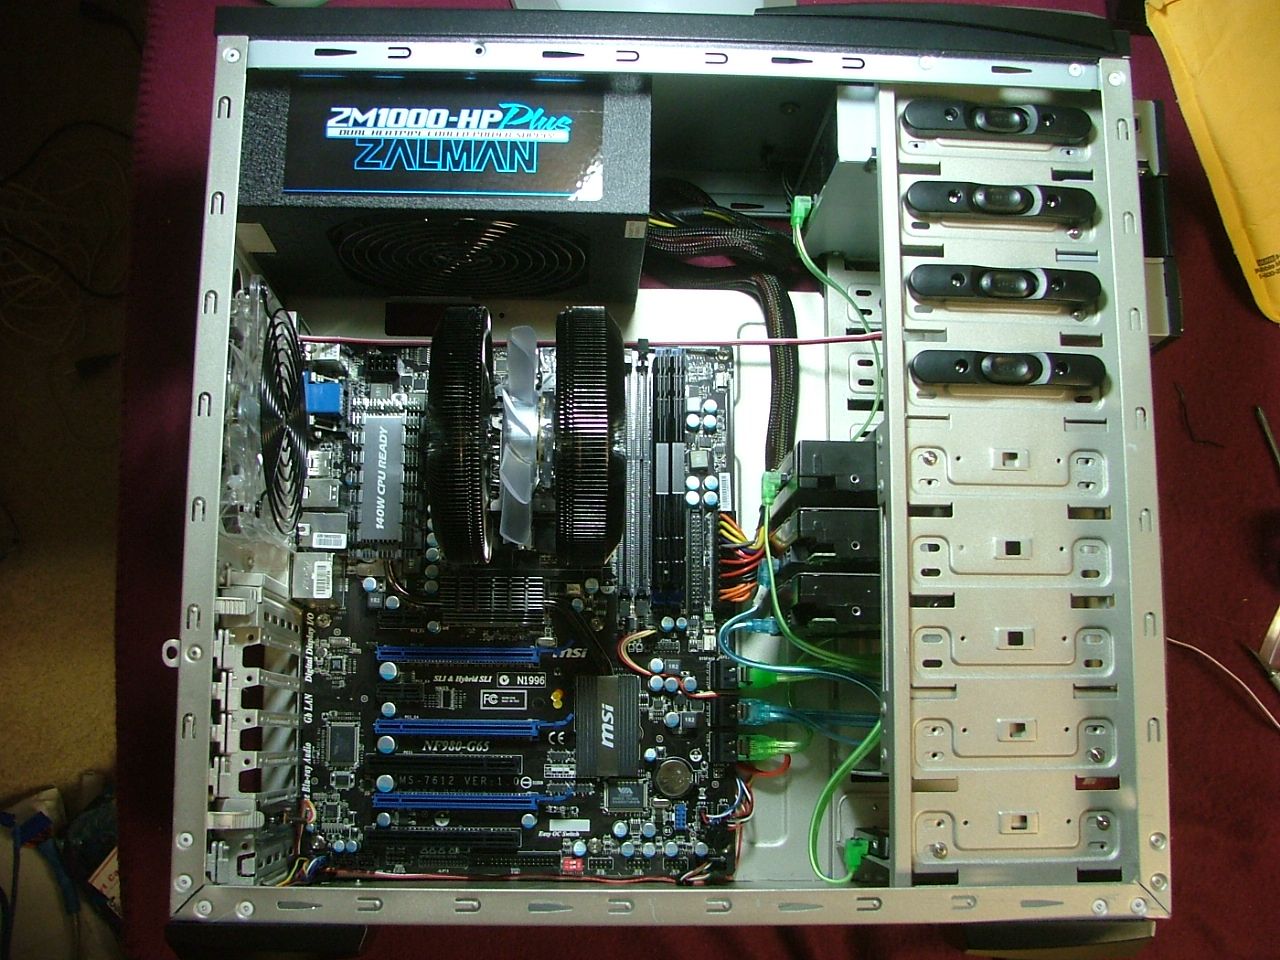
    This last week I have taken the mobo assembly off the TechStation and mounted it into the case. Had a couple of major components arrive the 6th (that’ll be covered later) but really got the desire to finish this thing (air cooler version that is!!). However this weekend turned into a bust time wise. Well anyway this may not be as wordy as usual, but that’s a good thing!

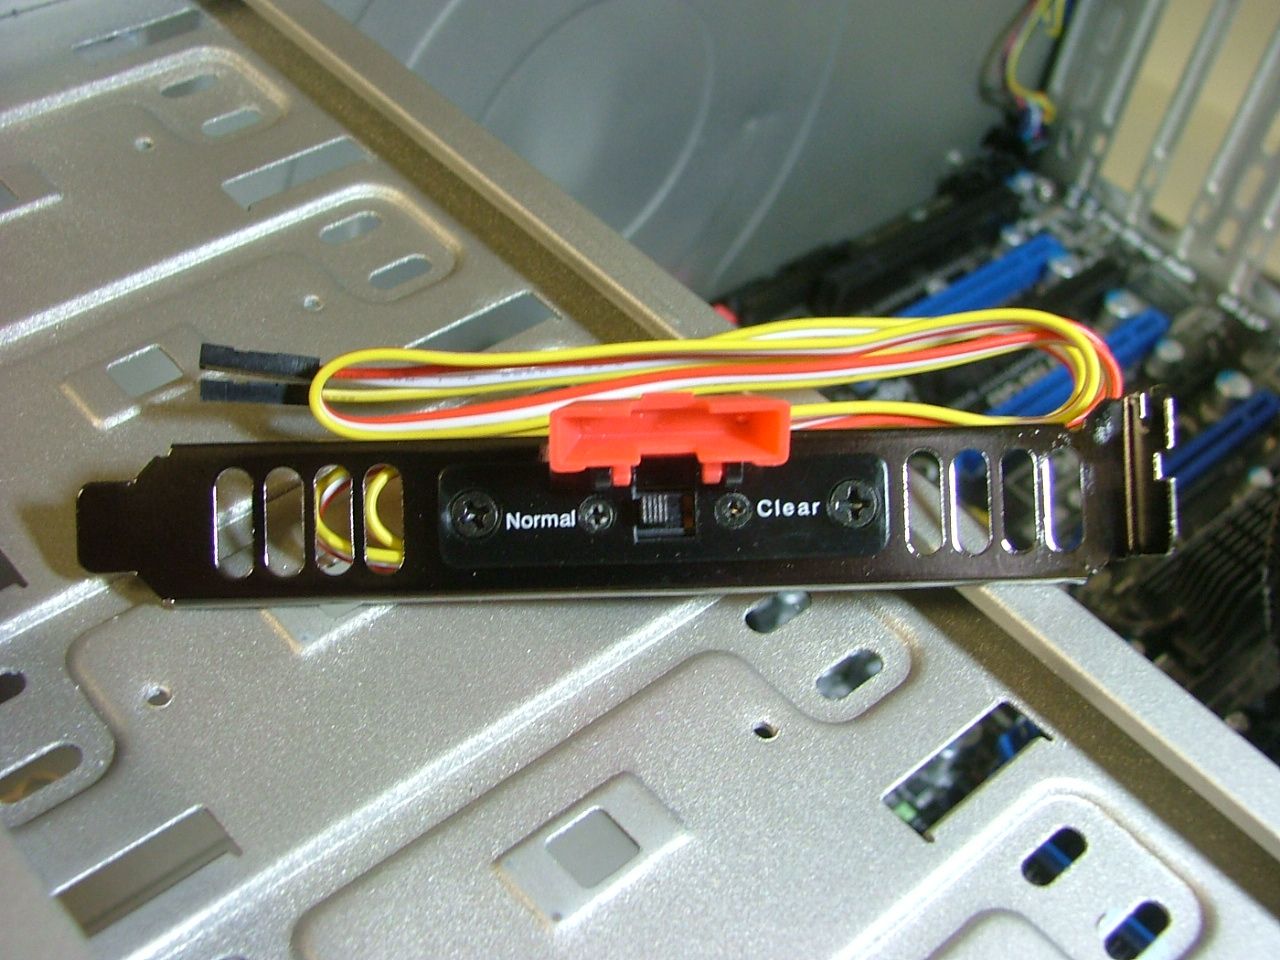
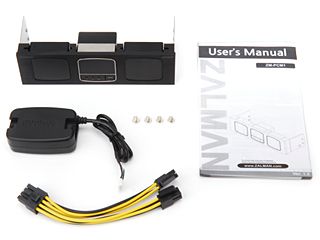
    For the first running I’ll be using the 285 and for some extra goodies I’ve added Zalman’s ZM-PCM1 with two ZM-VPM1s http://www.zalman.com/ENG/product/Pr...ad.asp?Idx=417 & http://www.zalman.com/ENG/product/Pr...ad.asp?Idx=418 . Also added Silverstone’s CLEARCMOS switch for when I start trying to overclocking. The CMOS jumper is located in the middle of the mobo and didn’t feel like reaching around things.


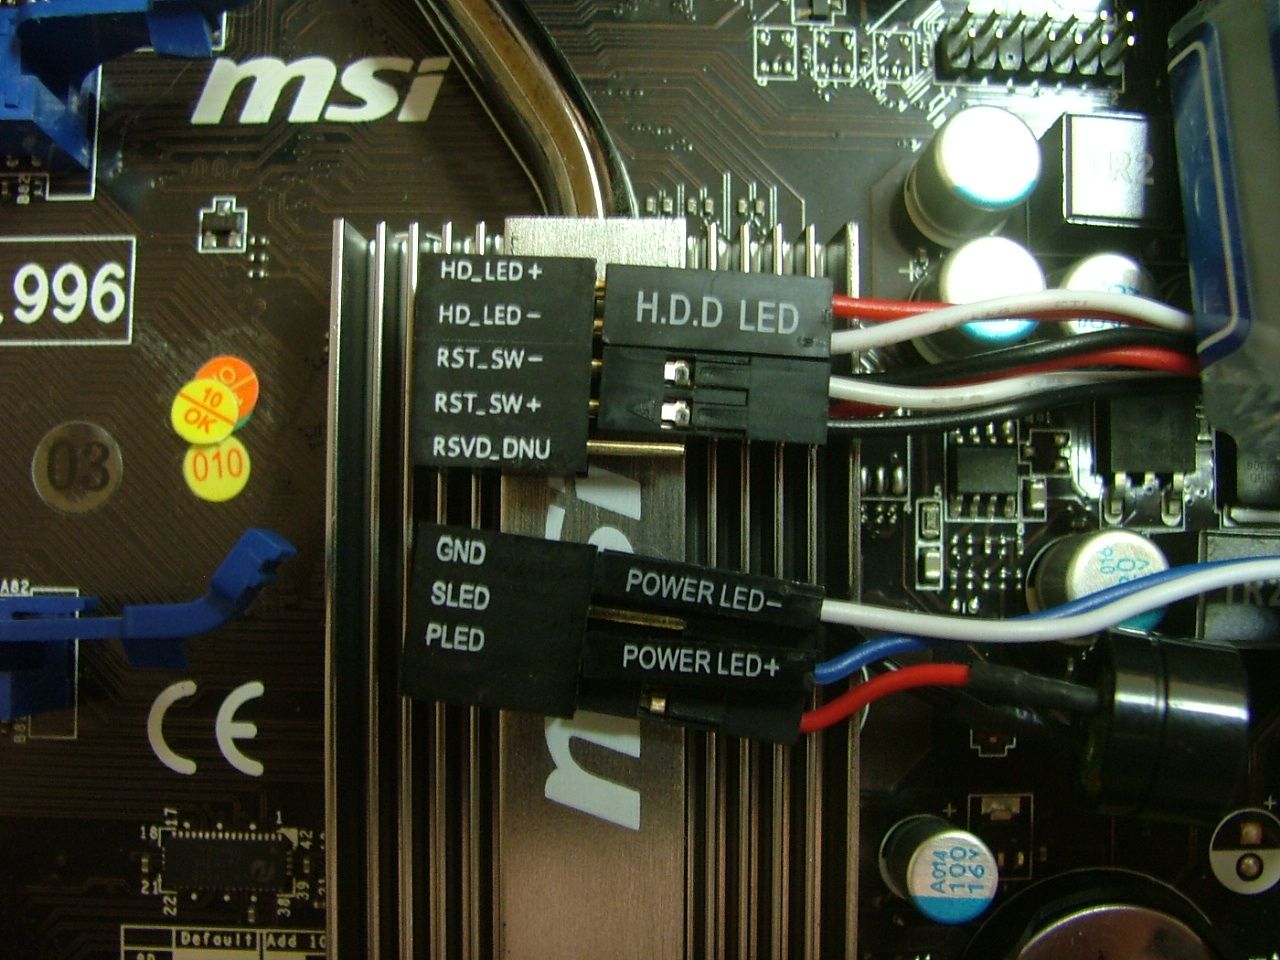
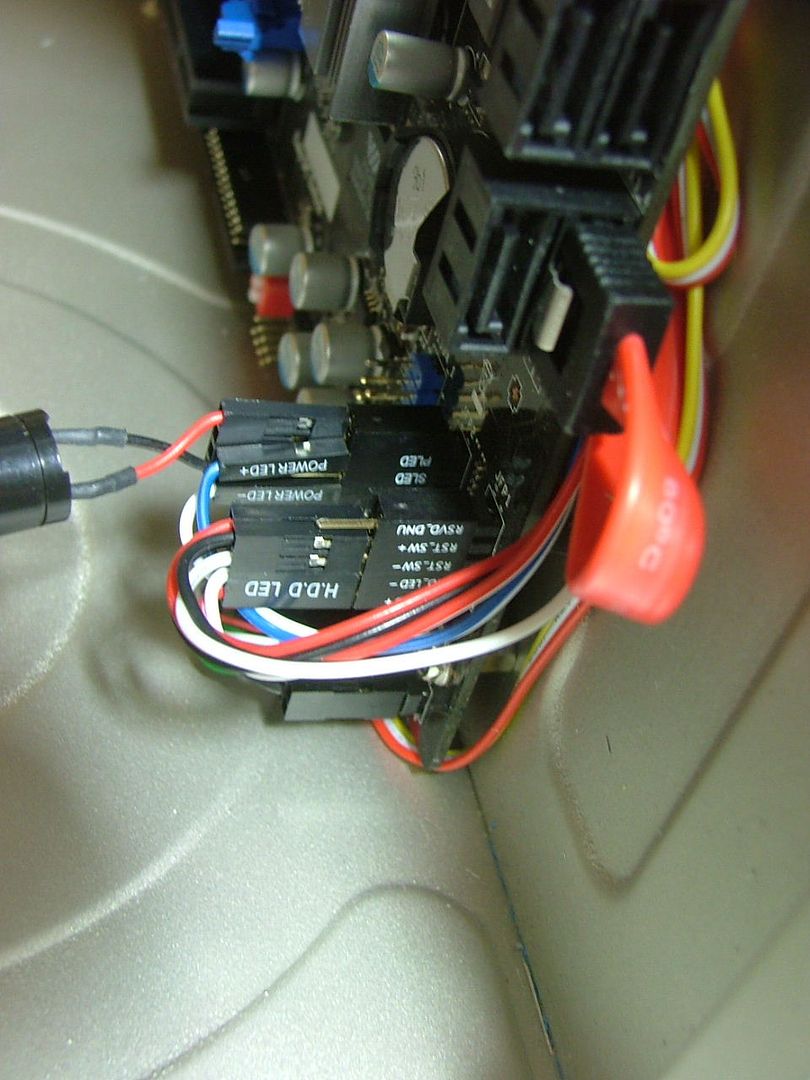
    Initially I started mounting the mobo, HDDs, bezel items, and PSU when it arrived. One of the things that MSI included with this mobo are something I call “pre-wire plugs”. In principle it sounds pretty cool. Hook up the entire front panel wiring to the plugs and then just plug those into the mobo.

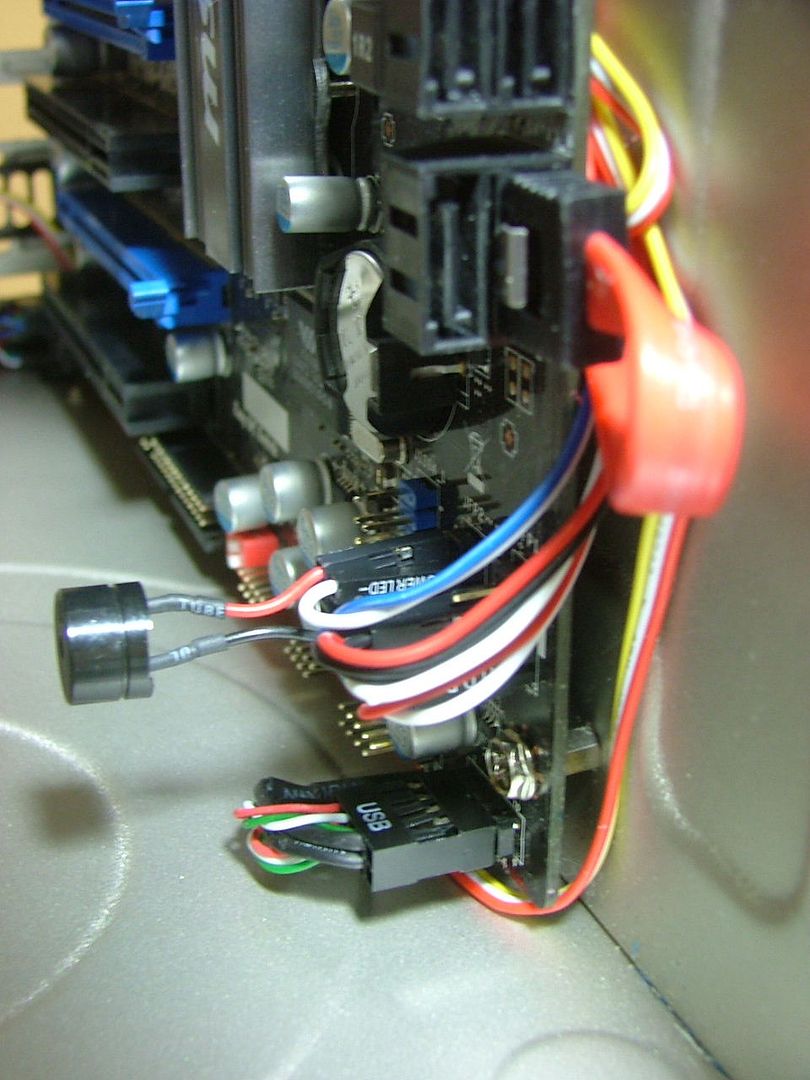
    But as you can see that makes the connections rather tall, and I wanted to see less wires so I went back to just doing it “the old way”.


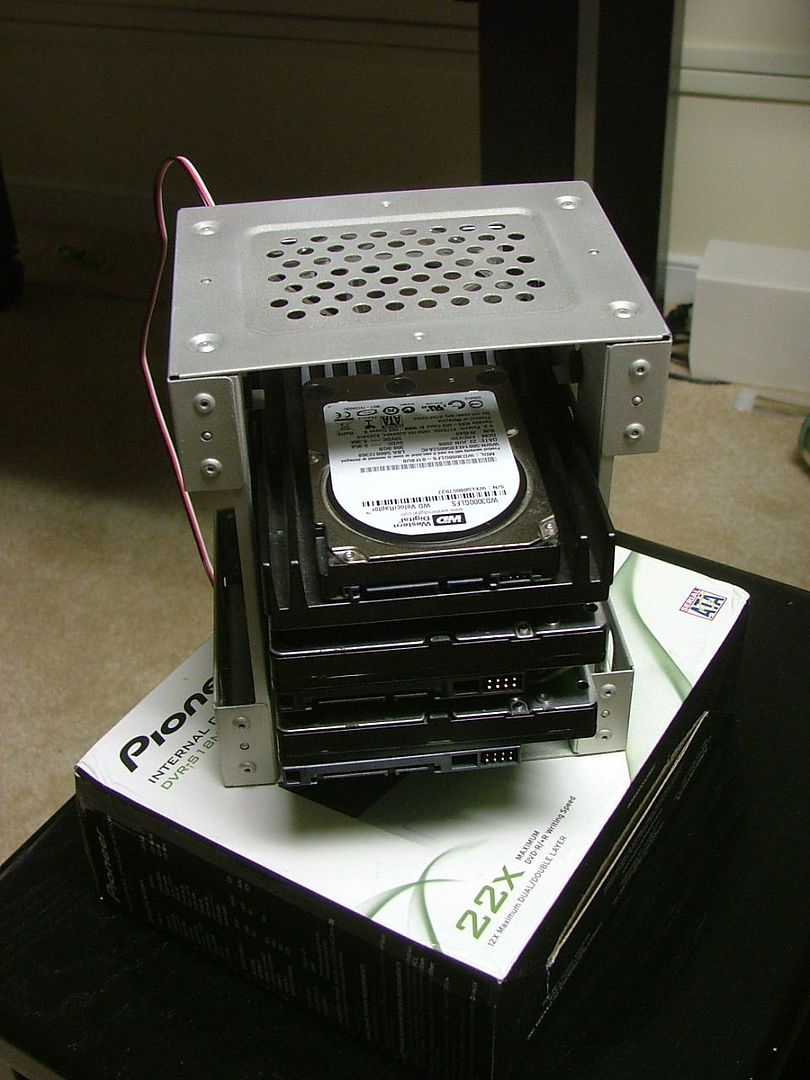
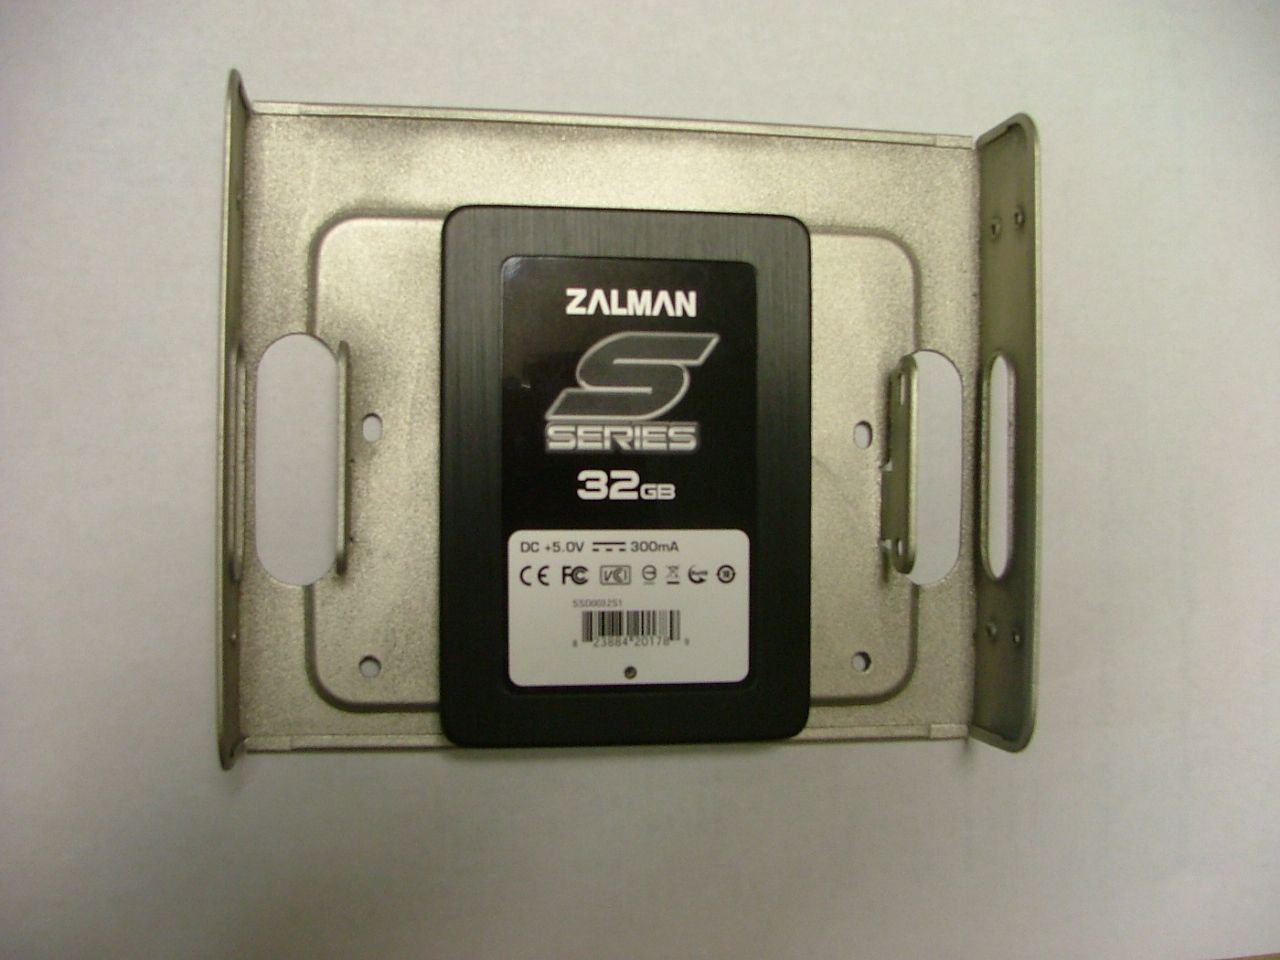
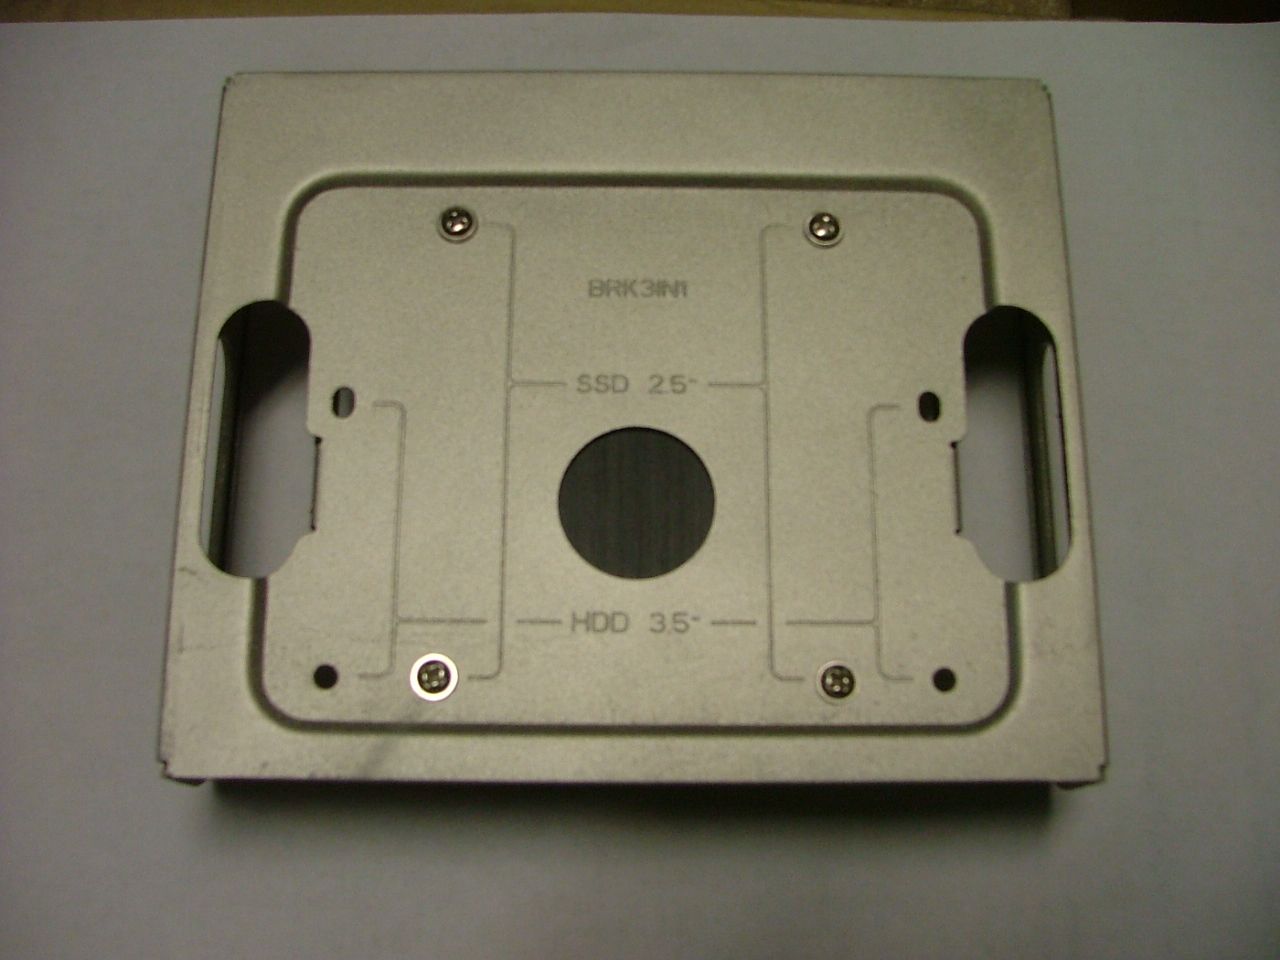
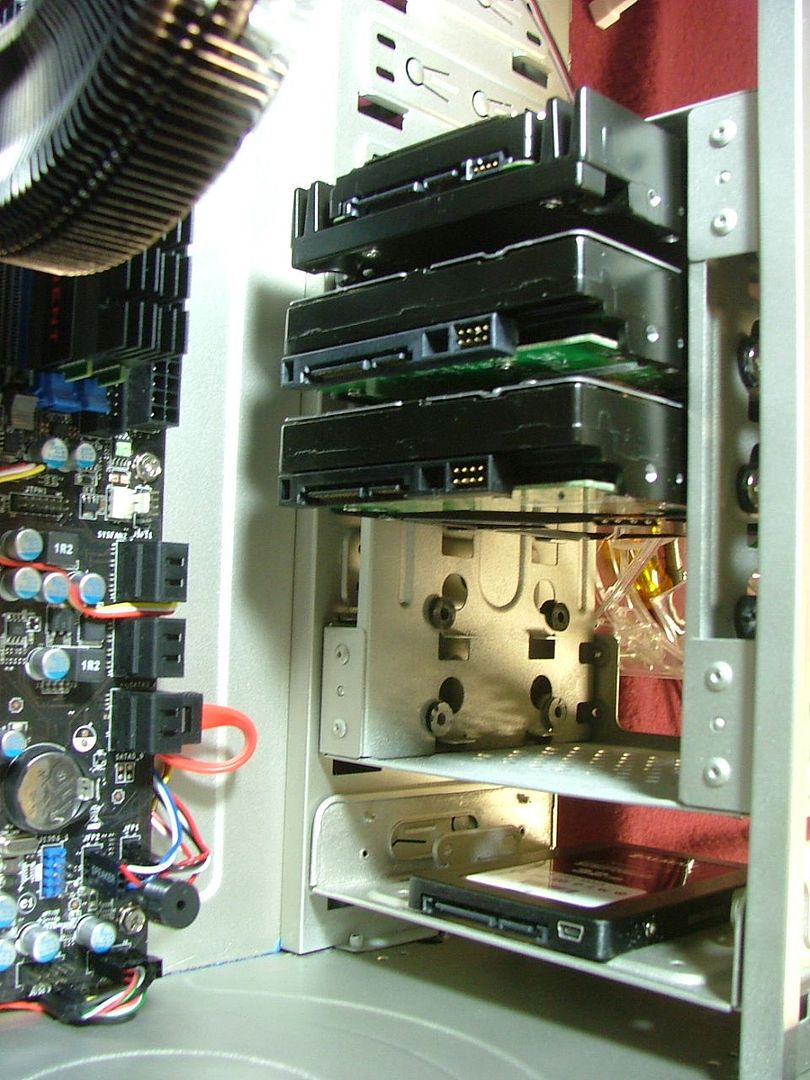
    Next up was mounting the HDDs into the cage and the SSD to its dedicated tray, which also would hold the FDD if one were still using those.


    Something to note about the SSD tray, this is the second build I’ve done where the case manufacturer supplied one. However I like the one in the Zalman as it is metal whereas the one in the NZXT Hades is plastic. To get things rolling I mounted my OCZ PSU just in case the Zalman 1000 didn’t arrive for the week. That one would handle the single 285 with out issue and I did want to say I had it running this weekend!
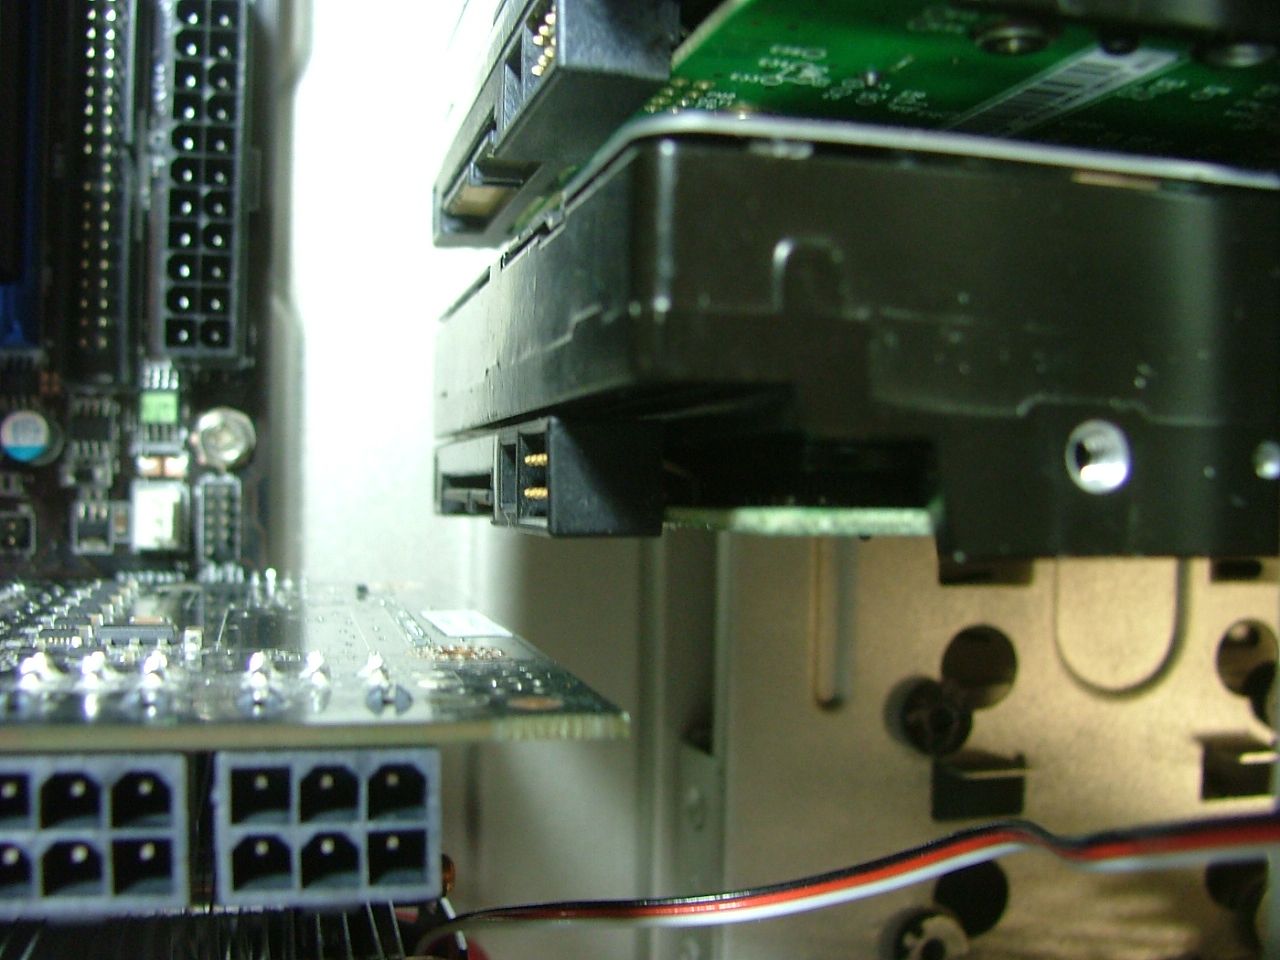
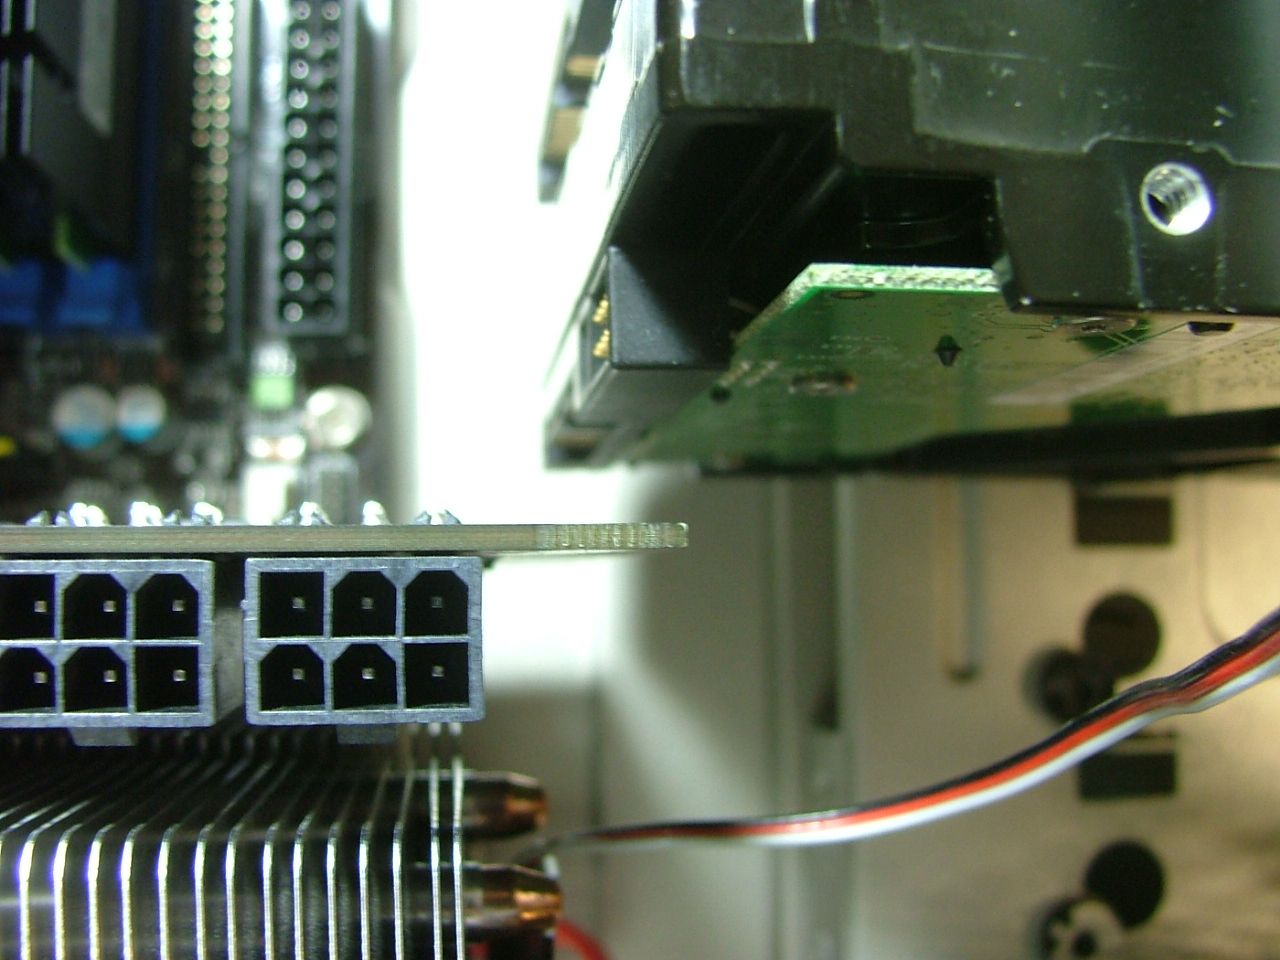
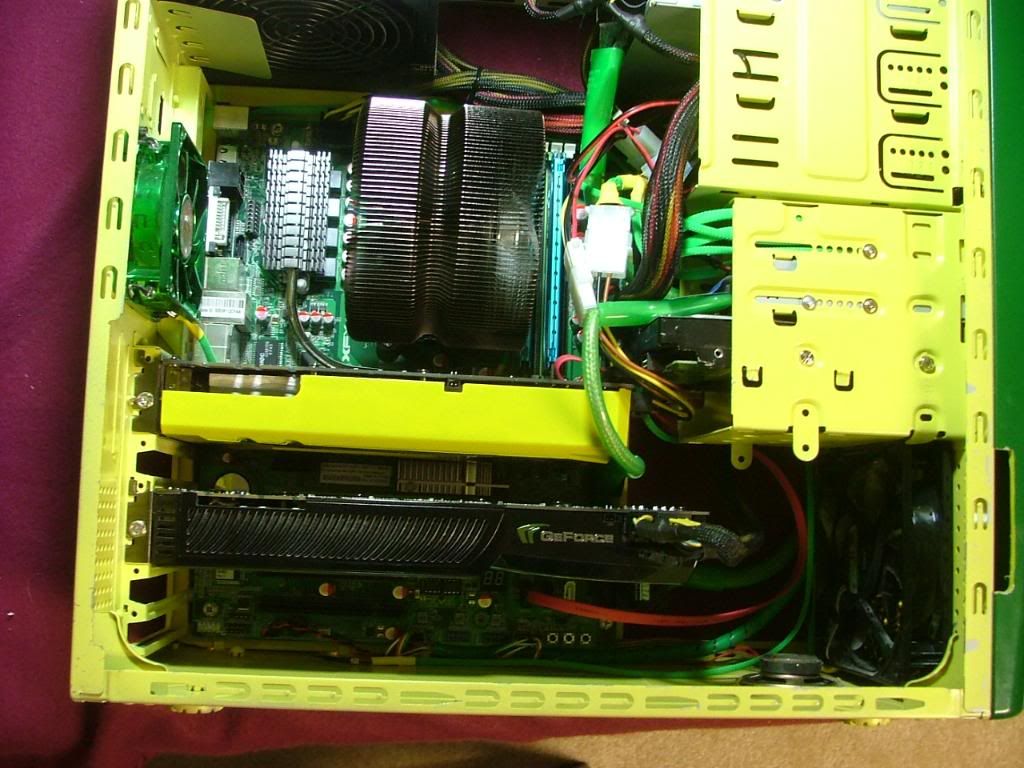
    The HDDs were mounted in the center of the cage as I wanted the fan to really cool the V’Raptor with the 2 x 1TBs below. Anyway mount the HDD cage and something didn’t look quiet right……so decided to mount the GPU, or try to any way!


    So the cage came out and moved everything up one slot and………..


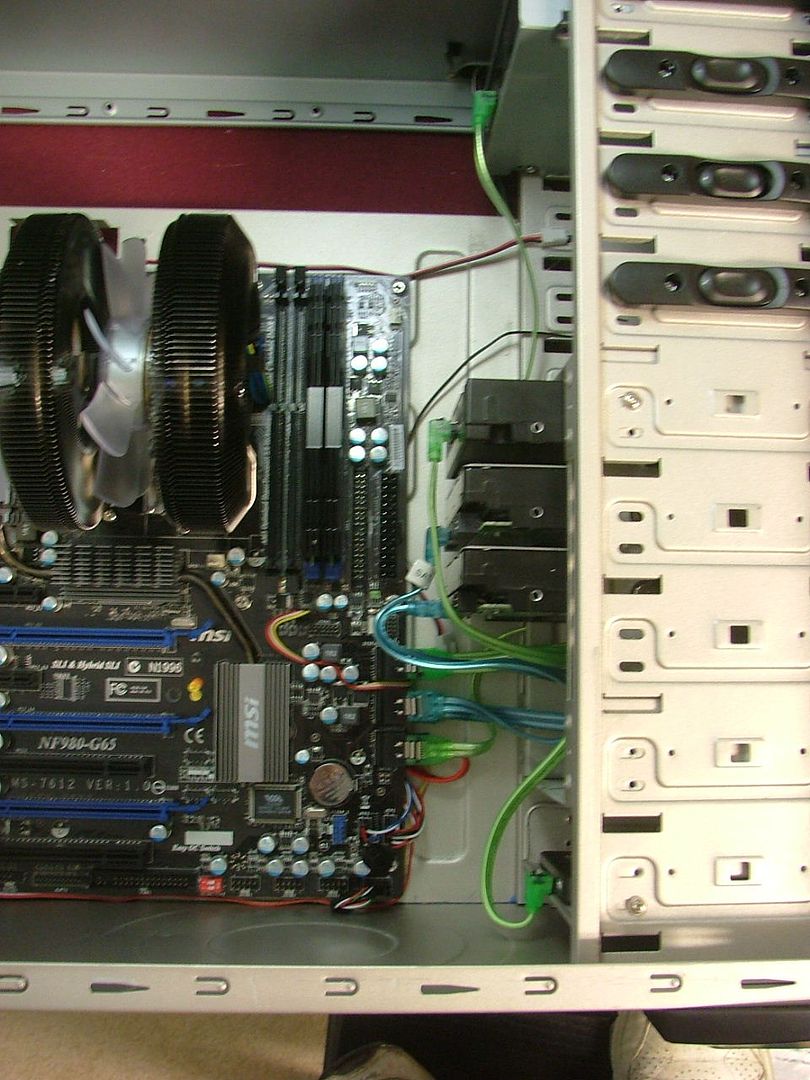
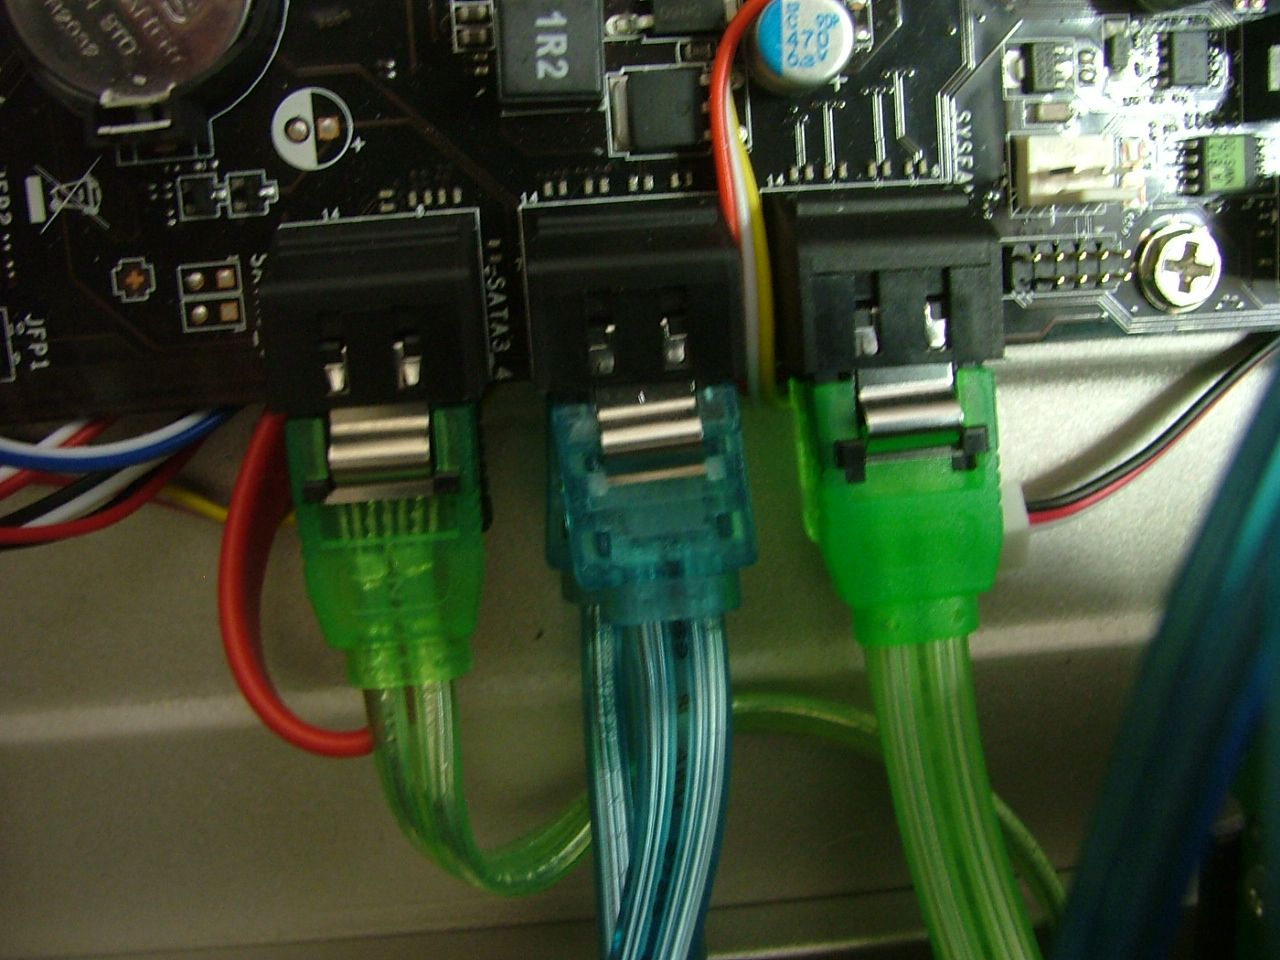
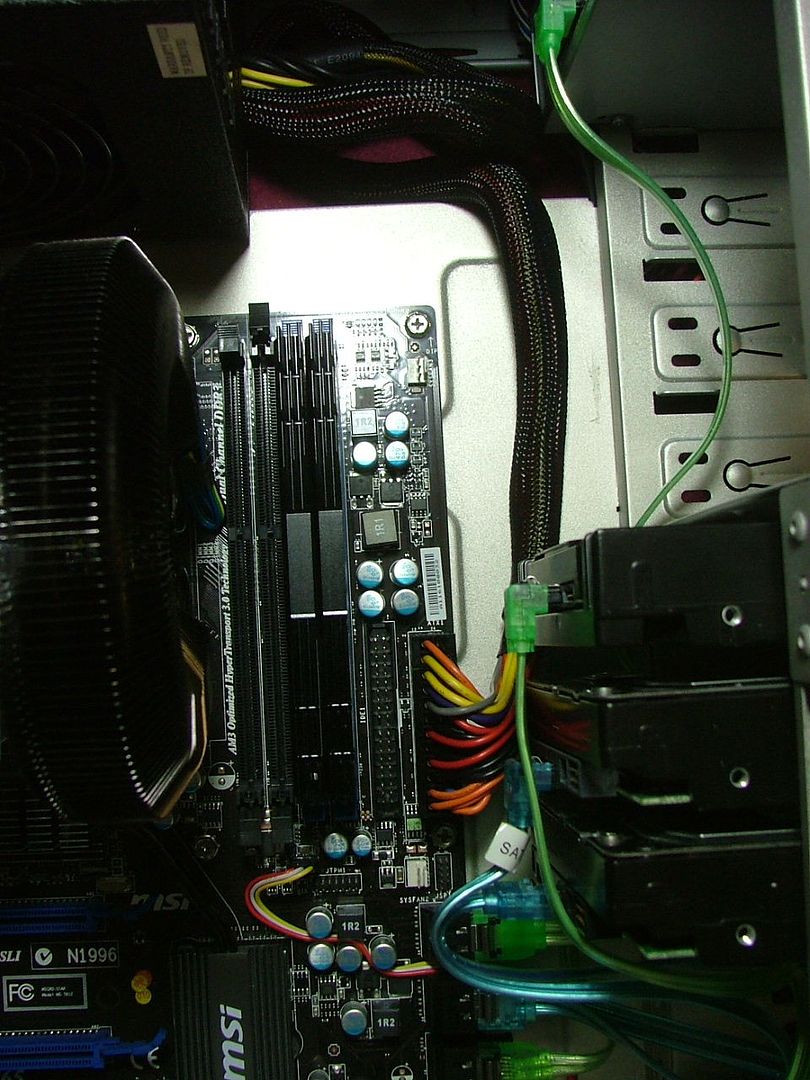
    With that resolved I started laying out the SATA cables to see how they would work out.


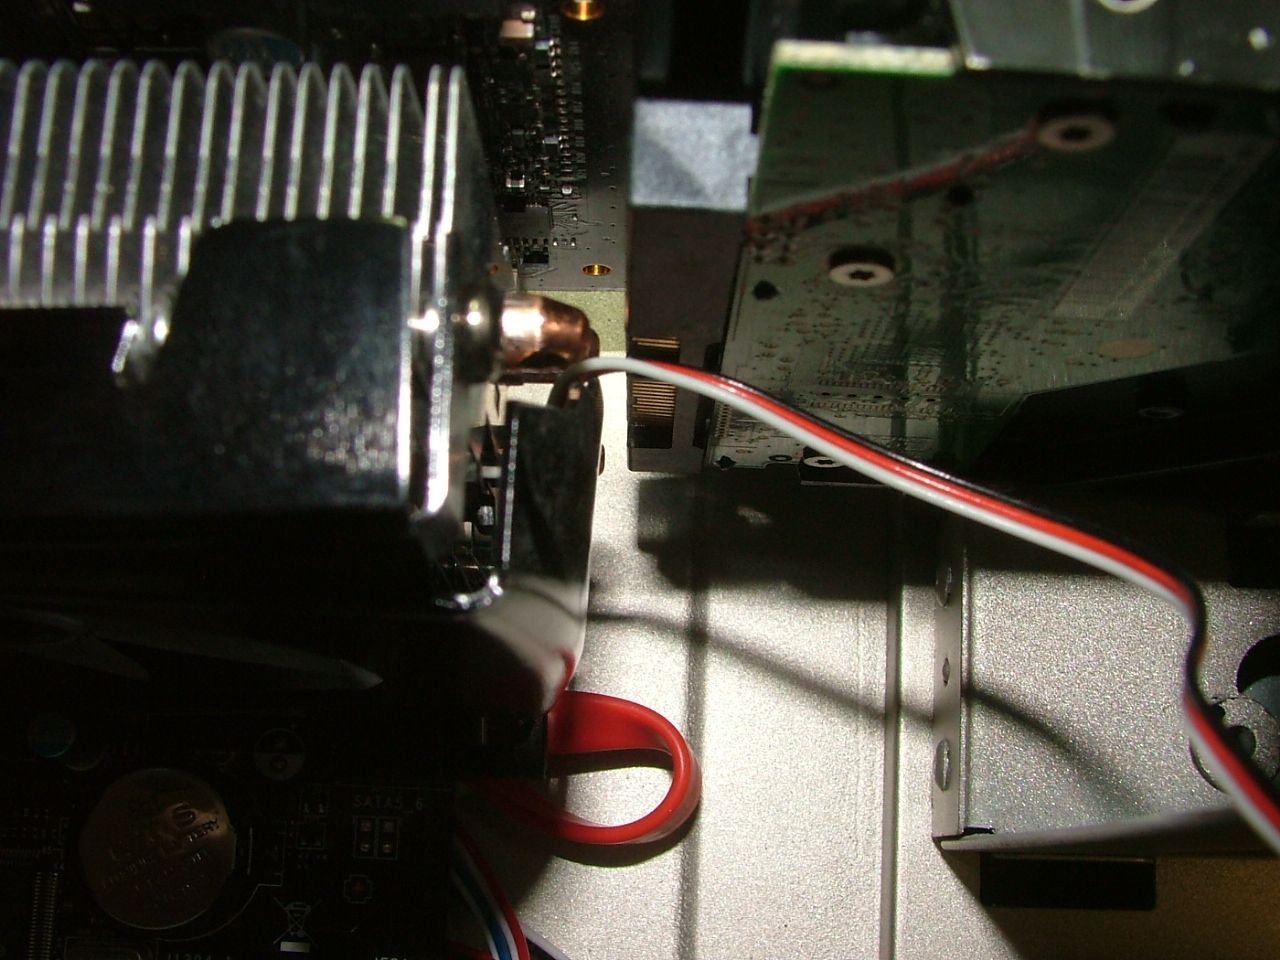
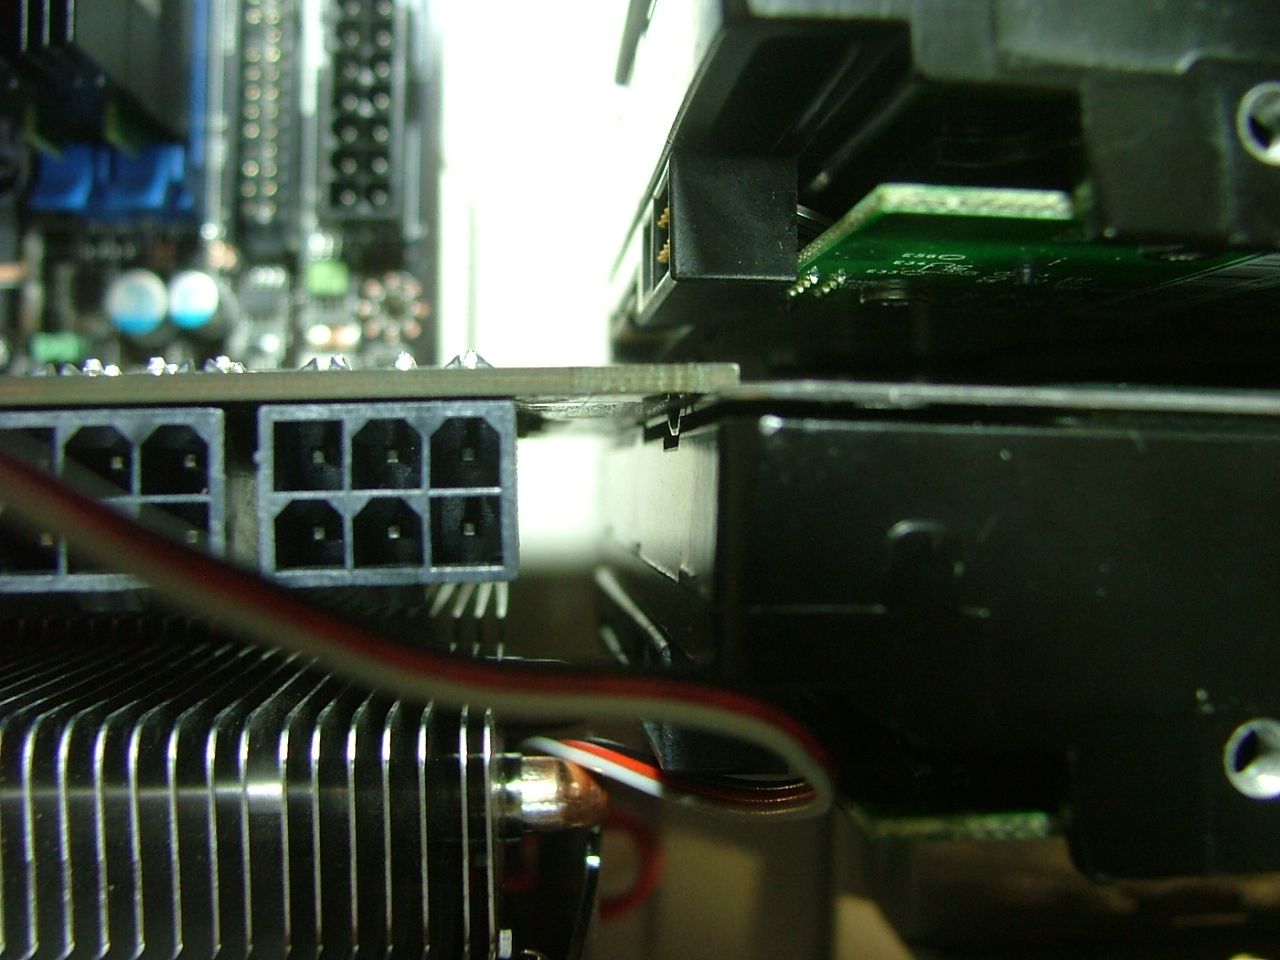
    This ended up having all of the SATA headers filled, more on this later. Don’t have a picture, but ended up with another GPU fit issue. Seems the 90 degree plug on the cable caused the cable(s) to push against the GPU PCB, so change number 2 thanks to the 285!

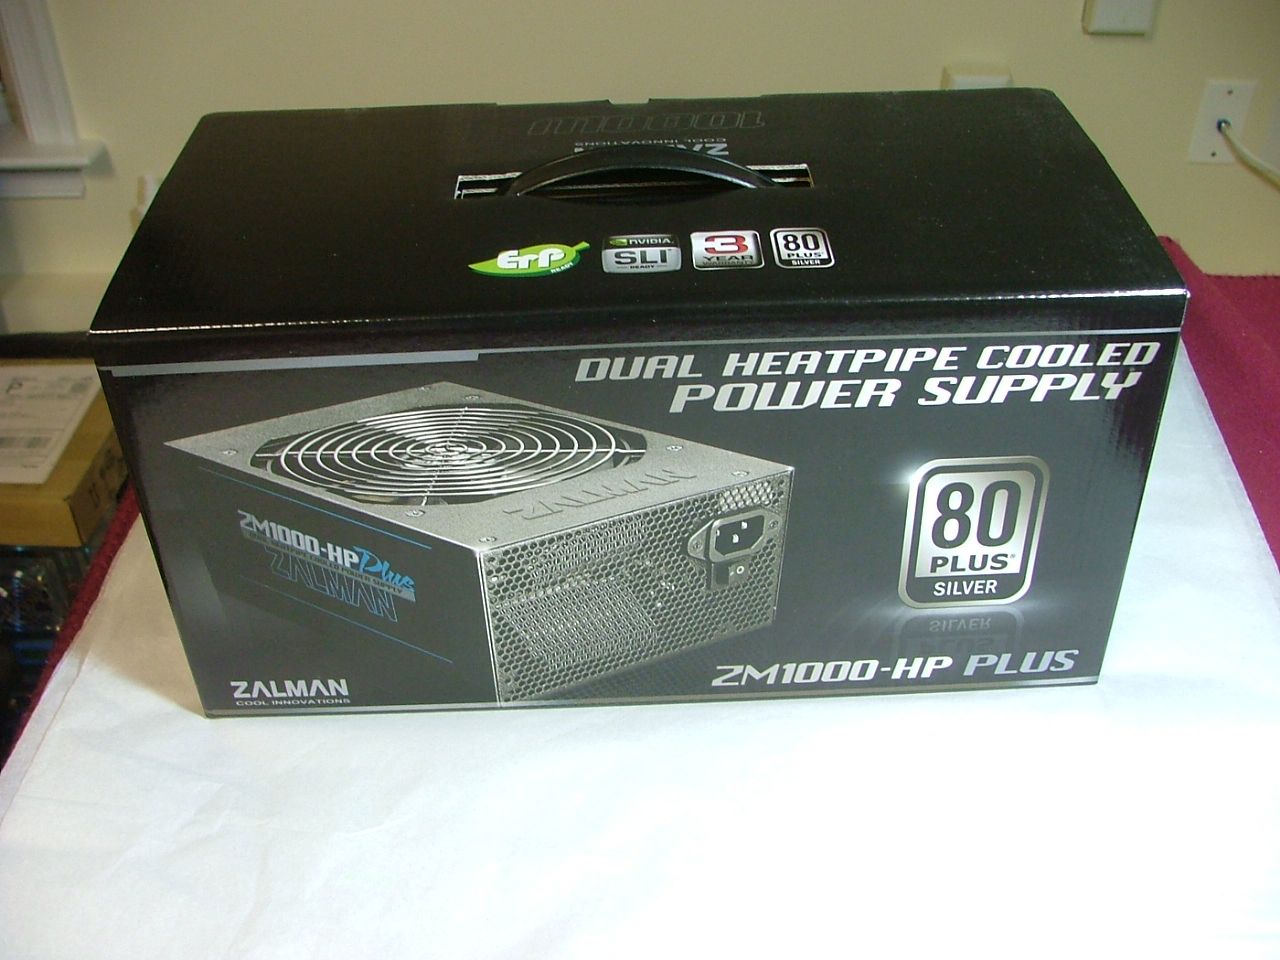
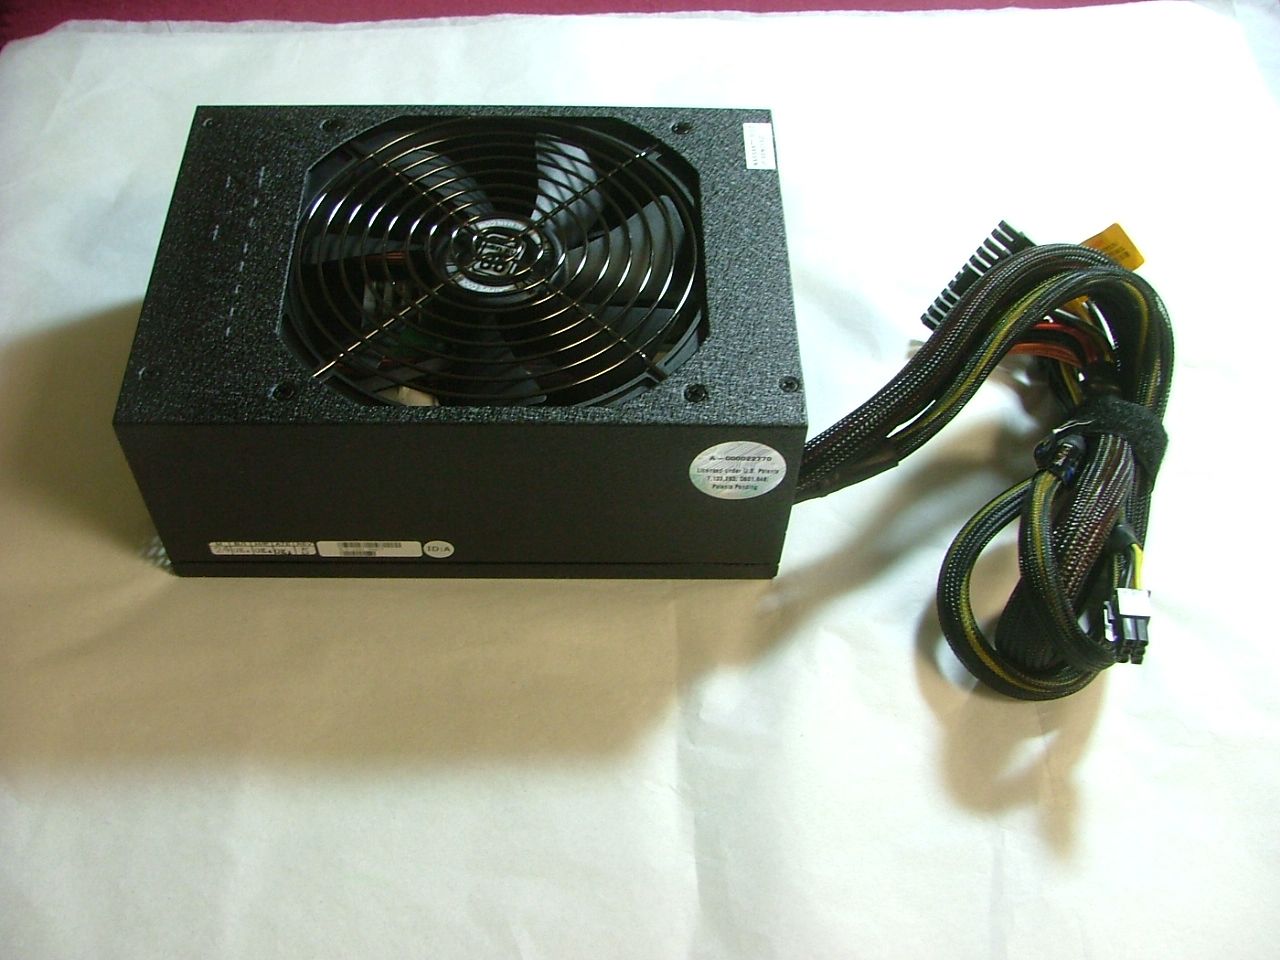
    While I was beginning to play with this stuff received a nice surprise last Thursday….the PSU and the “power meters” arrived!


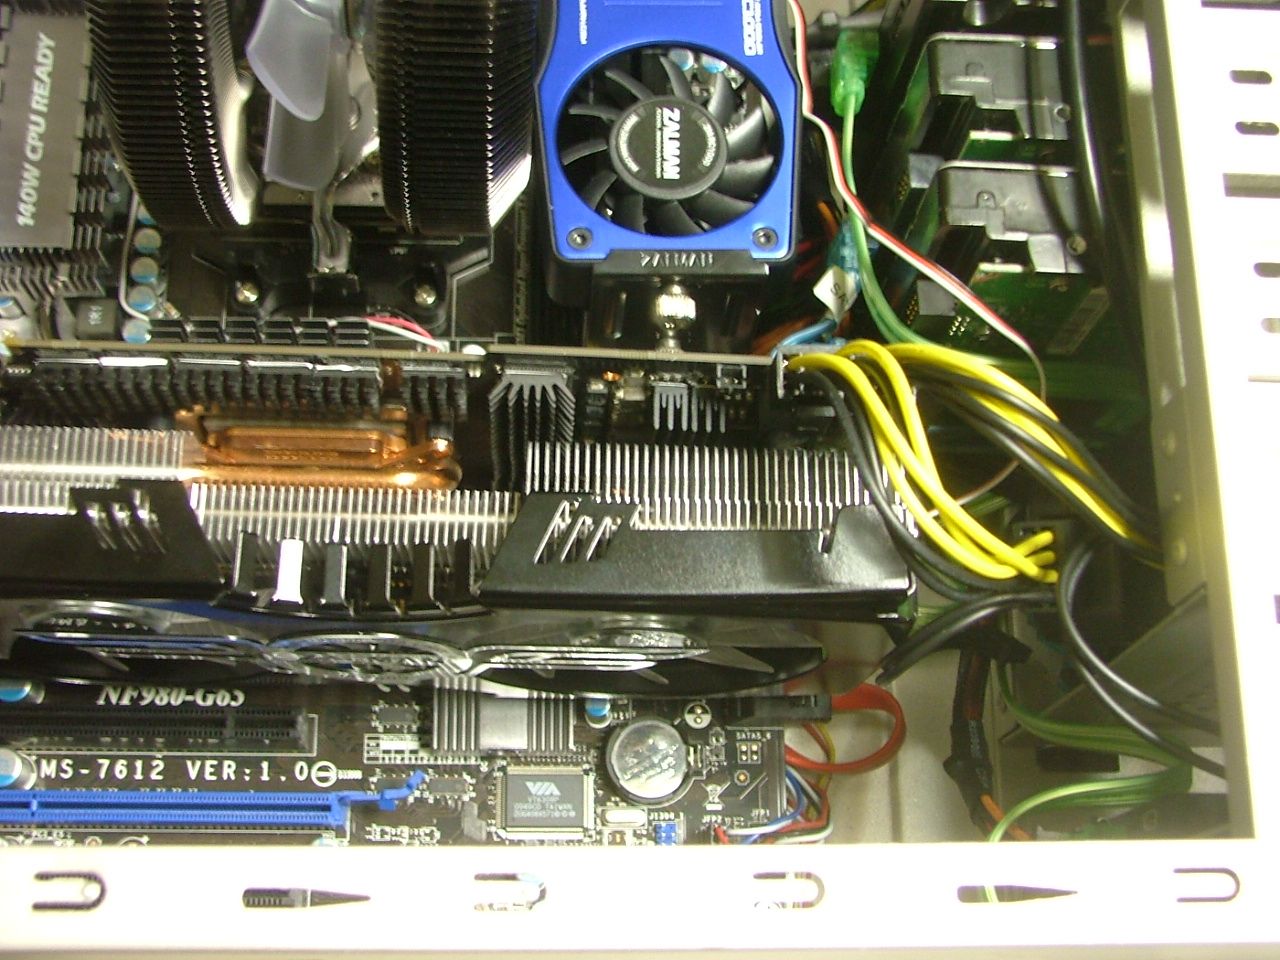
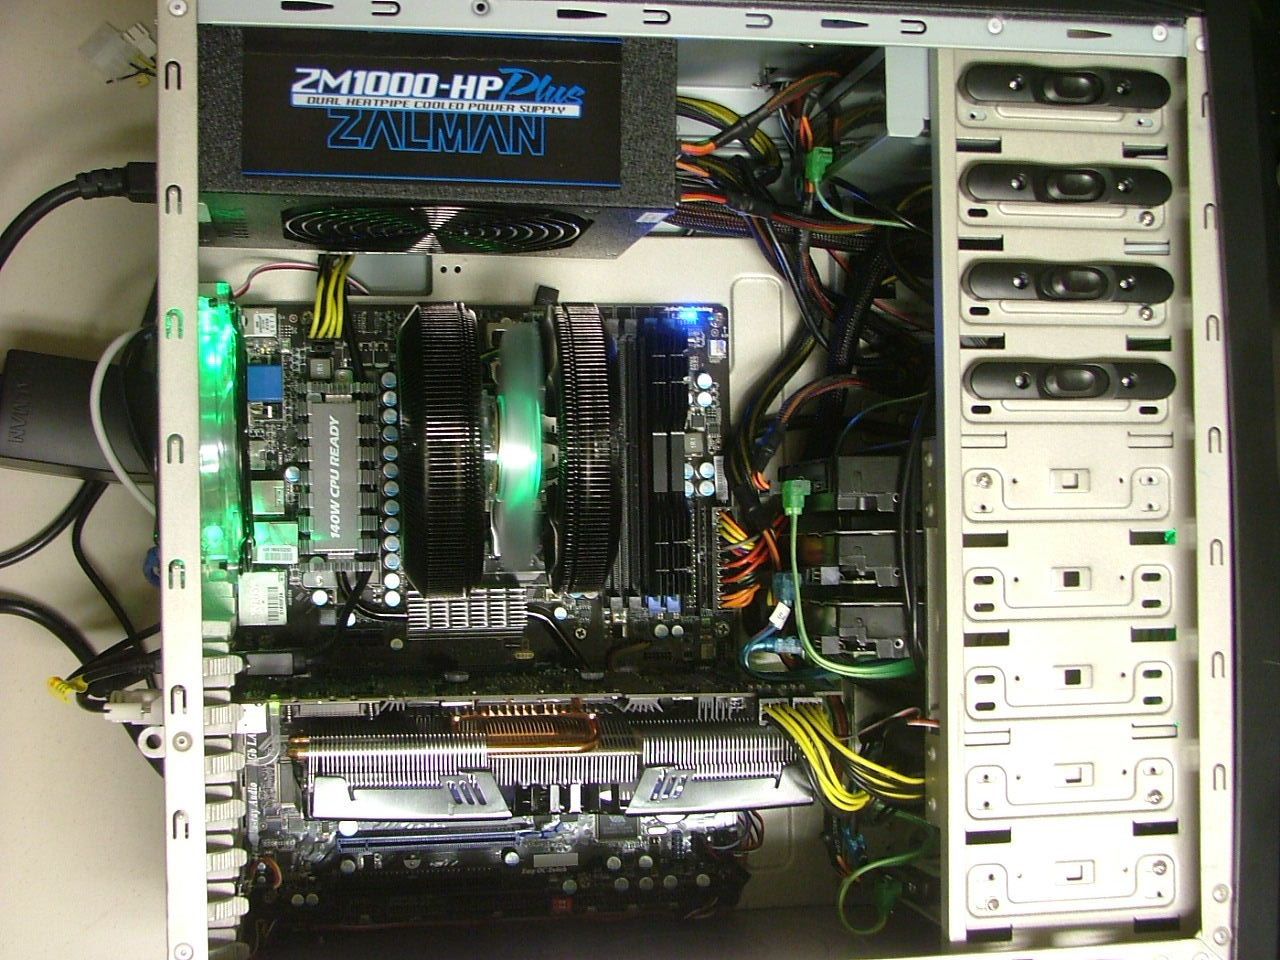
    Now with that in place I could start layout the power cables and see how I could make it tidy. However my “big” case started shrinking!


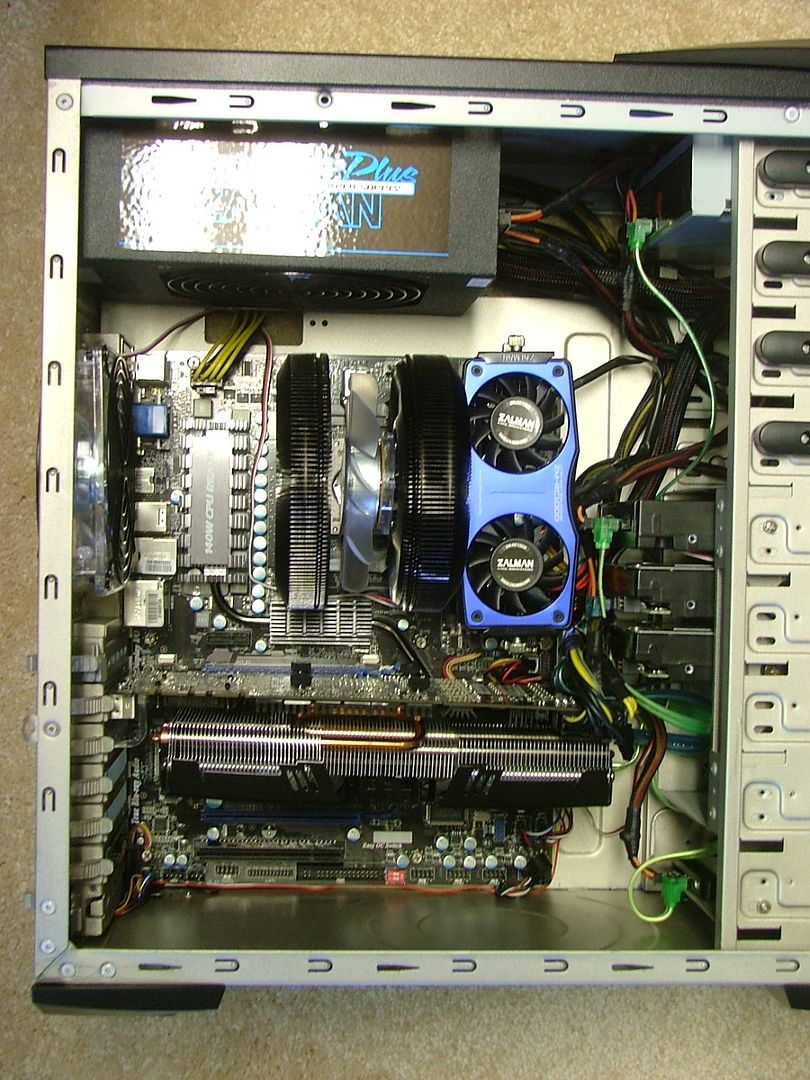
    The last picture shows all the power cabling in place along with the mem cooler. So much for “neat and tidy”!!

    Now the latest snags………..

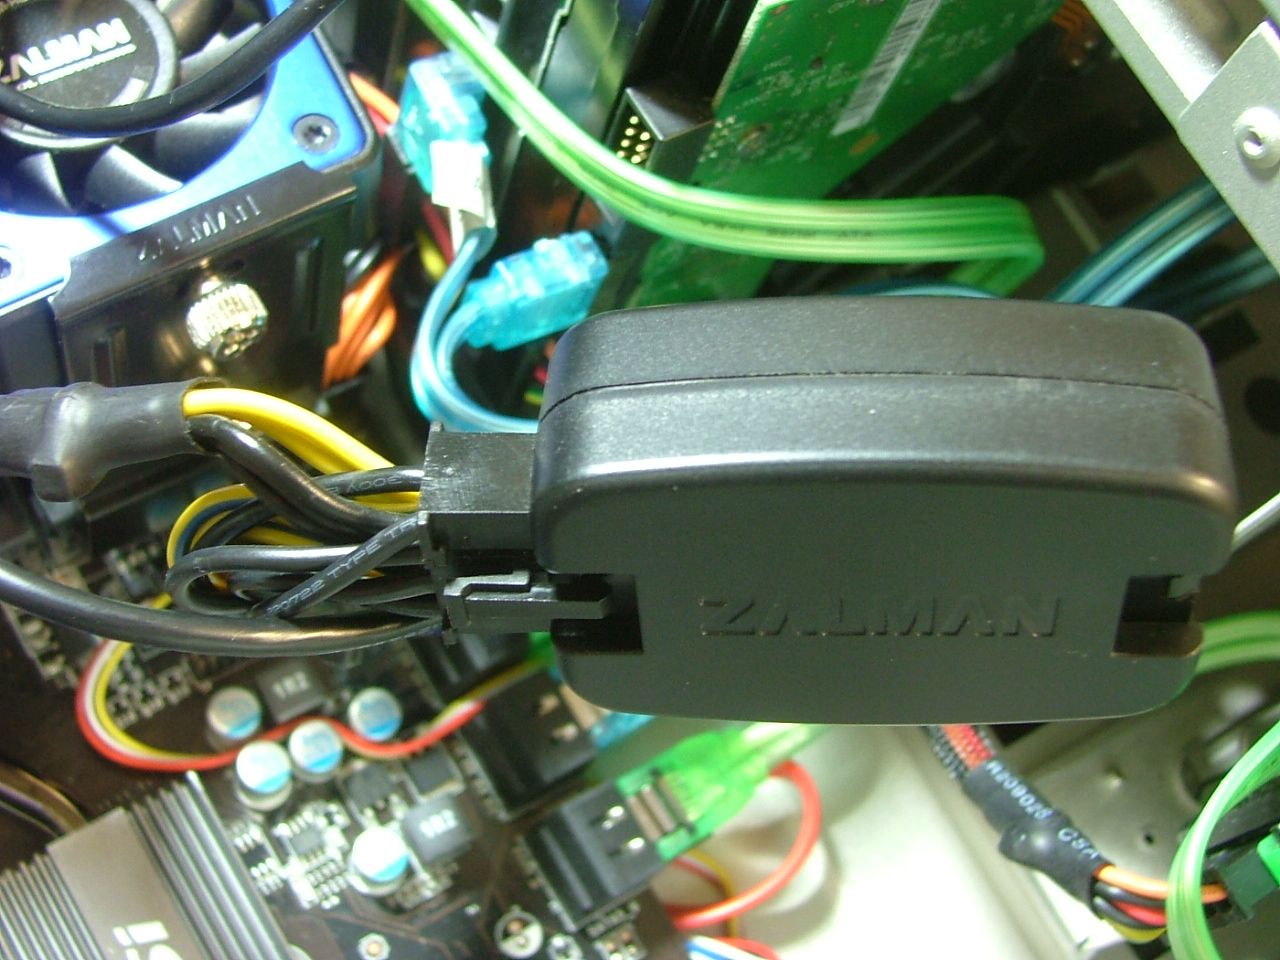
    The “extension” cables provided by Zalman to go between their interface block and the units (both GPU & PSU) are way too short so having to get something ordered. Managed a temp fix for the CPU one though.

    The Zalman fan controller looks to require some 3-pin extensions also the hook up the fans but the real biggie is the dang interface/power brick that is pug ugly and LARGE!!

    So need to stop the ‘puter stuff until I get the issues figured out and get back on the honey dos!!
    As of 04/29/11
    Celtic Spirit >> (Under Construction / WC’ed) >> Antec SX1200, MSI 890GXM-E65, PII X6 1055T, 2 x GTX 285s, HDDs (TBD), 2 x G.S. F3-12800CL7D-2GBPI, OCZ 700W Modular, XP Pro SP2
    KestrelFlight v1.0 >> (To Be WC’ed v2.0) Zalman Z7+, MSI NF980-G65, PII X4 1055T, 2 x Galaxy 580GTXs, Zalman 32GB SSD, WD V'Raptor 300GB, G.S. F3-16000CL9D-4GBTD, Zalman ZM1000-HP Plus , Win7
    Oz1a v2.0 >> XFX MDA72P7509 750a, PI X2 8870BE, 2 x XFX GTS250, WD 250GB, F2-8500CL5D-2GBPK, Tt TR2 600W, XP Pro SP3

  19. #19
    Xtreme Enthusiast
    Join Date
    Mar 2006
    Location
    Central VA, USA
    Posts
    731
    Have had all kinds of things get in the way of trying to finish this build!! Anyway while it’ll come out a bit disjointed I’ll try to bring everyone up to date. Lots of things are a changing but for now let s just worry about KestrelFlight (KF) v1.0!

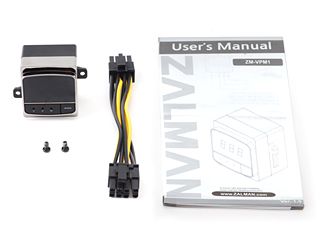
    Finally got around to setting up and “testing” the “power meters” – ZM-PCM1 & ZM-VPM1. I’ll try to set up a “User’s Review” thread, but for now just the quick and dirty.

    First and foremost, what I found disappointing…….both come with an interface block and gender bender cable. I had to rely on factory pix here as I and my camera let myself down when I tried to shoot them. To the left will be the VPM1 with the PCM1 to the right. The interface block is the same for both. The PCM1 has the 5.25 mounting bracket also.


    You can see how short the adapter cable is but show how large the block is we have…….


    This one is for the GPU (CPU is the same) which leads to the second disappointment……..one block per meter means that if you want the total watts for a card that has more than one power connector – you quest it another meter is needed! I’ve been in conversation with performance-pcs about making longer gender bender cables with two connects like what most PSUs have. Until that happens though I will be monitoring one unit and have tucked the interface blocks into the HDD cage.


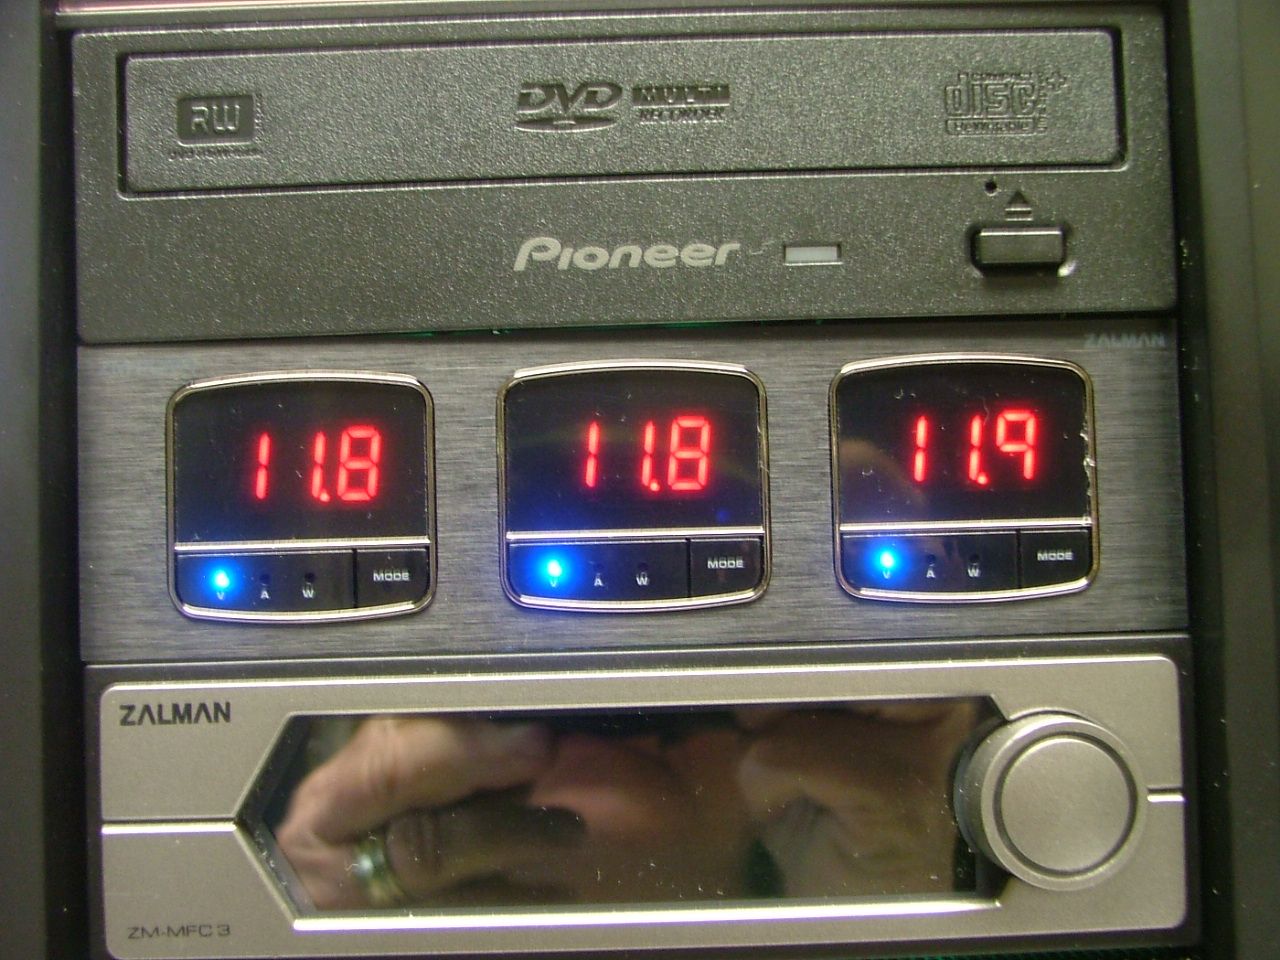
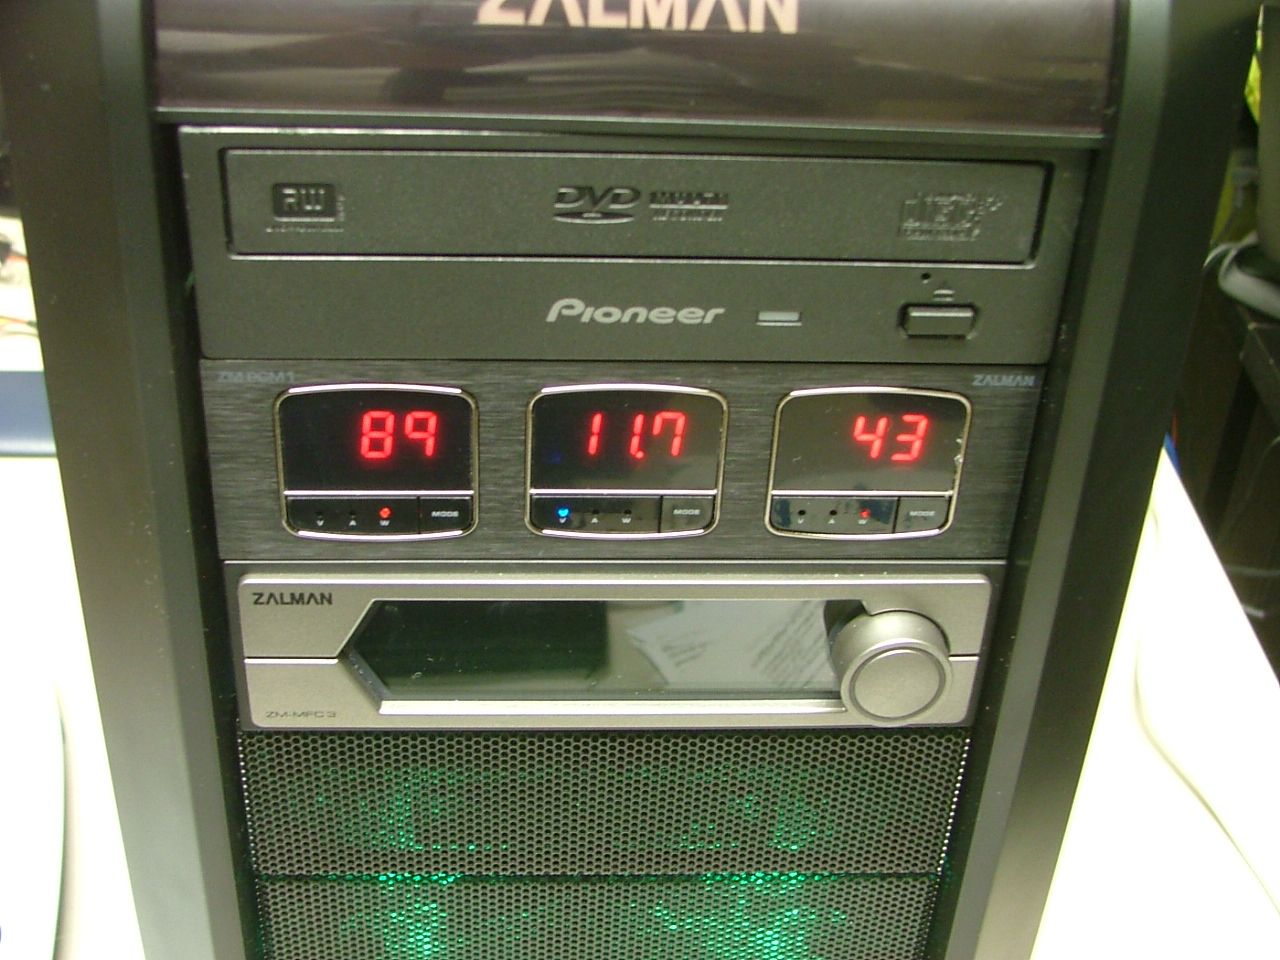
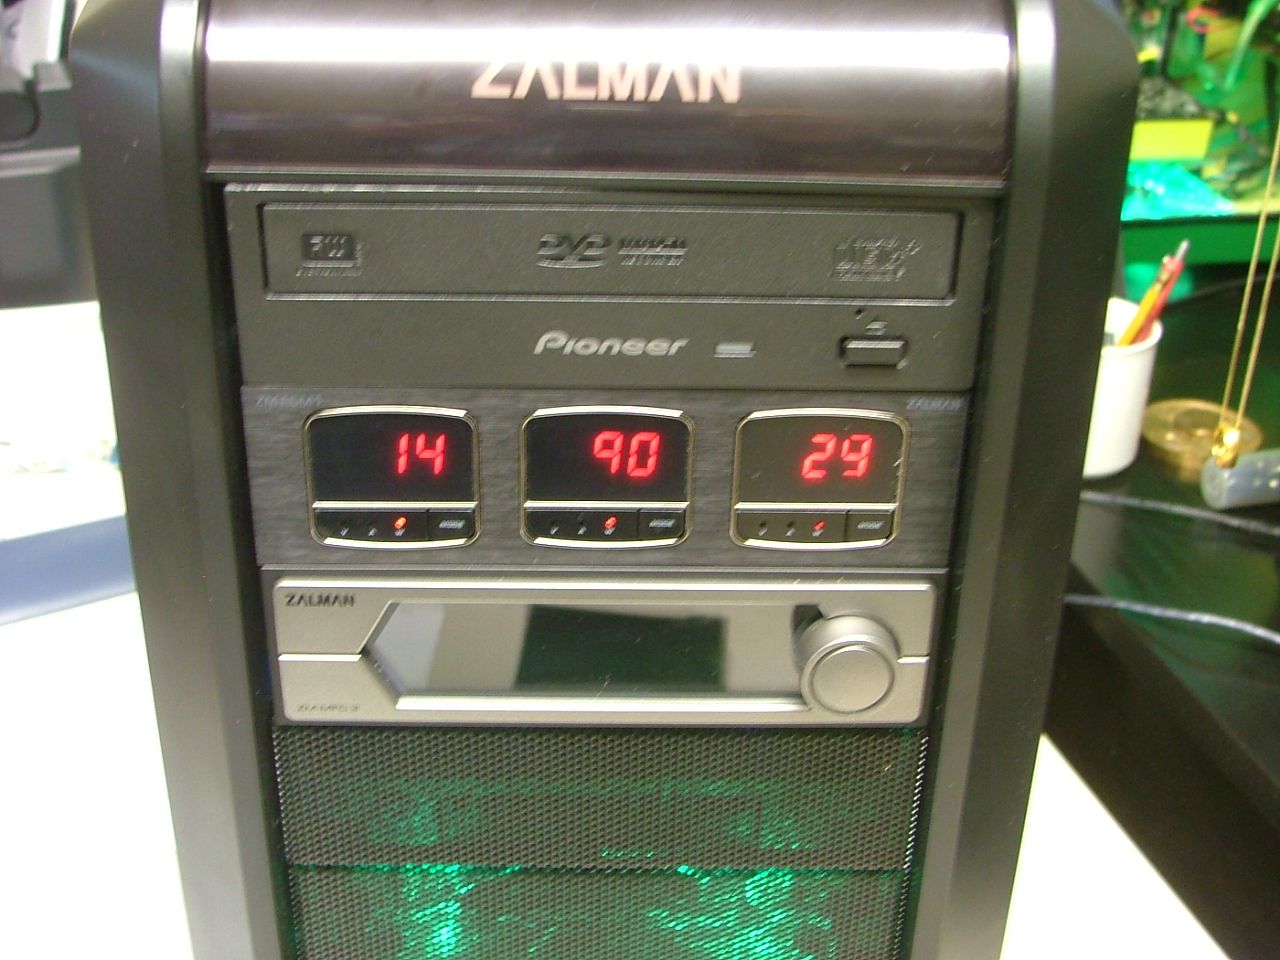
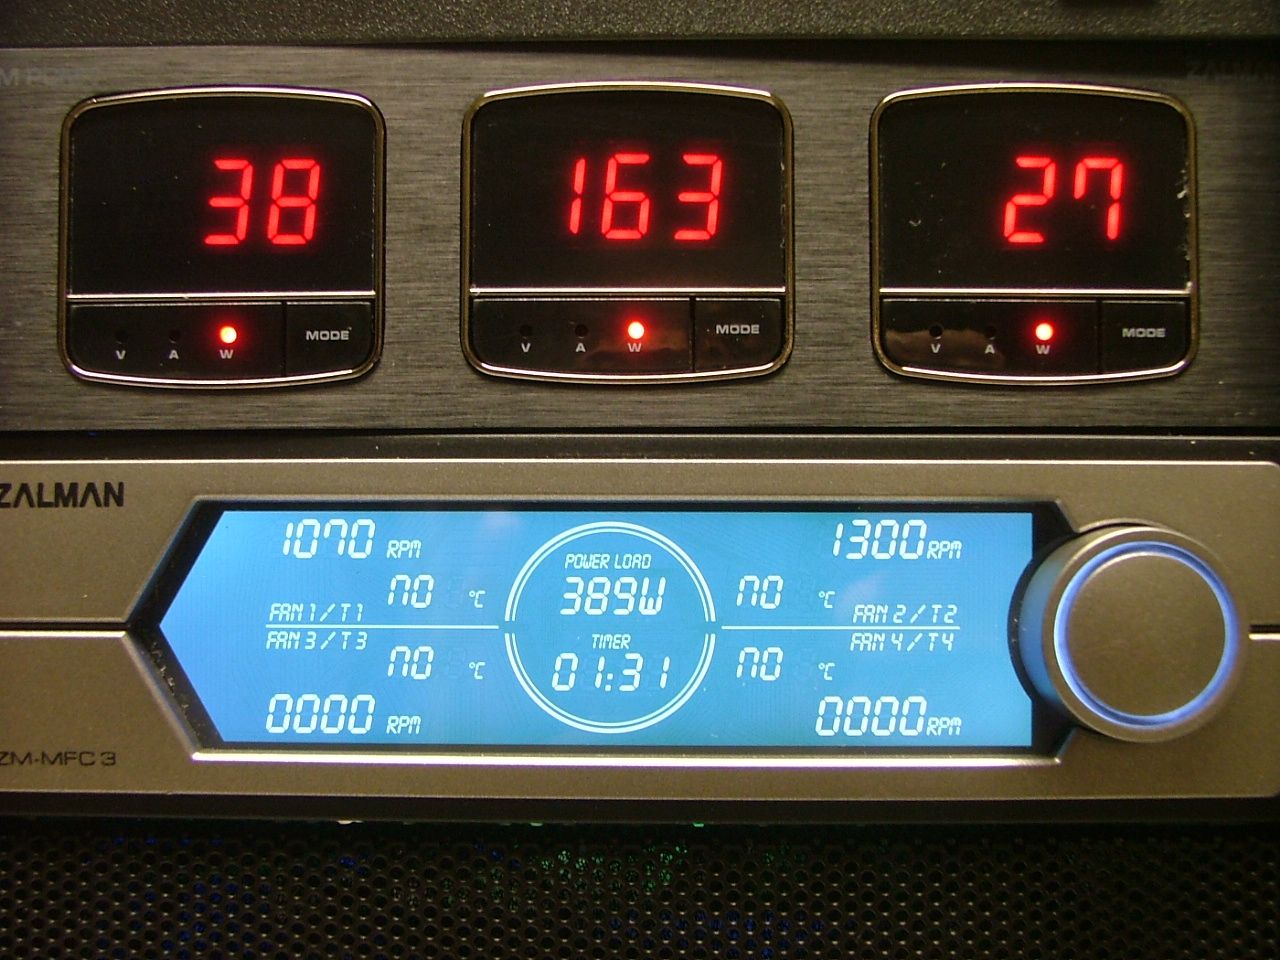
    Here are a couple of pix showing various settings and will go into more detail in the User’s Review thread. However they look pretty cool, just don’t know, for me anyway, just how useful they will be.


    Because of wanting to run the fans through a fan controller initially I had everything hooked up to the 3 fan headers on the mobo. Only problem was I had four items………2 x 120 fans, the mem cooler, and of course the 3000N on the 285, so the mem cooler lost.

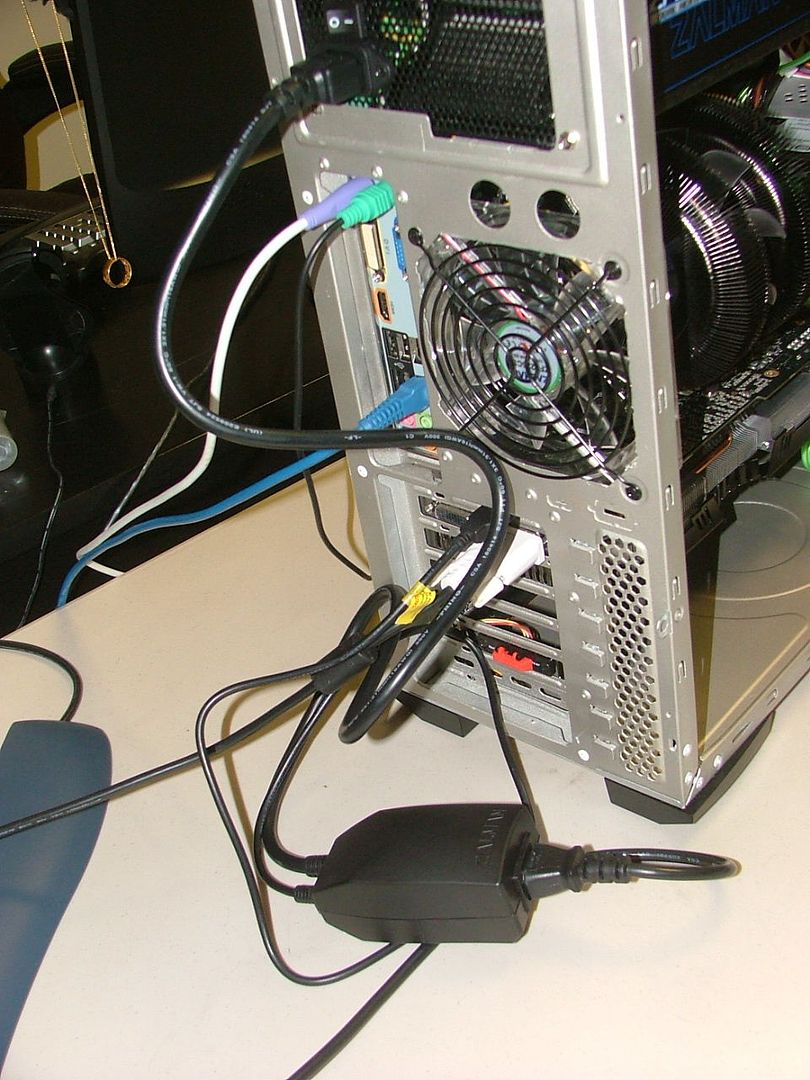
    Now comes the ZM-MFC3 which you can see in the earlier pix, just not hooked up. Now I’ve already mentioned the big dislike there…..the so called interface/power brick. Here you can see it at the rear of the case as the power cable goes to it and then its power cable goes to the PSU. Also there is an interface cable that hooks into an I/O plate that brings info to the device.


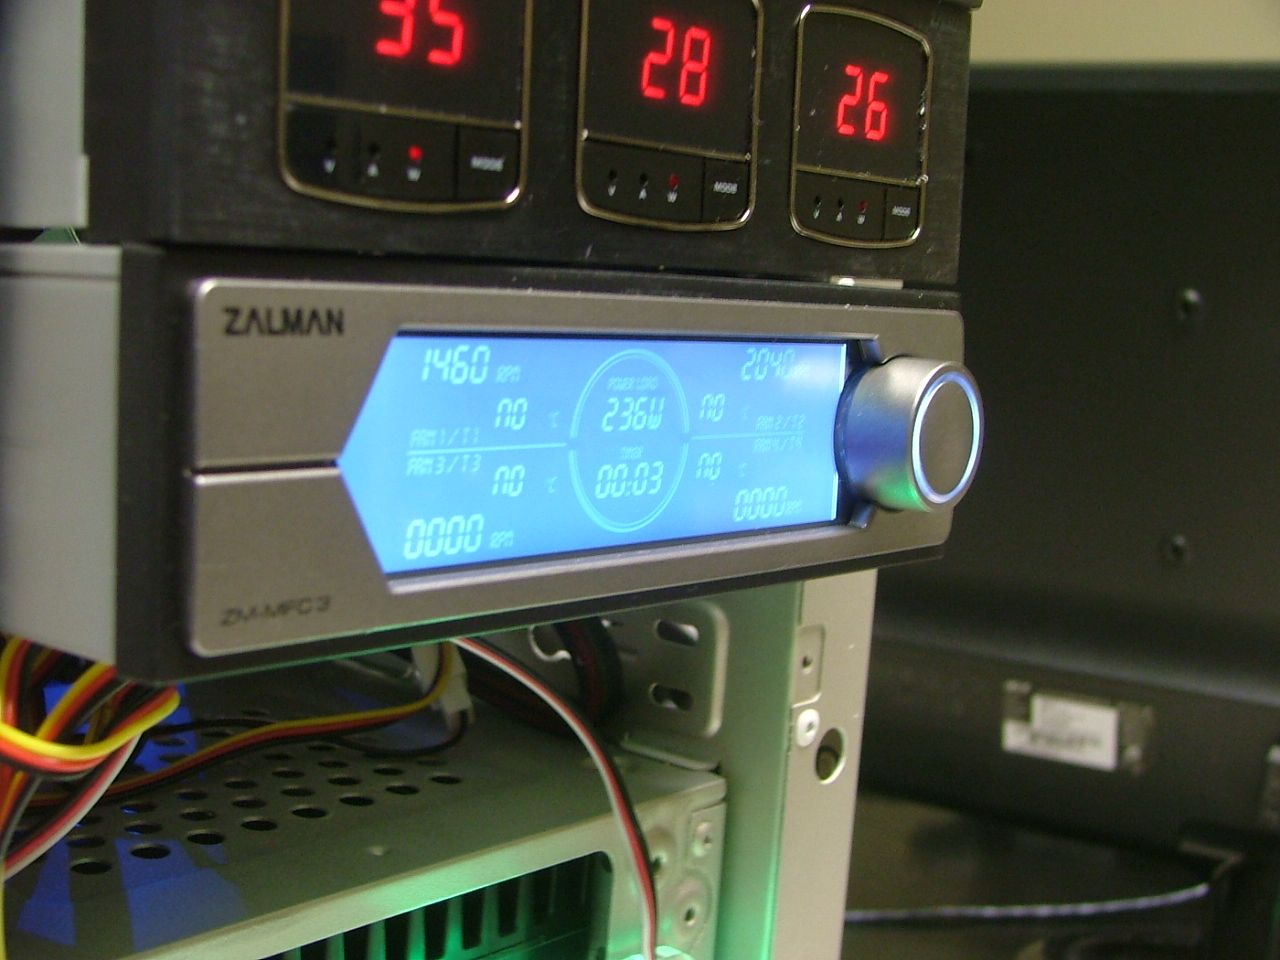
    Sure would have like to have had the time and inclination to mod that so it could be hid. If I use another one that will be done, especially if it is a bigger case! However after setting it up and really paying attention to what the fan controller does I understood the big ugly black things job. While I knew it controlled fans and had four temperature probes I hadn’t realized that it also showed total used wattage. Ergo the big block with the separate data cable.

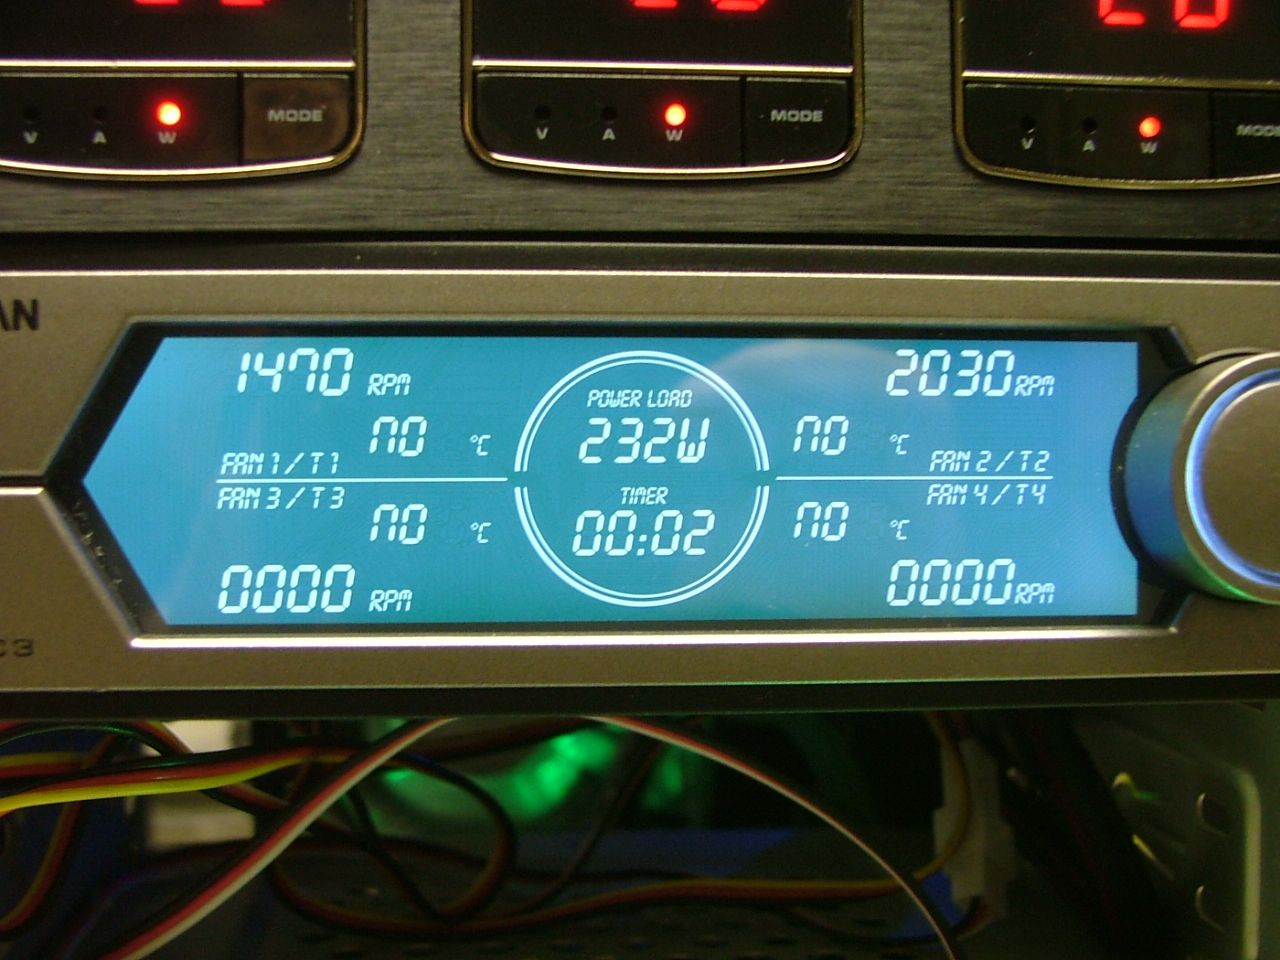
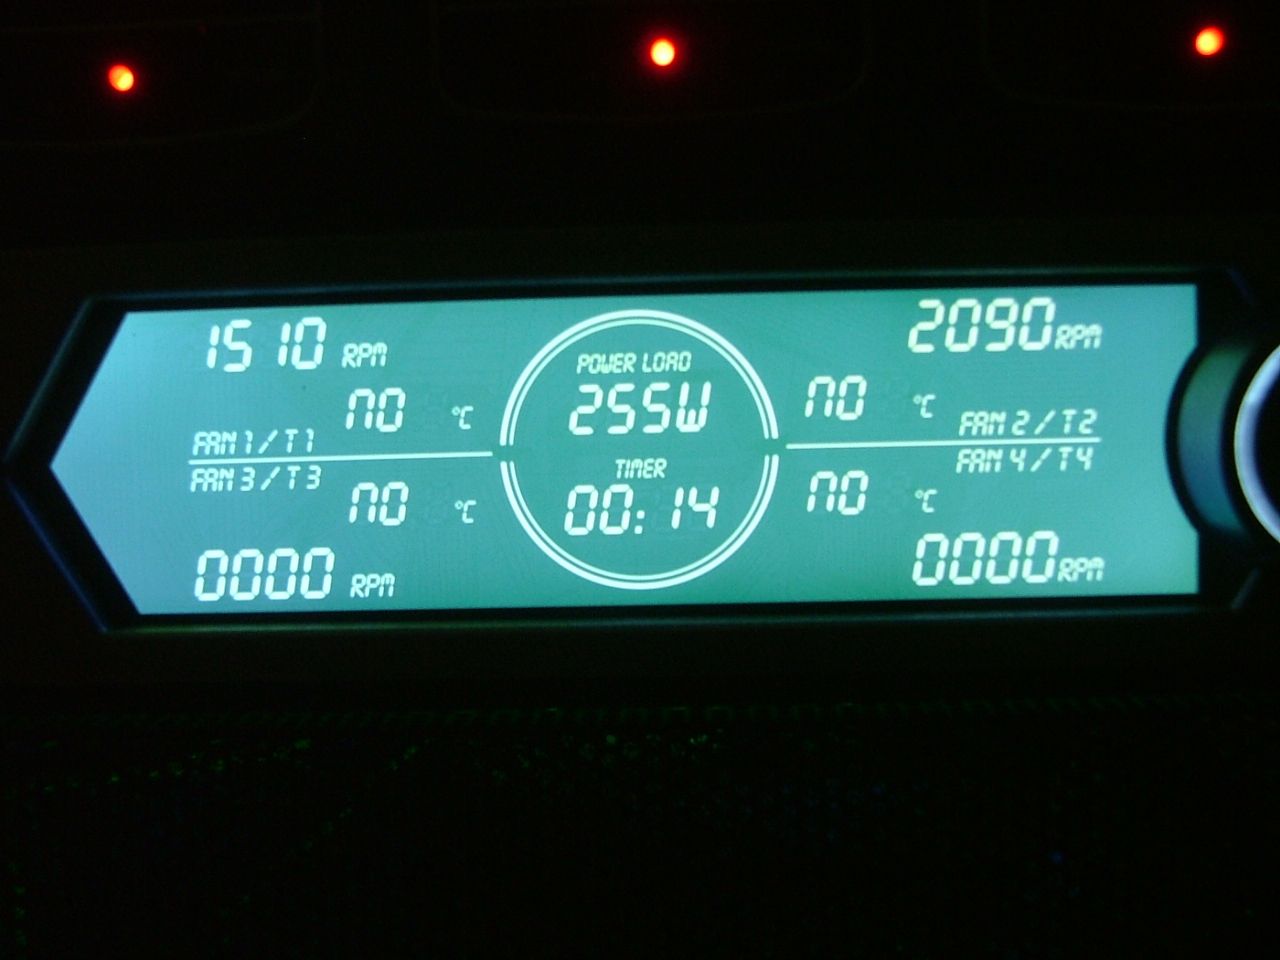
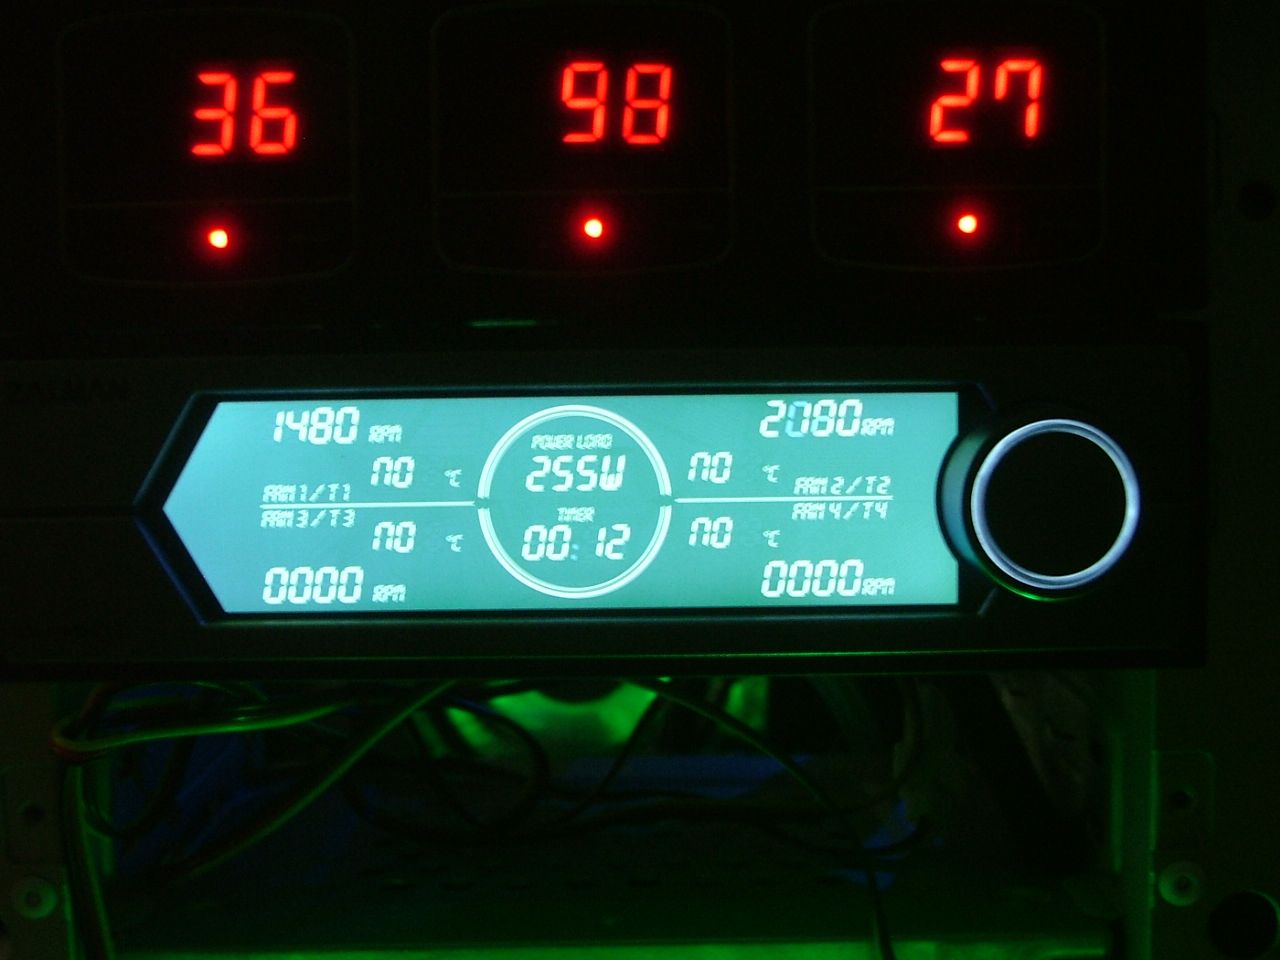
    The darn thing looks absolutely divine, is easy to program, and seems to have a pretty wide viewing angle. Shown is straight on, from above, and from one side. Only the color has a noticeable shift.


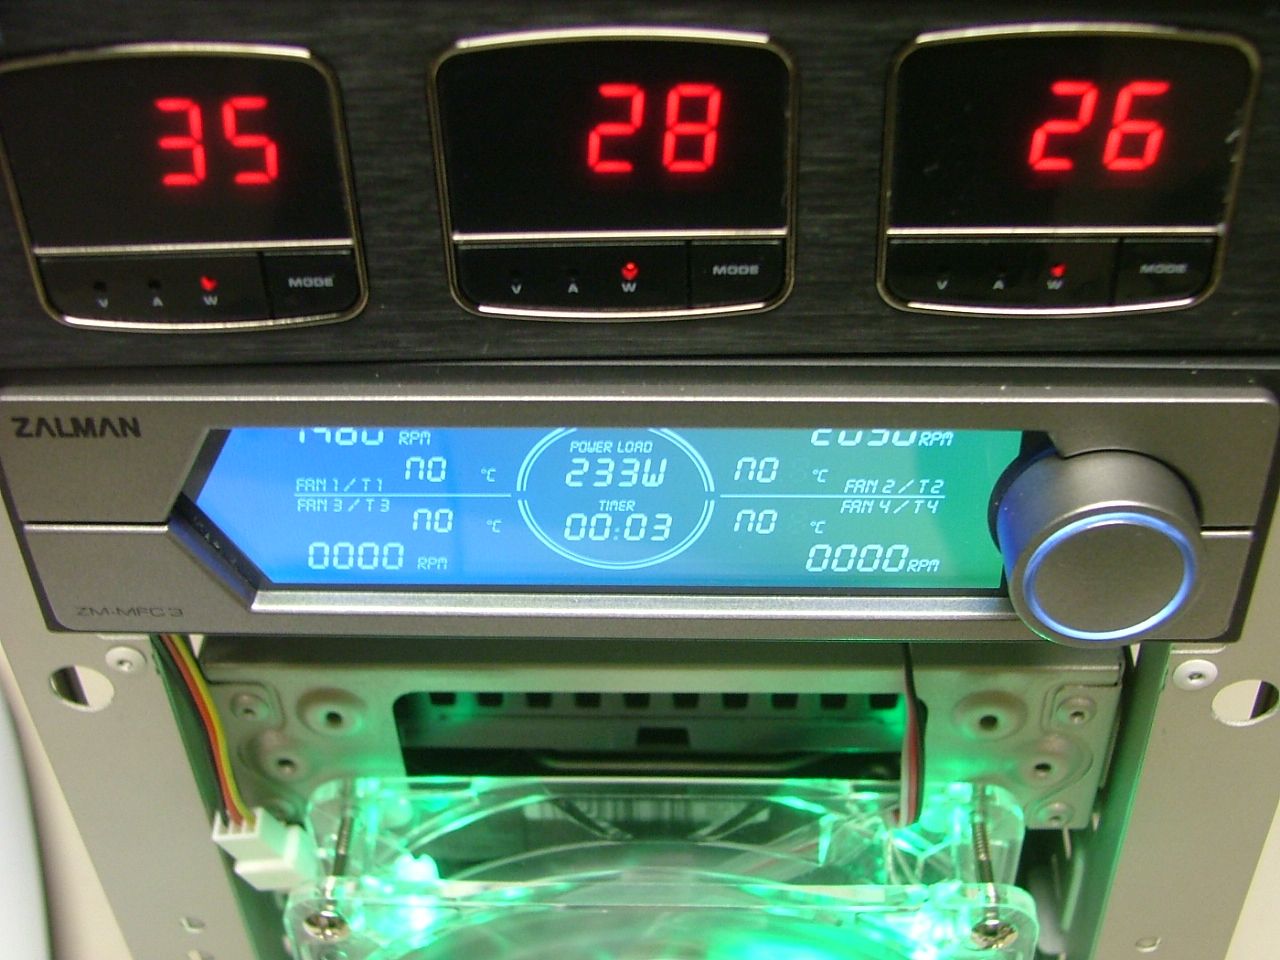
    Here we have everything running……..the 285 GTX is doing GPU3 folding (left and right) with the CPU (center) doing Prime. Sadly because this build is about to go through a major rebuild I didn’t setup any temperatures. You can see the total wattage in the middle of the fan controller. Then I’ll finish this out with some misc. pictures.
    As of 04/29/11
    Celtic Spirit >> (Under Construction / WC’ed) >> Antec SX1200, MSI 890GXM-E65, PII X6 1055T, 2 x GTX 285s, HDDs (TBD), 2 x G.S. F3-12800CL7D-2GBPI, OCZ 700W Modular, XP Pro SP2
    KestrelFlight v1.0 >> (To Be WC’ed v2.0) Zalman Z7+, MSI NF980-G65, PII X4 1055T, 2 x Galaxy 580GTXs, Zalman 32GB SSD, WD V'Raptor 300GB, G.S. F3-16000CL9D-4GBTD, Zalman ZM1000-HP Plus , Win7
    Oz1a v2.0 >> XFX MDA72P7509 750a, PI X2 8870BE, 2 x XFX GTS250, WD 250GB, F2-8500CL5D-2GBPK, Tt TR2 600W, XP Pro SP3

  20. #20
    Xtreme Enthusiast
    Join Date
    Mar 2006
    Location
    Central VA, USA
    Posts
    731
    An interesting side note with the fan controller.........I'm cooling the 285 with Zalman's VF-3000N and all of the 3000 series are pretty much fixed speed (unless you like the fanmate) as they use a fan header on the mobo for power. With the controller I now can control that speed. While not that load it can be even quieter.

    I believe the two fans run at about 2200rpm and just to see how efficient it is I lowered the RPMs to 1400 while folding. One would have to put their ear right next to it to even hear the fans and it keep it at 71C (HWMon). Again as with most coolers the better the case cooling the better they work. Under the same case and ambient temps I raised the fan speed to 1900 and it is now showing 56C.

    I may give it a try with FurMark when I have the time.
    As of 04/29/11
    Celtic Spirit >> (Under Construction / WC’ed) >> Antec SX1200, MSI 890GXM-E65, PII X6 1055T, 2 x GTX 285s, HDDs (TBD), 2 x G.S. F3-12800CL7D-2GBPI, OCZ 700W Modular, XP Pro SP2
    KestrelFlight v1.0 >> (To Be WC’ed v2.0) Zalman Z7+, MSI NF980-G65, PII X4 1055T, 2 x Galaxy 580GTXs, Zalman 32GB SSD, WD V'Raptor 300GB, G.S. F3-16000CL9D-4GBTD, Zalman ZM1000-HP Plus , Win7
    Oz1a v2.0 >> XFX MDA72P7509 750a, PI X2 8870BE, 2 x XFX GTS250, WD 250GB, F2-8500CL5D-2GBPK, Tt TR2 600W, XP Pro SP3

  21. #21
    Xtreme Enthusiast
    Join Date
    Mar 2006
    Location
    Central VA, USA
    Posts
    731
    Still playing with it a wee bit more before I can call it finished.....however that hasn't stopped me from planning and laying out rev 2.0!!

    http://www.xtremesystems.org/forums/...d.php?t=267058
    As of 04/29/11
    Celtic Spirit >> (Under Construction / WC’ed) >> Antec SX1200, MSI 890GXM-E65, PII X6 1055T, 2 x GTX 285s, HDDs (TBD), 2 x G.S. F3-12800CL7D-2GBPI, OCZ 700W Modular, XP Pro SP2
    KestrelFlight v1.0 >> (To Be WC’ed v2.0) Zalman Z7+, MSI NF980-G65, PII X4 1055T, 2 x Galaxy 580GTXs, Zalman 32GB SSD, WD V'Raptor 300GB, G.S. F3-16000CL9D-4GBTD, Zalman ZM1000-HP Plus , Win7
    Oz1a v2.0 >> XFX MDA72P7509 750a, PI X2 8870BE, 2 x XFX GTS250, WD 250GB, F2-8500CL5D-2GBPK, Tt TR2 600W, XP Pro SP3

  22. #22
    Xtreme Enthusiast
    Join Date
    Mar 2006
    Location
    Central VA, USA
    Posts
    731
    In the continued tradition where my builds “never stay the same” KestrelFlight has already been going through some engineering change ideas in getting ready to start KF v2.0.

    As I sit here looking at KF I am mentally reviewing my quest for a maxed out Zalman build. As a kinda sorta “it is finished” situation I’ll “close” with my thoughts on how things went together and how they matched my “expectations”.

    To review what Zalman items were used here is a quick inventory and then my comments about each one. I will do this from “memory” and not refer back to the log so as to have an “overall” opinion.

    CASE: Z7 Plus
    PSU: ZM1000-HP Plus
    HSF: CNPS9900-NT
    GPU COOLER: VF3000N
    SSD SSD0032S1
    MEMORY COOLER: ZMRC-1000
    FAN CONTROLLER: ZM-MFC3
    POWER MONITORs: ZM-CPM! & -VPM1

    Z7 Plus

    This (along with a NZXT Hades) was my first foray into mid-towers for a long time. Overall I like its exterior appearance. Quality is what I would expect from Zalman and really enjoyed working with it. If one wants to do a window as I did save yourself some change and buy the non-Plus. Now as far as the door fan of the plus the only issue there is the same as I had with the Hades………the fan will interfere with most if not all “super” HSFs as their height is right to the door. Not a knock on Zalman as this issue is showing up in several cases that provide door fans, especially the 200mm and up size.

    The HDD cage is a nice feature as well as the 2.5” device / SSD holder. They are designed to pretty much move up and down where one wants to put. Another about the SSD mount is it is metal. The plastic one in the Hades was fine but I’m old school.

    As I guess is typical with this class of case one usually doesn’t have that much space on the “back” side for cable placement. However I was able to do a decent job with the case to hide stuff.

    ZM1000-HP Plus

    Because of having done mATX builds I’ve always been partial to modular power supplies. The 1000 gave me some strong +12v rails as it was originally going to have the single 285 GTX replaced with 3 x 470 GTX then 2 x 580s. SO there is more than enough power here. Again I’m happy with the quality, passive cooling, and a manageable size. The cables are a decent length (a bit much for mATX) for a mid tower and possibly a full. Their assembly is neat and didn’t have any connector issues and the black sleeving worked well for me. An interesting side note was that when it was all said and done I used both SATA cables and could have gotten away without the one Molex cable if I had gotten a SATA (male) to Molex (female) adapter sooner. The fan controller uses a Molex for power.

    CNPS9900-NT

    Don’t really think I can add much to what has already been said about this series of coolers. While overclocking the 1055T I maxed out the volts on the mobo and it stayed for the most part in the mid 50s at load. I am and have always been a big fan of the 9XXX series cooler.

    SSD0032S1

    Did the SSD thing because I won it in a contest. Do not have any knowledge base to even make an evaluation other than to say it does appears fast and 32GB just don’t cut it size wise with Win7. Do like the I can go anywhere size though.

    VF3000N

    Elsewhere on this forum there is a “User’s Review “ I did on this unit. The only real complaint I had/have is the quality of the thermal tape used to attach the passive coolers. Not sure if it was due to the thermal paste used or what but those little suckers would not stick!! Finally got them to work after running the card flat and letting the tape cook for a while.

    A minor con is how the fans are powered…..two wire plug that needs to be attached to a fan header on the mobo. That leaves one with it either running at max speed, whatever 7v gives you with an adaptor, or the old faithful fan mate. Hooking it to a quality fan controller is what I would suggest as it is an efficient cooler. When I lower it to 1400RPM via the MFC3 one could not hear it!! And with folding that speed managed to keep the 285 in the 60s.

    ZMRC-1000

    Honestly this was added more for bling than anything else as I don’t over volt my memory for overclocking. And as with most mem coolers of this size it gets very tight with a HSF of the larger kind. I may have mention in the log I do like it thought and thought the attachment method is better than most.

    ZM-MFC3

    I ordered this because it was the “latest and greatest” from Zalman and really hadn’t read up on it. So it was with great surprise when I opened the box and the big black ugly “brick” appeared! However after realizing that the MFC3 did more than control the fans and give temps I could like with it…….just need to figure out how to hide it. This is a neat and attractive device that does its job well.


    ZM-CPM! & -VPM1

    These again were a “bling” and sounds neat kind of deal. As with the rest of the stuff don’t have any issue with the build quality, just don’t quite understand some of the engineering. As mention in my “User’s Review” the interface blocks are meh, the adapter cables are way too short (at least in the way I wanted to use them), and again to me THE CARDNIAL SIN………if you have a dual plug GPU (who doesn’t if they are going power!) it requires two –VPM1s to measure fully the card!! That’s the way I feel unless someone can convince me the total power usage can be done using only one plug (6 or 8 pin).

    Also when it is said and done I just don’t see the average guy or gal using these except like me…..for bling and because!! Don’t get me wrong I think they are quality and neat, but just not sure what I would do with the numbers.

    That’ll be it until some custom cables I’ve ordered to “correct” my issues with the –CPM! And –VPM1 come in. After building KestrelFlight v1.0 I’m still very much the Zalman fanboy!!
    As of 04/29/11
    Celtic Spirit >> (Under Construction / WC’ed) >> Antec SX1200, MSI 890GXM-E65, PII X6 1055T, 2 x GTX 285s, HDDs (TBD), 2 x G.S. F3-12800CL7D-2GBPI, OCZ 700W Modular, XP Pro SP2
    KestrelFlight v1.0 >> (To Be WC’ed v2.0) Zalman Z7+, MSI NF980-G65, PII X4 1055T, 2 x Galaxy 580GTXs, Zalman 32GB SSD, WD V'Raptor 300GB, G.S. F3-16000CL9D-4GBTD, Zalman ZM1000-HP Plus , Win7
    Oz1a v2.0 >> XFX MDA72P7509 750a, PI X2 8870BE, 2 x XFX GTS250, WD 250GB, F2-8500CL5D-2GBPK, Tt TR2 600W, XP Pro SP3

Bookmarks

Bookmarks

Posting Permissions

  • You may not post new threads
  • You may not post replies
  • You may not post attachments
  • You may not edit your posts
  •