MMM
Page 1 of 2 12 LastLast
Results 1 to 25 of 50

Thread: [Project] Zodiac

  1. #1
    Xtreme Addict
    Join Date
    Mar 2007
    Posts
    1,489

    [Project] Zodiac

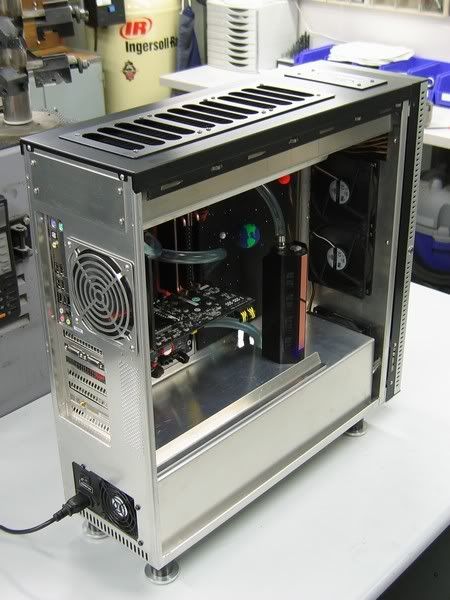
    Lots of changes have happened throughout this mod, but I decided to leave all of the original pics attached for a more natural progression. If you see something missing in a later photo, it likely got axed.

    I'm not going to clutter the the first post with a whole bunch of stock
    rocketfish pics, if you aren't sure what they look like, or would like
    a bit of history relating to the "famous" rocketfish case, just type
    "rocketfish" in the search. :P

    So, lets jump right in.

    System specs:

    E4600
    Gigabyte P35-DS3L
    EVGA 9800GTX
    4Gb G.skill
    WD 250Gb SE16
    Sony/NEC DVD-RW
    PC Power & Cooling Silencer 610
    DDC3.2/MCP355 w/XSPC top
    Swiftech MCR320
    CPU GPU cooling- custom waterblocks


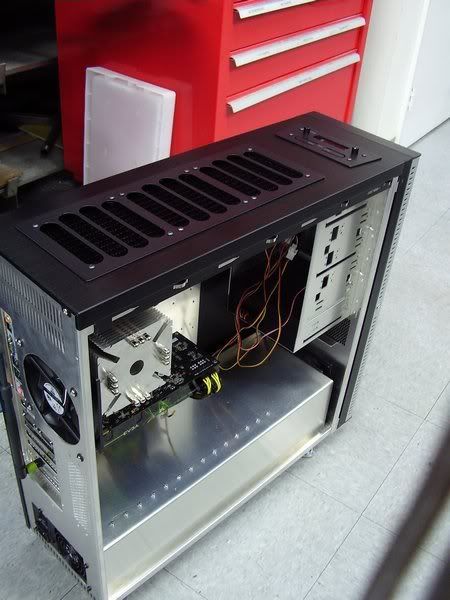
    Here is my case with the front door and floppy bay removed. I also
    removed the USB/headphone jacks from the top of the case. I am going
    to switch that PSU out for a PCP&C version because it has two PCIE
    connectors.


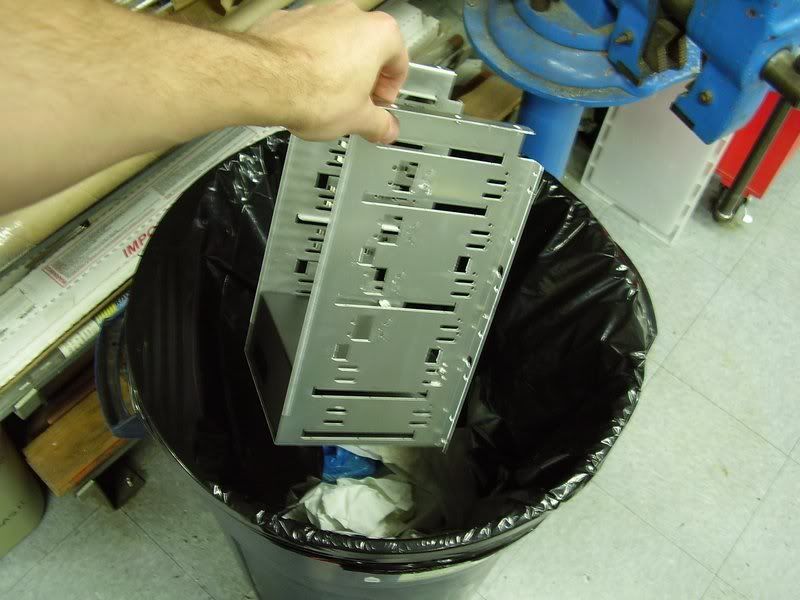
    Since the 3.5 bay is gone, I'm going to remove a section to help
    with ventilation.


    The same section needs to be removed from the inner front panel.
    Also seen here, Pnuematic nibbler and the "belt sander gun" as I
    like to call it. Modder's best friends. Invest in these puppies,
    and cutting window/radiator holes will turn from minutes into seconds.
    I am very grateful that I have access to this equipment at my work, and
    that my boss is generous enough to let me use it.


    After cutting. You can see I didn't do a perfect job but it won't matter
    in this case.


    Some mesh added to the hole


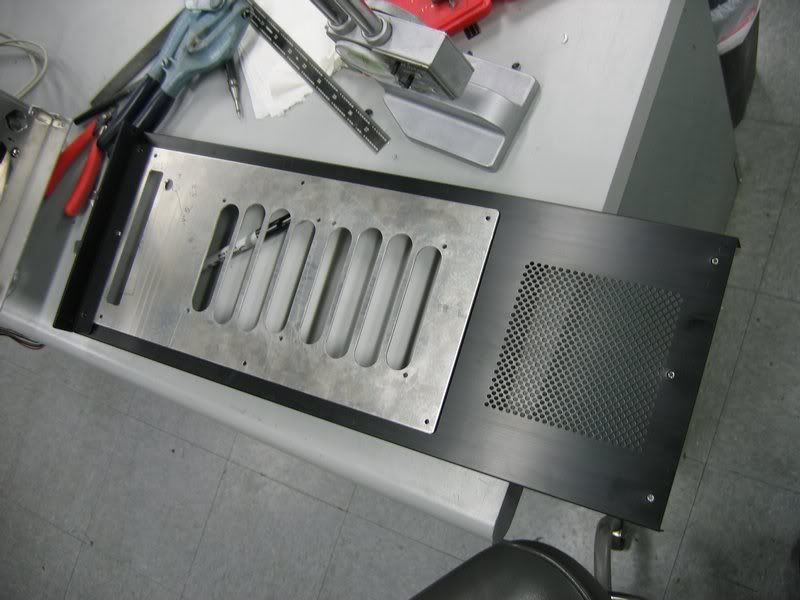
    I made up a nice little aluminum grille for the inner front panel
    using the punch and shear(the two will be pictured later).


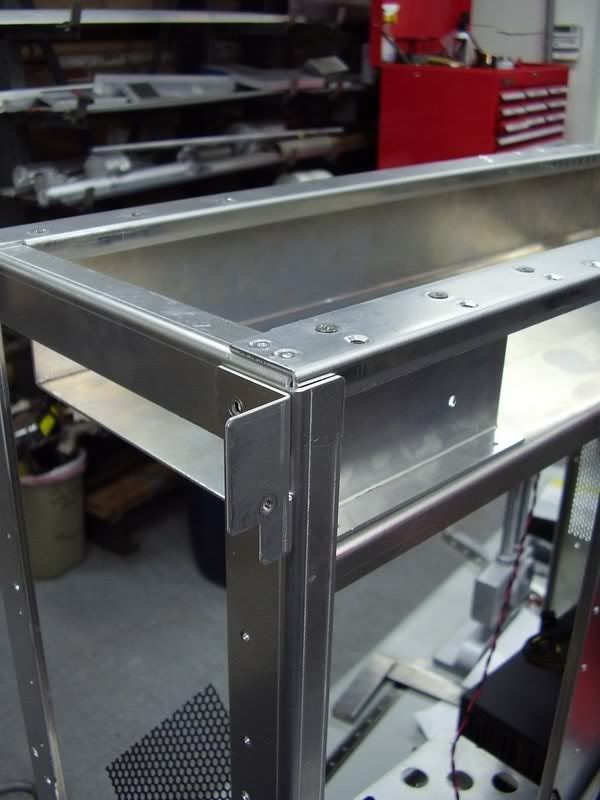
    There is a bracket between the hard drives and motherboard tray that
    adds quite a bit of strength to the case. I want to make a nice divider,
    but still retain this feature some way.


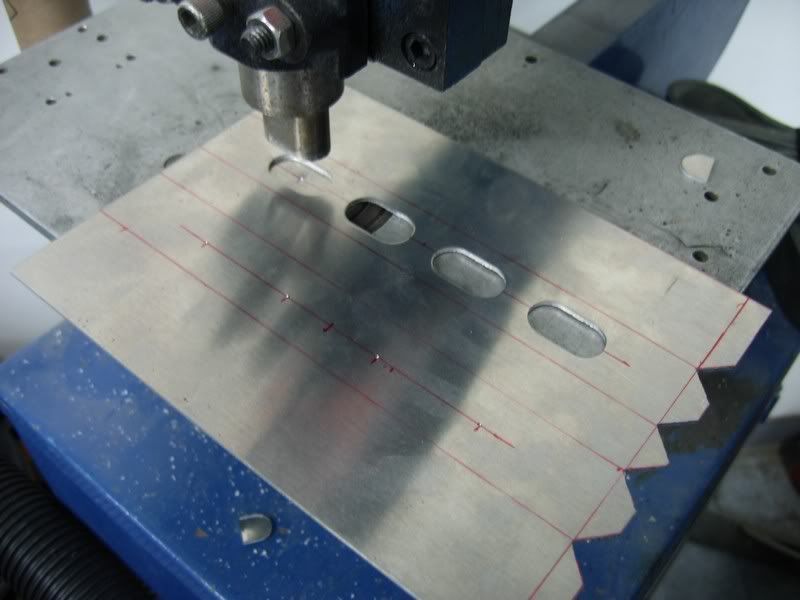
    Here is the aluminum sheet sheared to size and drilled out for some
    UV Leds. You can see the bend lines marked in red.


    Here is the metal about to be bent on the brake.


    Perfect fit! I love it when that happens, especially because screwing
    up means buying more metal.


    I hot-glued the UV Leds in the holes on the back of the cover, and wired
    them up with a molex connector.


    Testing.


    I was going for the clean look, I think it turned out pretty well.


    I used the same mounting holes as the previous bracket to hold in the
    so the cover ends up handily serving a dual-purpose.
    Asus G73- i7-740QM, Mobility 5870, 6Gb DDR3-1333, OCZ Vertex II 90Gb

  2. #2
    Xtreme Addict
    Join Date
    Mar 2007
    Posts
    1,489
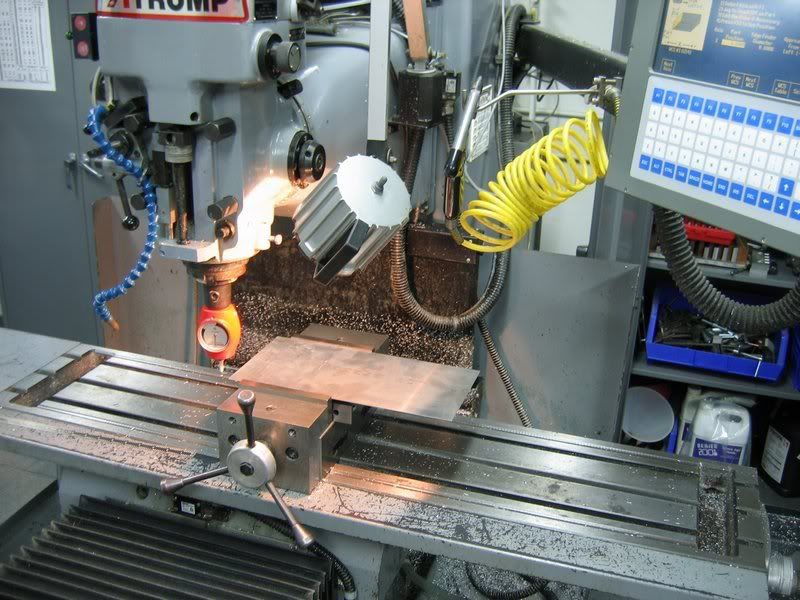
    Today is radiator grille day. Here is a sheet of .080" 6061 alumiunum fixtured on the mill.


    After cutting, I deburred the edges with a scraper and a file, and then softened everything
    with a handy scotch-brite pad.


    While the grille was on the CNC, I cut out the blank for the upper Led lighting, and drilled it.


    Here it is after being bent on the brake, hot-glued, wired, and molex'd.


    I decided to switch PSU's real quick, so I went ahead and put in some cable management
    holes using a step bit and electrician's knockout punches.


    The cable management turned out looking excellent.


    I think I deserve a bit of gaming after all this work, so I will be taking a break for a few
    days.
    Asus G73- i7-740QM, Mobility 5870, 6Gb DDR3-1333, OCZ Vertex II 90Gb

  3. #3
    Xtreme Addict
    Join Date
    Apr 2008
    Location
    France
    Posts
    1,210
    sounds like we got an interesting thread starting here Ian, subscribed!
    [SIGPIC][/SIGPIC]

  4. #4
    Xtreme Addict
    Join Date
    Mar 2007
    Posts
    1,489
    If you look at the second to last picture in the previous post,
    you can see the rectangular hole I nibbled out in the top front of the case.
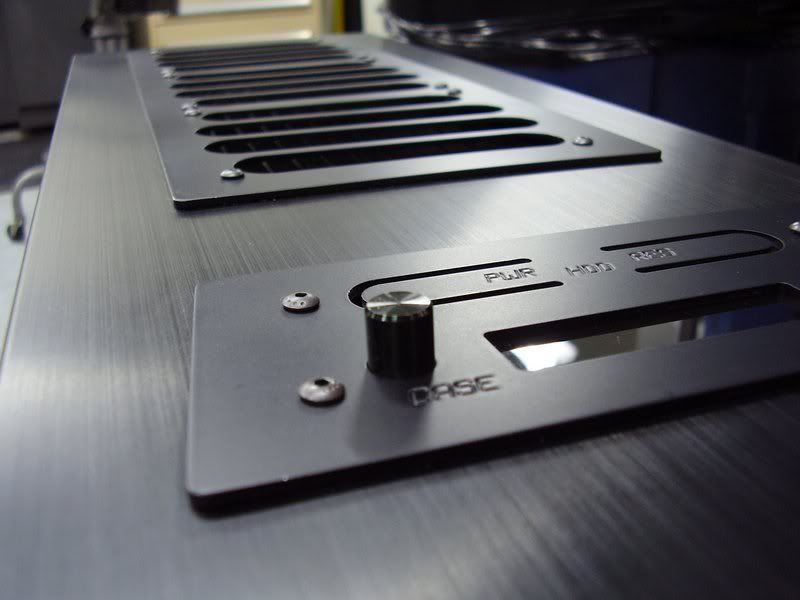
    It will contain a control panel with the relocated power buttons and
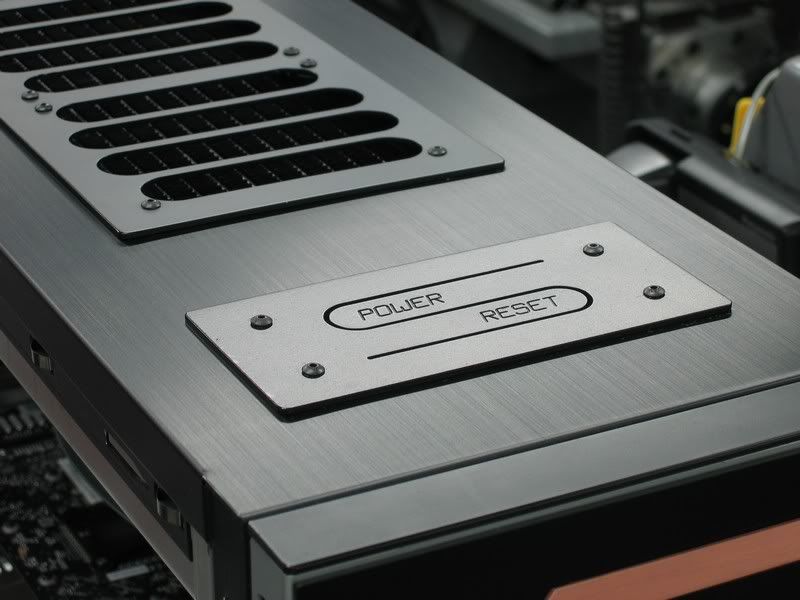
    a slightly chopped Scythe Kaze Master fan controller. This is the display after programming the CNC:


    I sheared the plate with the angle cuts, and then clamped it into the vise
    for machining. This is after a quick beadblast; I'm just about to engrave
    the labels for the buttons and knobs.


    After engraving and another light beadblast.


    I machined a bit out from the back of the power and reset button tabs to make them a
    little more flexible.


    After painting; I rather like the way this turned out.

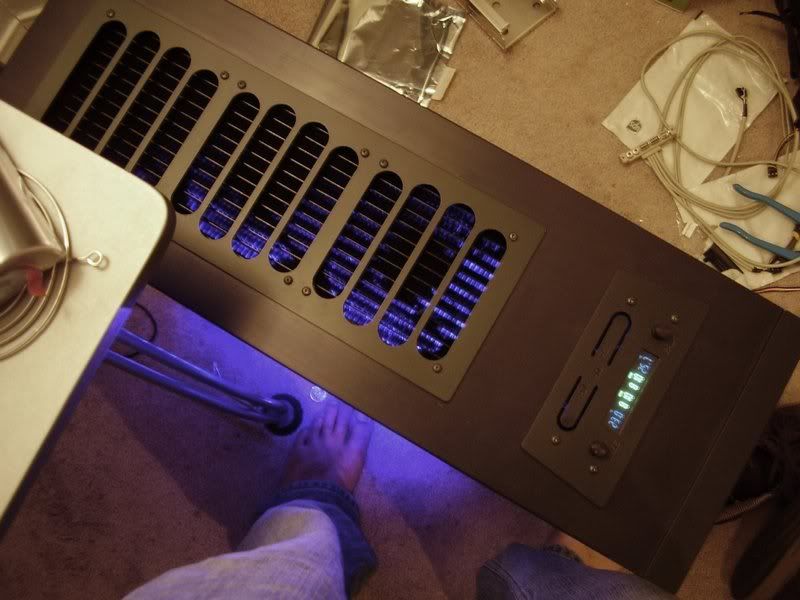
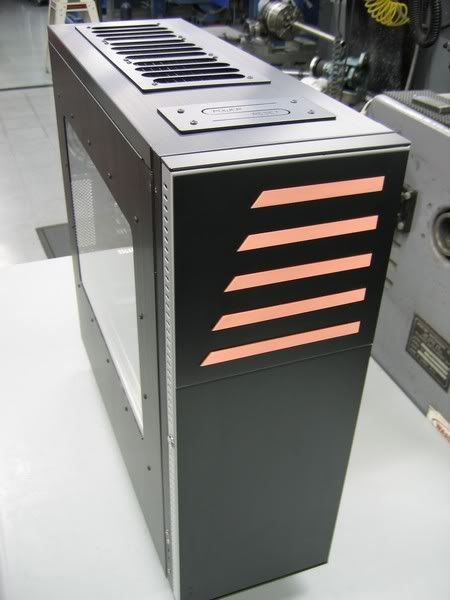
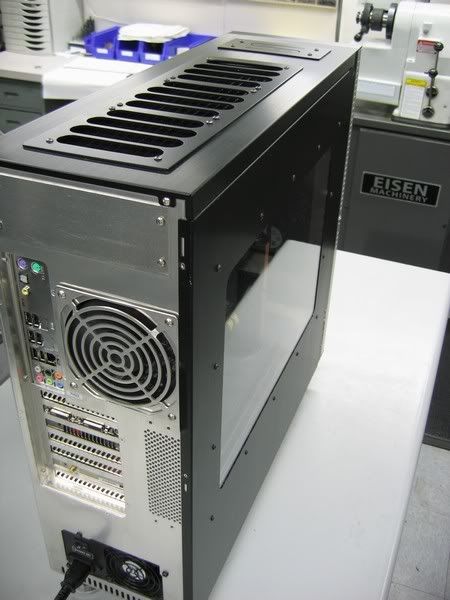
    Here's a whole bunch of shots:


    With the lights on:


    The "HDD" label in the control panel will have a small hole drilled above it for a small
    piece of fiber optic leading to an LED. I will detail that later in the worklog, along with pictures
    of how I mounted the Kaze master.
    Asus G73- i7-740QM, Mobility 5870, 6Gb DDR3-1333, OCZ Vertex II 90Gb

  5. #5
    Xtreme Addict
    Join Date
    Mar 2007
    Posts
    1,489
    Quote Originally Posted by Logos4 View Post
    sounds like we got an interesting thread starting here Ian, subscribed!
    It is actually finished already, I am transferring my worklog over from another forum right now.
    Asus G73- i7-740QM, Mobility 5870, 6Gb DDR3-1333, OCZ Vertex II 90Gb

  6. #6
    Xtreme Addict
    Join Date
    Mar 2007
    Posts
    1,489
    BIG CHANGES

    So, first off, I need to update the system specs.

    -The E4600 was switched out for an E7200
    -Gigabyte P35 DS3L switched for DFI Lanparty P35 Dark
    -G.Skill switched out for 4gb OCZ Reaper HPC

    I was busy for a couple weeks, and had some time to review the work I had already completed, and make plans for the rest of the build. I scrapped a few things, and replaced them with newer, better things.

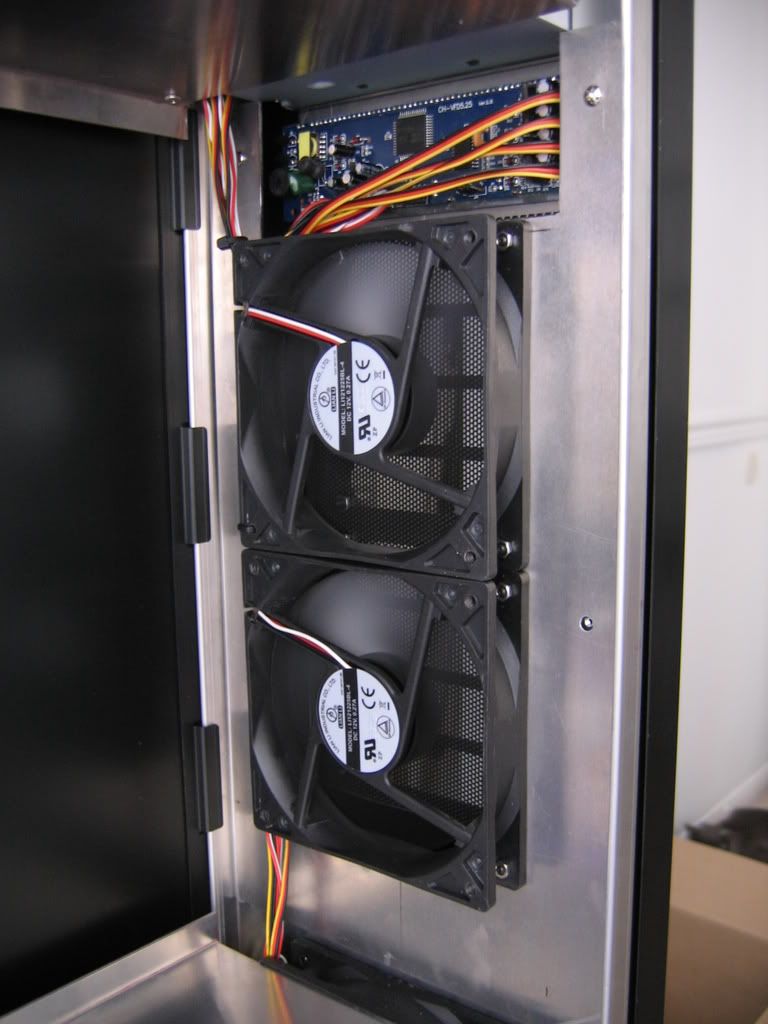
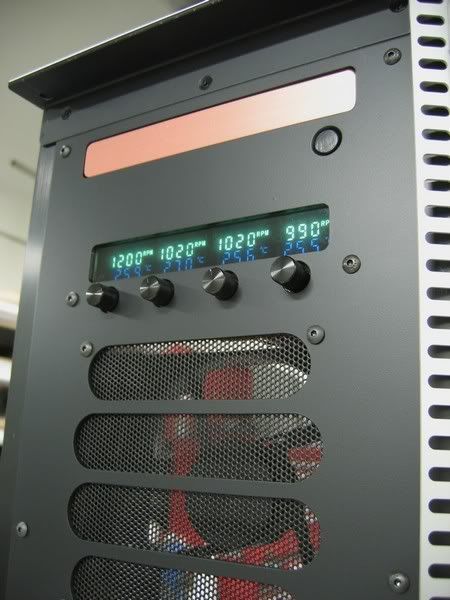
    The top power button/fan control panel is gone, and the 2 channel 3.5" Kaze master has been switched out for the 4-channel 5.25" version. Originall channel 1 was going to be the rad, and channel 2 was going to be the intake and exhaust fans.

    Now it will be-

    -Channel 1, radiator
    -Ch 2, Front intake (Upper case section)
    -Ch 3, Front intake (HDD/PSU bay)
    -Ch 4, Rear exhaust

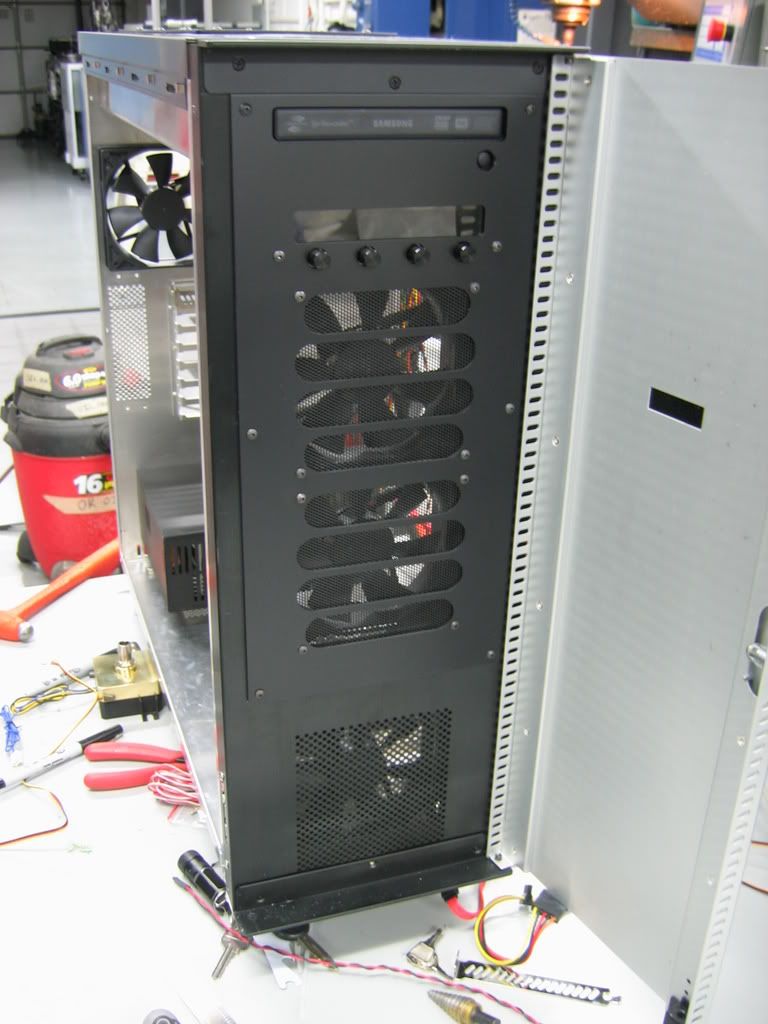
    After deciding on my design changes, the first order of business was to remove those pesky 5.25" drive bays. Who needs em?


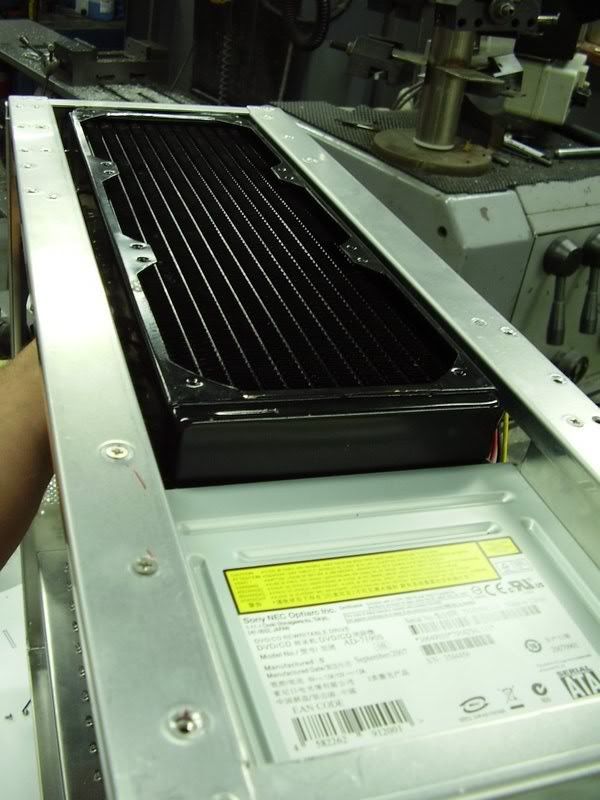
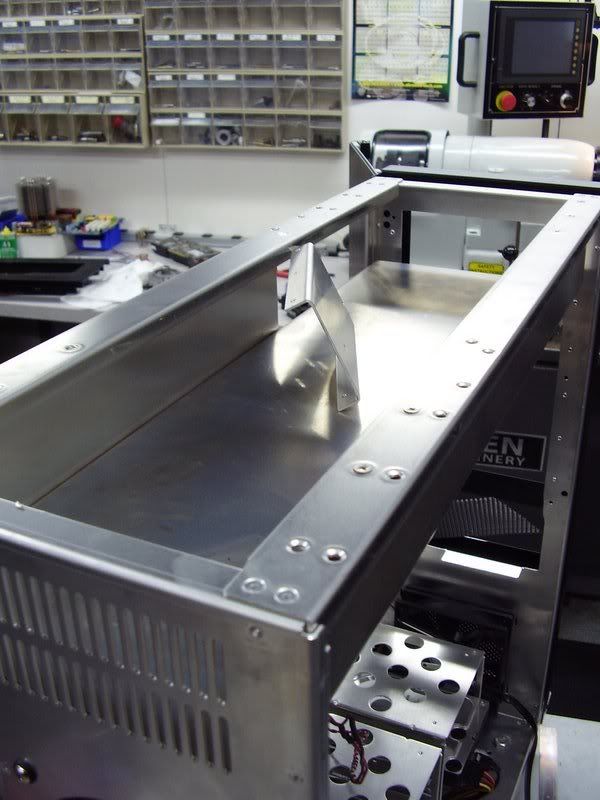
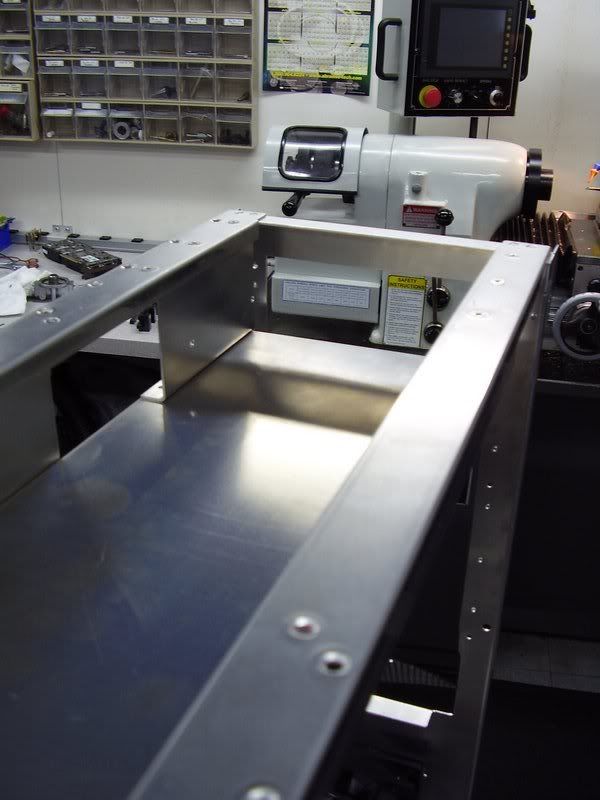
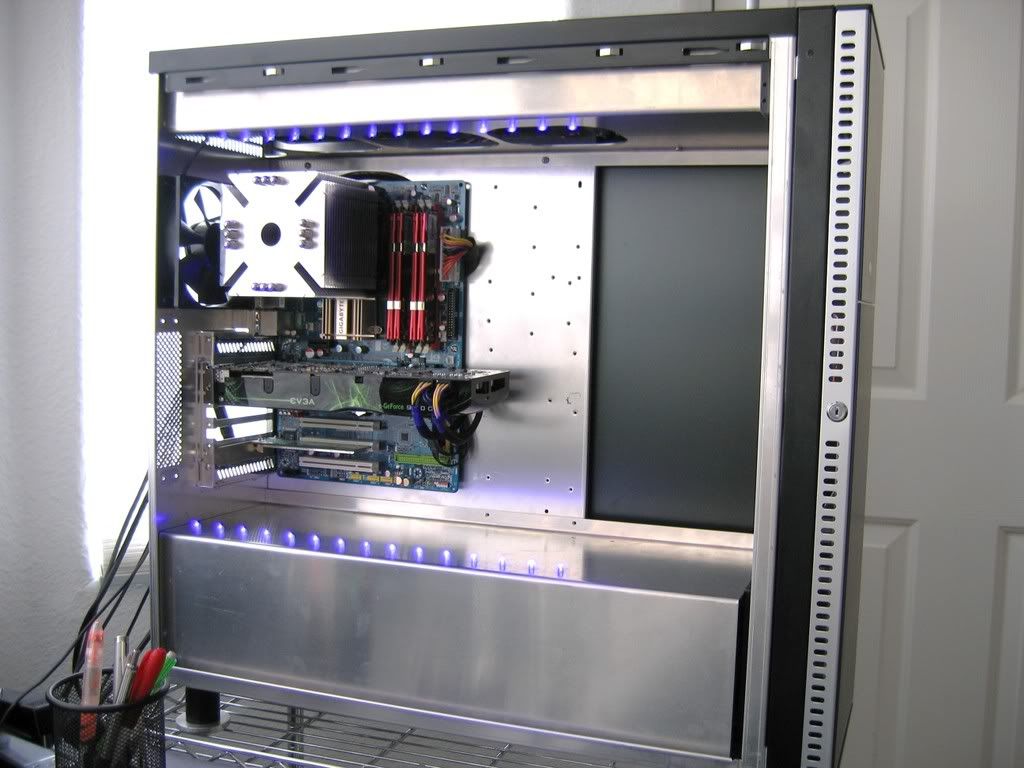
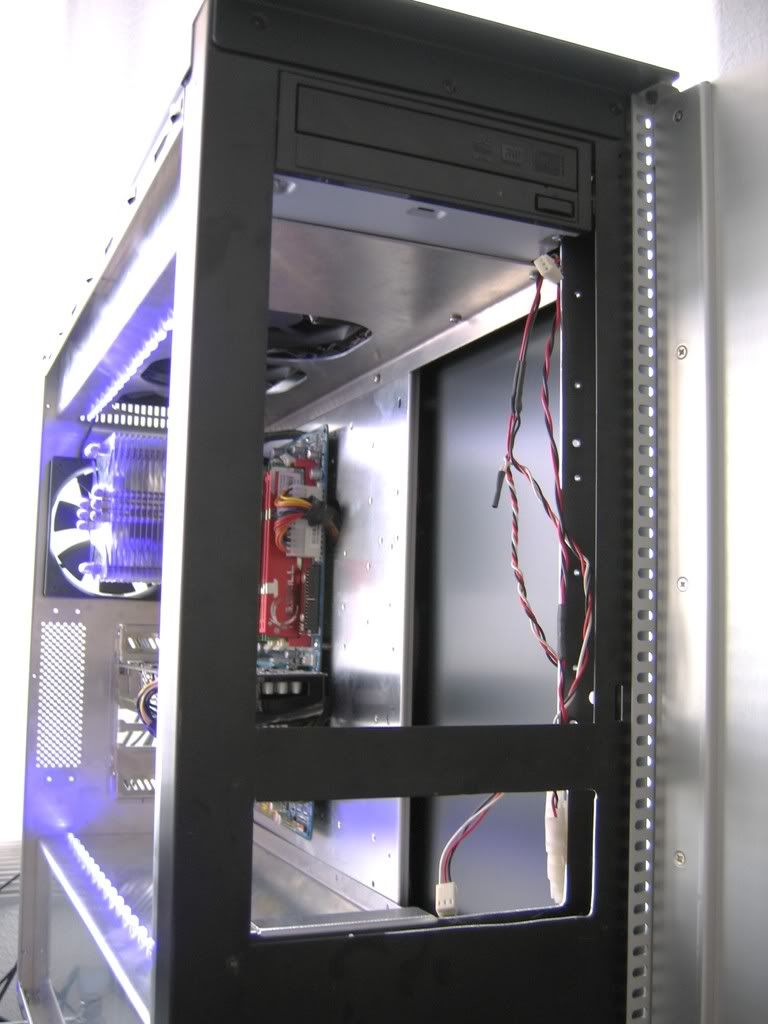
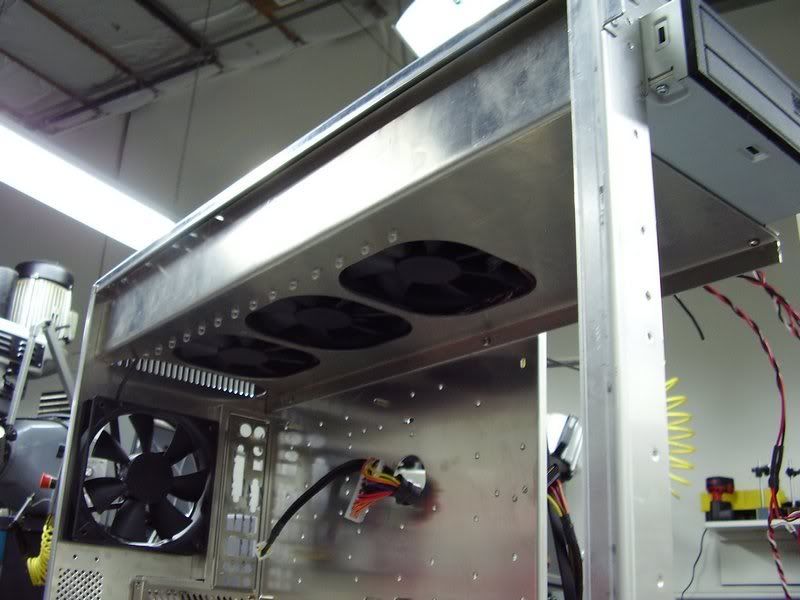
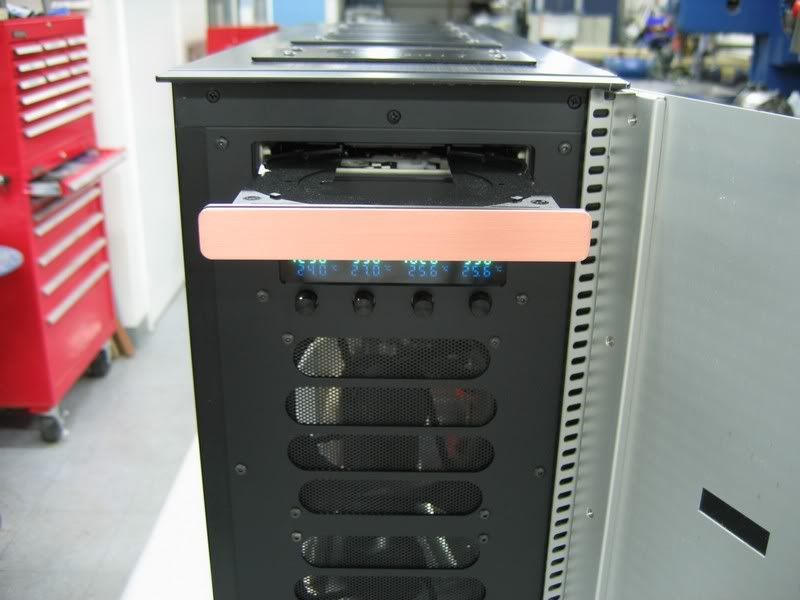
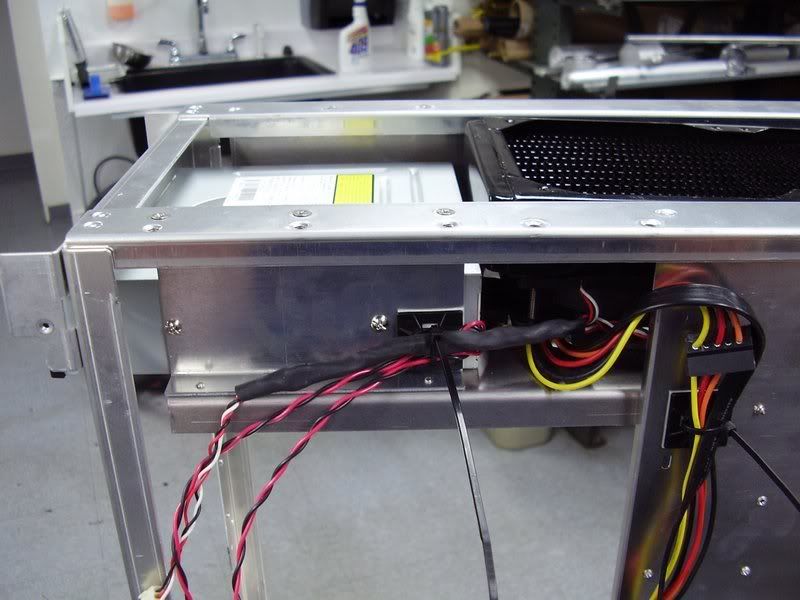
    Since I removed the drive bays I'll need somewhere to put the DVD drive amirite? It will be hidden under an upper shroud that covers the radiator and DVD, which matches the lower shroud which covers the HDD's/PSU.


    I used the same techniques shown earlier in the worklog for the lower shroud. Brake, shear, drill, mill, punch, etc. Show here is the mounting bracket for the DVD drive.


    Mounting bracket installed.


    Another view.


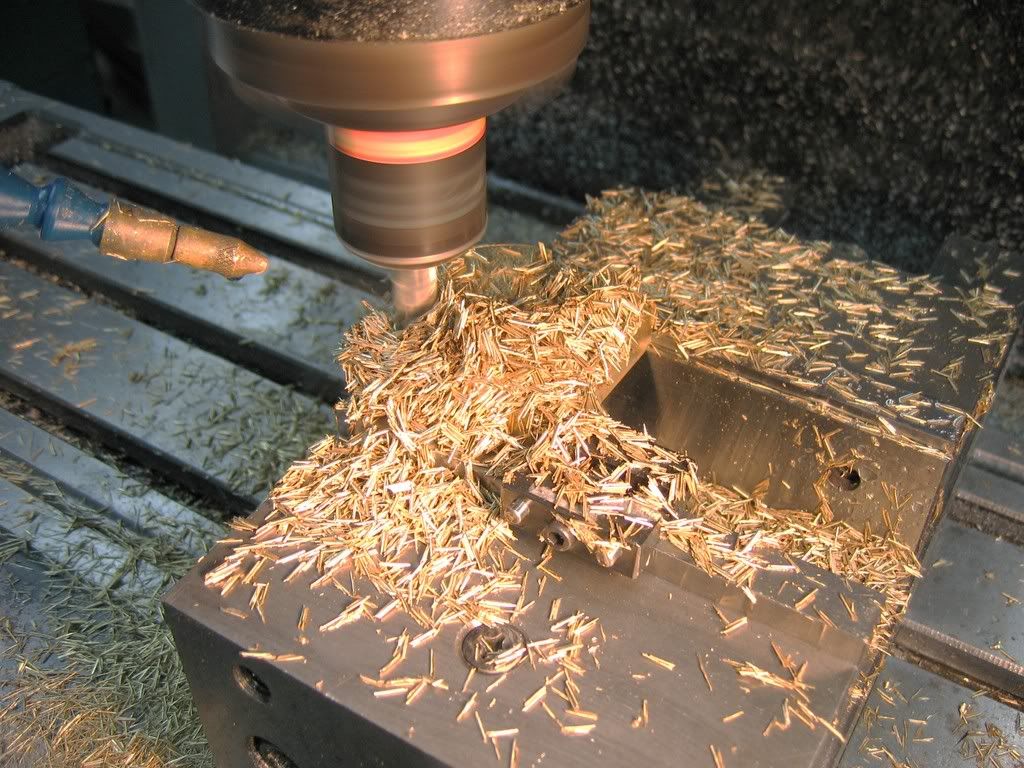
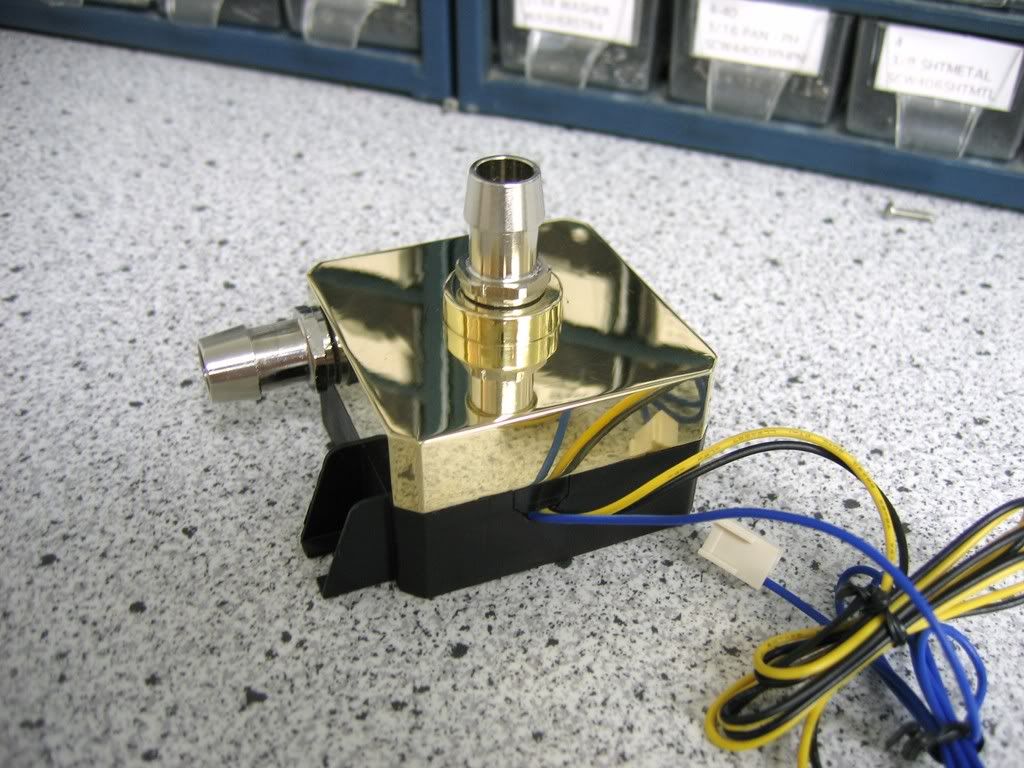
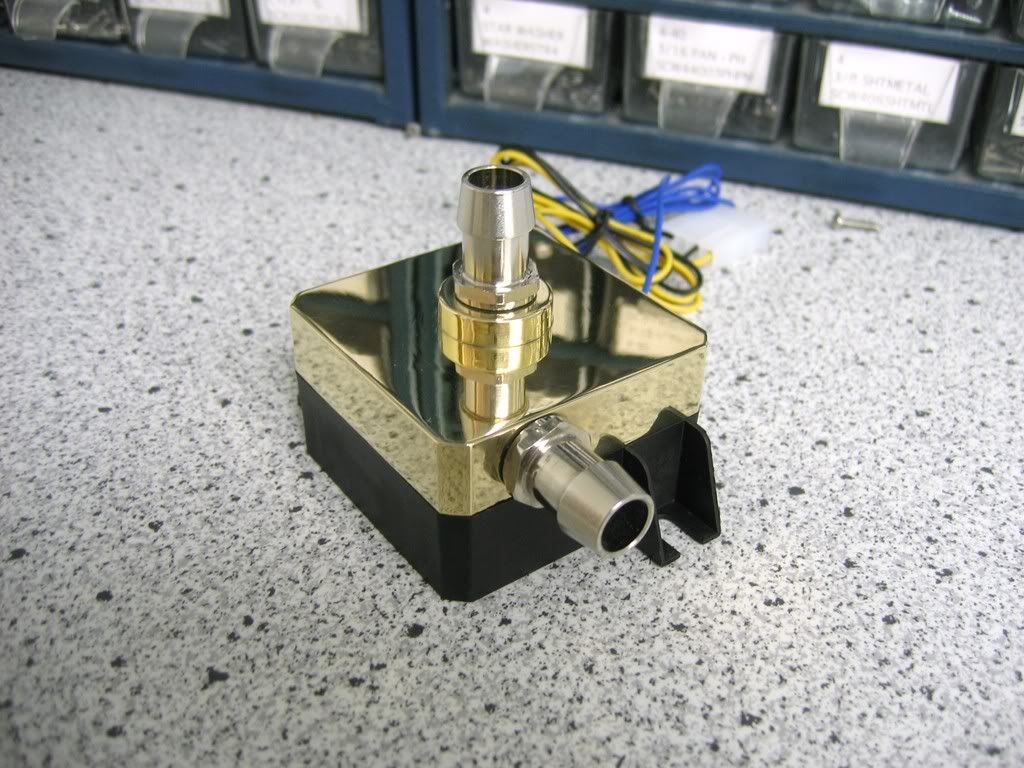
    While I was working on measurements I set the CNC to work on a nice solid brass top for my DDC pump.


    Hehe, sweetness.


    Here are a couple pics I snapped after I got home (*not shown* I set the upper shoud up on the CNC and cut the fan/tubing holes for the rad):


    This shows the location of the DVD drive.


    Dayuum! That's a tight fit!


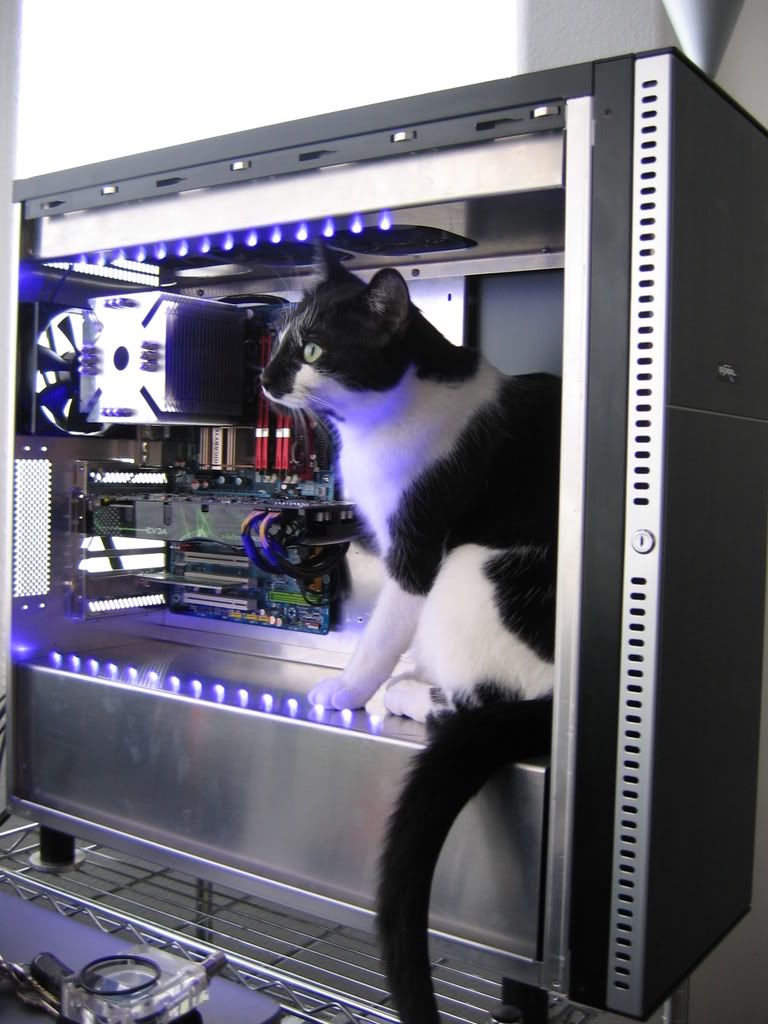
    KITTY!
    Asus G73- i7-740QM, Mobility 5870, 6Gb DDR3-1333, OCZ Vertex II 90Gb

  7. #7
    Xtreme Addict
    Join Date
    Mar 2007
    Posts
    1,489
    Setting up the blank for the front trim panel on the CNC


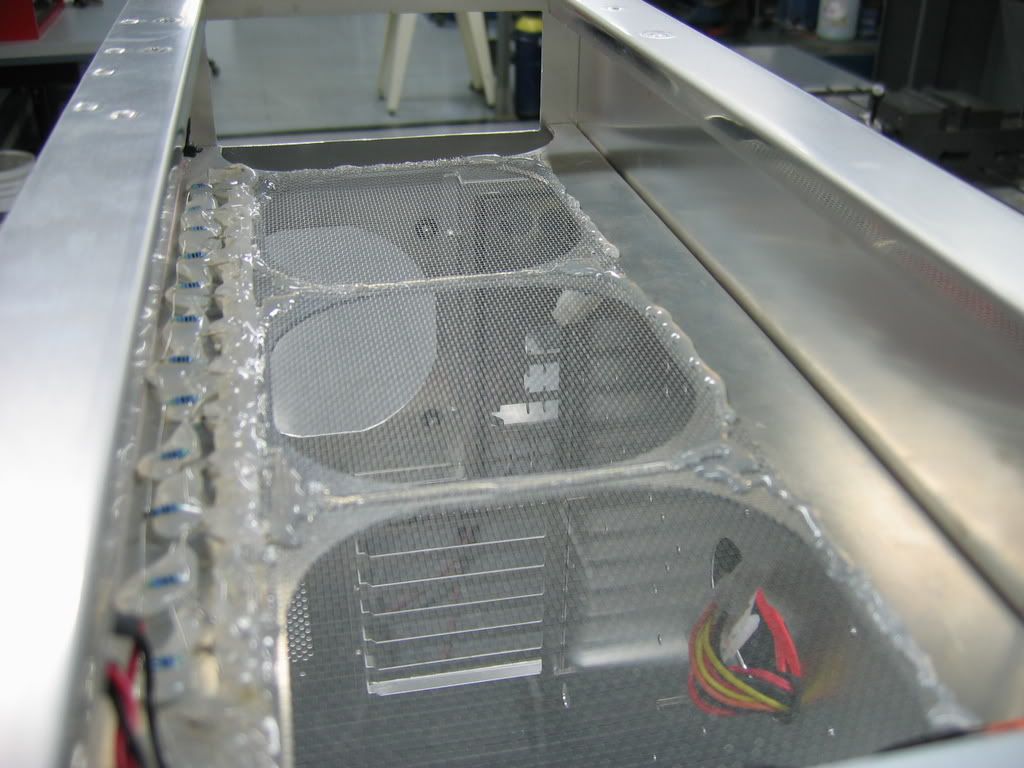
    While I was waiting for the part to come off the CNC I tore the case down and hot-glued some screen into the upper cover as a dust filter. You can also see in the back where I removed the stock grille area to make way for an access panel, this will (hopefully) allow me to better work on my loop without having to remove the radiator.


    Part is done!


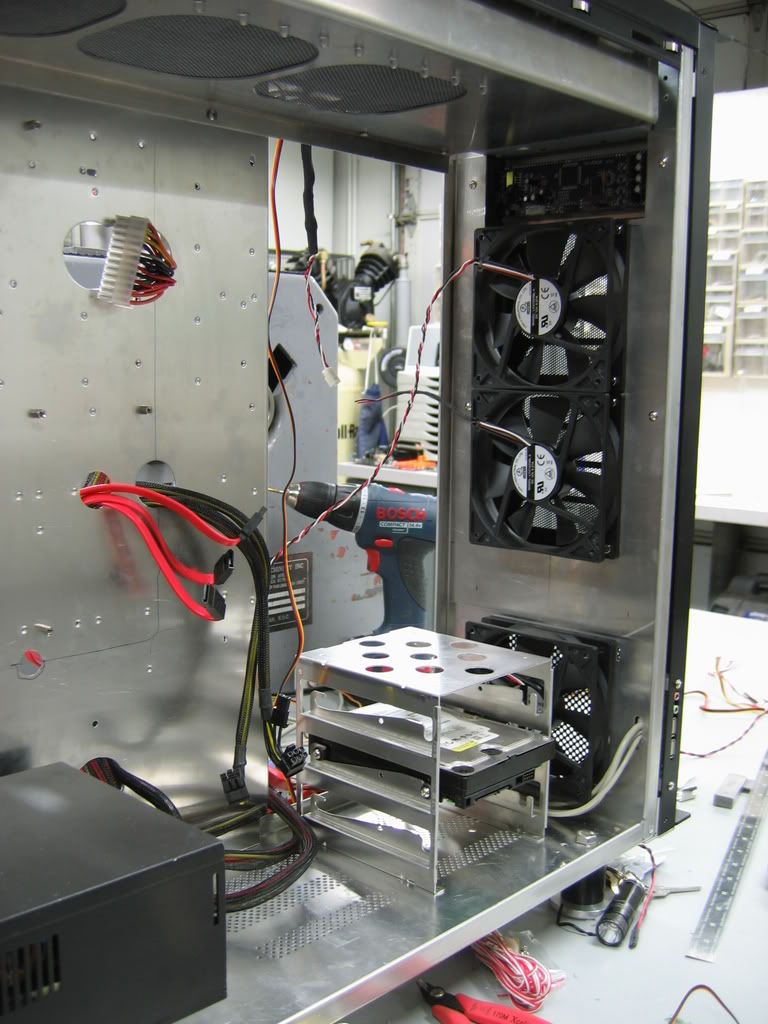
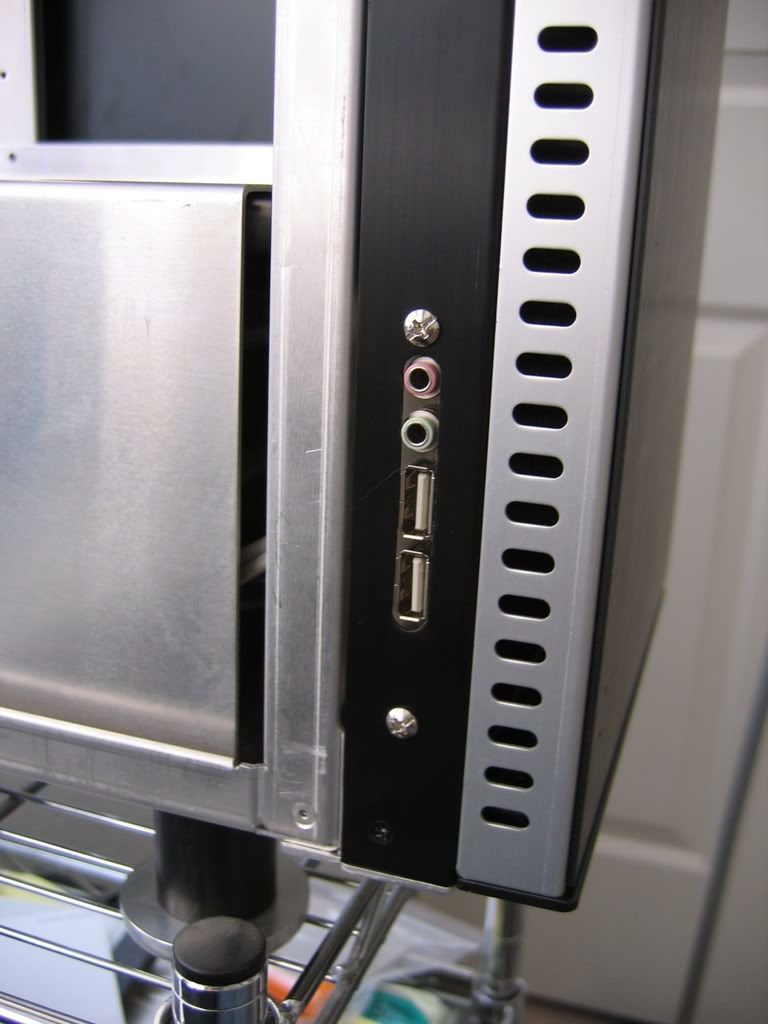
    I mounted the two front intakes. I also removed the 2nd HDD bay to make room for the pump. In the front you can see where I modded the stock audio jacks from the top of the case into easy reach on the side. As you can see I am also working on the cable management.


    Here's a close up with the wiring in place.


    *Not Shown* I took the measurements for the Scythe 5.25" Kaze master and cut the appropriate holes, then stripped the fan controller down to the circuit board so I could stealth mount it.


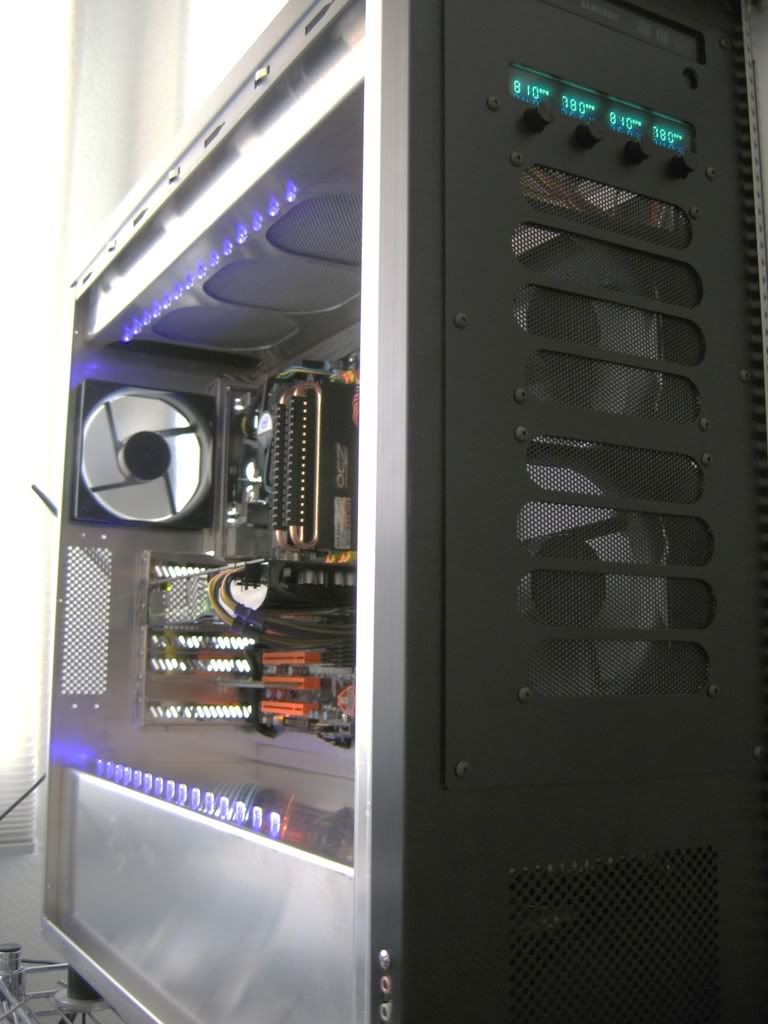
    Front trim panel w/fan controller after painting:


    Here's some pics I took after I got home:


    Kaze Master ablaze in all its glory.


    Closeup of audio/USB jacks. I used a roper whitney hand punch to make the holes, and used the stock screws to attach the jacks through the panel.


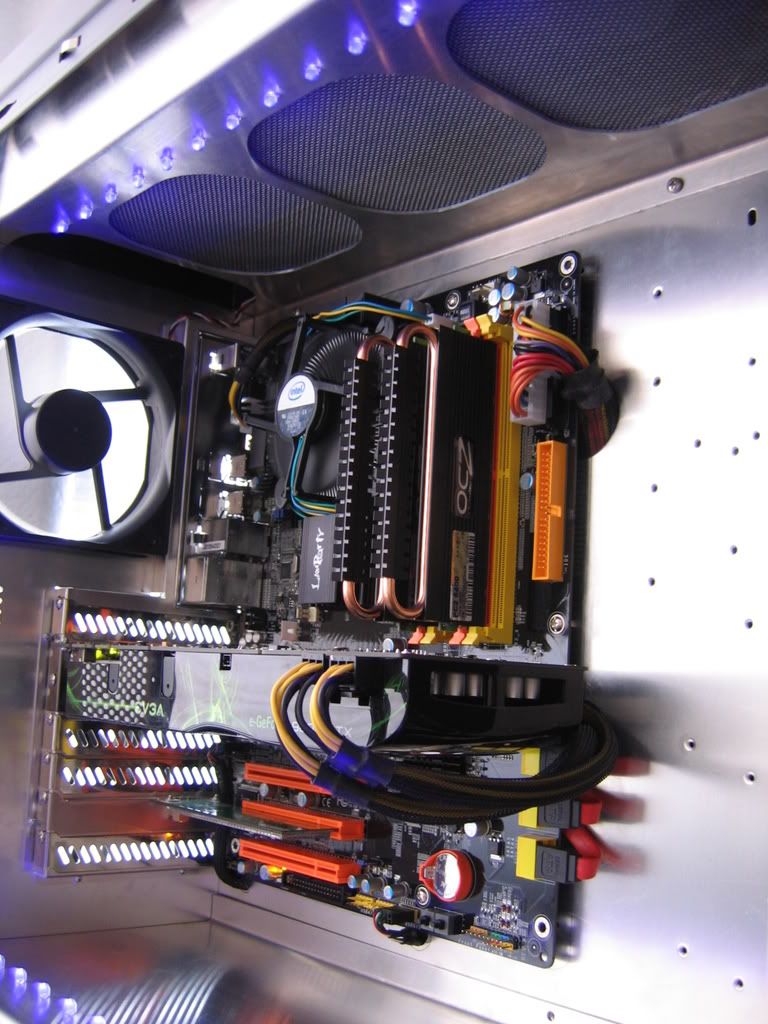
    Here's the first pic so far in the log with my new mobo/cpu/ram, and improved cable management. Looks pretty snazzy IMO.
    Asus G73- i7-740QM, Mobility 5870, 6Gb DDR3-1333, OCZ Vertex II 90Gb

  8. #8
    Xtreme Addict
    Join Date
    Mar 2007
    Posts
    1,489
    Here's where I go a bit out of bounds:


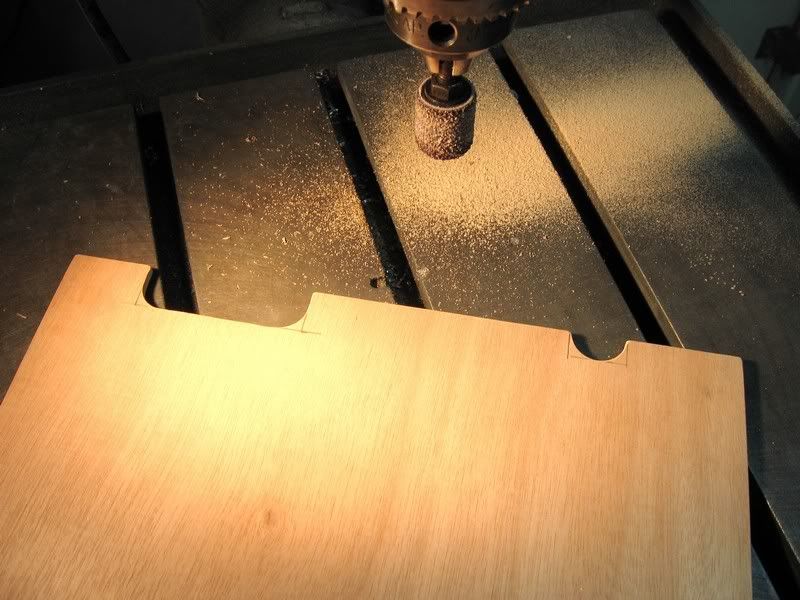
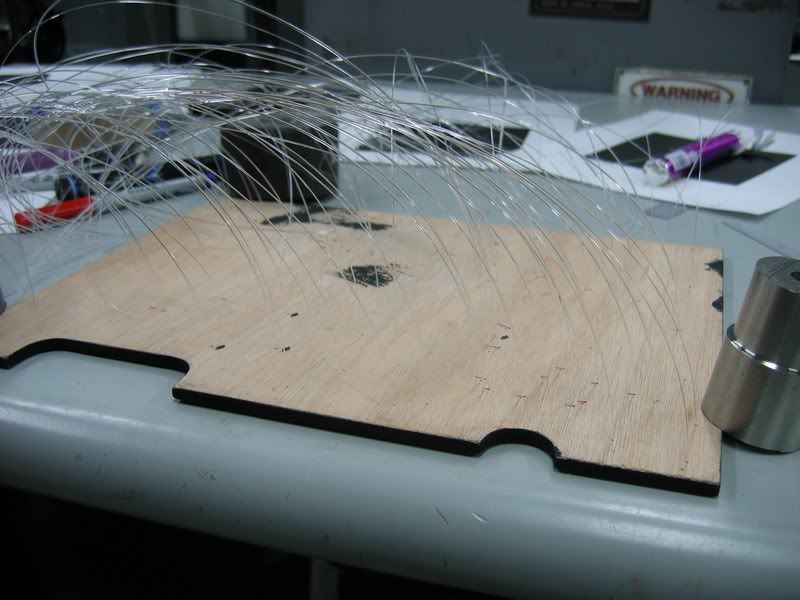
    I cut a piece of thin plywood to size with the bandsaw, and made cutouts for the sata connectors and power cable, then smoothed them with this little drum sander.


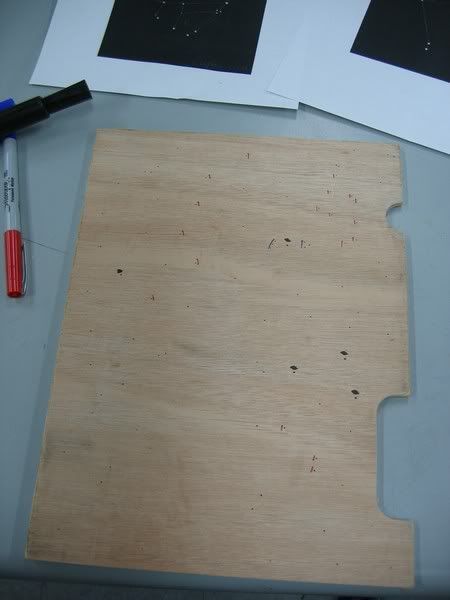
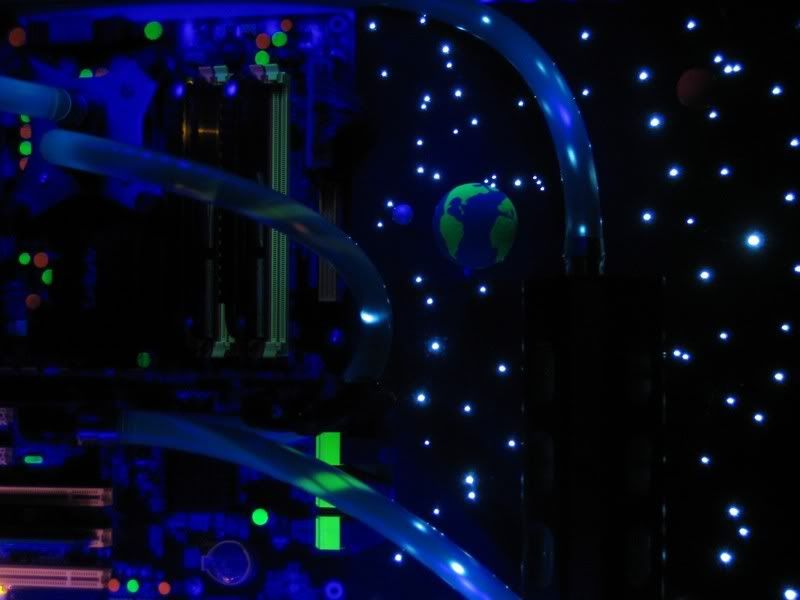
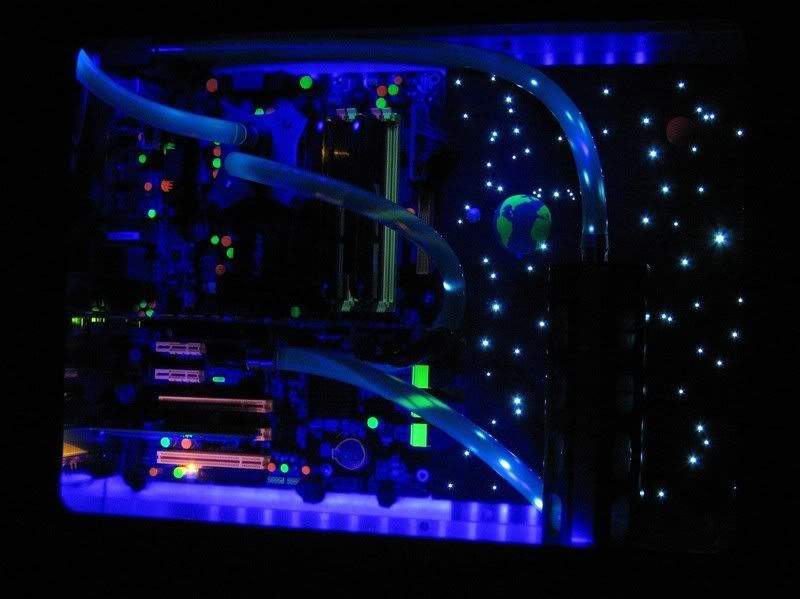
    Here I marked and drilled a few notable constellations.


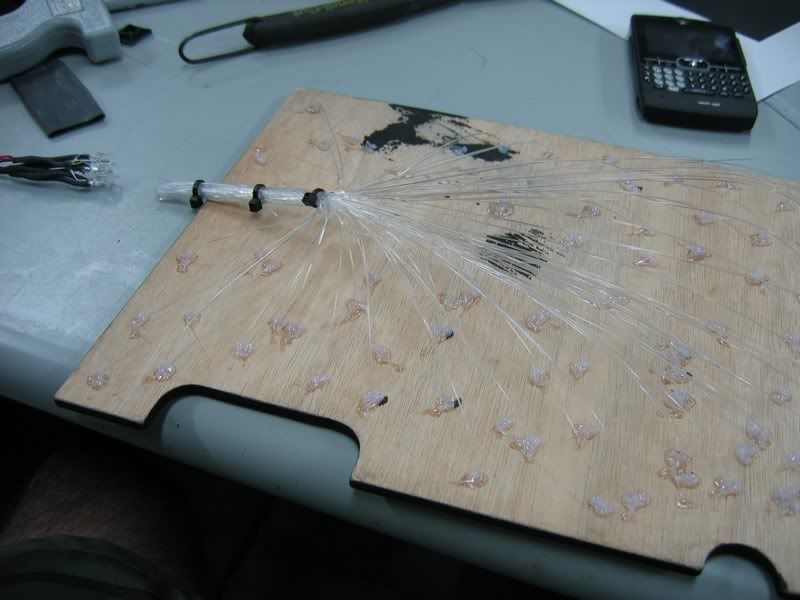
    Wig making, case modding, it's all the same amirite?


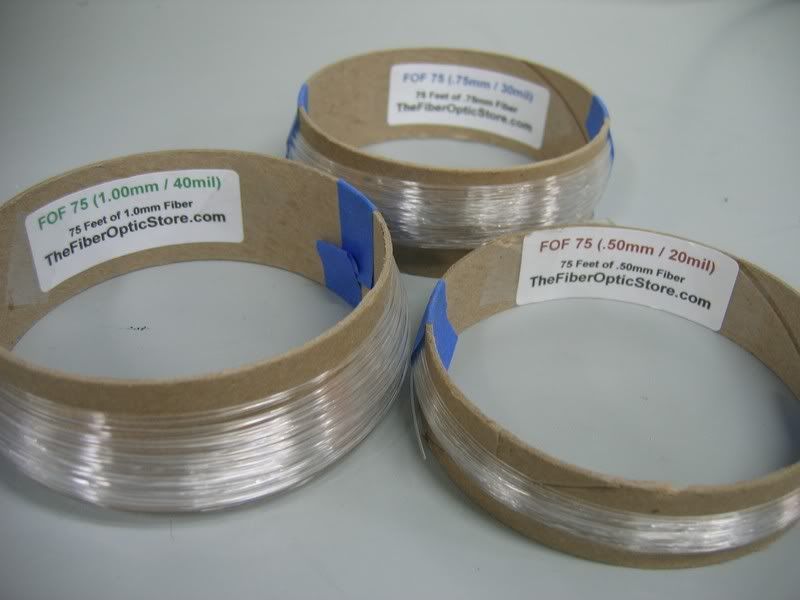
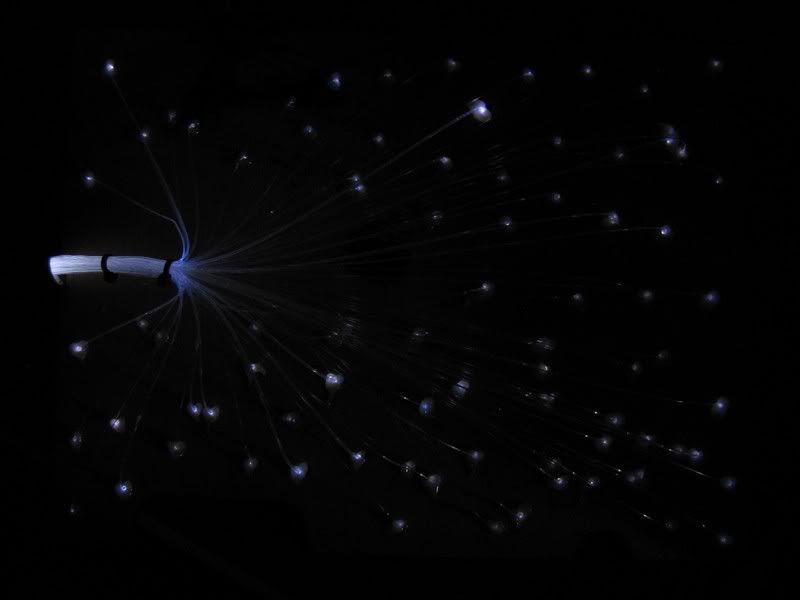
    Here's all the fibers glued in place and tied down. You can see the white LED illuminator bundle I made on the left. I filled up a piece of heatshrink with epoxy, and then jammed the LED's and Fiber optic bundle into each end, then heat cured it.


    Back shot lit on the test bench


    Front


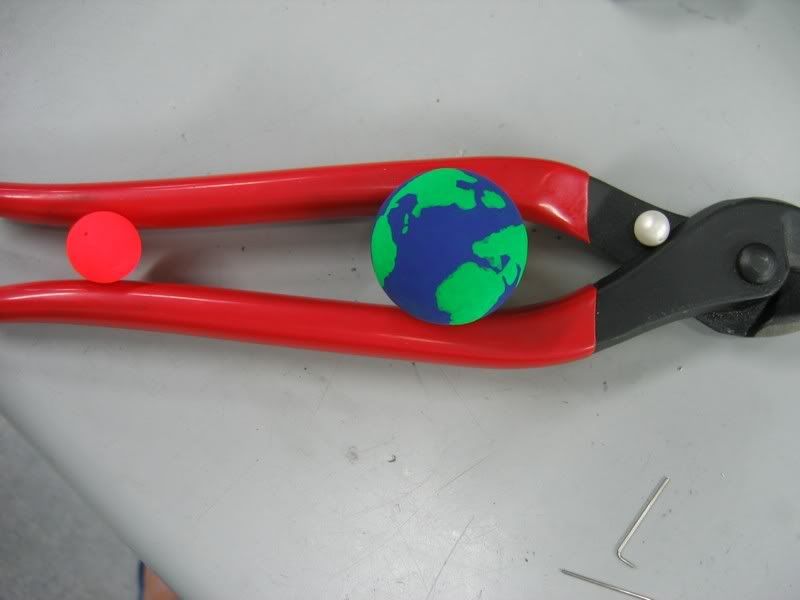
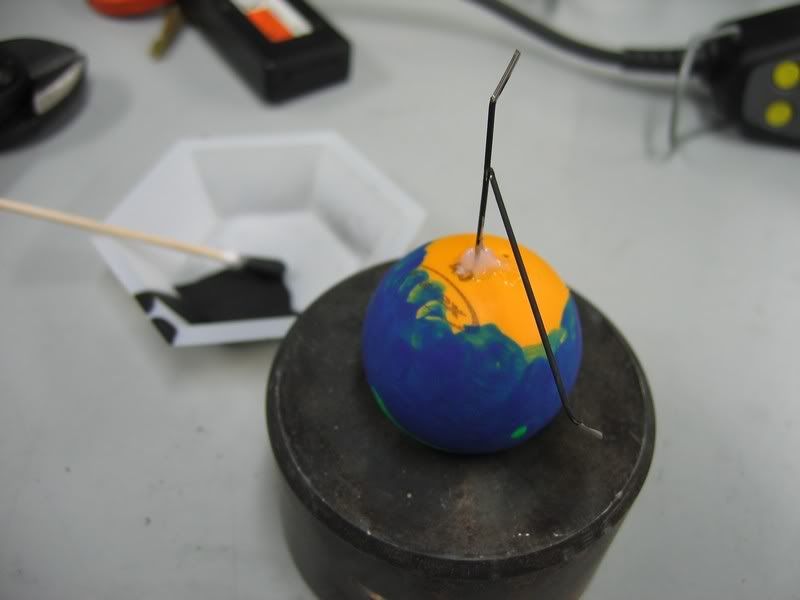
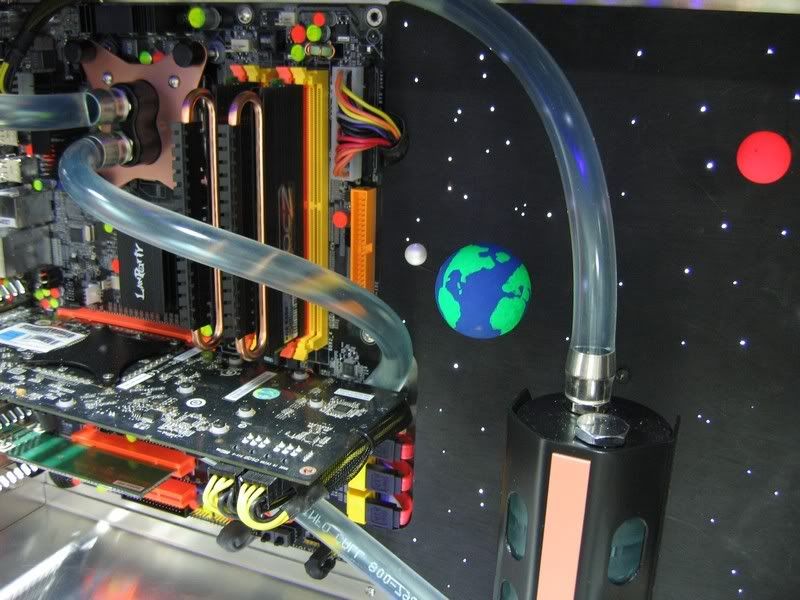
    Mars, Earth and Venus (aka Ping pong ball and round beads painted with UV paint)


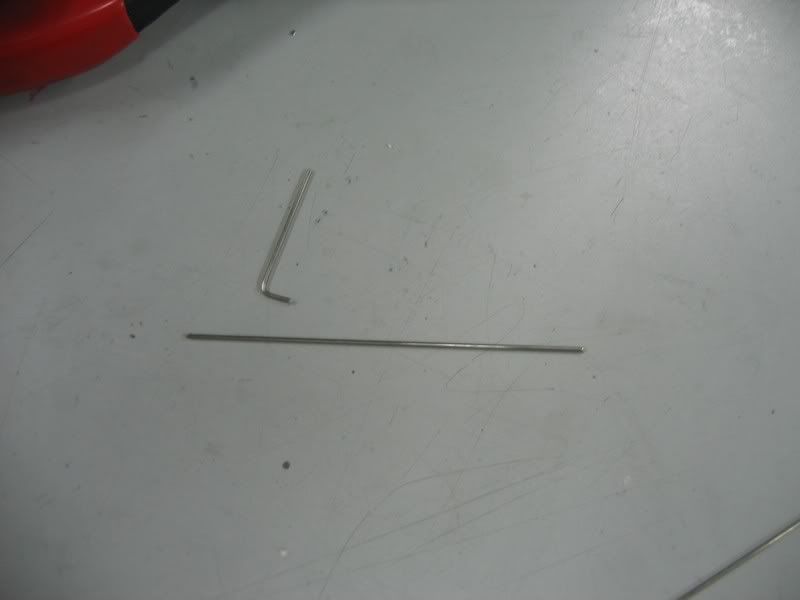
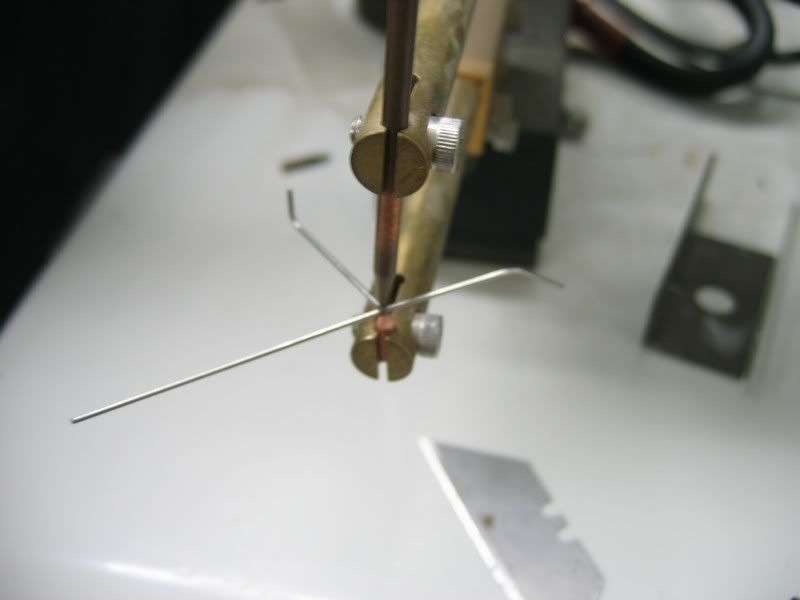
    I will attach them to the star panel using some epoxy and .035" welding wire, heres the supports for the Earth and the Moon.


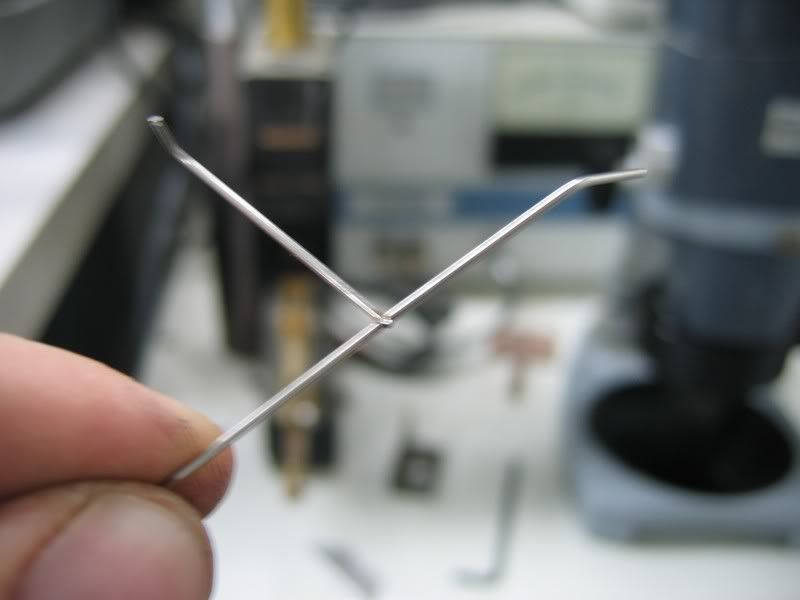
    Using the handy-dandy micro spot welder to attach the two:


    Sweet.


    I glued the wire in with epoxy, and painted it black with some flat black spray paint and a q-tip.


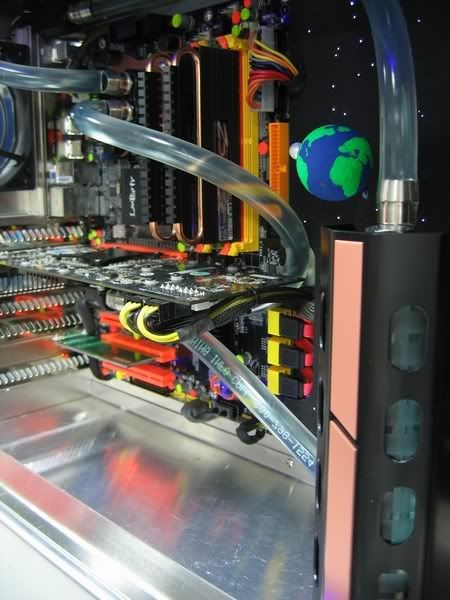
    While I waited for the epoxy to cure, I started on a shroud for the reservoir. I ended up cutting the ears off because they ended up being ugly when it was all bent up.


    Couple shots with the shroud in place and the planets attached:


    Asus G73- i7-740QM, Mobility 5870, 6Gb DDR3-1333, OCZ Vertex II 90Gb

  9. #9
    Xtreme Addict
    Join Date
    Apr 2008
    Location
    France
    Posts
    1,210
    yeah I know, I was just thinking about upcoming comments and questions about your work Gotta go eat something now, will take a closer look after that...
    [SIGPIC][/SIGPIC]

  10. #10
    Xtreme Addict
    Join Date
    Mar 2007
    Posts
    1,489
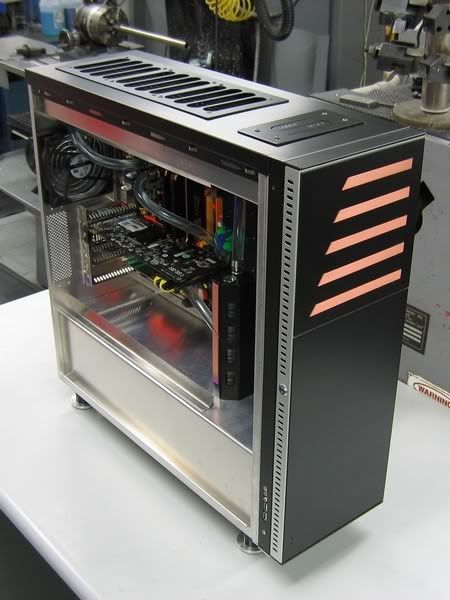
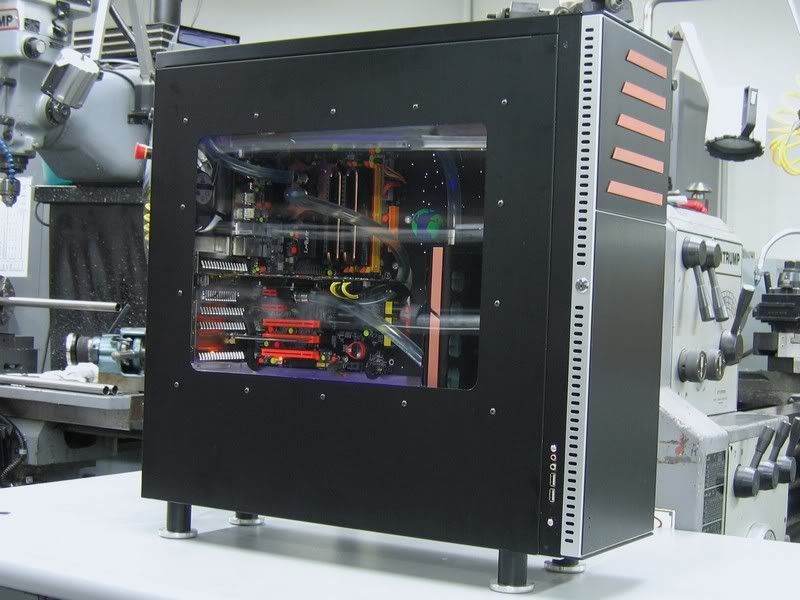
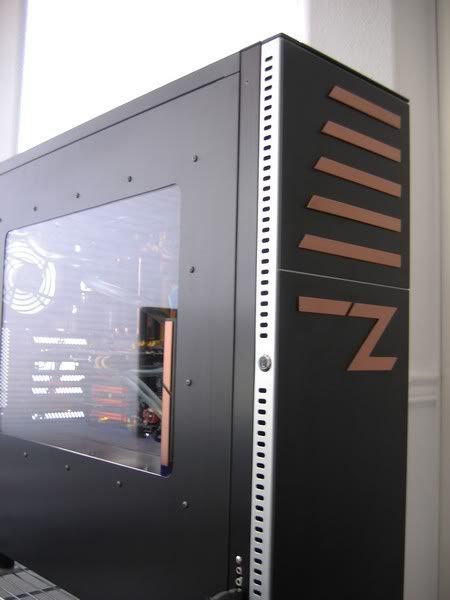
    FINISHED (well, almost anyways)!


    Can you pick out the three constellations?


    Oops, almost forgot the most important part, Z for "Zodiac", so now it is officially "complete". Too bad I couldn't get a decent picture (I'm stuck at home and the lighting is much better at the shop... darned deadline).
    Asus G73- i7-740QM, Mobility 5870, 6Gb DDR3-1333, OCZ Vertex II 90Gb

  11. #11
    Xtreme Addict
    Join Date
    Apr 2005
    Posts
    2,330
    Awesome work.

  12. #12
    Xtreme Addict
    Join Date
    Mar 2007
    Posts
    1,489
    Quote Originally Posted by [XC] Kayin View Post
    Awesome work.
    Finishing this thing in time for the deadline was the main reason I have been taking so long on your block.


    I was going to head over to the shop right now but we somehow managed to get VIP passes at the Toby Keith concert last night, and included were many, many beer tickets. I hurt all over.
    Asus G73- i7-740QM, Mobility 5870, 6Gb DDR3-1333, OCZ Vertex II 90Gb

  13. #13
    Xtreme Member
    Join Date
    Jan 2008
    Posts
    379
    Wow your work is simply amazing. My next rig will probably just like yours simple hardware but maximum case modding .

    Love the detail of your work; very nice and clean btw how is that loop go?
    Cooler Master Haf X
    i5 3750k
    Asrock Xtreme 4
    660 Ti

  14. #14
    Xtreme Addict
    Join Date
    Apr 2008
    Location
    France
    Posts
    1,210
    ...back...just a very beautiful case; I wonder how many hours you've spent on that. I like the finish very much: front panel, top...just amazing. Yep, I'm definitely fond of that front panel with the integrated mesh grills

    ...and yes, forgot to mention the power/reset plate
    Last edited by Logos; 07-13-2008 at 02:20 PM.
    [SIGPIC][/SIGPIC]

  15. #15
    Xtreme Cruncher
    Join Date
    Jul 2007
    Location
    @ the computer
    Posts
    2,510
    doesn't have the most high end parts, but it's so creative! where did you find/get those UV LED's? and i noticed you whole worklog within the time frame of only a few hours haha
    [SIGPIC][/SIGPIC]

  16. #16
    Banned
    Join Date
    Apr 2008
    Location
    Brisbane, Australia
    Posts
    3,601
    Fantastic build, top notch workmanship.

  17. #17
    Xtreme Enthusiast
    Join Date
    Aug 2007
    Location
    Brasilia - DF - Brazil
    Posts
    741
    Awesome job!
    This is what happens when skills meets tools: what a great case.
    Congrats to you iandh. Now go work on our 4870 ramsinks
    My Lian Li G70
    Asus P6X58D-E * i7-930 * Saphire 7970 * 6GB Corsair XMS3 1600 C7 * Crucial M4 256GB SSD * Lian Li G70W Powdercoated
    Watercooled by single loop Coolgate Quad 120 + Swiftech MCR220 with San Aces H1011 * EK Supreme HF * Koolance VID-AR797 * EK Asus X58 full set * DDC 3.25 with EK Dual Top/Res

  18. #18
    Xtreme Addict
    Join Date
    Mar 2007
    Posts
    1,489
    Thanks all!!!


    Quote Originally Posted by Pellepel View Post
    Wow your work is simply amazing. My next rig will probably just like yours simple hardware but maximum case modding .

    Love the detail of your work; very nice and clean btw how is that loop go?
    The pump is hanging underneath the res, so pump-gpu-cpu-rad-res

    Quote Originally Posted by WhiteFireDragon View Post
    doesn't have the most high end parts, but it's so creative! where did you find/get those UV LED's? and i noticed you whole worklog within the time frame of only a few hours haha
    I got a pack of 50 from ebay for like 8 bux. WAY better than CCL's imo, but a bit of a pain to install. I can't stand the high pitched whine the CCL transformers make... some can hear it and some can't.

    Quote Originally Posted by leo_bsb View Post
    Awesome job!
    This is what happens when skills meets tools: what a great case.
    Congrats to you iandh. Now go work on our 4870 ramsinks
    Yep, if you have the right tools you are already halfway there.

    I actually am working on the 4870 sinks right now.

    I'll be updating this worklog when I get my 4870 installed.
    Asus G73- i7-740QM, Mobility 5870, 6Gb DDR3-1333, OCZ Vertex II 90Gb

  19. #19
    Xtreme Member
    Join Date
    Dec 2007
    Location
    Vancouver
    Posts
    269
    My God, its beautiful.
    Kick it oldschool

    The Vortex H20 V2.0

    Coolermaster ATCS 840 w Window panel
    EVGA SR-2 Classified
    2 x Xeon L5639 Hexcore CPUs, 3.2GHZ
    EVGA GTX 580
    24GB Mushkin Blackline DDR3 1600MHZ 9-9-9-24 1.5v
    OCZ Z-Series GOLD 850W
    2 x 90GB Corsair Force SSD RAID0
    Sharp 32" Aquos 1080p
    Benq W500 1080i Pojector.

    Watercooling:
    2 x EK Supreme HF, MCR320+Gelid Silent 12 Push/Pull, DD Pump, EK Multioption 100ml Res, XSPC GTX 580 FC block, EK Coolstream XT 220 RAD Gelid Wings Push - CM R4s Pull.

  20. #20
    Xtreme Cruncher
    Join Date
    Jul 2007
    Location
    @ the computer
    Posts
    2,510
    those LED's are inspiring me to throw out my UV cathodes since they take up so much room for wiring and converters. would i need to also get resistors for these LED's or do they come with them? and can you link the exact item number on ebay so i can see the specs? here are some i picked out so can you tell me which one is best (ebay item numbers):

    1) 290245212128
    2) 280245685872
    3) 370068346503
    [SIGPIC][/SIGPIC]

  21. #21
    Xtreme Member
    Join Date
    May 2008
    Location
    Highlands Ranch, CO
    Posts
    445
    {Insert jealousy here}

    Not gonna lie dude..


    ... WOW!

  22. #22
    Xtreme Member
    Join Date
    May 2008
    Location
    Portugal
    Posts
    181

    Thumbs up

    Quote Originally Posted by Cptn Vortex View Post
    My God, its beautiful.
    indeed!

    very very very very nice work


  23. #23
    I am Xtreme
    Join Date
    Jul 2007
    Location
    The Sacred birth place of Watercooling
    Posts
    4,689
    lovely build iandh MDPC candidate for sure.

    How do you like that dfi board?
    Quote Originally Posted by skinnee View Post
    No, I think he had a date tonight...

    He and his EK Supreme are out for a night on the town!

  24. #24
    Xtreme Mentor
    Join Date
    Mar 2006
    Location
    Evje, Norway
    Posts
    3,419
    Wow, impressive.

    About UV leds. U can get plenty for cheap here and they can run straight of 3.3v:
    http://www.ledshoppe.com/led5mm.htm
    I dont know how good they are but they are dirt cheap. And its free shipping too. Ive used the store several times, no problems.

    Edit: I have 100 uv, 100 blue and 100 white on the way...
    Quote Originally Posted by iddqd View Post
    Not to be outdone by rival ATi, nVidia's going to offer its own drivers on EA Download Manager.
    X2 555 @ B55 @ 4050 1.4v, NB @ 2700 1.35v Fuzion V1
    Gigabyte 890gpa-ud3h v2.1
    HD6950 2GB swiftech MCW60 @ 1000mhz, 1.168v 1515mhz memory
    Corsair Vengeance 2x4GB 1866 cas 9 @ 1800 8.9.8.27.41 1T 110ns 1.605v
    C300 64GB, 2X Seagate barracuda green LP 2TB, Essence STX, Zalman ZM750-HP
    DDC 3.2/petras, PA120.3 ek-res400, Stackers STC-01,
    Dell U2412m, G110, G9x, Razer Scarab

  25. #25
    Xtreme Cruncher
    Join Date
    Jul 2007
    Location
    @ the computer
    Posts
    2,510
    Quote Originally Posted by eXa View Post
    Wow, impressive.

    About UV leds. U can get plenty for cheap here and they can run straight of 3.3v:
    http://www.ledshoppe.com/led5mm.htm
    I dont know how good they are but they are dirt cheap. And its free shipping too. Ive used the store several times, no problems.

    Edit: I have 100 uv, 100 blue and 100 white on the way...
    how would you connect it to the 3.3v rail of the PSU? wouldn't it be a better choice to get resistors with those so you can connect it to the primary 12v rail? those are cheap but they dont include the resistors :[
    [SIGPIC][/SIGPIC]

Page 1 of 2 12 LastLast

Bookmarks

Bookmarks

Posting Permissions

  • You may not post new threads
  • You may not post replies
  • You may not post attachments
  • You may not edit your posts
  •