

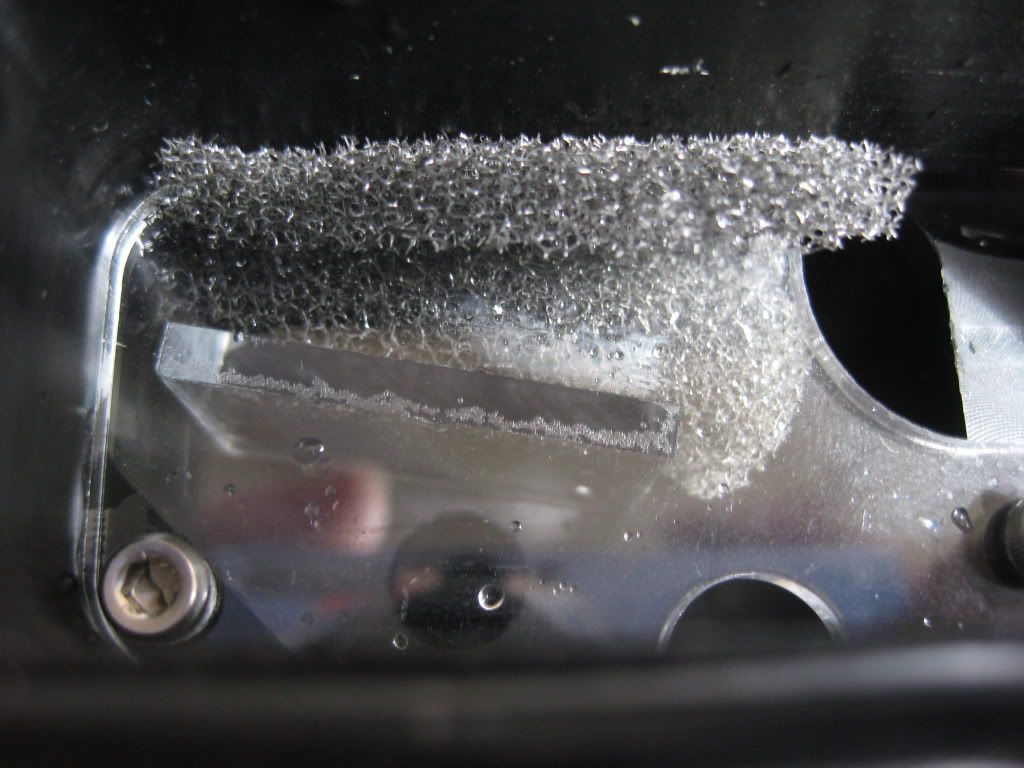
sponge arrestor...
Thats my final fix... its the bubble trap in the top chamber that making this res hard.


sponge arrestor...
Thats my final fix... its the bubble trap in the top chamber that making this res hard.
Nadeshiko: i7 990 12GB DDR3 eVGA Classified *In Testing... Jealous?*
Miyuki: W3580 6GB DDR3 P6T-Dlx
Lind: Dual Gainestown 3.07
Sammy: Dual Yonah Sossoman cheerleader. *Sammy-> Lind.*
Its my fault.. and no im not sorry about it either.[12:37] skinnee: quit helping me procrastinate block reviews, you asshat. :p
[12:38] Naekuh: i love watching u get the firing squad on XS
I'll see what happens over a longer period of time, before I attempt taking my unit apart.
However, neither fix would solve the problem of bubbles hiding in the radiator.
I just tried opening the bleed screw a little, but it doesn't seem to have helped. I simply opened it very slightly until it started leaking, and left it open for about 20 seconds (plenty of toilet paper padded all round). Dunno if I was meant to wait longer, but to be honest, I kind of expected air to start gushing out.

OK, I tried an alternative method. I orientated and shook the case so that all the air in the radiator would rise to the corner where the bleed screw is.
It seems to have gotten rid of some of the air, but there is still quite a bit inside it still.
My guess is that it is gathering in the outlet chamber when I power the pump on. If so, would I have to worry about it affecting performance?
Last edited by Odai; 04-08-2011 at 05:06 AM.
Gargh! I give up. There's just no shifting the air out of the radiator. I did think about maybe opening the bleed screw port, sticking a syringe in there, and sucking the air out, but it's becoming a ridiculous amount of effort just for this single problem.
So, I figured maybe it would be more appropriate to simply warm up the water a little (leave the pump running), and feel the radiator for any cold spots. Cold spots=significant bubble size, right?
You mean res, not radiator, correct?
Yes, I am having bubble issues in mine too...with 2xd5 in serial with the bypass acrylic and pipe.
Nope, radiator.
It would be a lot easier if it was in the res... At least then I could see it. Right now I'm playing the (educated) guessing game.
My res is the one storing bubbles ... I can see em circulating throughout the loop, bah!
Mkai...
Bleeding instructions...
1. If you have the Serial U pipe... install it on the TOP port.
2. REMOVE ALL ACRYLIC INSERTS INCLUDING STOCK... Sorry to say this Tim, but its unfunctional, and only makes things worse.
3. Connect both side res's by removing side plug.
4. Make sure u have both top fill ports open and start filling.
5. Once u filled as much as possible.. close the right side, and then turn your pumps on.
Whats going to happen is the right side will purge.
The bubbles will go all over the place and eventually collect on the left side.
Since your left side fill port is open, you should be topping off, as the left side starts going down to 3/4th full.
You want to only leave a little air gap like in my pictures on the left side:
Then just keep topping the left side.... 10min later:
Another 10 min later :
This is the easiest solution i can think of, without adding a Tline.
Martin do me a favor please, and try to repeat this.
Confirm if its the easiest to bleed.
Nadeshiko: i7 990 12GB DDR3 eVGA Classified *In Testing... Jealous?
Miyuki: W3580 6GB DDR3 P6T-Dlx
Lind: Dual Gainestown 3.07
Sammy: Dual Yonah Sossoman cheerleader. *Sammy-> Lind.*
Its my fault.. and no im not sorry about it either.[12:37] skinnee: quit helping me procrastinate block reviews, you asshat. :p
[12:38] Naekuh: i love watching u get the firing squad on XS
I am going to do this when I get home tonight ...
time to get wet!
final picture b4 i shut the system off, and start working on my rebuild. :X
I think im pissing a lot of people off in the worklog section, because ive been playing with this guy more then ive been dismantling my main.
Nadeshiko: i7 990 12GB DDR3 eVGA Classified *In Testing... Jealous?
Miyuki: W3580 6GB DDR3 P6T-Dlx
Lind: Dual Gainestown 3.07
Sammy: Dual Yonah Sossoman cheerleader. *Sammy-> Lind.*
Its my fault.. and no im not sorry about it either.[12:37] skinnee: quit helping me procrastinate block reviews, you asshat. :p
[12:38] Naekuh: i love watching u get the firing squad on XS
You should go update that thread ... haha ,consider it your final fix
Turned pumps off... waited... and then turned them back on to simulate a sleep cycle.. or on and off cycle.
its a working solution guys.
So its up to you guys on which way you want to go.
Nadeshiko: i7 990 12GB DDR3 eVGA Classified *In Testing... Jealous?
Miyuki: W3580 6GB DDR3 P6T-Dlx
Lind: Dual Gainestown 3.07
Sammy: Dual Yonah Sossoman cheerleader. *Sammy-> Lind.*
Its my fault.. and no im not sorry about it either.[12:37] skinnee: quit helping me procrastinate block reviews, you asshat. :p
[12:38] Naekuh: i love watching u get the firing squad on XS
I thought I did that, but I'll try again. Maybe I only tried the right side without anything...can't remember now. I have tried serial with the stock baffle plates and with the acrylic insert on the right. I thought the acrylic helped keep the air from getting trapped in the right side to some degree.Originally Posted by NaeKuh

FYI, to get that right side reservoir completely full, you have to bleed with the case tipped to the left at about a 45 degree angle and leave it that way for a while. Best if you can use a barb and at least a piece of tubing to keep it self topping off. Then you have to cap the reservoir BEFORE shutting it off. That's how I did it anyhow, never tried a sponge or anything.
I'll give it a shot this weekend, been busy running thermals on CPU blocks...
well no, if u have the acrylic baffles removed, and the connector plug removed so both res's are tied, as well as right fill port sealed, left seal port open, what happens martin is you get a massive vortex in the right side.
eventually all that air is either pulled though the inlet or shoved though the internal hole to the left side.
This is why u only need to top off the left side, because eventually the right side will be completely purged.
Nadeshiko: i7 990 12GB DDR3 eVGA Classified *In Testing... Jealous?
Miyuki: W3580 6GB DDR3 P6T-Dlx
Lind: Dual Gainestown 3.07
Sammy: Dual Yonah Sossoman cheerleader. *Sammy-> Lind.*
Its my fault.. and no im not sorry about it either.[12:37] skinnee: quit helping me procrastinate block reviews, you asshat. :p
[12:38] Naekuh: i love watching u get the firing squad on XS
Yeah, I was talking about if you used the acrylic inserts. I have seen the vortex without baffles in the right before and why I went to using the insert there. I'm just not sure I tried omitting everything from the left. I'm sort of thinking you need something a bit in between the factory heavily baffled insert and no insert at all.
The baffle allows you to operate that left reservoir at lower levels, so there is some give and take there. More baffle means more bubble bypass and more time bleeding, but less baffle means more of a need to keep it completely full and vortexing would be my guess. Long term you might want to have some baffles in place so you don't have to top it off so high. I think it needs something in between, but I'll try your idea to a T sometime this weekend. Just about done with one of my CPU block reviews so I'll move back to a little pump playing..
Odai, Are you wrestling the case about? I've never had rad bubbles come out by themselves before. you have a water tight system, put a long tube on the fill port and twist and turn unsidedown
I've had to do a upside down, hold left, wait, hold right, wait hold left, wait, hold right, wait, then boop the bubble comes out, I stop the pump let it come up.
And I had the Notorious XSPC bayres for 2 ddc's. tubes fed directly to the pump inlet. this should be cake. it took me a few hours to work out all the big bubbles, then A few minutes every other day if I noticed some large pockets.
If your annoyed by sigs telling you to put things in your sig, then put this in your sigyou know you're addicted to watercooling when:
Yup, I've been tilting it to try and free the bubbles, but it's only making very small differences, and the way the loop is set up means it's impossible to get the bubbles straight back into the res tank.
I just spent about 4-5 hours with the radiator loose from the chassis, and it seems to have helped a tiny bit. The water level in the res has come down a few mm.
I've never had to do this before... It's bizarre. With my last build (standalone EK-topped D5 and an EK res on top of the case), I had the radiator mounted in the roof also, but to completely bleed the system all I had to do was fill, switch on the pump, go away for 8 hours. Very easy. No idea why it's happening now. Only explanation I can come up with is that the EK res I had allowed bubbles to bleed out of the system before they built up in the radiator and formed much larger air pockets.
To be honest, as long as the air build up only in the end chambers, I'm not fussed. I've already wasted so much of my time and other people's time on this loop it's really not worth more hassle if there is no effect on flow.
The only thing I was concerned about is if the tubes had worked themselves loose on the fittings from all the twisting. But I removed the compression rings to make sure the tubing was sitting well on the barb, then re-tightened. So hopefully no problems there.
Oh, and there is the massive amount of creaking and flex my case has developed from all the tilting/lifting.
For my next loop, I think I'll try NaeKuh's suggestion on the baffles, to see if it aids bleeding.
I bet you're just paying a lot more attention to it this time around so you're finding more problems that you did before.
If your annoyed by sigs telling you to put things in your sig, then put this in your sigyou know you're addicted to watercooling when:
I finally got mine together without lube! I am usig a single pump, and tried what Naekuh said and removed the insert. I can't confirm this with any reliability, but I believed it killed the flow. I am wondering if one of the purpose of the insert is to increase flow.
should not have said increase, wrong word. What I meant is it helps prevent flow from decreasing.
Possibly, I never bothered doing anything for the bleeding process apart from occasionally checking fluid level. Though I still think this new reservoir is causing issues.
While it's been an absolute nightmare to fill this loop (and I've got my VGA loop to set up still, with the dodgy right tank), I'd have to agree in saying that, once bled, it's a pretty impressive unit. So much in a very small space. However, it may have been wiser to sacrifice a little more space (3 5.25" bays?) to make things a little easier.
not having the inserts cant kill the flow.
your going from obstructing, to non obstructing.
it would be the other way around.
Nadeshiko: i7 990 12GB DDR3 eVGA Classified *In Testing... Jealous?
Miyuki: W3580 6GB DDR3 P6T-Dlx
Lind: Dual Gainestown 3.07
Sammy: Dual Yonah Sossoman cheerleader. *Sammy-> Lind.*
Its my fault.. and no im not sorry about it either.[12:37] skinnee: quit helping me procrastinate block reviews, you asshat. :p
[12:38] Naekuh: i love watching u get the firing squad on XS
I now have no inserts , with the bridge up top, it's working a bit better ... I still have hundreds of microbubbles, and even some huge ones, just can't seem to bleed the last few out!
I let it run all night, left side open, and she still has a lot of bubbles throughout. I can see them when I shut it off.
Last edited by vivithemage; 04-09-2011 at 12:16 PM.
Add some dye and watch the flow. with the insert, and with the lower res, the flow is around the insert. With the insert removed the flow is more chaotic. My rpm sensor on fan controller for pump drop almost 20%. I could be wrong maybe I just had too much air in the tubing and it added resistance.
bleh... just read through this whole thread again.... im confused...
im setting one of these up (402x2 though) in my new build, and im quite worried about it.... i have the serial connector attached according to the instructions on the koolance website, and the acrylic insert on the bottom... should i use it, or should i opt for another solution!?
 Posting Permissions


 Reply With Quote


Bookmarks