


I figured that i would update the original post in case some are wondering what the deal is w/ all the builds spread over the many pages of this log.
Project 1
It started with the V2000 just for me. While in middle of working on it, my friend the LocknessMounsta decided he wanted to upgrade his current computer
Project 2
LocknessMounsta's HP Blackbird
Project 3
my GF liked the results i was experiencing & wanted a little someting for herself. For being a trooper dealing with all the messes as items for the builds started to take over my residence, I decided to get her a mini version of my V2000 - so i purchased a V600 for her
Project 4
As i made one of the most grand messes ever...it dawned upon me that now would be a great time (sarcasm) to take apart my home server a Lain Li PC-A17 & get the internals painted black w/ the rest of the parts from the above builds & give it a once over w/ some sleeving.
Project 5
the LocknessMounsta had some extra parts (plus a BUNCH of new) & wanted to have a backup watercooled pc. He decided now was a great time (sarcasm) for me to have another project (as well as more large boxed product for my humble abode) Enter one PC-K10 by LianLi or LanCool (i've seen it as both...regardless...still silverpcs)
which brings me to Project 6
this is a selfish tangent from the V2000 that I started this journey with with. My brain has been overflowing with ideas for a TJ07 build...& i could not take it any longer...i took the plunge & got one in the middle of all of the above...subsequently sidelining the project that started it all...the V2000 (for now as of 8/2/09)
It begins:
Tis the season for a new build .this time around I really wanted to focus on the details. On that note..should something be amiss, or look off, feel free to voice your opinion. Like all great creations even a master faults & misses something that another eye can pick up (I imply not a thing here b/c I am far from a master but more often than not Im focused on one important detail in my mind & miss another in the process)
Anyone can build a computer, but what I am going for is a showpiece. I have spared no expense on the quality of parts (with the exception of cheaping out on the power supply something that I paid the price for .deeply regret & .something I will never do again) It is a shame that i did not go w/ the silverstone all along; I would have saved my hands quite a thrashing.
Quite a few of parts have been sitting collecting dust for longer that I would like to admit. Finding time is more difficult that one can imagine. Quite a bit of this will be worked on over xmas (when I have a day or 2 away from the office) & commencing again (if necessary) in Feb 09 after 1099s go out (Im an acct/it mgr for a law firm) time is never on my side EVER
first & foremost everything in the case short of the motherboard/v-cards & blocks will be painted black -
I wanted an automotive themed build
I am a huge Porsche Enthusiast & I wanted in some way shape or form to incorporate a few things auto .along the same lines of the Porsche Design an auto feel/look from a non automotive object
For me that means something with some chrome, black metal & some carbon fiber ..well hell A LOT of carbon fiber but that was pretty much out. It would look a bit tacky imo (though I would not turn down an all carbon case
After purchasing (10) .2mm 9.7 x 12 sheets of real carbon fiber 4 months ago, I slowly started seeing more & more sheets return to the box I keep them in b/c it just did not look right. There will be a few accents of real carbon
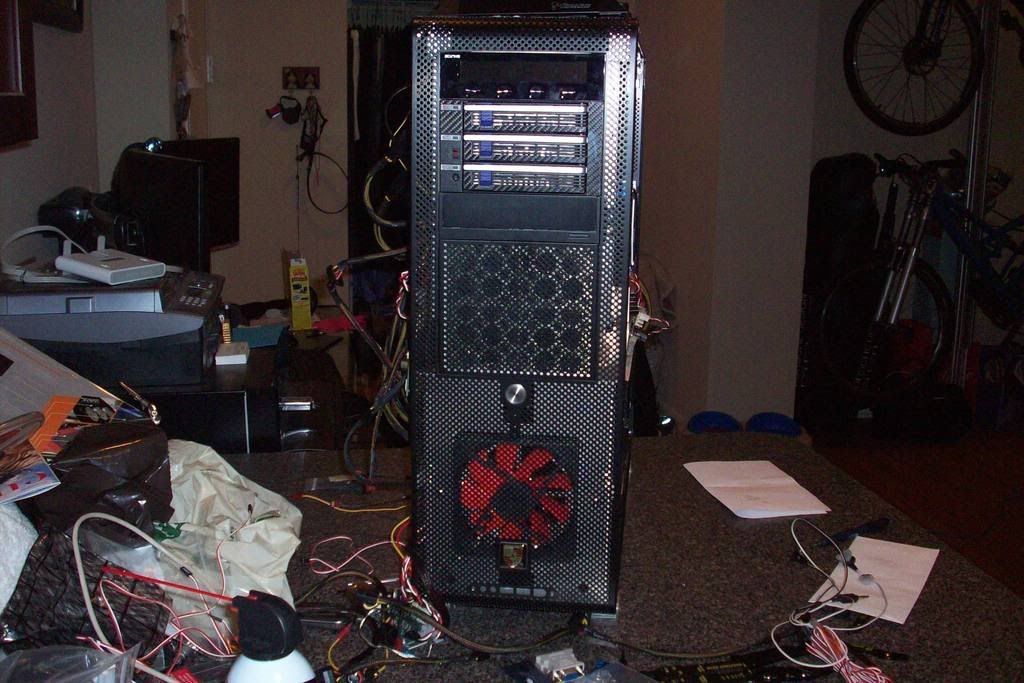
The Case:
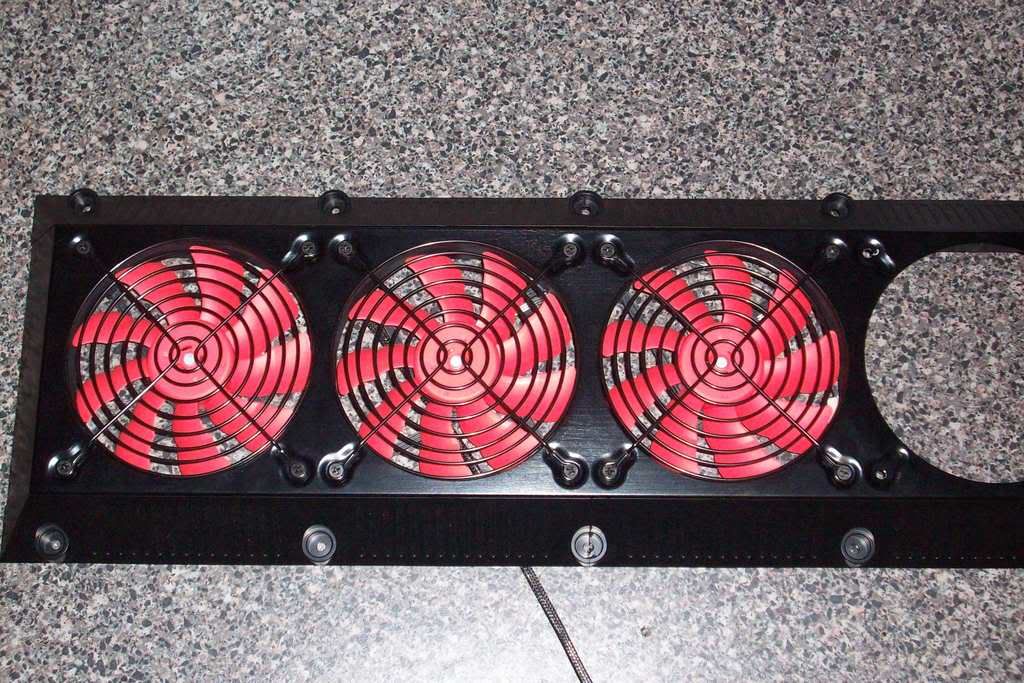
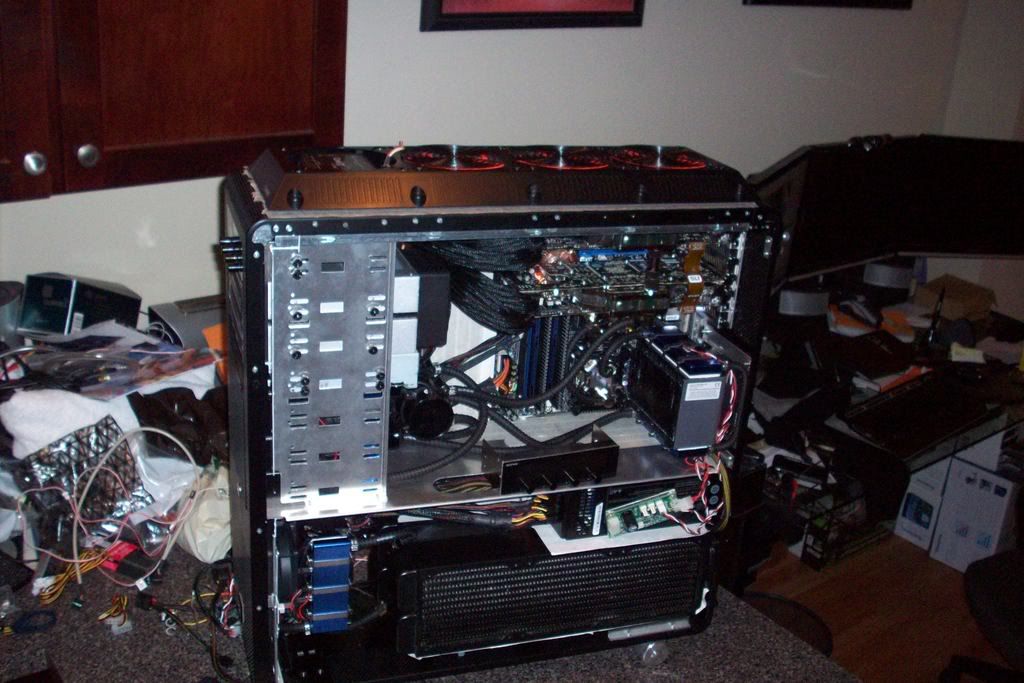
I will be using a Lian Li PC-V2000B Plus II as the foundation due to the great deal of space afforded & top it off w/ a 4 fan Koolance shroud (thank you for the clearance info Gone Cruising no rad up there for now but you never know).
I did however start out with one of the best cases for water cooling with some nifty wheels already affixed. So all is not lost with the auto theme Im already off to a great start since it can already roll freely & has a built in emergency brake
THE COOLING:
I have had some great experiences using thermal electric cooling on the cpu. This build I wanted to incorporate a TEC system for the cpu, v-cards & entire motherboard (I later found out that cooling the southbridge was not going to happen w/ the innovatek block that came with the black pearl, so I have decided to just use a fan)
I did not like the way the blocks looked that did fit (not that I like the fan option one bit) but routing another hose to that block (SB) would disturb a flow of tubes I have already created in my head & we cannot have that!
After spending a great deal of time on www.extremesystems.org I came across a Lian Li V2000 & v1000 thread http://www.xtremesystems.org/forums/...d.php?t=154982 which sent my brain to overload. There are so many great cpu systems in this one thread. I devised a plan of attack, which brings me to the details.
The plan calls for 2 loops one for the CPU->NB->MOSFETS & the second for the video cards each of which chilled by a hybrid CoolIt Freezone
The grocery list seems to be never ending there are so many little bits & pieces
As follows:
Lian Li PC-V2000B Plus II
EVGA 680i Black Pearl
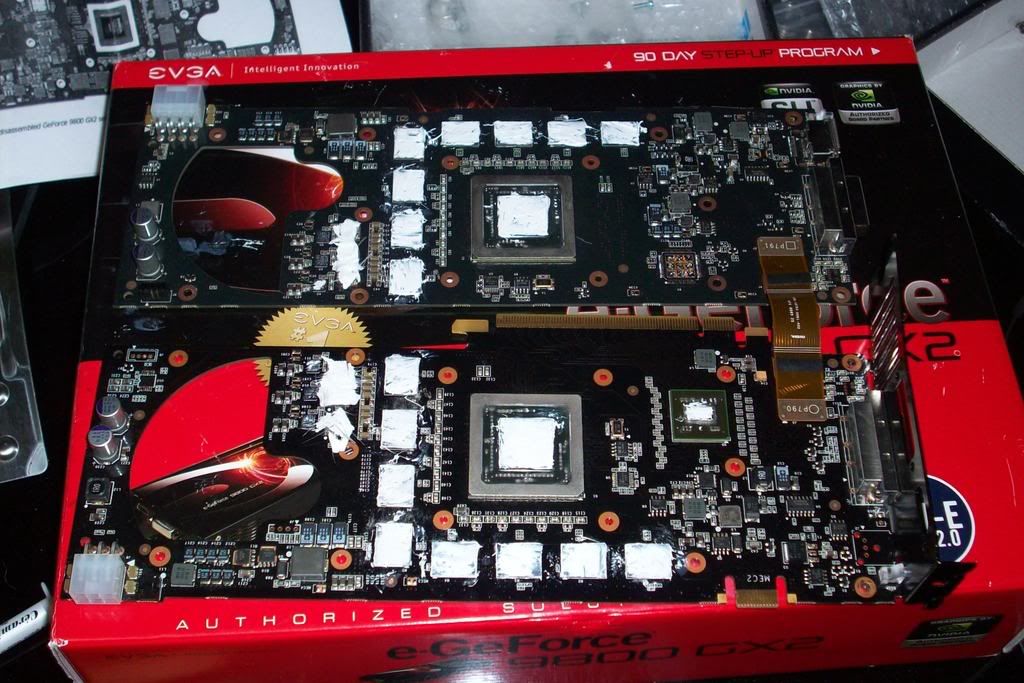
(2) EVGA 9800GX2s
(2) EK 9800GX2 Nickel Blocks
Intel E8400 E0 stepping recently benched in a 780i FTW 4.5 @ 1.27v
http://service.futuremark.com/compare?3dmv=466655
CORSAIR DOMINATOR 4GB (2 x 2GB) 240-Pin DDR2 SDRAM DDR2 1066 w/ ram fan
Plextor PX-755SA
WD Raptor X 150
Icy Dock 3 Bay hot swap cage
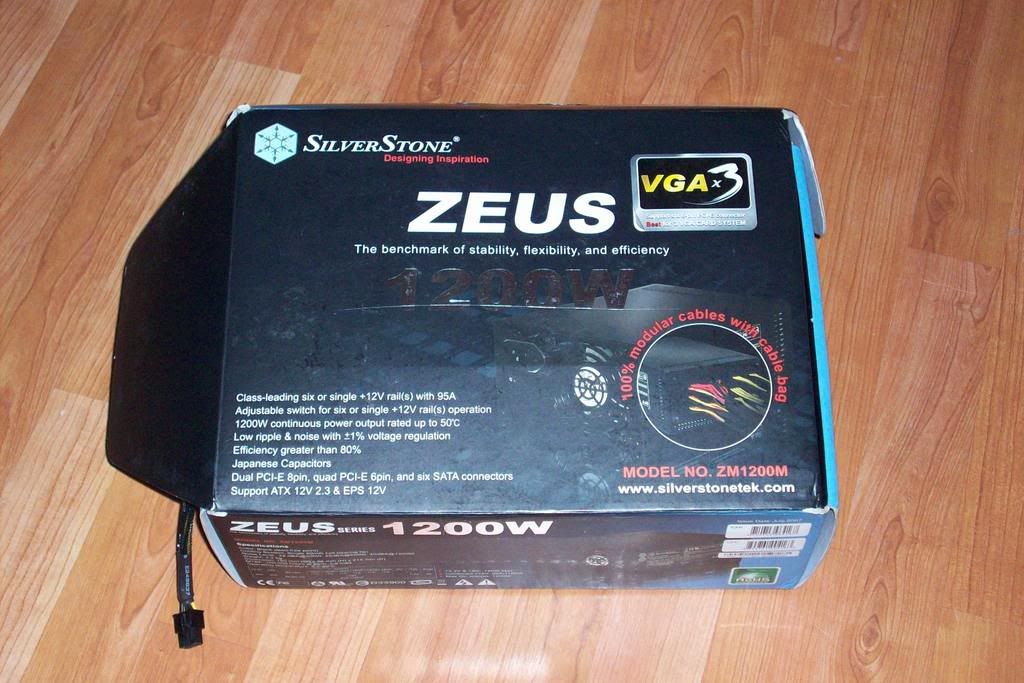
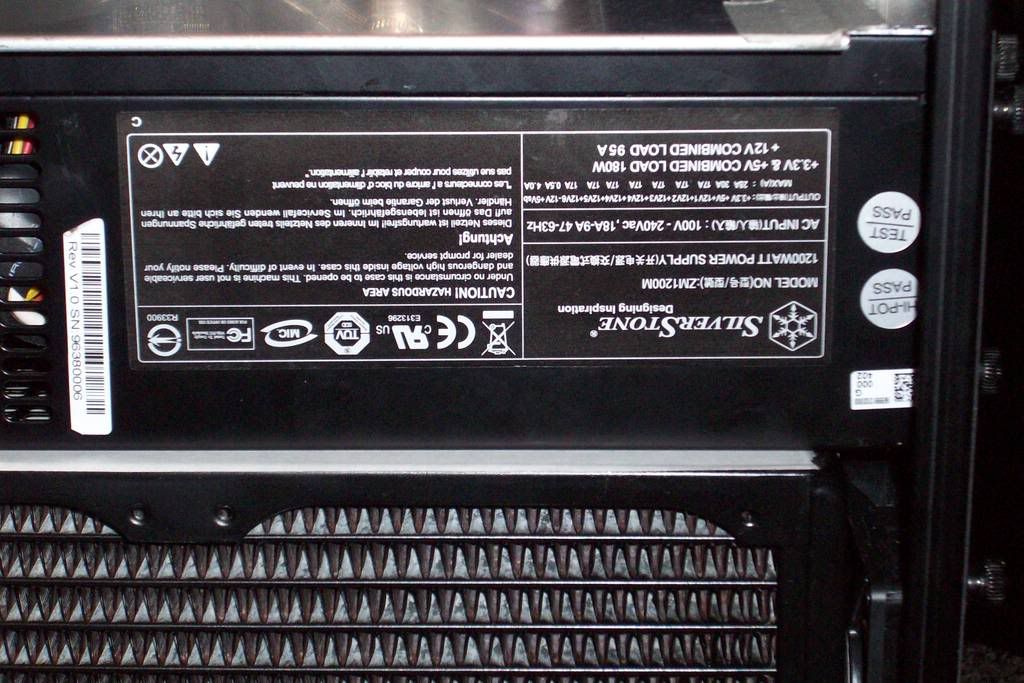
SILVERSTONE ZEUS 1200W
(it is 3 now....) Coolit Freezone Thermal Electric Coolers
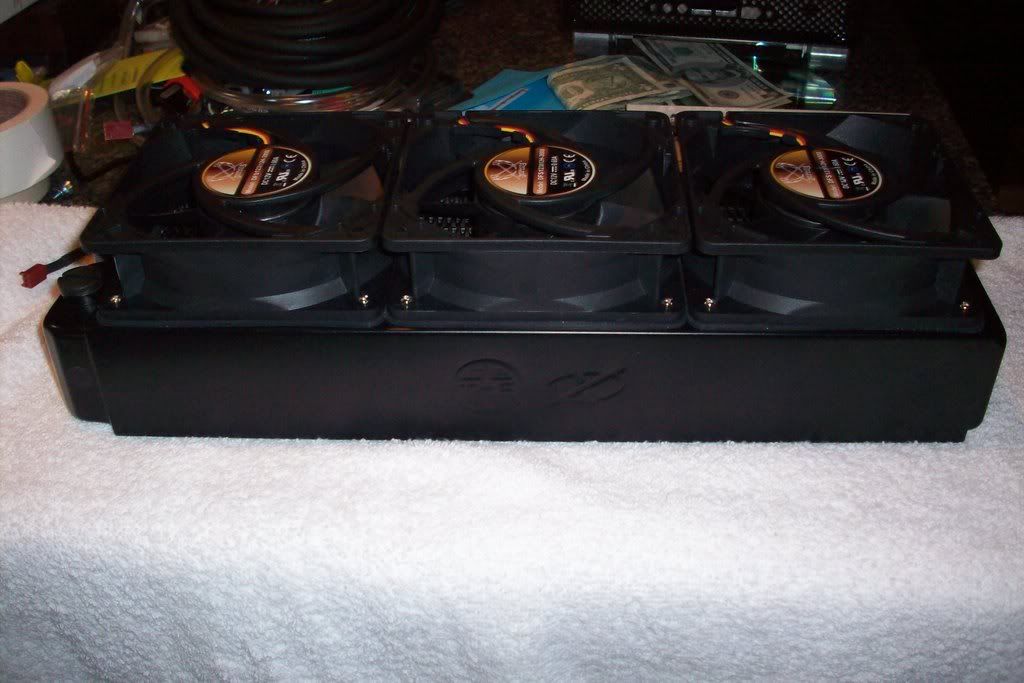
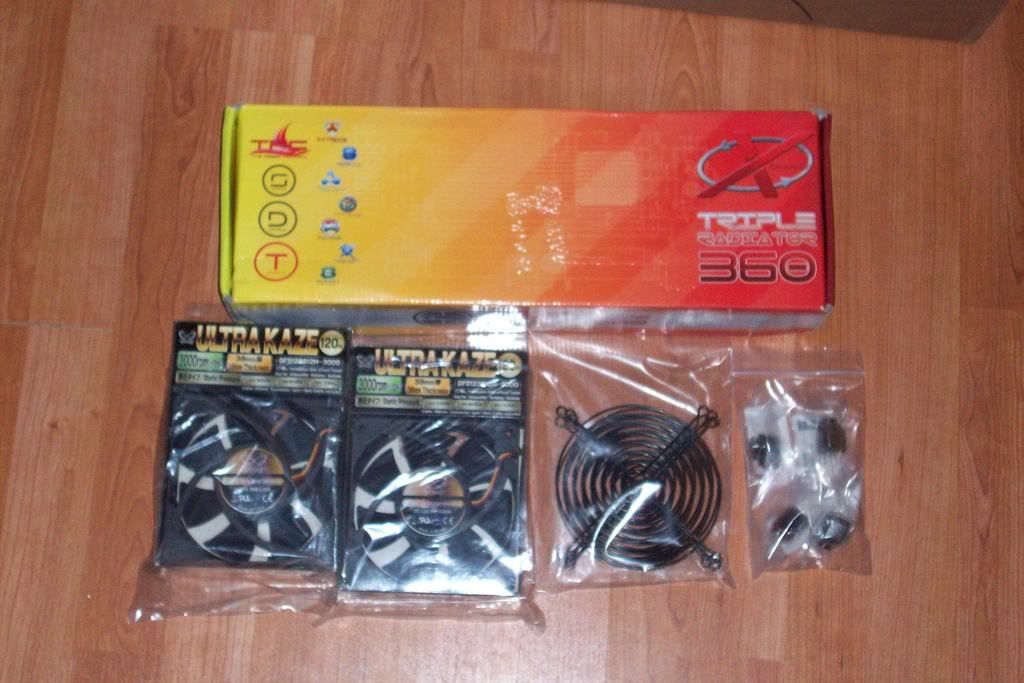
(2) Feser XChanger 360's
Koolance 4 Fan Shroud
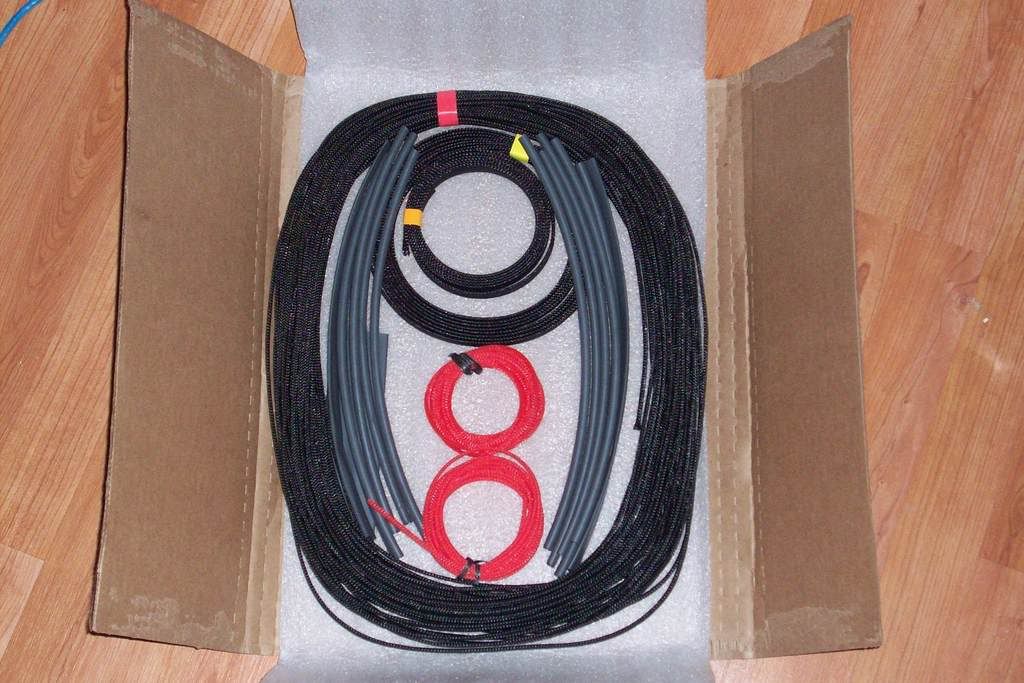
2 x MurderMod MDPC-X Psychopacks (i used one on the antec power supply i ditched & got a second for the new Silverstone Zeus)
(10) Sheets of Hayame real carbon fiber (.2mm thick w/ adhesive backing 9.7 x 12 sheets)
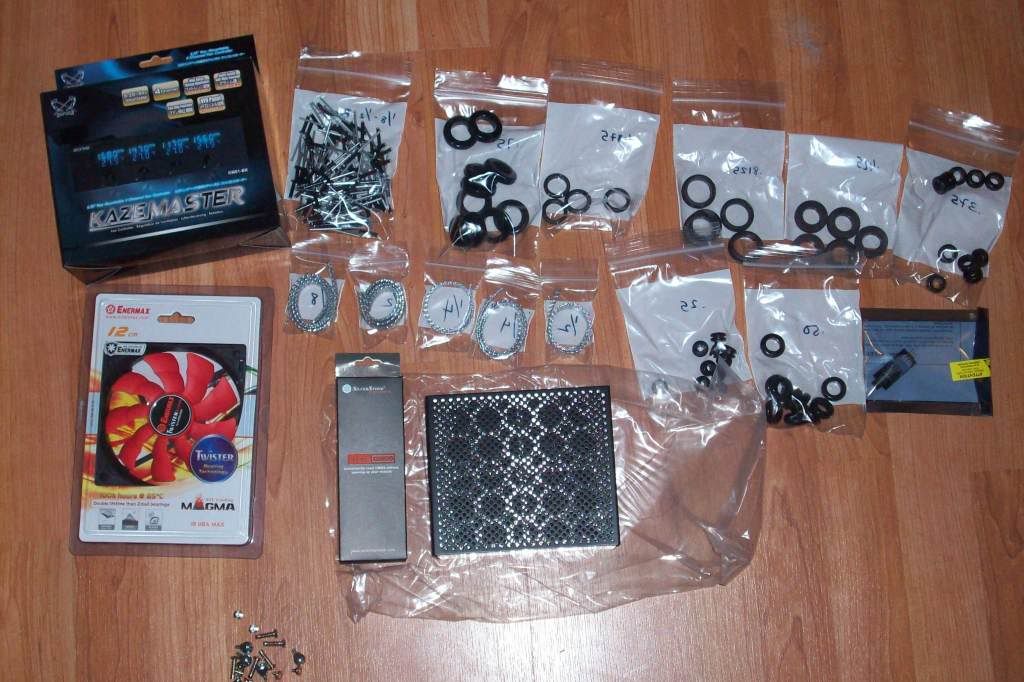
(2) Scythe Kaze Master Fan Controllers
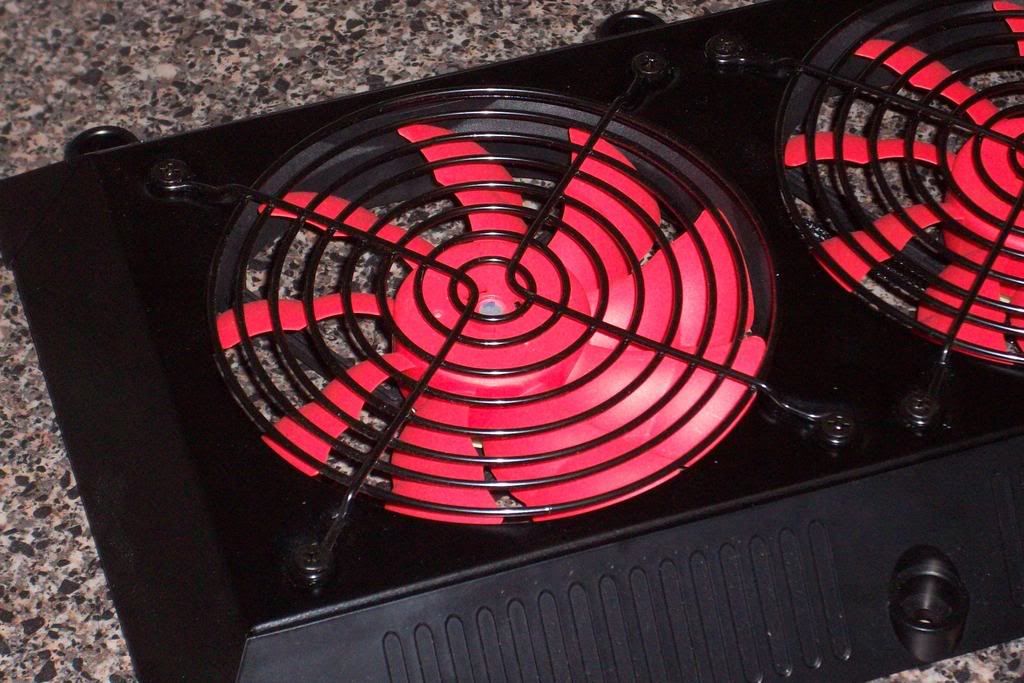
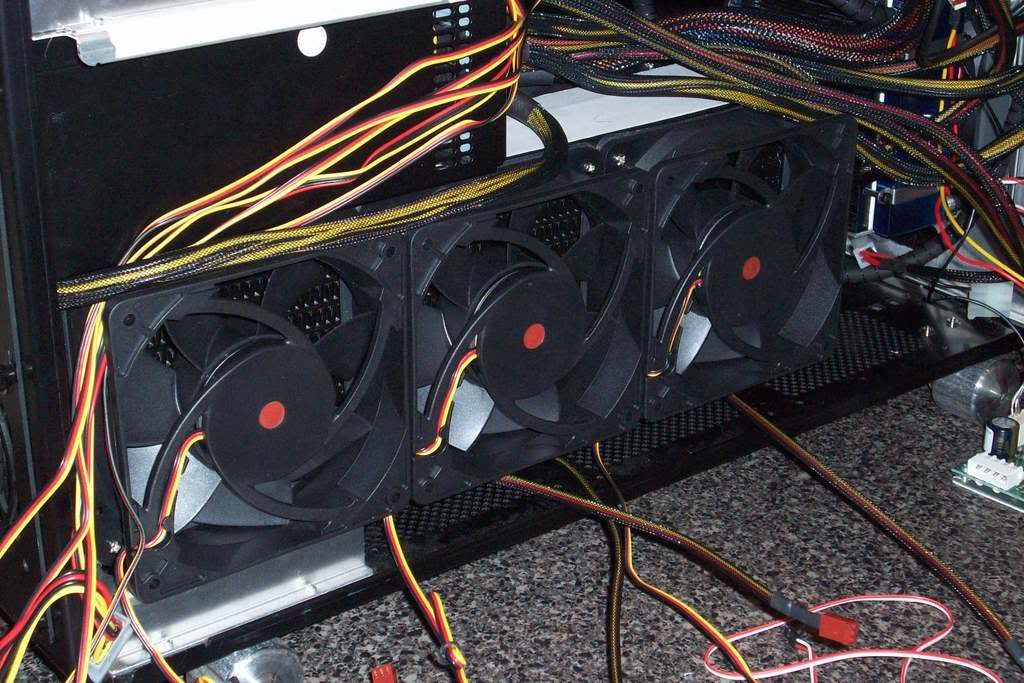
(5) Enermax Magma 120mm x 25mm Twister Red & Back Fans (for the shroud on top & one for the bottom coolit freezone)
(7) Scythe Ultra Kaze 120mm x 38mm 3000RPM fans (6 for the Feser rad's - one for the freezone in the top portion of the case in the lian li 3x5.25)
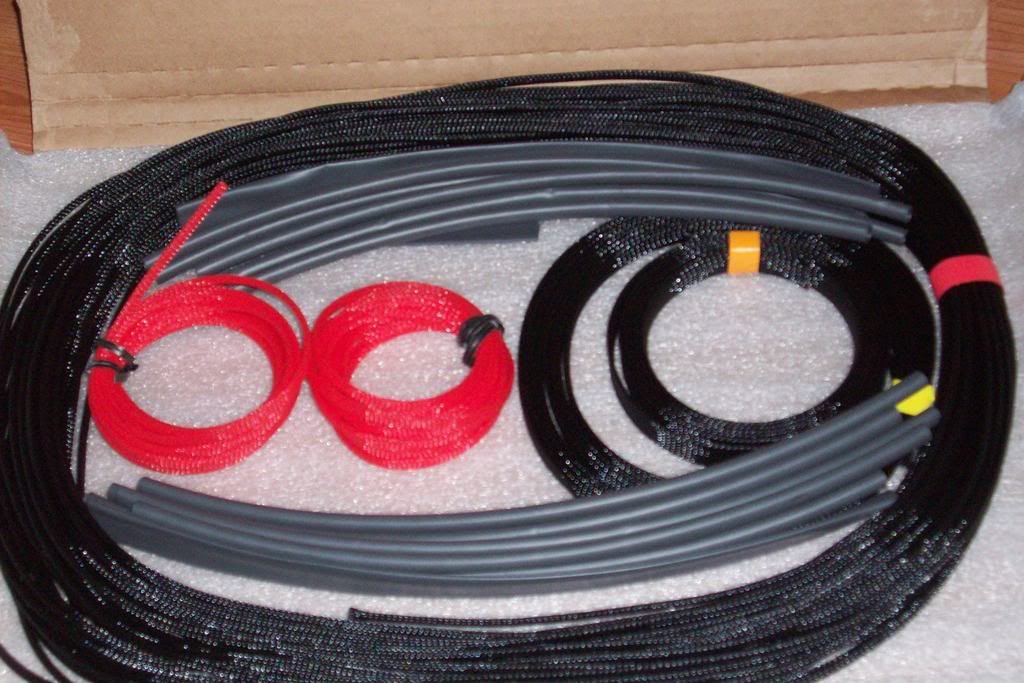
many feet of 18AWG Stranded Hook Up Wire UL Approved - Black
1 x Logisys Remote Control Molex Connector Kit (RM01) a few USB/KK Header Connector 1 X 2's
3 x Dual LED - Pre-wired with Connector - 5mm - White
30 x Lian Li Anodized Thumbscrews M3 Size (1) - Black
30 x black fan screws
50 ft of red & 50 ft of black 26g
100 ft of 22g
30 ft 0.375 (3/8") Chrome Cable Sleeving (just going to use a few feet)
Lian Li Solid Aluminum Black Anodized Casters (wheels!) to replace the oem silver ones
Logisys 12" 12V LED Light Strip - White (may get a few more - i like these things)
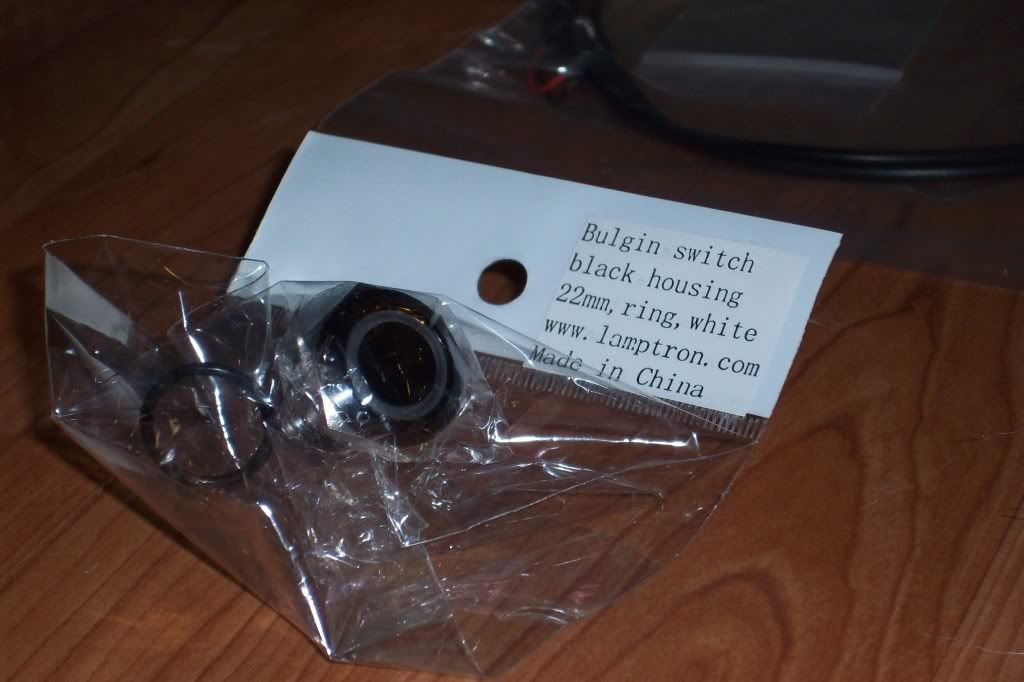
White Illuminated Bulgin Vandal Switch - Black Housing w/ Ring Illumination
(2) NMB / Panaflo 80mm x 15mm Fan (3106KL-04W-B50-C00) (for the rear bottom of the case)
Lian Li PC-343B 3 X 5.25" Fan Module with Mesh Front and Filter
15 ft of Slim C-Strip Fan/Window Molding - Black (not going to need it all obviously)
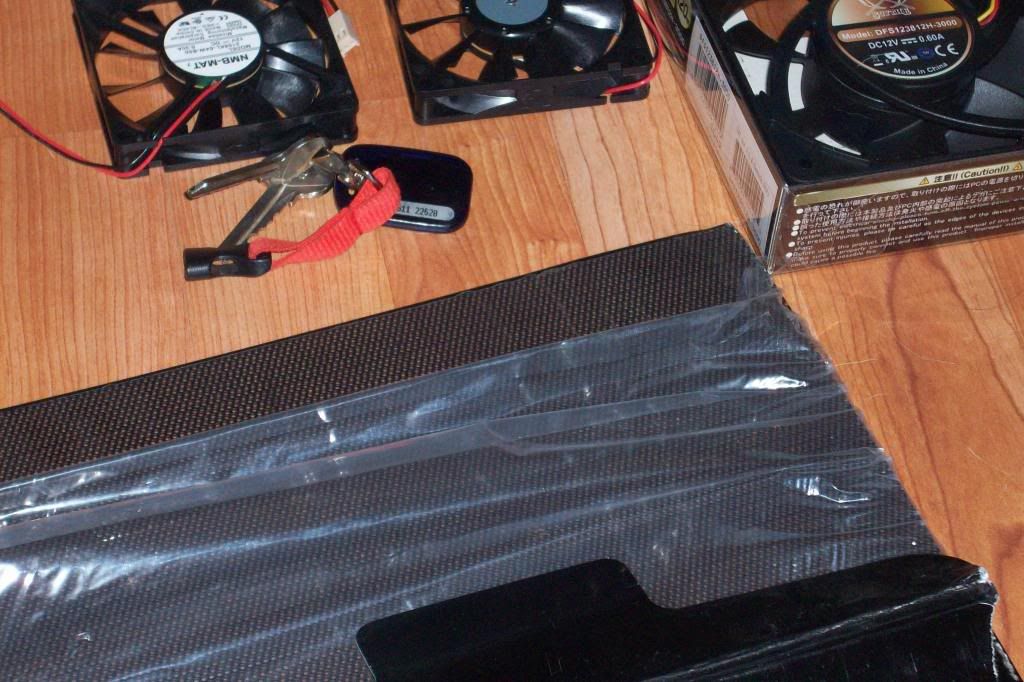
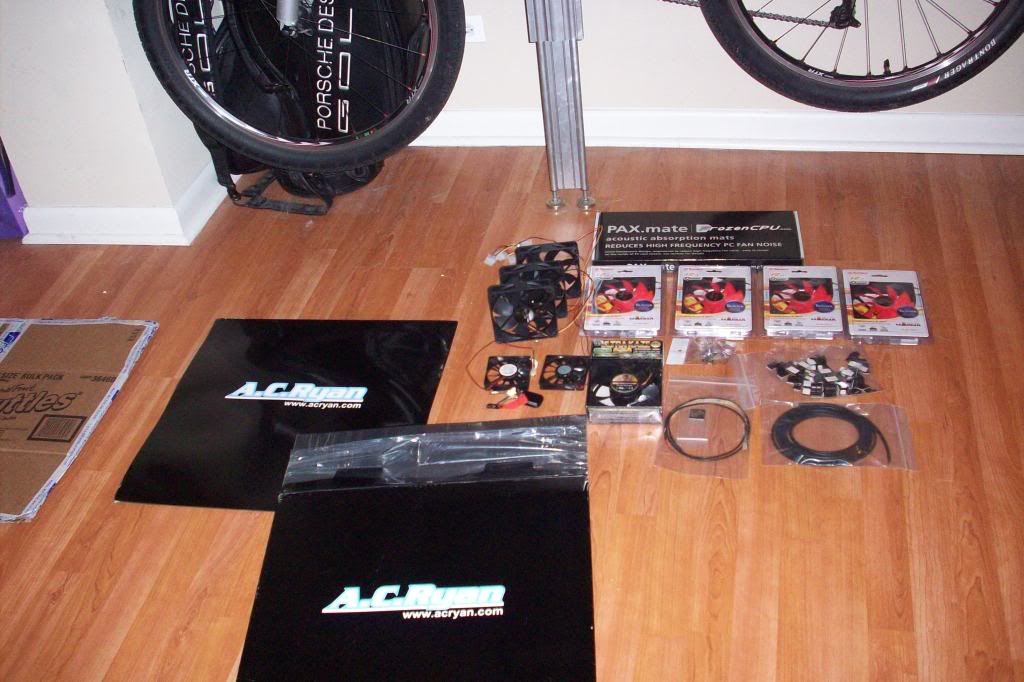
(2) A.C. Ryan MeshxPanel Modder's Mesh sheets - Black (ACR-XP0748)
FrozenCPU Noise Dampening Material
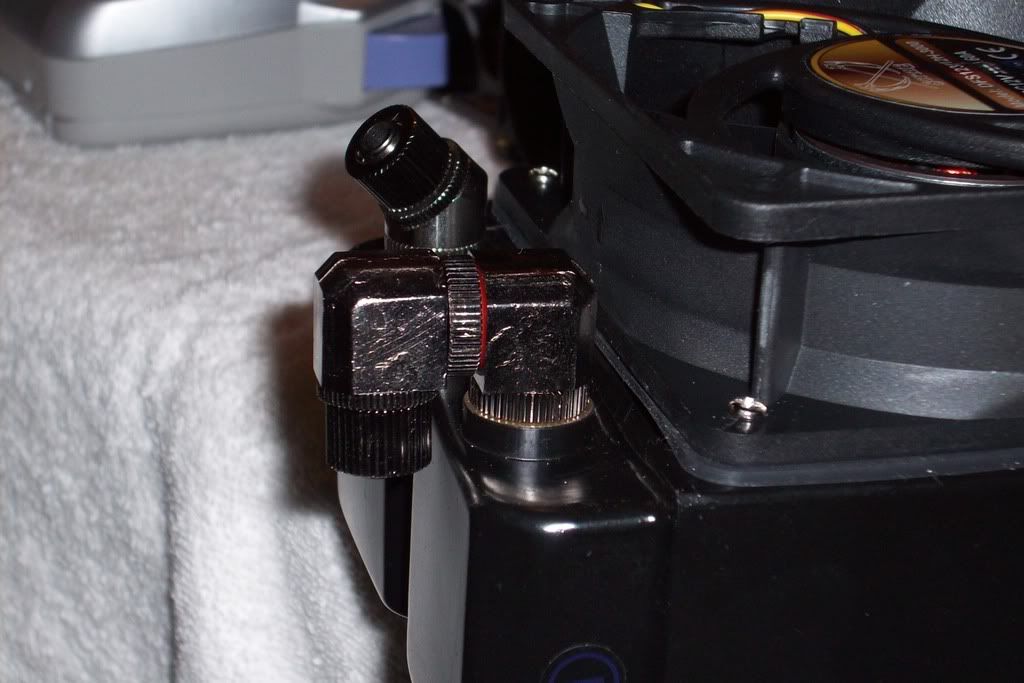
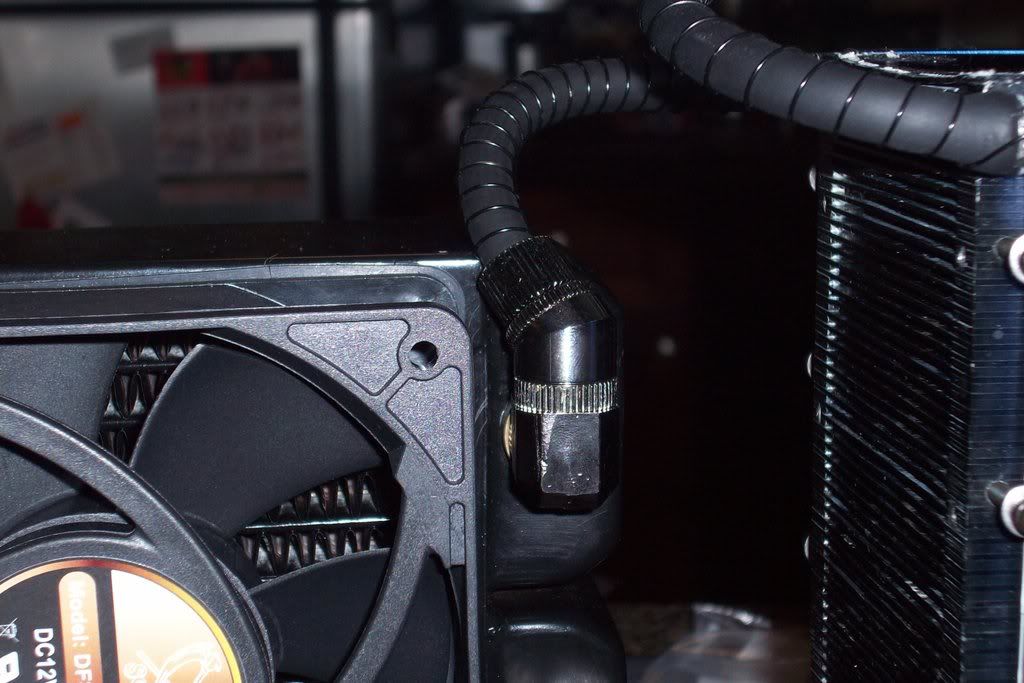
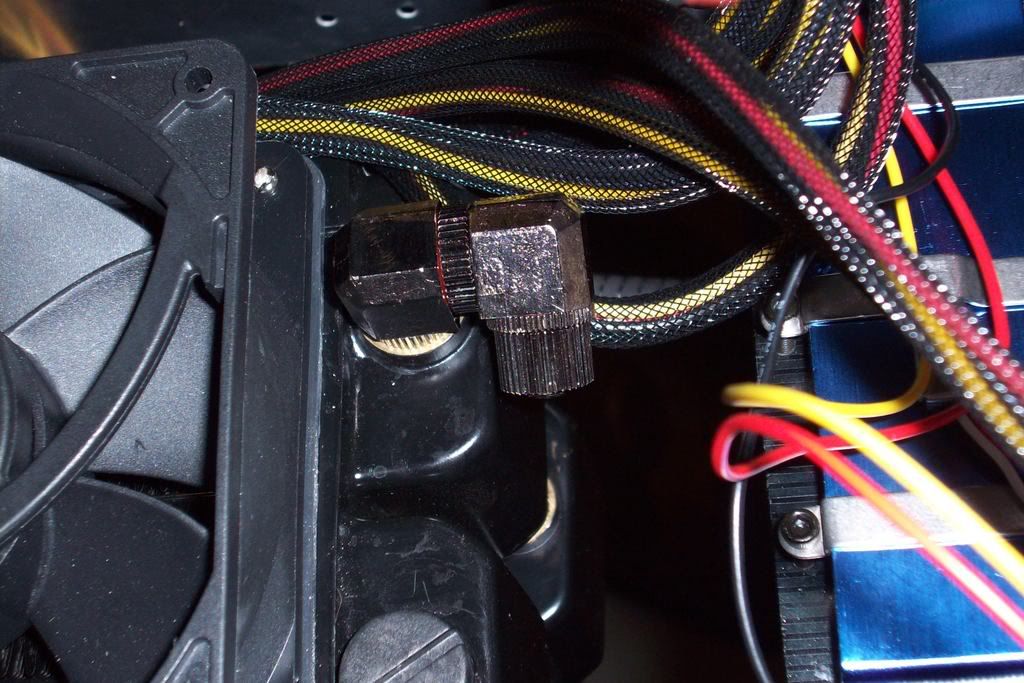
TONS-O-Various Koolance compression swiveling fittings/adaptors/elbows
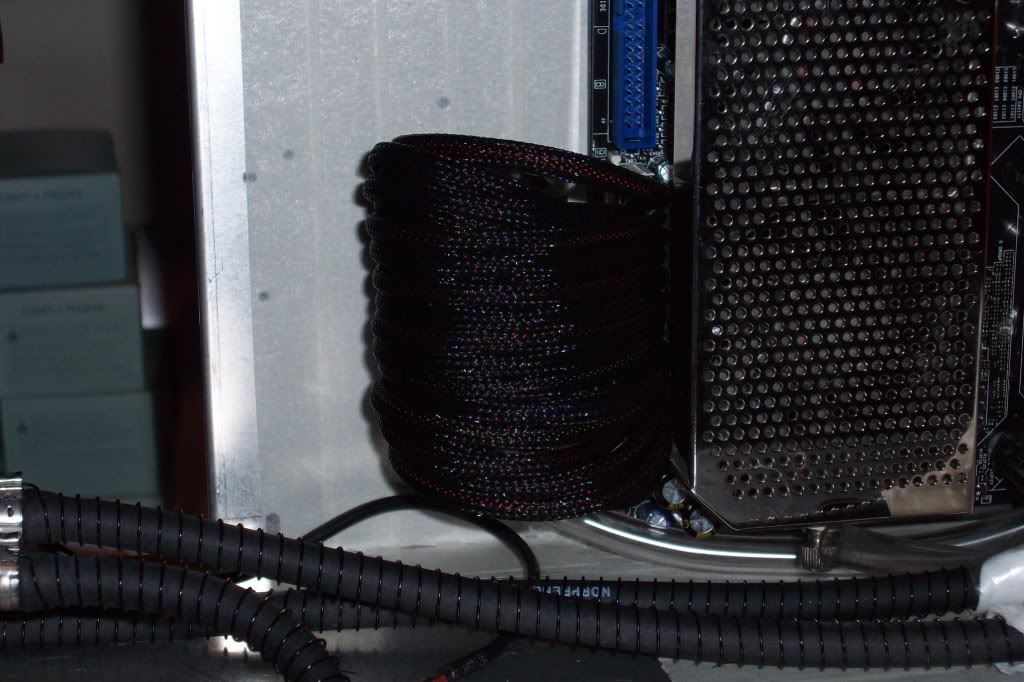
20 feet of NORPRENE TUBING (3/8" OD; 1/4" ID; BEND RADIUS 7/8" MIN) (I got extra for a blackbird project that i will be working on)
A bunch of various sized rubber grommets
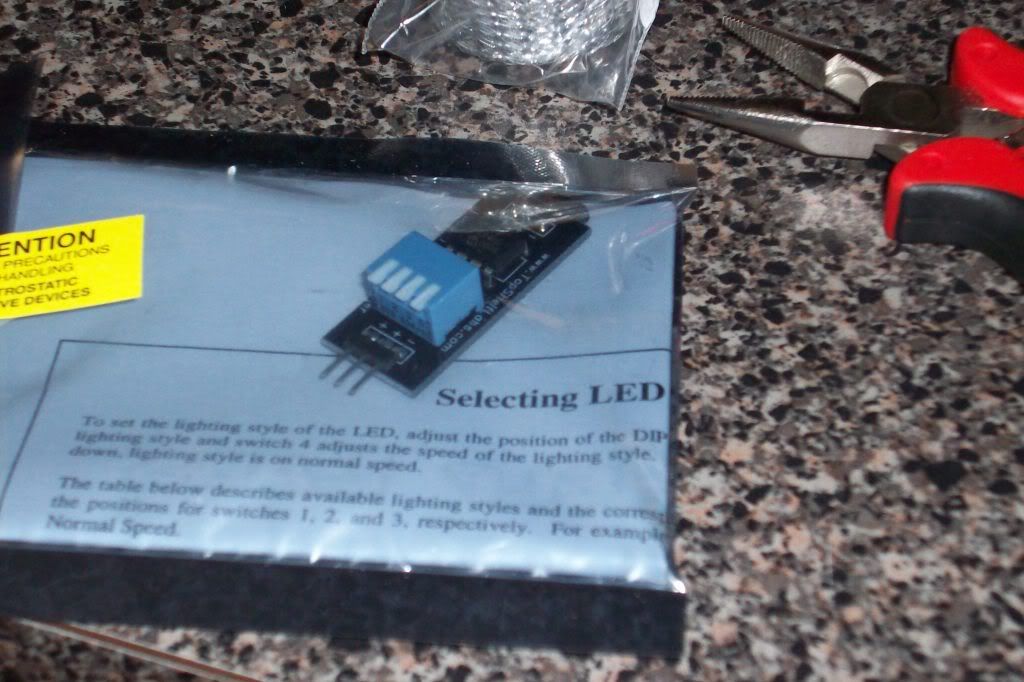
Top Shelf LED controller
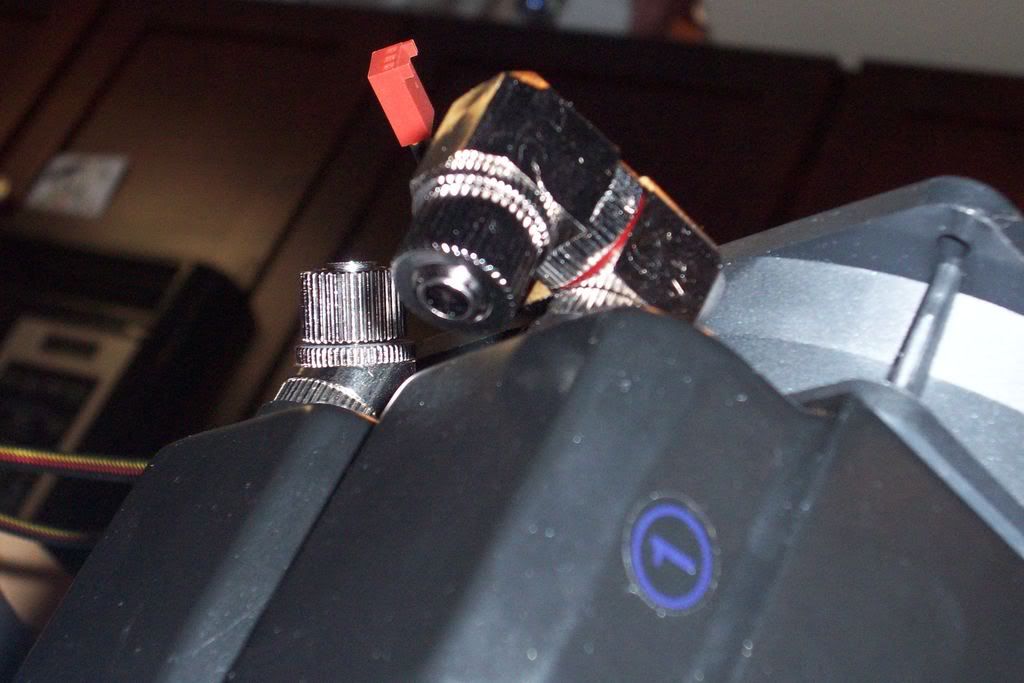
Silverstone SST-CLEARCMOS reset button
100 black pop rivets (all will be replaced to black)
12 120mm rubber black gaskets/vibration absorbers (2 extra for the LochnessMounsta's build)
4 sets of koolance quick disconnects (for removing the v-cards easily & also to remove the board) i want to be able to swap out set ups without ripping hair out of mt head
a few Hammond boxes to raise the rad above floor level & hide a few things
& a ton of blood & tears (hopefully there will be little use for the Kleenex box I know the band aids will be on ready)
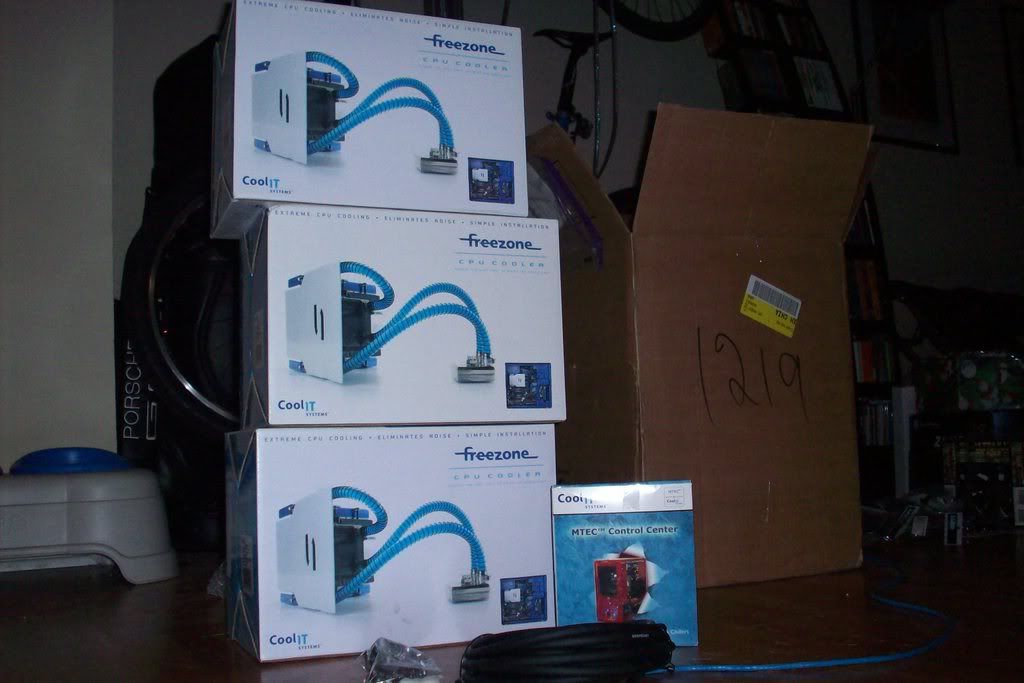
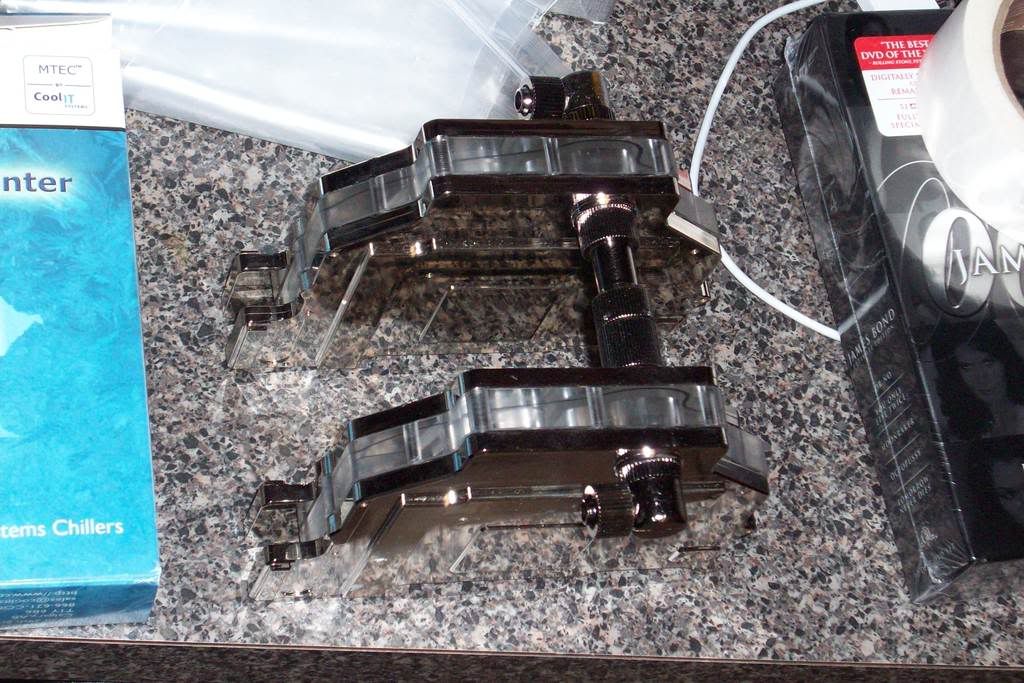
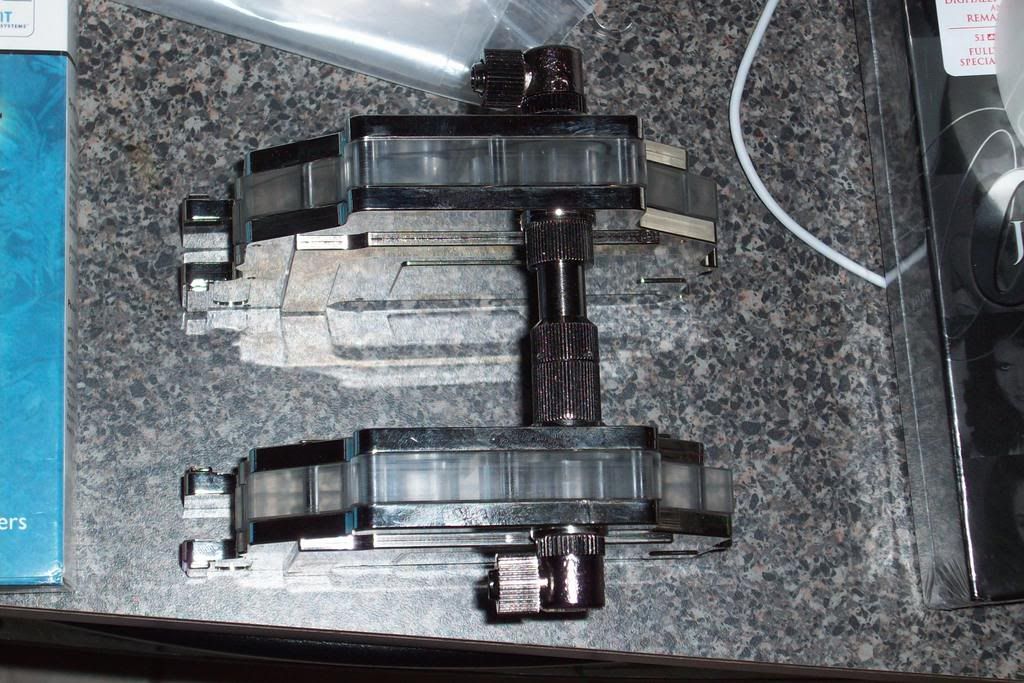
A special delivery from Barry @ Coolit:
TY you again for the speeding shipping!
3 freezones, some neoprene, & a MTEC controller
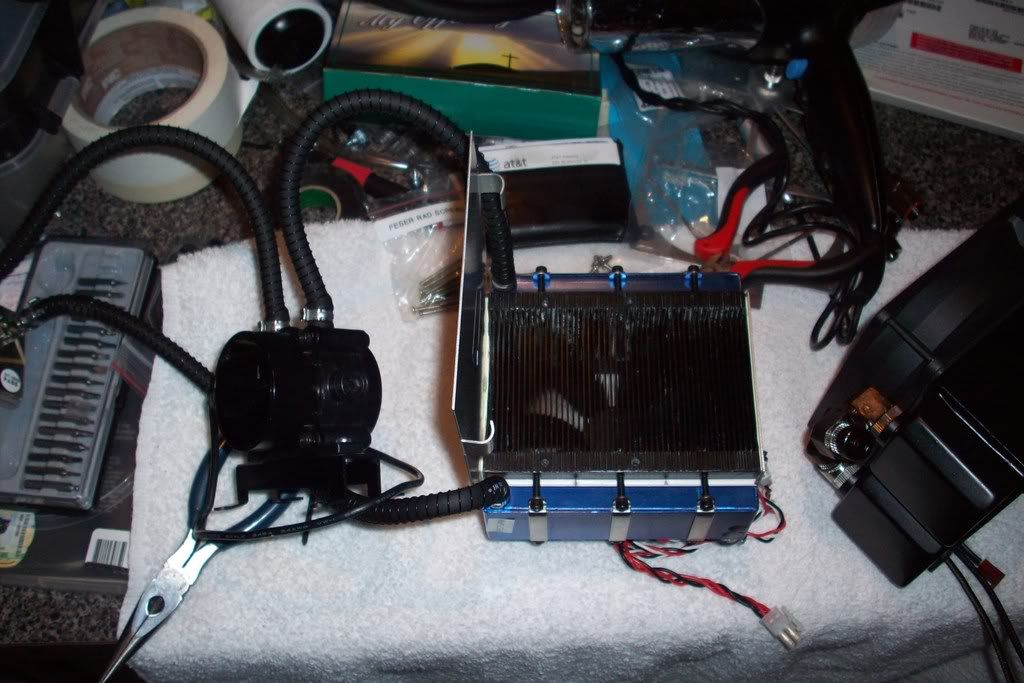
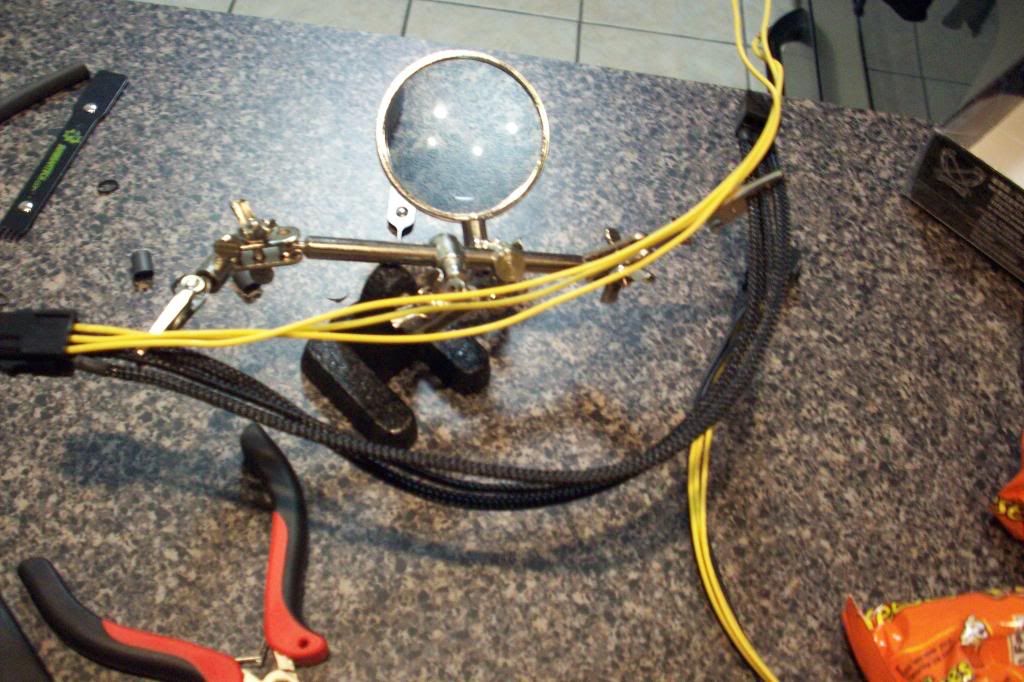
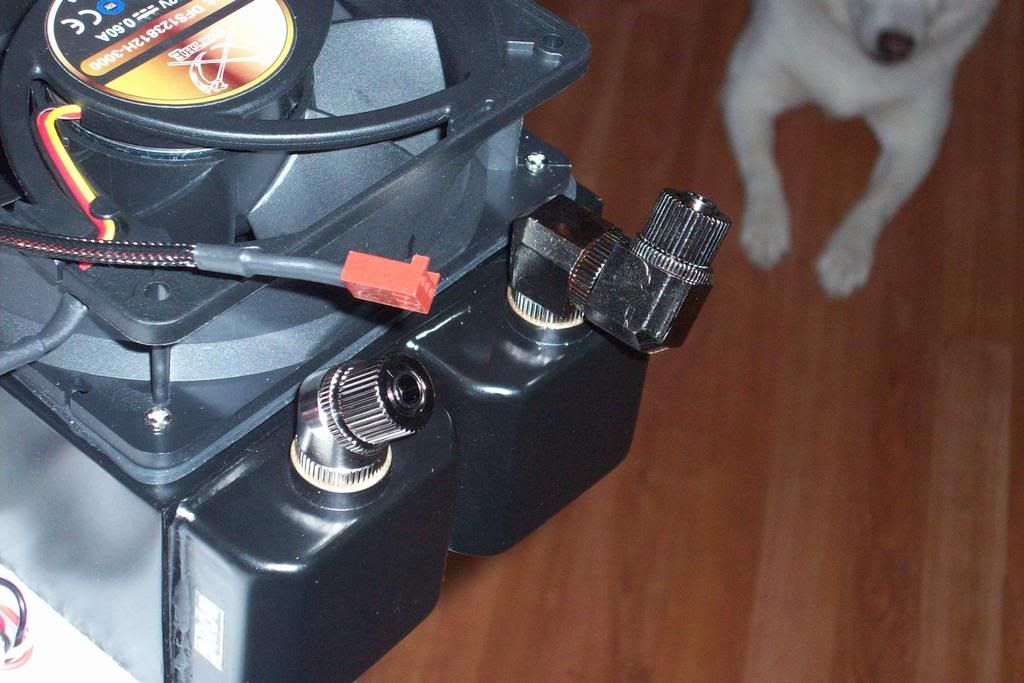
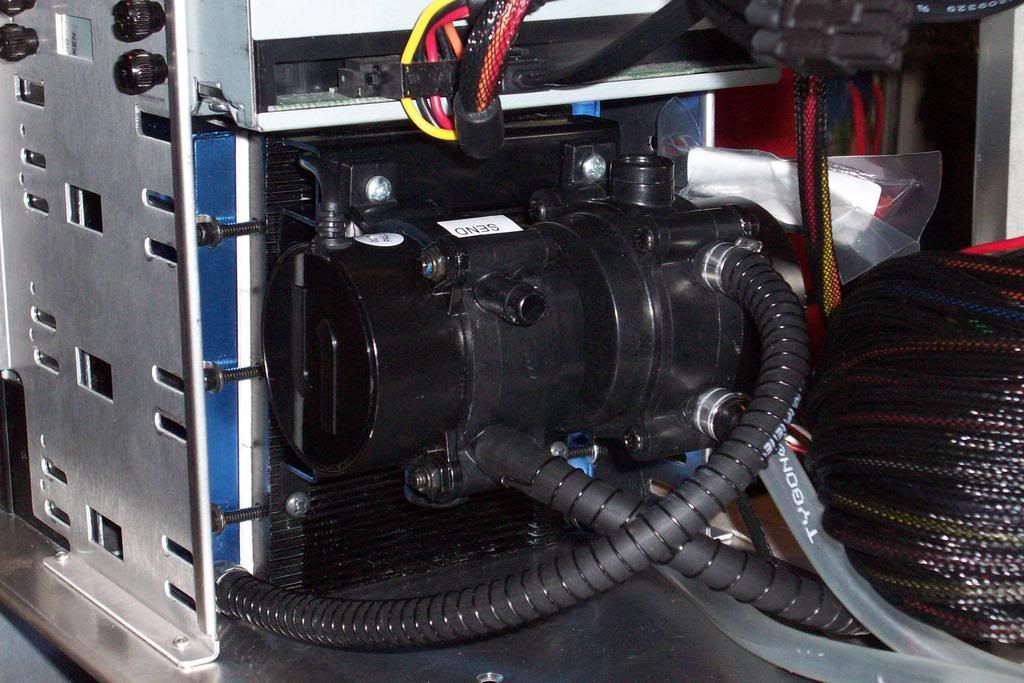
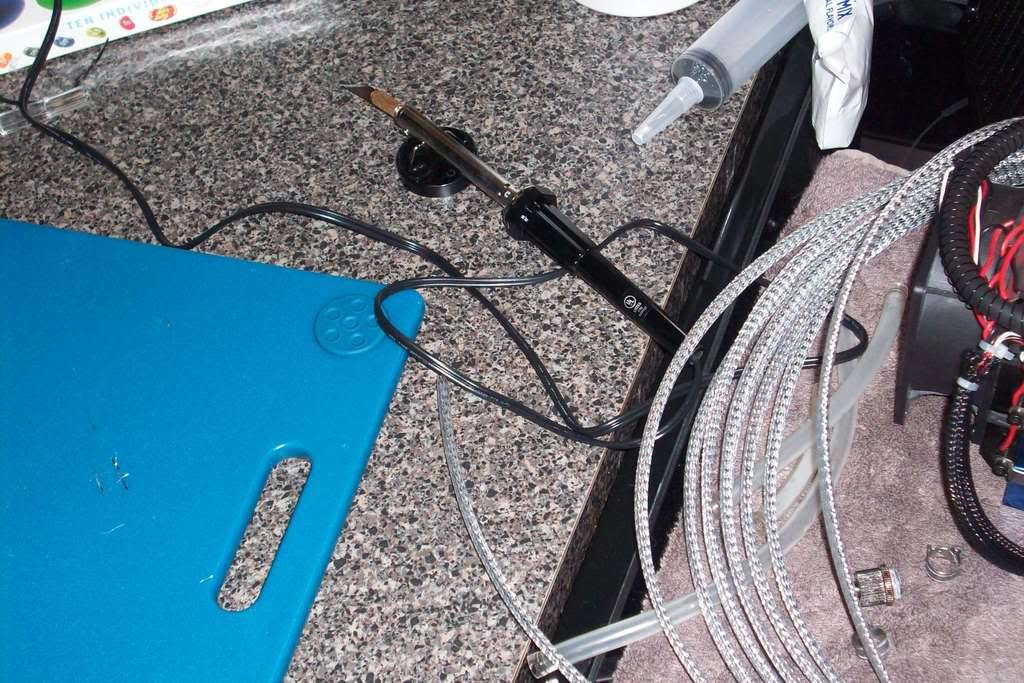
Well lets start w/ taking apart one of the CoolIt Systems Freezones:
I used a blow dryer to heat up the adhesive to remove the face plate I will not be needing any them it makes for easier disassembly as well
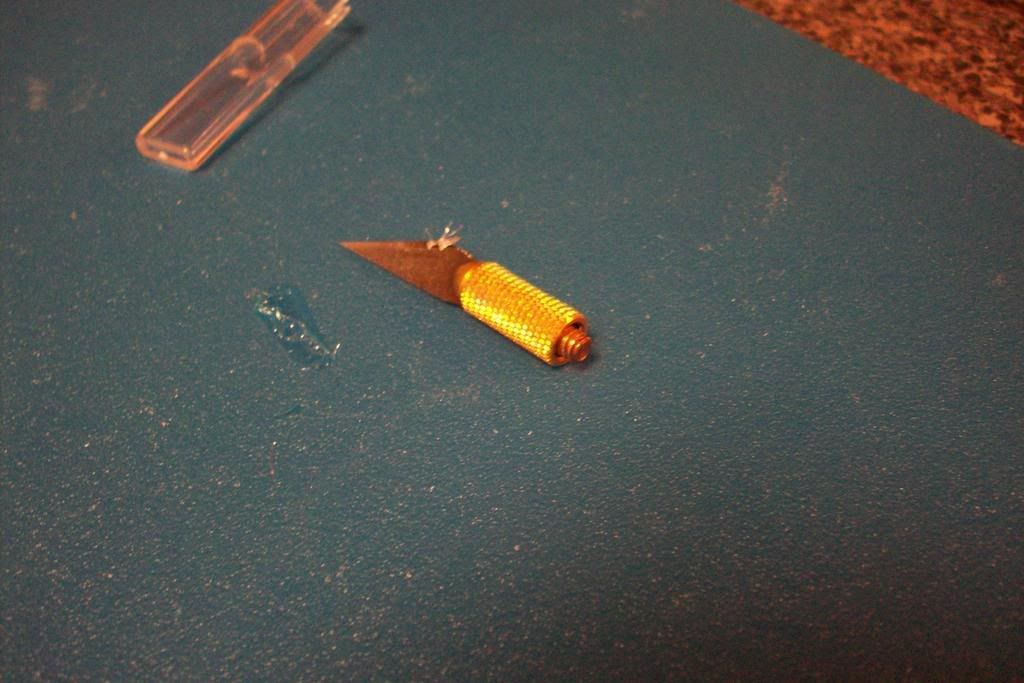
There is a small screw that needs to be removed to drain & fill the system it is located on the pump & requires an allen key
To remove the clamps that are on the system you need a small pair of metal cutters & pry the clamp back away
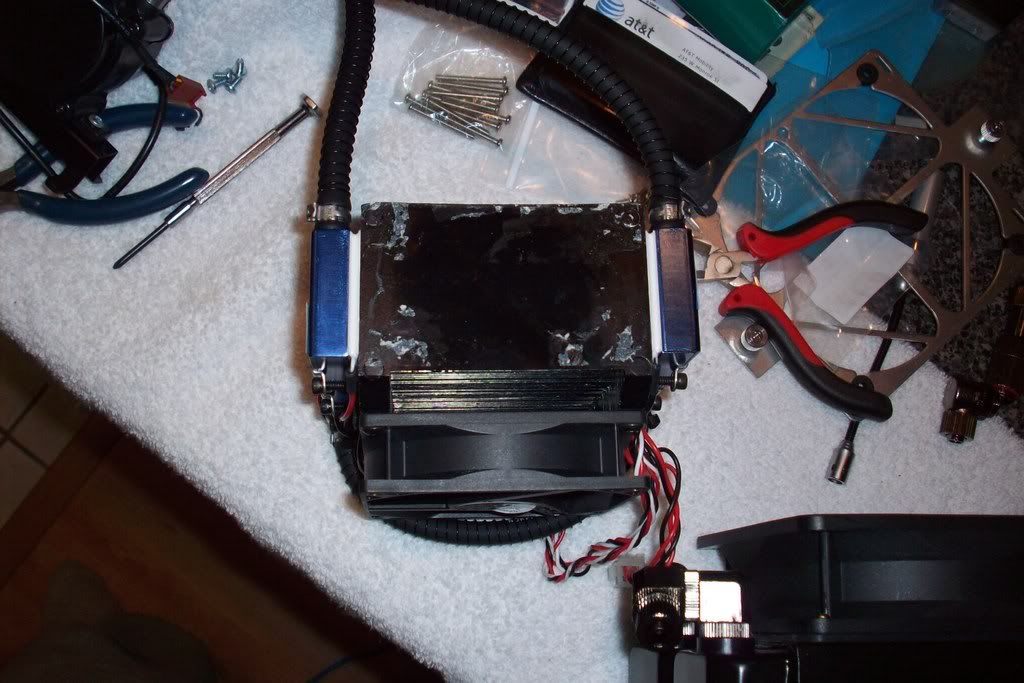
this initial loop you are seeing was changed after I got the toobage from Barry
I was already in possession of one freezone & wanted to get the first loop going so I used the some extra tygon I had laying around just for testing purposes
after attaching all necessary tubes/clamps/compression fittings:
it is time to start filling the loop
the only nice thing about the tygon is that you can see where there are bubbles
not a big deal though
after opening the pump screw fill port, use a syringe like this to fill the liquid in w/:
http://www.dangerden.com/store/produ...4&cat=0&page=1
I slowly added a mixture of distilled h20 & Prestone low tox 4:1
You really do not need more than that unless you will be shipping your system to Canada or Chicago in the winter the end result is to keep the liquid from freezing in transport & for its anti-corrosive properties
I have a little secret sauce I will be adding later on which should drop the temps even further by allowing for better absorption of the heat

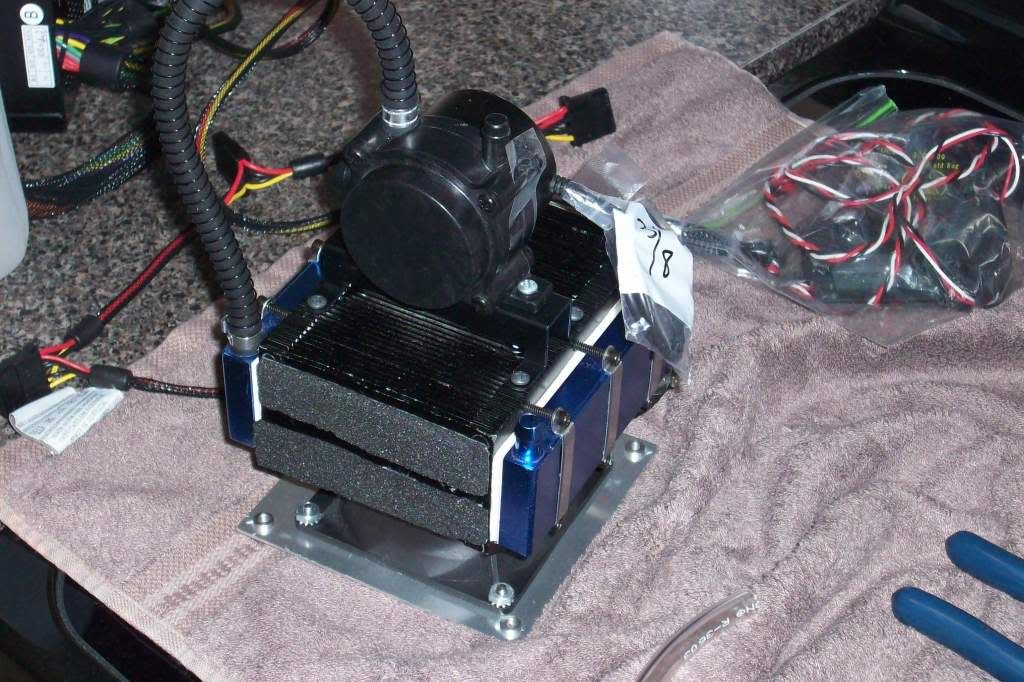
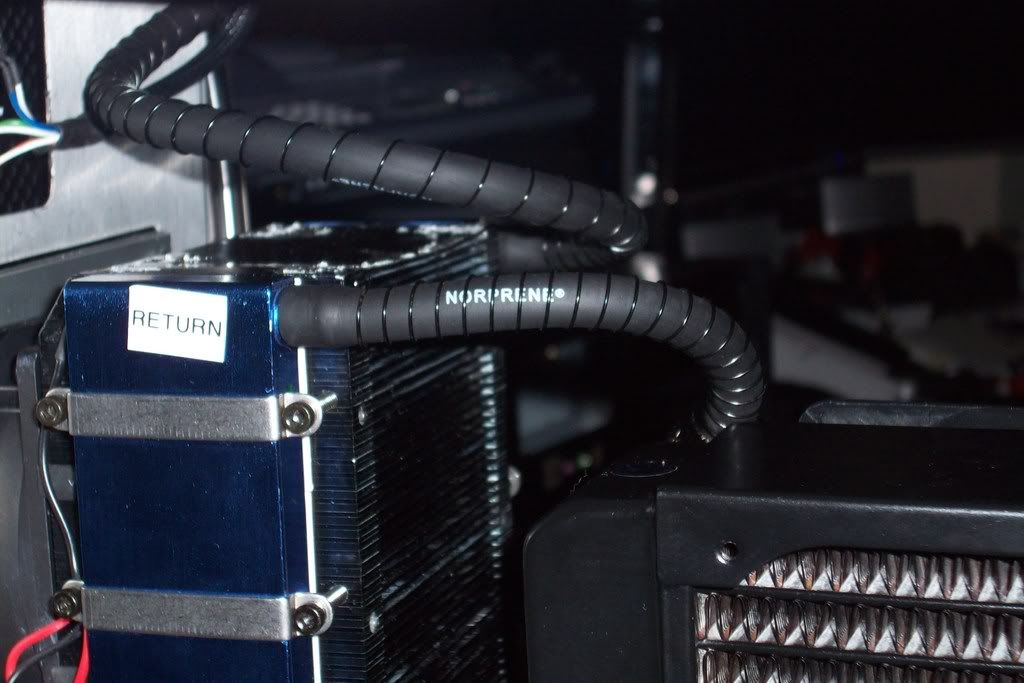
I added a DangerDen 120.1 rad inline after it hits the cpu block (this has since been changed)
initial temps on the blocks (cpu/nb/v-reg/DDrad)
16
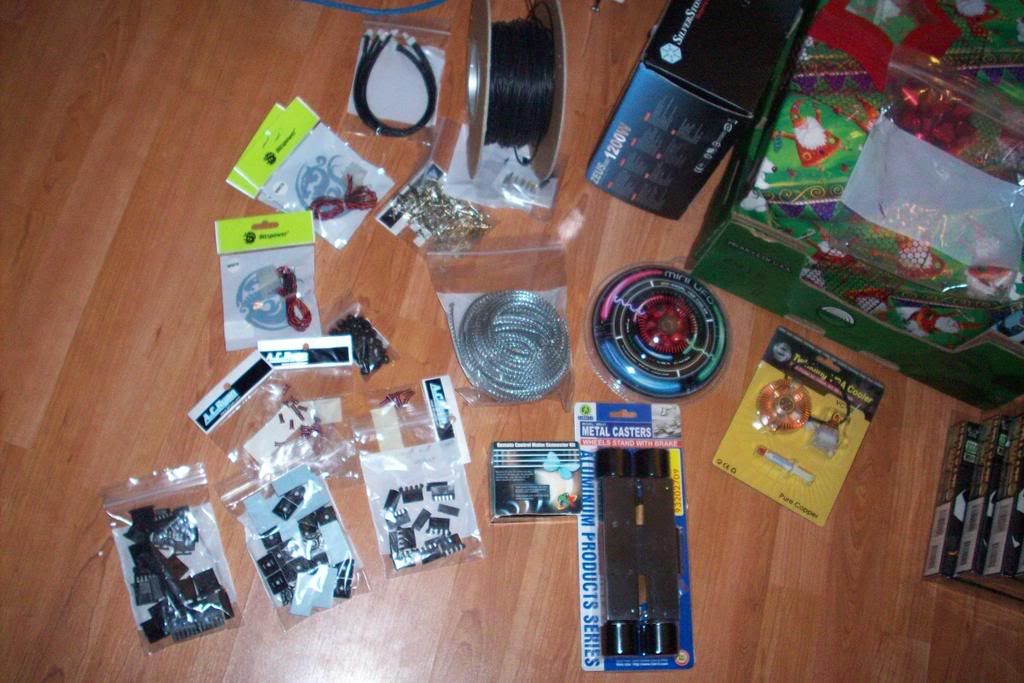
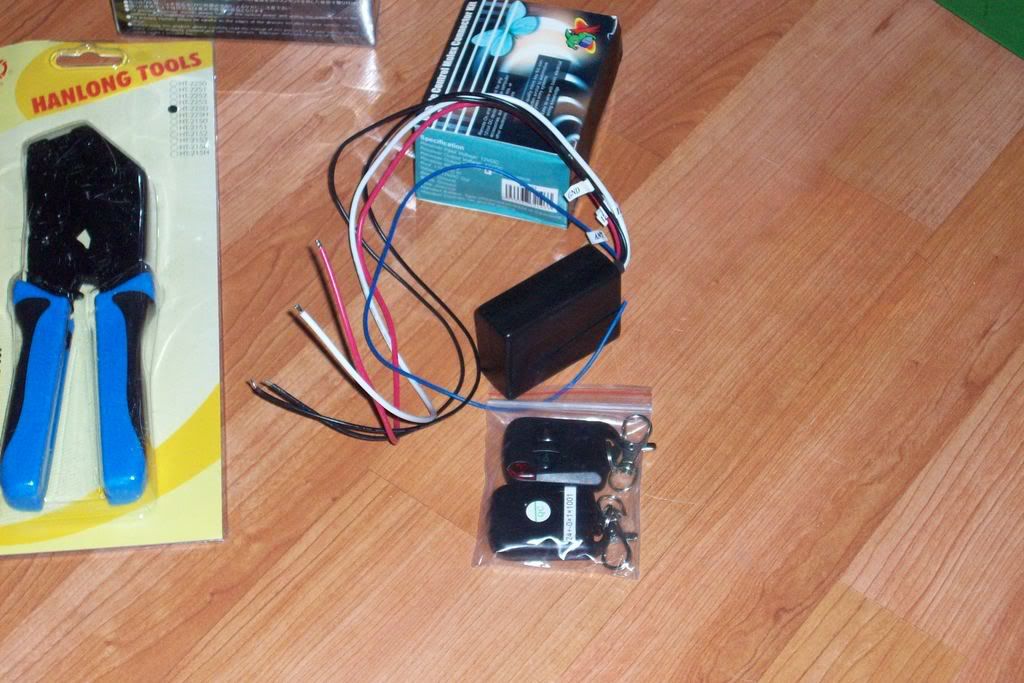
A few more bits to work with
Some modders mesh
Misc parts
The new switch
This was a must have
A few more misc parts
& my little led controller
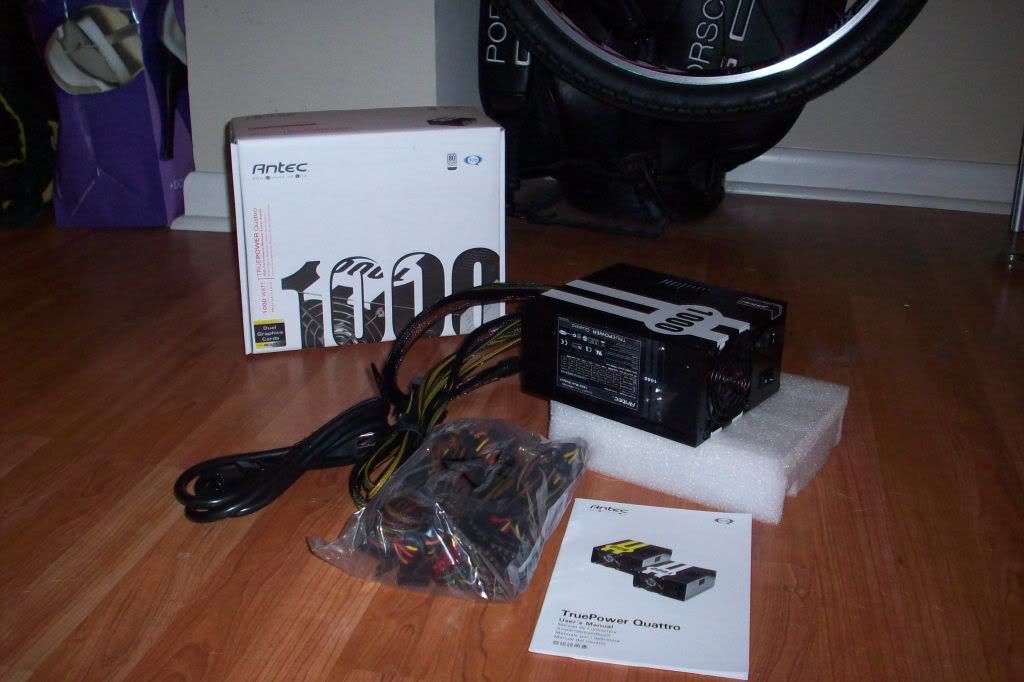
The PS I will be using on the build
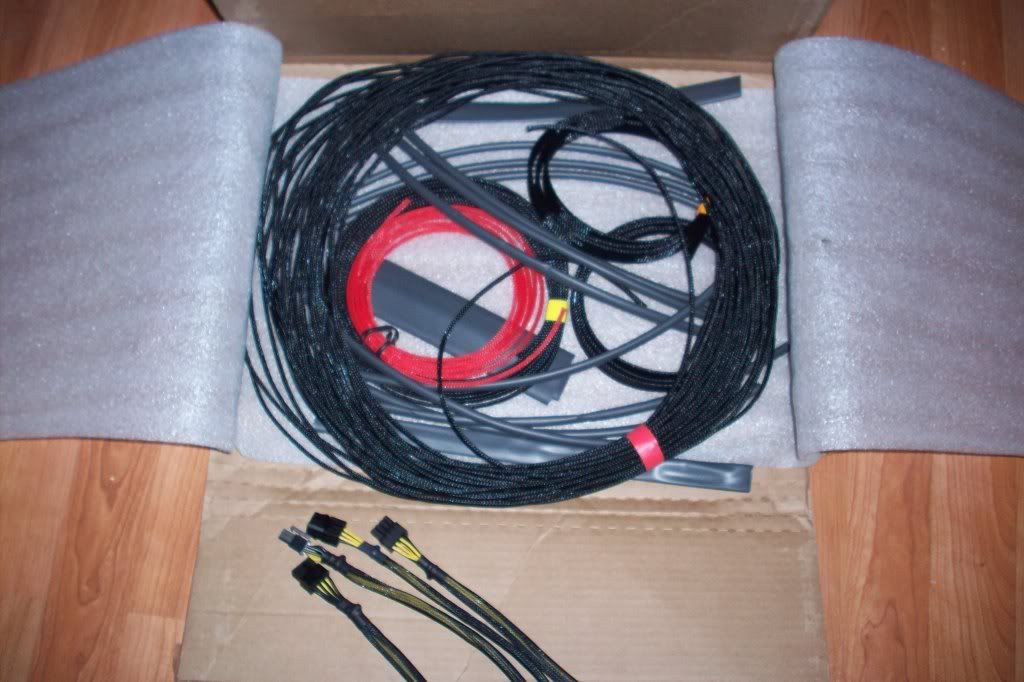
My murdermod Psychopack from Charles in Canada
http://store.murdermod.com/murderwar...psychopack.htm
- BTW - super fast delivery w/ the cheapo postage (i was not in immediate need of it) - there is so much stuff in the pack
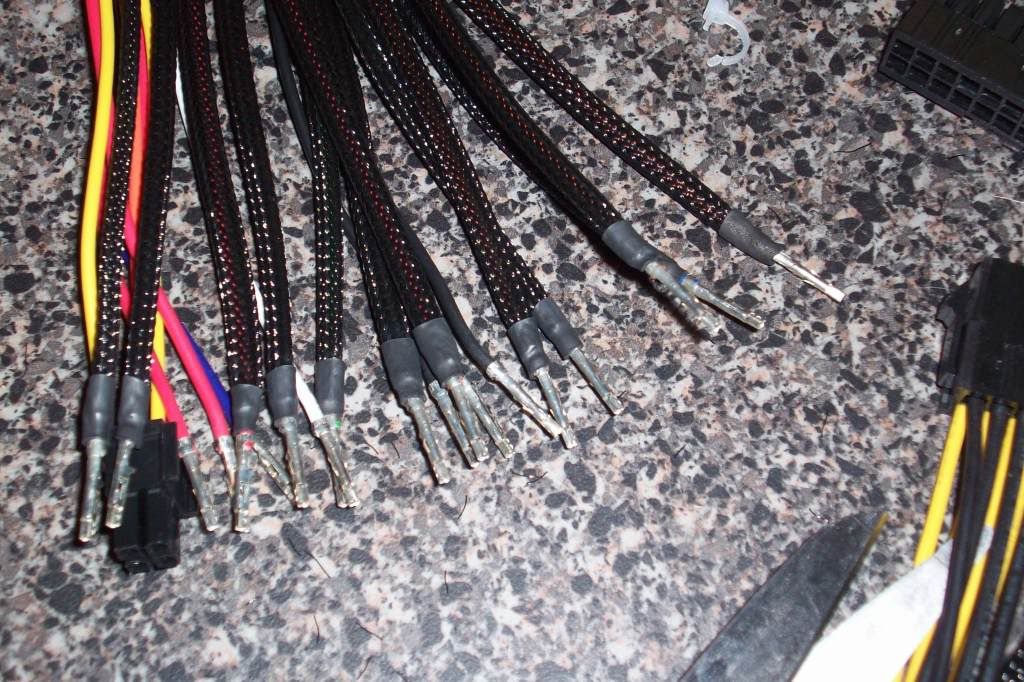
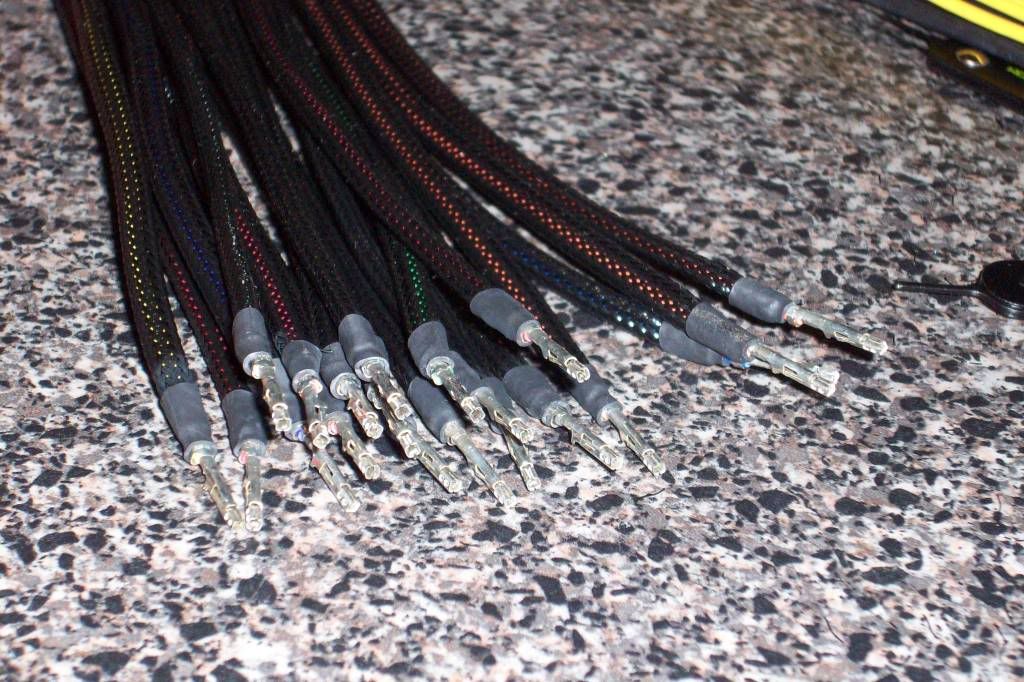
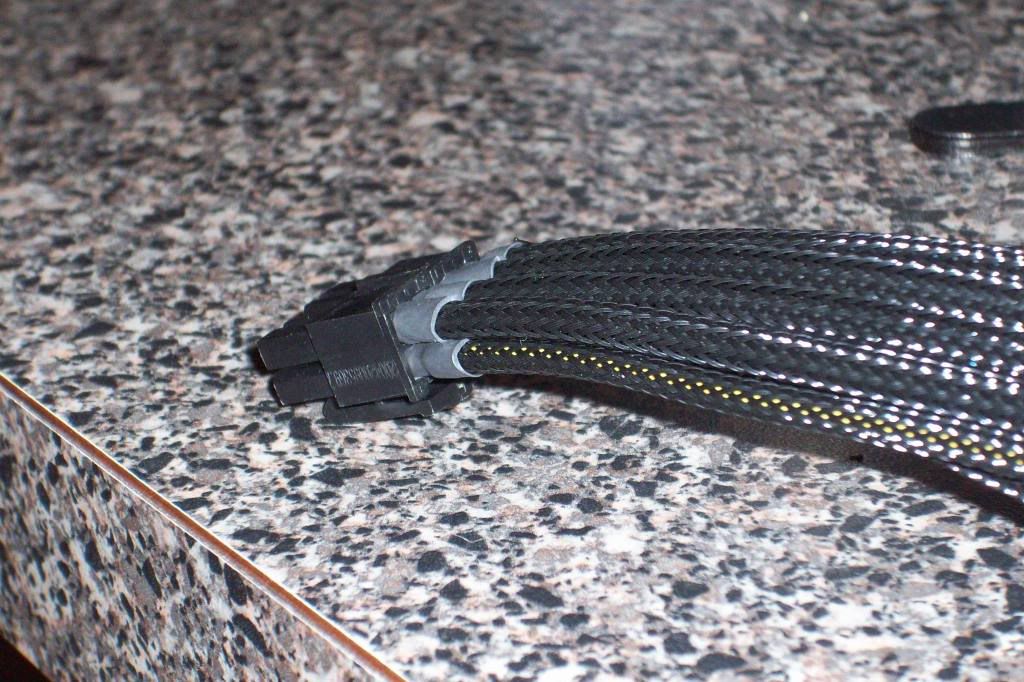
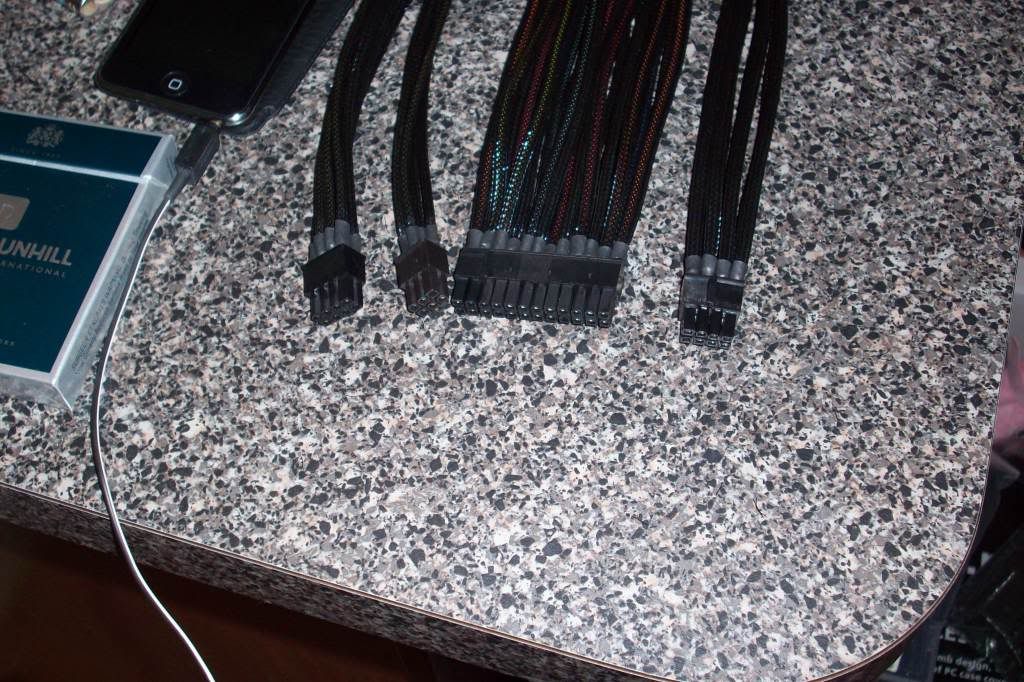
100' of MDPC-X 11/64" custom diameter sleeve
10' of 3:1 heatshrink for the 11/64" sleeve
12' of MDPC-X custom diameter SATA sleeve
24" of 3:1 heatshrink for the SATA sleeve
6' of MDPC-X 5/8" custom diameter sleeve
12" of big 3:1 heatshrink for PCI-E cable transitions
6" of jumbo 2:1 heatshrink for ATX cable transitions
- Very happy w/ what i got - def be getting another or 2
Let the fun begin - i have a full battery on the ipod & a ton of podcasts from sonnydeejay that have gone unlistened over the past weeks - time to jam
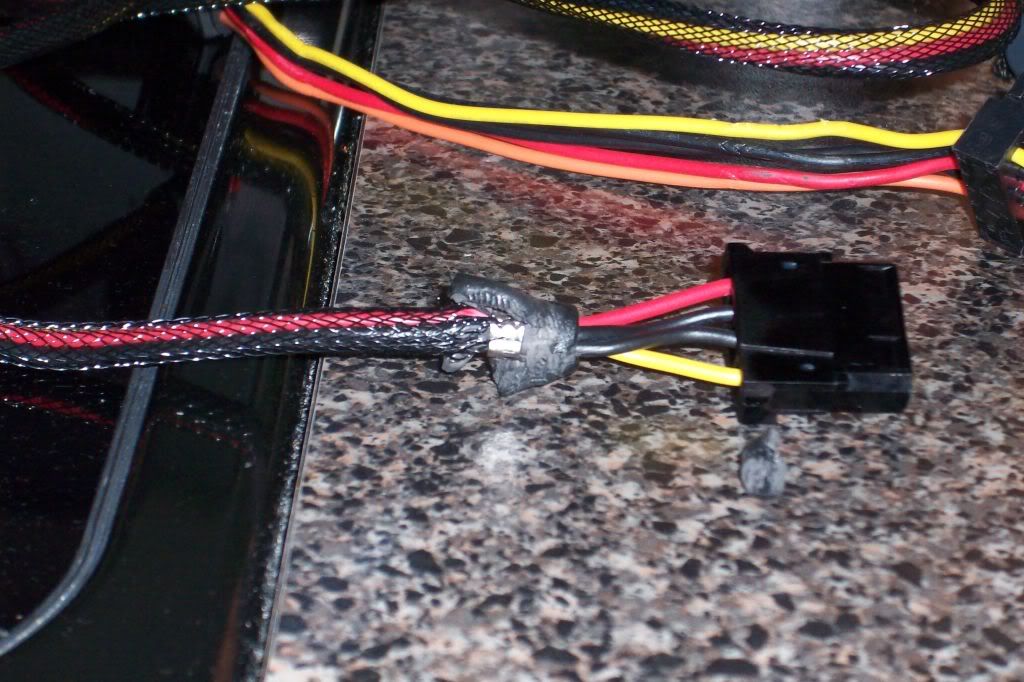
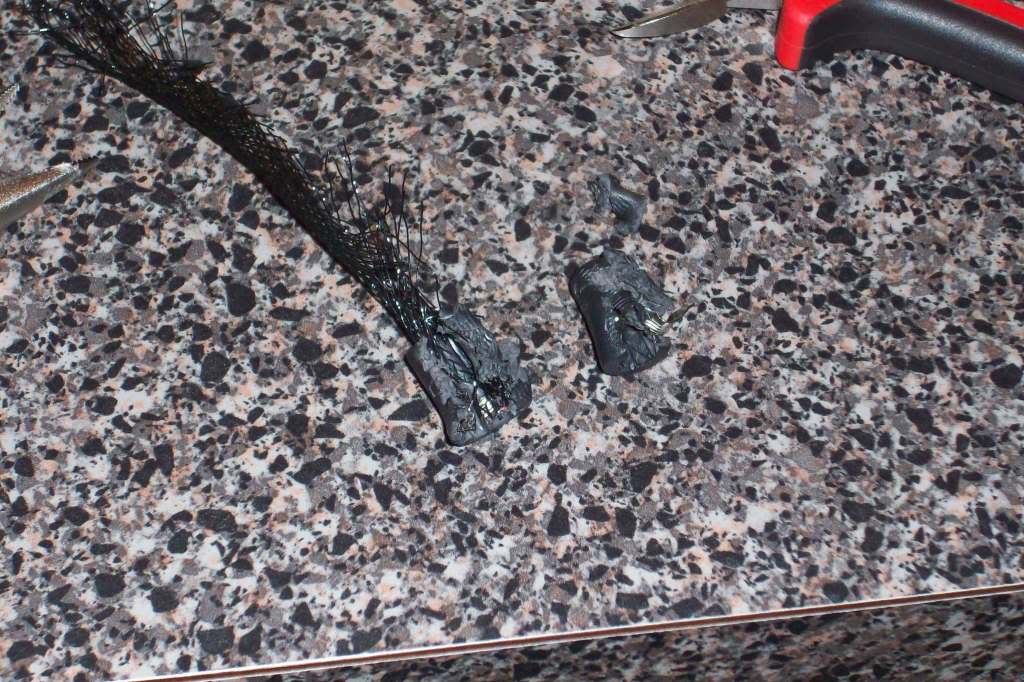
Note..this was a horrible choice on my part going with the antec there are these hardened rubber????things that are used in place of heatshrink horrible choice antec- & quite a PIA to take apart
Here are a few in progress
Some progress
A little more
Hard work does pay off
Mmmhm this looks very nice!
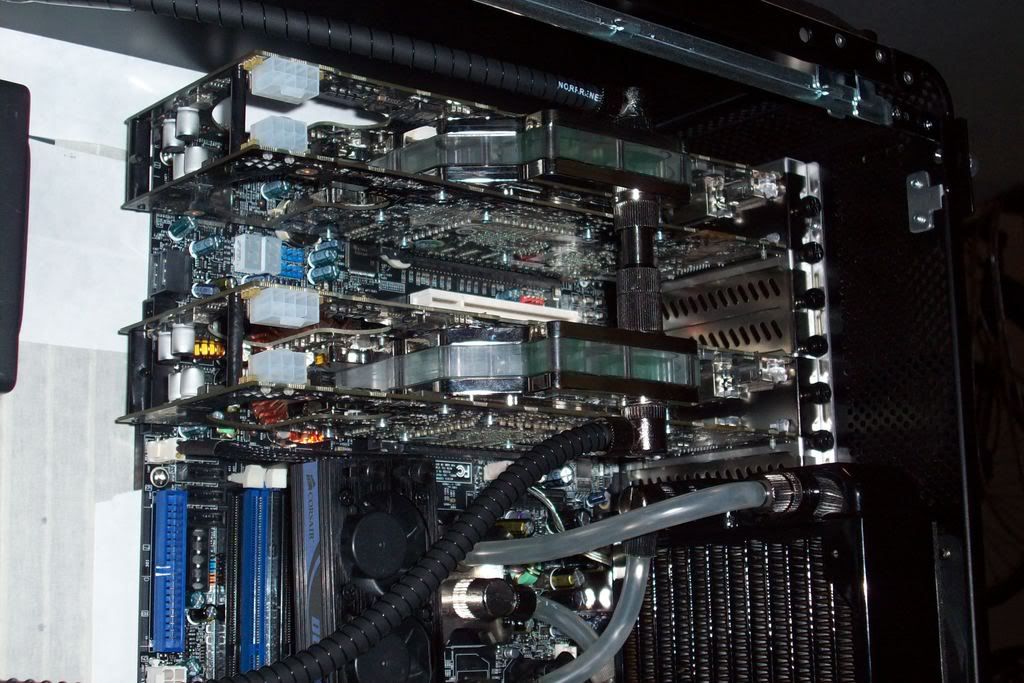
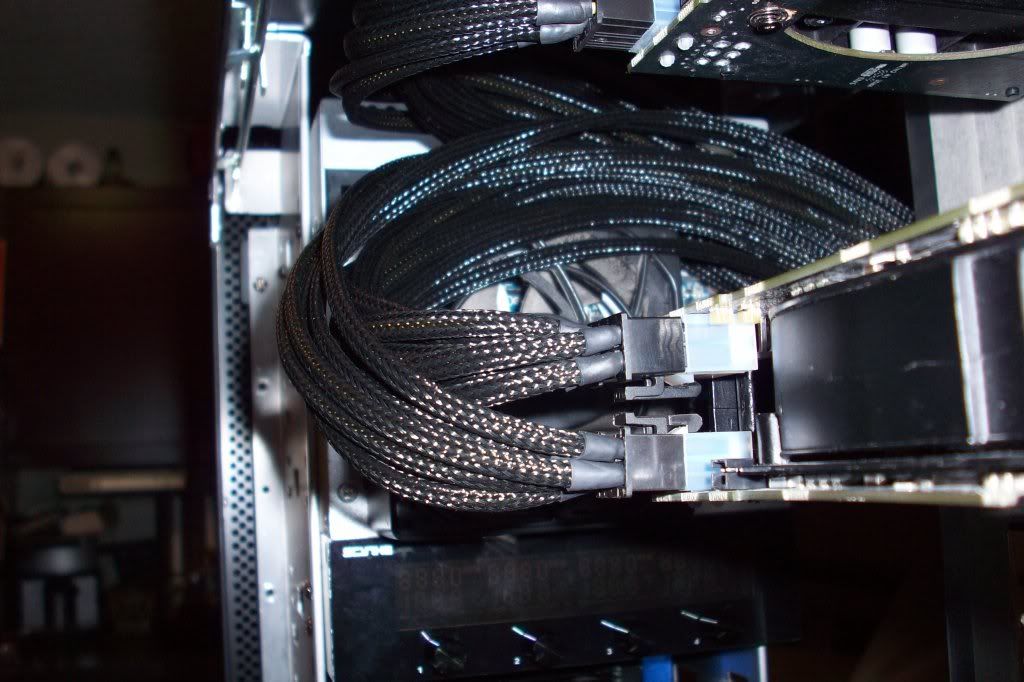
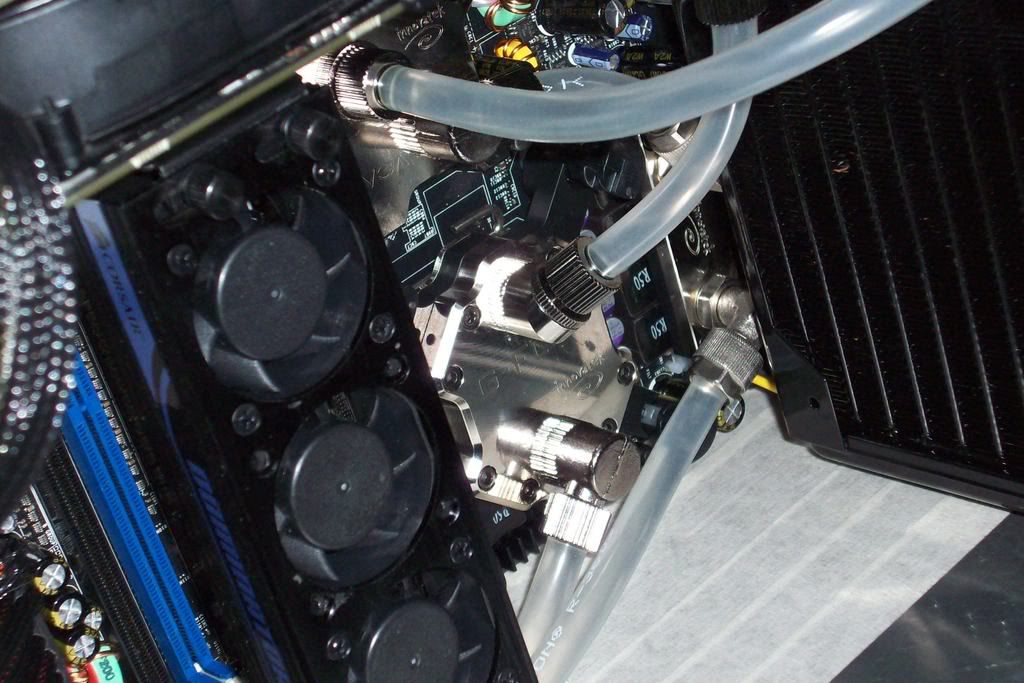
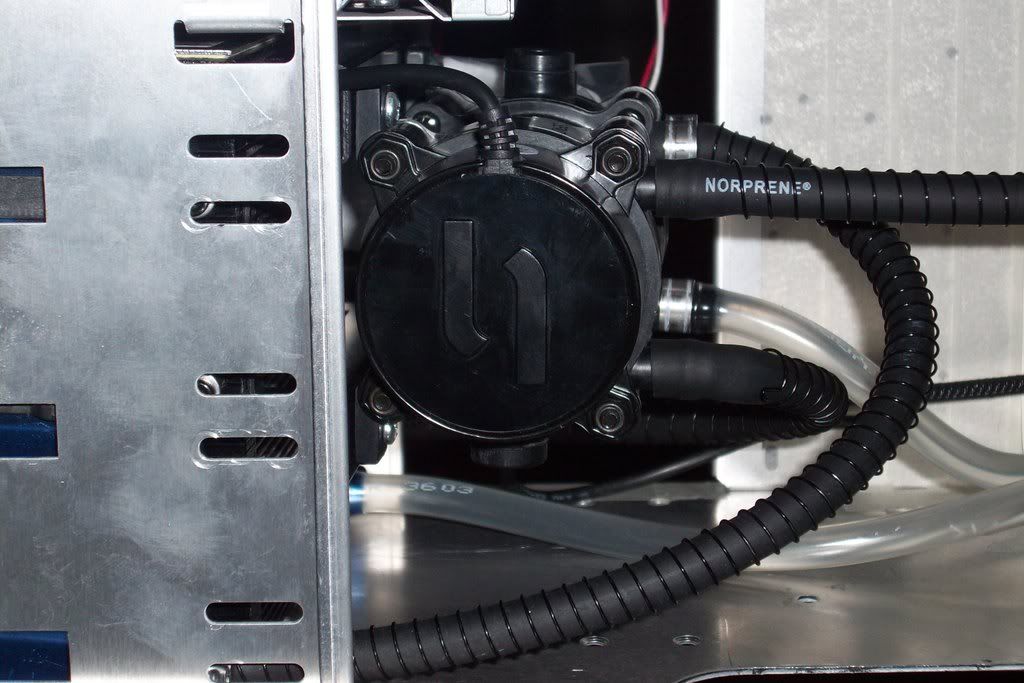
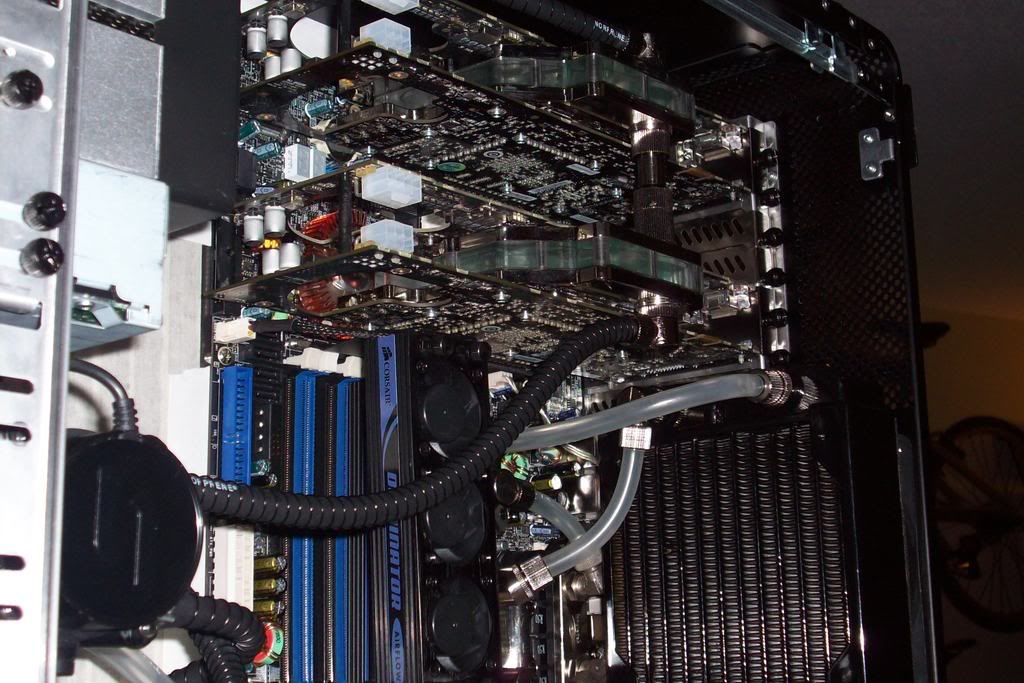
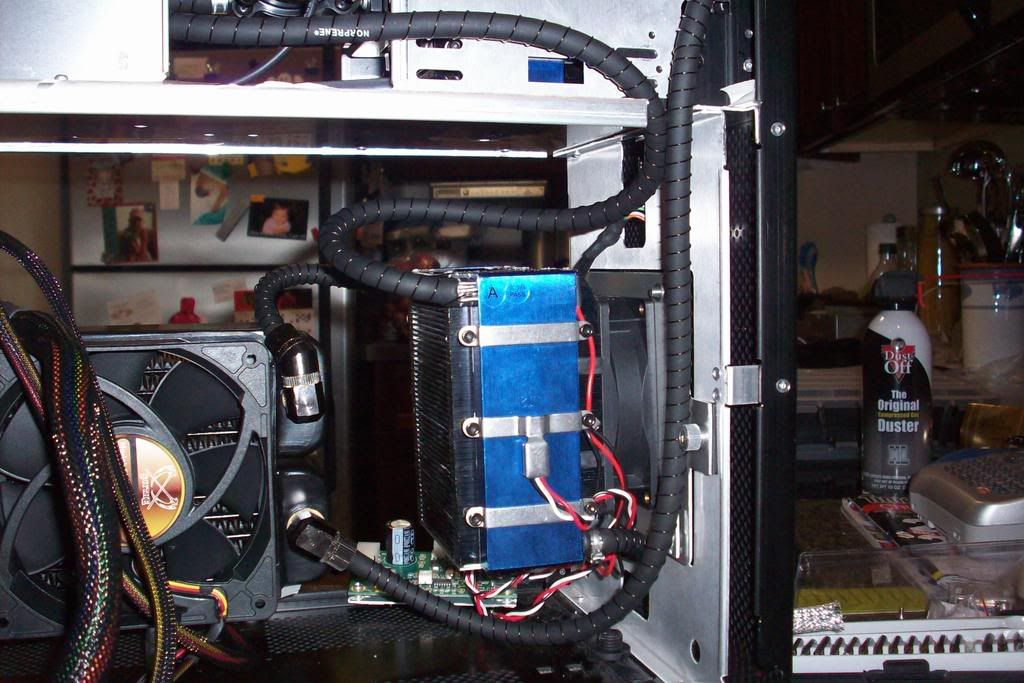
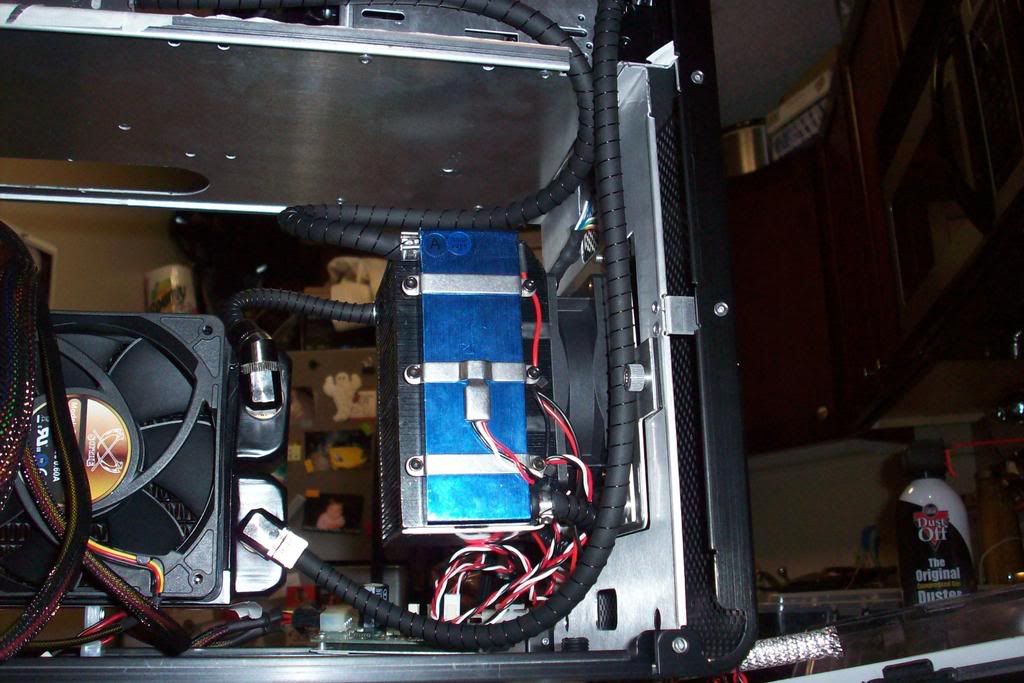
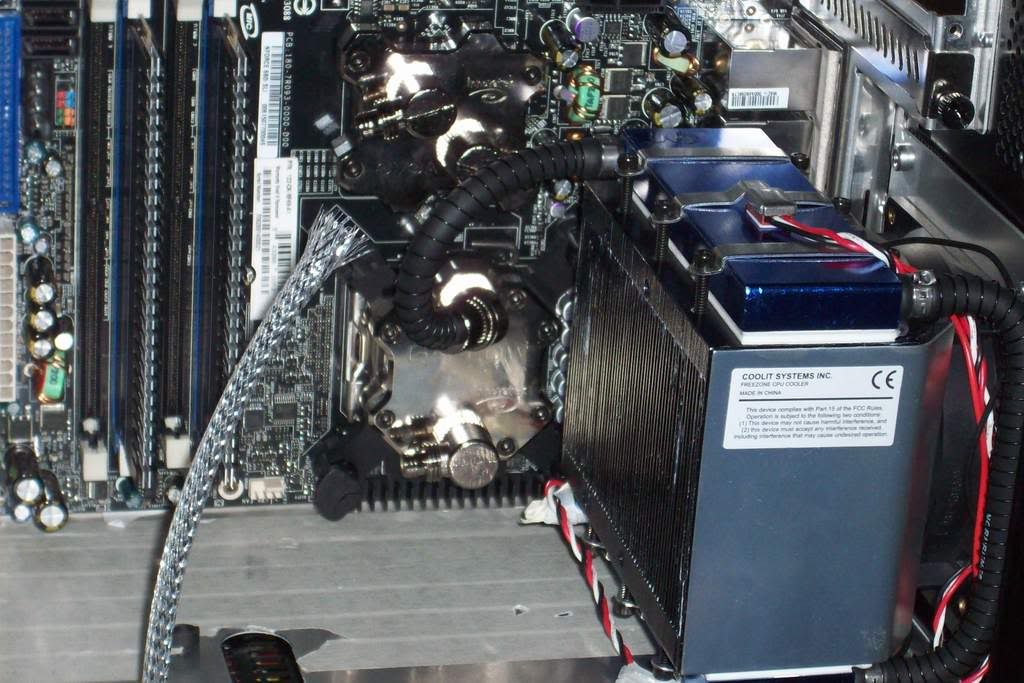
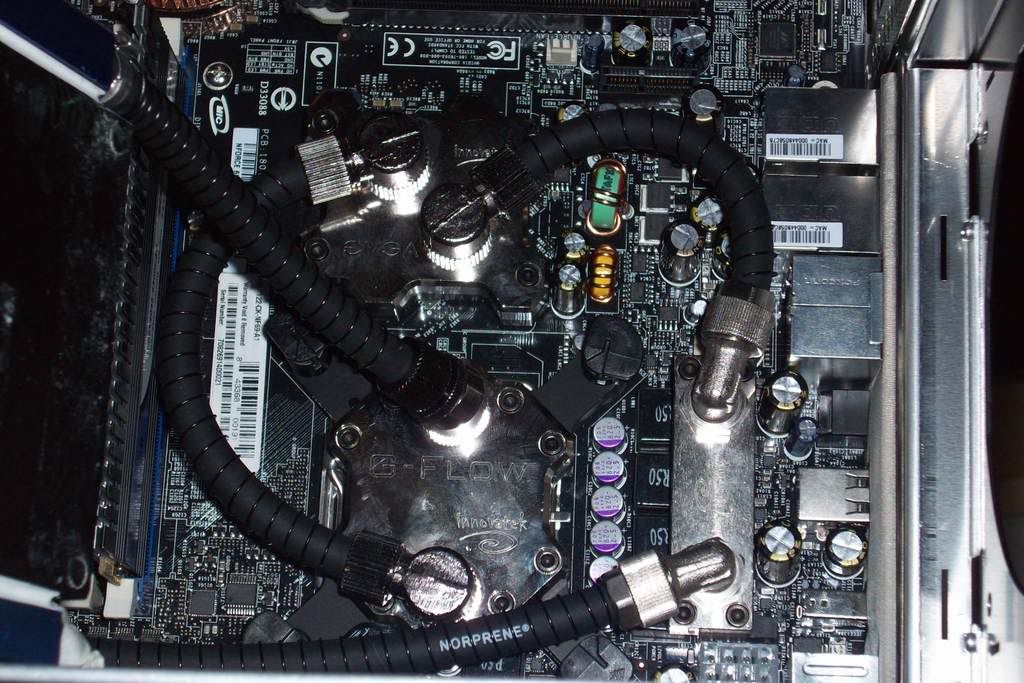
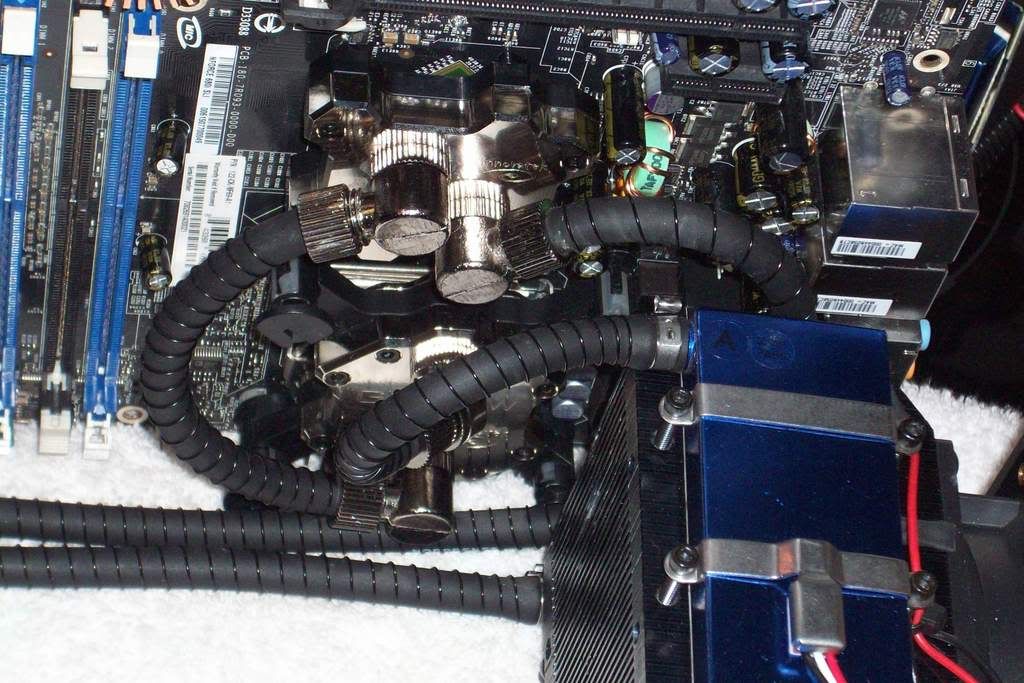
Before I do the prep for the v-cards, here is loop one mounted.
Flow looks A O K
Still not digging the SB Fan but it serves a purpose
I was really eager to see the temps so I jumped the gun hooked up the SATAs & loaded Vista.
After 12 hrs of running, the max temp under load from Everest was 39 24 @ idle (ALSO NOTE this was done w/ a Q6700 @ stock settings, rather than the E8400 which is temporarily in the computer I am typing this log on
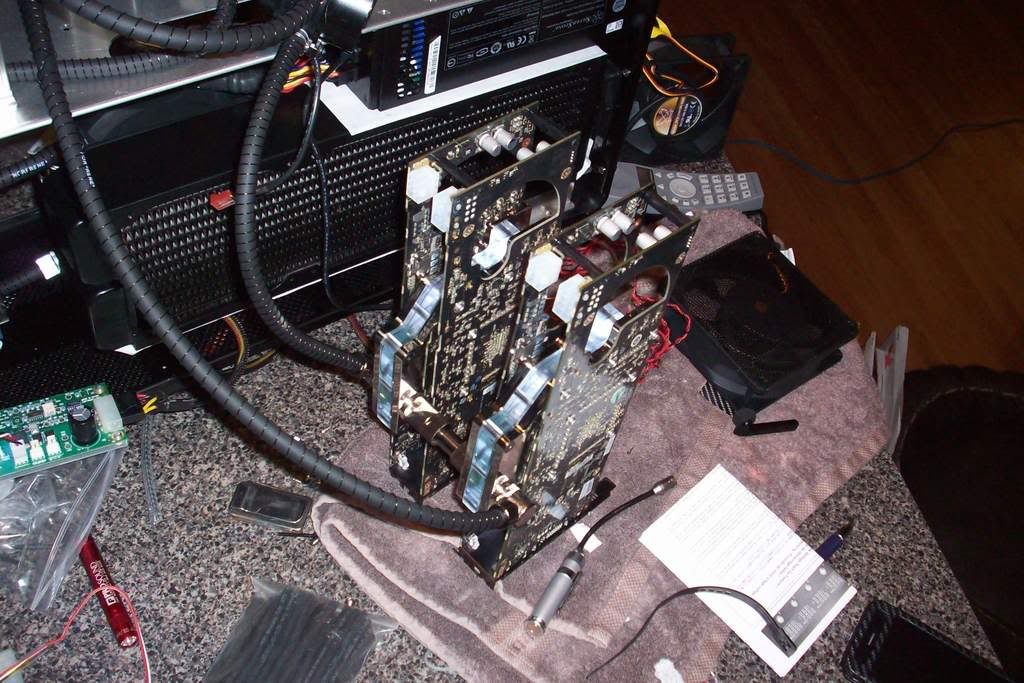
Time for some prep on the video card loop
Now onto the good stuff
Time to take apart one of the new CoolIt Freezones
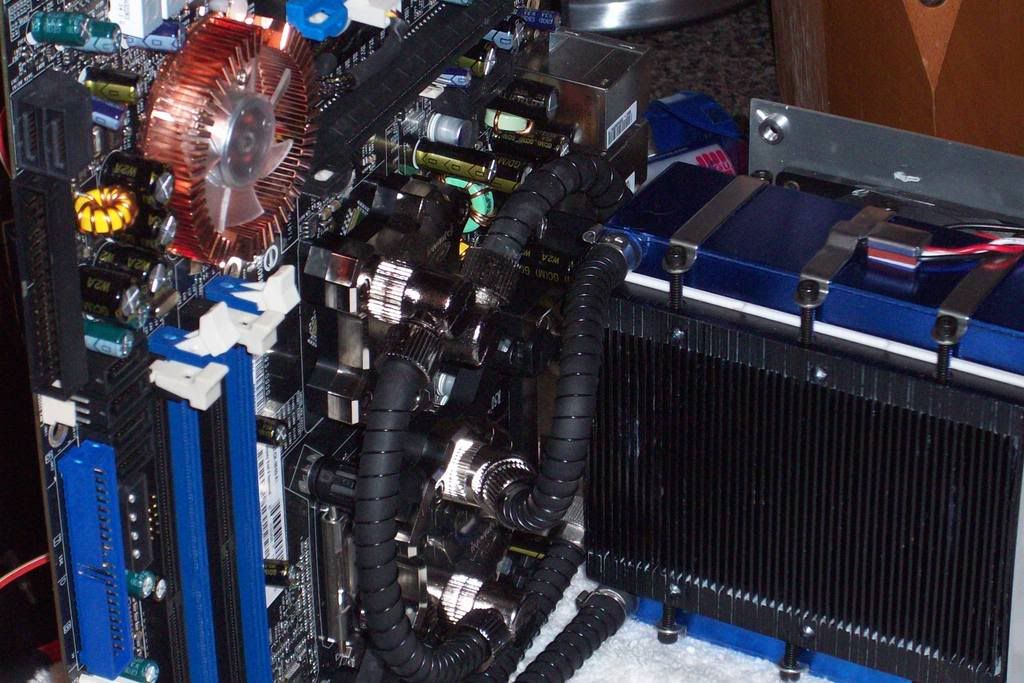
I added the scythe fans to the feser rad
I OCDd the fittings for the better part of 4 hours
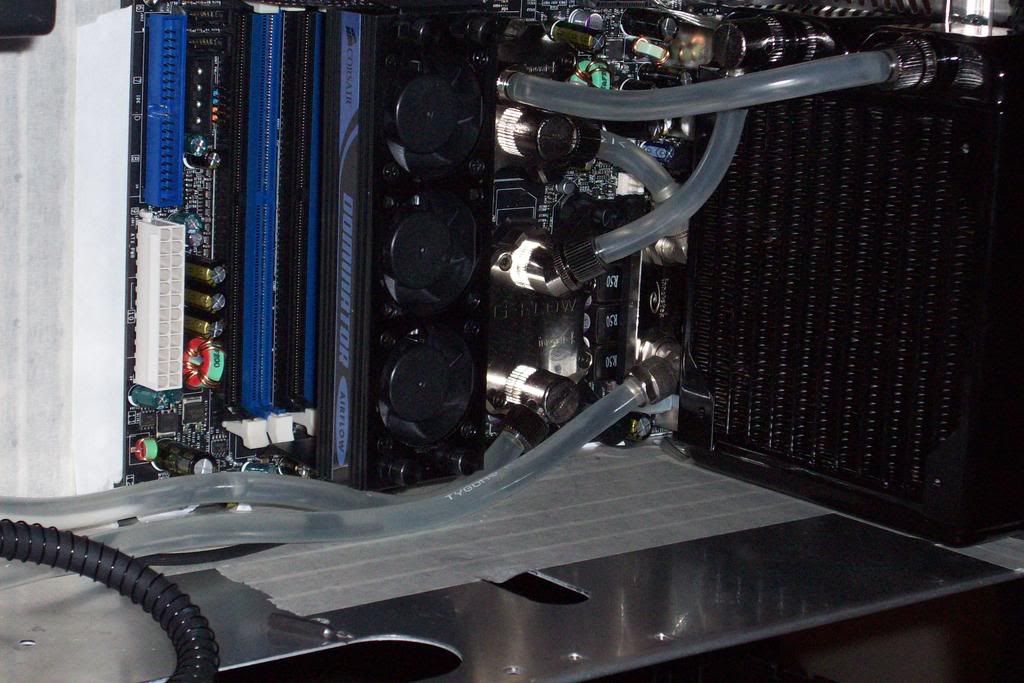
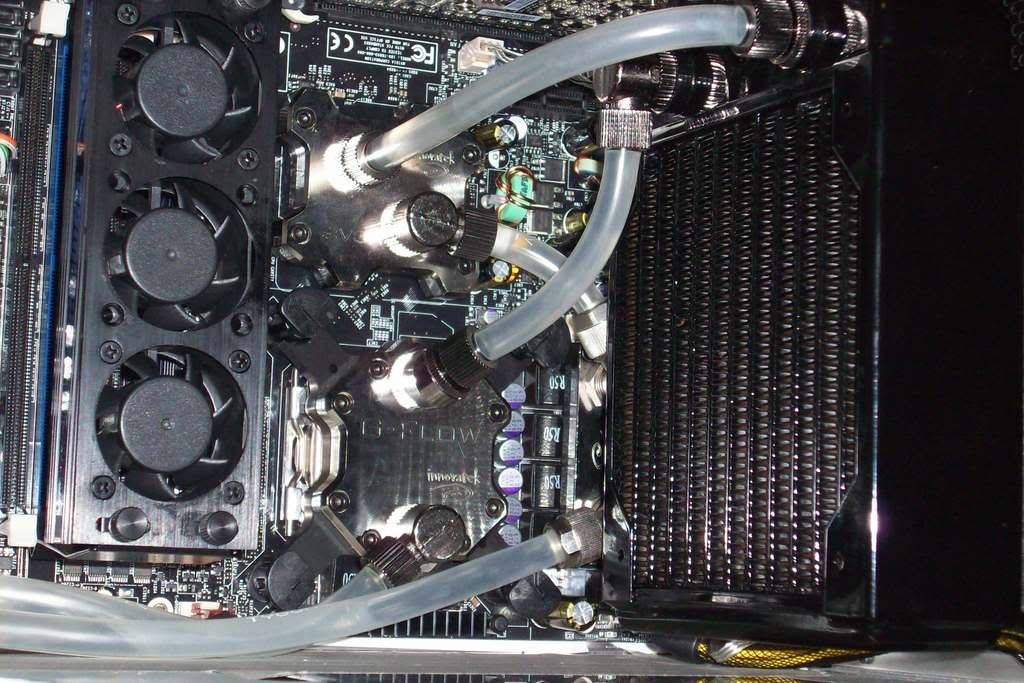
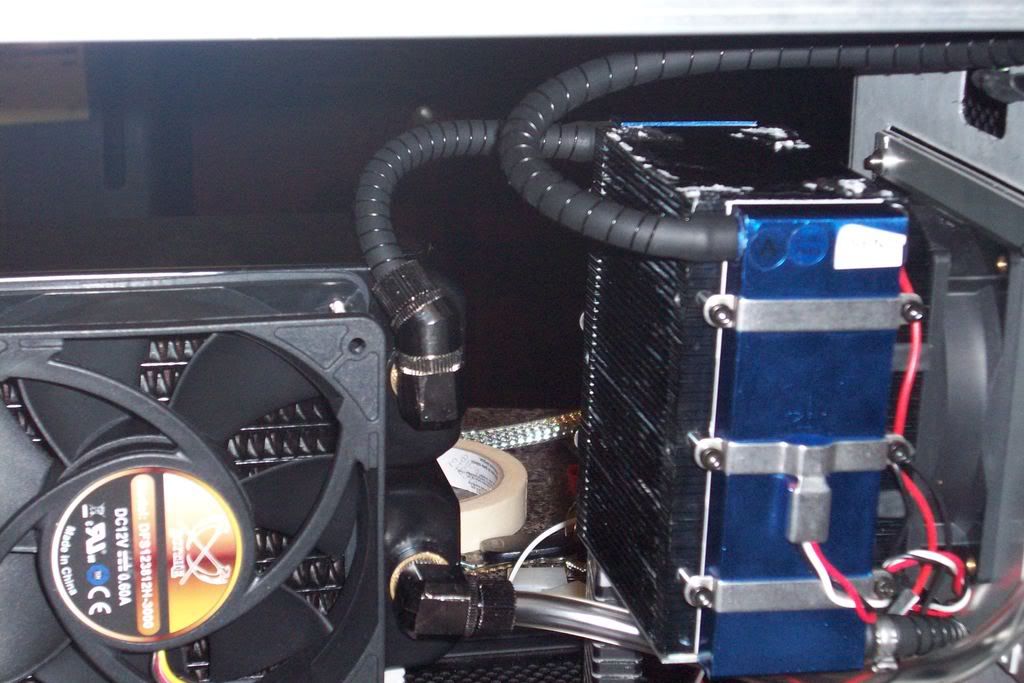
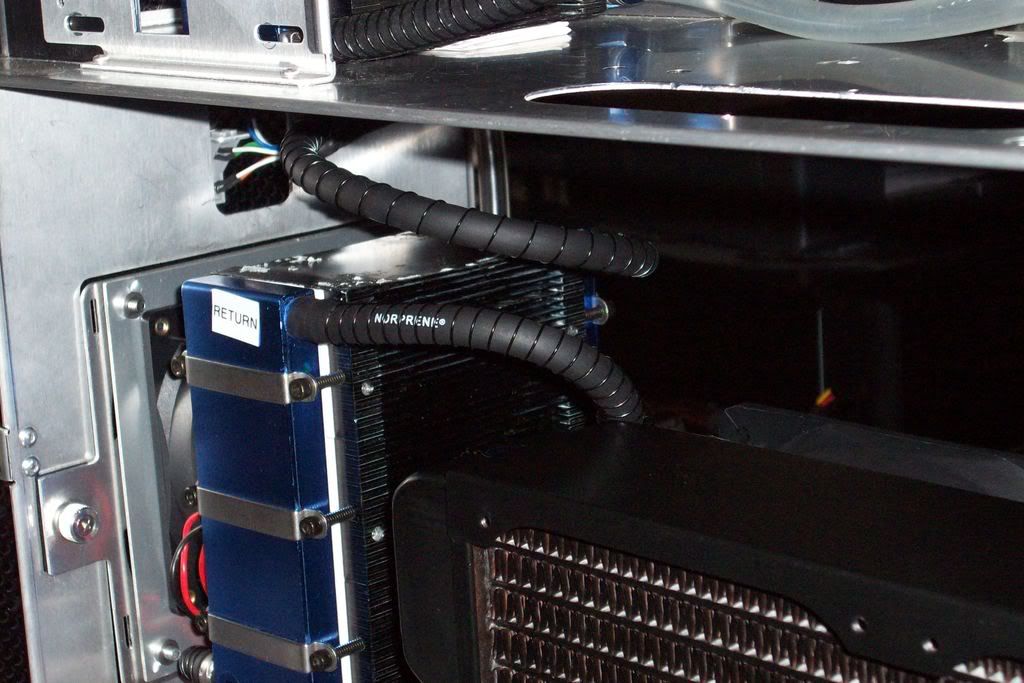
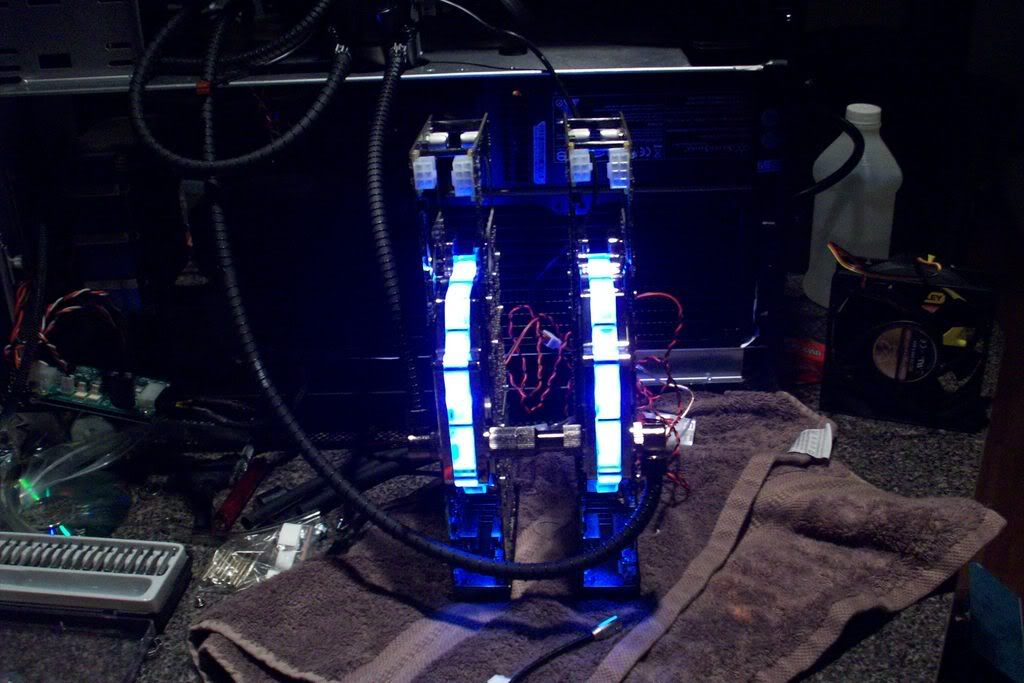
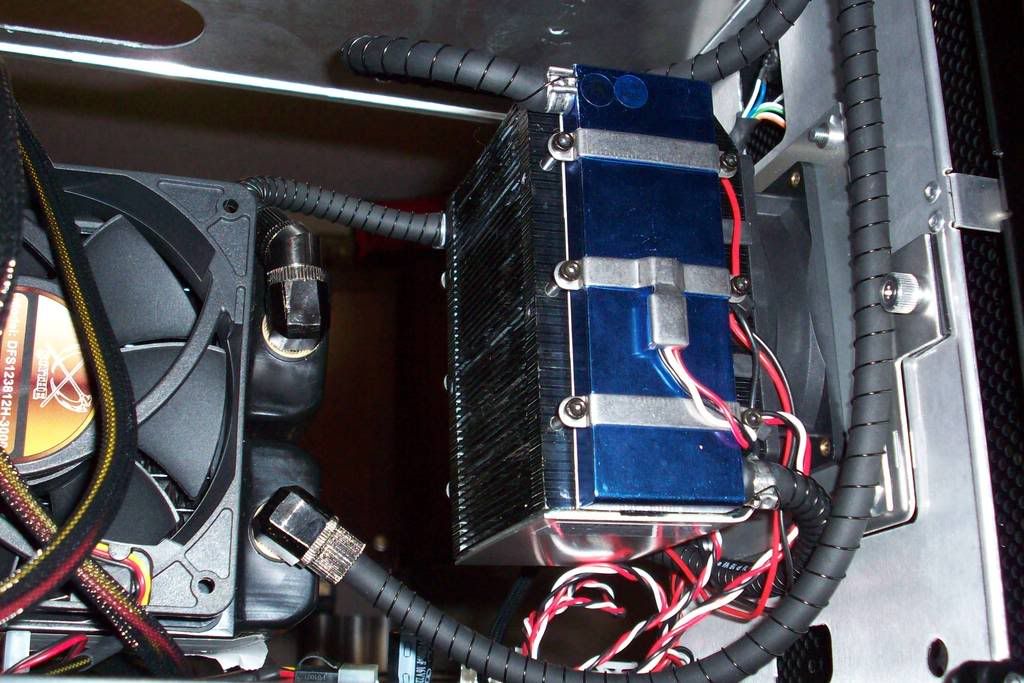
After mounting the CoolIt Freezone in the lower 120mm fan location, I added the feser rad to the mix
& began to fiddle w/ the tubing
When it was all said & done & ended up w/ this:
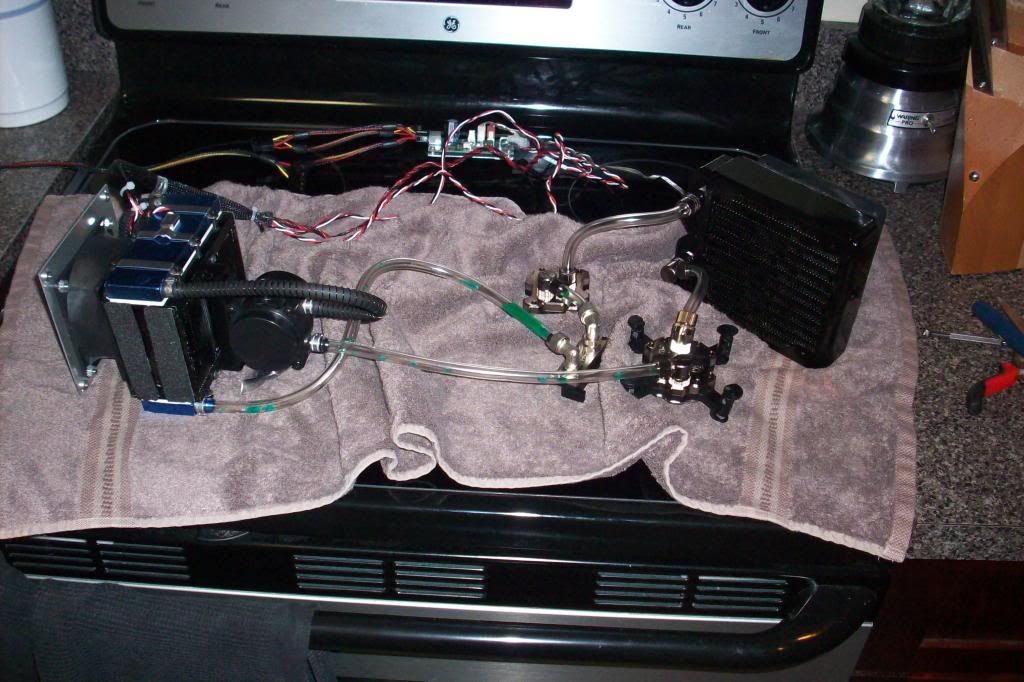
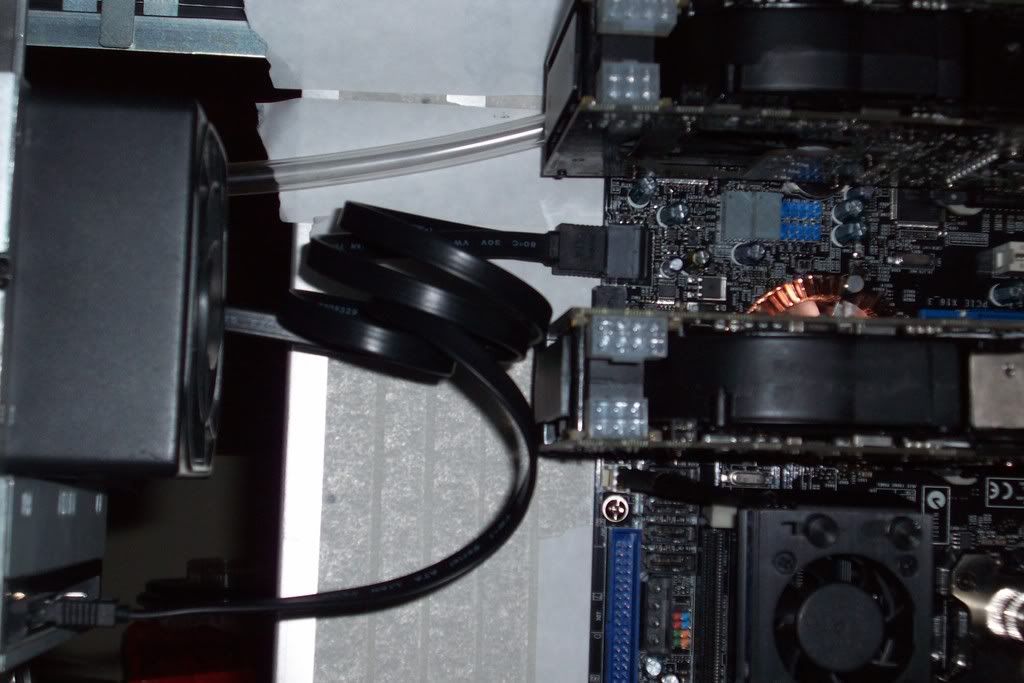
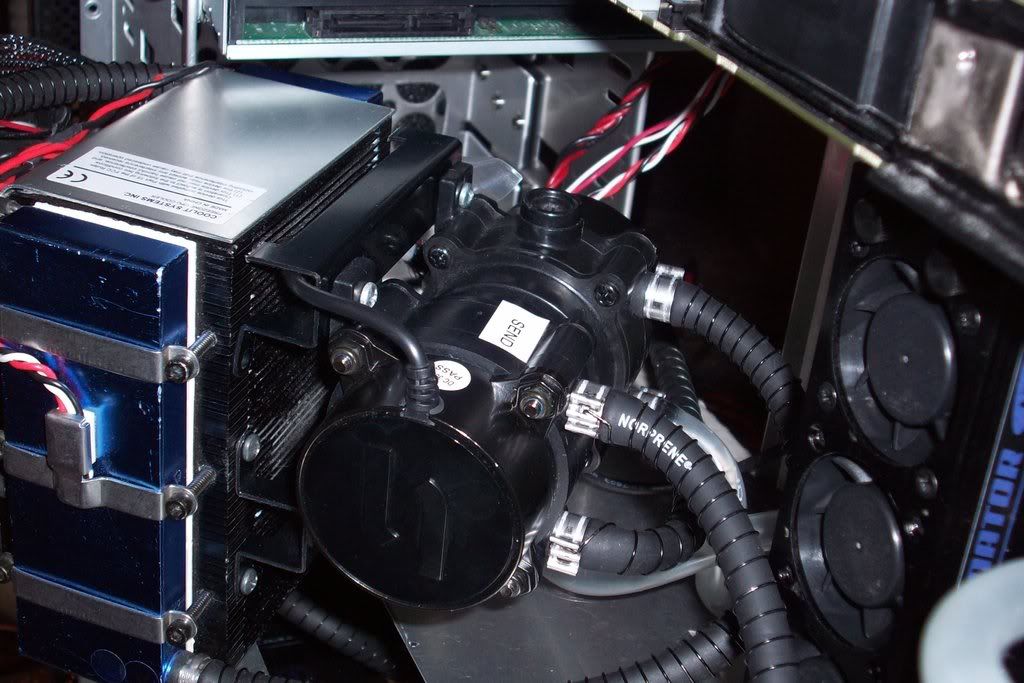
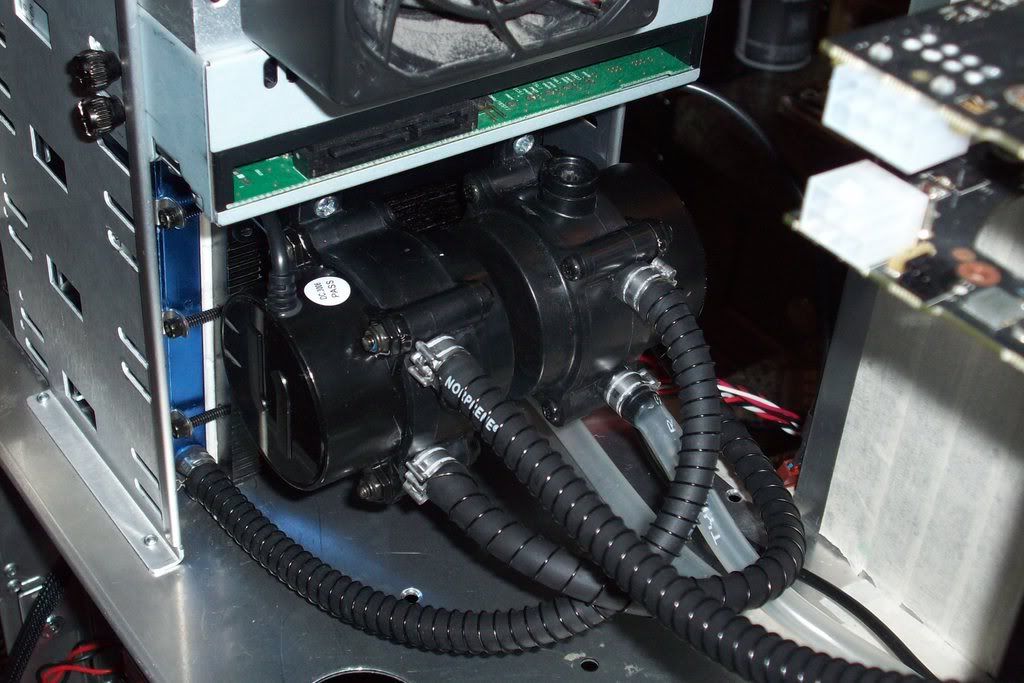
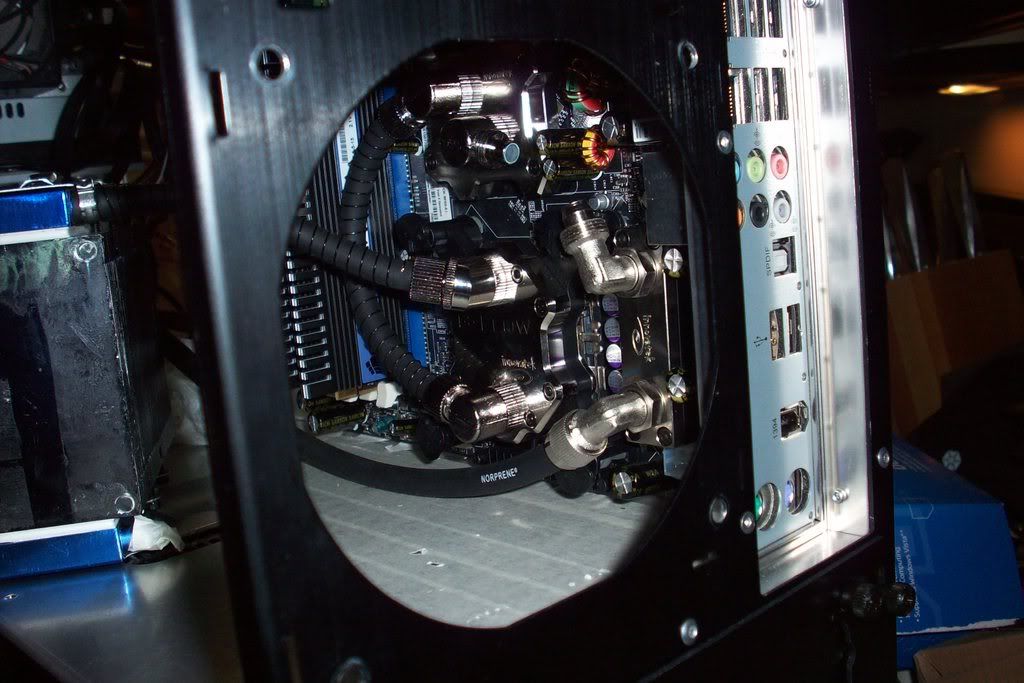
Here is how the pumps will be mounted in the top section of the case
Another picture of the pump mounted on the Freezone in the 5.25 drive bays
I like the flow if the tubes a lot
It begins:
I Used AS ceramique on the GPU & ram
2 shiney EK nickel Blocks compliment the innovatek blocks nicely
[IMG http://i491.photobucket.com/albums/rr277/jonhapgood/MArk%20II/100_1939.jpg[/IMG]
One in
They are alive
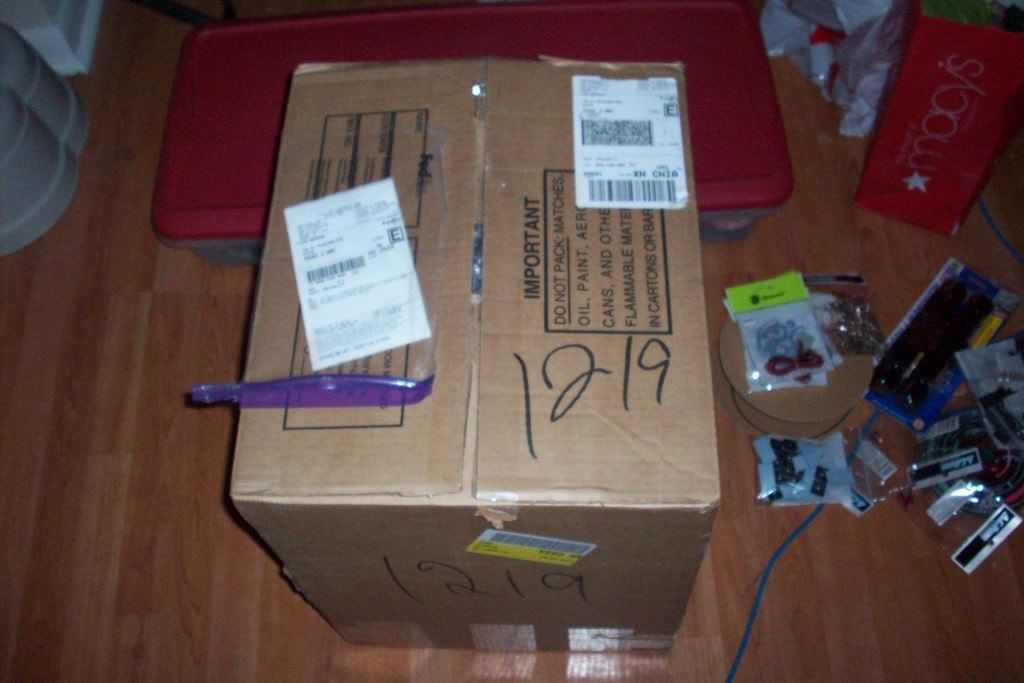
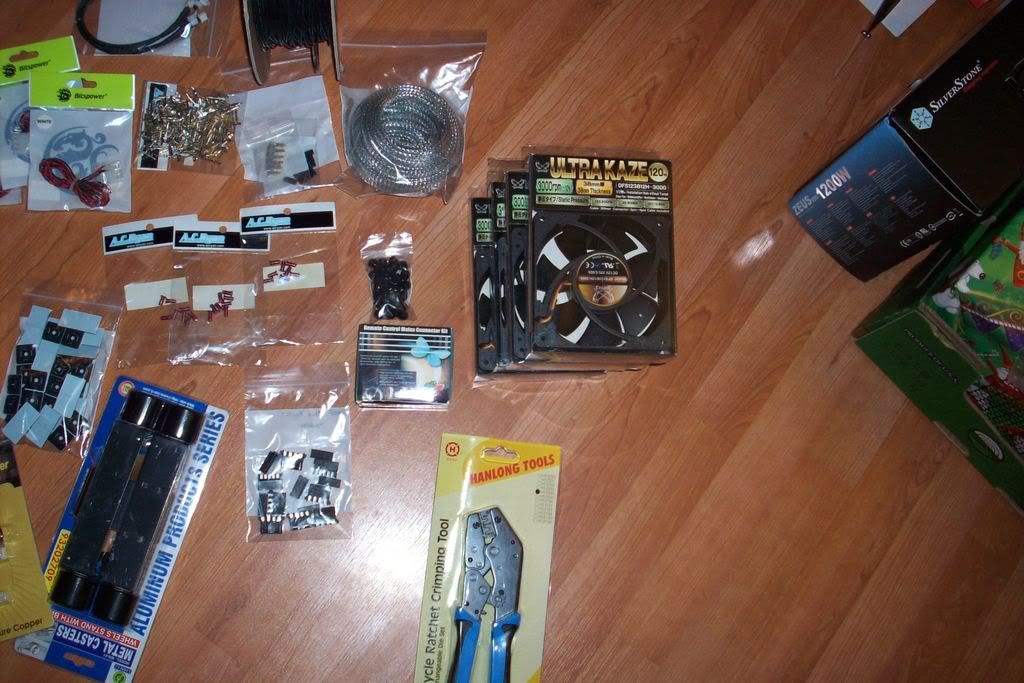
Got a few items from performance-pcs.com & frozencpu.com
200ft of 18G wire, 30 ft of chrome sleeving, some 5mm leds, a few scythe fans, a ton of power supply connectors ATX/SATA/PCIE/Molex & a multitude of male & female pins, some black lian li thumb screws, some zip tie .75 mounts, molex crimper, black lian li wheels & a less than desirable SB fan
& this nifty little thing:
It is a single channel remote control for anything molex I plan to use it for the entire lighting system (as it will draw little current) there are other models available w/ more channels I have seen up to 4
WELL ..that Antec Power Supply is out..
There is a new sheriff in town:
A Silverstone Zeus 1200W
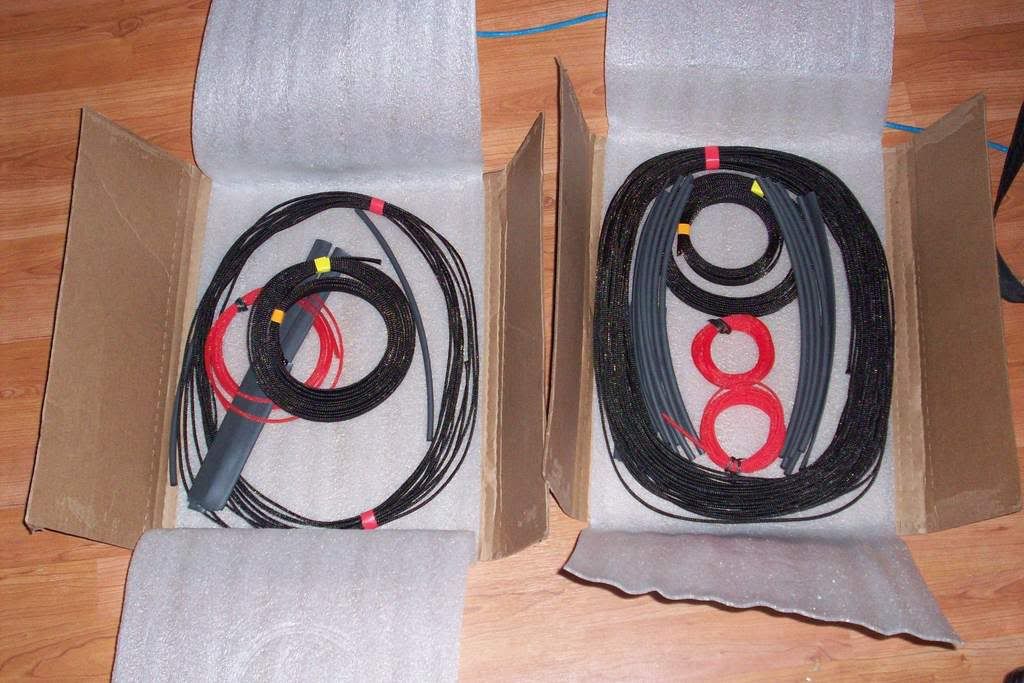
After making the decision to axe the Antec power supply, there was once again a need to order another Psychopack from Charles @ MurderMod
http://store.murdermod.com/murderwar...psychopack.htm
Once again it arrived in light speed via the regular post shipped out on Monday & I received it today (& keep in mind yesterday was x-mas!) that is speedy from Canada to Chicago!
TY CHARLES!
Here is what is left from the first one
I will have quite a bit of sleeving to do again lucky for me it is the weekend & I will have a little free time
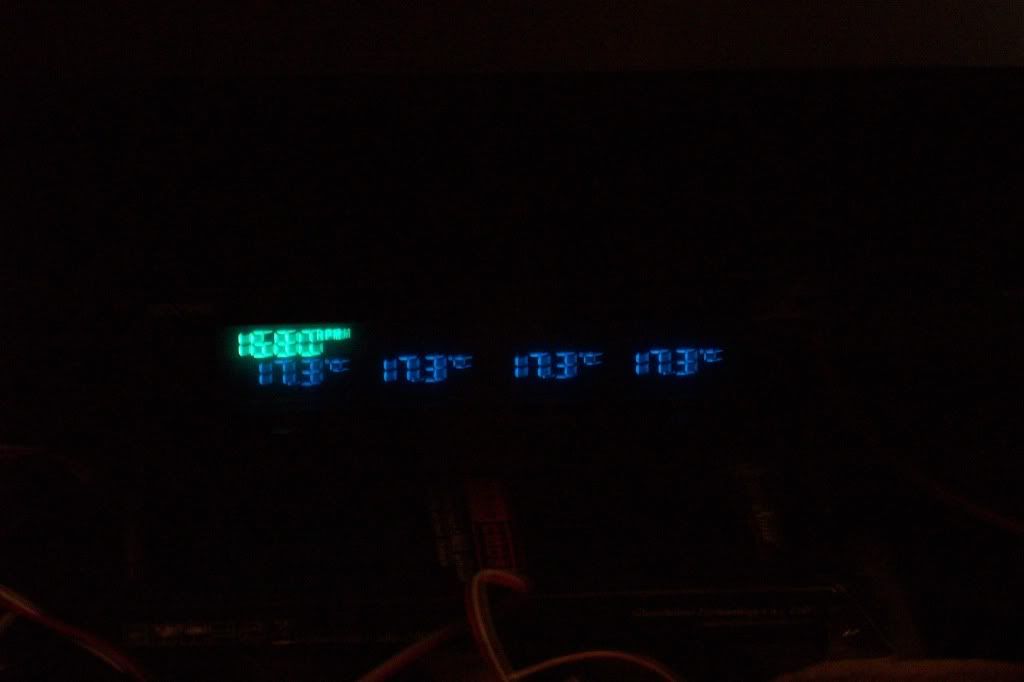
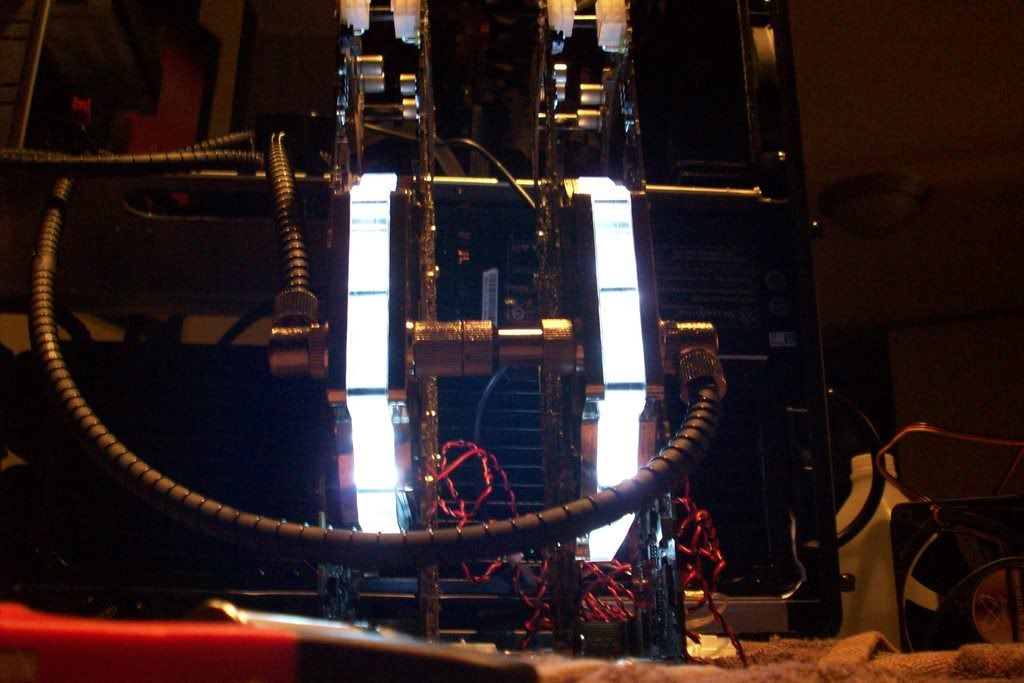
After running the cards for almost 24 hours, all seems well & the blocks are CHILLY!
I love the flow of the tubing that was attained w/ a little O C & D
I did a little overclocking - just mild on the chip - but really tried to set the v-cards a blazing....
still working with the Q6700 (for a few more days)
chip @ 3.33 1.325v rest of the settings auto
idle 28 27 29 26
load 40 39 38 37
as I have a few extra freezones laying around...I may choose to remove the DD rad in favor of another coolit freezone - that would put 12TEC's (6 on each freezone) on the board & CPU....VERY CHILLY to say the least - we'll see what happens after i put the dual core in - i may not need it (the extra freezone) if the temps are where i want them to be
now the cards...
...
Everyone knows that the GX2's are some of the hottest cards that have ever been created.
my old temps w/ the stock fans:
idle 47 48 48 49 fans @ 100% - load was well into the 70's & beyond w/ the fans @ max
NOW for the GOOD STUFF!!!!
I AM VERY IMPRESSED W/ THERMOELECTRIC COOLING
idle @ stock was 29 30 30 29
@ Load 36 37 36 36
OC'd 756 1890 1131 @ idle 31 32 31 30
LOAD 39 40 39 38
i even jacked the clocks to artifacting land - 777 1960 1161 still....
my delta is less than 10c it never went above 40c- that is out of control!
more to come


 Reply With Quote


 *
*


 .i have already tested out the loop (an update will follow this evening after some reposting of pics) & temps remain under 40/41 (LOAD) w/ a 10c delta (& I want to drop them even further - another feser may be in order
  )
) .it was cleaned up before i put em together....that is not thermal paste on the vregs, those are thermal pads that i tried to save from the original card - i ended up scrapping that idea (mostly b/c they were falling apart) but i was gracious enough to show you a fault or 2

 there are only a select few that want them & those that do want it new & w/ the warranty
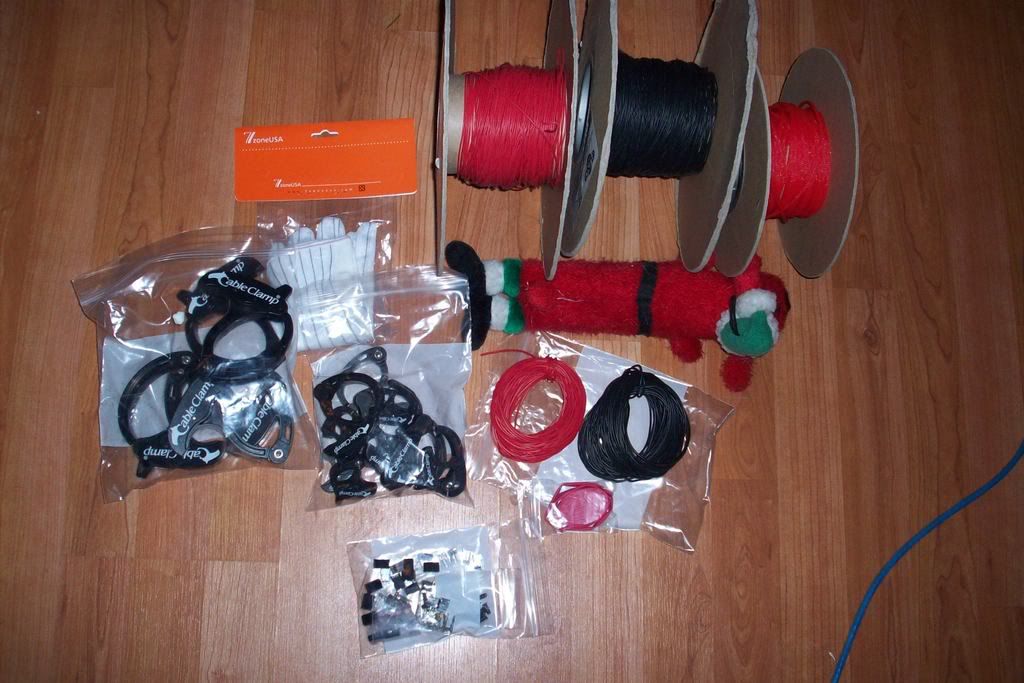


Bookmarks