Page 1 of 3 123 LastLast
Results 1 to 25 of 59

Thread: Temjin480 WorkLog

  1. #1
    Xtreme Cruncher
    Join Date
    Jun 2006
    Location
    On top of a mountain
    Posts
    4,163

    Temjin480 WorkLog

    Hi all.

    Thought I would share this Client build.

    Quote Originally Posted by CyberDruid View Post
    QuakeMazer at OCN commissioned a killer build.

    TemjinTJ07
    480GTX
    MCP655
    Apogee GTX (which I will put a Copper Top onto)
    MCW60 with 8800 kit
    Microres.

    QM wants this to be a discreet and classy LC conversion: no colored lights..no wide panel window...no nothing...just performance out the BenWah.

    I did some careful measuring and some pseudo renders to assure the 480GTX would fit and we went for it.

    I have to say I doff my cap to QuakMazer for Ponying up serious coin for this most Uber of builds.

    I intend to lavish this case with as much attention as QM will permit. This build will get the full monty RE cabling and attention to detail.

    Take a look at where we are with this.


    LC Goodness for Swiftech and Performance-PCs.com


    The micro res will get featured with a porthole in the side panel to view the action.


    This gets the AM2 Hold Down and a tasty Copper Top from my stash.


    All for the GFX.


    MCP 6 Vario..pretty much the industry standard for pumps.


    What can I say...this thing is bigger than mt PA 120.3...


    These fans are Scythe and feature the Sony FDB...a good balance between power and silence.


    I can't explain how large the box is for this case. I could pack both my children in there with enough Barney tapes to make it to California...


    The case arrived in perfect condition. I intend to keep it that way...even to the point of wearing gloves when working on the interior...just like the Lian Li the aluminum is a fingerprint trap.


    I stripped the case. We won't be using the nice HDD caddies.


    That's a lot of real estate. You'd think it would be easy to just pop a rad in there...


    First test fit shows that the rad does just pop in there . With fans installed it just allows clearance for a PSU.


    Mounted up ready for another test fit.


    These are some mesh filters I find work extremely well. I didn't cjheck with QM about this or the color..but I think once he sees it with the blue fluid in the res he'll give it a thumbs up. If not I can always fit different filters. I like it.


    Some may scoff at using velcro instead of brackets but I use this same industrial Velcro in Multimillion dollar yachts...it does the job. It will also isolate the fan noise from the chassis. In the event QuakeMazer decides to go with a different set up the case is easily returned to stock condition.


    Now that's money.


    I have yet to exactly locate the res...it's critical.
    There will be a hole in the side panel to view it..so it's a one time deal...on a $300 case.


    Although I would prefer to not use elbow fittings I have some special ones coming from Martinm210 that are barely restrictive...and may make use of several in this loop to streamline the tubing.


    Much much more to come

    I'll post up some progress this weekend most likely. Been getting the shop completed during this warm spell so I can get properly set up out of the weather. Modding in the great outdoors has a few drawbacks...

    Thanks for looking
    20 Logs on the fire for WCG: i7 920@2.8 X3220@3.0 X3220@2.4 E8400@4.05 E6600@2.4

  2. #2
    Registered User
    Join Date
    Aug 2006
    Posts
    5,855
    Horrors!! Aluminum... Fi Fai Fo Fum.. I smell aluminum!! The world is ending. The sky is falling. We're all going to die !!!

    Our Father who art in Heaven, Hallowed be Thy name. Lead us not away from D-Tek, but deliver us from aluminum!!

    Repent, see your evil sinful ways and you shall be saved from corrosion !!!
    Last edited by IanY; 11-21-2007 at 09:52 AM.

  3. #3
    Xtreme Member
    Join Date
    Nov 2007
    Posts
    114
    Nice case. Just wondering is it possible to fit a PA120.3 there?

  4. #4
    iadstudio
    Guest
    Quote Originally Posted by Red Evil View Post
    Nice case. Just wondering is it possible to fit a PA120.3 there?
    Definately. I think the question is would a PA120.4 fit in there if and when they make one?

    Good looking build!

  5. #5
    Xtreme Enthusiast
    Join Date
    Dec 2005
    Location
    NYC
    Posts
    937
    Quote Originally Posted by Red Evil View Post
    Nice case. Just wondering is it possible to fit a PA120.3 there?
    yes its been done to death...

    thanks for sharing druid!
    i5 2500k @ 4.6ghz 1.335v [ASUS P8Z68 Deluxe]
    8gb gskill ripjaws f3-12800cl8-8gbxm
    600gb velociraptor + 1TB black
    MSI N560GTX-TI Twin Frozr II + x-fi xtrememusic
    corsair hx-620w + lian li pc201b + dell 2408fpw
    d-tek fuzion1/ddc2 + petra top/thermochill pa120.3

  6. #6
    Xtreme Member
    Join Date
    Nov 2007
    Location
    Surrey, UK
    Posts
    179
    U can put 120.3 the top like mine, post some pictures later.

  7. #7
    Xtreme Cruncher
    Join Date
    Jun 2006
    Location
    On top of a mountain
    Posts
    4,163
    Quote Originally Posted by IanY View Post
    Horrors!! Aluminum... Fi Fai Fo Fum.. I smell aluminum!! The world is ending. The sky is falling. We're all going to die !!!

    Our Father who art in Heaven, Hallowed be Thy name. Lead us not away from D-Tek, but deliver us from aluminum!!

    Repent, see your evil sinful ways and you shall be saved from corrosion !!!
    The only aluminum here is the case

    hence the lovely Copper Top for the GTX...lord knows copper looks better...tastes better..it even smells better.

    I would stuff my my pinky finger in an electric pencil sharpener rather than put aluminum in QM's loop

    Yeah lately on this forum the Temjin TJ07 has seen a lot of exposure. But, like the Antec 900, it's a popular case..so whaddya gonna do

    I prefer stealth LCS...no need for radiators strapped t the top or hanging off the back or anything like that...the look I am striving for is "factory" and to that end I am working with what Temjin has to offer.

    Luckily QM is only using a single HDD so he'll never miss those two caddies I pulled.

    Hope to get something done in the next day or two.

    Thanks for looking
    20 Logs on the fire for WCG: i7 920@2.8 X3220@3.0 X3220@2.4 E8400@4.05 E6600@2.4

  8. #8
    Registered User
    Join Date
    Aug 2006
    Posts
    5,855
    Hook me up with the velcro, buddy

  9. #9
    Xtreme Enthusiast
    Join Date
    Jun 2007
    Location
    Canada, eh?
    Posts
    824
    Quote Originally Posted by IanY View Post
    Hook me up with the velcro, buddy
    Same here... Would you consider this setup shipping proof?
    Please note: I am not here to provide any kind of official NCIX support on these forums.

    For faster (and official) service please contact me at Linus@ncix.com, or please contact our customer care team at wvvw.NCIX.com (Canada) or wvvw.NCIXUS.com (America)

    Heatware: http://heatware.com/eval.php?id=25647

  10. #10
    Xtreme Member
    Join Date
    Oct 2005
    Posts
    100
    Looking superb Cyberdruid
    Having just got that case today for my first ever LC build, I will watch with interest how the Pro does it

  11. #11
    Xtreme Member
    Join Date
    Mar 2007
    Location
    Durham, UK
    Posts
    453
    Quote Originally Posted by Red Evil View Post
    Nice case. Just wondering is it possible to fit a PA120.3 there?
    You can get a PA 120.3 in the there ok, check my build log:
    http://www.xtremesystems.org/forums/...d.php?t=146870

  12. #12
    Xtreme Cruncher
    Join Date
    Jun 2006
    Location
    On top of a mountain
    Posts
    4,163
    Quote Originally Posted by IanY View Post
    Hook me up with the velcro, buddy
    Hmmm....I can't always tell when you are joking. But seriously this Velcro is massively strong. A 2" x 2" patch can resist about 20# of shear force and about 10# of direct pull. this strip is 19" x 2" so to remove the rad I actually have to rock it to break away the hook and loop closure and tear it out of the case...gently. It is a very strong mount. Not strong enough I could swing on it like a raped ape...but strong enough to secure a 7 pound rad.

    Quote Originally Posted by Linus@ncix View Post
    Same here... Would you consider this setup shipping proof?
    After I properly stuff the case yes. Before I ship an LC system I stuff empty plastic bag(s) in the cavities then shove as much expanded foam as I can into the bag(s) so that nothing has a chance to shift if the case is dropped. I have shipped a number of completed, filled, ready to run systems in this manner. If the case is tightly packed with foam nothing can go amiss.

    The client is actually making the drive to my shop to pick up the build when it is complete s no worries in that regard.

    I prefer brackets for most applications but the confines of the case would make attaching the rad a real puzzle.

    Just to demonstrate I will take a picture of the case lifted just by the rad if I can figure a way to grip the rad.
    20 Logs on the fire for WCG: i7 920@2.8 X3220@3.0 X3220@2.4 E8400@4.05 E6600@2.4

  13. #13
    Registered User
    Join Date
    Aug 2006
    Posts
    5,855
    Like I said... tell me where I can get some, please I'm not joking heh

    I'm offerring my PC building/maintenance services for free as a charity to my son's school.

    I didn't know you have a side business going...

  14. #14
    Xtreme Addict
    Join Date
    May 2007
    Location
    New York City
    Posts
    2,065
    velcro (R) makes the best hook & loop that will maintain it's strength over time...
    they have various kinds velcro...

    velcro can also come in various strength too... for those who are familiar with EZ-Pass, the mounting stuff is also velcro as well.

    if you want real strong fix, look for the plastic hook & loop velcro's

    one note tho... some velcro's adhesive dont do so well with heat...

    and btw, home depot, ace hardware, lowe's all have strips of velcro in various strengths...
    "The ultimate measure of a man is not where he stands in moments of comfort and convenience, but where he stands in times challenge and controversy."
    Dr. Martin Luther King Jr.

    DIY: Self Clinching Nuts

    Canon EOS 7D | Tokina 12-24mm f/4 | Canon EF 24-105 f/4 L | Canon EF 70-200 f/2.8 L IS Mk II | Canon EF 35mm f/1.4 L | Canon EF 400mm f/5.6 L | Canon EF 100-400mm f/4-5.6 L

  15. #15
    Xtreme Cruncher
    Join Date
    Jun 2006
    Location
    On top of a mountain
    Posts
    4,163
    Sorry Ian I had no idea you were looking to source it.

    Get the Industrial version. The plastic interlocking Velcro is so incredibly strong that you might break whatever you are trying to remove.

    Putting in overheads on Yachts I would only use a few 2" patches of the heavy Interlocking Velcro because otherwise you would break the 1/2" birch panels trying to get them down ...One closet panel with 4 patches just wouldn't come down one time. I'm 240 pounds and iwas literally swinging on that panel bouncing with all my strength..it broke before it released..lol.

    This Fuzzy "industrial" strength Velcro can be bought at Lowes or Home Depot or a lot of other places. I usually get the largest quantity I can because it's so much cheaper that way.
    20 Logs on the fire for WCG: i7 920@2.8 X3220@3.0 X3220@2.4 E8400@4.05 E6600@2.4

  16. #16
    Xtreme X.I.P.
    Join Date
    Jun 2007
    Location
    Bend, Oregon
    Posts
    5,693
    Does someone have a mop handy? I have a puddle of drool here...

    That case is just awesome, might be time to retire the armor..

  17. #17
    Registered User
    Join Date
    Aug 2006
    Posts
    5,855
    Quote Originally Posted by CyberDruid View Post
    Sorry Ian I had no idea you were looking to source it.

    Get the Industrial version. The plastic interlocking Velcro is so incredibly strong that you might break whatever you are trying to remove.

    Putting in overheads on Yachts I would only use a few 2" patches of the heavy Interlocking Velcro because otherwise you would break the 1/2" birch panels trying to get them down ...One closet panel with 4 patches just wouldn't come down one time. I'm 240 pounds and iwas literally swinging on that panel bouncing with all my strength..it broke before it released..lol.

    This Fuzzy "industrial" strength Velcro can be bought at Lowes or Home Depot or a lot of other places. I usually get the largest quantity I can because it's so much cheaper that way.
    A million thanks ! I can think of hundreds of uses for velcro of that strength!

    I didn't know you are in the luxury yacht business. I can't afford a true yacht, but I can appreciate what you do.

  18. #18
    Xtreme Cruncher
    Join Date
    Jun 2006
    Location
    On top of a mountain
    Posts
    4,163
    Here is some more of the work[QUOTE=CyberDruid;3057022]


    I took apart some of the panels I had collected to get 8 controllers.


    Here is the location I settled on for a variety of reasons: it keps the front looking clean; there are pre-exisitng perforations; the knobs are silver and match the silver backplane; the wires from the controllers will have a short run straight to the power below decks.


    I nipped off the lil tabs on the controllers so they would lay flat and enlarged the grid slightly with my step bit.


    **********************************

    Then I turned my attentions to fabricating a triple gauge bay device for QuakeMazer to monitor his rig temps at a glance.


    I like these analog gauges I found they have a nice mellow glow like a tube amp...the LED shifts to amber then orange and finally red as the temps rise.


    I bored three precisely lcated holes in one of the bay covers and modified the gauges by grinding off their "ears" and fusing them togther with acrylic adhesive.


    The unified block of gauges I then adhered to the aluminum plate using "Goop" and incredibly strong all purpose adhesive that will hold up quite well.


    Looks pretty nice...the only thing that would be better is black faces on the gauges but I have yet to find any temp gauges with black faces and these are not built so you can take the protective lenses off so no retouching. I like it anyway. I will be making mor of thes for my own stash ...let's see what QuakeMazer thinks.

    ***********************************

    Then I decided to give this fine rig a classic CyberDruid touch: fan isolators.


    This aluminum plate is one of the only thin pieces of aluminum on the case...why they decided to make the fan mount thin with little support is a mystery. Otherwise the case is very well designed.


    I've been saving these silicon grommets for just such an occasion.


    A quick drilling with the step bit to slightly enlargee the holes so I can insert the grommets.


    I used torx drive buttonhead screw to add some class to the ass end of this fine looking rig.


    The fans are now decoupled...this will without a doubt lower the noise of the them once the rig is in action.


    Locknuts will ensure evrything stays put as it should...


    QuakeMazer gave me the go ahead to keep the FilPort internal so I will next make a tasty polished aluminum standoff to keep the Fill tube from flopping about.

    ****************************************
    20 Logs on the fire for WCG: i7 920@2.8 X3220@3.0 X3220@2.4 E8400@4.05 E6600@2.4

  19. #19
    Xtreme Cruncher
    Join Date
    Jun 2006
    Location
    On top of a mountain
    Posts
    4,163
    Here is some more of the work
    Quote Originally Posted by CyberDruid View Post


    I took apart some of the panels I had collected to get 8 controllers.


    Here is the location I settled on for a variety of reasons: it keps the front looking clean; there are pre-exisitng perforations; the knobs are silver and match the silver backplane; the wires from the controllers will have a short run straight to the power below decks.


    I nipped off the lil tabs on the controllers so they would lay flat and enlarged the grid slightly with my step bit.


    **********************************

    Then I turned my attentions to fabricating a triple gauge bay device for QuakeMazer to monitor his rig temps at a glance.


    I like these analog gauges I found they have a nice mellow glow like a tube amp...the LED shifts to amber then orange and finally red as the temps rise.


    I bored three precisely lcated holes in one of the bay covers and modified the gauges by grinding off their "ears" and fusing them togther with acrylic adhesive.


    The unified block of gauges I then adhered to the aluminum plate using "Goop" and incredibly strong all purpose adhesive that will hold up quite well.


    Looks pretty nice...the only thing that would be better is black faces on the gauges but I have yet to find any temp gauges with black faces and these are not built so you can take the protective lenses off so no retouching. I like it anyway. I will be making mor of thes for my own stash ...let's see what QuakeMazer thinks.

    ***********************************

    Then I decided to give this fine rig a classic CyberDruid touch: fan isolators.


    This aluminum plate is one of the only thin pieces of aluminum on the case...why they decided to make the fan mount thin with little support is a mystery. Otherwise the case is very well designed.


    I've been saving these silicon grommets for just such an occasion.


    A quick drilling with the step bit to slightly enlargee the holes so I can insert the grommets.


    I used torx drive buttonhead screw to add some class to the ass end of this fine looking rig.


    The fans are now decoupled...this will without a doubt lower the noise of the them once the rig is in action.


    Locknuts will ensure evrything stays put as it should...


    QuakeMazer gave me the go ahead to keep the FilPort internal so I will next make a tasty polished aluminum standoff to keep the Fill tube from flopping about.

    ****************************************
    20 Logs on the fire for WCG: i7 920@2.8 X3220@3.0 X3220@2.4 E8400@4.05 E6600@2.4

  20. #20
    Xtreme Cruncher
    Join Date
    Jun 2006
    Location
    On top of a mountain
    Posts
    4,163
    Some more
    Quote Originally Posted by CyberDruid View Post


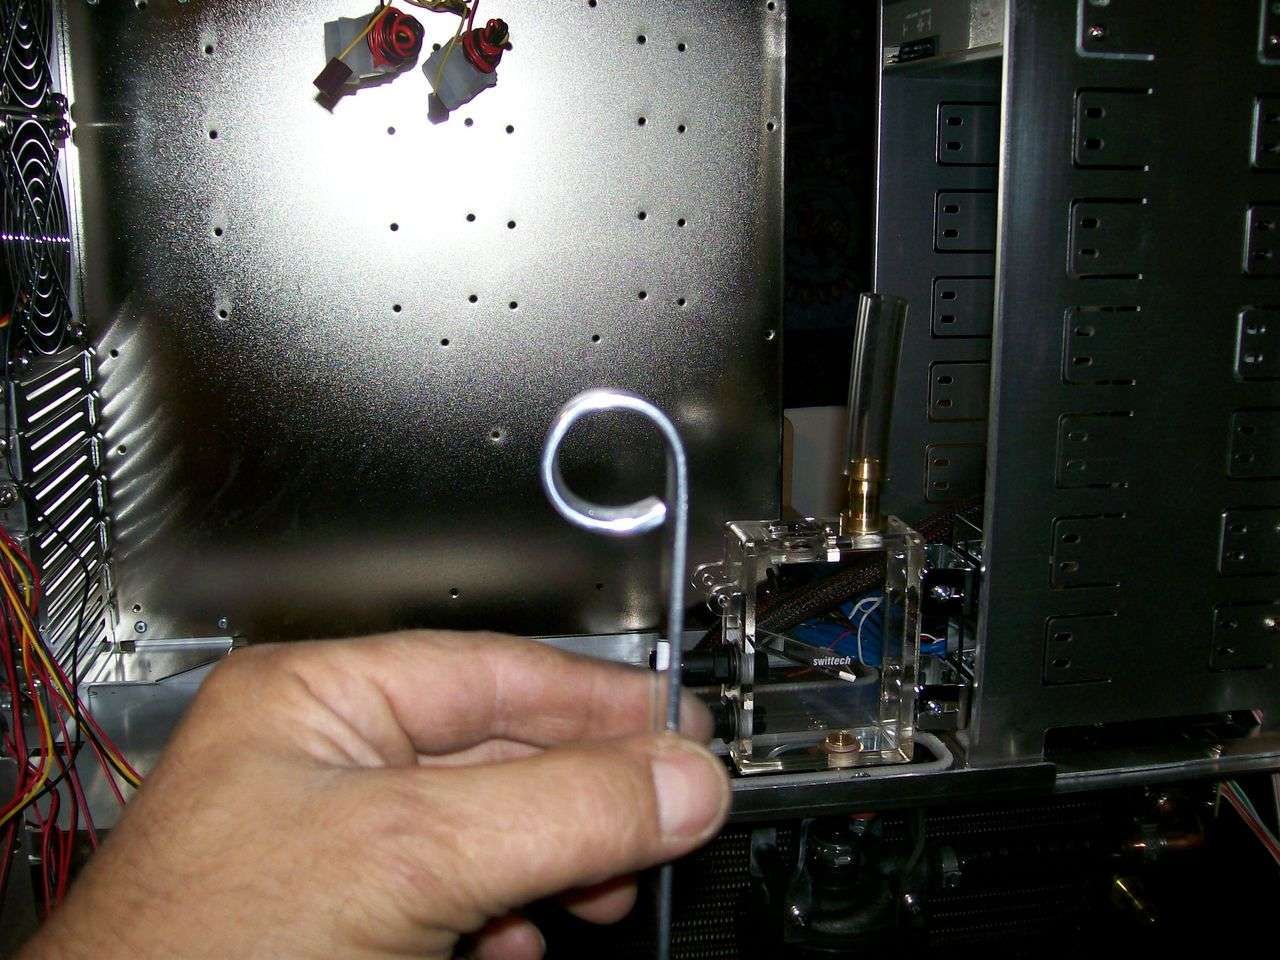
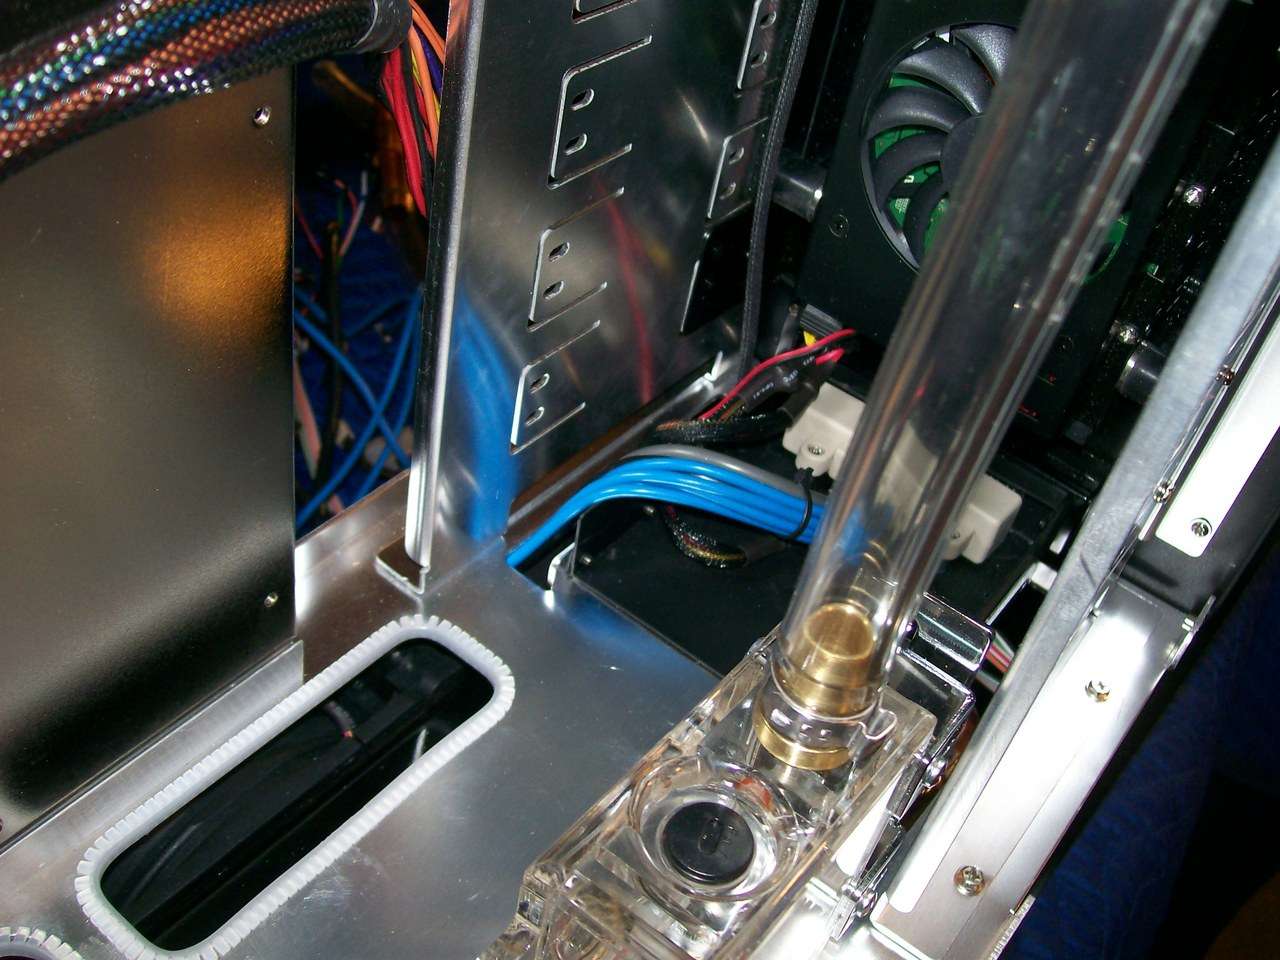
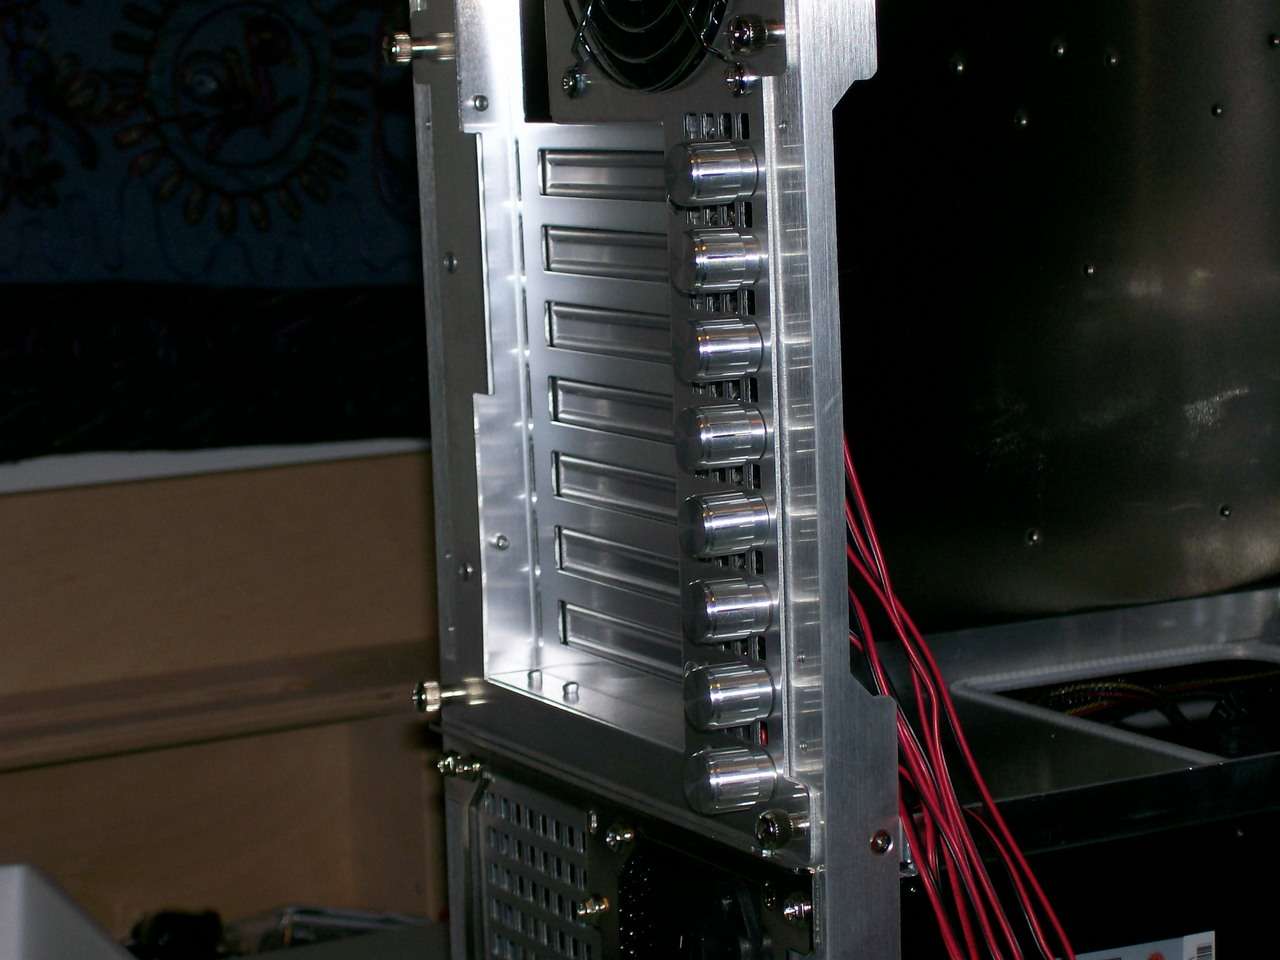
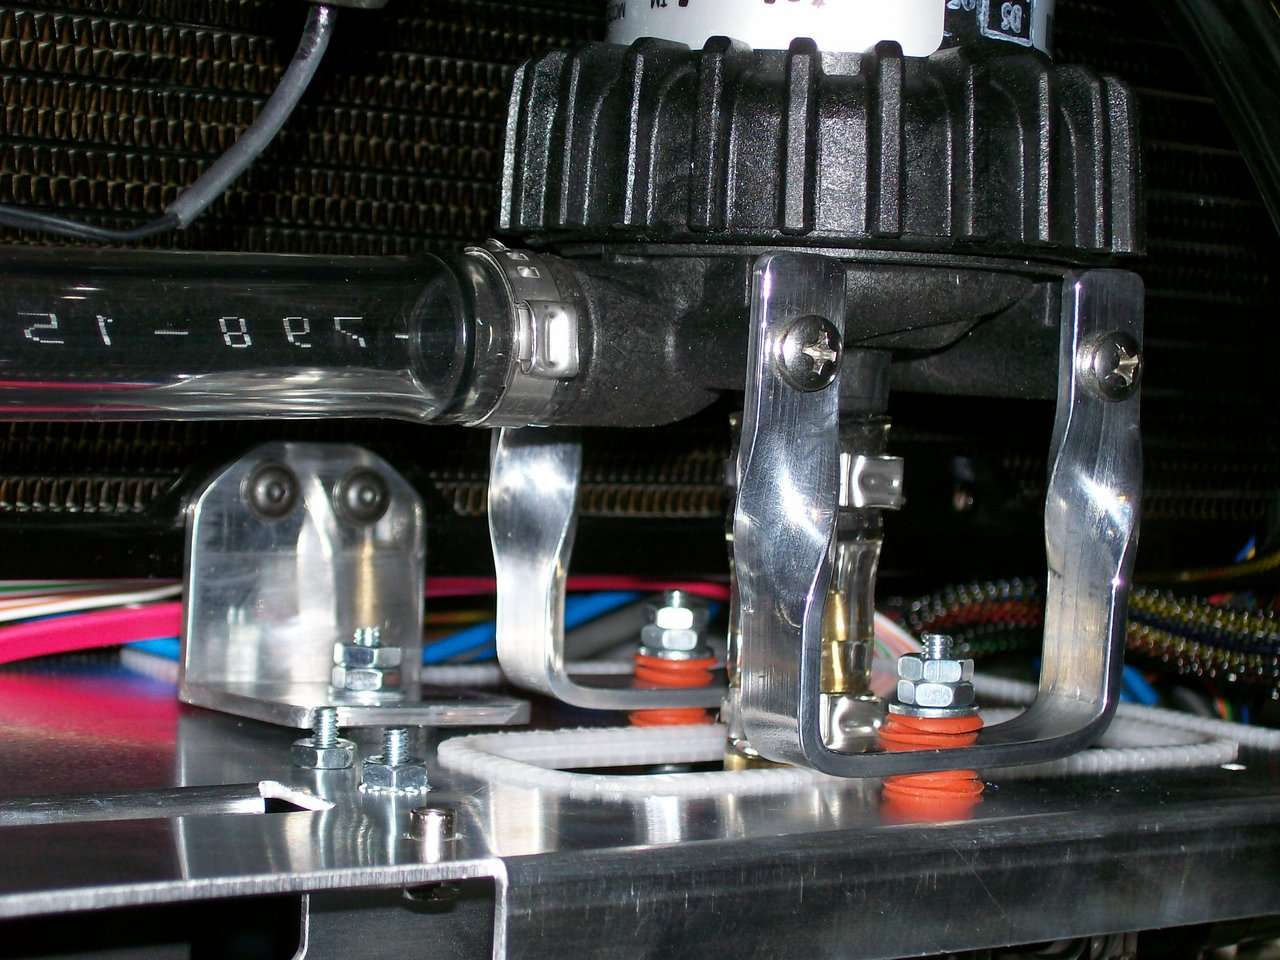
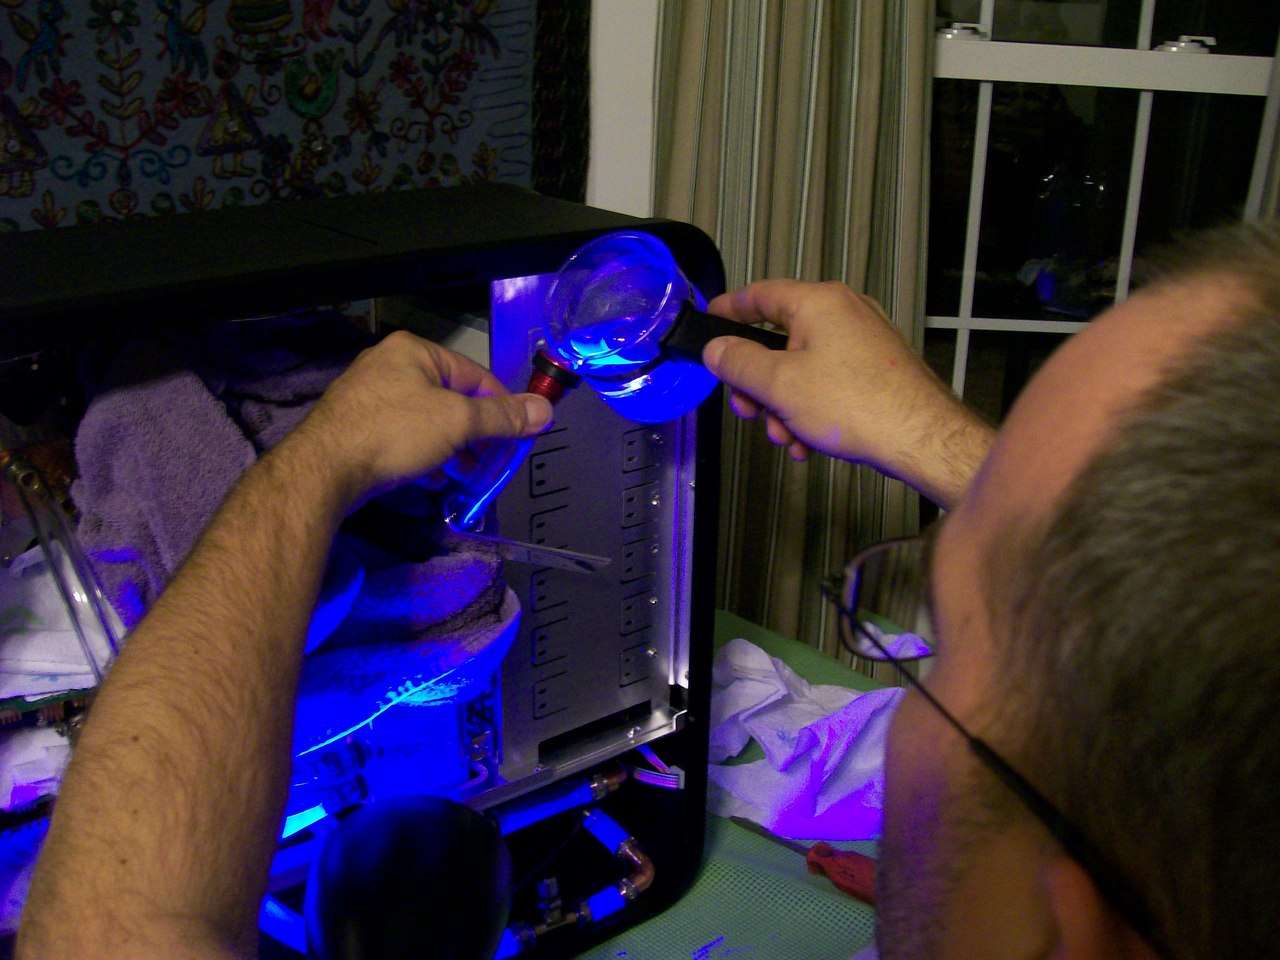
    I made a nice alumninum bracket to support the fill tube.


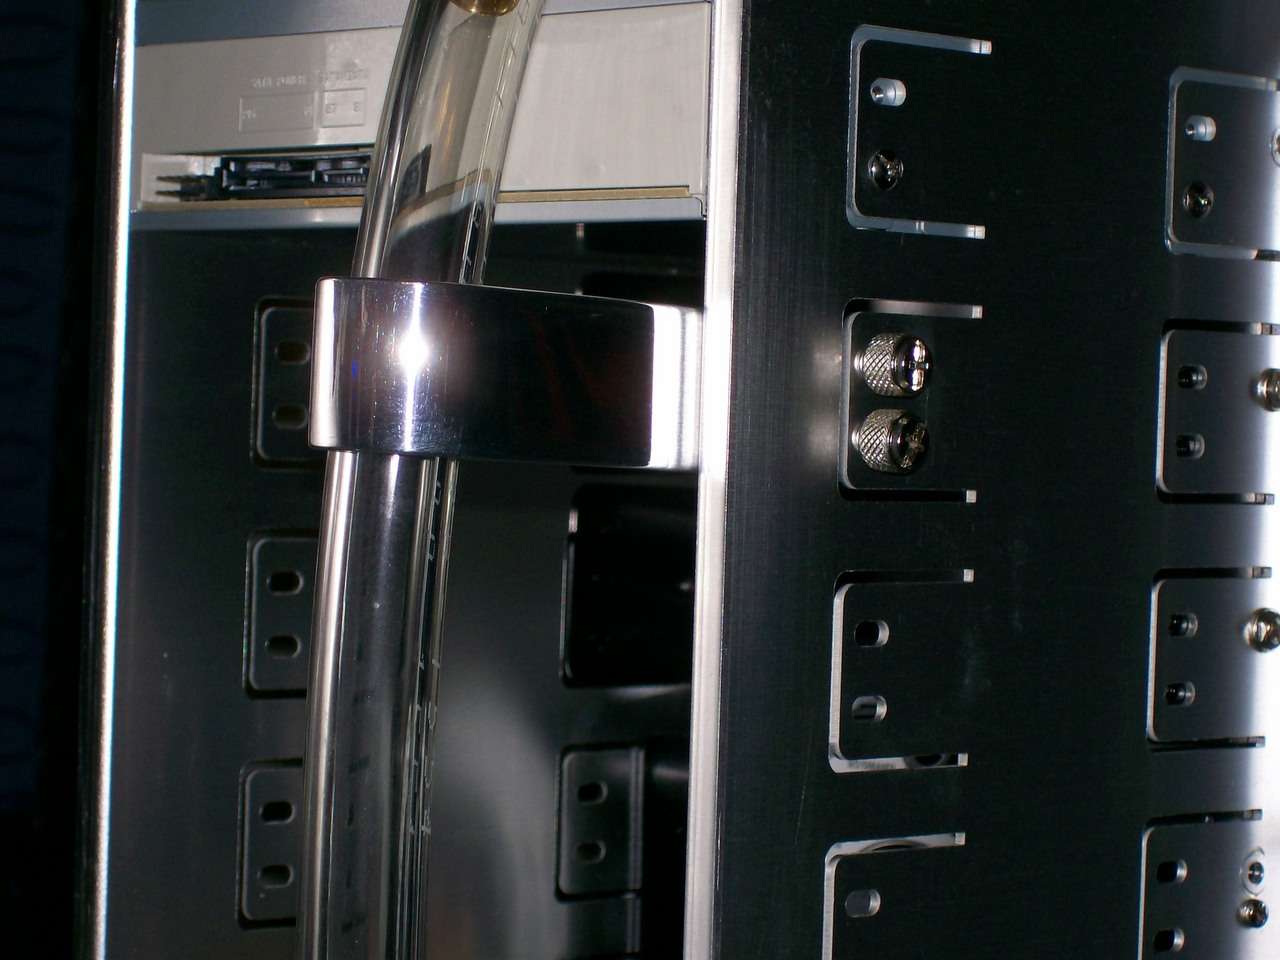
    It took quite a while to gt a mirror finish from the piece but in the end I was pleased


    I drilled and tapped it for a pair of thumbscrews so it would be easy to remove in order to fill the res.


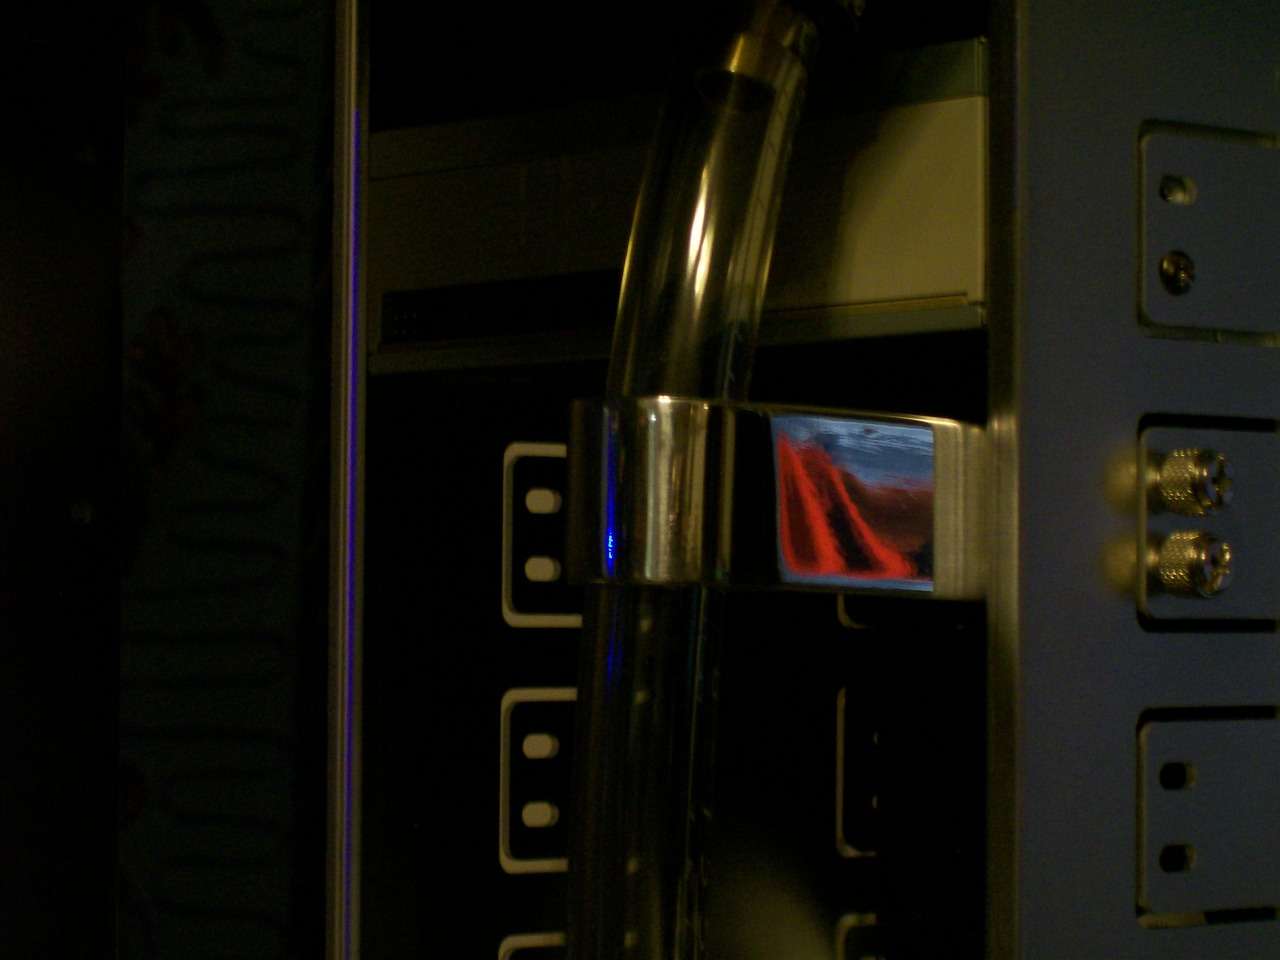
    That's my 22" monitor captured on the support


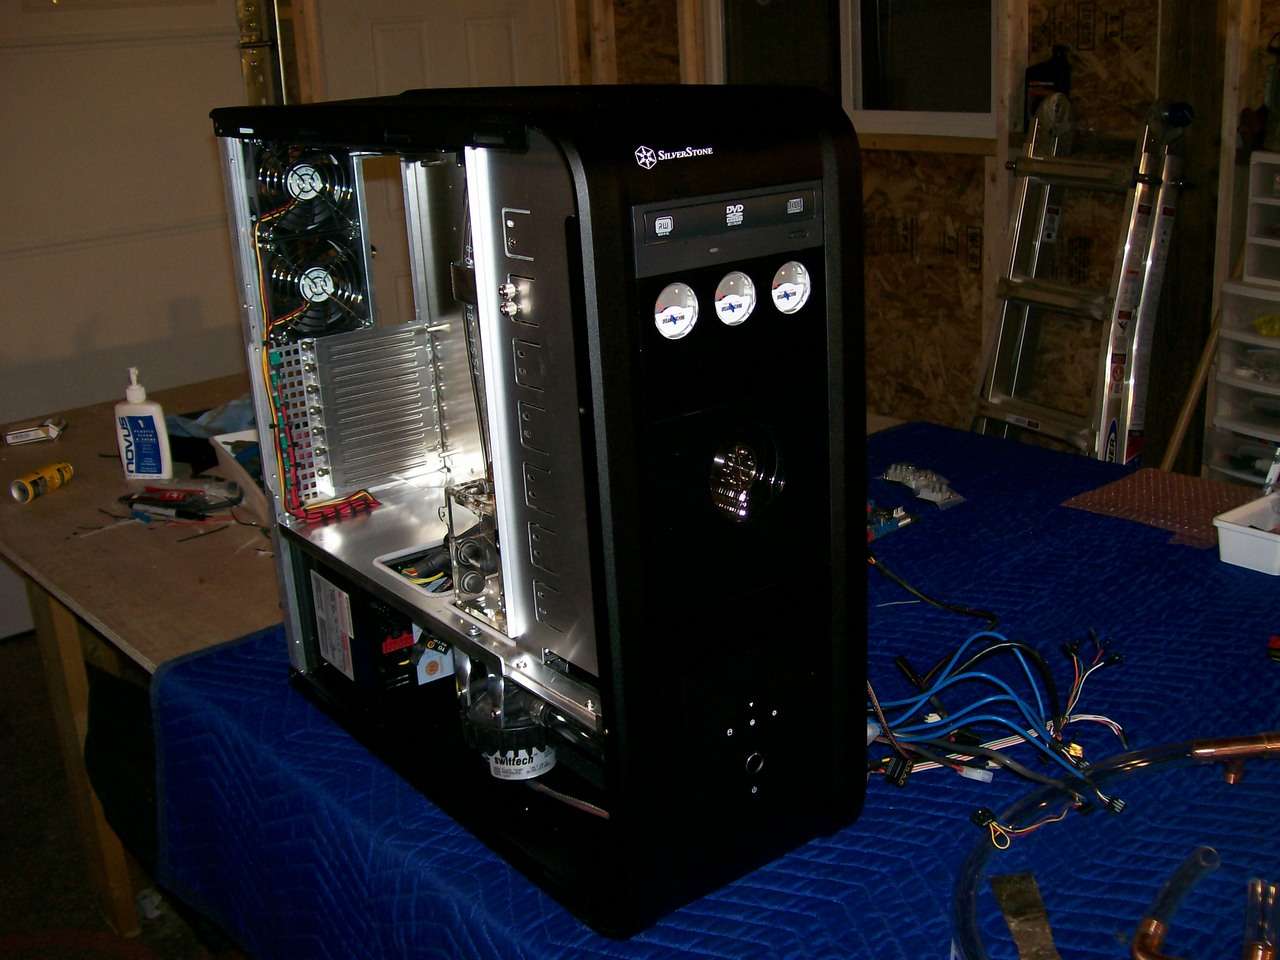
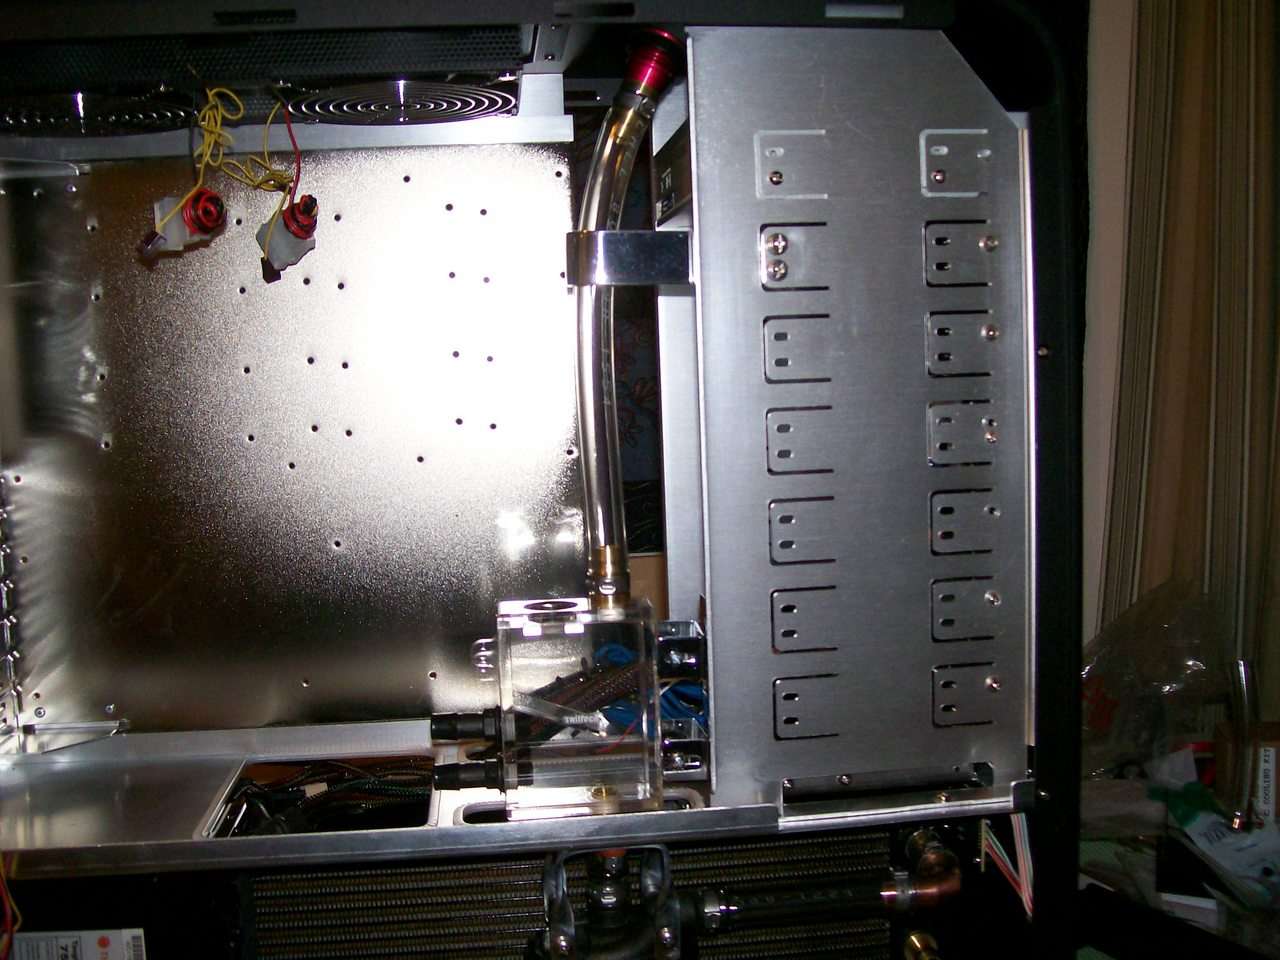
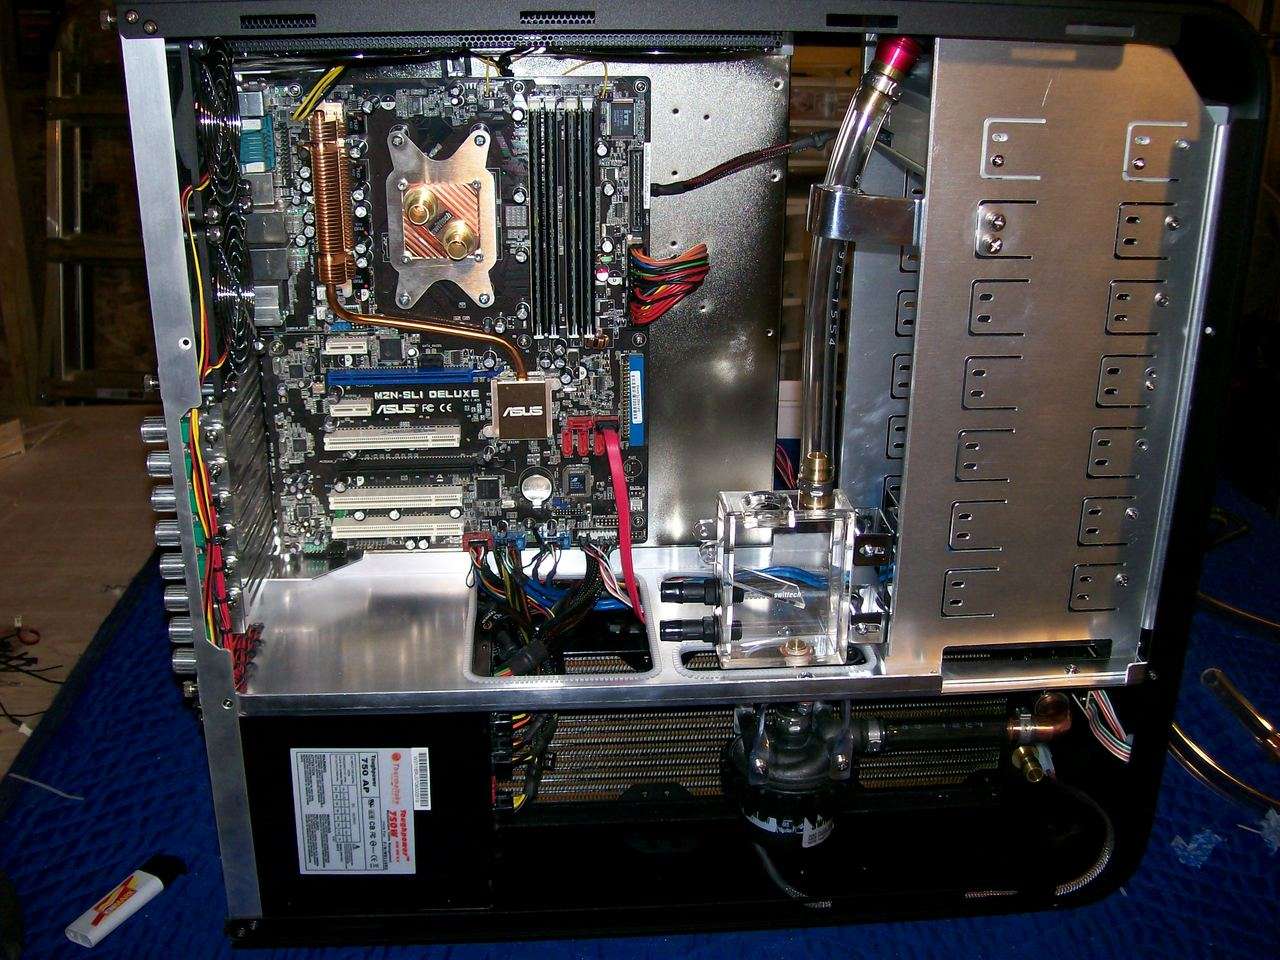
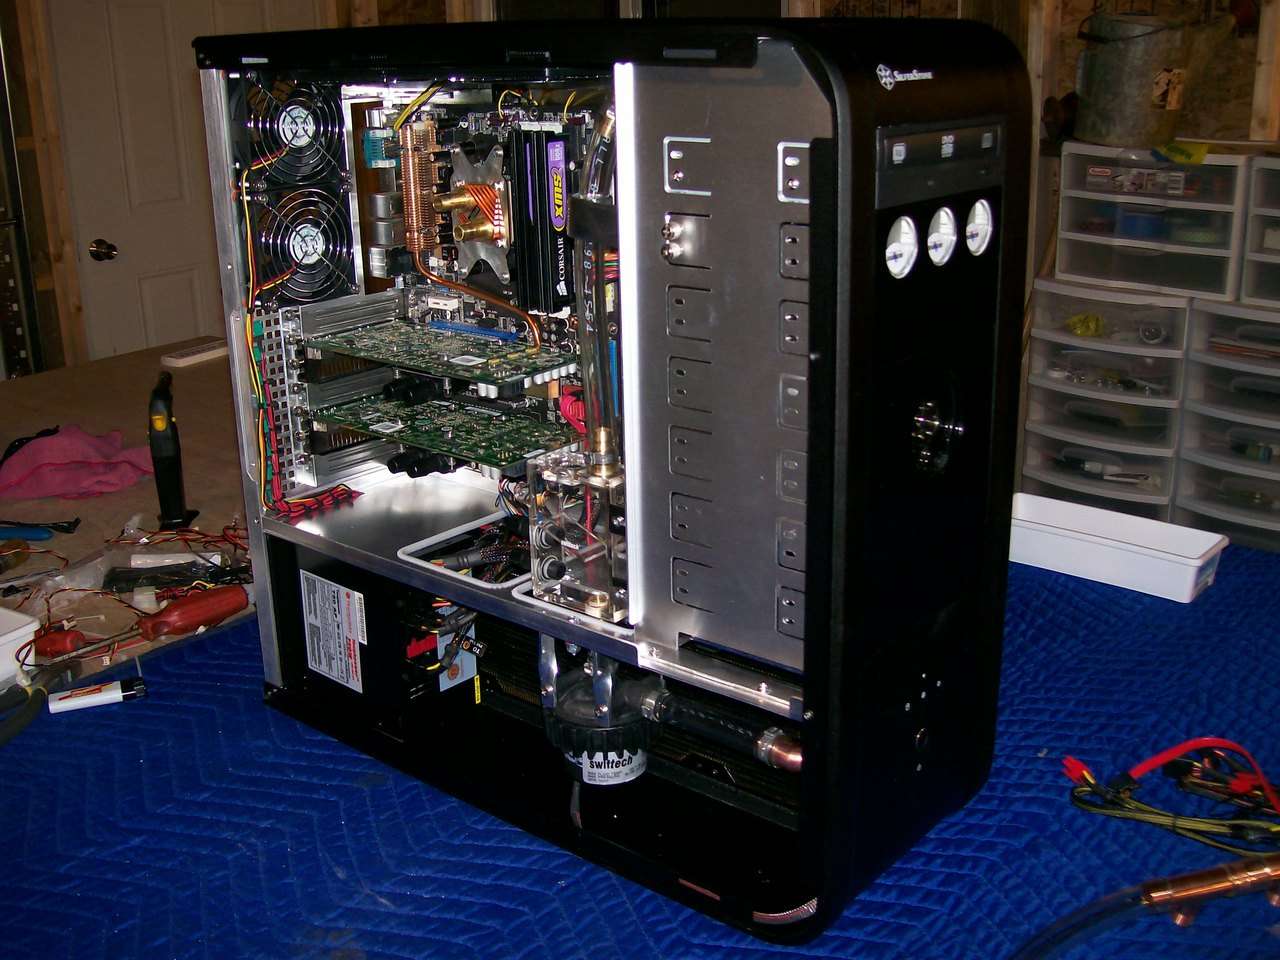
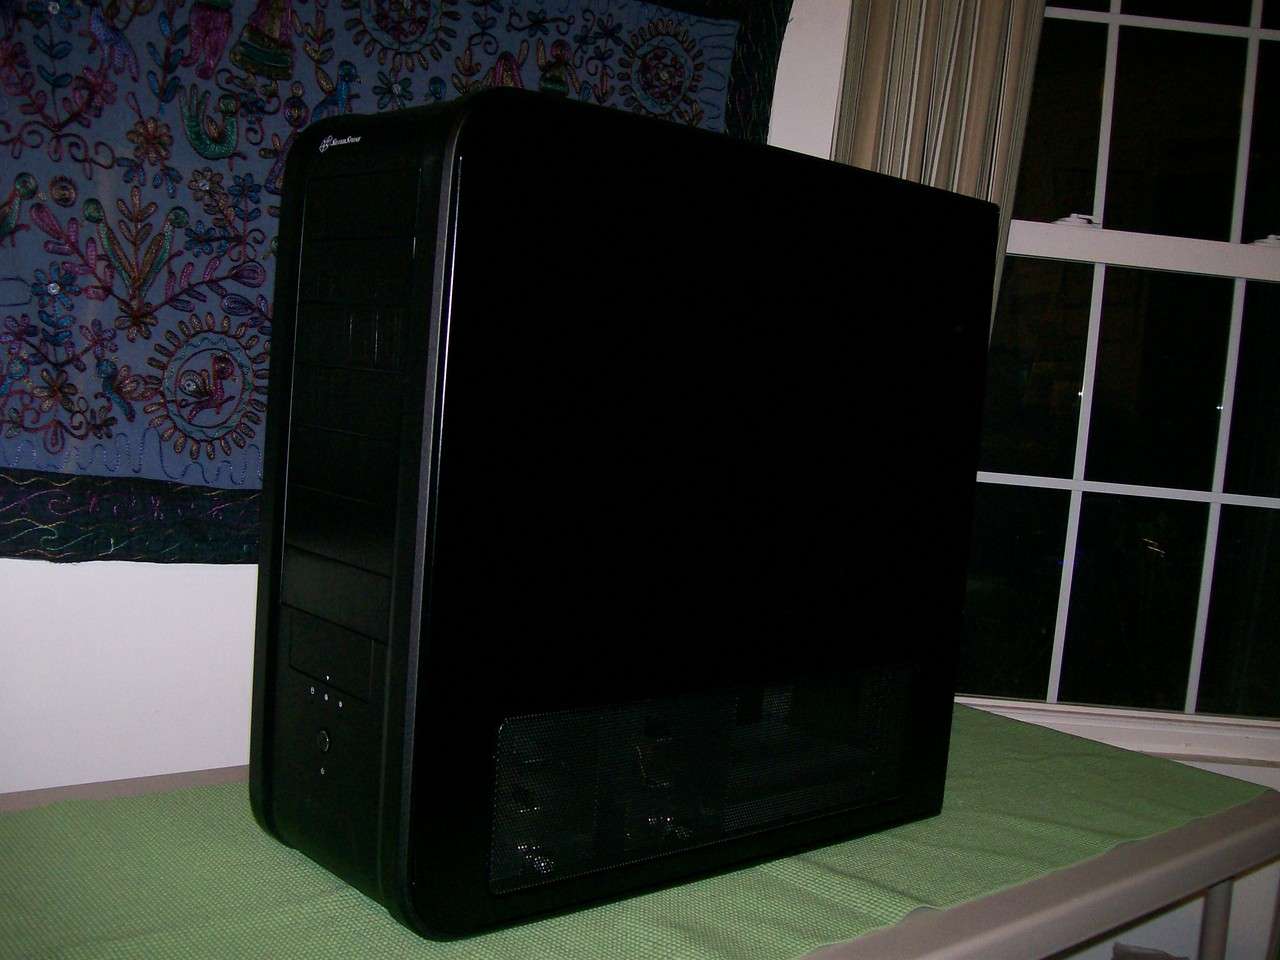
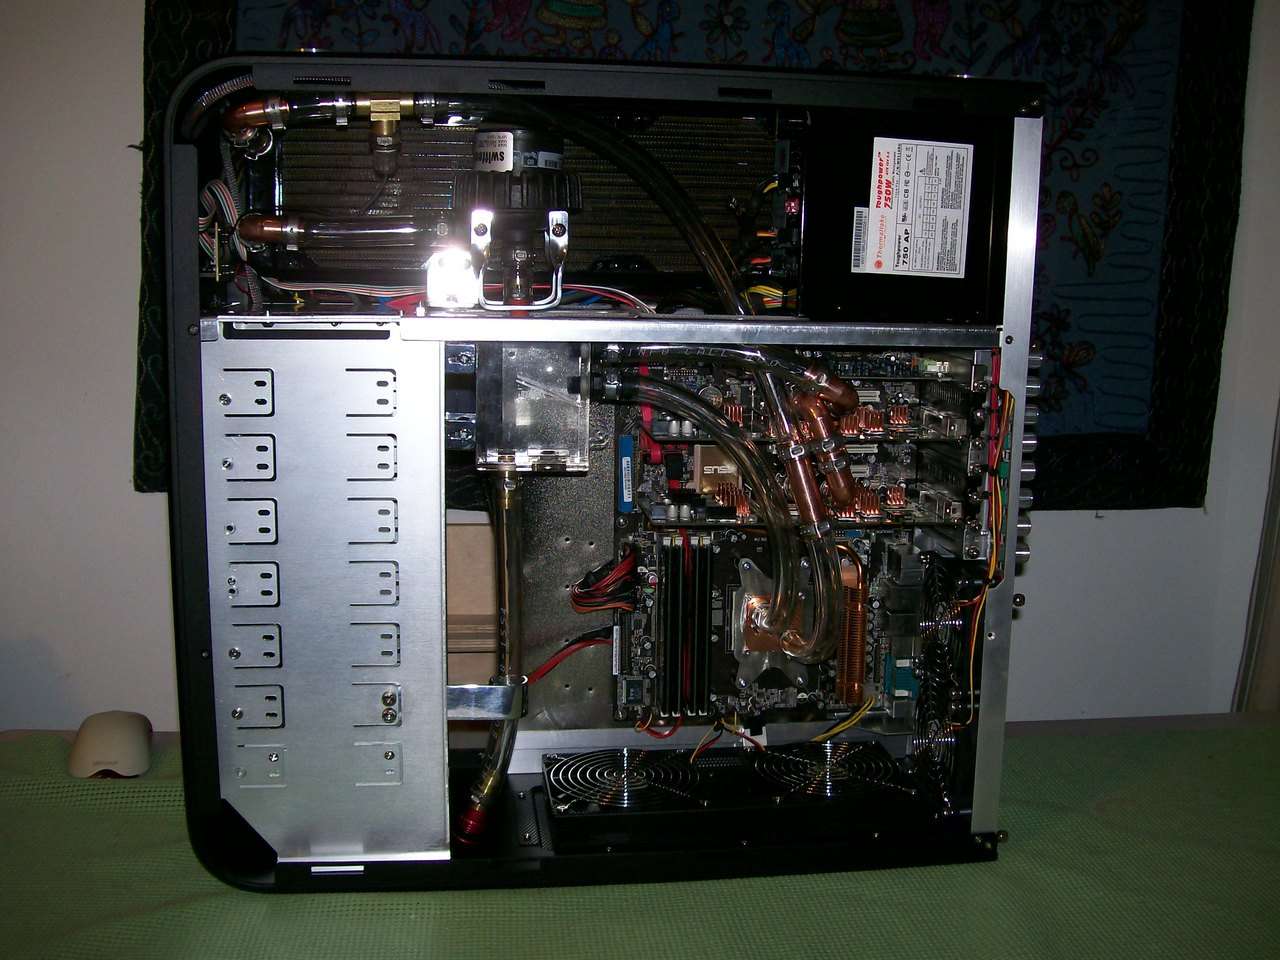
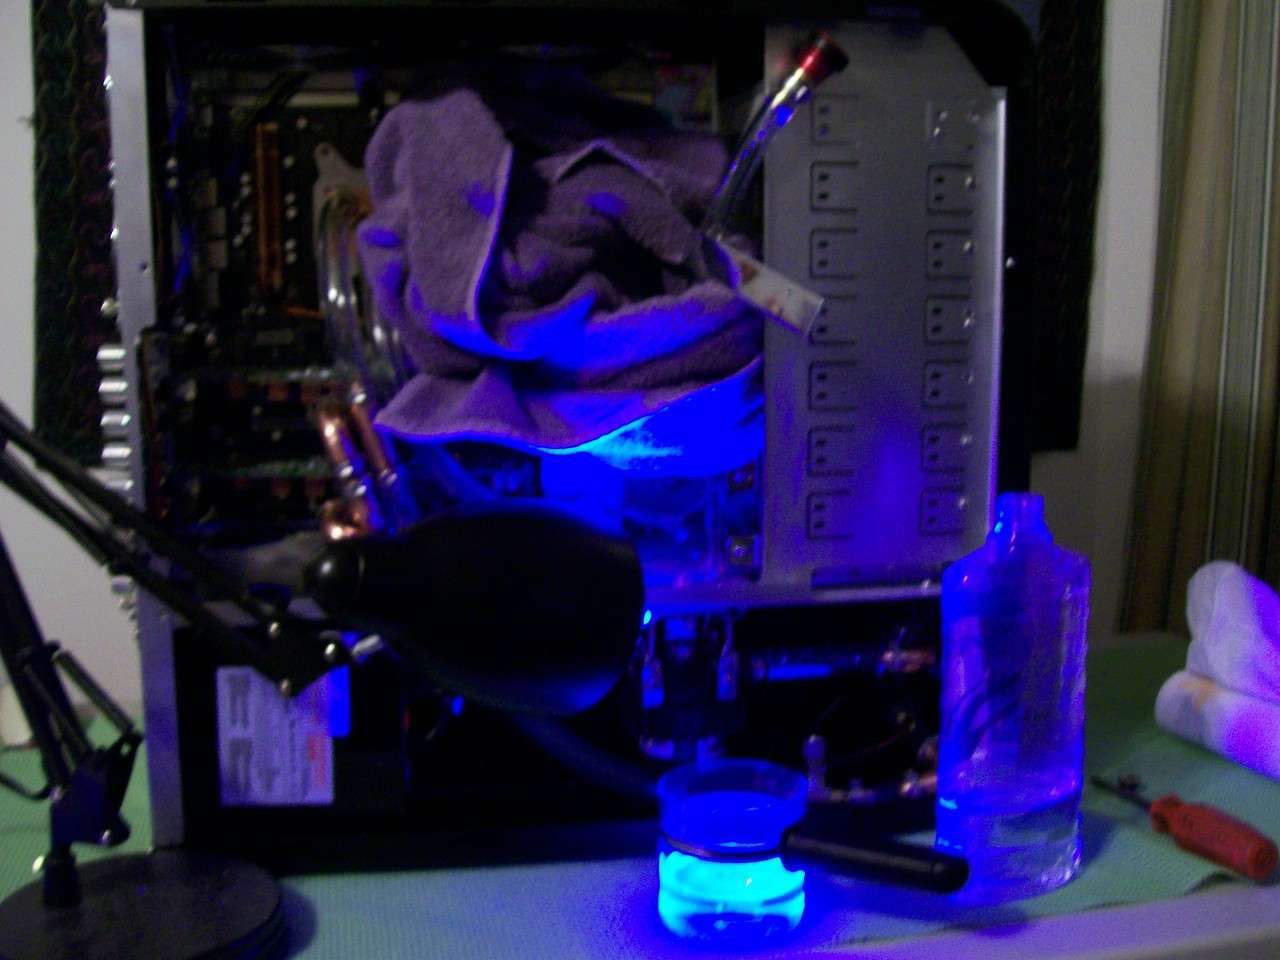
    Here we are back in the Lair putting this beast to rights.


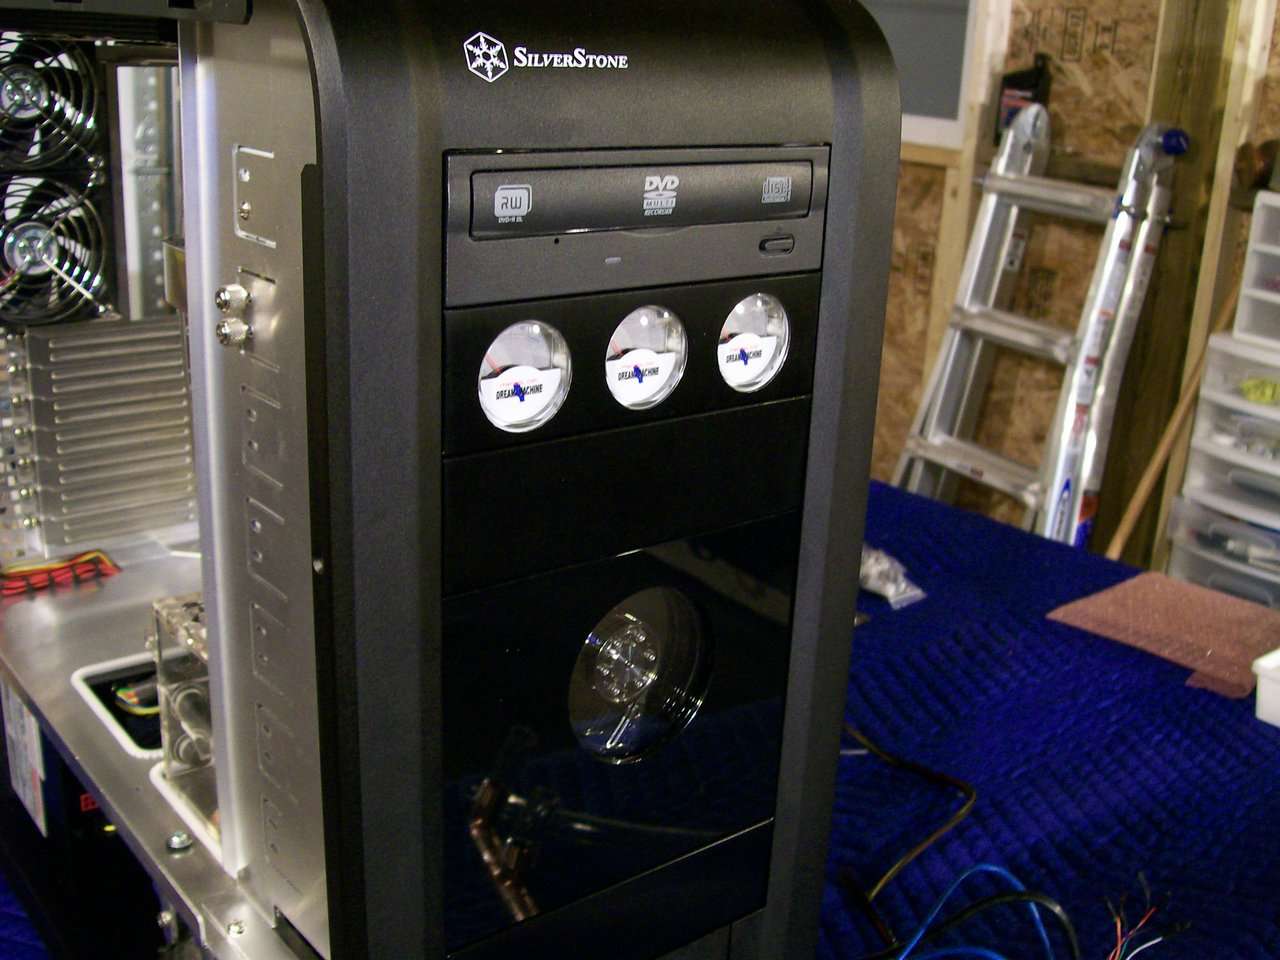
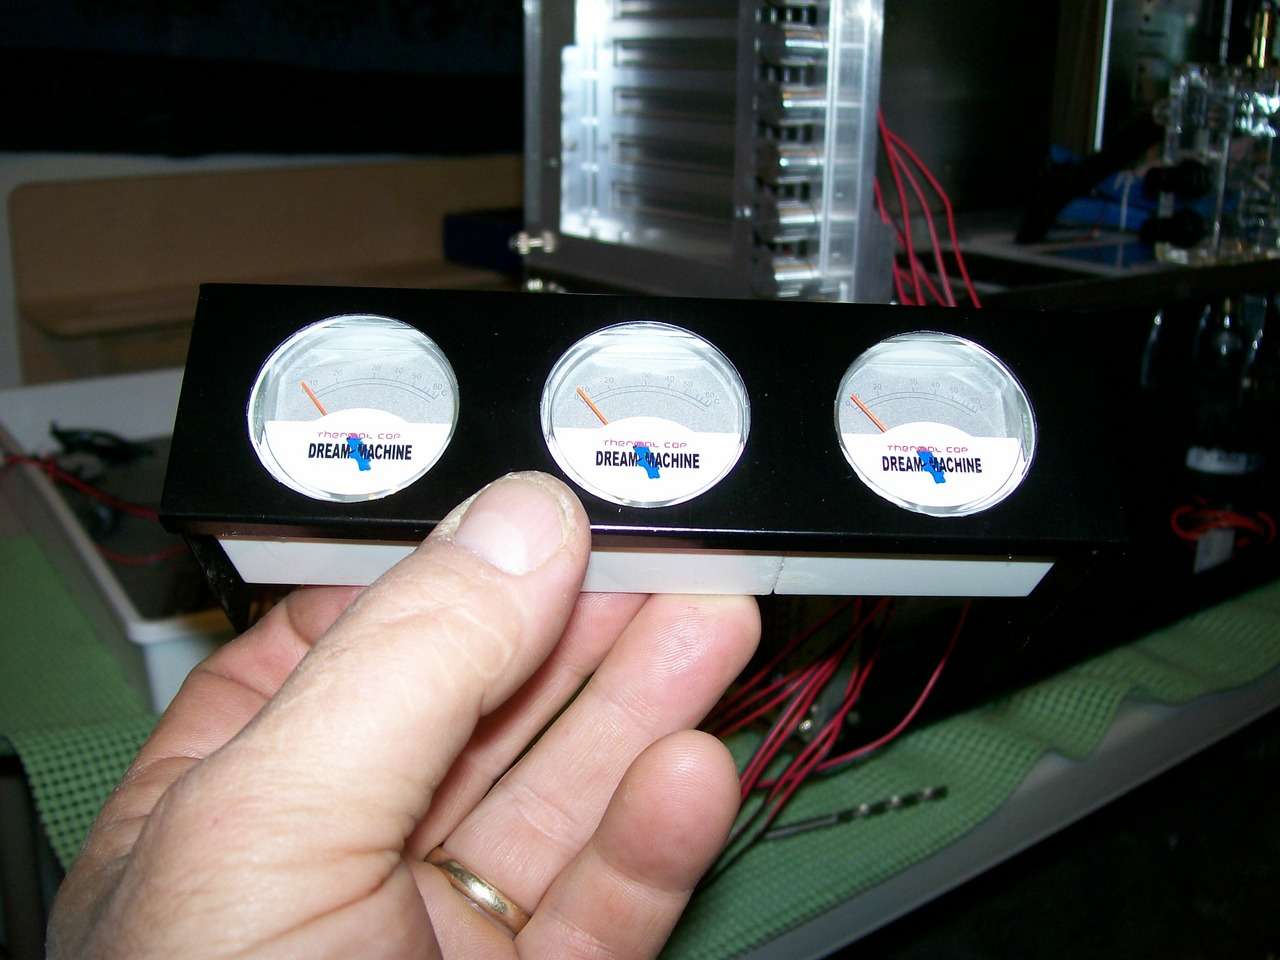
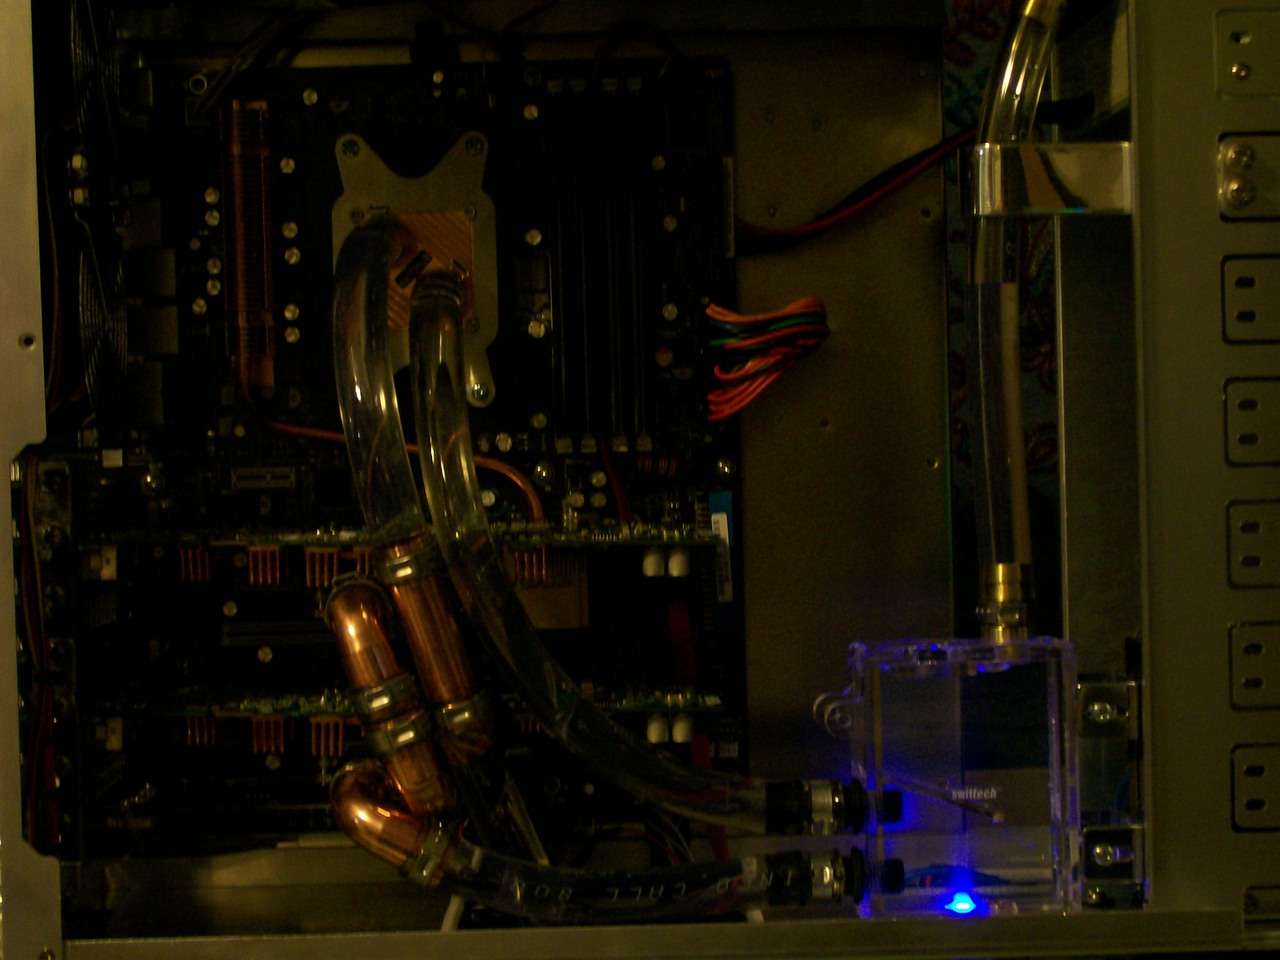
    I love how the gauges look with the rest of the rig. I wish Silverstone made a DVD dress plate like Lian Li but the finish of the case matchs the LiteOn pretty well.


    I spent a few more minutes dressing the edges of the black part of the Raptor X display and polishing them before gluing it to the clear part of the window.


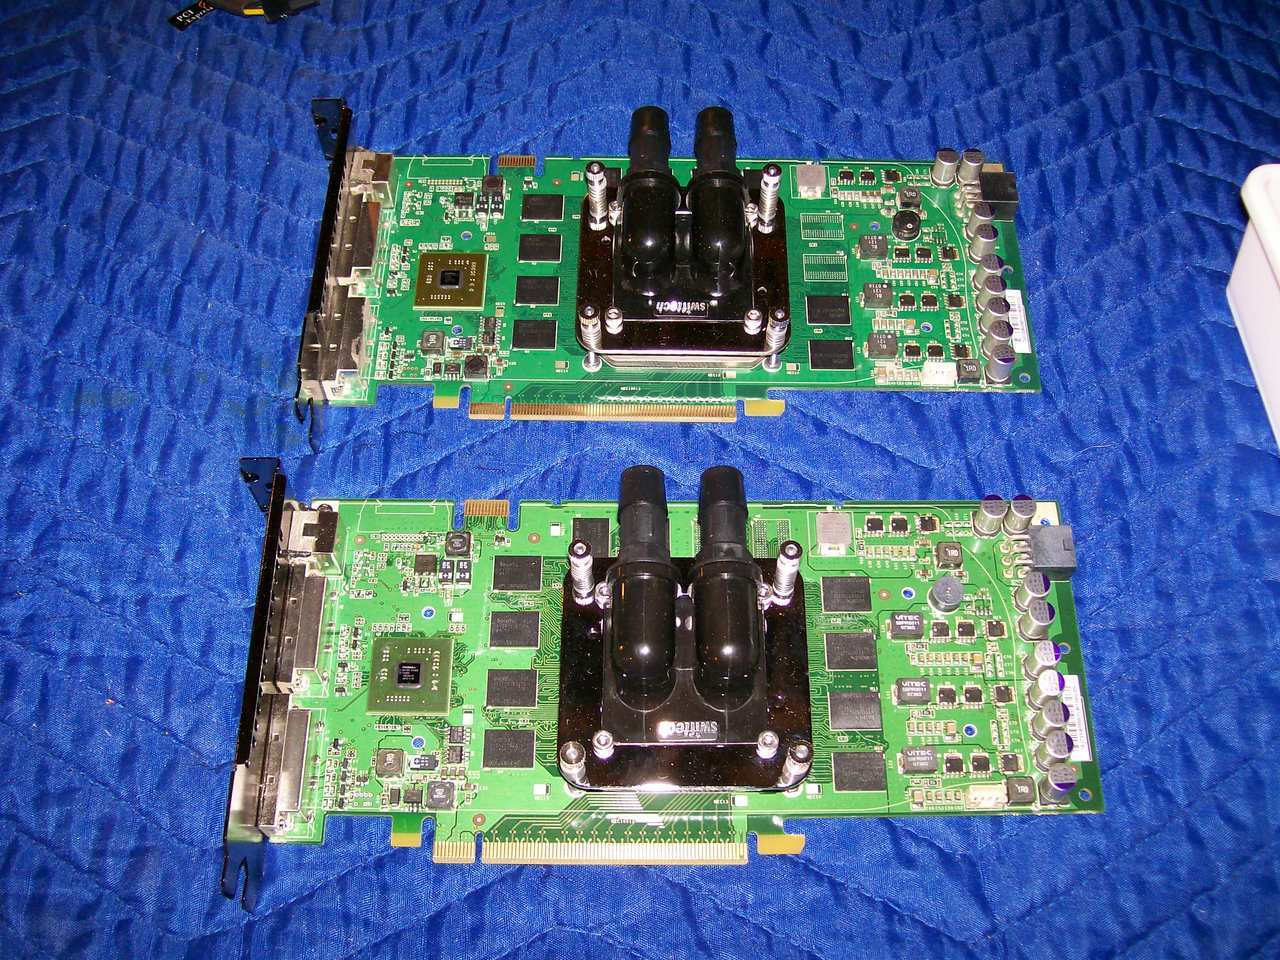
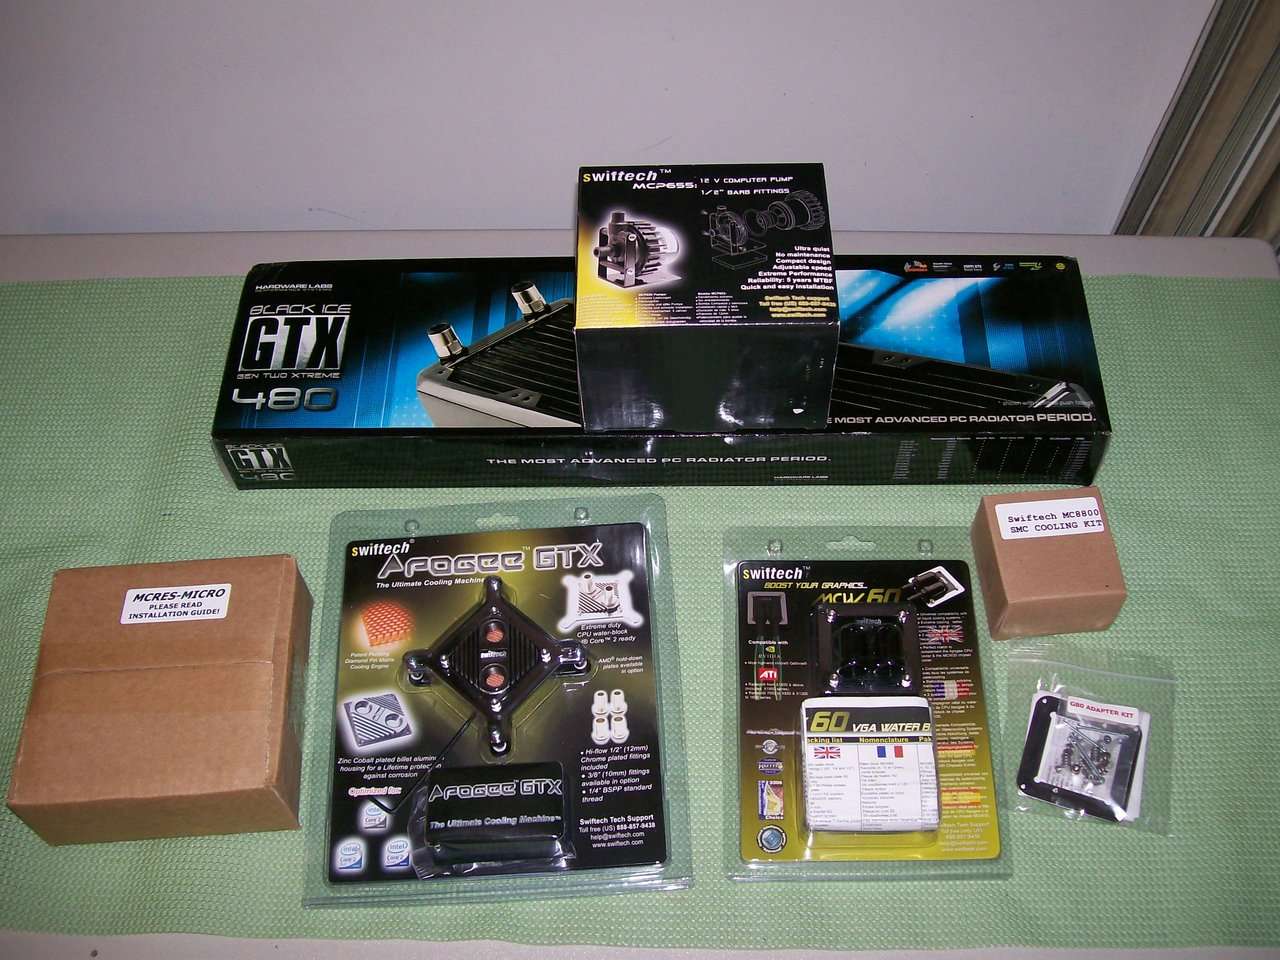
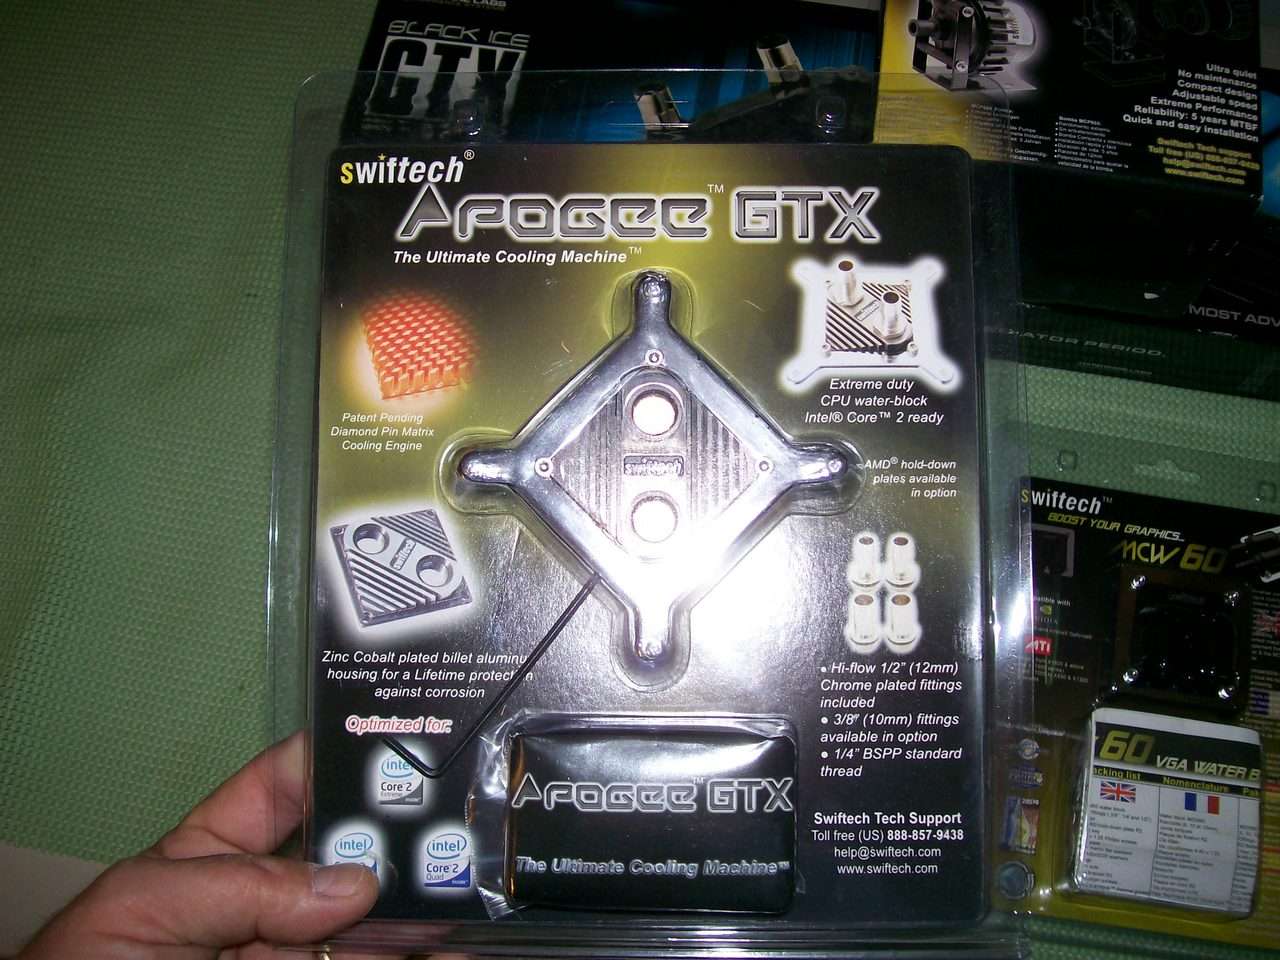
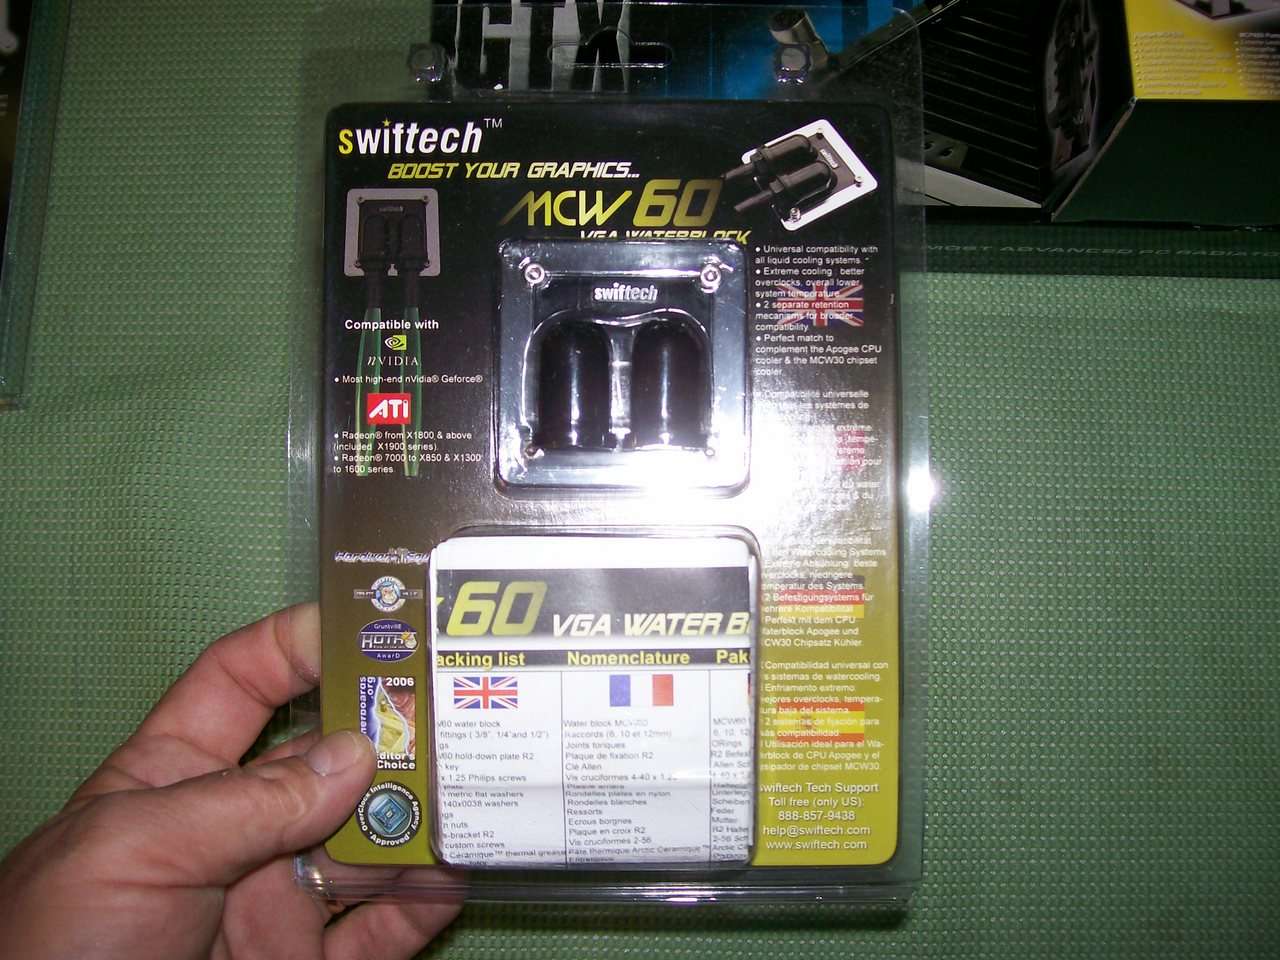
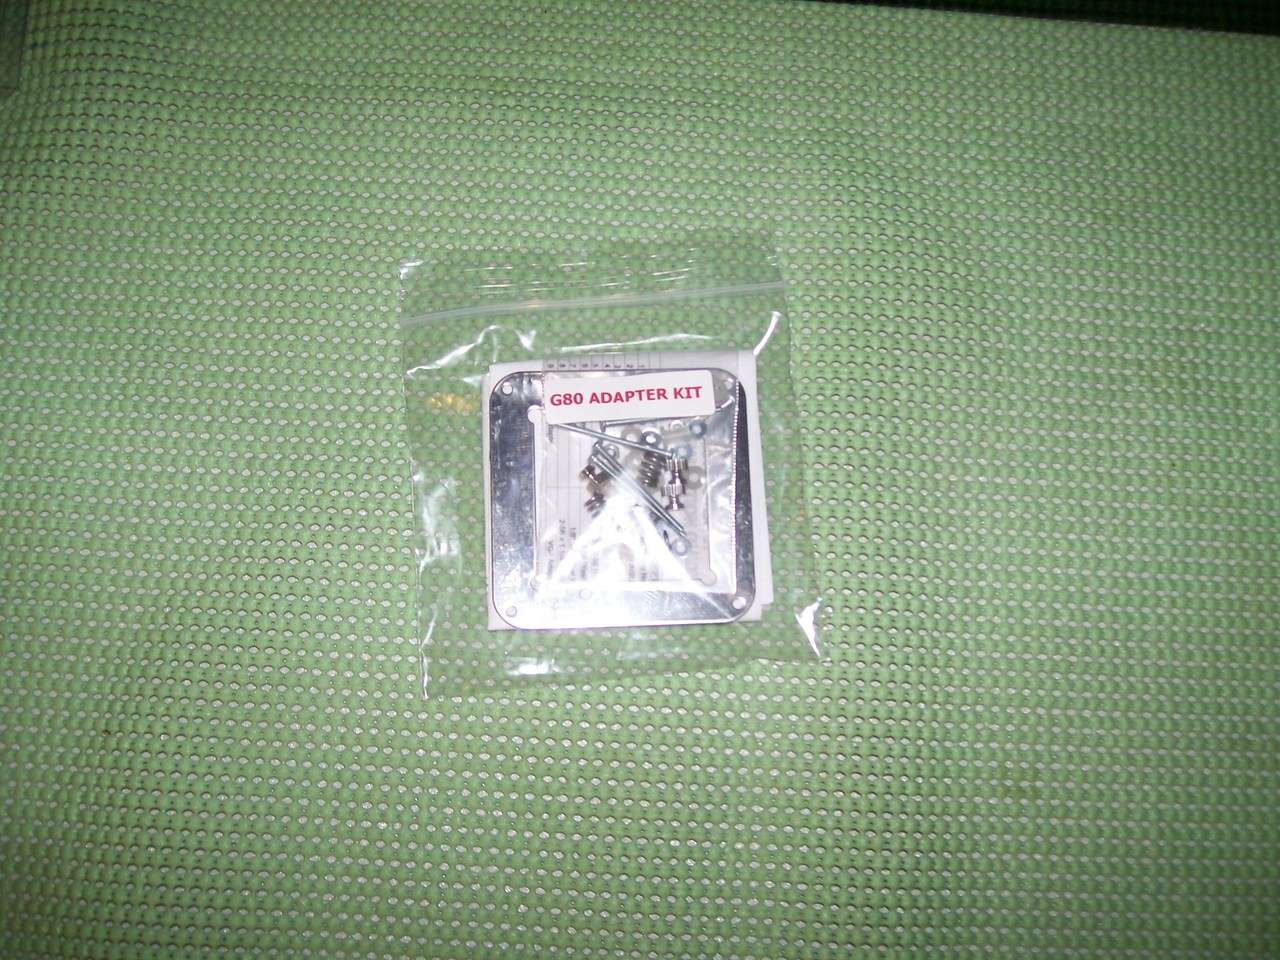
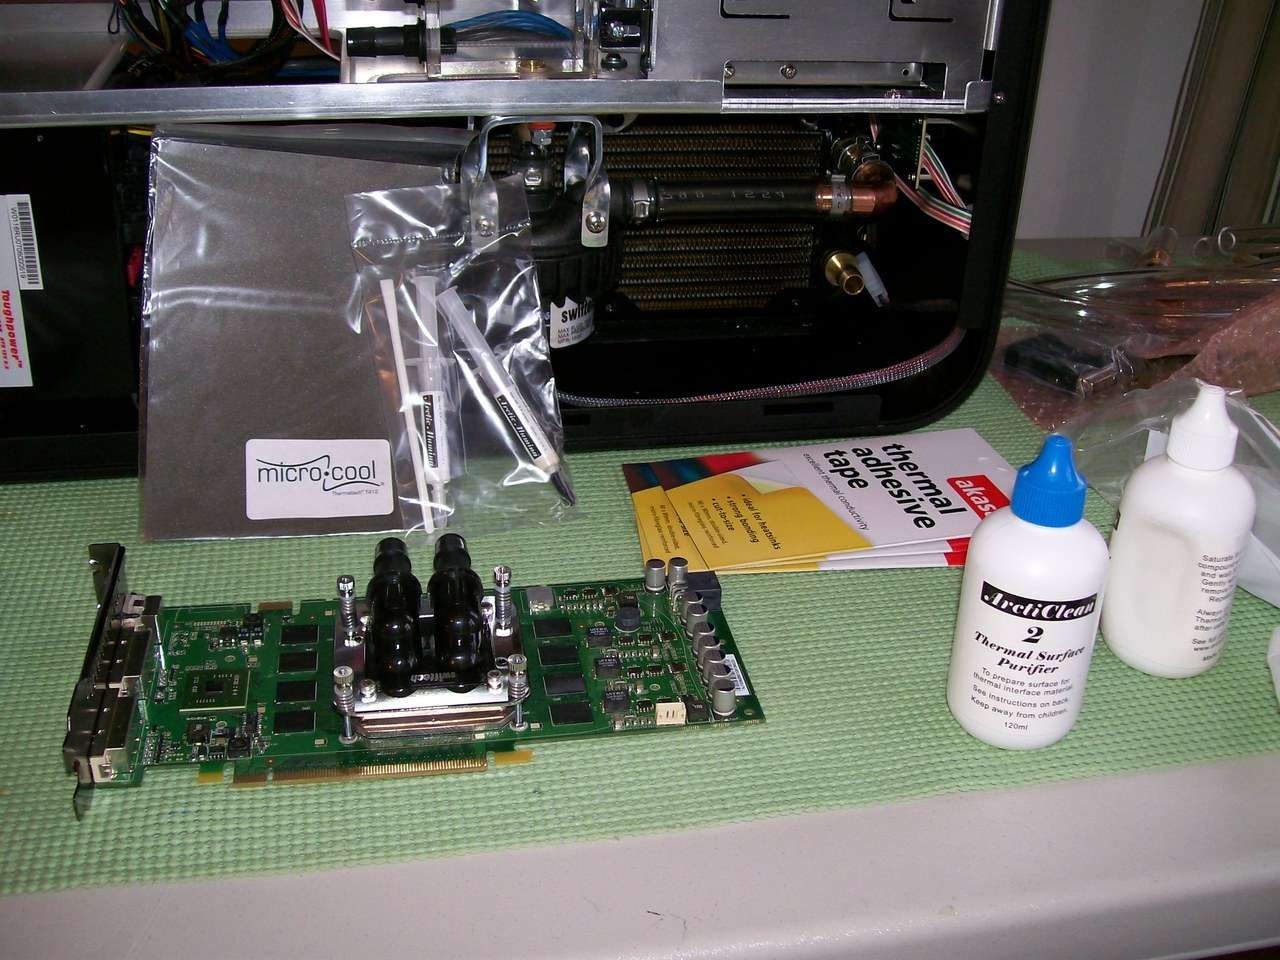
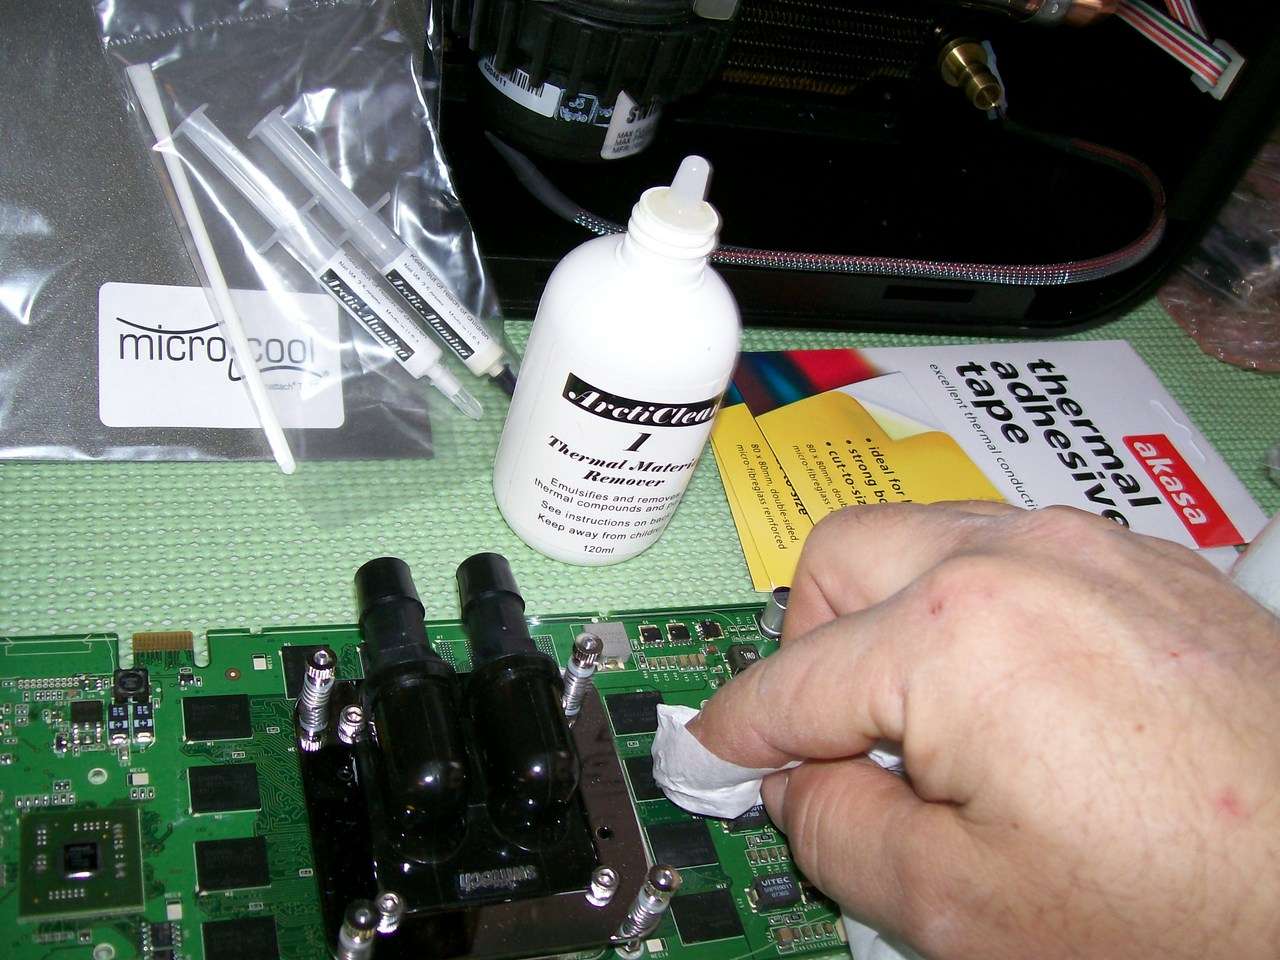
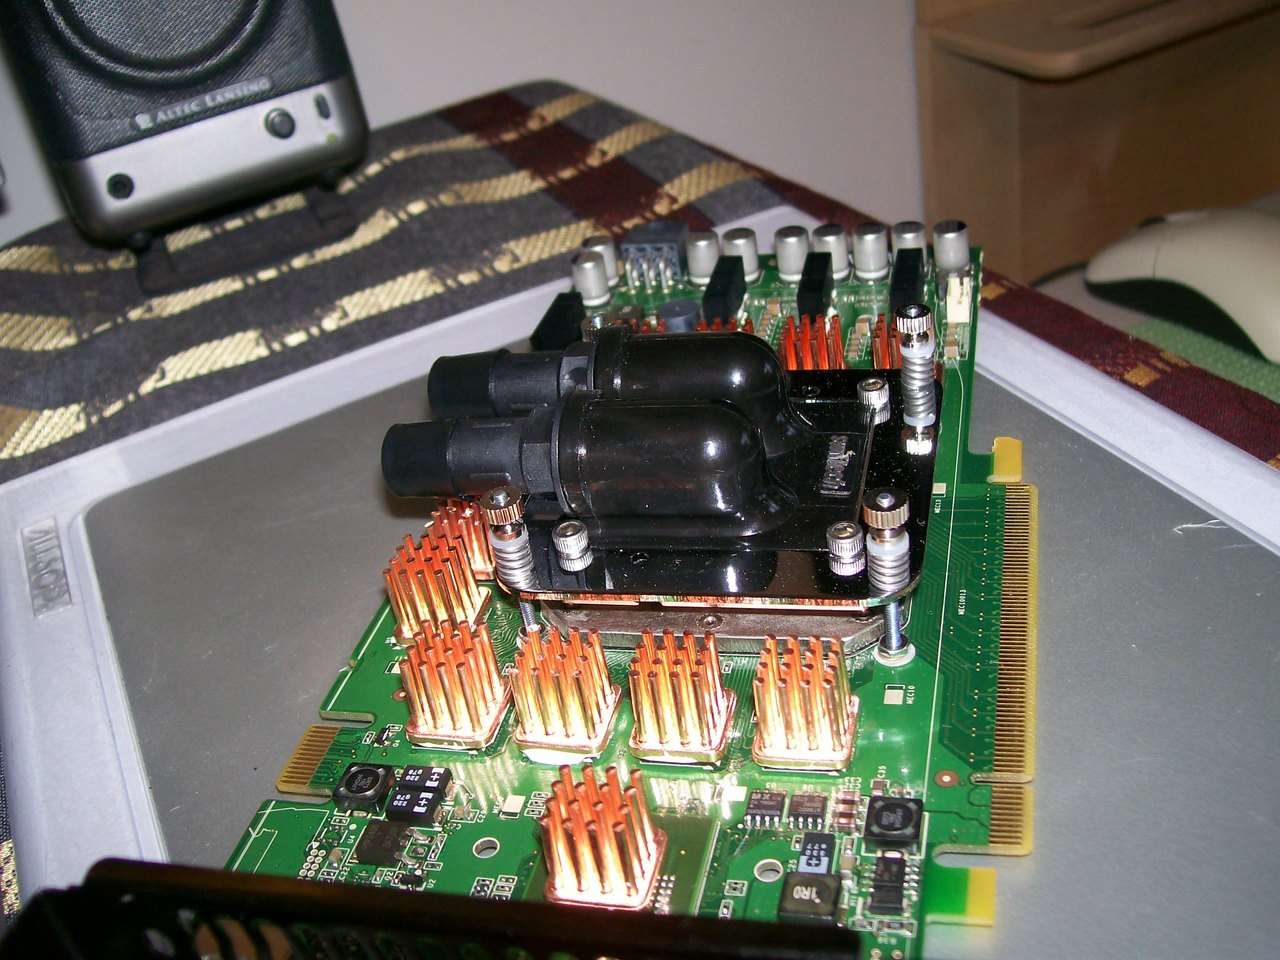
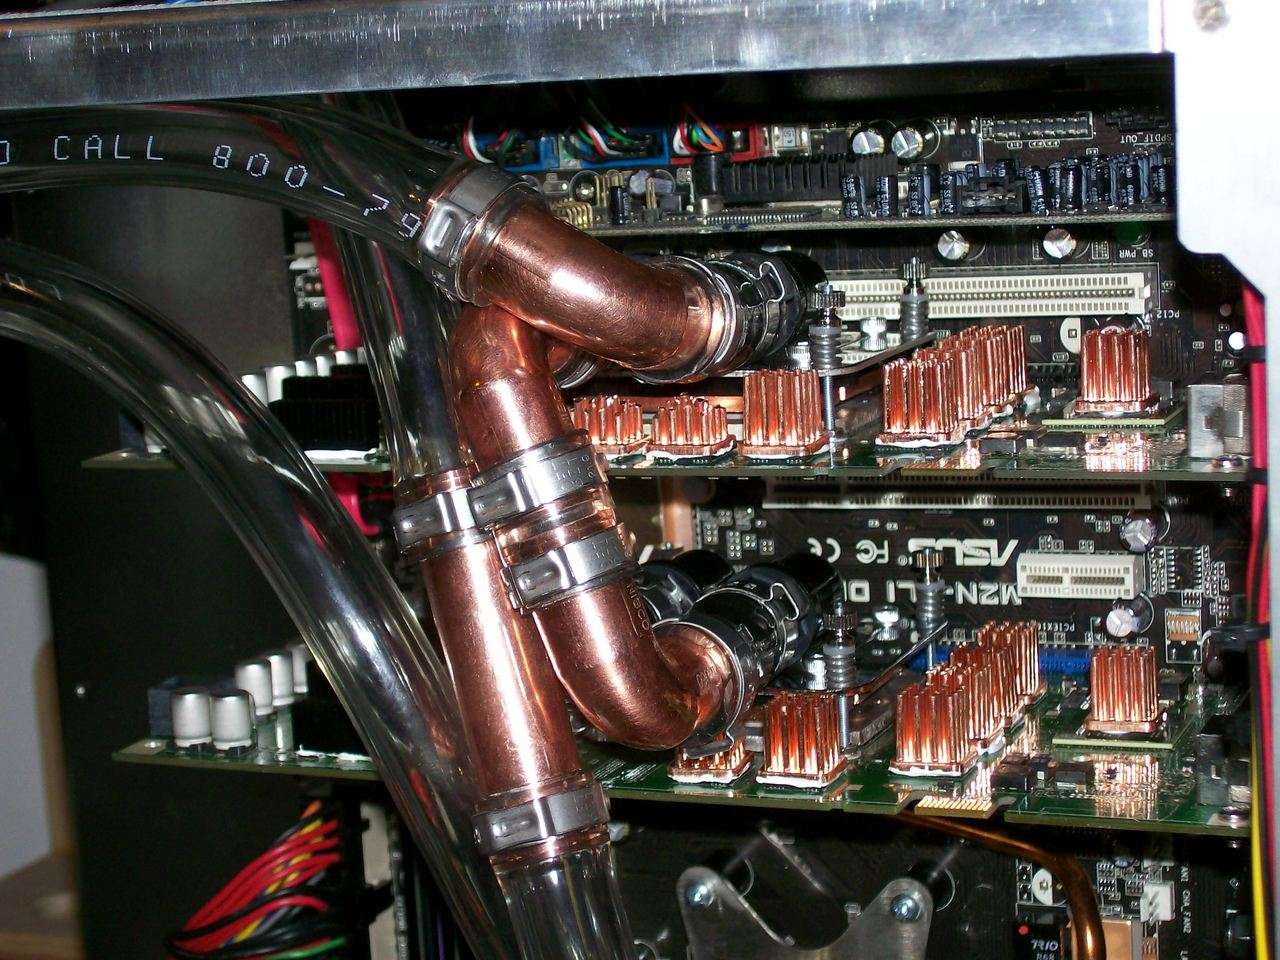
    I then took the heatsinks off the BFG 8800 GTS 0C and cleaned the factory TIM off with denatured and mountd the waterblocks. The blocks have to come apart and be fitted with the G80 adapter kits.

    Do you notice anything odd about these two 8800 GTS OC cards???


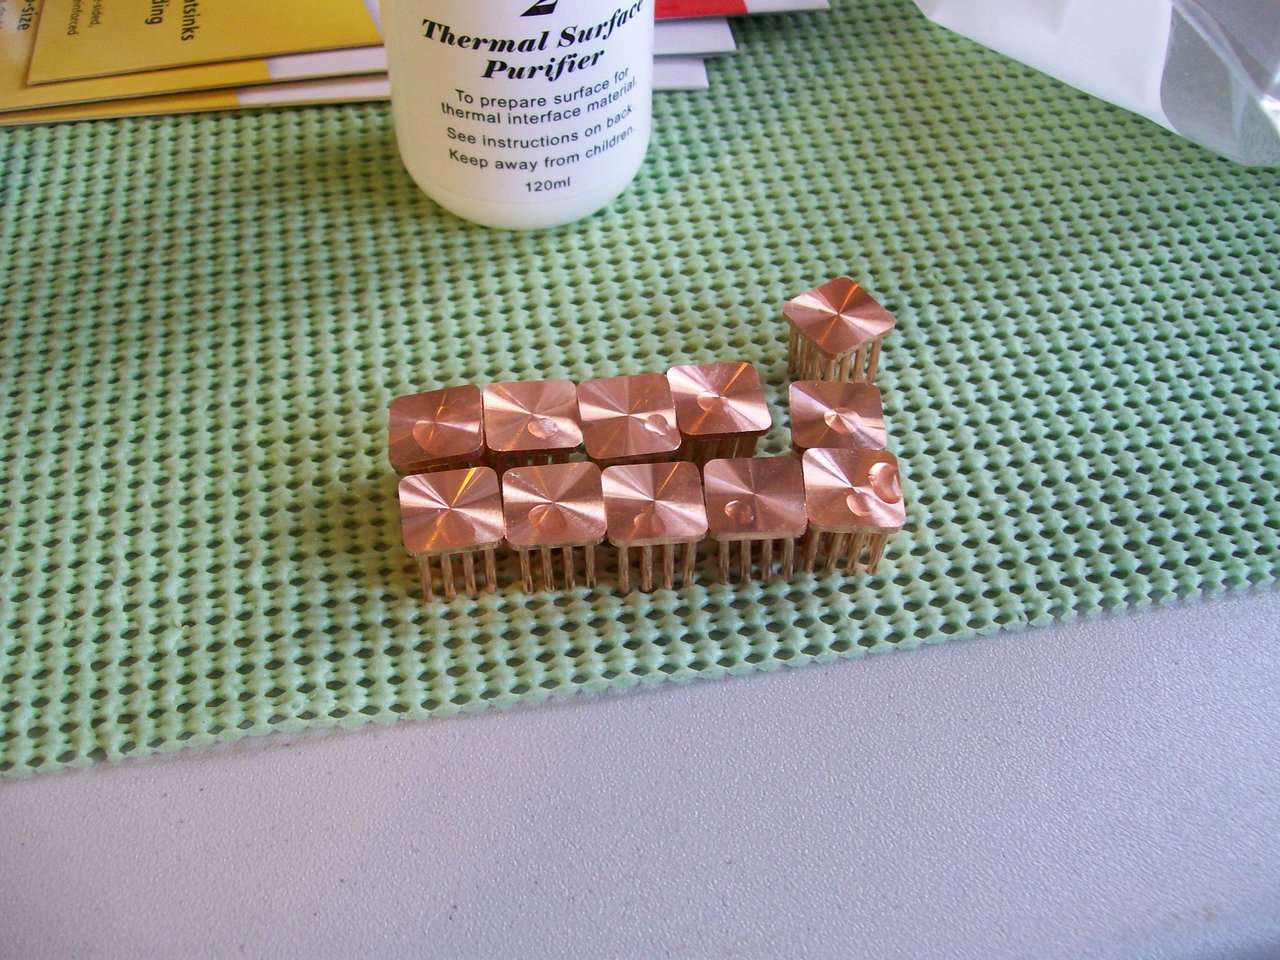
    I tried heating the RAMsinks before installing them but it just wasn't working. The crappy self adhesive TIM they ship with is useless. I spent a fewa annoyed minutes pulling all that useless tape of all the sinks and cleaning them with dnatured so they will be ready to install when some better tape arrives tomorrow.


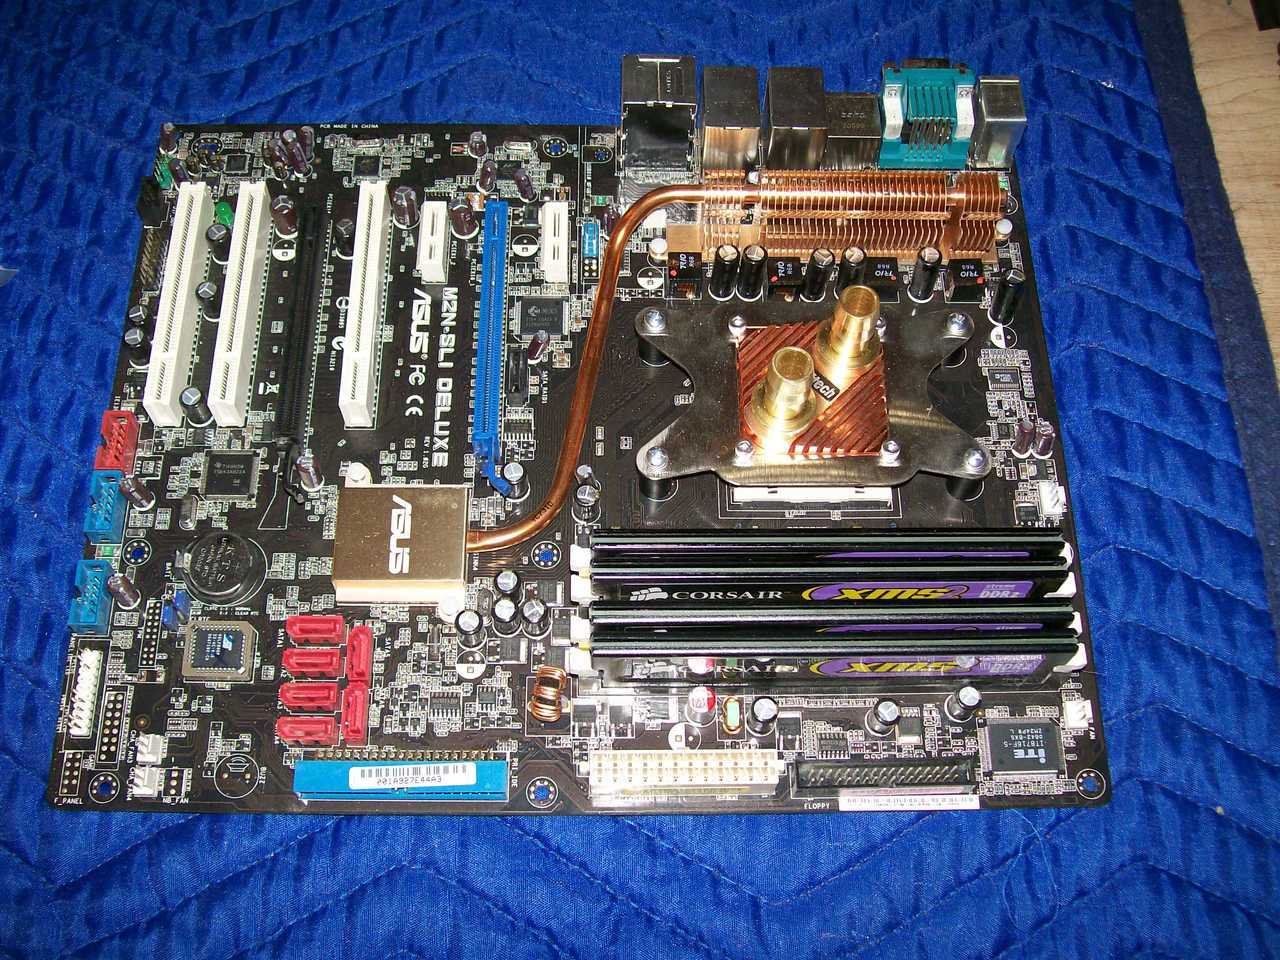
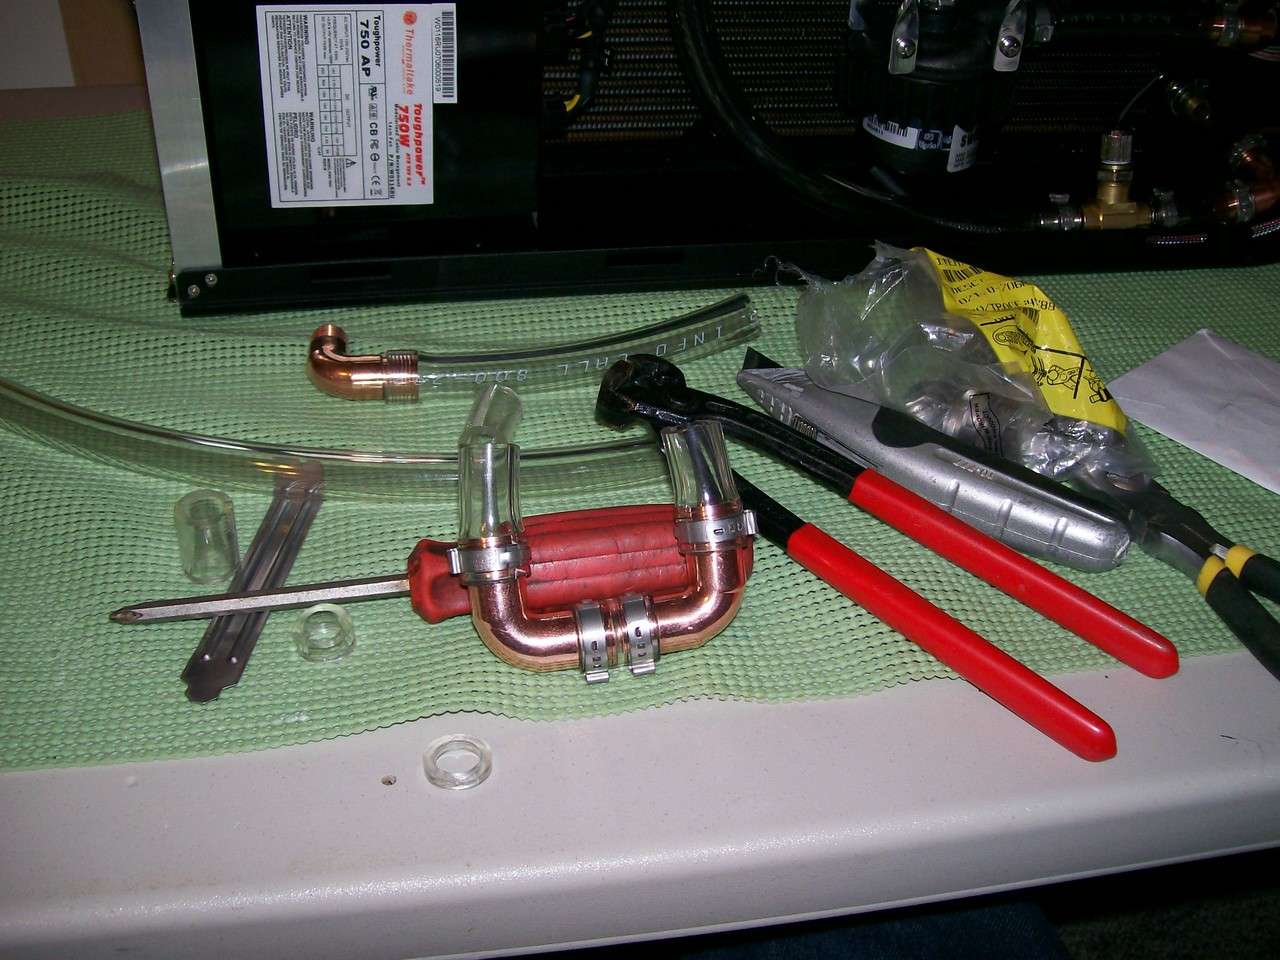
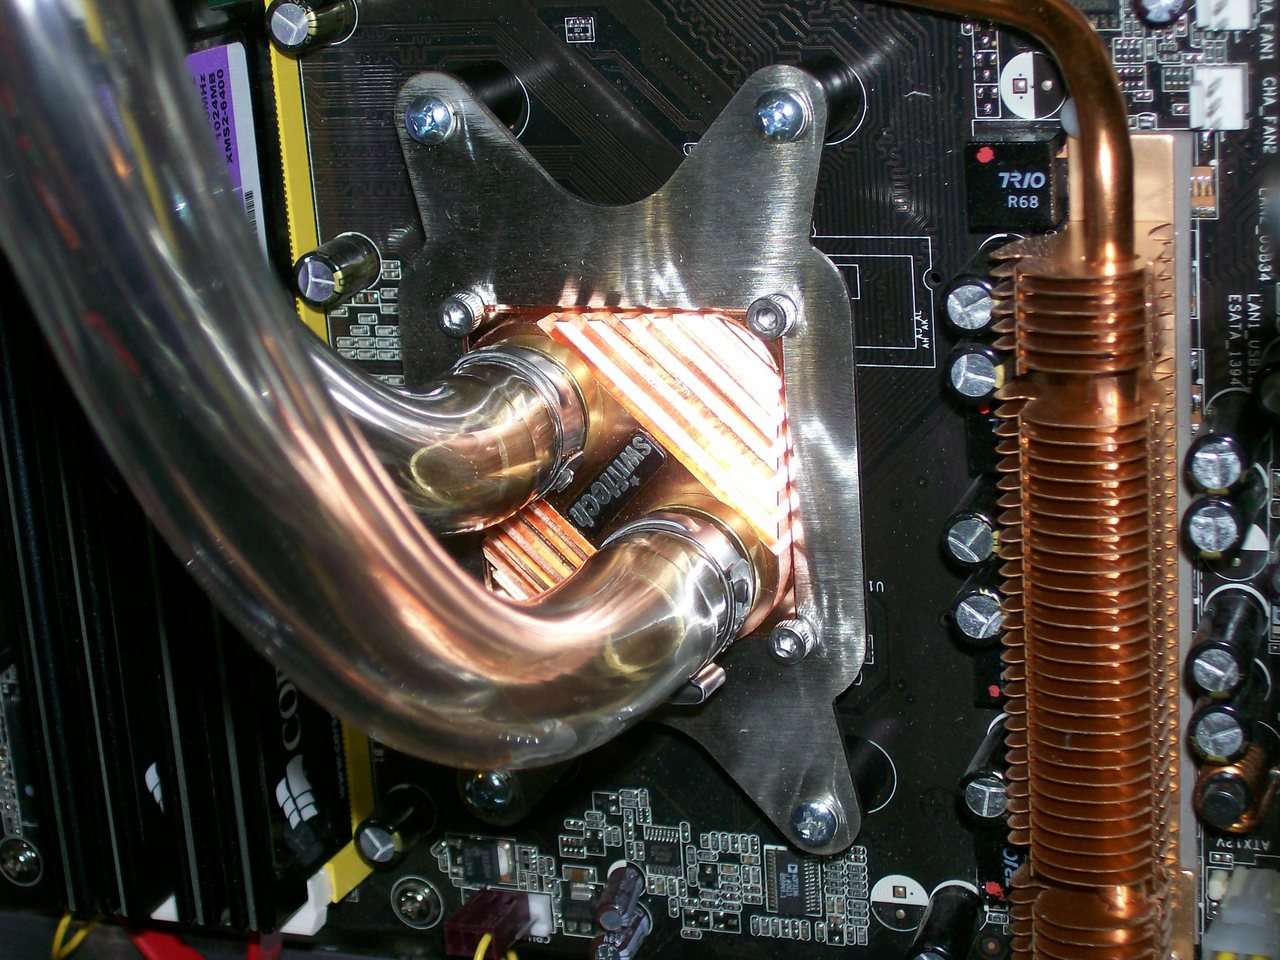
    I then cleaned the TIM off the AMD processor and took the GTX apart to put on a sweet copper top, AM2 adapter and pair of Iandh barbs.


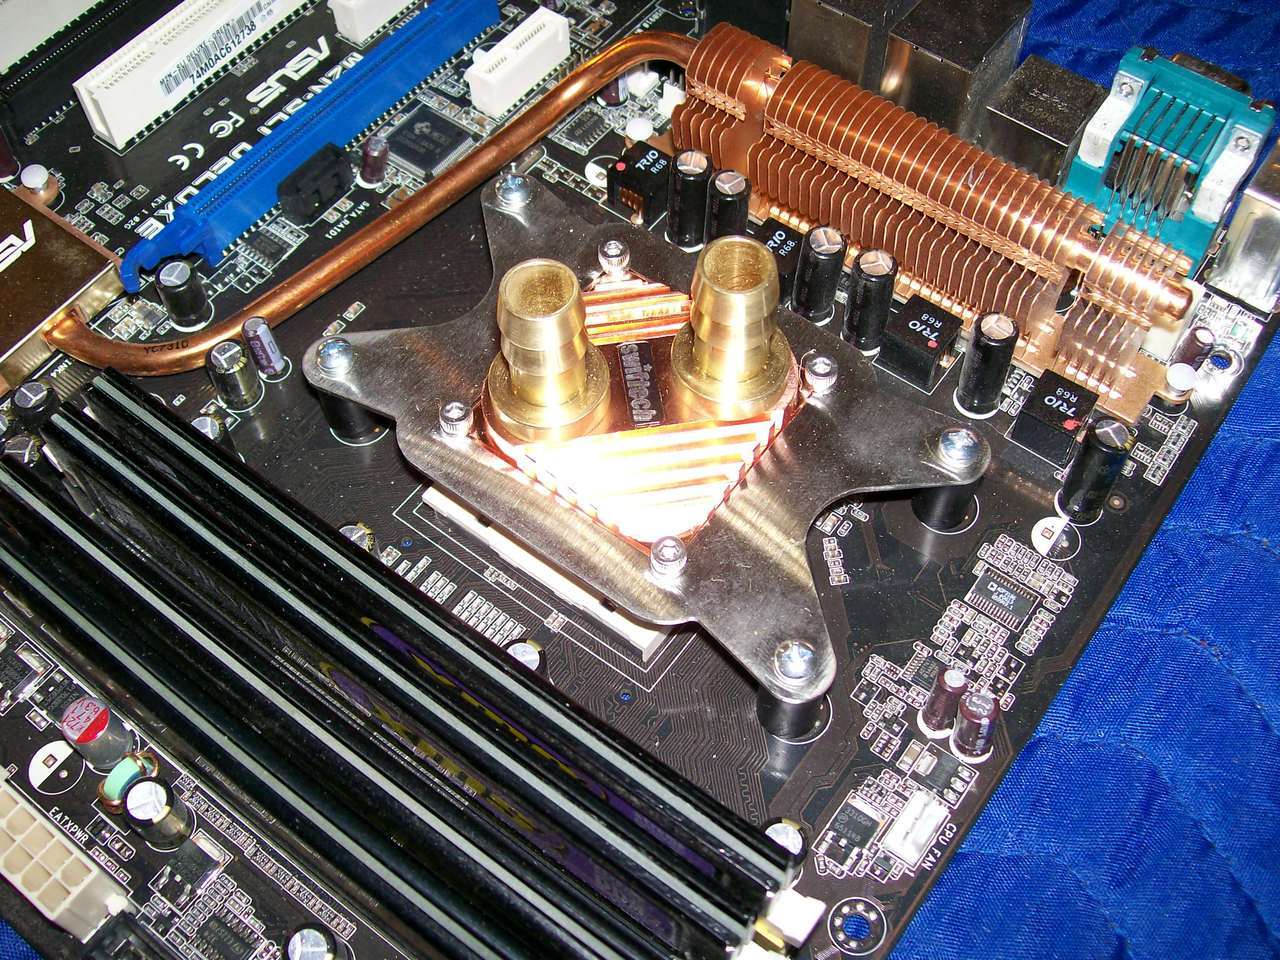
    Hot Sex! Why the hell Swiftech did not make them that way from the git go I'll never understand. They also neglected to include a pair of Orings with one of the MCW60 blocks...and NO NUTS for the AM2 kit..that's unacceptable. The latest revision of the GTX has a special backing plate for Socket 775 that is vry nice...but the nuts are welded too that plate! So what the hell does Swiftech think an AM2 user is going to do if he does not happen to have 4 6-32 nits on hand? That's a srious oversite in an otherwise well thought out package.


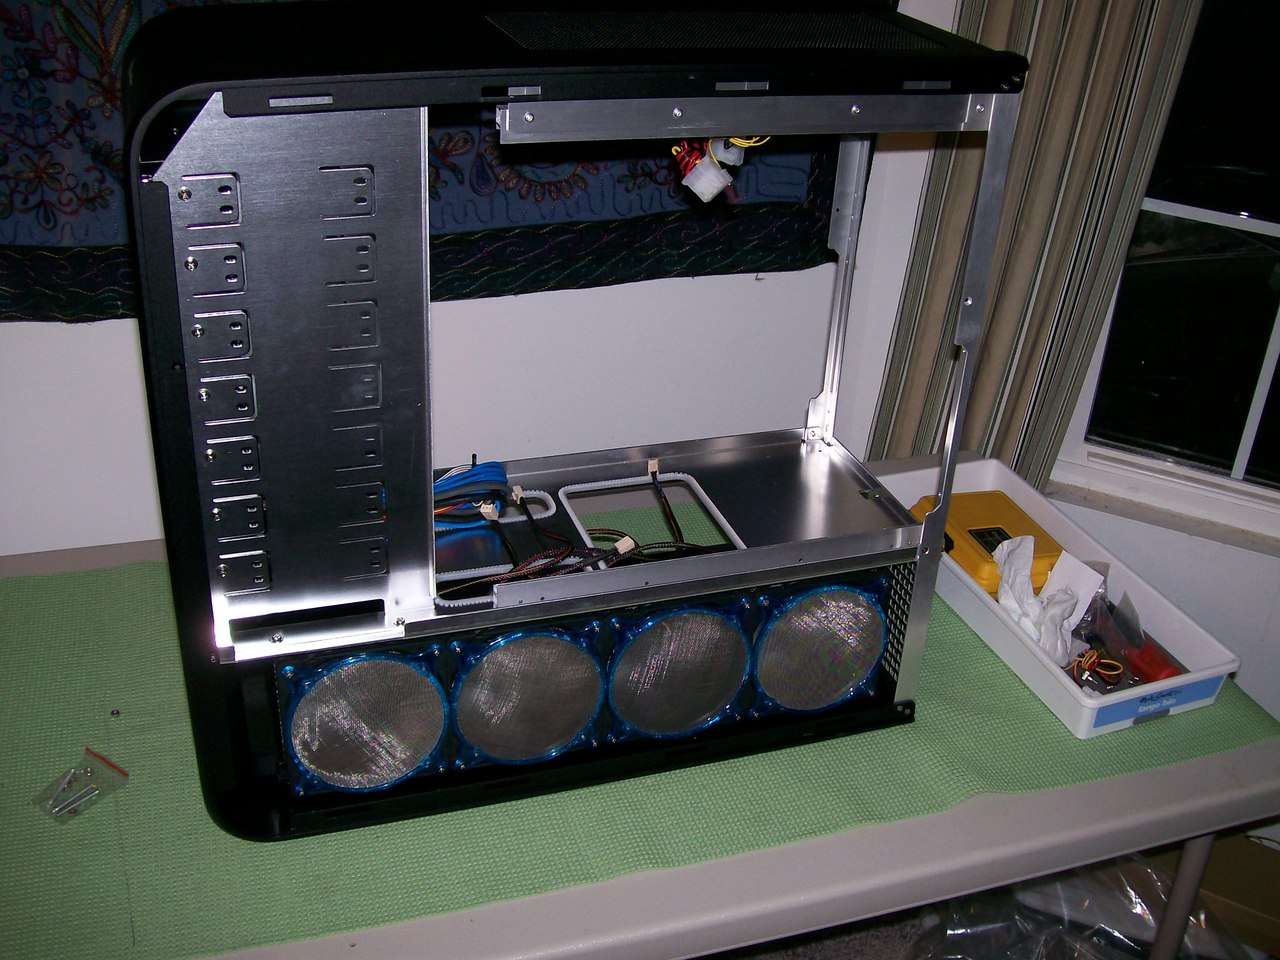
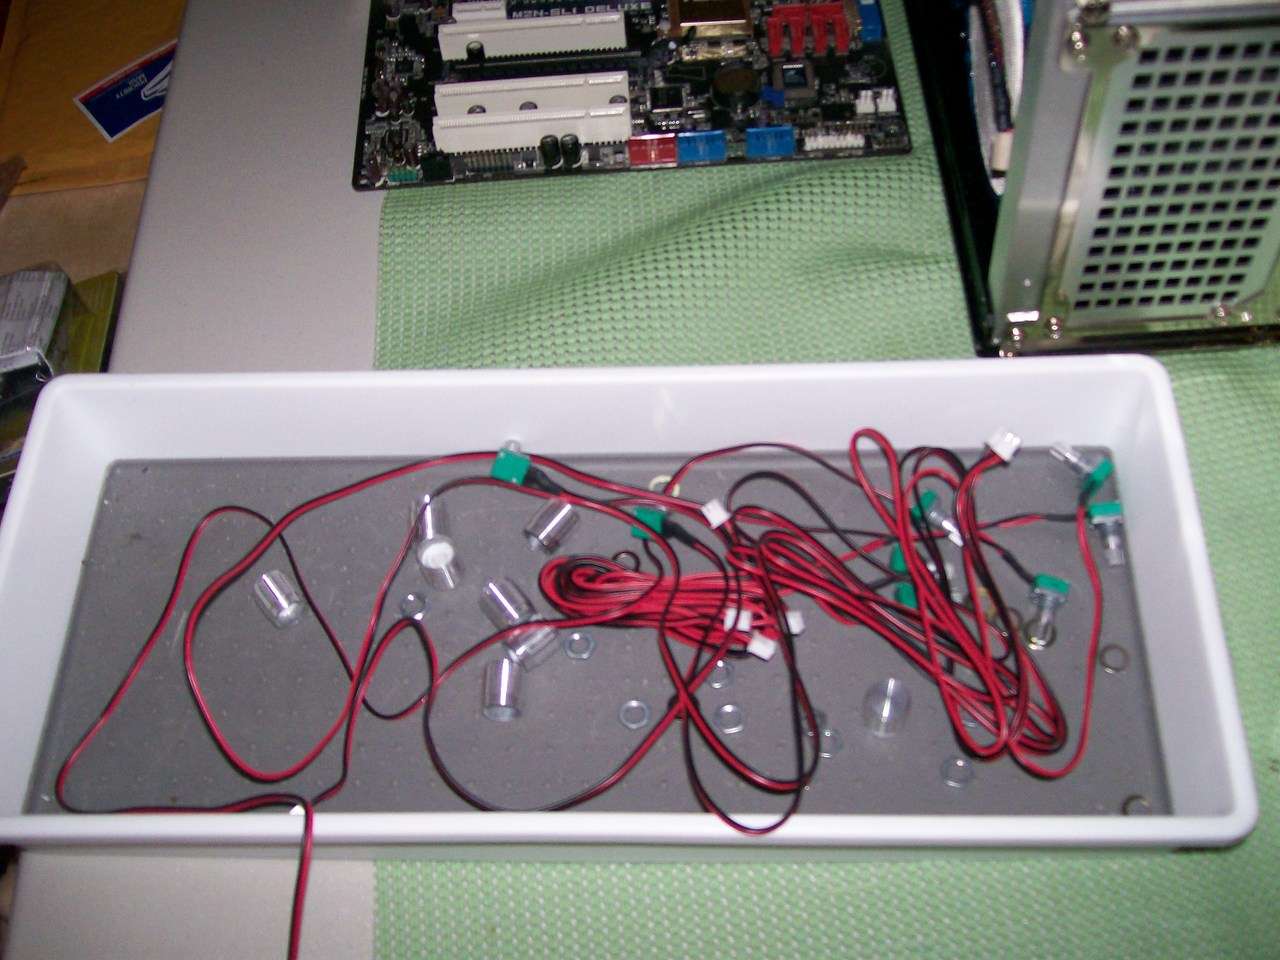
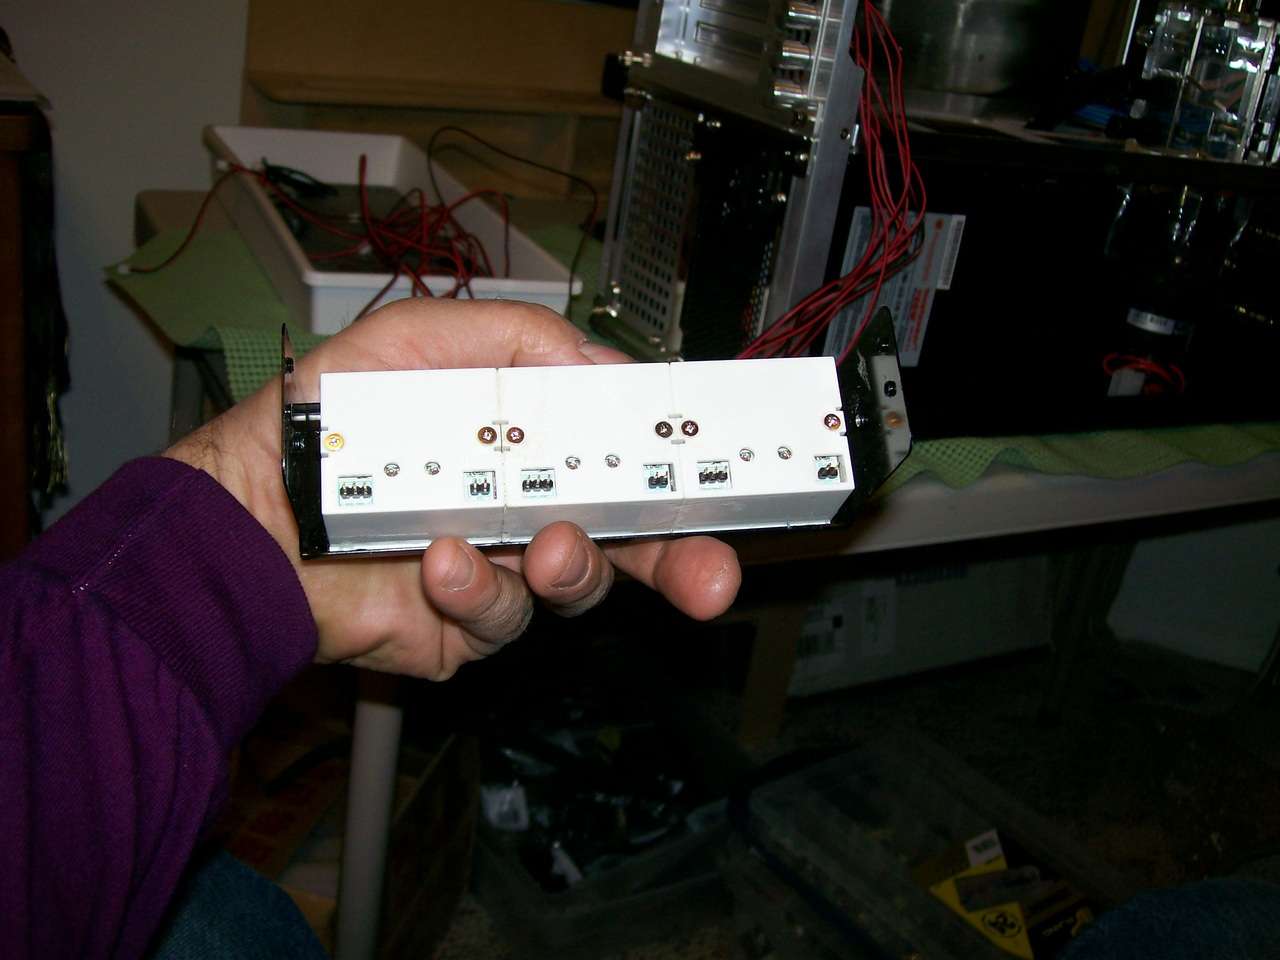
    Before I could install the motherboard I needed to do a lot of cable wrangling. You don't controll 8 fans without some wires... The Silverstone controllers are nicley designed for stealth mounting due to their dimuinitive size and sweet little modules that can be stuck anywhere there is a bit of space.


    Here are the three modules from the three kits I for 2nd day air from NewEgg. Each controller handles three pretty high watt fans.


    I made up a very nice "squid" to feed the thre gauges and terminated it in a Molex.


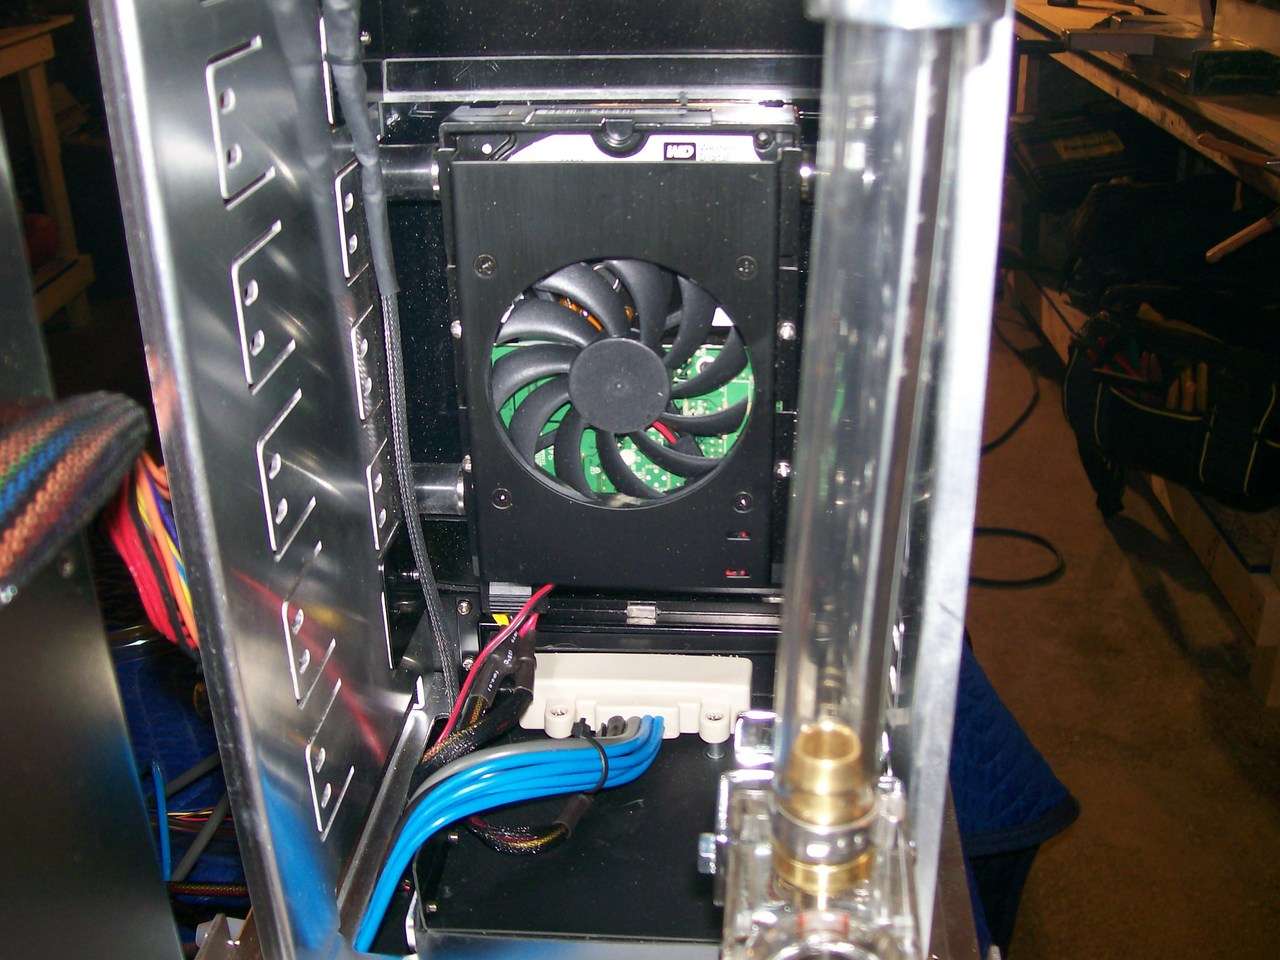
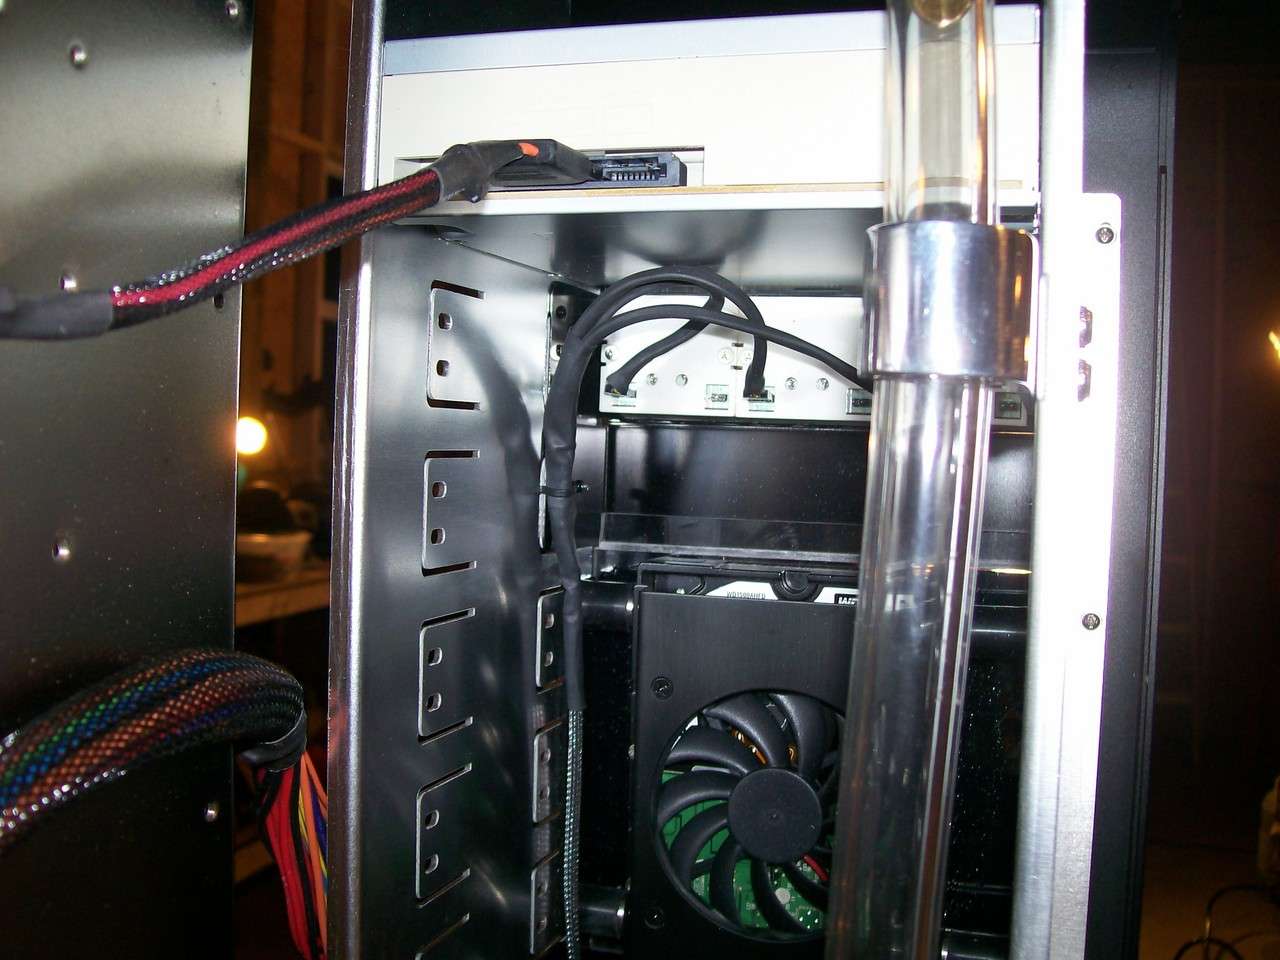
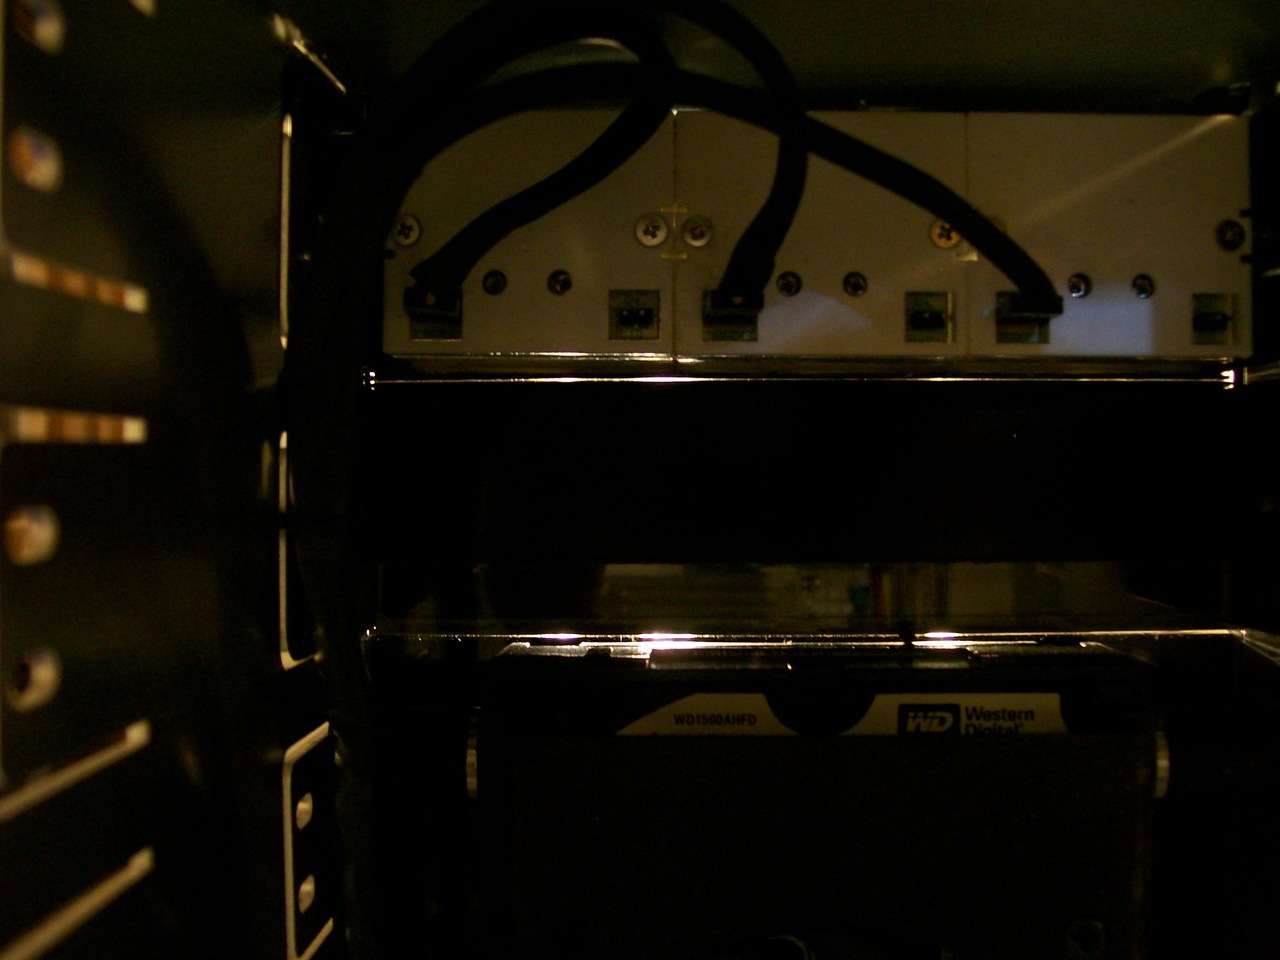
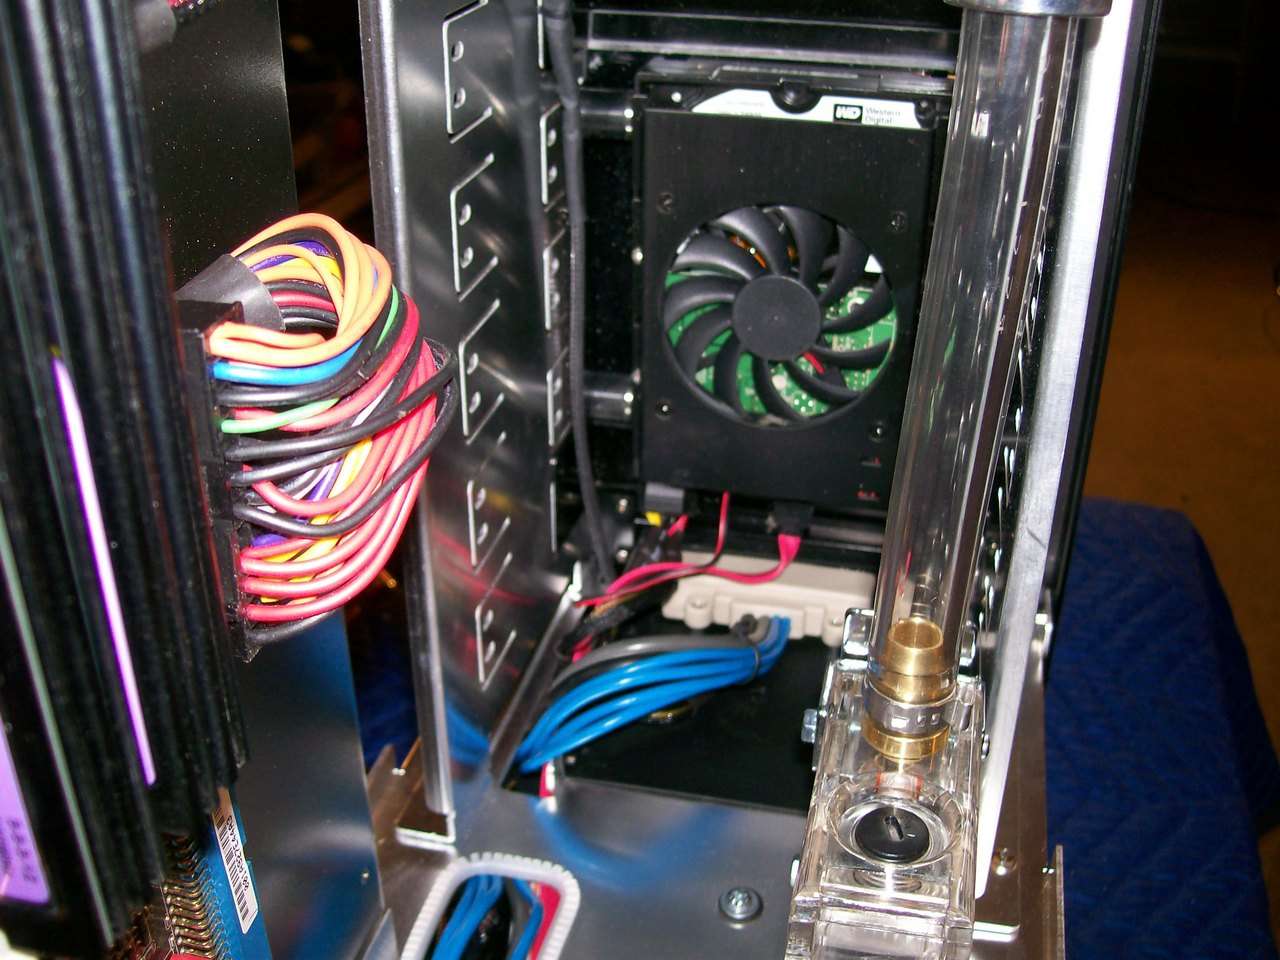
    Mounted the HDD cooler. I went with a plain black non LED model. I briefly considered adding a 9th controller to control this 9th fan but it's a very low CFM fan to begin with.


    I stealthed the USB/FireWire/Audio and switchgear cabling.


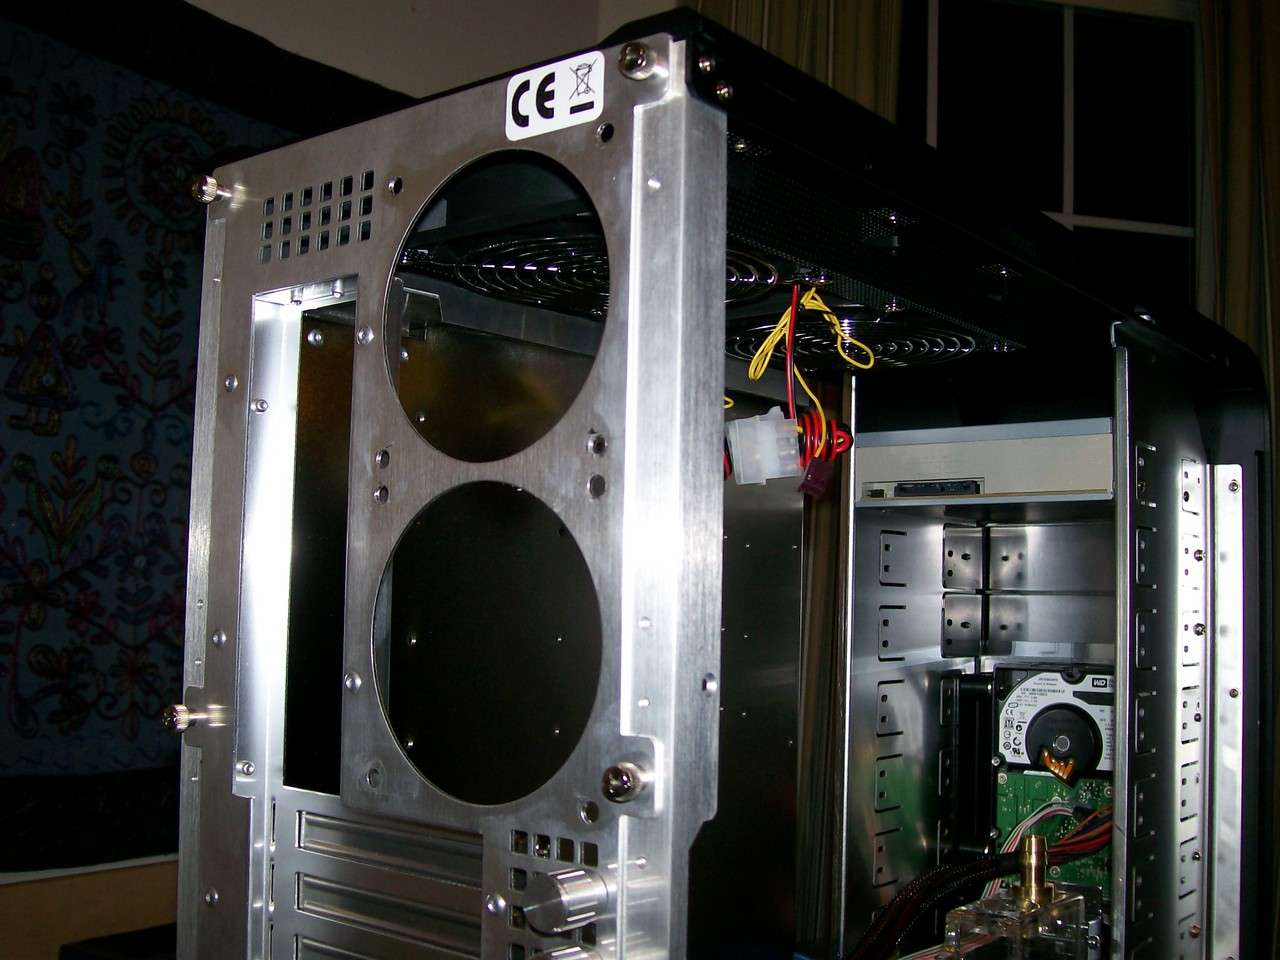
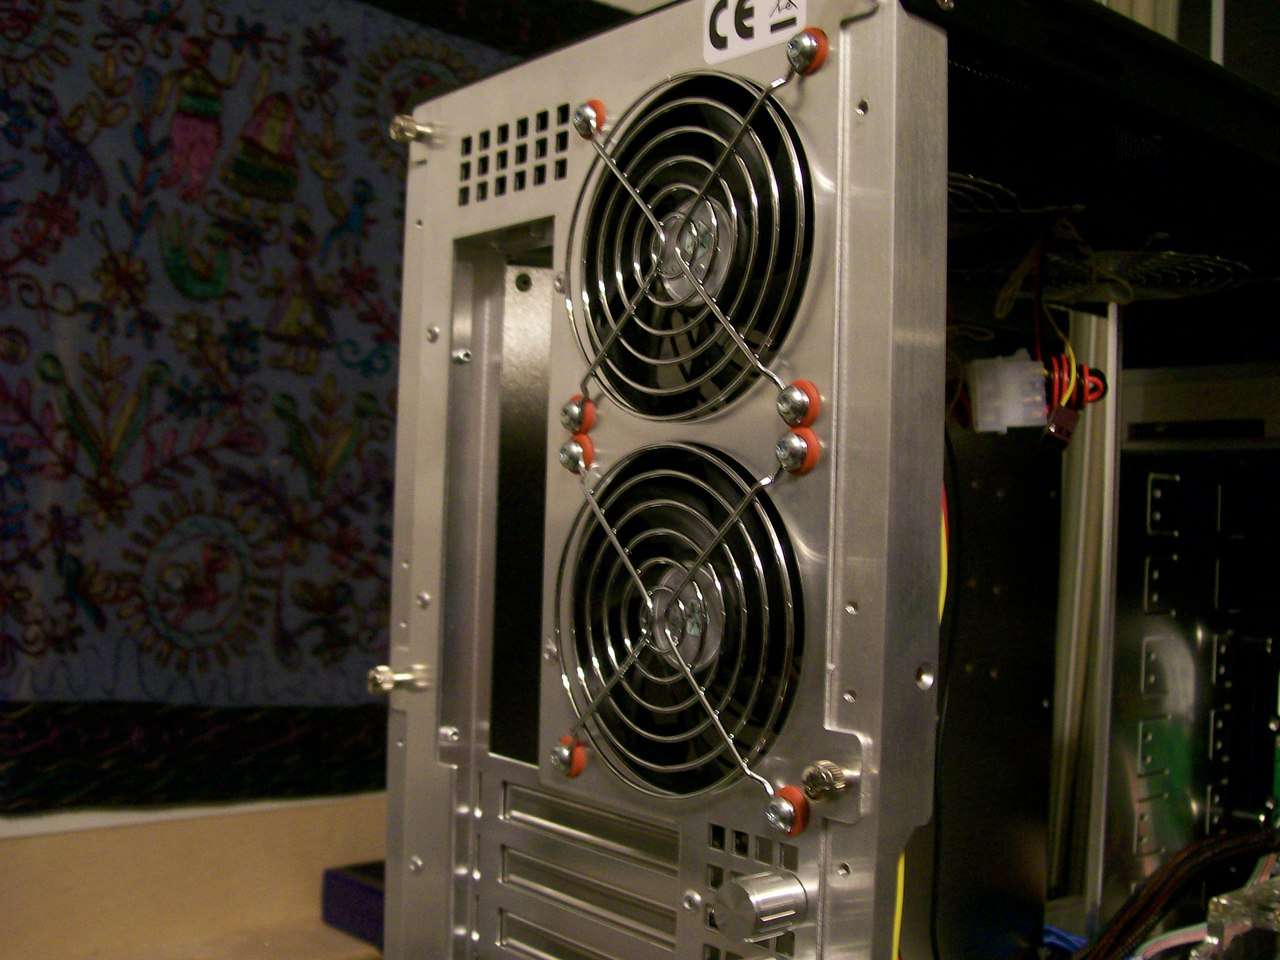
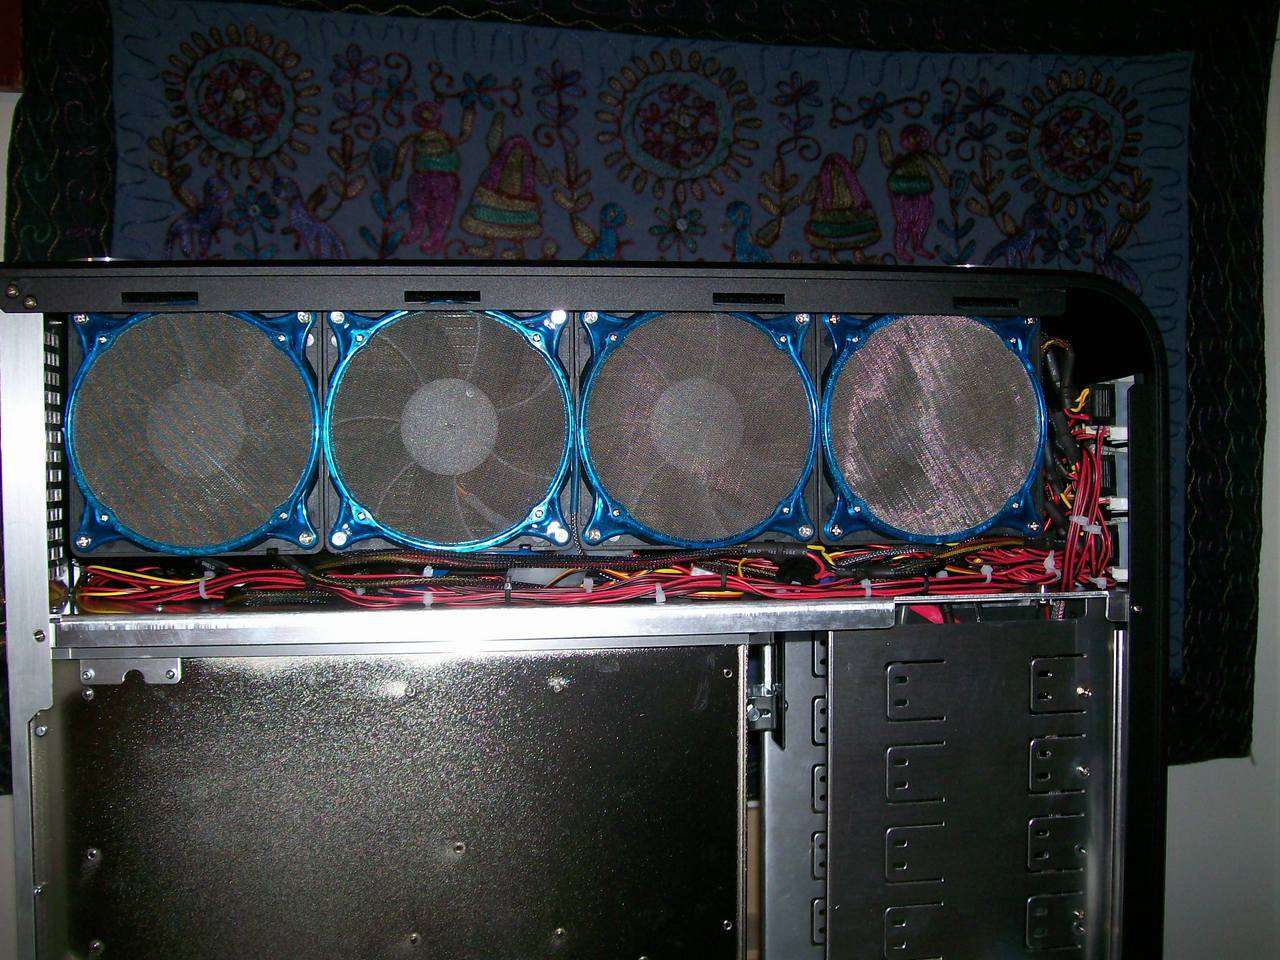
    The top fans. 4 pin Mobo power, 24 in mobo power and DVD SATA power cables all get hidden by the motherboard. I lashed them to the motherboard tray to make removing and replacing the motheerboard less annoying...Silverstone uses very long mobo standoffs and I took full advantage of that. The 8pin mobo lead from the TT SU was too short...but in my amazing stash of cables n things I found an 8pin to 4 pin adapter that made it possible to reach the header...YAY for NEVAR throwing away an adapter. That adapter was at least 3 years old


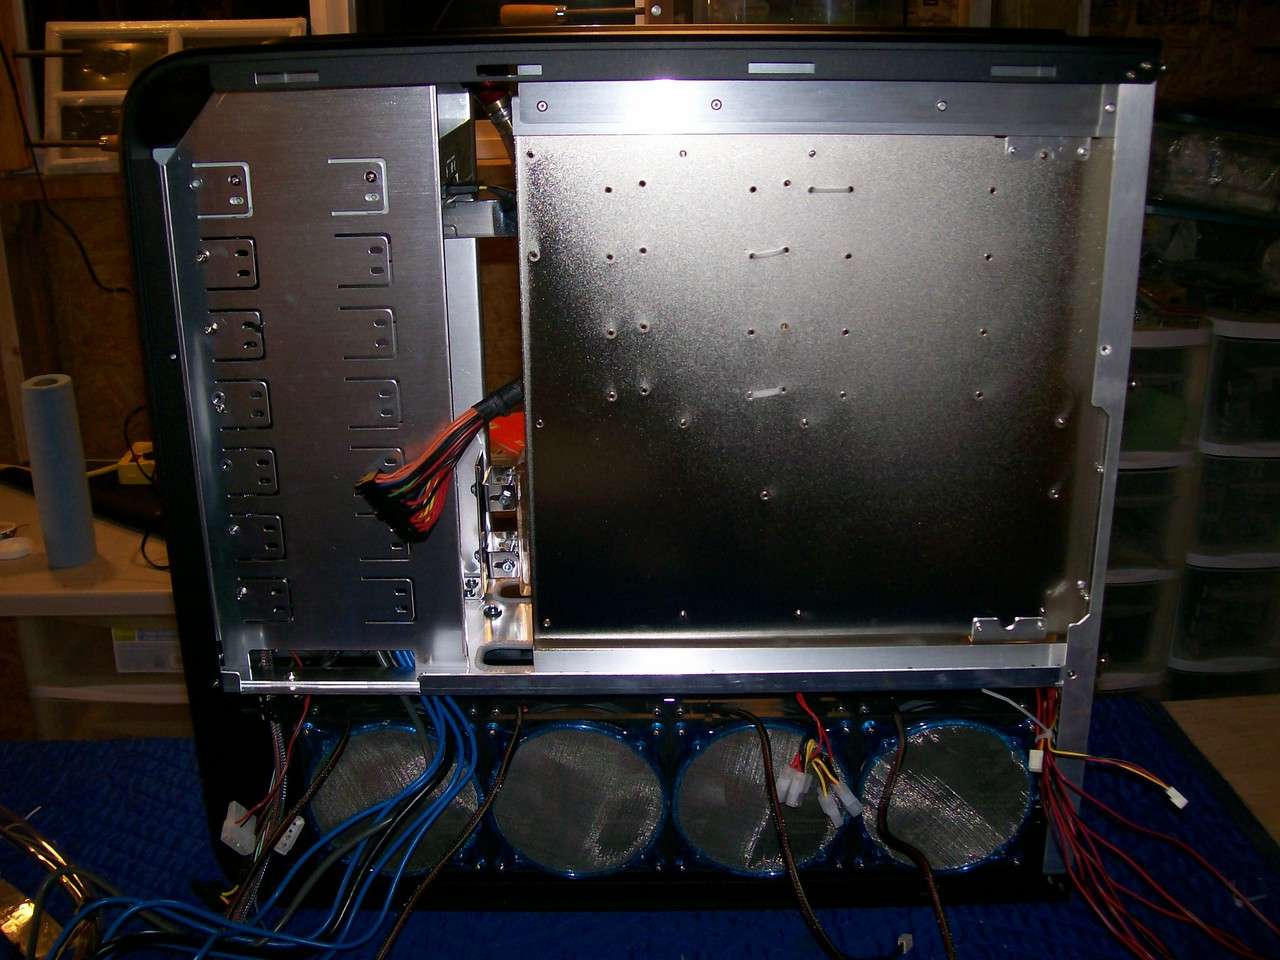
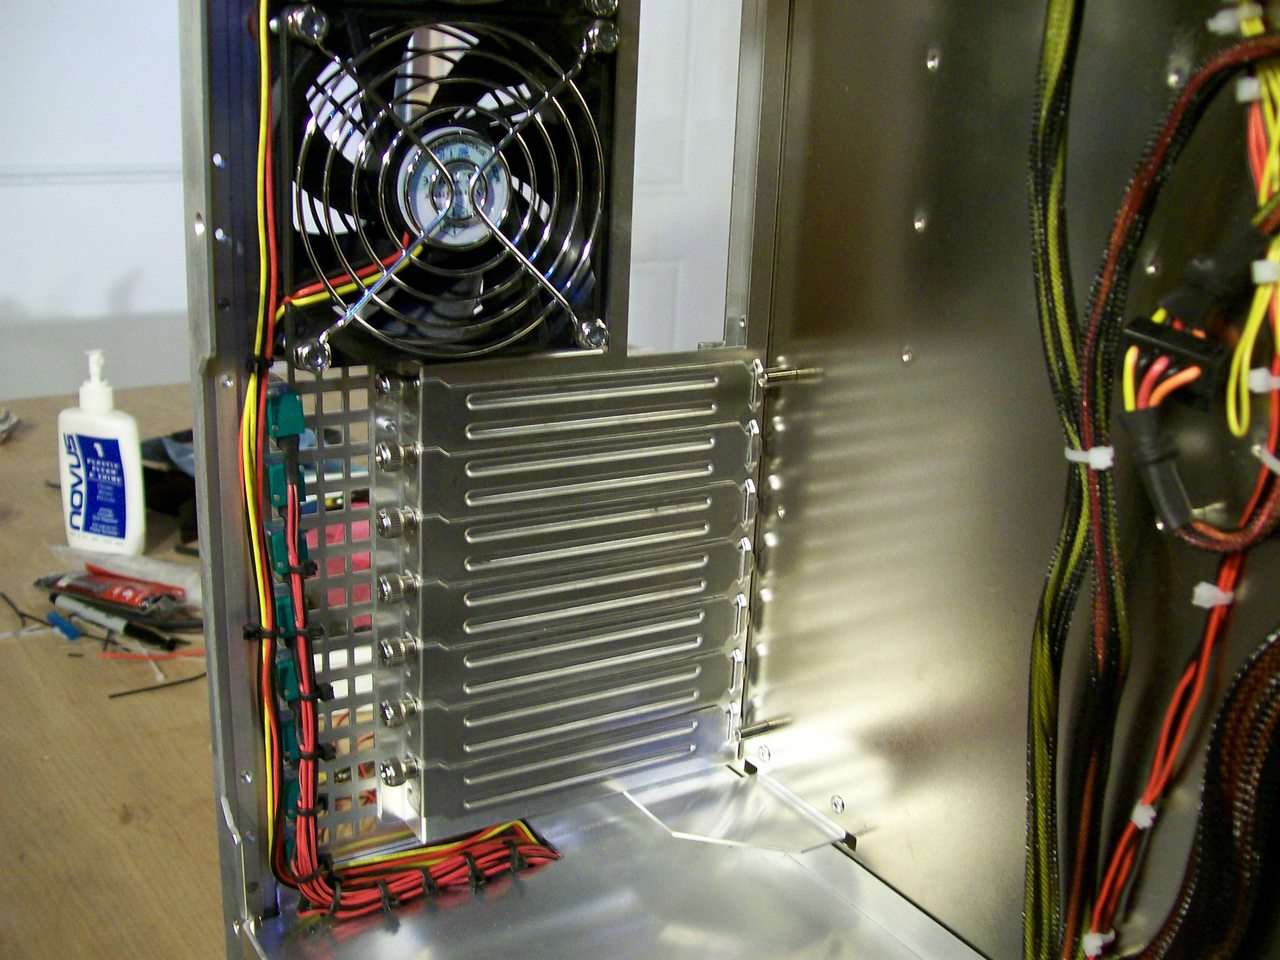
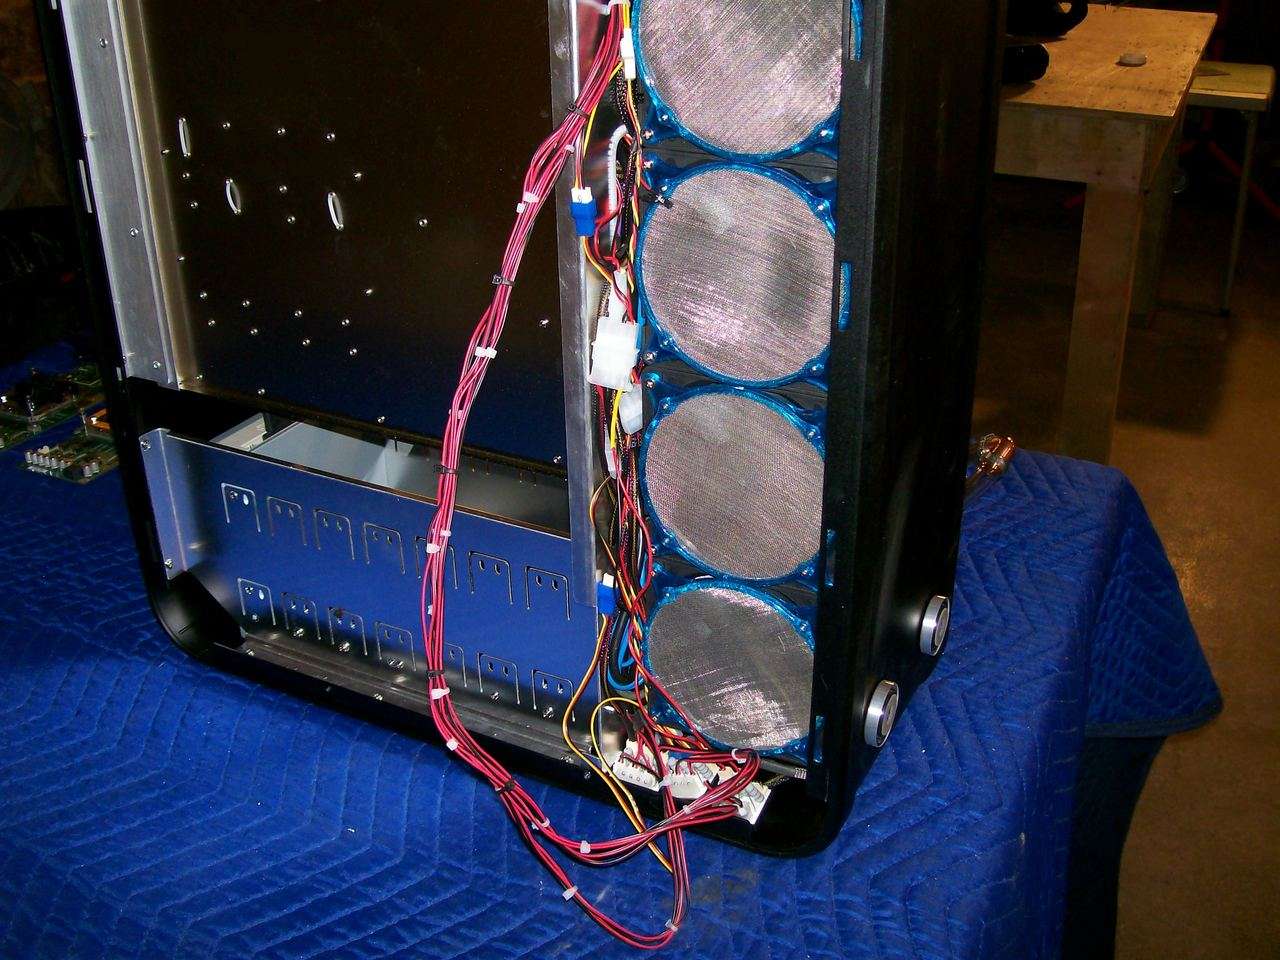
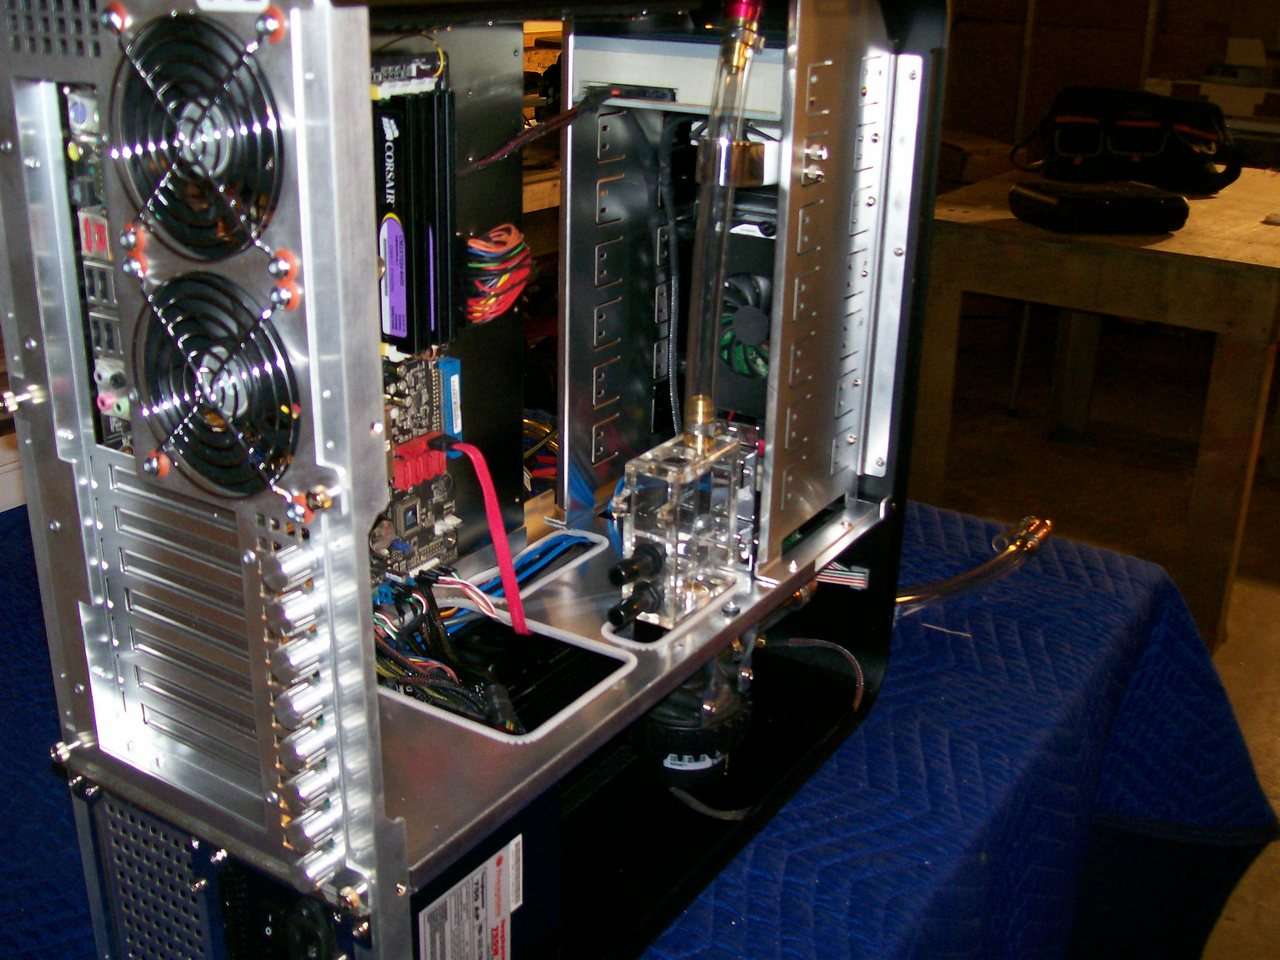
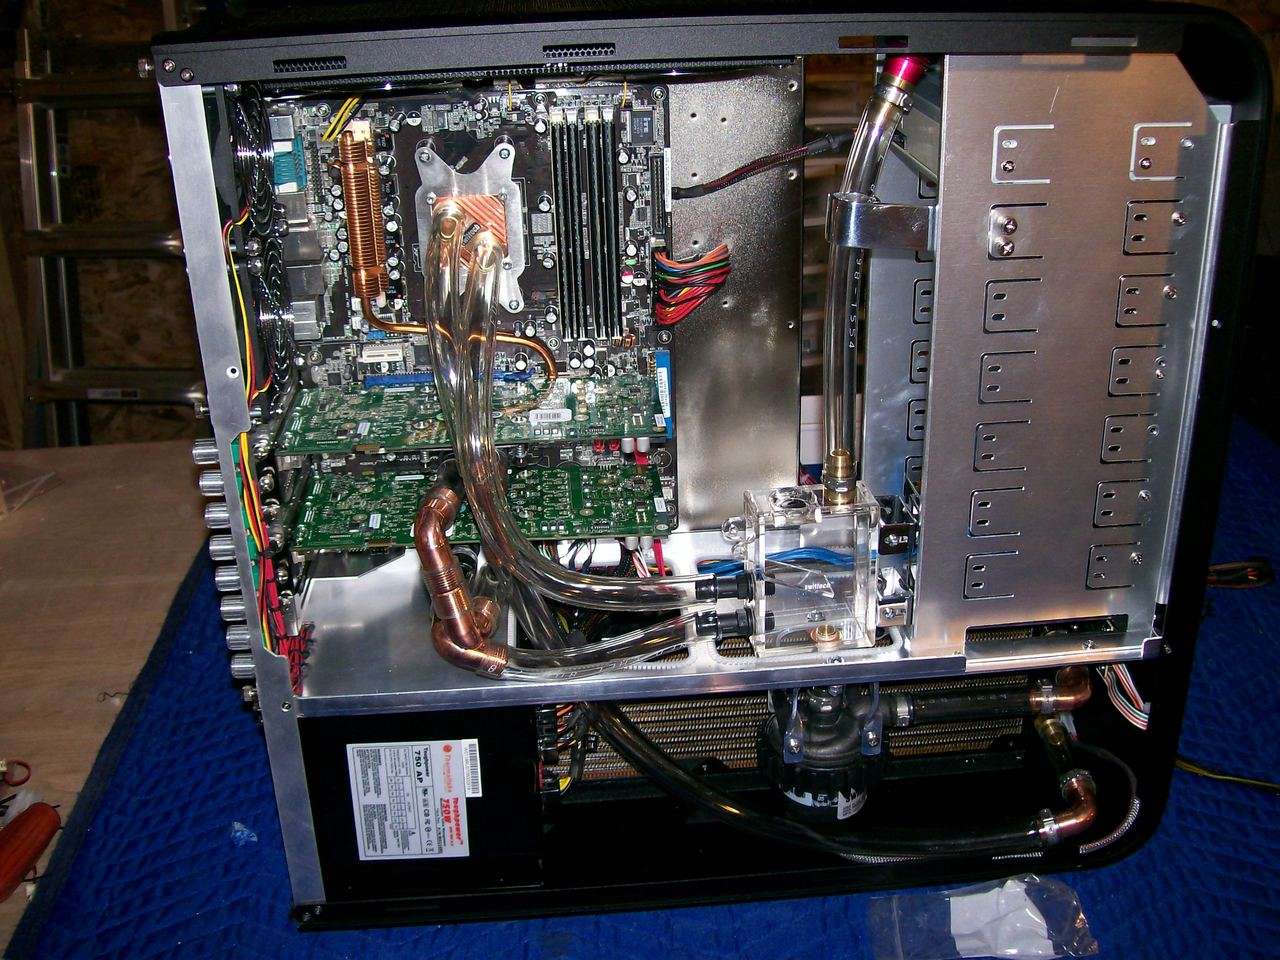
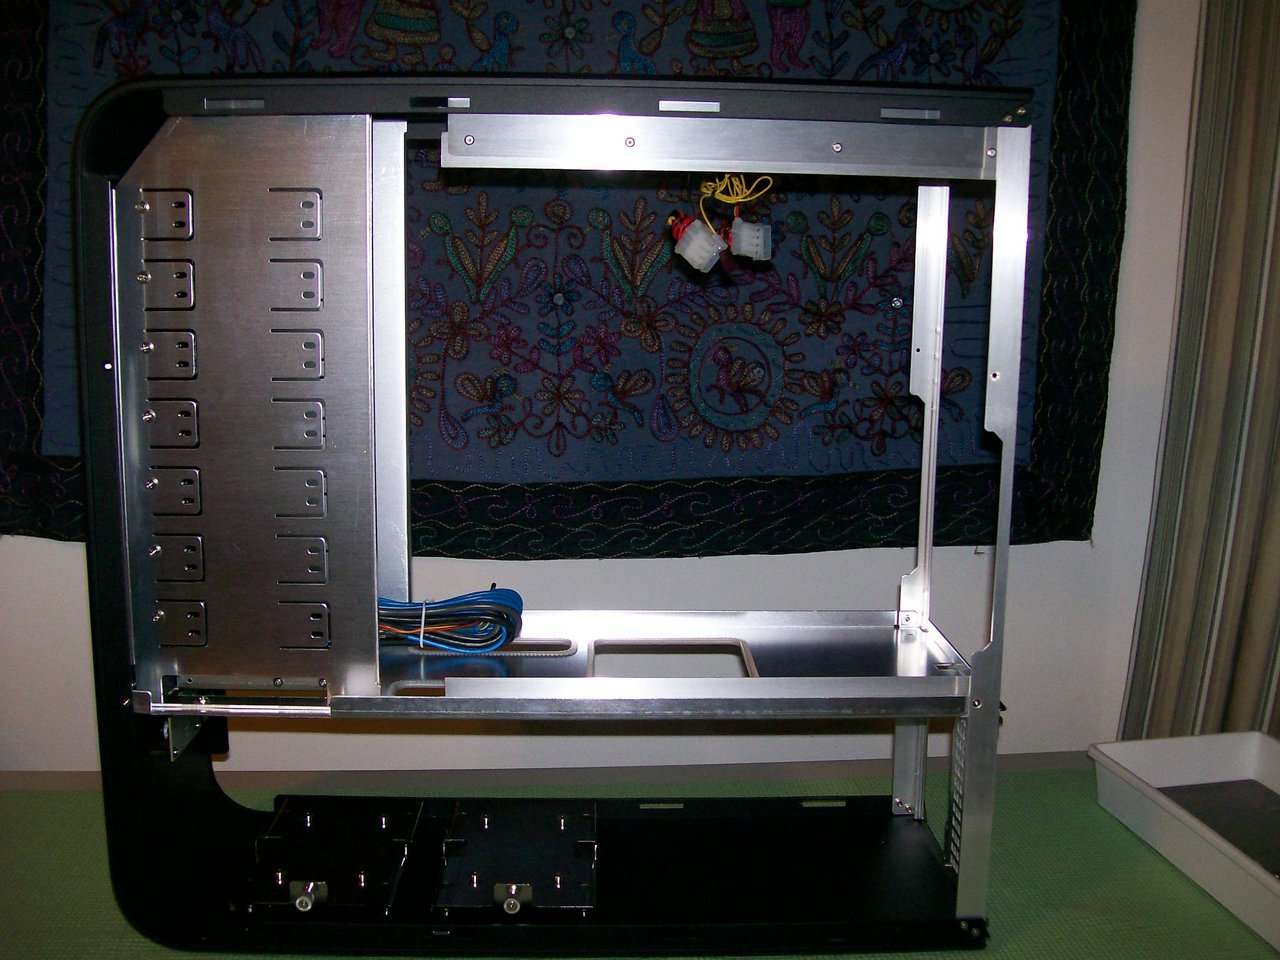
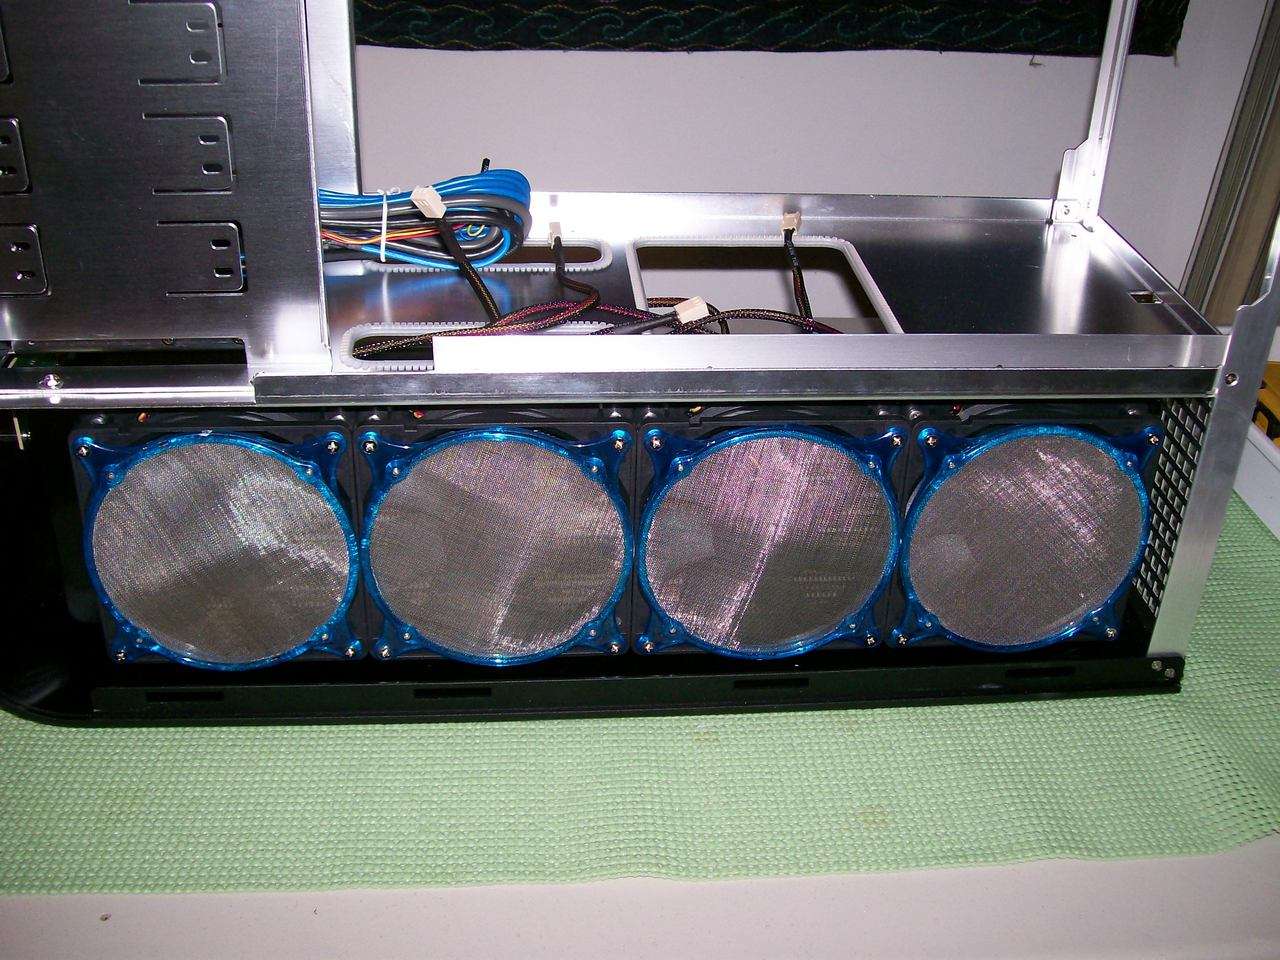
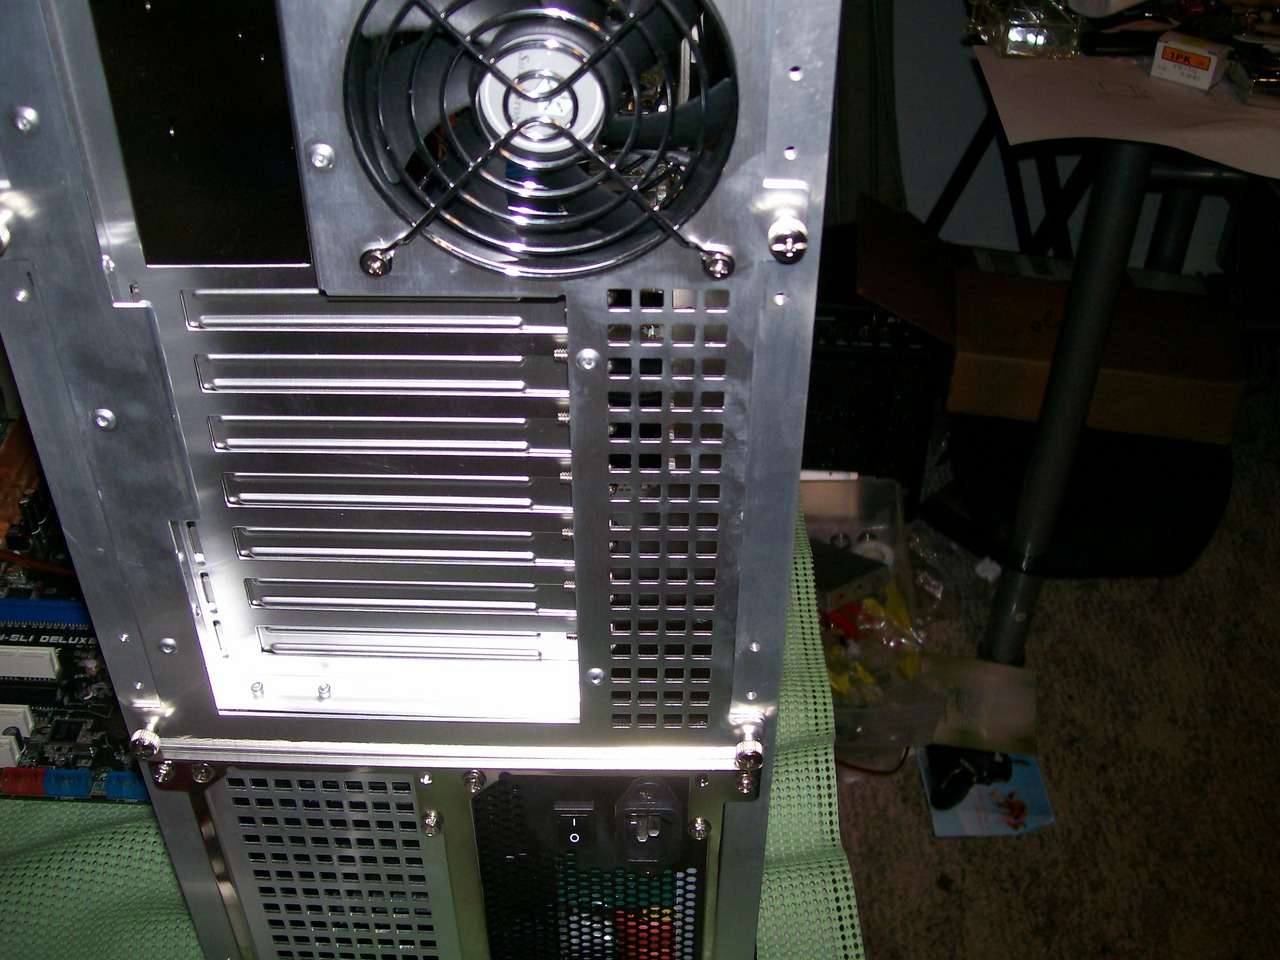
    At the moment the back side is just as neat as the front...a credit to the design of this case. I am endeavoring to take full advantage of the dual compartment layout by hiding all the fan cabling between the rad and the top of the middle bulkhead.


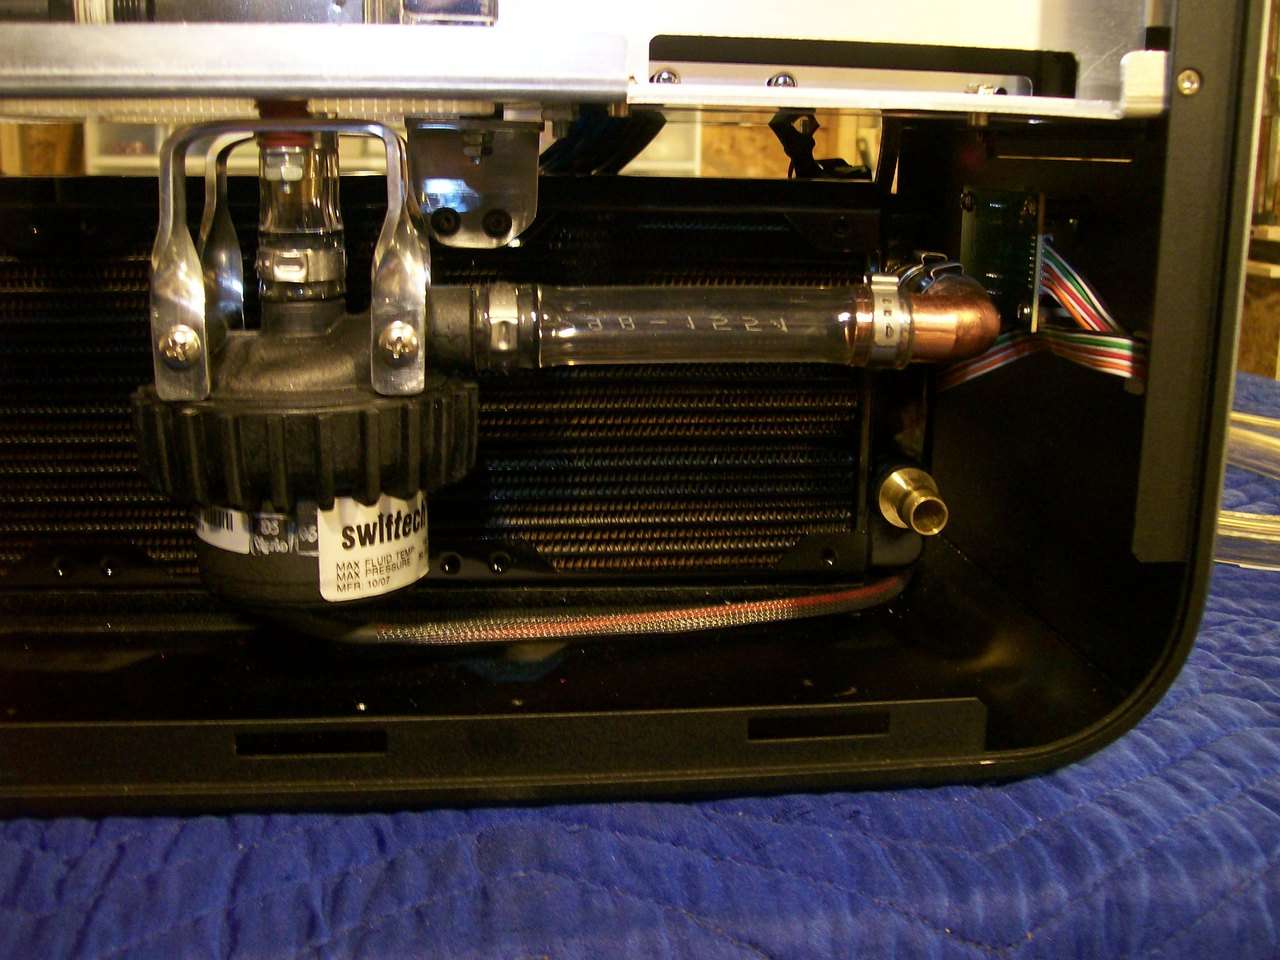
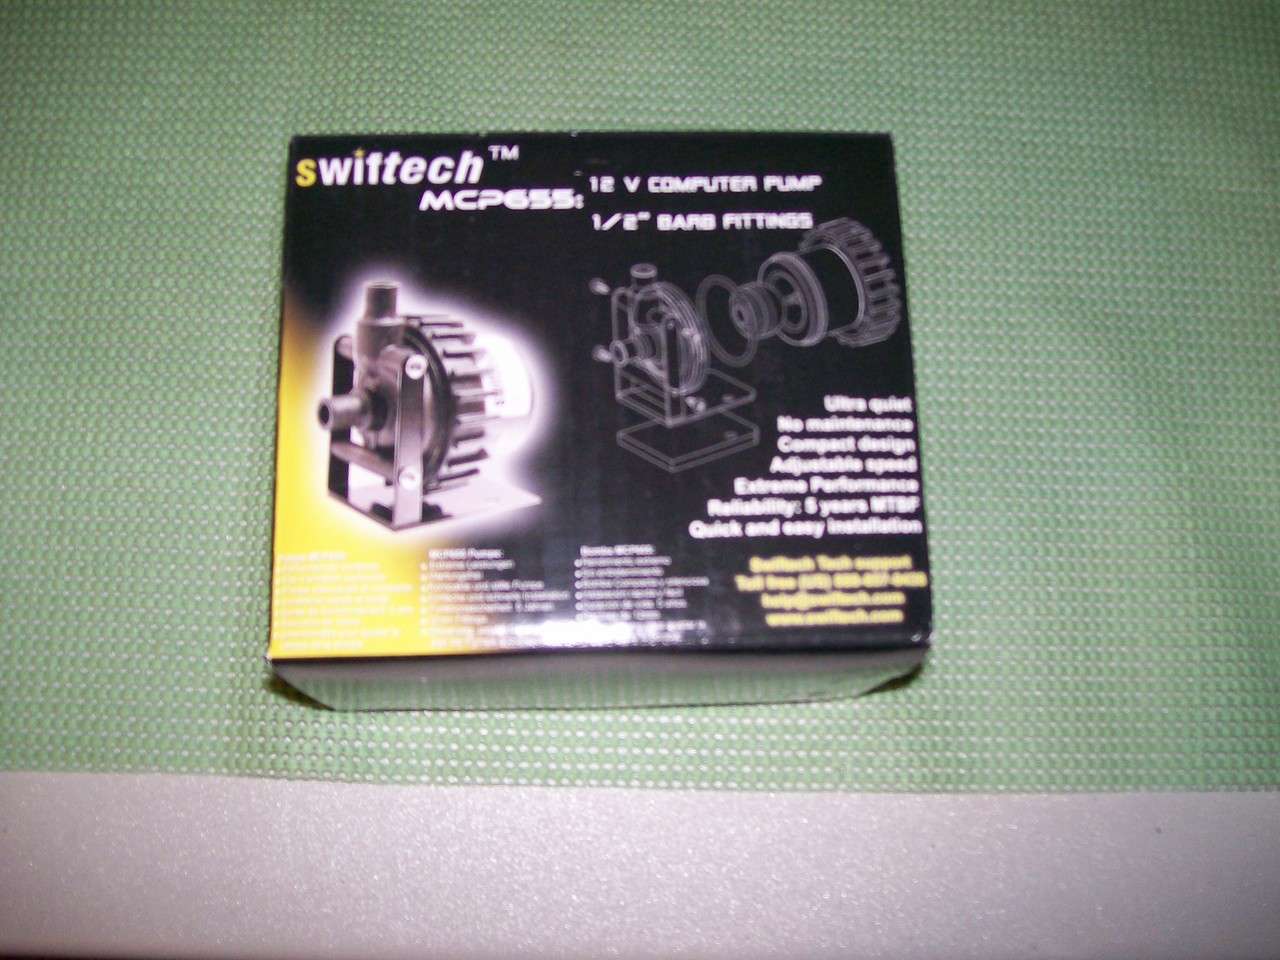
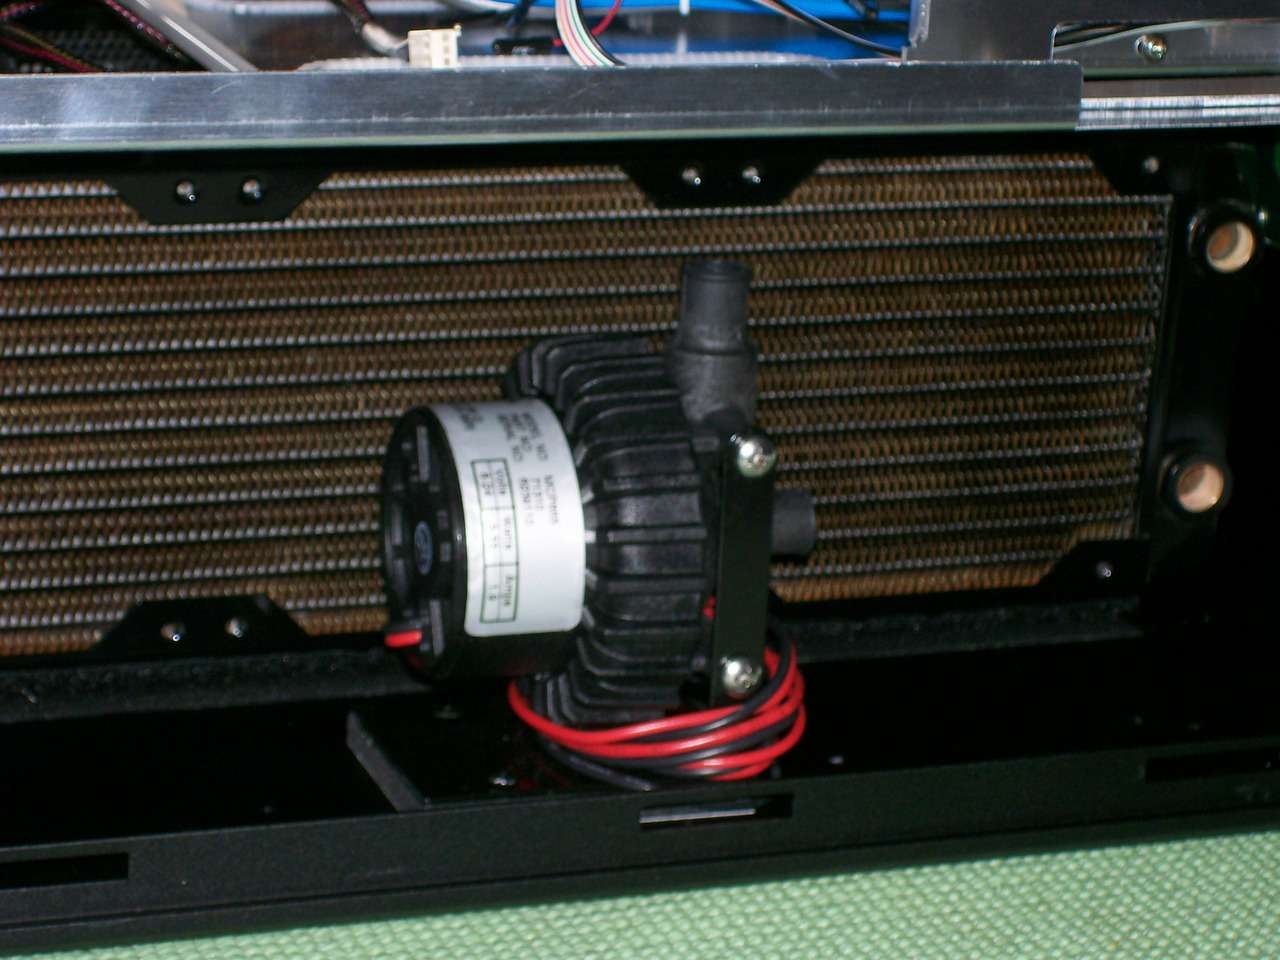
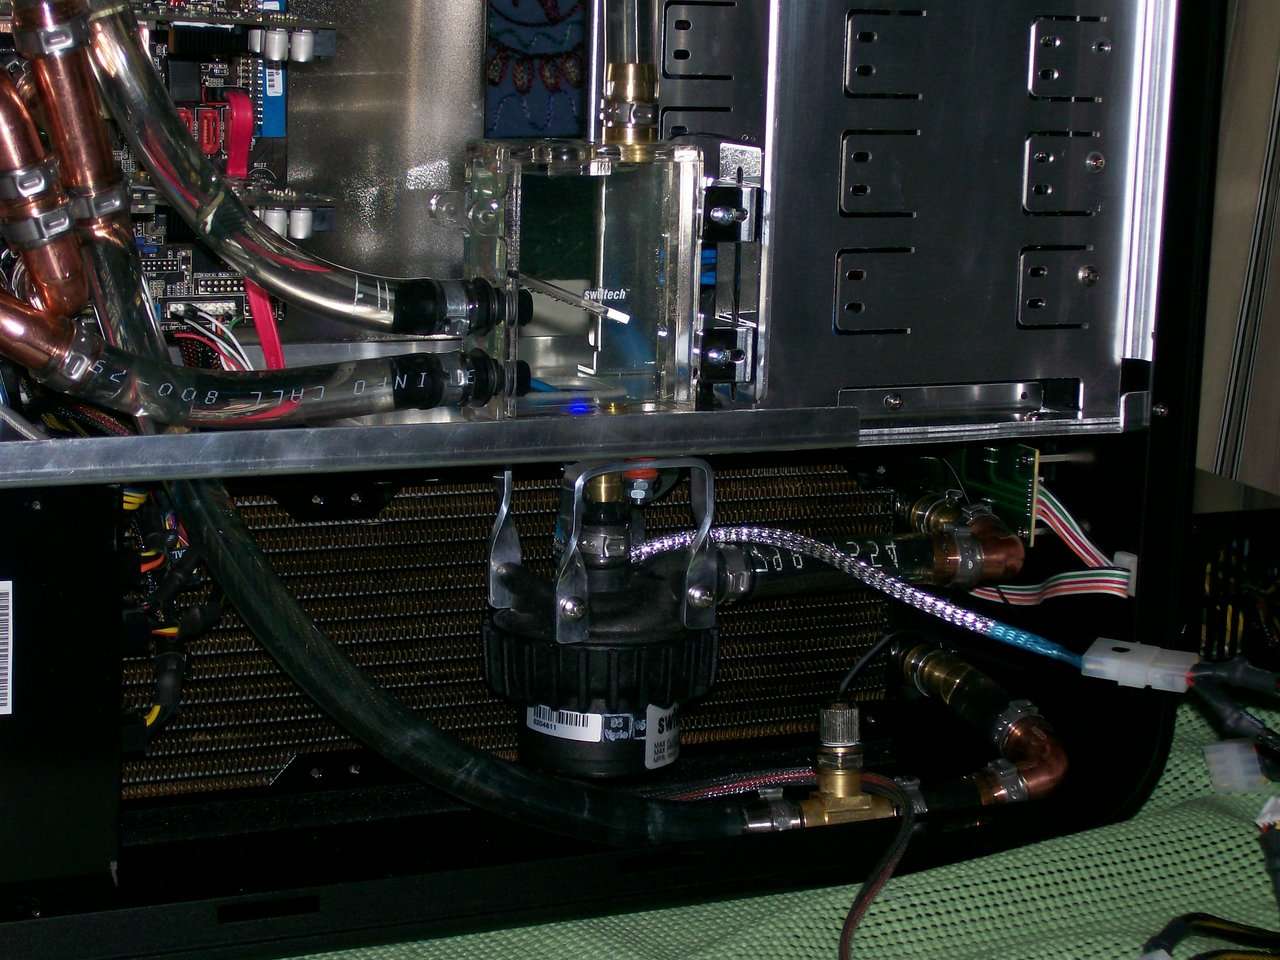
    I shortened/sheathed/re-molexed the MCP655 pump (which always have about 3 foot leads for some reason)


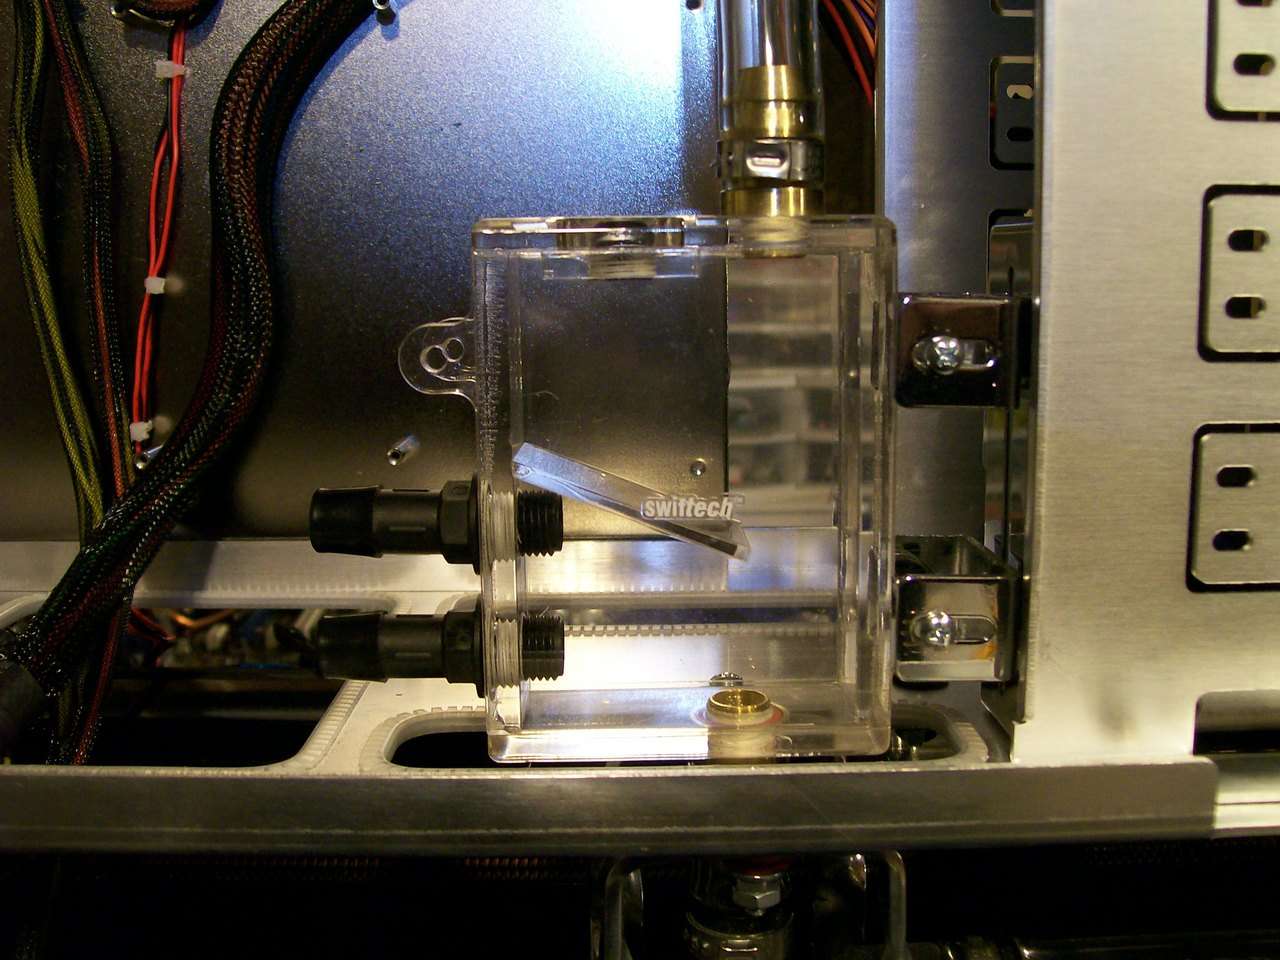
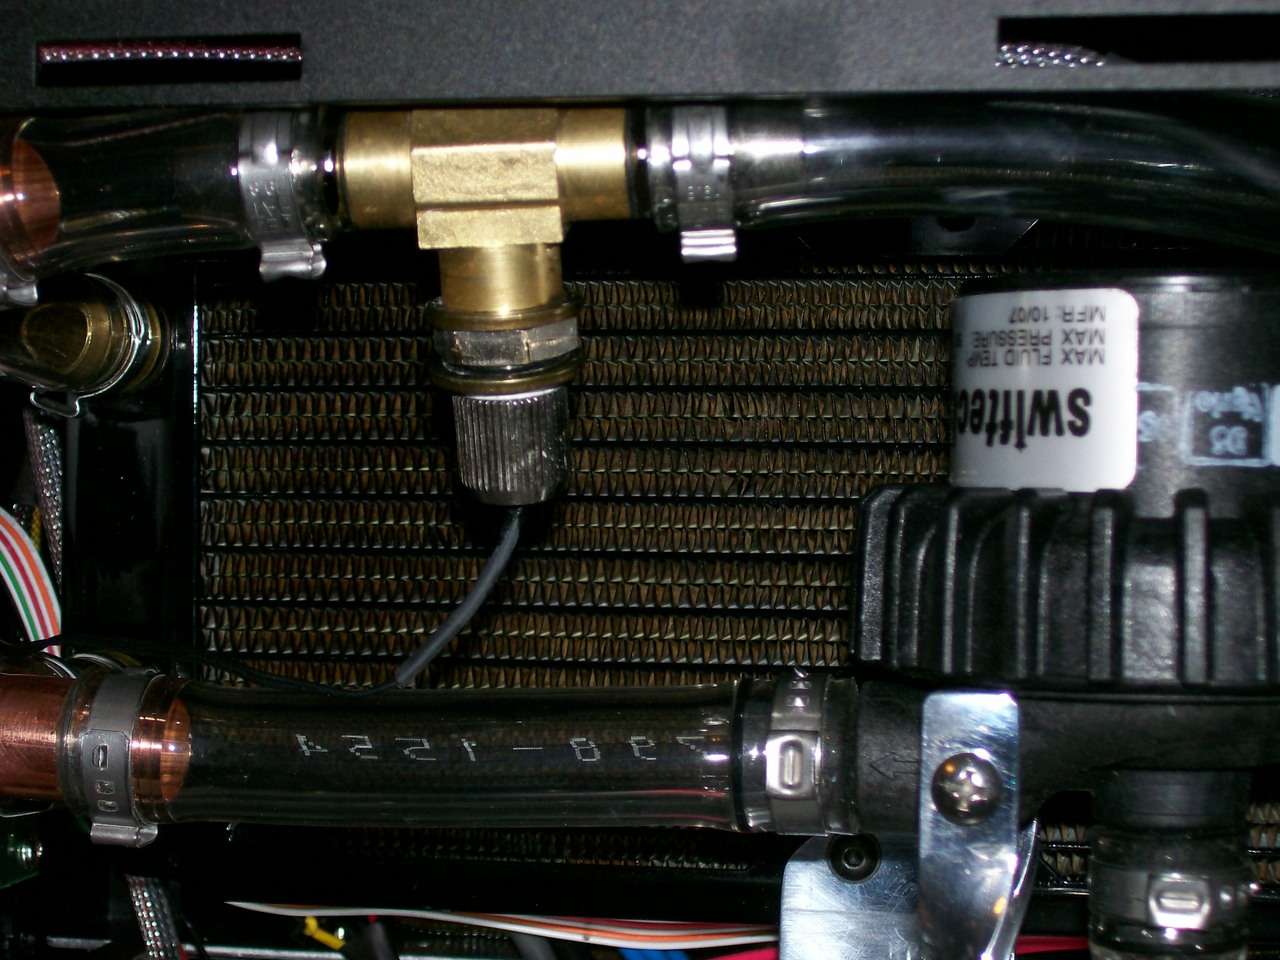
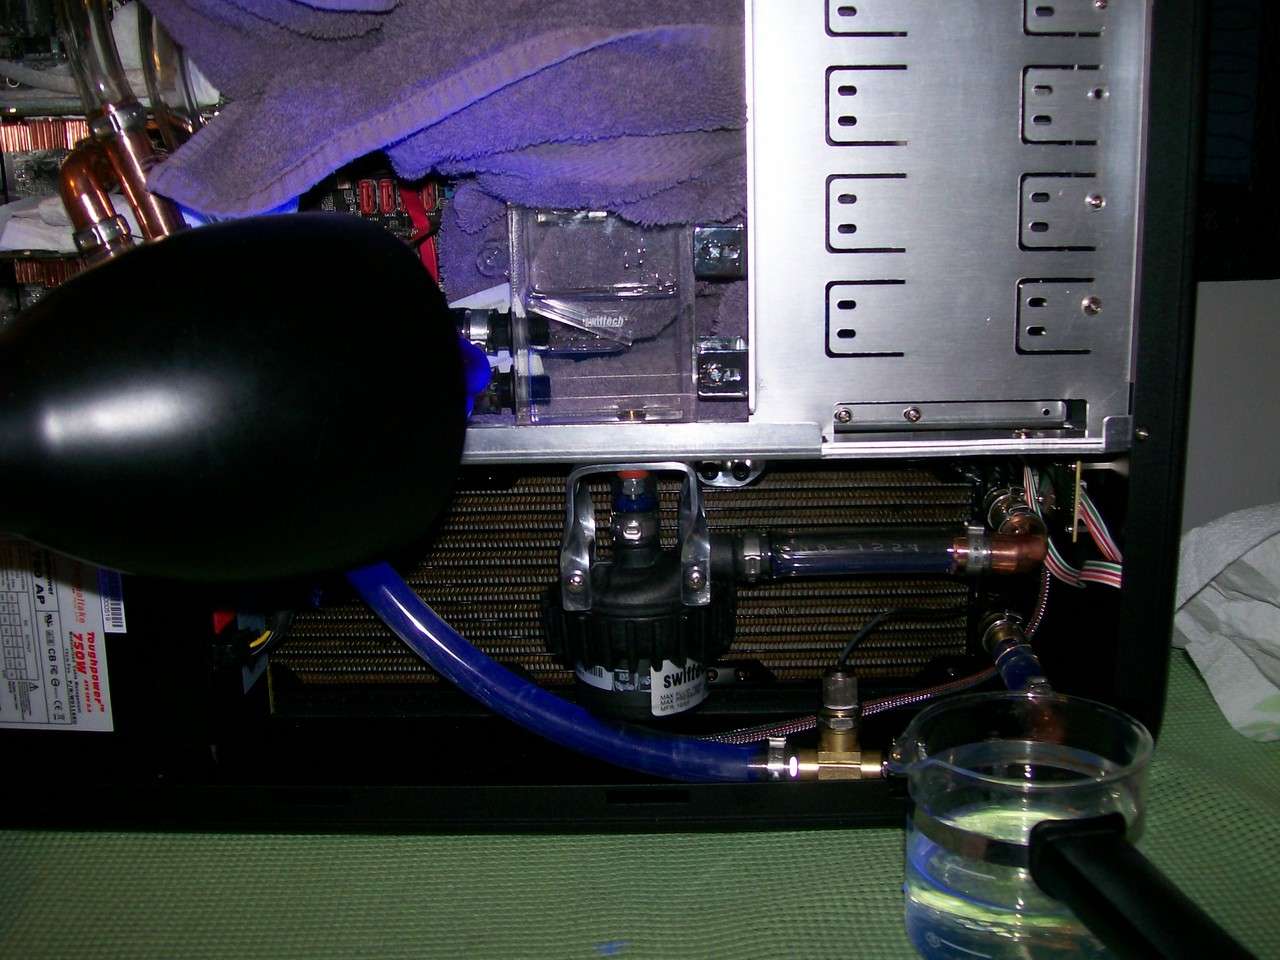
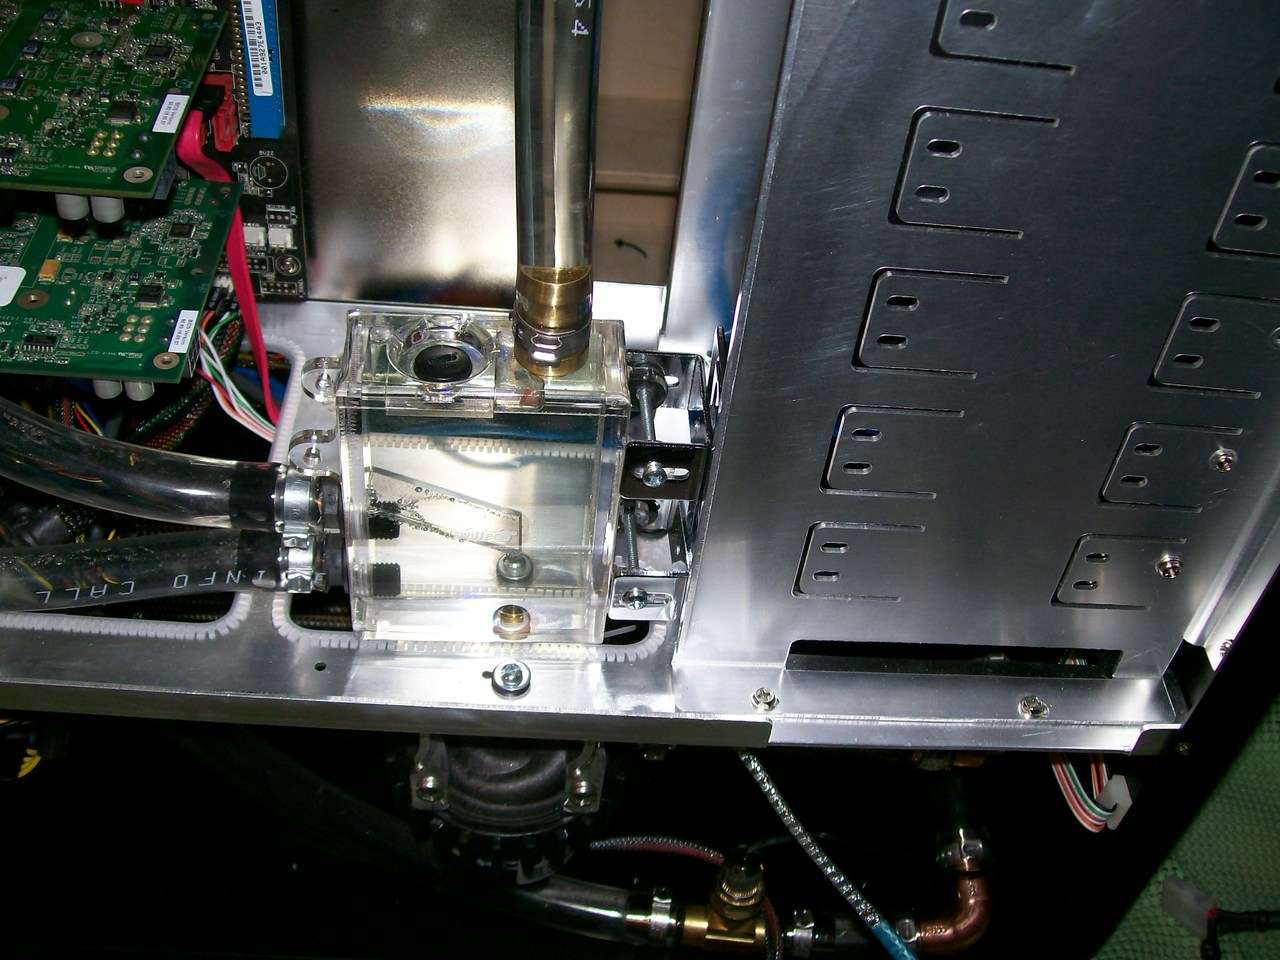
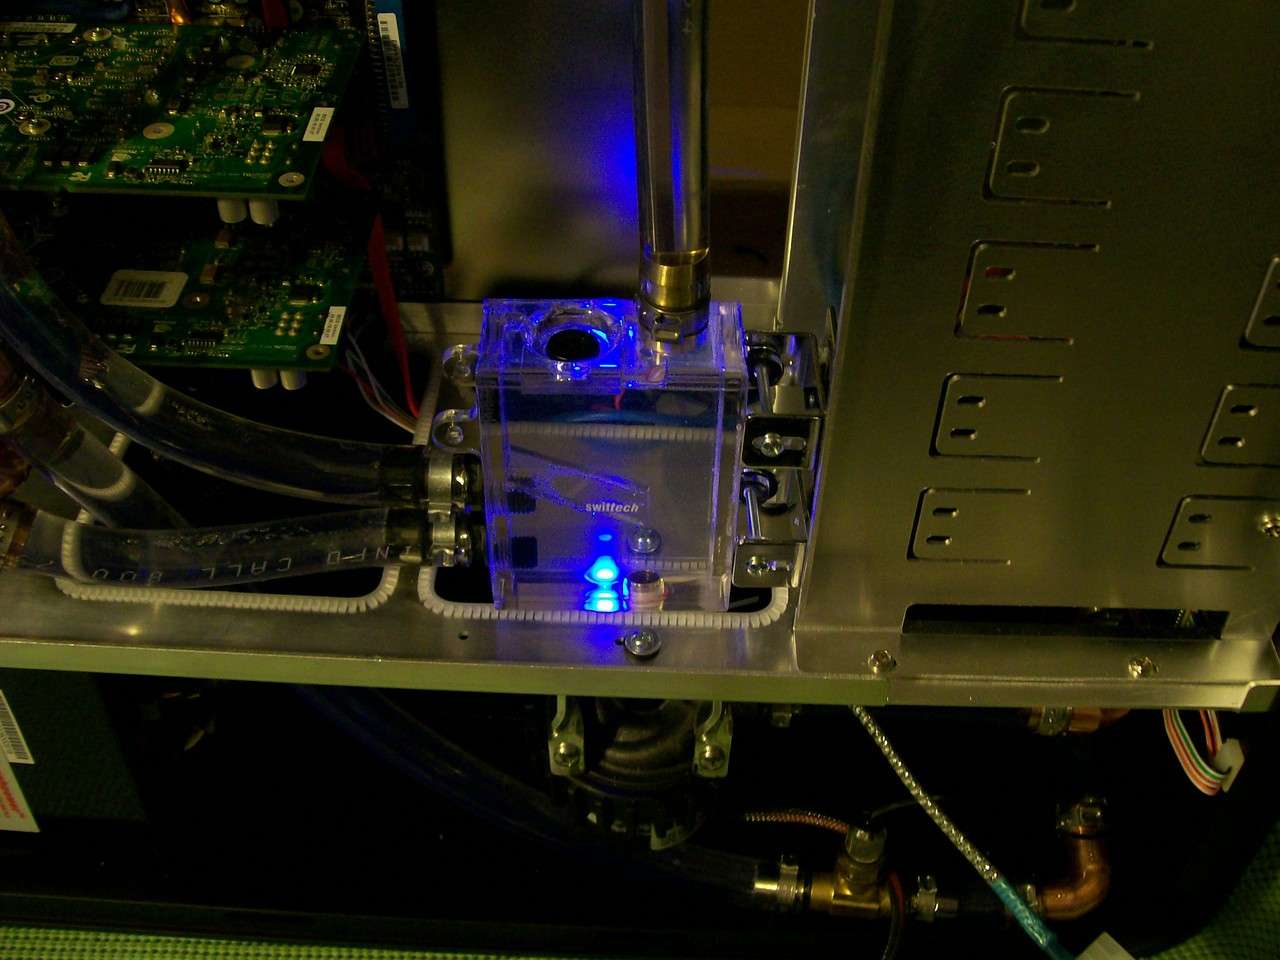
    And another look at my custom ported MicroRes. In the Future I will just make my own from scratch so I can use all BSPP fittings.


    God I love having a shop I have been wanting to mak stuff from metal but without a bench and vice etc it's about impossible. Gotta love polished aluminum.


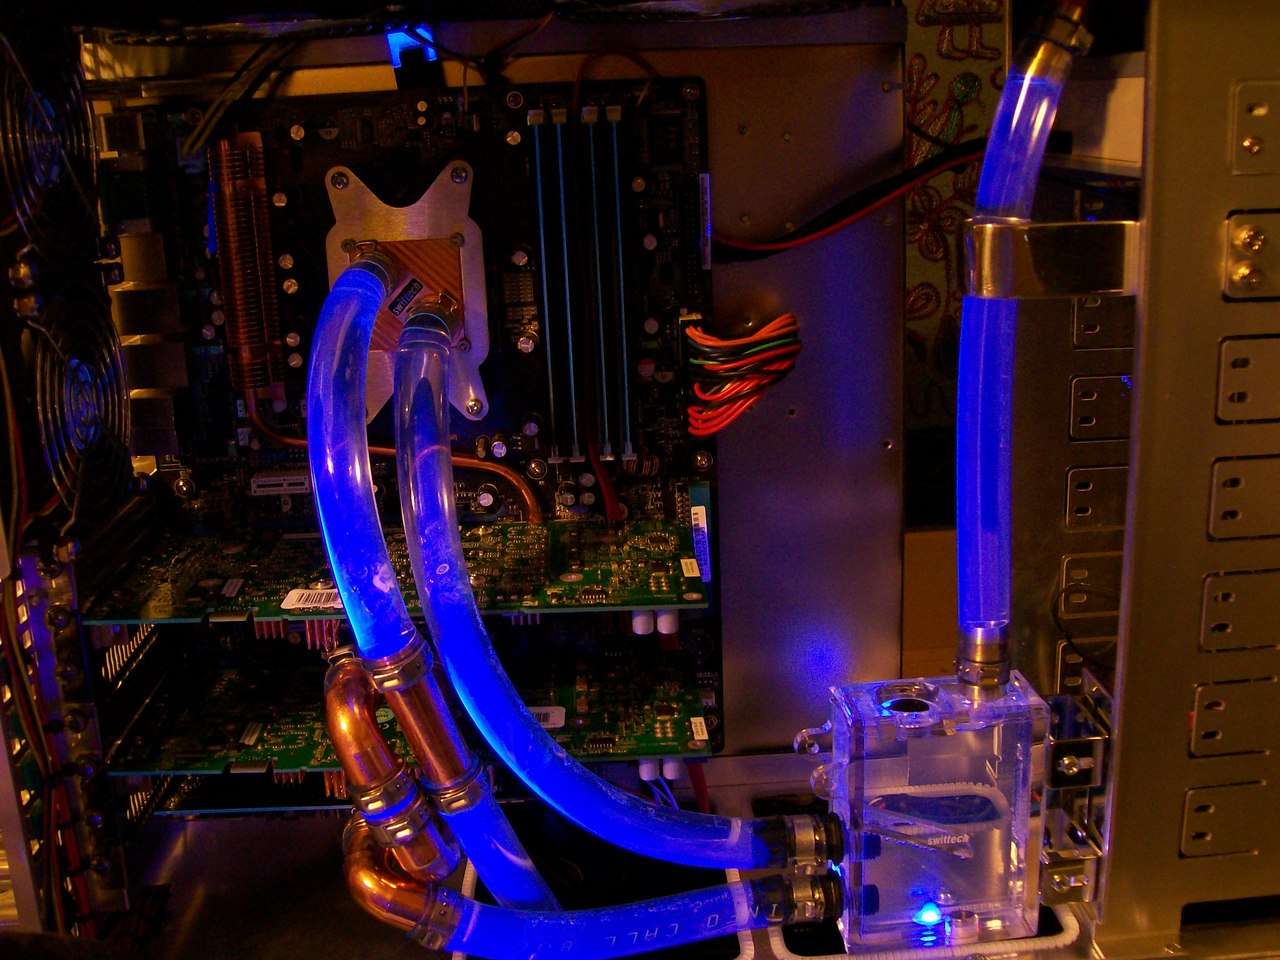
    I still have some work ahead of me here. I want to modify a Koolance temp sensor to fit in the reservoir. I think one lead should be intake air and another exhaust air and a third Res temp. I am not keen on cluttering the loop with any reducers/adapters for the Koolance stuff I have on hand. So I will make something special


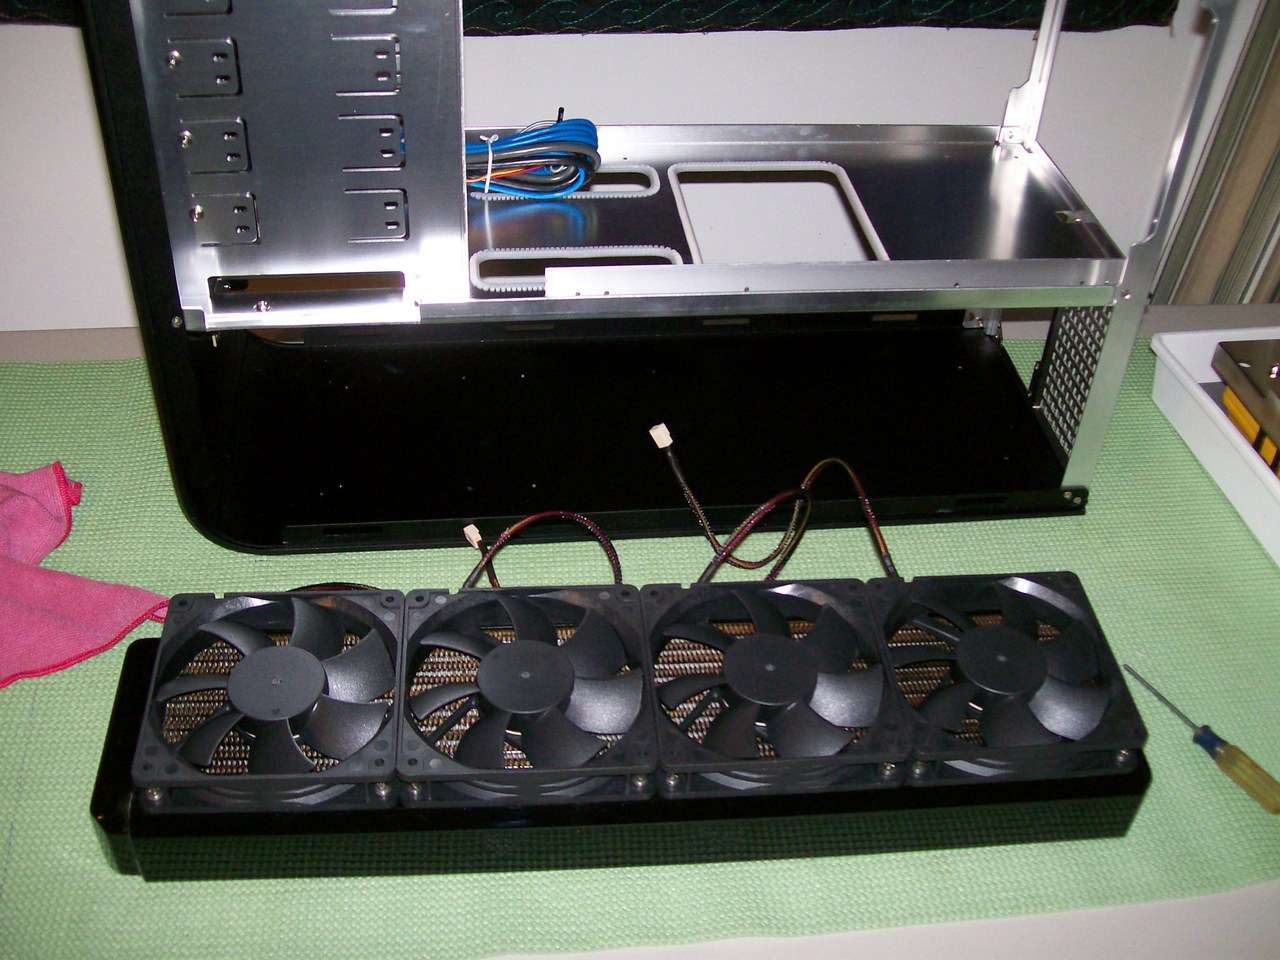
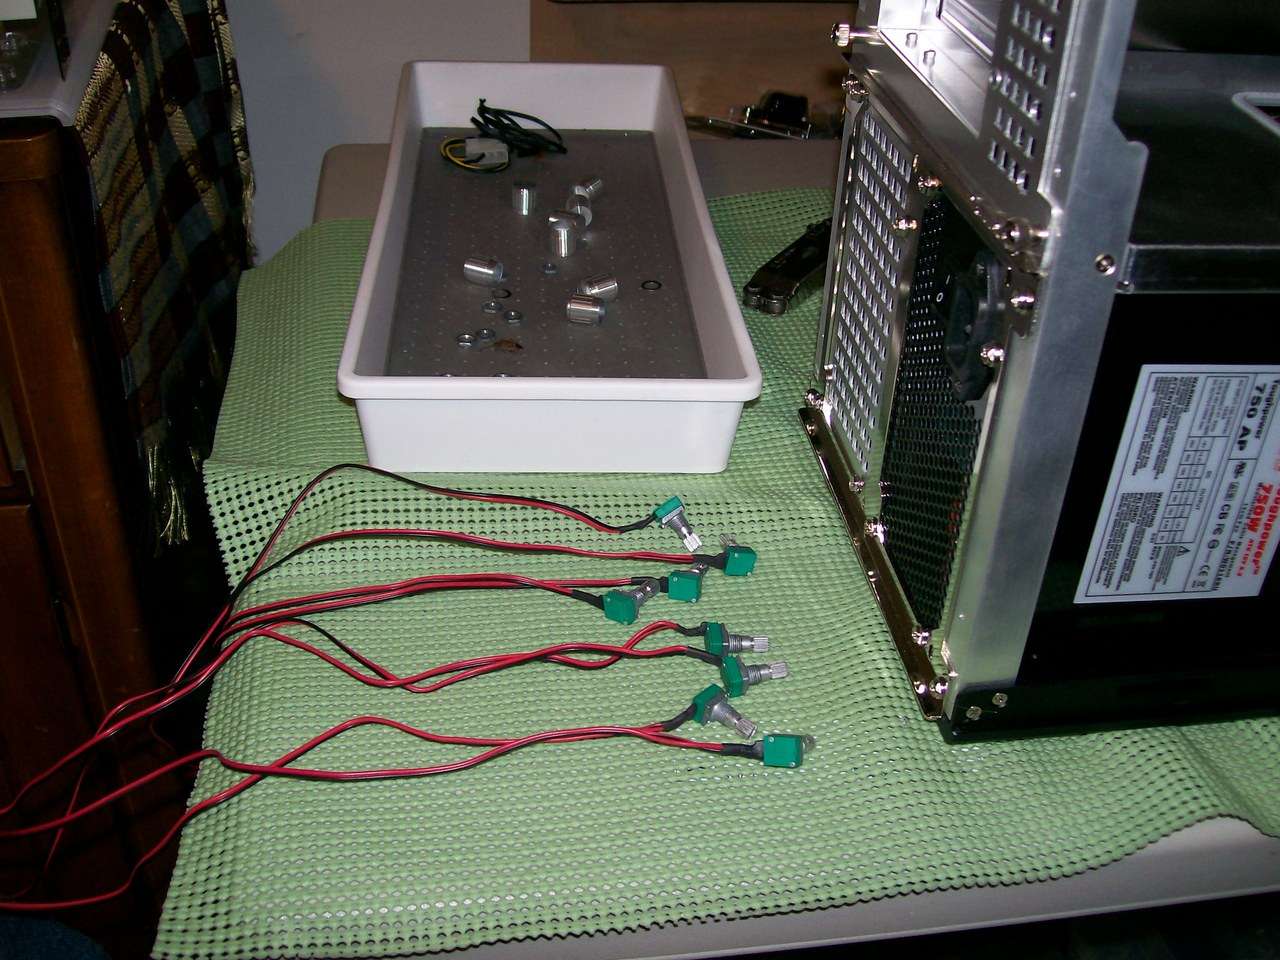
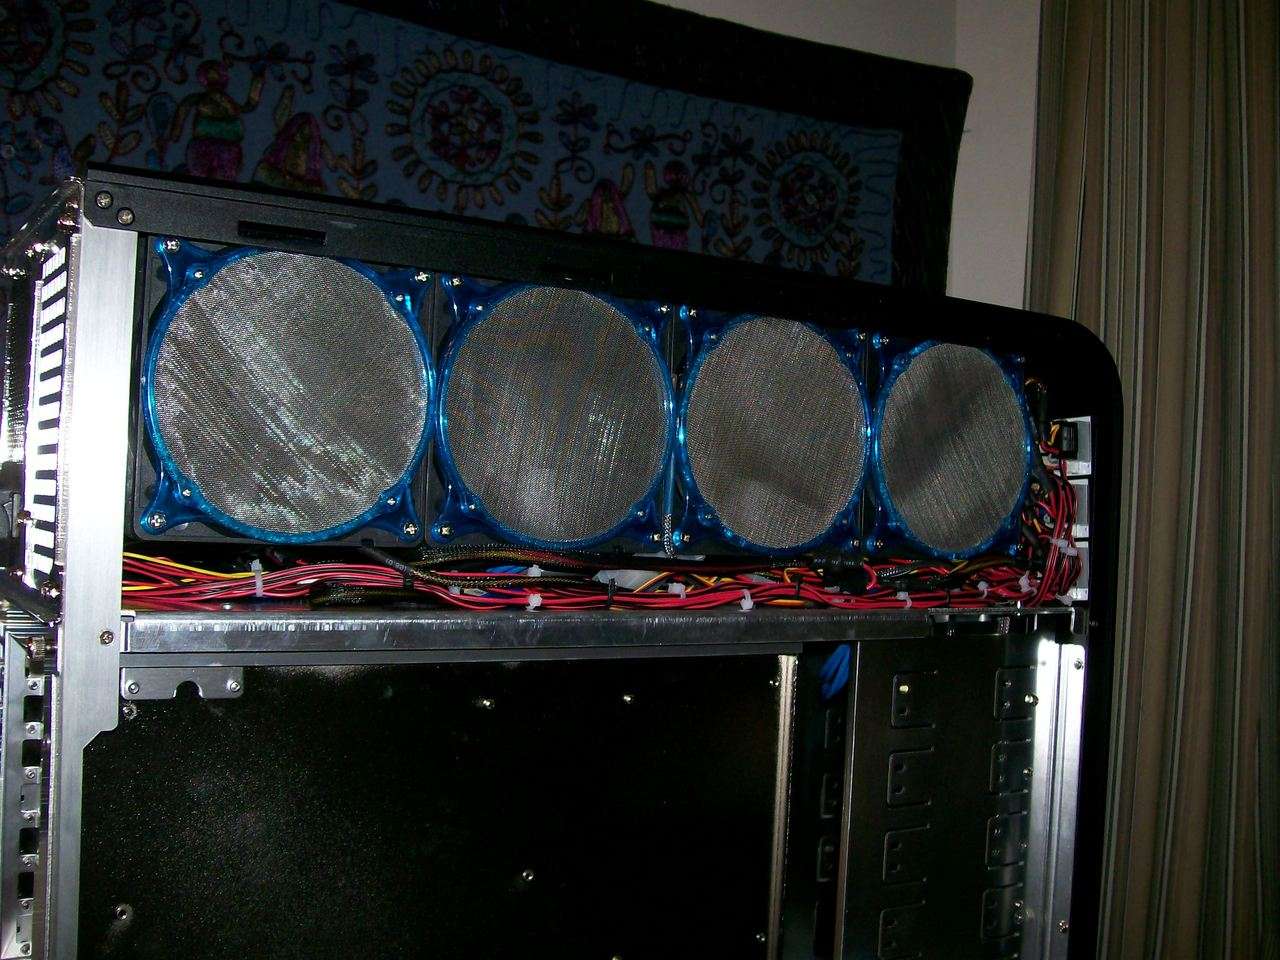
    Again my amazing collection of cables n things saved my ass. I just happened to have a number of extensions for 3 pin leads and some other odd adapters that allowed me to take the two molexed top fans and connect thm to the Silverstone controllers. I did a lot of connector modifying to make that happen.


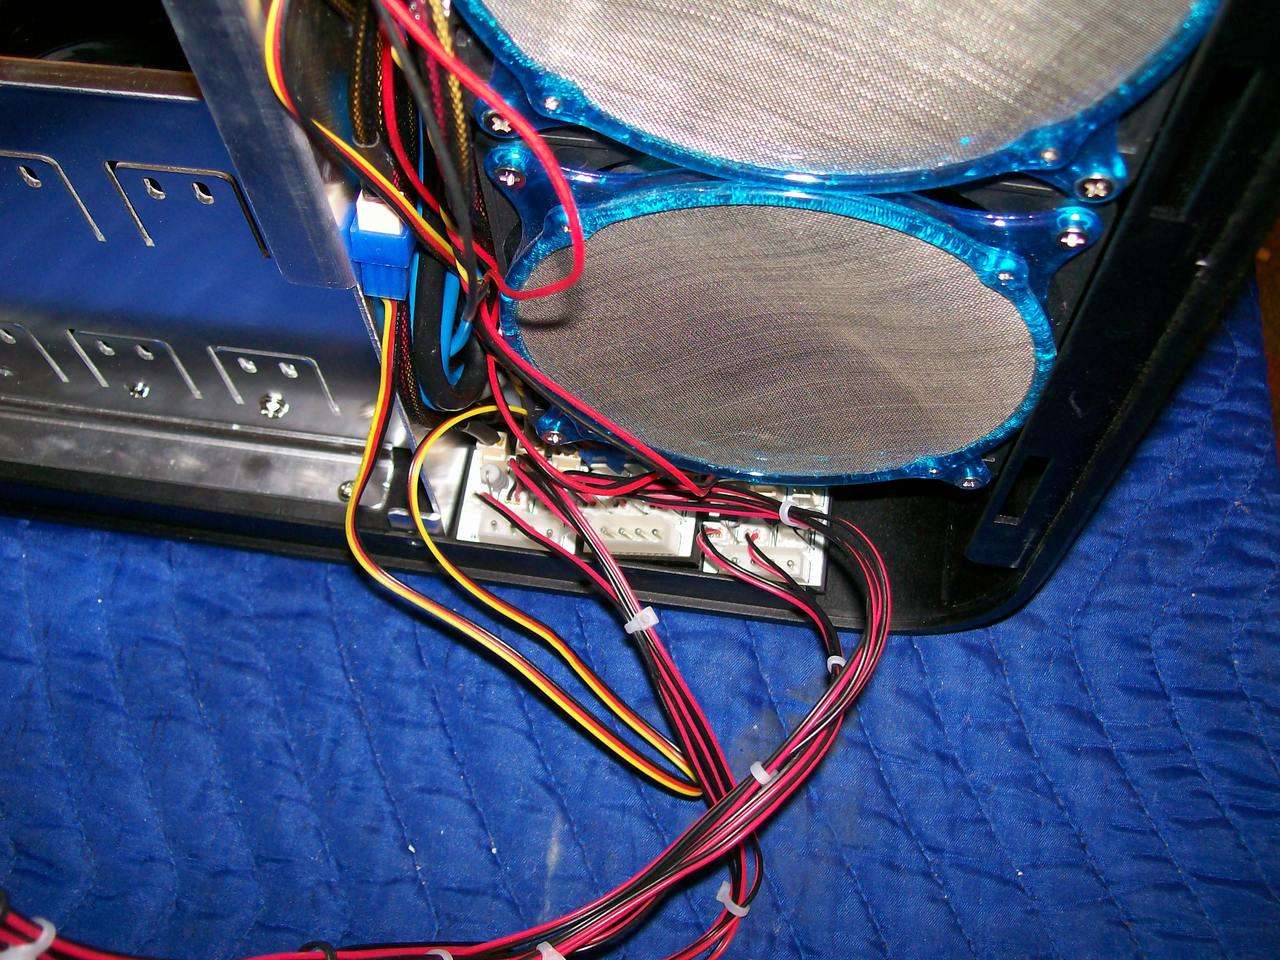
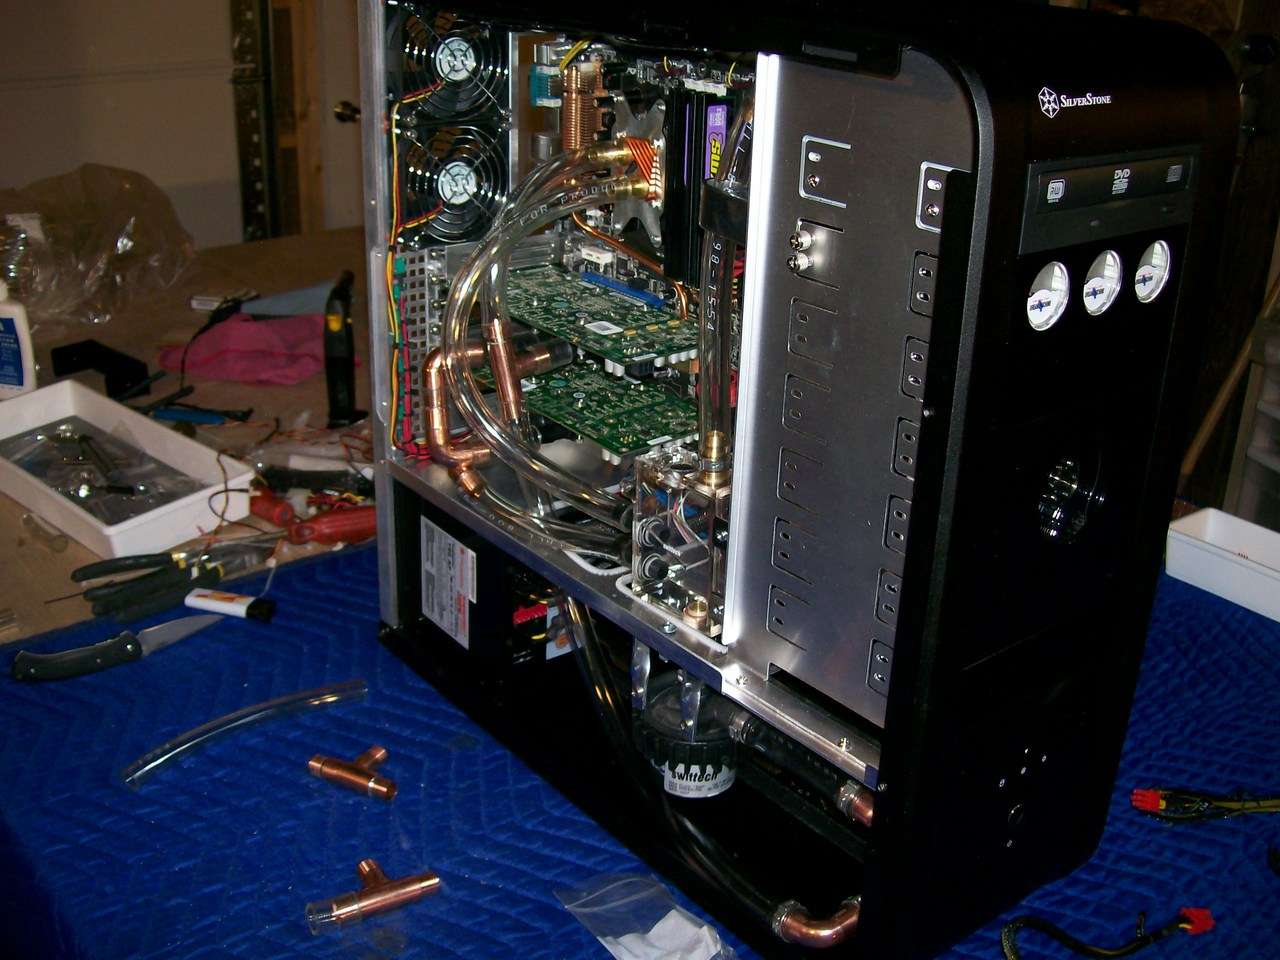
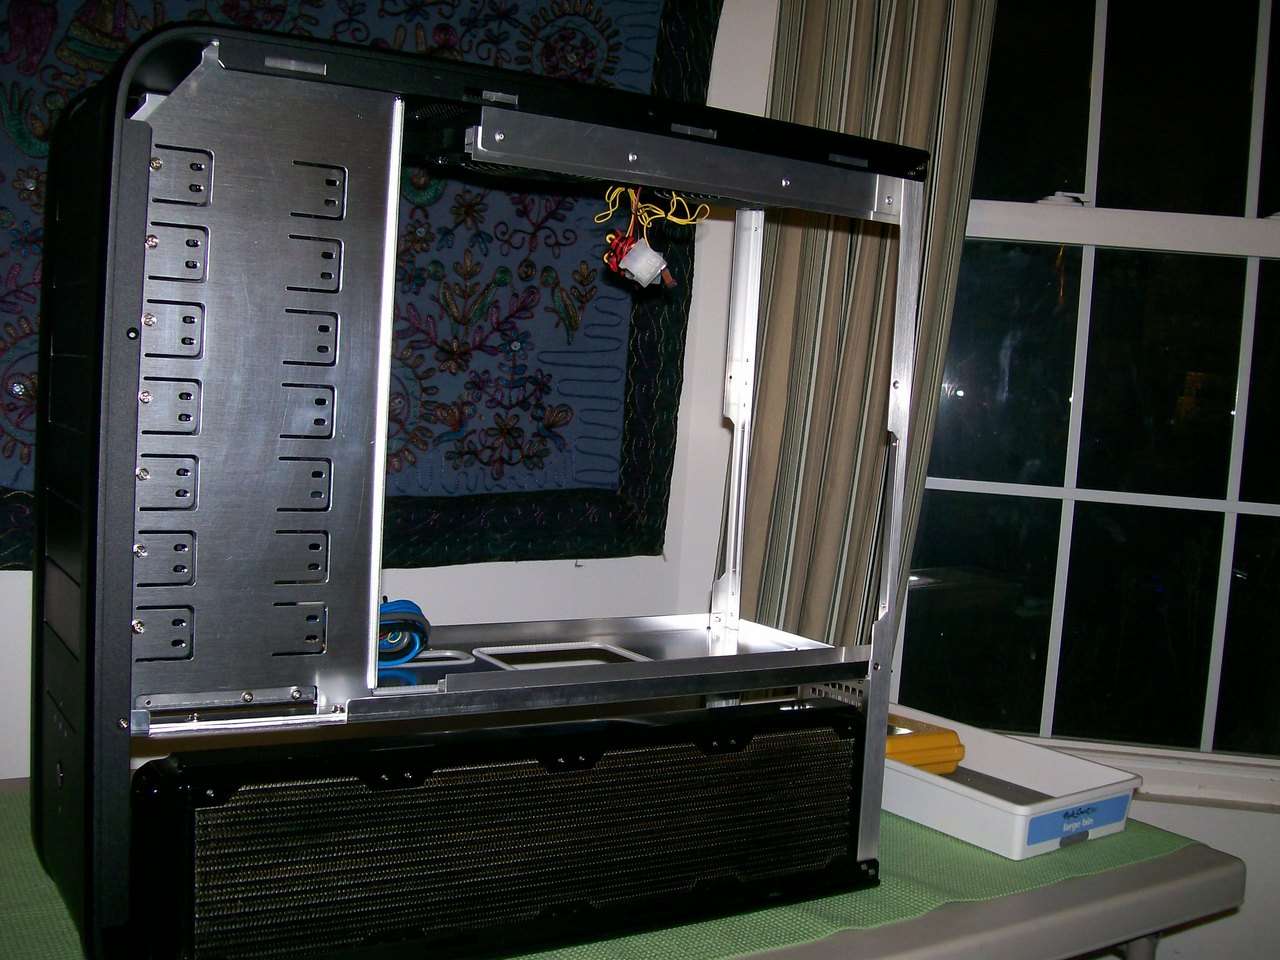
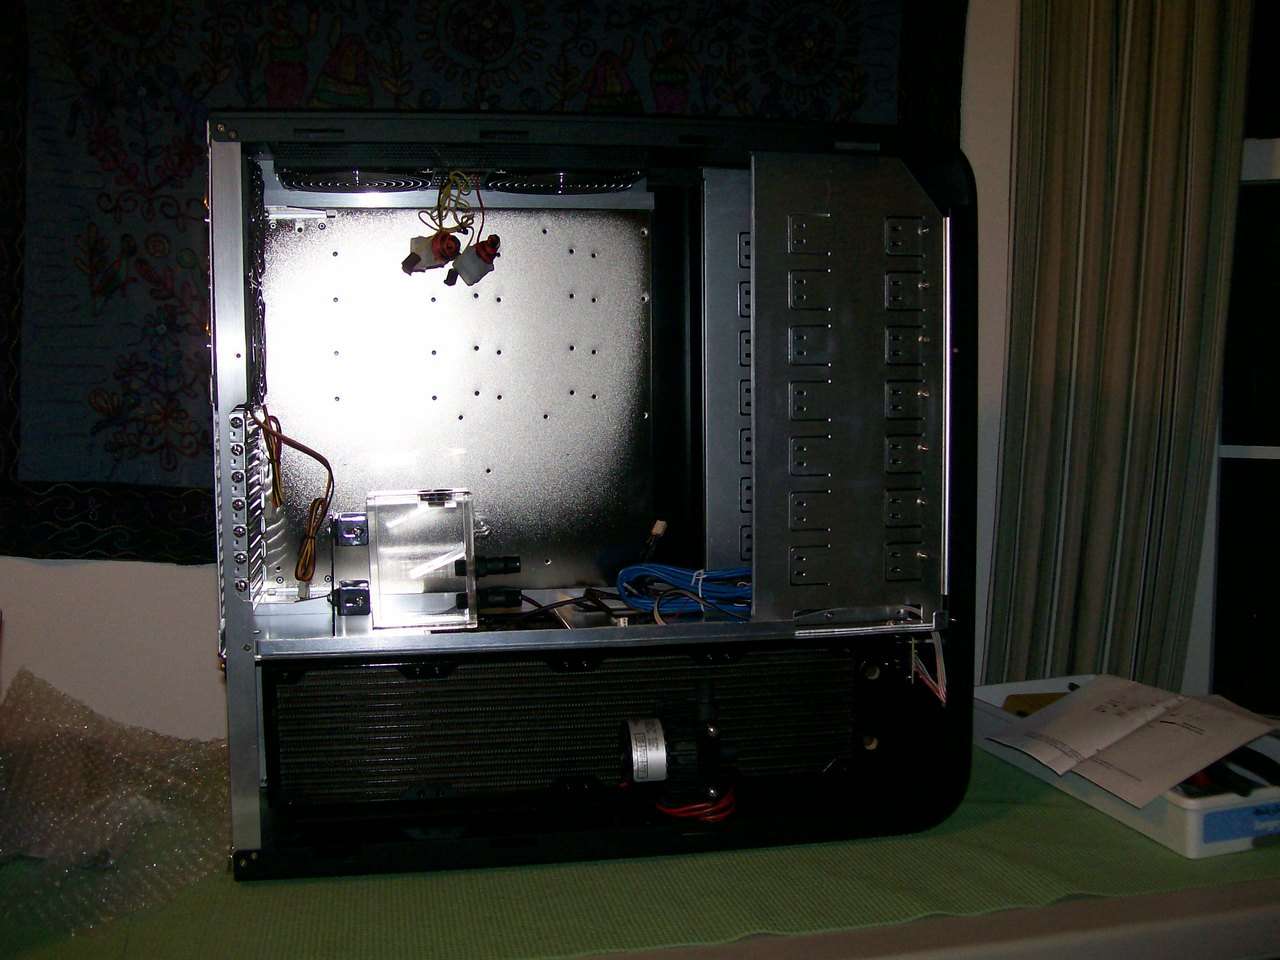
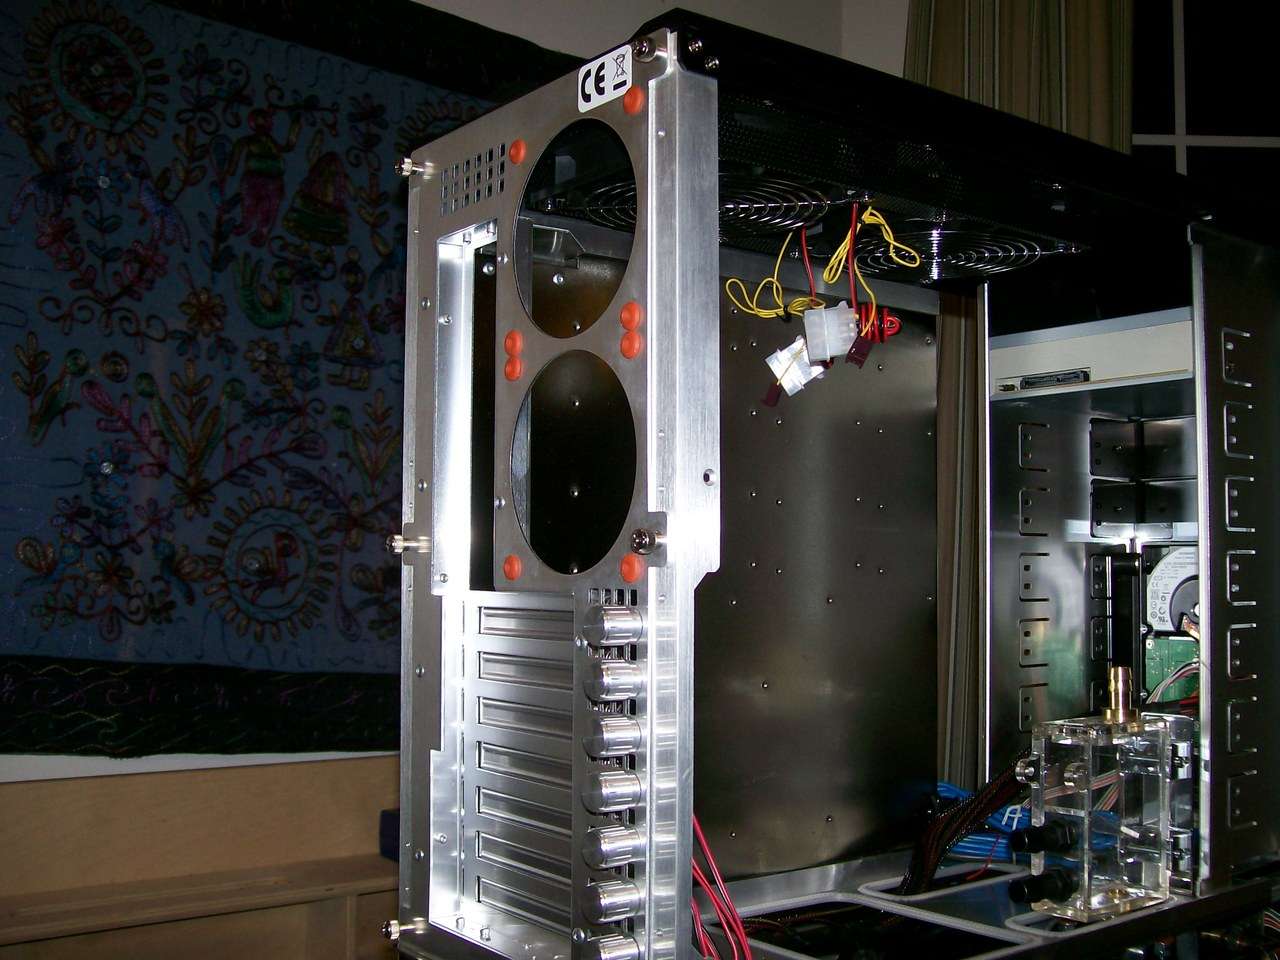
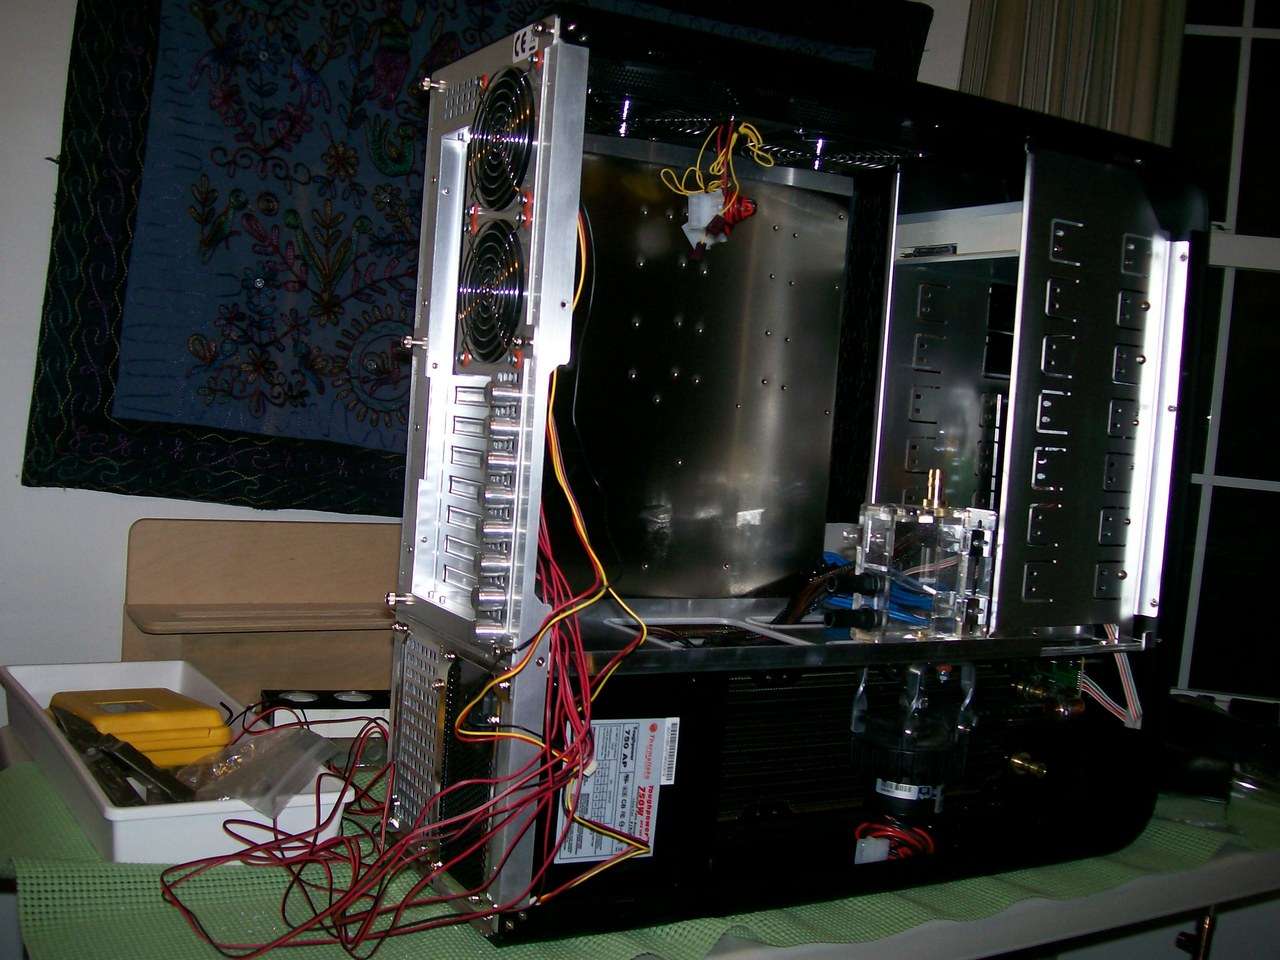
    The case is setting on it's front panel in this shot and the three cntrollers will nest in the small space in front of the Rad. This will keep them out of sight through the grill onc the panel is on.


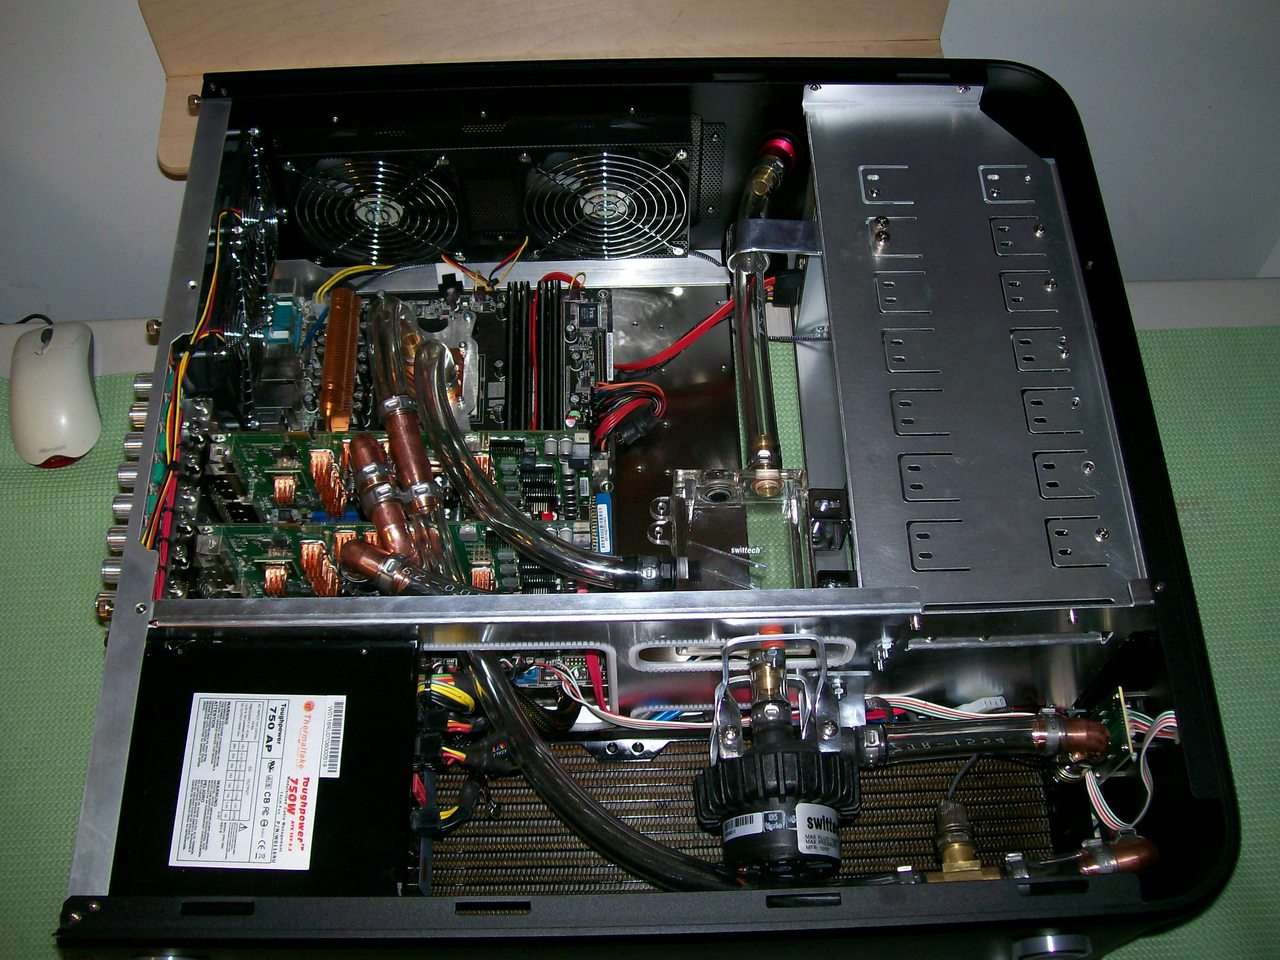
    I do whatever it takes too get at very nook. The case is really starting to fill up...But I have managed to keep it looking empty.


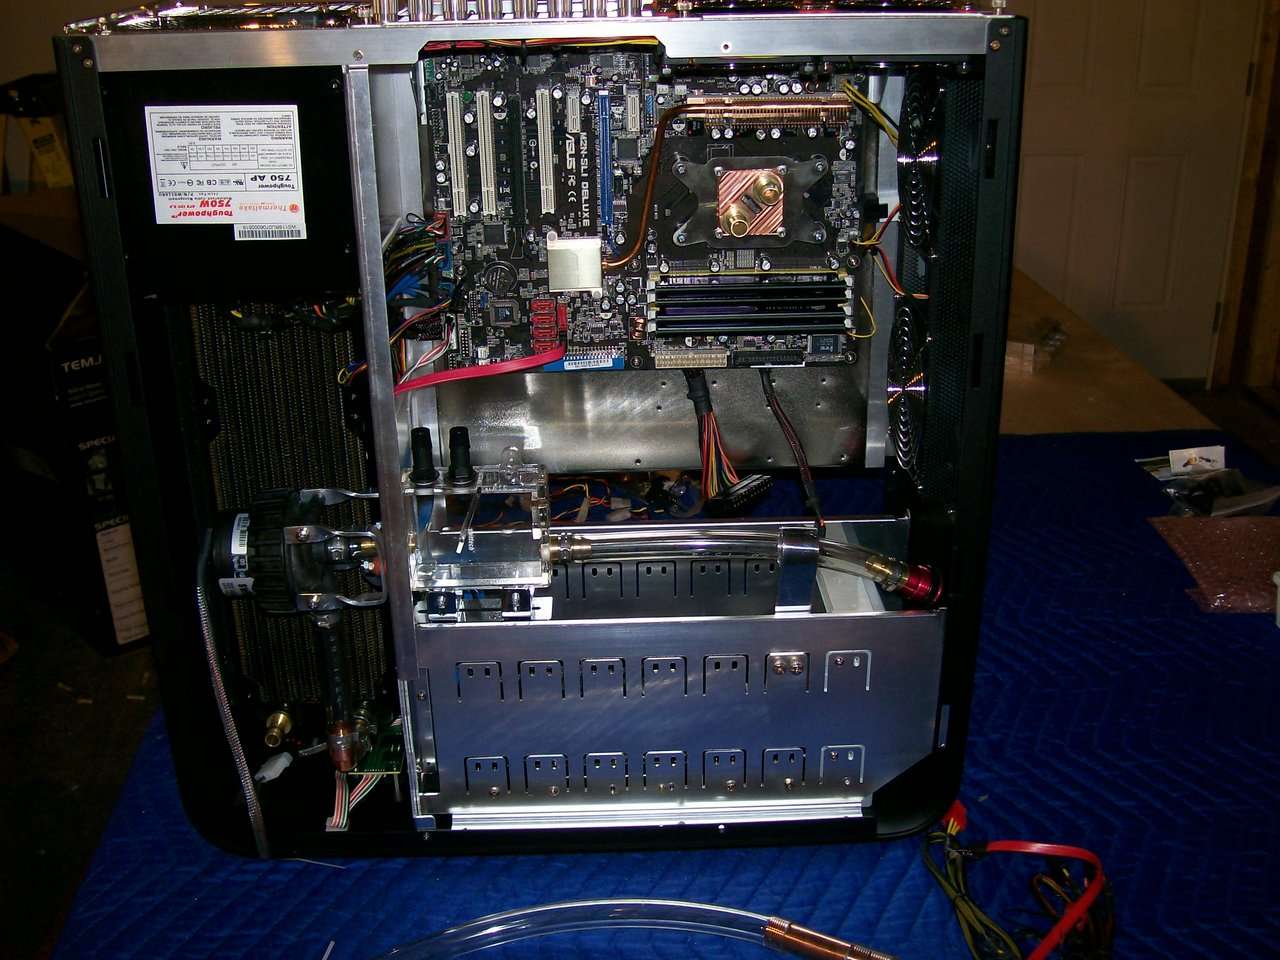
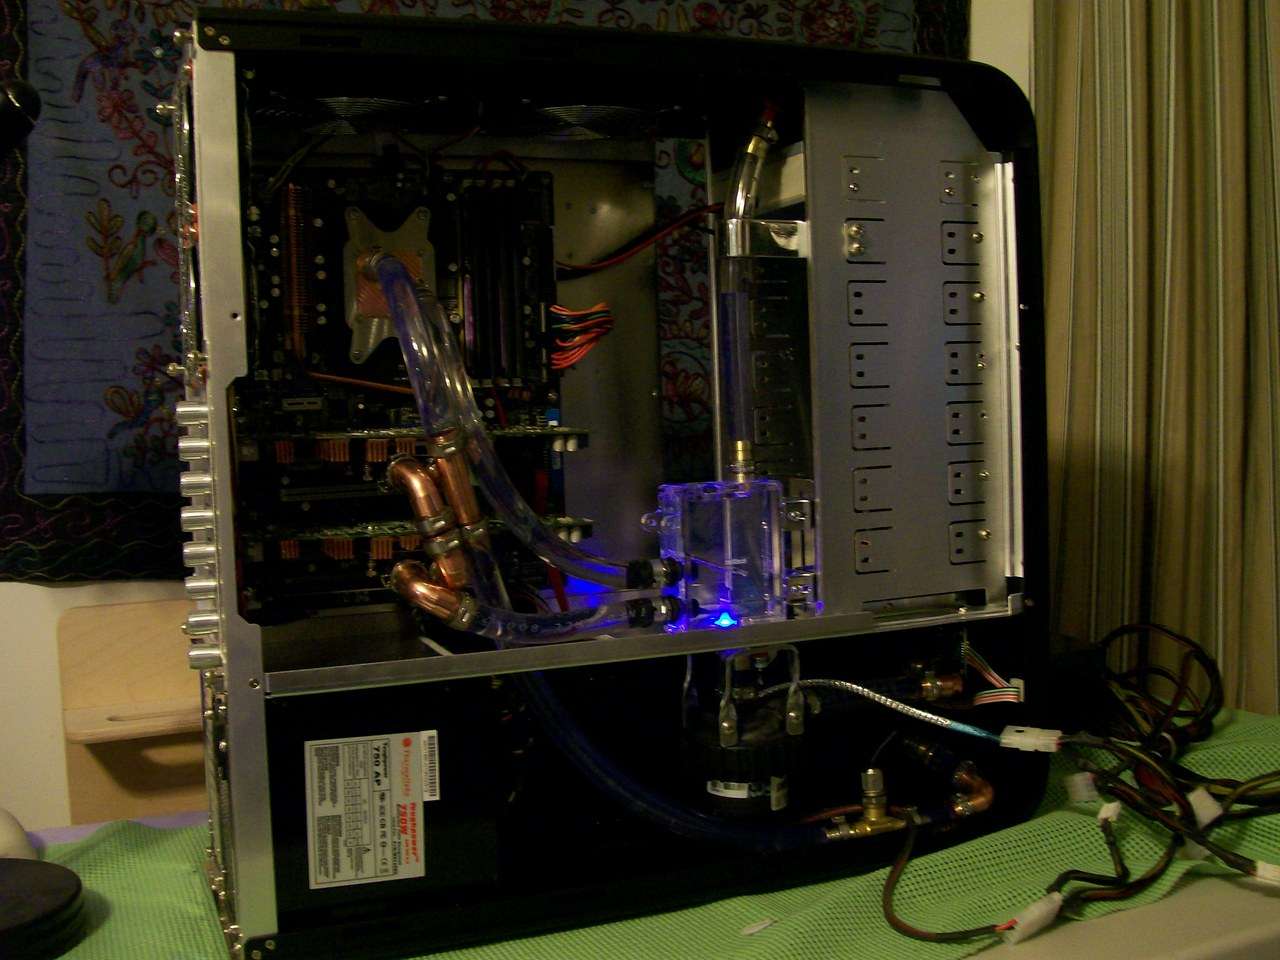
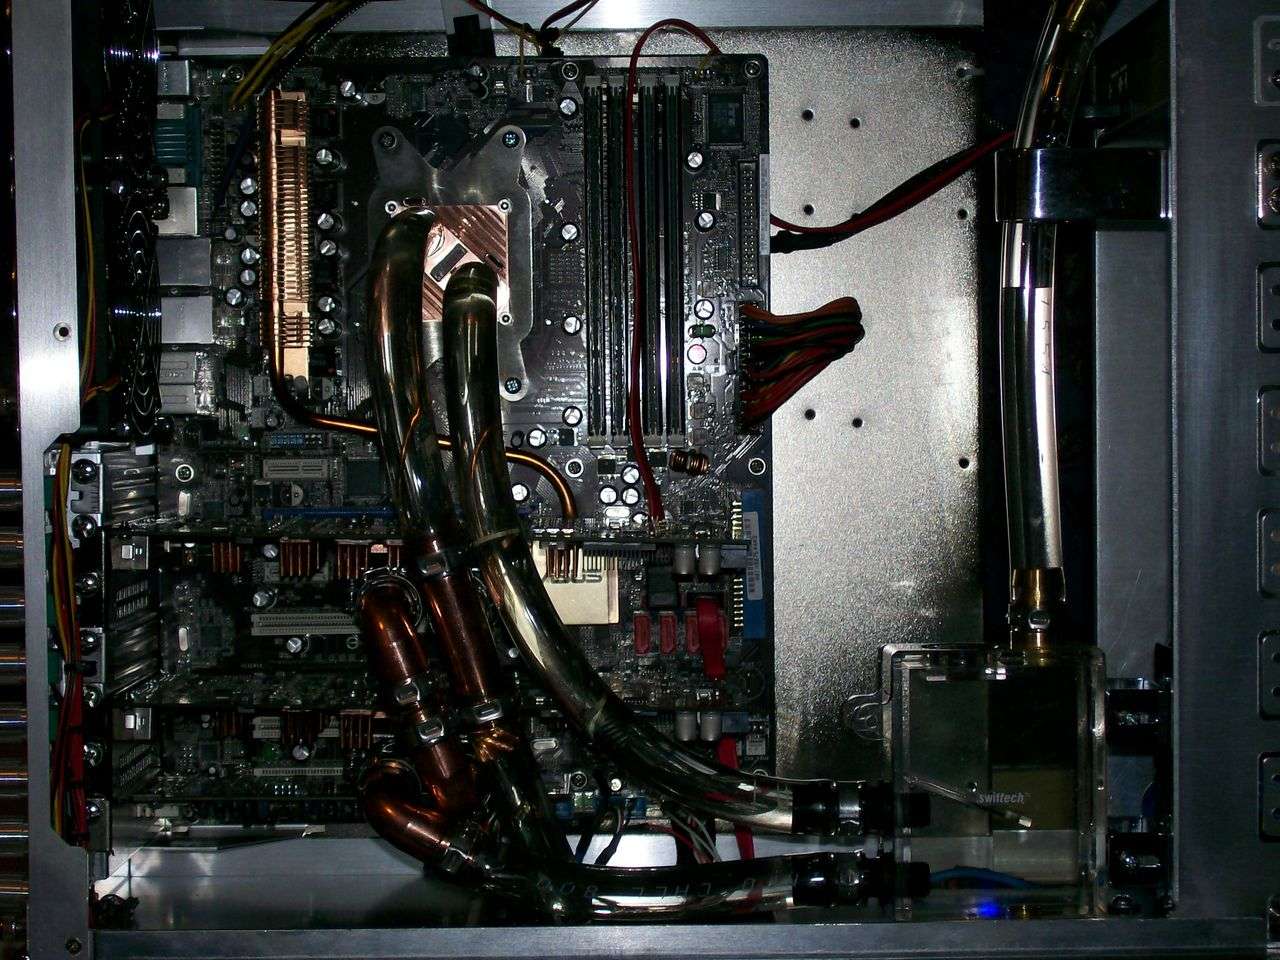
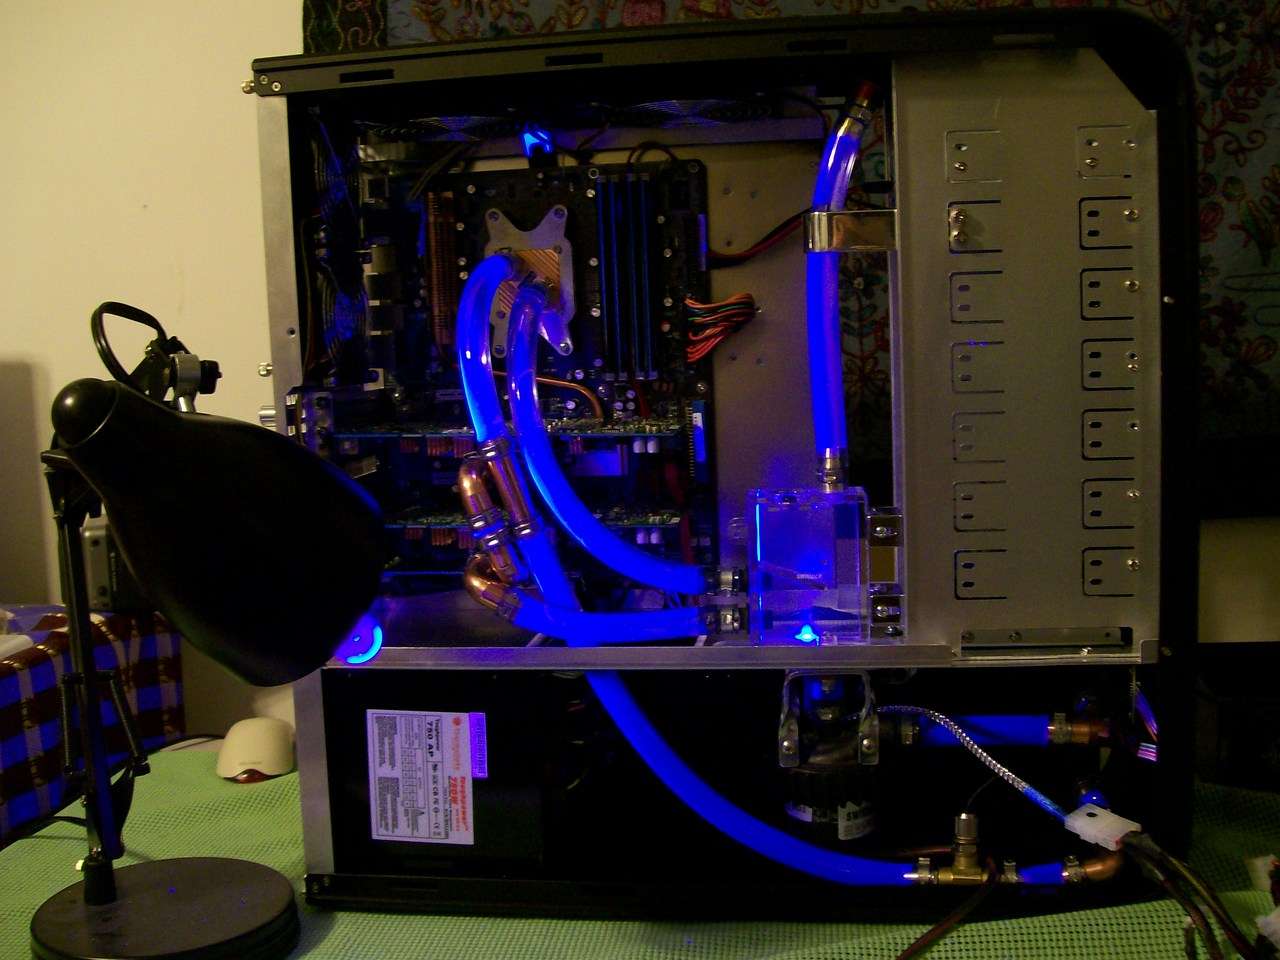
    That's powered up and cabled up except for the DVD data cable and the PCIe pwer leads from the PSU.


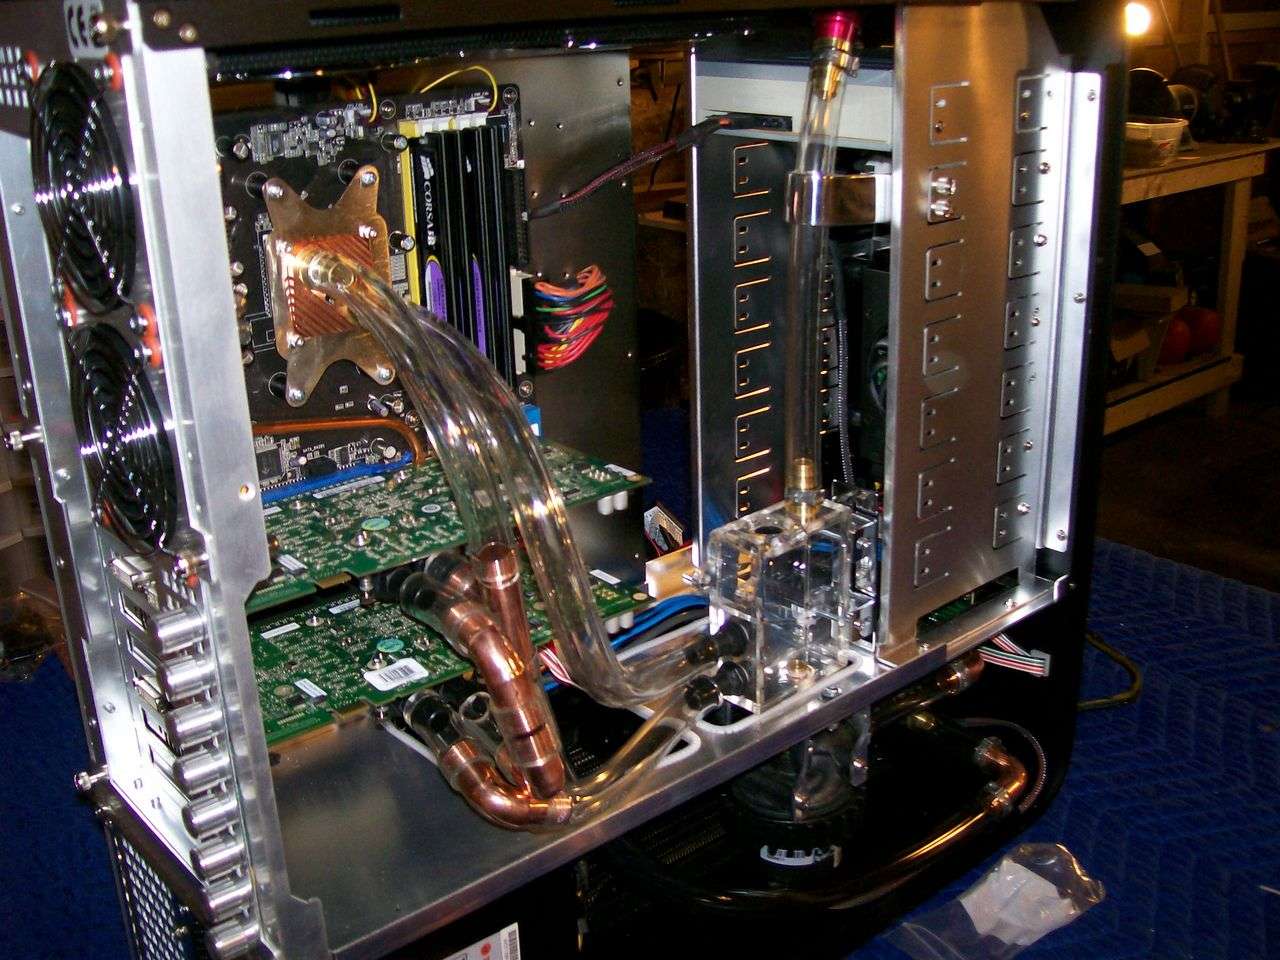
    I like that nice mpty front bay...something about unused space adds a sense of Luxury to the build...


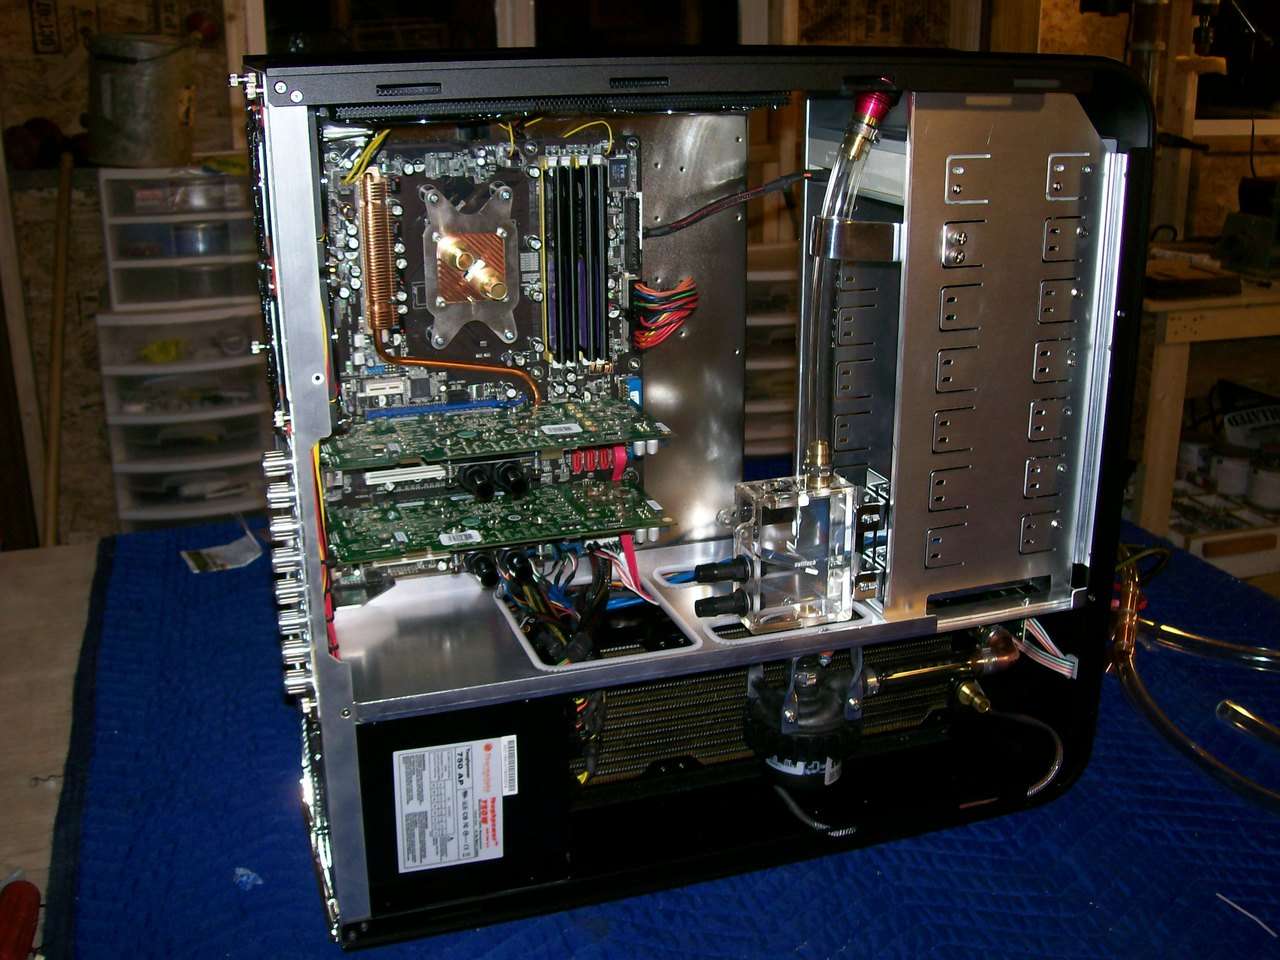
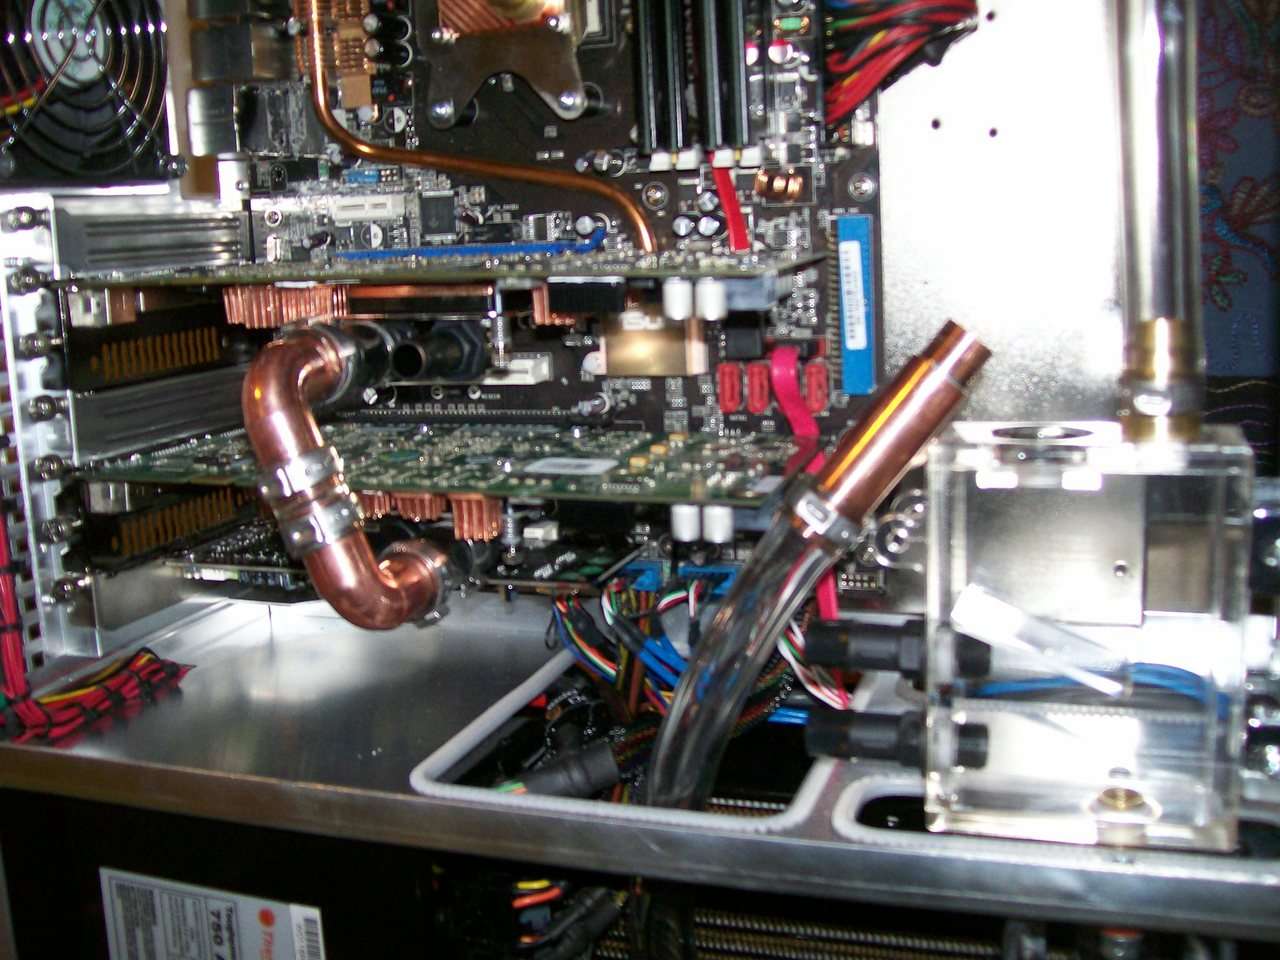
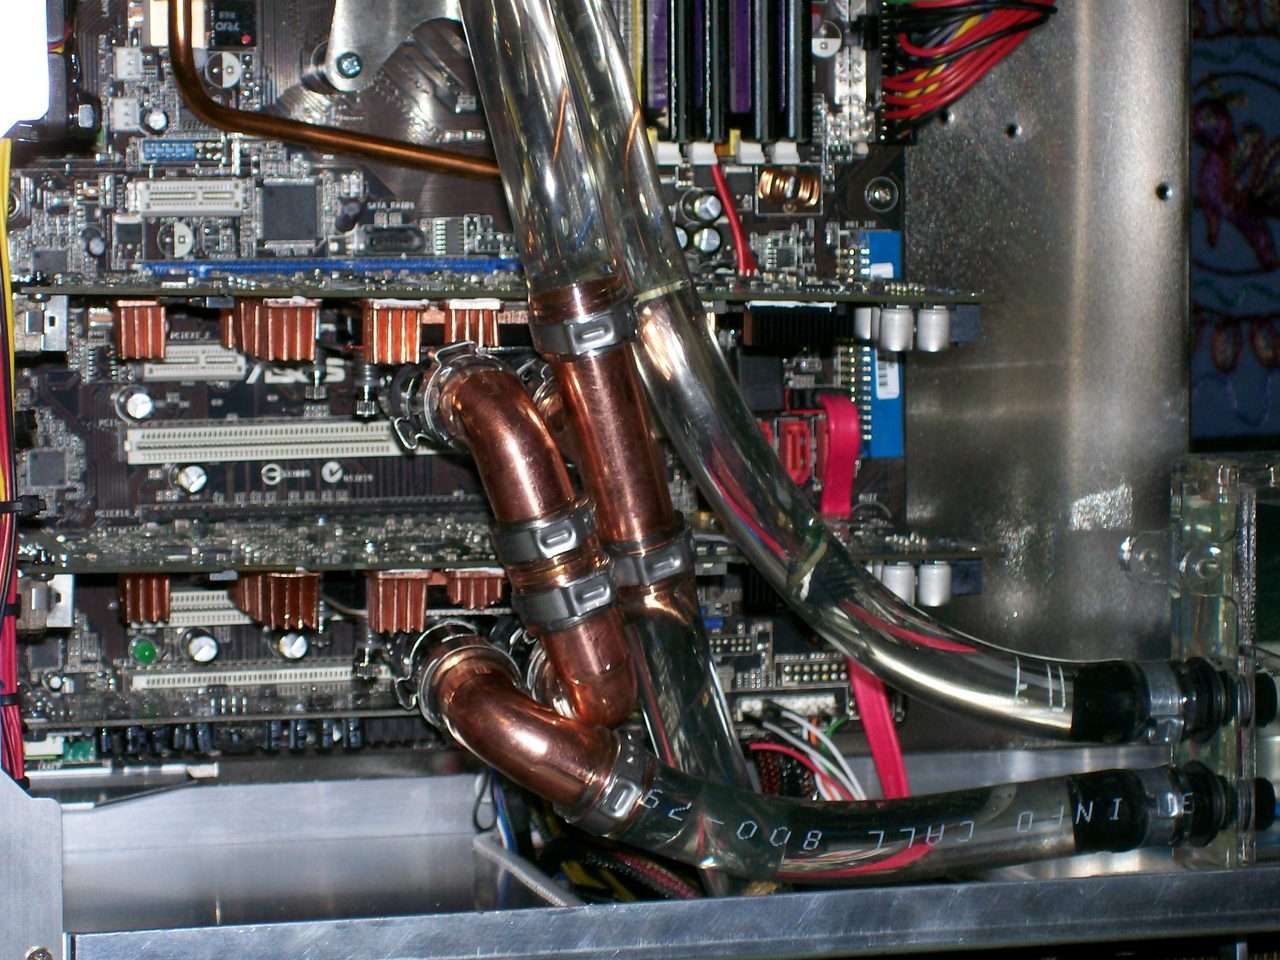
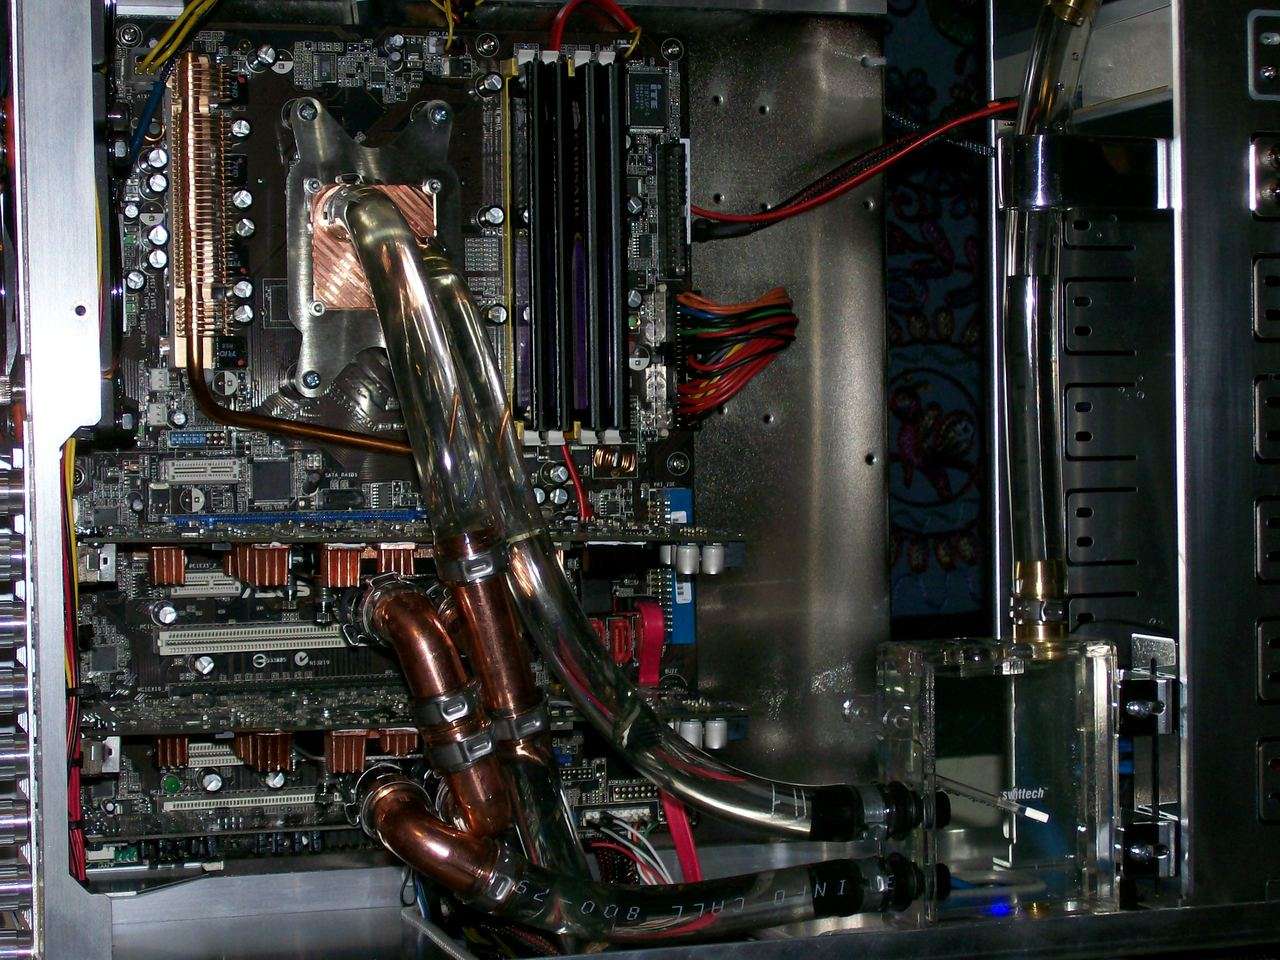
    Test fitting the cards to gt the loop completed. If only the RAMsinks were on...


    20 Logs on the fire for WCG: i7 920@2.8 X3220@3.0 X3220@2.4 E8400@4.05 E6600@2.4

  21. #21
    Xtreme Cruncher
    Join Date
    Jun 2006
    Location
    On top of a mountain
    Posts
    4,163
    And a lil more
    Quote Originally Posted by CyberDruid View Post


    I orderd some TIM products to try out. The self adhesive TIM supplied with the RAMsinks is not up to the task.


    I meticulously cleaned the RAM modules and VRMs for the third or fourth time...this time I used ArtiClean just for the hell of it.


    I prepared all the sinks with equal care.


    This stuff is not suitable for the application though it may be good TIM I dunno. Not strong enough adhesion. Plus it had Fail written all over it from the git go.


    I had to use the two part epoxy.


    With only a few minutes I had to work quickly


    But they came out all right


    With the cards finally installed I could start on the loop. I trimmed down a couple of Martin elbows to line up with th outlets on the MCW60 blocks.


    This one piece consumed a fair amount of time as I got it to fit just right


    Here's a trick for stretching tubing to fit oversize barbs.


    I'll do whatever it takes...to git r done


    Custom bracket and isolators.


    A pound of copper cooling some cards...


    Another chunk of the fabled ore...


    A low restriction inline temp gauge...


    Filtered Scythe S-Flex and another pound of copper in wire neatly bundled between rad and bulkhead.


    8 fan controllers, pump, gauges, drives, wires out the yang all impossibly crammed into 1/2" x 19" crevice...


    Hooboy...done with almost every detail...


    Time to tank up with joy juice.


    I wish the camera could capture how cool this stuff is to play with...


    Perfectly clear in normal light.


    It took a while to tank up the beast..


    I am using a single LED to illuminate the res which will get a viewport in the side panel.


    The view port will be about the same diameter as the gauges on the front.


    Copper everywhere...


    And no leaks


    Running in the loop with a jumpered PSU


    Flash. Natural Light. UV.


    And there you have it. I will let the pump run overnight.
    I'll be finishing the rig off today and load testing to see if the Pump is up to the task. If not I will add a second pump inline after the rad.

    As you can see the rig is capable of being shipped although my Client is driving all the way from Ohio to VA just to pick it up.
    Last edited by CyberDruid; 12-06-2007 at 05:43 AM.
    20 Logs on the fire for WCG: i7 920@2.8 X3220@3.0 X3220@2.4 E8400@4.05 E6600@2.4

  22. #22
    Xtreme Cruncher
    Join Date
    Jan 2005
    Location
    England
    Posts
    3,554
    looking good m8.

    is that 480 any good?

    My Free-DC Stats
    You use IRC and Crunch in Xs WCG team? Join #xs.wcg @ Quakenet

  23. #23
    Registered User
    Join Date
    Feb 2006
    Posts
    79
    Hot... *envious*

  24. #24
    Xtreme Cruncher
    Join Date
    Jun 2006
    Location
    On top of a mountain
    Posts
    4,163
    Quote Originally Posted by Origin_Unknown View Post
    looking good m8.

    is that 480 any good?
    I have not a clue. I am a Thermochill fanboy. I'll let you know if it performs well.

    It seems highly restrictive both to liquid and air...not something I like in a PC rad.
    20 Logs on the fire for WCG: i7 920@2.8 X3220@3.0 X3220@2.4 E8400@4.05 E6600@2.4

  25. #25
    Xtreme Member
    Join Date
    Aug 2007
    Location
    UK
    Posts
    222
    O_o i can't tell if the res has liquid in or not...think I need my eyes tested..
    does the T-line impinge flow to the GPUs??

Page 1 of 3 123 LastLast

Bookmarks

Bookmarks

Posting Permissions

  • You may not post new threads
  • You may not post replies
  • You may not post attachments
  • You may not edit your posts
  •