Page 1 of 3 123 LastLast
Results 1 to 25 of 51

Thread: Start of a new build

  1. #1
    Xtreme Member
    Join Date
    Feb 2008
    Posts
    115

    Start of a new build

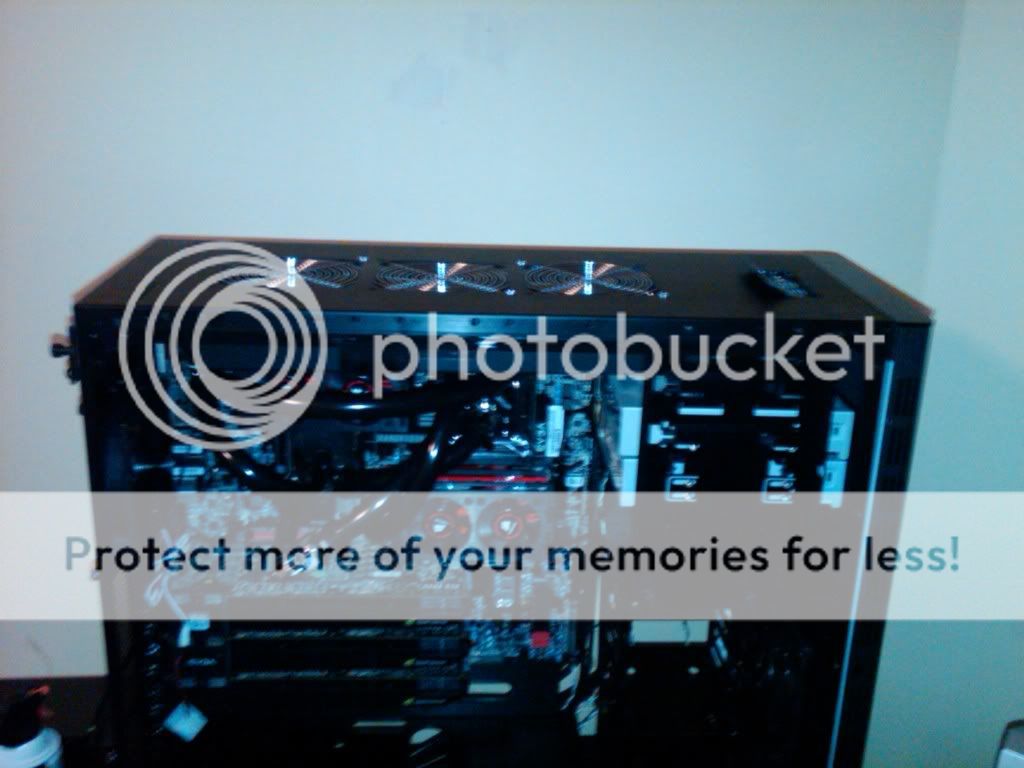
    Not much to show for now,but i did get some work done on the motherboard to start off....It's going to be a long build to get everything the way i want it...First picture, though it is blurry but it was taken with a cell phone camera so..


    I gotta admit it was a massive pain in the ass to install that motherboard water block, but it's done now thogh there's still the second CPU water block and a couple of fittings to deal with....More to follow over the next few days.
    Last edited by Shadow0001; 03-26-2011 at 10:26 PM.

  2. #2
    Xtreme Addict
    Join Date
    Feb 2010
    Location
    Wisconsin
    Posts
    1,634
    Oh boy oh boy! SR-2 builds are sweet! Are you just testing out the block? Because tubing routes are a little crazy and... there's no block on the left.
    Signatures make my posts look huge... but I'm not humble enough to completely remove my signature, so I kept this note explaining it.

  3. #3
    Xtreme Member
    Join Date
    Dec 2008
    Location
    Jerusalem, Israel
    Posts
    252
    yea!
    another sr-2 build!
    [SIGPIC][/SIGPIC]


    EVGA SR-2 , 2X Intel Xeon 5620, 12X2GB Corsair Domminator 1600 MHZ CL7
    3X GTX580, Corsair AX1200, Lian Li PC-Z70
    3X Dell U2311H, Liliput 7" touchscreen monitor

  4. #4
    Xtreme Member
    Join Date
    Feb 2008
    Posts
    115
    Quote Originally Posted by ScottALot View Post
    Oh boy oh boy! SR-2 builds are sweet! Are you just testing out the block? Because tubing routes are a little crazy and... there's no block on the left.


    Still had to use some cooling parts from my current system, hence the missing water block to see on that picture, and as far as the tube routing goes, it's both related to just now close each individual block is to eachother, wich makes it pretty much impossible to make short tubing paths without kinking it and restricting water flow, and also because of the radiator + pump + reservoir combo i'm using (swiftech H2O 320 kit), wich combines all 3 into a single unit to save space, and i need to save space for a seperate water cooling loop for the video cards, but that will get done later....The PC case is a Lian LI V2120X(all black inside an out)


    Anyhow, here's an updated picture with more stuff installed:


    Both CPU blocks installed(had to modify one of them to fit),the cooling circuit completed at the motherboard level, 24 GB of ram installed and 3 GTX580's as well as an ASUS Xonar sound card installed....There's not much left to do at the motherboard level execept set jumpers as to what i want enabled or disabled.


    i start on the case and radiator and PSU wire routing tomorrow...

  5. #5
    Xtreme Member
    Join Date
    Feb 2008
    Posts
    115
    It's progessed quite a bit, as i i've gone to the initial fittment in the case, including the top mounted radiator and modifications required will be detailed as it wasn't easy an had to make every milimeter count....Here goes:


    Overall view of how everything is looking and it's easy to note that the top radiator is extremely close to one of the CPU's memory slots and since the last picture, the water flow path has changed to make the tubing more simplified overall,as well as adding a drain port at the lowest point that i have access to within the loop.


    View of the top section ,and i'm not out of the woods here, as hole needs to be drilled just behind where you see that little flip up panel with the USB,ESATA and sound jacks, that also lines up with the fill port that's built into the radiator itself....Serious mesuring with precision required here, and i need to get more screws that hold up the radiator itself,since the ones that comes with the kit are too short given the thickness of the case's top panel...


    Here is where you see just how close the motherboard is to the blueray drives, wich like lian-li noted, involves removing a fan where the IDE and ATX power conectors on the motherboard is, but unlike they didn't note,also the brace behind that fan and the 3.5 inch adapter that's fitted to the lower pair of 5 1/4 inch drive bays, so it is an HPTX case,bu needs some creative thinking and adjustments to make it all fit,at least for the SR-2....


    Given that the case has a removable motherboard tray though, i was able to gradually push the motherboard forward and check/remove clearance issues along the way....It also shows a better view of the drain port itself.
    Last edited by Shadow0001; 03-28-2011 at 01:26 PM.

  6. #6
    Xtreme Member
    Join Date
    Feb 2008
    Posts
    115
    And a further step and it's a big one, since it involves drilling a 1 inch hole in 450$ case in an exact location for a fill port, to wich i replaced the stock plastic plug that ships with the cooling kit with a little bling.... A metal silver plated one...


    I had to go triple check the mesurements and drill the hole with extreme care and very slowly as it went deeper and deeper, then finish off with a dremel to smooth it out and added a rubber grommet....Basically it looks like the case has always had a fillport there straight from the factory...


    Also found a nice set of bolts that are perfect to hold up the radiator too(the ones that come with the kit are too short), so that's another problem taken care off...


    Next up is the bleeding and leak check, but that will only happen when i receive the coolant in the next couple of days..

  7. #7
    Xtreme Addict
    Join Date
    Feb 2010
    Location
    Wisconsin
    Posts
    1,634
    Do you have a better camera you can use or borrow? The build looks promising, but the pictures don't do it justice
    Signatures make my posts look huge... but I'm not humble enough to completely remove my signature, so I kept this note explaining it.

  8. #8
    Xtreme Member
    Join Date
    Feb 2008
    Posts
    115
    Quote Originally Posted by ScottALot View Post
    Do you have a better camera you can use or borrow? The build looks promising, but the pictures don't do it justice

    I do actually, but i'll save it for the final photo session once everything is installed and all the wire routing done....The camera in the cell phone sucks, but it is practical just to show how the build is evolving overall...


    While i wait for the feser coolant to arrive,i might as well start on the power supply and the wiring and storage(a pair of 120 GB Intel 510 SSD's in raid 0 and a pair of 1 terrabyte Western digital caviar blacks,also in raid 0)....


    The coolant is used not so much because i believe it's better than destilled water, wich is likely isn't, but mostly for it's color(easy to detect leaks) and it's supposedly non conductive( the top reason of all)....All this hardware in one system is kinda expensive...

  9. #9
    Engineering The Xtreme
    Join Date
    Feb 2007
    Location
    MA, USA
    Posts
    7,217
    Quote Originally Posted by Shadow0001 View Post
    I do actually, but i'll save it for the final photo session once everything is installed and all the wire routing done....The camera in the cell phone sucks, but it is practical just to show how the build is evolving overall...


    While i wait for the feser coolant to arrive,i might as well start on the power supply and the wiring and storage(a pair of 120 GB Intel 510 SSD's in raid 0 and a pair of 1 terrabyte Western digital caviar blacks,also in raid 0)....


    The coolant is used not so much because i believe it's better than destilled water, wich is likely isn't, but mostly for it's color(easy to detect leaks) and it's supposedly non conductive( the top reason of all)....All this hardware in one system is kinda expensive...
    Feser coolant is just as conductive as distilled water (read: not conductive), it performs worse than distilled and you run a good chance of getting this: http://www.xtremesystems.org/forums/...d.php?t=226632

    Use colored tubing and find another way to get the colors you desire in your build.

  10. #10
    Xtreme Member
    Join Date
    Feb 2008
    Posts
    115
    Quote Originally Posted by SNiiPE_DoGG View Post
    Feser coolant is just as conductive as distilled water (read: not conductive), it performs worse than distilled and you run a good chance of getting this: http://www.xtremesystems.org/forums/...d.php?t=226632

    Use colored tubing and find another way to get the colors you desire in your build.

    The tubing is pitch black and the reservoir is built into the radiator so i can't see the color in the system as it's running anyhow....It's mostly to be easier to detect leaks(i chose green) and the non conductive properties.


    Now if it's going to leave deposits on the CPU block like you linked(yikes), and that distilled water is just as good in terms of being electrically non conductive, then i have no reason at all to use feser 1...

  11. #11
    Engineering The Xtreme
    Join Date
    Feb 2007
    Location
    MA, USA
    Posts
    7,217
    Quote Originally Posted by Shadow0001 View Post
    The tubing is pitch black and the reservoir is built into the radiator so i can't see the color in the system as it's running anyhow....It's mostly to be easier to detect leaks(i chose green) and the non conductive properties.


    Now if it's going to leave deposits on the CPU block like you linked(yikes), and that distilled water is just as good in terms of being electrically non conductive, then i have no reason at all to use feser 1...
    I promise you, distilled water is not conductive. As far as leak detection goes, I would be less worried about leaks. Set your system up right, leak test the blocks without hardware on and then make sure everything is tight as far as fittings go and you will not have a leak.

  12. #12
    Xtreme Guru
    Join Date
    Dec 2009
    Location
    Latvia, Riga
    Posts
    3,972
    SNiiPE_DoGG: in the beginning, yes. But after a while in loop, because of air and ions dissolved from metallic components in it - it will become conductive.

  13. #13
    Engineering The Xtreme
    Join Date
    Feb 2007
    Location
    MA, USA
    Posts
    7,217
    Quote Originally Posted by churchy View Post
    SNiiPE_DoGG: in the beginning, yes. But after a while in loop, because of air and ions dissolved from metallic components in it - it will become conductive.
    The same is true of feser coolant and any other fluid you might choose to put in your loop.

  14. #14
    Xtreme Member
    Join Date
    Dec 2008
    Location
    Jerusalem, Israel
    Posts
    252
    Quote Originally Posted by ScottALot View Post
    Do you have a better camera you can use or borrow? The build looks promising, but the pictures don't do it justice
    [SIGPIC][/SIGPIC]


    EVGA SR-2 , 2X Intel Xeon 5620, 12X2GB Corsair Domminator 1600 MHZ CL7
    3X GTX580, Corsair AX1200, Lian Li PC-Z70
    3X Dell U2311H, Liliput 7" touchscreen monitor

  15. #15
    Xtreme Guru
    Join Date
    Dec 2009
    Location
    Latvia, Riga
    Posts
    3,972
    SNiiPE_DoGG: i just wrote that correction for anybody wishing to rely and expect unconductivity of distilled. Seen several posts along the lines of "distilled is unconductive, therefore i'm safe from shorting in case of leaks". It's not so, especially if in addition to white i wrote above, leaked water mixes with dust on components.

  16. #16
    Xtreme Member
    Join Date
    Feb 2008
    Posts
    115
    Thanks all for the info on the coolant...I guess it'll be straight distilled water and yes, i'm charging up the battery on the better camera to take higher quality pictures....


    Oh, i received the intel 510 SSD's just 30 mins ago...woot.

  17. #17
    Xtreme Addict
    Join Date
    Feb 2010
    Location
    Wisconsin
    Posts
    1,634
    Quote Originally Posted by arkadur View Post
    What? You do or don't agree with me?
    Signatures make my posts look huge... but I'm not humble enough to completely remove my signature, so I kept this note explaining it.

  18. #18
    Xtreme Member
    Join Date
    Feb 2008
    Posts
    115
    Quote Originally Posted by ScottALot View Post
    What? You do or don't agree with me?

    More pictures for your viewing please follow, and yes, they're a little better than what i took on the cellphone...:p


    The finalised filling port on the top of the case, wich just putting a plug on it seemed pretty tame and i had some bitspower fittings left over so i came up with this:


    The 2 intel 510 SSD's wich will be in raid 0 and sitting on a metal plate that seperates the motherboard area to the PSU section in the lower half of the case....I actually has to go to a couple of hardware stores until i could find the right screws to attach them there(along with quick release rubber mounts),since the ones that come with the drives are too short for it...


    You get a better idea of what i'm talking about here in terms of overall location....Also note that i removed the coolers for the memory as i think that the red heatsinks on the memory really should be shown in their full glory,and not hidden behind a fan...


    Another view of the top fillport, wich will be the only clue that the system is water cooled


    Another view of the main motherboard area with the coolers for the ram removed, and showing all 24 GB or ram onboard....I think it looks better this way to be honest:


    That's enough for now as i want to finish this freaking build....
    Last edited by Shadow0001; 03-30-2011 at 01:45 PM.

  19. #19
    Registered User
    Join Date
    Aug 2010
    Location
    Houston
    Posts
    17
    wow

  20. #20
    Xtreme Addict
    Join Date
    Feb 2010
    Location
    Wisconsin
    Posts
    1,634
    Oh my goodness gracious!! Muchas Gracias, such a clean build in such a short time!
    Signatures make my posts look huge... but I'm not humble enough to completely remove my signature, so I kept this note explaining it.

  21. #21
    Xtreme Member
    Join Date
    Feb 2008
    Posts
    115
    Quote Originally Posted by ScottALot View Post
    Oh my goodness gracious!! Muchas Gracias, such a clean build in such a short time!

    Thanks... I try my best and used my imagination in some areas along with a few trips to the local home renovation store...


    Anyhow one last picture, this time at the air bleeding stage, wich is taking a while and the pump makes a racket as it seems to be cavitating every now and then(stray air bubbles in the loop perhaps), but it's bone dry as far as leaks goes(woot)....


    So since this is the last pain in the ass part to deal with, i should have all the physical installation done by the weekend(it's mainly the PSU install and wire management left), and ready for the software install part after that...

  22. #22
    Xtreme Member
    Join Date
    Feb 2008
    Posts
    115
    What a struggle to get that last bit of air out of the cooling loop, i had to physically tilt the entire case 90 degress several times while cycling the pump on and off and hearing the air bubbles making their way to where the silver plated fill port is, and adding fluid each time....Took an hour this morning, but now the cooling system is quiet as a mouse, and still no leaks to report....


    Time to add the hard drives and PSU this afternoon, then screw around with the wire management part, but at least the pain in the ass parts are done...:p


    I can see the light at the end of the tunnel...

  23. #23
    Xtreme Member
    Join Date
    Jun 2005
    Location
    Toronto, Ontario, Canada
    Posts
    196
    Awssome build dude, what kind of rad will you be using on this build, and why did you plan not to water cool the video cards?
    CPU: 2x Intel Xeon E5530 @ 3.6Ghz
    GPU: 2x 580GTX
    RAM: G.SKILL Ripjaws X Series 16GB
    MB: Evga SR-2
    HDD: OCZ Agility 3 120GB
    PSU: COOLER MASTER Silent Pro 1200W
    Monitor: 4x Samsung Sync Master 245BW

  24. #24
    Xtreme Member
    Join Date
    Dec 2008
    Location
    Jerusalem, Israel
    Posts
    252
    @ScottALot - of coure, i'm defently agree with you.

    finally pics that this rig should get!

    the BP fitting dont short your GPU there!? this is bare metal.

    great work so far - keep it up
    [SIGPIC][/SIGPIC]


    EVGA SR-2 , 2X Intel Xeon 5620, 12X2GB Corsair Domminator 1600 MHZ CL7
    3X GTX580, Corsair AX1200, Lian Li PC-Z70
    3X Dell U2311H, Liliput 7" touchscreen monitor

  25. #25
    Xtreme Member
    Join Date
    Feb 2008
    Posts
    115
    Quote Originally Posted by OpTiX View Post
    Awssome build dude, what kind of rad will you be using on this build, and why did you plan not to water cool the video cards?

    That comes later as i left the front hard drive/ SSD cage completely open....Pictures to follow

    Quote Originally Posted by arkadur View Post
    @ScottALot - of coure, i'm defently agree with you.

    finally pics that this rig should get!

    the BP fitting dont short your GPU there!? this is bare metal.

    great work so far - keep it up

    The only thing touching the PCB there is the tube going downwards towards the motherboard block, so there's no chance of a short..The tube beside that one keeps it from moving in any case...


    More pictures with the power supply, twin terrabyte hard drives and the power wiring for all the components basically done, and you'll note that the area between the Power supply and hardrive cage isn't exactly roomy to say the least...


    SSD hookups:


    And the trouble spot where i had to pack in a lot of wiring:


    This is a more generall picture that shows the front cage to mount hard drives and more SSD's completely empty, and it's only held with thumb screws, so the potential is there to handle a dedicated water loop for the video cards, along with using the last pair of 5 1/4 bays for one of those reservoirs with a built in pump...Muhahaha.


    Last edited by Shadow0001; 03-31-2011 at 01:45 PM.

Page 1 of 3 123 LastLast

Bookmarks

Bookmarks

Posting Permissions

  • You may not post new threads
  • You may not post replies
  • You may not post attachments
  • You may not edit your posts
  •