-
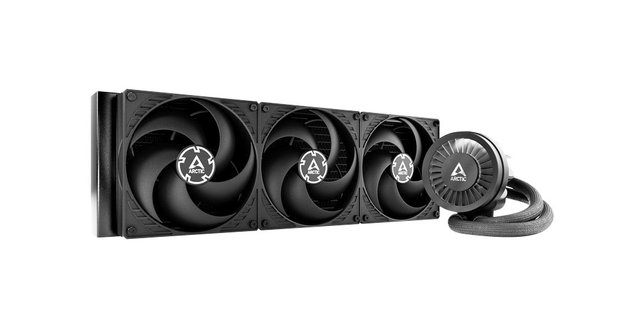
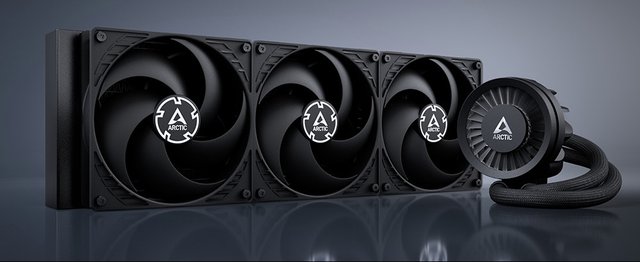
Arctic Liquid Freezer III 420
Introduction
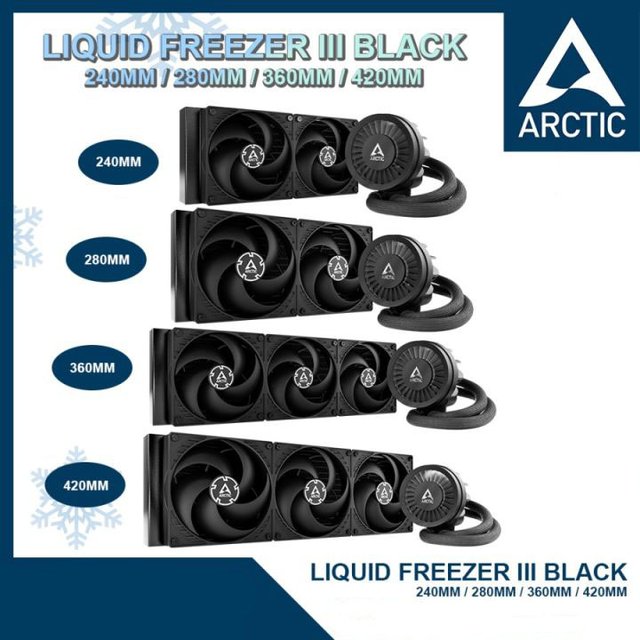
When building a new PC, picking the CPU cooler is always the next step after finalizing the best gaming processor. However, thanks to many coolers in the market, choosing one over the other has become significantly more difficult based on their TDP and looks. With the introduction of the Liquid Freezer III series, Arctic has taken another significant step forward in the cooling market. This new lineup builds upon the success of the previous Liquid Freezer II series, the great price-to-performance ratio of which made it a highly popular product. These new models feature an upgraded design that includes a new pump-mounted VRM fan, integrated cable management features, and more. Another key aspect of this new liquid cooler design from Arctic is its extended radiator surface, which suggests that the cooler will either a thicker radiator than before of feature an increase fin density. Either way, this will give the Freezer III series more radiator surface area, enhancing its cooling potential. Arctic has prepared the Liquid Freezer III coolers 12 ways, in a variety of formats and designs. For all of them (240, 280, 360 and even 420 mm) there are three options to choose from. There is one without lighting and the two with ARGBs are available in complete white (with white fans, white radiators and also with a white tube cover), in addition to the black designs. While the fans of the coolers with ARGB LEDs have an impeller with a hoop (P12 PWM PST A-RGB or P14 PWM PST A-RGB), the non-LED coolers do not have it and are the P12 PWM or the P14 PWM fans. Regardless of the format, the fans always have 1700rpm. Arctics Liquid Freezer II Lineup is known to be one of the best on the market. Each time we review one of them it pushes the limit we thought impossible to push further. Now it's time for the 420mm version. The biggest, fattest AIO you can get! Will it push the boundary again?
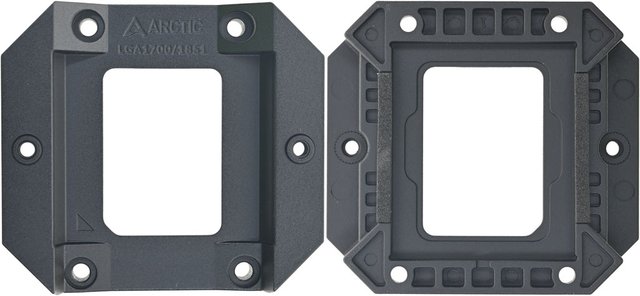
The compatibility of the Liquid Freezer III is worse (than it used to be) in terms of supported platforms. You wont install these coolers on Intel LGA 1200/115x and 2066 anymore, but then again, they were given extra consideration to be able to work on the more current Intel LGA 1700 platform (and the upcoming LGA 1851). For the latter, an ILM (Integrated Lever Mechanism) is included, which eliminates deformation of the socket at problematic points in these processors at high pressure, thus reducing the mechanical load on the motherboard and at the same time improving the contact between the cooler and the processor (and thus faster heat transfer).
Packaging & Contents
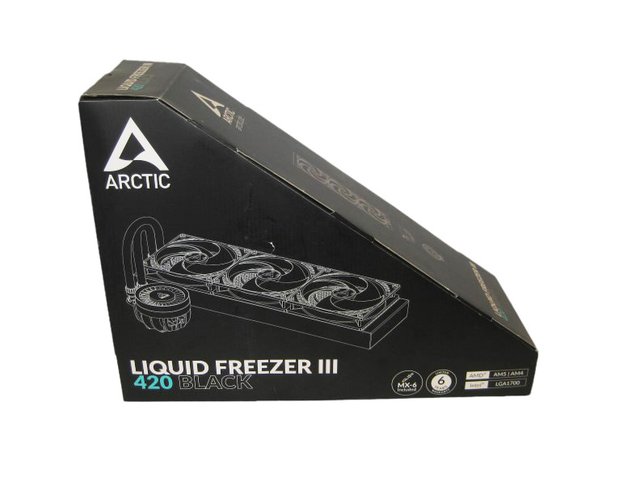
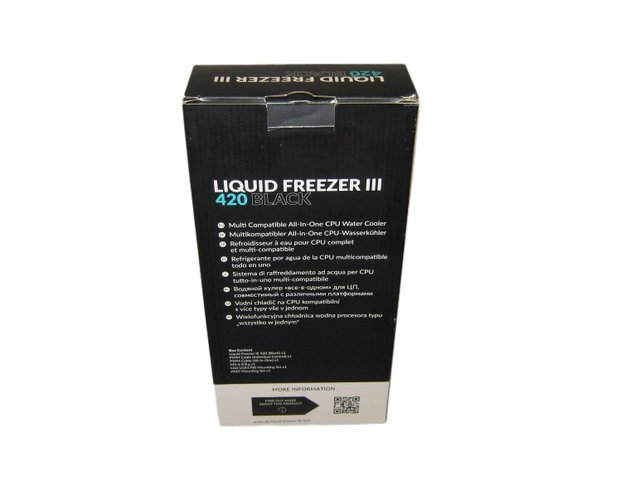
Liquid Freezer III 420 arrives in a big heptagon box. I have never seen such a packaging style. Although it seems lucrative and eye-catching, its handling is quite the worst. I wish they had kept it simple like other AIOs. The front showcases a mechanical drawing of the Liquid Freezer III 420 Black, along with supported CPU sockets and the generous six-year warranty.
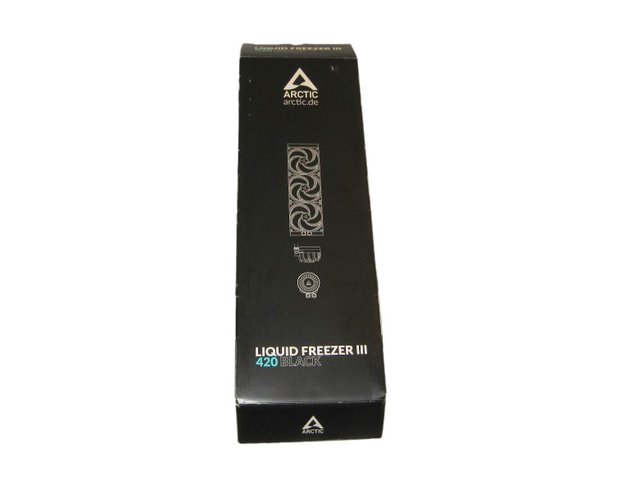
The technical details are printed on the back of the packaging.
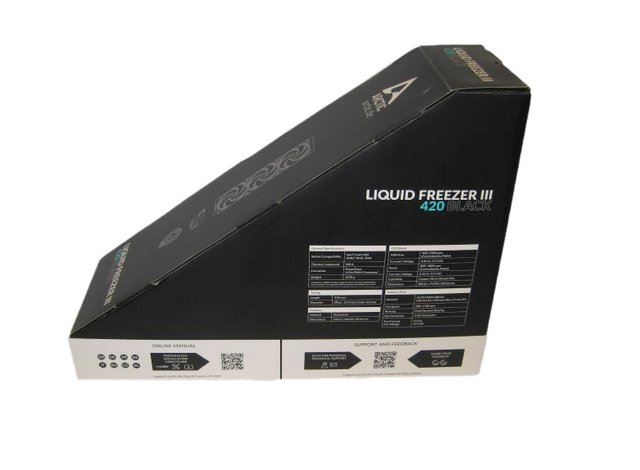
On the bottom of the packaging we find a QR code for the box contents list and assembly manual.
At the top you will find a mechanical drawing of the cooler, the Arctic logo, and the product name but little else.
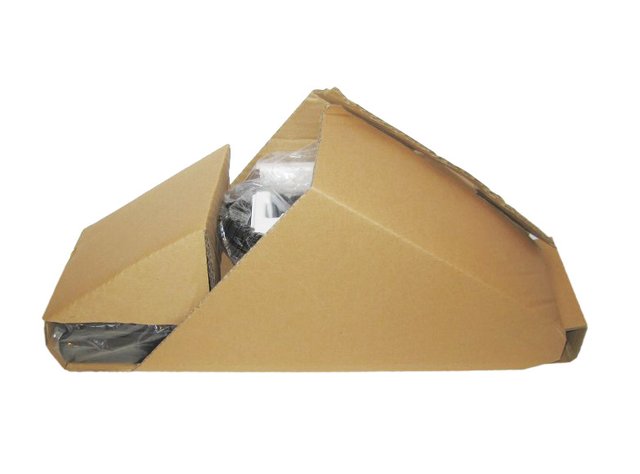
The internal packaging is completely different compared to what I have seen with other all-in-one liquid coolers. The box offers very little protection for the product with only a bit of extra cardboard placed between the radiator and the outer box. Meanwhile, the pump and VRM fan are placed in a separate tray that keeps them centered above the radiator and pre-mounted fans. While everything arrived safe and sound, and I am sure this approach helps keep prices down, more protection for the product would have been nice to see.
The installation accessories package contains Intel CPU fixing frame, T20 star screw wrench, Intel CPU fixing frame locking screw, AMD AM5/AM4 offset bracket, AMD AM5/AM4 Sleeve and bracket fixing screw package, MX-6 thermal paste 0.8g, radiator/fan fixing short screws, fan frame screws, metal washers, integrated control Water-cooled head connection cable, independent control water-cooling head connection cable.

A Closer Look
Arctics Liquid Freezer II was probably one of the best AIO coolers on the market, for both performance and value though it does falter in its visual appeal and as some would say, it has a face for radio. Today with the Liquid Freezer III I can confidently say theyve fixed the ugliness. This cooler looks very solid and I do love the turbine design, just without RGB.
Arctic crafts all its parts in-house rather than slapping its logo on an Asetek device. The radiator was also printed with a very discreet ARCTIC logo on the two outer sides.
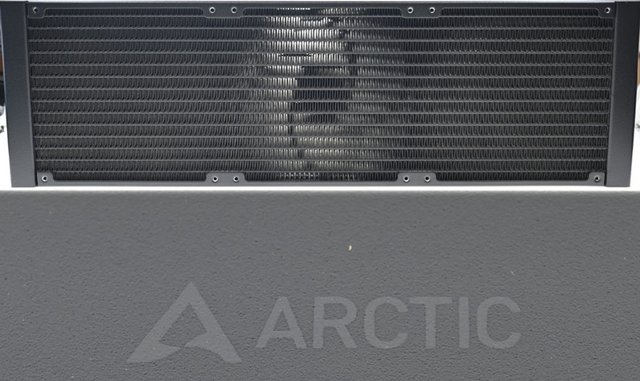

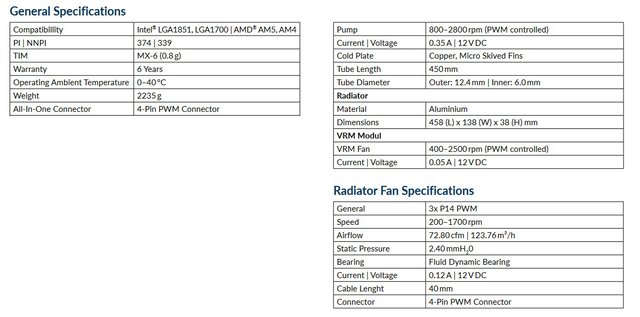
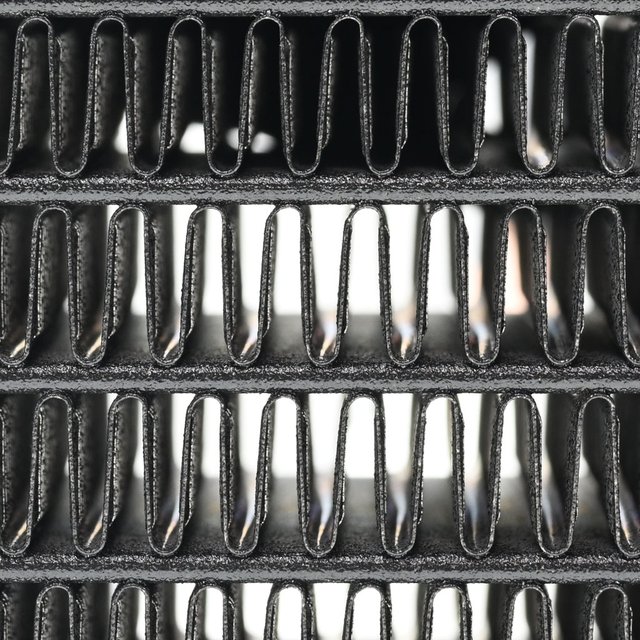
One of the most significant improvements in the Liquid Freezer III is its radiator design. The fins have been extended to the edges of the frame, increasing the surface area for heat dissipation. The 458 x 138 x 38 mm (L x W x H) radiator is made of aluminum. The thickness is about 10 mm greater than that of most models included in TEU kits.
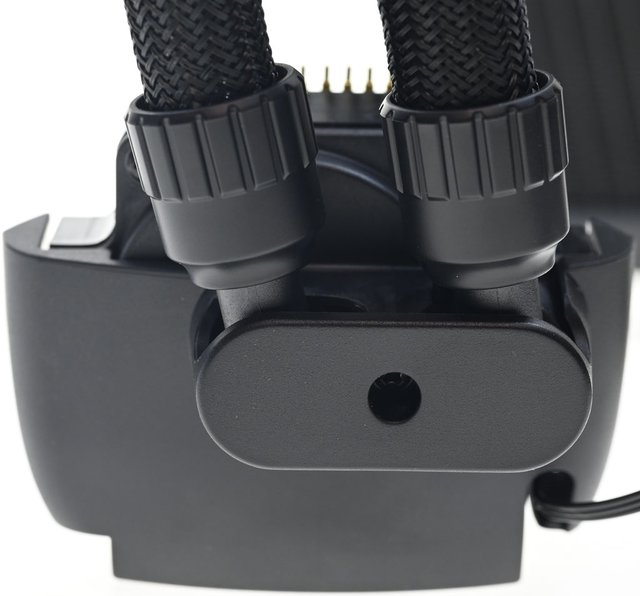
A pair of 450 mm long mesh rubber tubes start from the radiator. The length of the braided mesh part is 41.5 cm. Arctic has now made the mesh rubber tubes black and replaced the silver-colored hose connections of the previous generation with black connections.

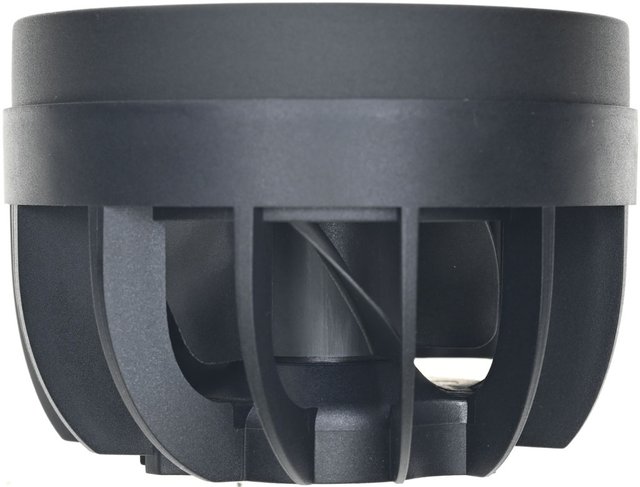
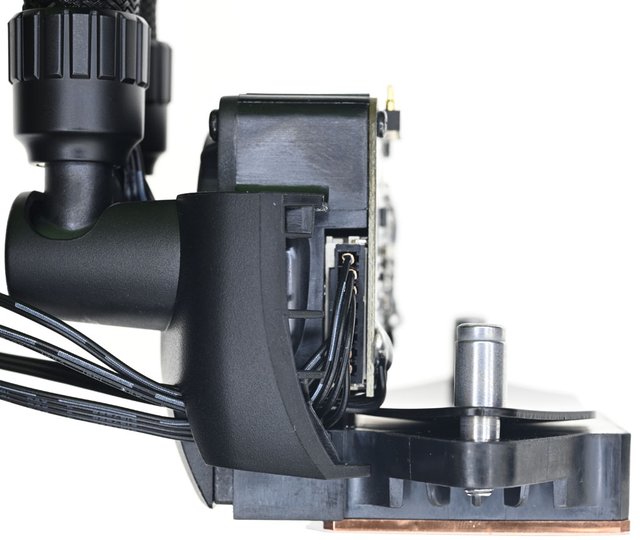
When it comes to the pump and copper cold plate, things are again wildly different from the norm. The pump has been shifted to accommodate a larger VRM fan, enhancing airflow to surrounding components. Arctic has equipped the pump unit with an L-shaped plastic housing. Liquid Freezer III's standout feature is its pump-block, meticulously crafted to resemble an aircraft turbofan engine intake. This design not only adds a unique visual appeal but also improves airflow to efficiently cool the CPU VRM and memory areas. On the front of the upper cover of the VRM fan module, there is a logo in the middle. Additionally, a dedicated VRM ventilation 60mm fan has been strategically placed to further optimize cooling performance. The integrated turbine-type fan is capable of rotating between 400 and 2500 RPM to help cool the VRM.
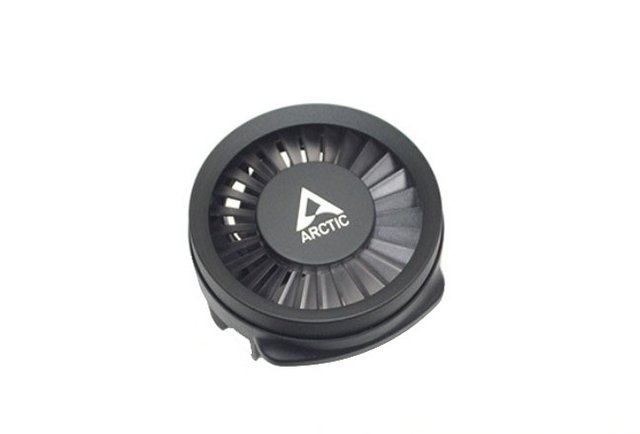
On the back of the upper cover of the VRM fan module, there are silver magnets on both sides for magnetic fixation.
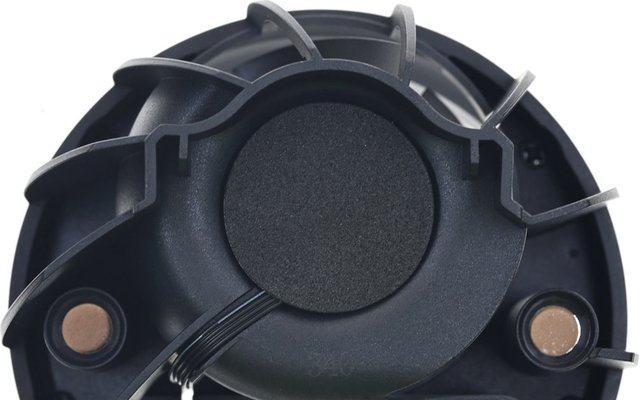
The fan blades of the internal 60mm VRM fan can be seen from the vent on the side of the upper cover of the VRM fan module.
When the upper cover of the VRM fan module is combined with the water-cooling head, the magnetic magnets will be attracted to the top of the fixing screws at both ends of the pressure plate. When the pressure plate screws are locked, the two can be tightly combined.

The angle of the water-cooling head inlet/outlet pipe joint can be adjusted left and right, but the maximum angle is limited by the fixed frame.
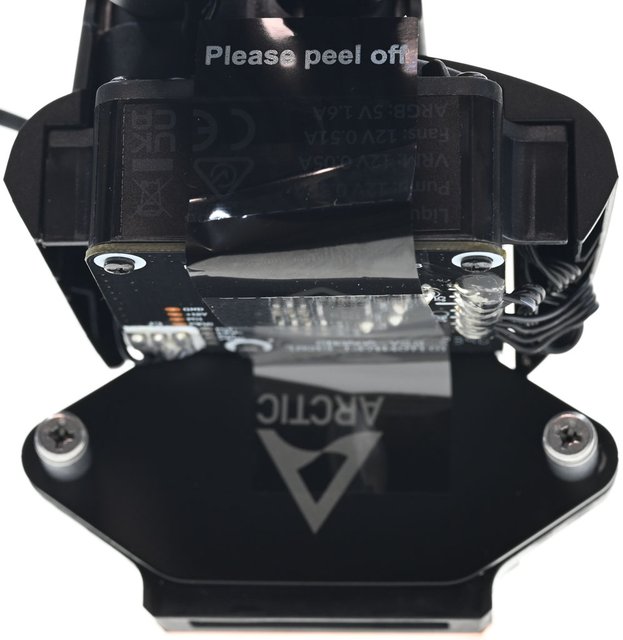
When you look at the inside of the pump unit, you immediately notice the exposed PCB of the control unit. Water block circuit board, with Fortior Tech FT8213Q non-inductive sinusoidal three-phase brushless motor driver IC with pump motor on it, supports PWM speed regulation and output speed signal, and provides over-current/over-temperature/over-voltage/under-voltage /Locked rotor/Lack of phase protection.

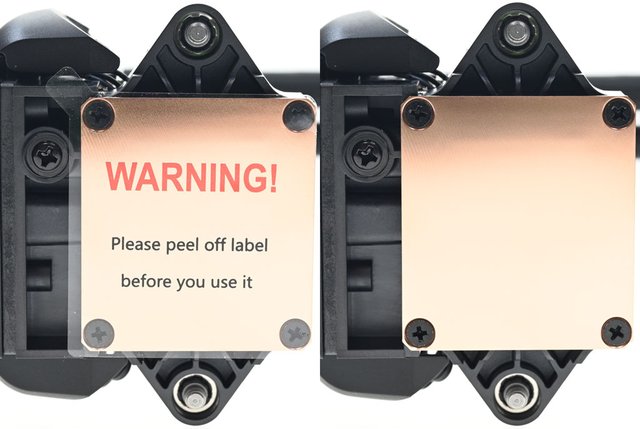
There is a protective sticker on the spring pin on the top of the water cooling head, which needs to be removed before installing the magnetically fixed VRM fan module.
Before installing the cold head on the motherboard, you must first connect the water-cooling head connection cable.
Independent control of the water-cooled head connection cable. The cable length is 39.5 cm, can independently control the pump (PUMP), VRM fan (VRM), cooling fan (FAN) and return speed (the return speed of the pump will be approximately higher than the actual speed) 50%), and is powered by the PUMP connector. When the motherboard has multiple sets of independent fans and pumps (PUMP/WP/AIO) 4-pin pins, this cable can be used to obtain independent speed control and detection.
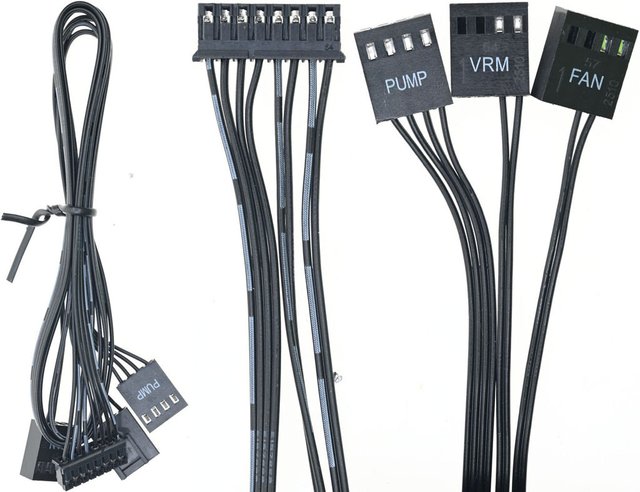
Integrated control water block connection cable. The cable length is 39.5 cm, the pump, VRM fan, and cold radiator fan share PWM speed control, and only the cold radiator fan speed is returned.
Looking at the bending arc of the pressure plate from the side.
There is a protective sticker on the contact surface of the water block processor with "Warning! Please remove before use" printed on it in English. The water-cooling head processor contact surface size is 44×40mm and is fixed with 4 pan-head Phillips screws.
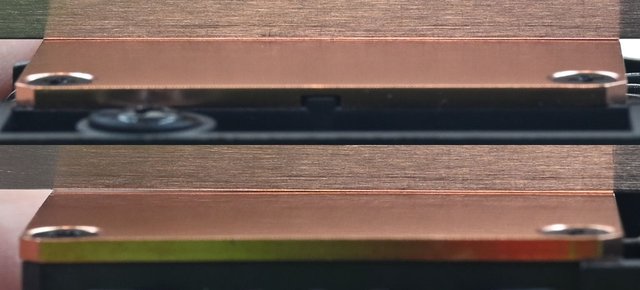
The flatness of the long side/short side of the processor contact surface is shown in the figure below.
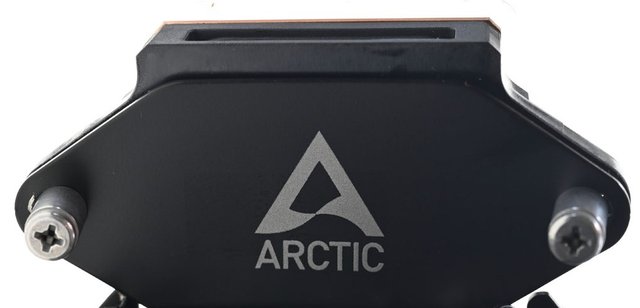
There is a trademark on the pressure plate of the water cooling head and screws on both ends.
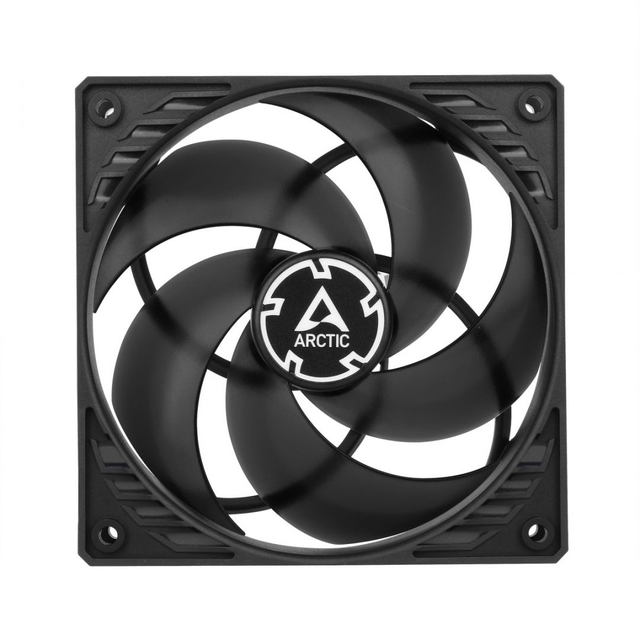
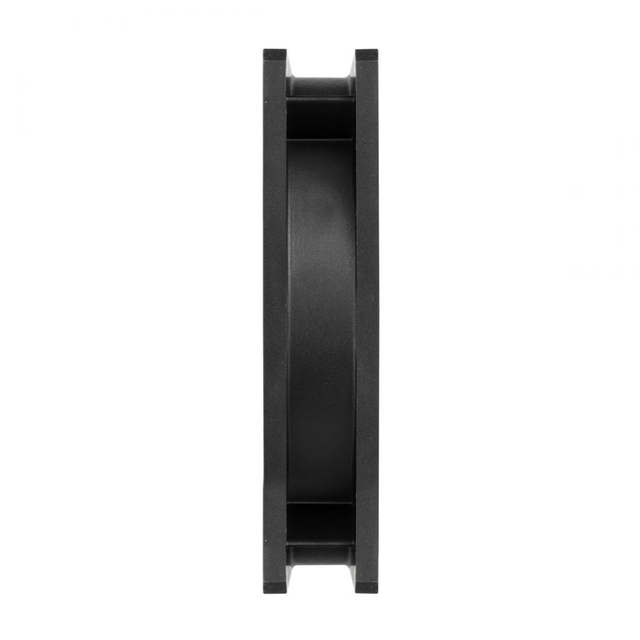
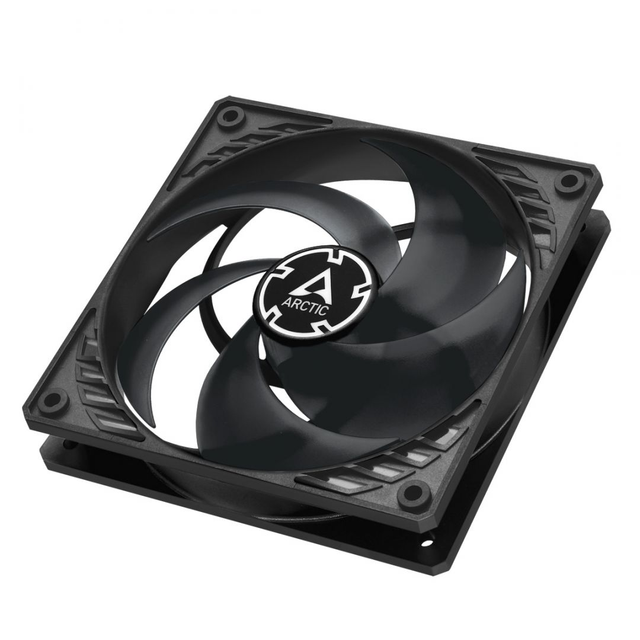
The ARCTIC Liquid Freezer III coolers feature the popular and powerful P14 PWM fans. Three P14 PWM fans with five blades each are pre-installed on the radiator, boasting a stealthy all-black design. The fans have ARCTIC branding on the hub, lack anti-vibration pads on the mounting corners, and display a spiral layout with wires routed from the hub on the backside. The top of the fan is embossed with P14 PWM, and the bottom indicates DC 12V 0.12A.
They work in a wide speed range of 200 - 1,700 rpm. Each fan has a 4-pin PWM connector on a small length cable. These are the screws used to install fans on the radiator.
Their cables are perfectly interconnected so that they are barely visible, perfecting the finish of the system and making our work as easy as possible.
Installation Process
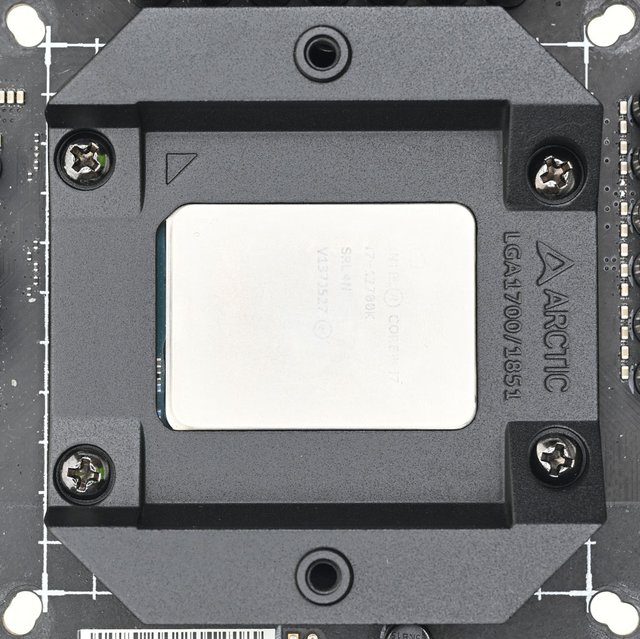
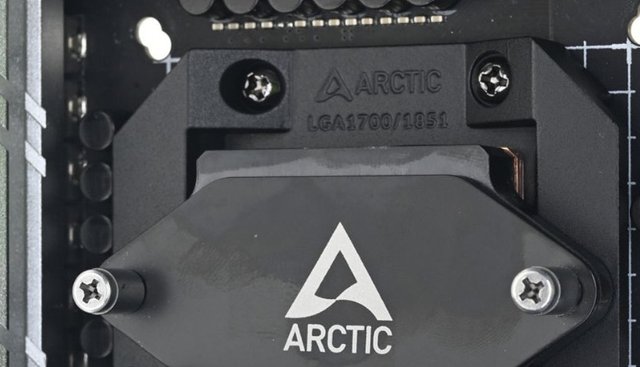
When installed on the Intel LGA1700 platform, the motherboards original CPU slot buckle (ILM, Independent Loading Mechanism) needs to be replaced with the included Intel CPU fixing frame.
The higher parts on both sides of the Intel CPU fixing frame have water-cooling head fixing locking points.
When removing the LGA1700 CPU slot buckle, it is recommended to remove the motherboard from the case and place it on a hard surface. Place a slightly thick flat object (such as thick cardboard) at the bottom of the CPU slot to support and secure the CPU. Then open the slot buckle, put the CPU into the slot, with the buckle open, use a T20 star screw wrench to remove the four T20 star screws that fix the buckle, and store the removed ones properly. The original fasteners need to be reinstalled before the motherboard is sent for repair. After removing the buckle, do not move the motherboard to avoid displacement of the CPU socket backplate (pay attention to whether the screw threads in the 4 holes next to the CPU socket have moved).
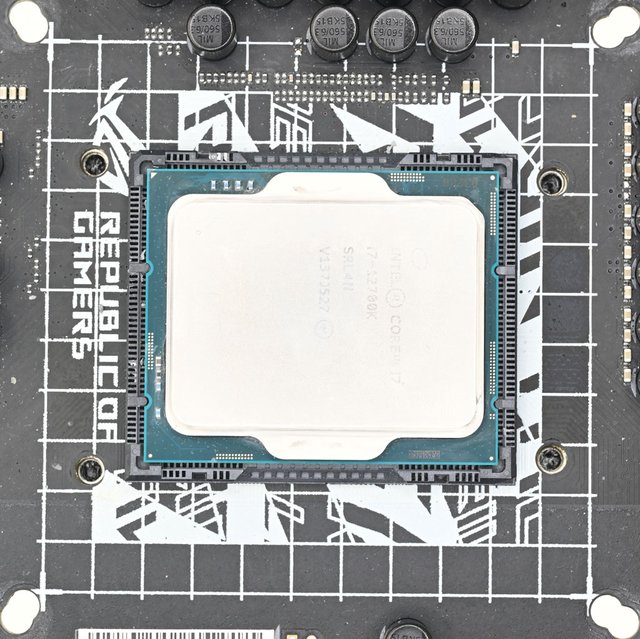
After confirming that the CPU socket backplane is not displaced when removing the buckle, align the triangle mark on the Intel CPU fixing frame with the triangle mark on the CPU IHS surface and place it on it.

Insert Intel CPU fixing frame locking screws into 4 holes in the corners of the Intel CPU fixing frame. Use a screwdriver to turn 1 to 2 turns at first to secure them. After they are all installed, tighten them diagonally and alternately. Lock the 4 screws evenly (turn the same number of turns), pay attention to the tightness, too loose or too tight is not appropriate.
Test the installation before formal installation to confirm that the water-cooling head water pipe joint will not interfere with the motherboard components/heat sink. After confirmation, remove the water-cooling head, clean the surface of the processor and apply thermal paste. Remove the protective sticker on the contact surface of the water-cooling head and processor, align the screws at both ends of the pressure plate with the locking points on the fixed frame, and use a screwdriver to take turns. Lock the two screws to the bottom. Do not lock the unilateral screw directly to the bottom at one time. Because the pressure plate has strong elasticity, it is recommended to remove the motherboard from the case and place it on a hard surface so that the bottom of the motherboard has solid support before installing the water block. Use the correct specification of the screwdriver head, not too large or too small, and do not deflect when applying force to prevent the screwdriver head from slipping from the top of the screw and damaging the motherboard.
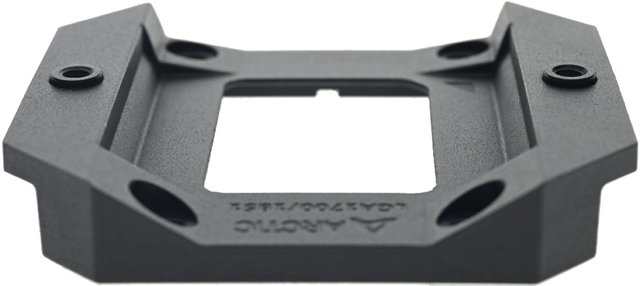
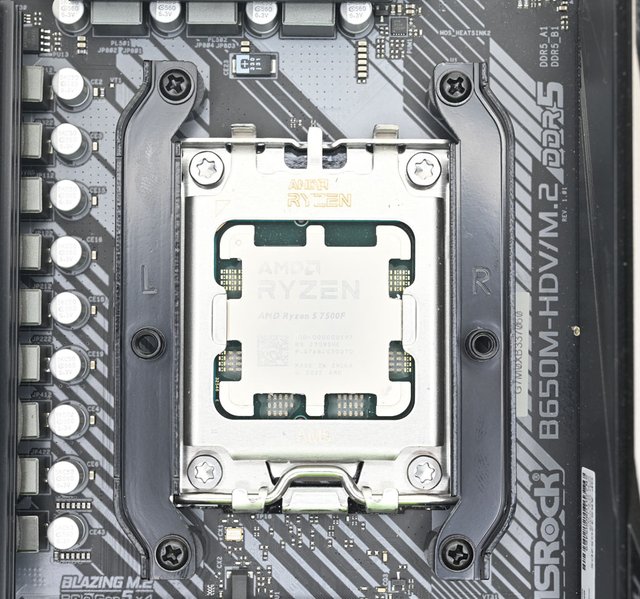
When installed on the AMD AM5/AM4 platform, AMD AM5/AM4 sleeves and AMD bracket fixing screws are required.
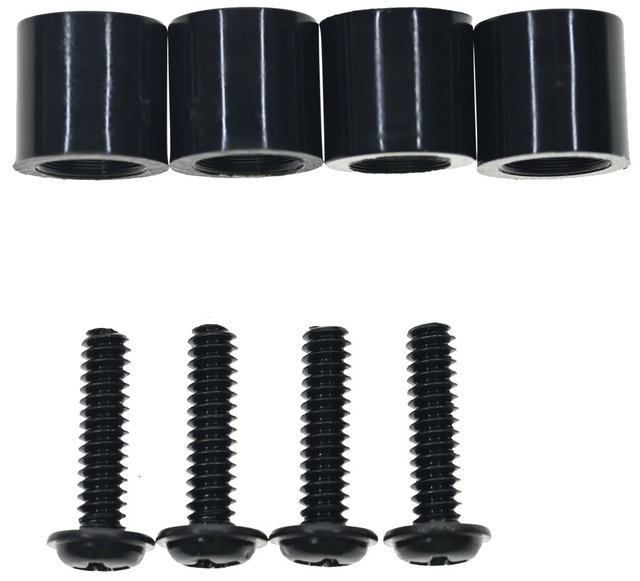
Before installing on the AMD AM5/AM4 platform, first remove the original bracket from the motherboard, leaving only the original radiator backplate (left), and insert the four AMD AM5/AM4 sleeves into the original backplate locking points(right).
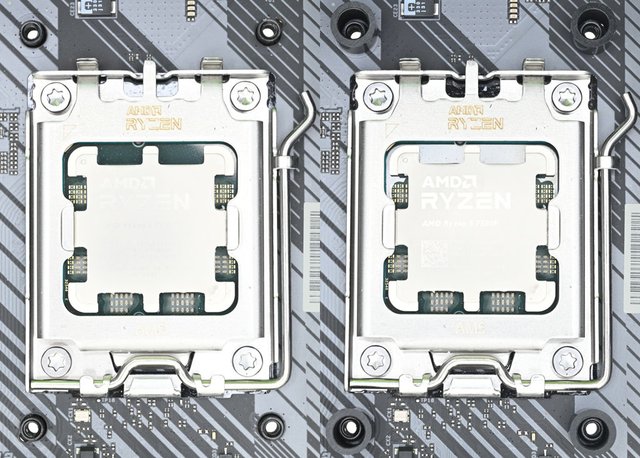
Place the AMD AM5/AM4 offset bracket. The bracket marked L is close to the I/O port on the rear of the motherboard. The bracket is close to the memory slot. Align the holes and insert the 4 AMD bracket fixing screws and lock.
Test the installation before formal installation to confirm that the water-cooling head water pipe joint will not interfere with the motherboard components/heat sink. After confirmation, remove the water-cooling head, clean the surface of the processor and apply thermal paste, remove the protective sticker on the contact surface of the water-cooling head and processor, align the screws at both ends of the pressure plate with the locking points on the bracket, and use a screwdriver to take turns. Lock the two screws to the bottom. Do not lock the unilateral screw directly to the bottom at one time. Because the pressure plate has strong elasticity, it is recommended to remove the motherboard from the case and place it on a hard surface so that the bottom of the motherboard has solid support before installing the water block. Use the correct specification of the screwdriver head, not too large or too small, and do not deflect when applying force to prevent the screwdriver head from slipping from the top of the screw and damaging the motherboard. On AMD processors, in turn, the coldplate with microchannels (on the inside) is centered above the asymmetrically (with respect to the processor PCB) placed CCD chiplets with the processor cores, where the highest temperatures occur. Heat dissipation from critical locations is thus faster.
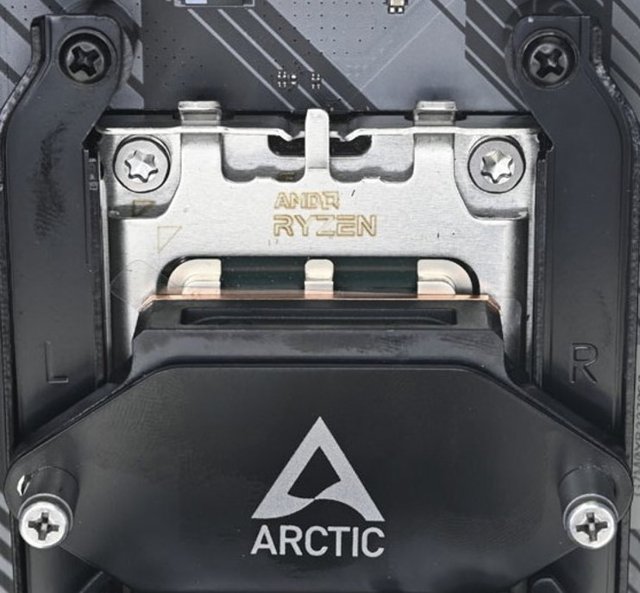
Install the upper cover of the VRM fan module. Due to the AMD AM5/AM4 offset bracket, the entire water-cooling head will be offset toward the expansion slot. This may occur if there are higher motherboard components/heatsinks in the water-cooling head pipeline position (common in ITX motherboards). It is recommended to check the original motherboard compatibility list first.

Connecting up all the cables is also nice and easy. With power added to the Arctic Liquid Freezer III 420, the fans spin up and the pump turns on. While many may say, "it's not RGB, I don't want it". You are free to think and say such things, but many dislike unicorn farts and mismatching modes, and this is not only a simplified solution to all of that.

Testing & Methology
For today's testing, we'll be using a new test setup, so we've also tested a few other coolers as part of it for direct comparison. We have recently equipped our lineup with a Ryzen 9 5950X processor, which is significantly more demanding. Perhaps the most important thing is that we are testing in a classic case, a large and very well ventilated Fractal Design Meshify 2 XL. In addition, it also allows the installation of a 480 mm heat exchanger on the ceiling. We always install the tested AiO coolers with an exchanger on the ceiling, while there are high-quality fans on the front wall of the cabinet for good air access to the cabinet. Very quiet graphics are also installed so that it does not disturb the results.
Testing coolers in practice
What else do you need to know about our testing? We test all coolers without manual adjustment and regulation. We leave everything to automatic regulation, that is exactly how the vast majority of users will use them. Of course, all coolers (and their fans) usually have the possibility of manual regulation, which affects performance and noise. The cabinet used definitely also plays a big role, and above all the temperature in the room. In our case, the temperature during testing is always around 20, maximum 21°C.

AMD Ryzen 9 5950X processor cooling.
As for the Ryzen 9 5950X processor, it also plays a big role when comparing coolers. The maximum safe operating temperature of this model is up to 95°C according to AMD. It is only at this point that the processor starts to limit clocks and therefore performance. The processor is actually made up of three separate chips under the heatspreader, so it is not a monolith (one chip). There are two 7nm 8-core/16-thread ZEN 3 and one low-end 12nm I/O pieces of silicon. The two small 7nm chips generate the most heat. In general, a larger chip area is more advantageous for cooling, as heat is dissipated more easily across the surface. However, with the current AMD ZEN chips, which are very small (only around 80mm2), the heat is extremely concentrated (as well as the transistors in the chip themselves) on a very small area. The area through which the chip transmits heat to the heatspreader is very small, which is why there are significant temperature fluctuations. A processor such as the Ryzen 9 5950X shows significant and rapid temperature changes, depending on the load. This processor can show high temperatures, but that doesn't mean it's heating up, so to speak. It makes a big difference if you have a small 70mm2 chip with a temperature of 80°C or a 200mm2 large chip with the same temperature. The Ryzen 9 5950X is actually extremely efficient with a low base TDP of only around 105W. However, even with powerful cooling, temperature fluctuations between 65 - 85°C in various types of load and 30 - 40°C in idle states are common. In our case, we are testing a typical longer-term load in CineBench R23, and all coolers are left in their own auto-regulation mode, so the fan speed and noise are different. And so here are the main differences.
Performance
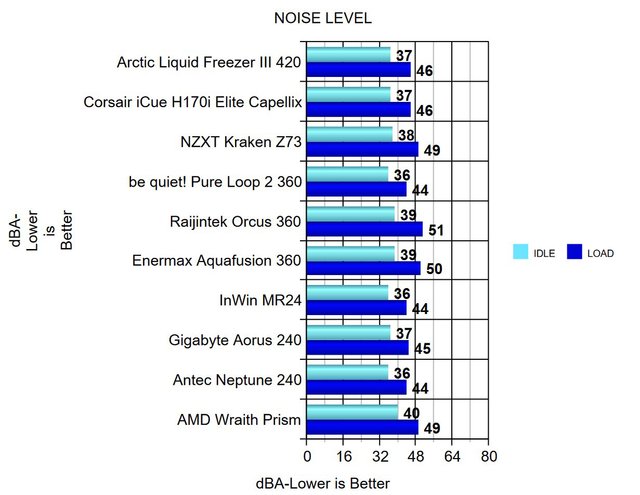
No surprises here. The largest all-in-one cooler climbs to the top of the charts.
Overclocking is where a radiator as large as this starts to make good sense. This graph is telling, too. On a fast lap of Forza Horizon 4, the CPU didnt even reach the 49°C mark! The test results clearly show that we couldnt really challenge the CPU with our overclocked 6-core. The Liquid Freezer III 420 is designed for bigger things. It takes it easy with 12 or 16 CPU cores, no matter if Team Red or Blue.
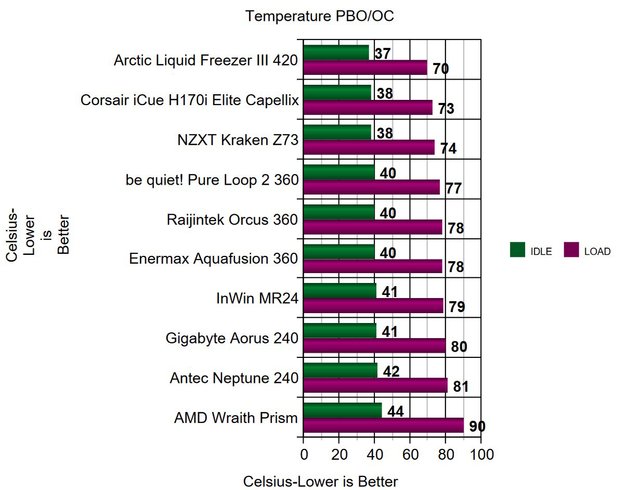
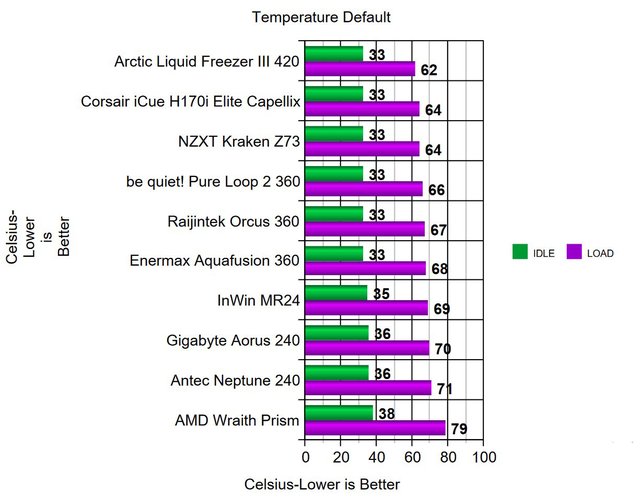
The Arctic Liquid Freezer III 420 was doing well in the idle state. Under stress, it still performs very well, especially considering the good temps.
Final Thoughts
Today I published my review of the Arctic Freezer III, the much-anticipated follow-up to the hugely popular and iconic Freezer II AIO series. They were long regarded as some of the best on the market, and now, the Freezer III is holding up as one of the best in 2024. Arctic crowns the Liquid Freezer III series with the 420mm version! The Swiss manufacturer delivers an AIO that can compete with high-end custom watercooling systems! Our Arctic Liquid Freezer III 420 AIO Cooler is the largest in the series. With three 140 millimetre fans, it expands the cooling region all around the system. The reviewed top-of-the-range Liquid Freezer III 420 proves to be a stellar performer on a modern, many-core CPU, but the sheer scope of the product is such that you will want to double-check dimensions before taking the plunge. Don't underestimate the size of the chunky radiator and make sure there's enough room around the CPU socket for the larger-than-usual block. First of all it features a new design that has removed that ugly block with a jet turbine looking block that looks very clean and fits more closely with other AIOs on the market. In earlier versions of the Liquid Freezer coolers, the ventilation fan for the VRM area was mounted on top of the pump block. However, in the new design, the fan is located within the pump block's top vent and directs its airflow laterally. The pump seems to be positioned adjacent to this fan, which ensures better cooling efficiency. In order to be able to accommodate the very strange-looking pump unit in a gaming system in a visually appealing way, the scope of delivery includes a cover made of plastic and aluminum, which, when viewed from above, makes it appear as if it is a small turbine. Thanks to the two integrated magnets and the pogo pins integrated into the pump unit, the cover can be mounted and removed from the pump unit in seconds. Behind this grille (compressor) is the fan, and then behind that are the air routers, which in turn are tasked with more efficiently guiding the air streams to where the most intense cooling is typically needed. Several features including an extended radiator surface, a PWM controlled pump with VRM fan like its predecessor, integrated cable management and Individually addressable A-RGB LEDs(@ A-RGB versions).
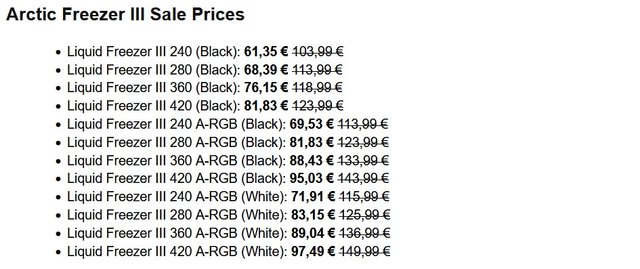
At MSRP, these devices are already a steal. With the reduction, there isnt a single other AIO cooler with the same value. Arctic is celebrating its 23rd anniversary in the best way possible: by reducing the prices of its newly-released AIO series. The brand plans to keep these deals going for three months, meaning they expire on May 20. You cannot get a better quality and performing AIO from a top-tier name for less, no freaking way. Itll be interesting to see if any rival brands attempt to counter this, because their rivals sales are about to drop to near zero. A wide variety of radiator form factors scaling from 120 to 420, and now a six-year warranty that's among the best in the business.
It's a monster. In both Max-Performance and Noise-to-Performance, there is absolutely nothing that can compete with an Arctic Liquid Freezer III 420 or 420 ARGB. Its sheer size and perfectly optimized fans are able to push the cooler to the top of the benchmark list where it will reside for the time being until somebody finds a new way to cool down a CPU without making the cooler itself bigger. To make it short, it is the best AIO we have ever seen and we can absolutely recommend this cooler for heavy-duty workhorses.
 Posting Permissions
- You may not post new threads
- You may not post replies
- You may not post attachments
- You may not edit your posts
-
Forum Rules


 Reply With Quote
Bookmarks