-
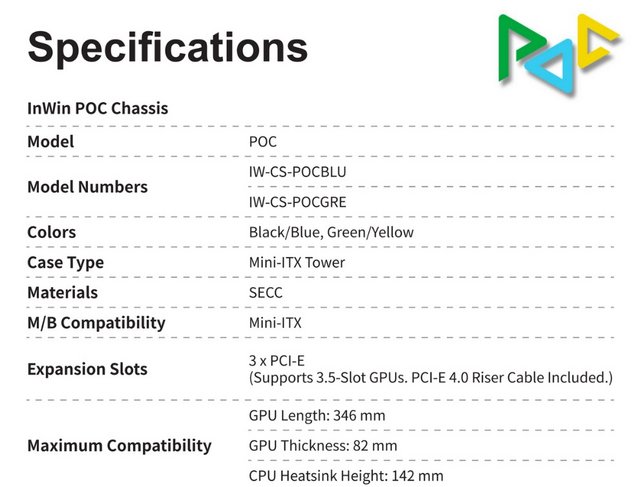
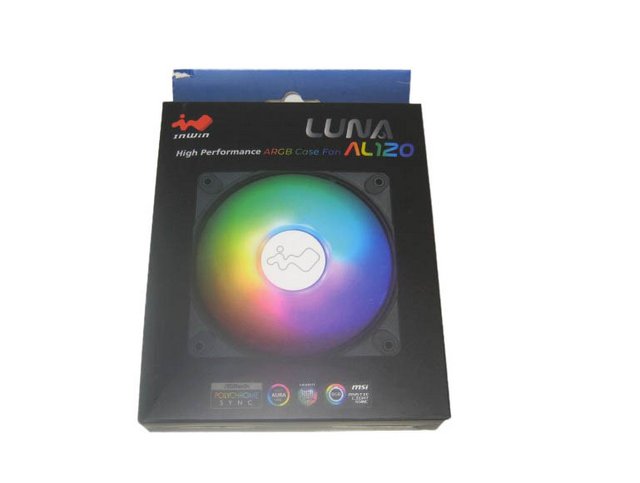
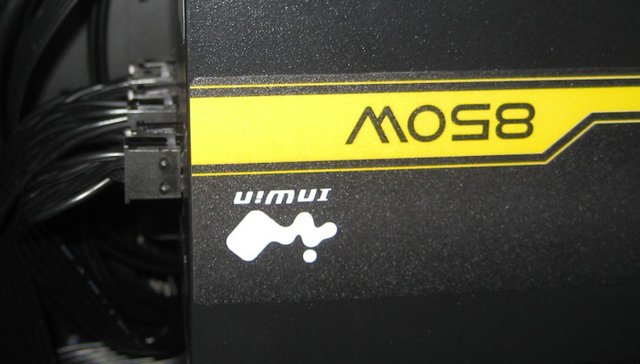
InWin POC
Introduction
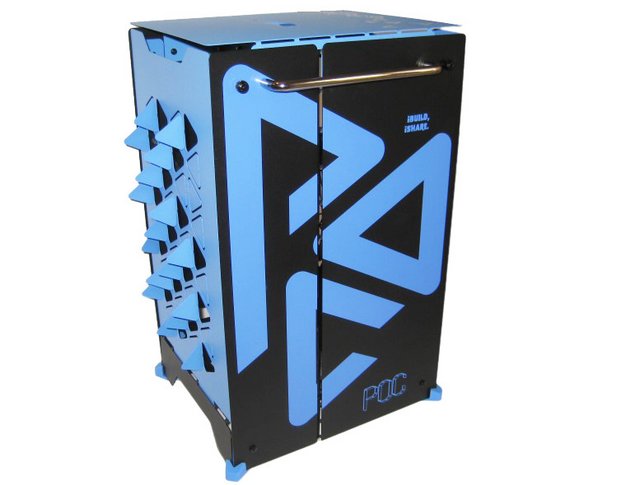
If the oldest of us know InWin for years, the brand has become known to a younger audience in recent years with rather extravagant cases. InWin is back with its POC PC Case. A kit case delivered flat in what looks like a pizza box. The idea? With this kit, you have pre-cut foldable steel panels that, once fully built, form a rather original mini-ITX chassis. This chassis is intended to be the first of a series that was mentioned in early 2023 during CES as part of the iBuildiShare product line. As you can see, the idea is to offer products with a focus on modular design and DIY. The POC Case is suitable for Mini-ITX systems and can be personalized via an associated website. The POC is a small form factor (SFF) case with a internal design that intends not to sacrifice much on the compatibility side. The POC is available in 2 different versions. Buyers can choose between bright blue and black (IW-CS-POCBLU) and bright green and yellow finishes (IW-CS-POCGRE).

On paper, this reads like a special product and it’ll be interesting to see if it can offer the performance to match.


Packaging & Contents
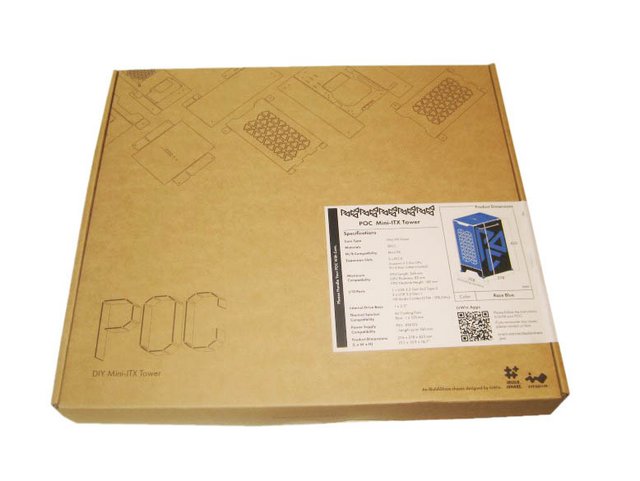
This case is delivered in a 1.8-inch (45mm) thick flat-pack pizza box-like package, and thus the POC minimizes packaging materials and weight, reducing environmental impact, and keeps the price down.
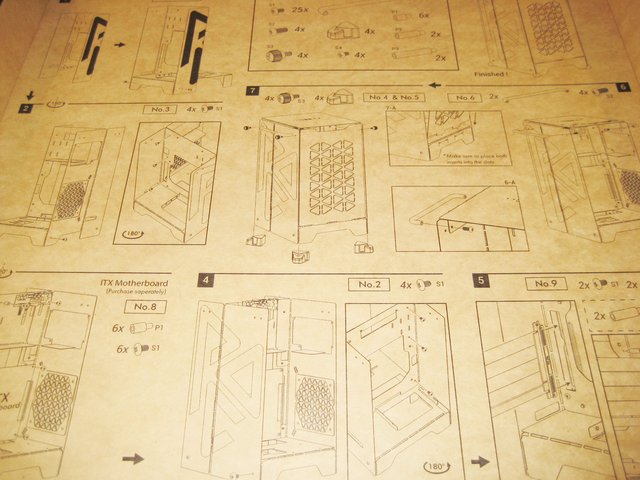
With the next step, the “magic of the arrangement of parts and packaging” begins: you open the box and in front of you are the neatly arranged elements of your future case.

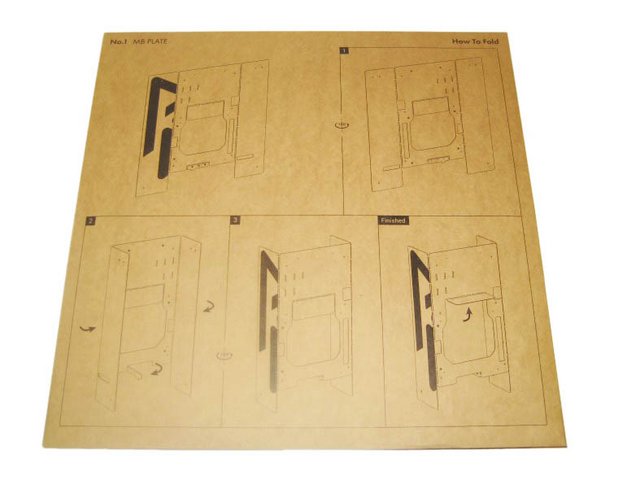
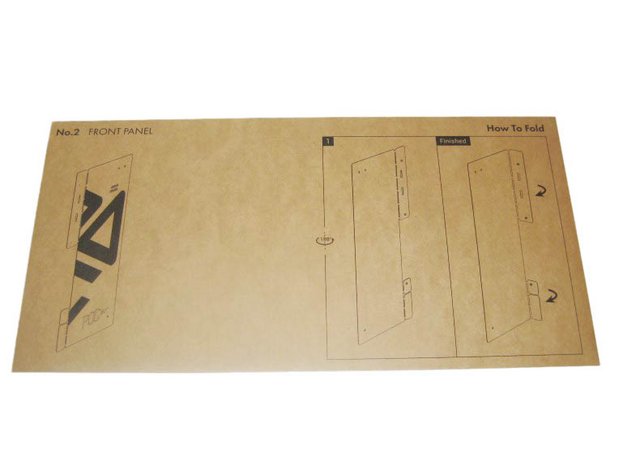
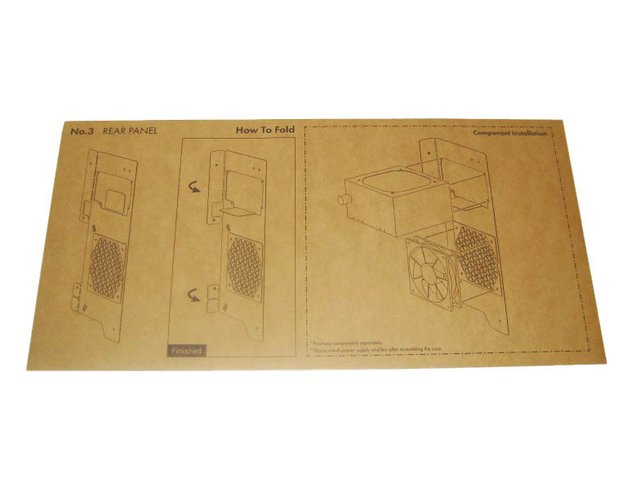
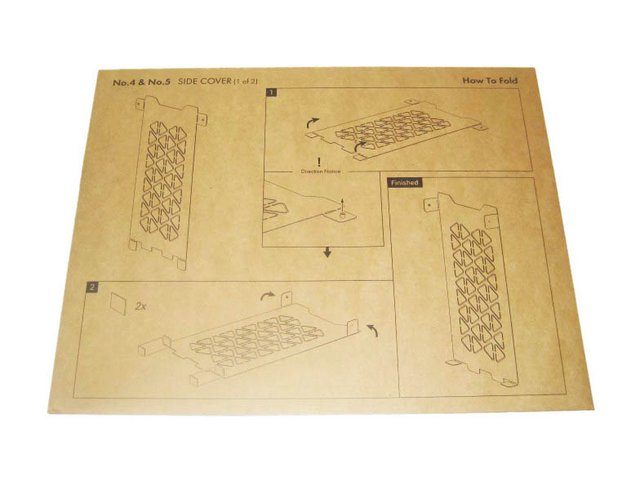
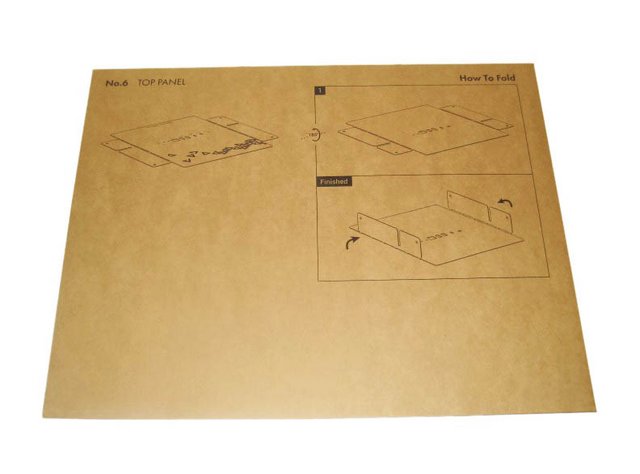
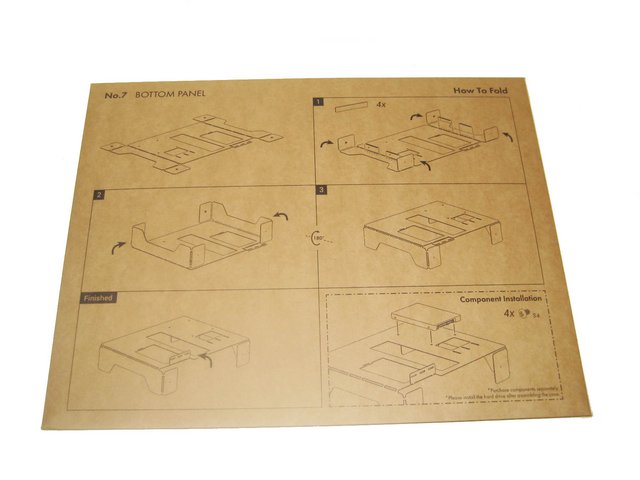
Under the top flap of the box a kind of drawing help you build your system.
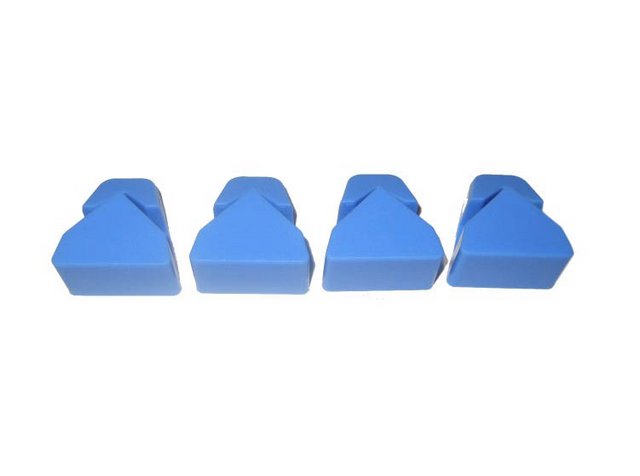
7-piece POC set.
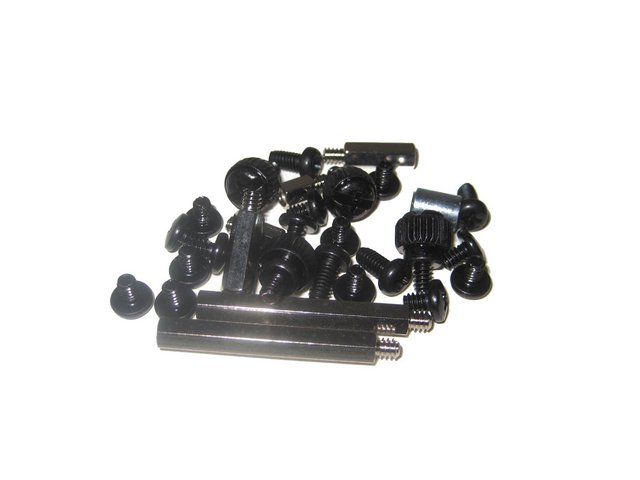
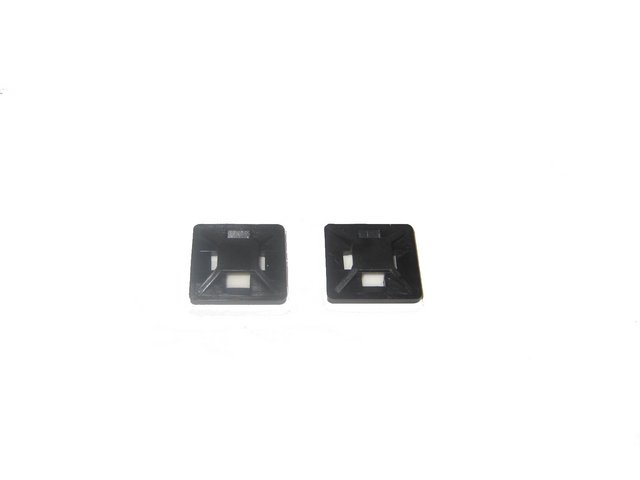
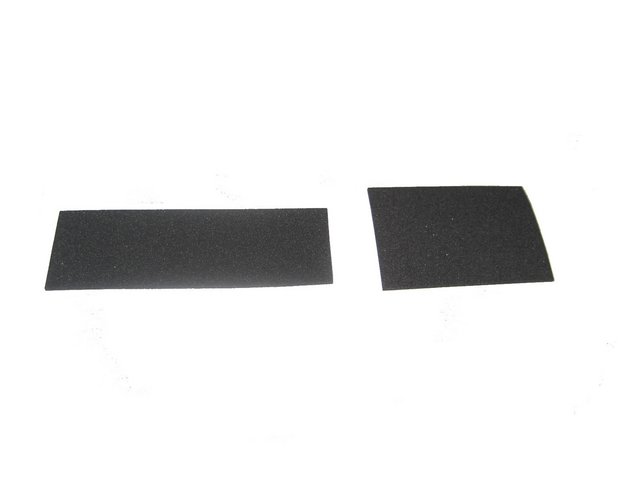
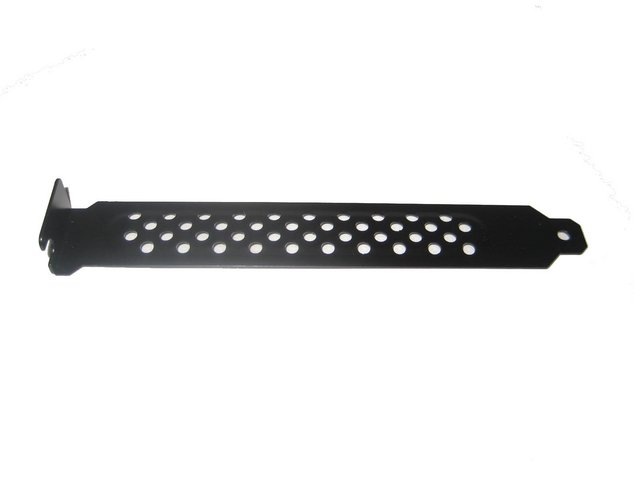
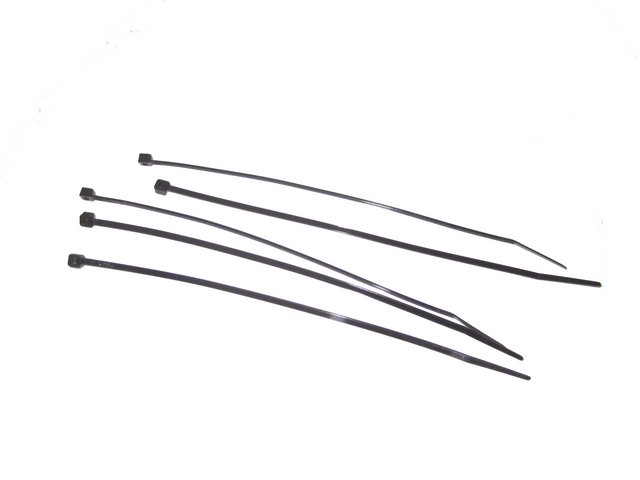
As is customary with an InWin chassis, there is a box with all the accessories. It holds a good number of Screws, Thumb Screws, Double-sided Tapes, Cables Mounts, GPU Stand-offs, PCI-E Slot Bracket, Velcro Strips and Cable Ties.

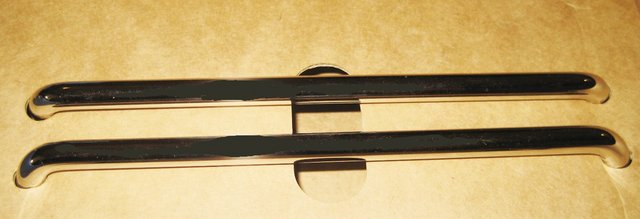
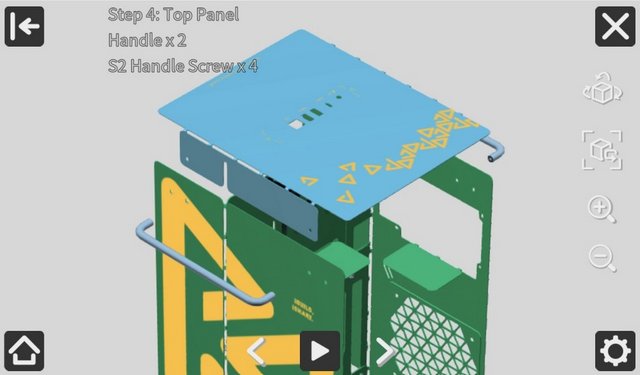
Lateral handles make it easier to transport the housing or the finished PC.
Rubber feet.
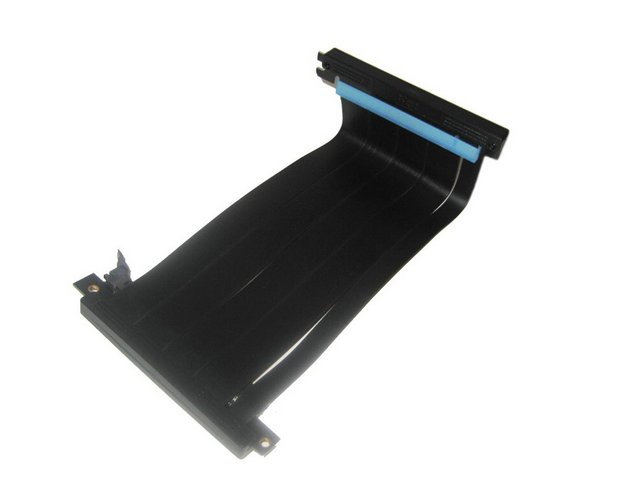
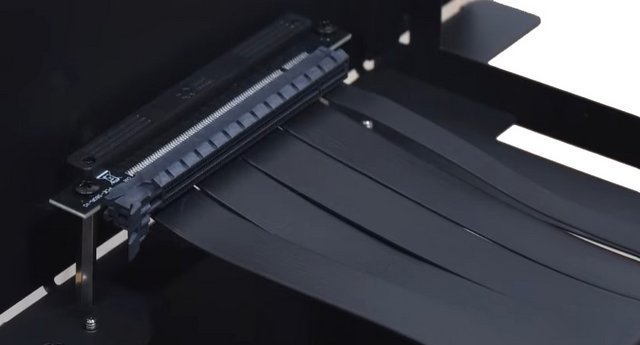
A special PCIe 4.0 riser cable, specially designed for the case also provided.
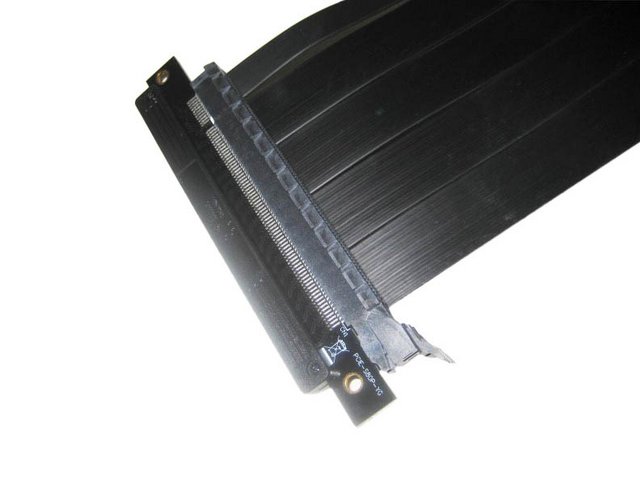
Τhe cable has been folded to accommodate the vertical, long GPU setup.
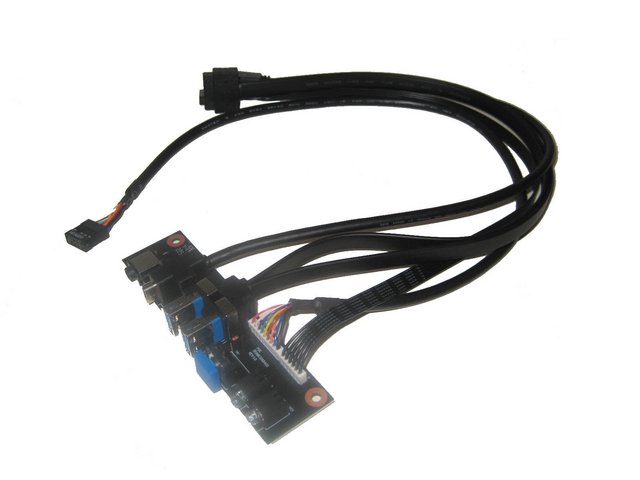
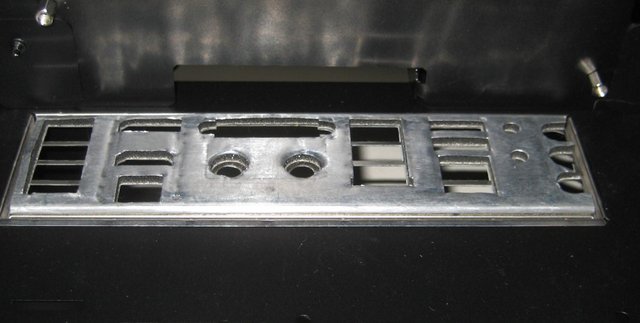
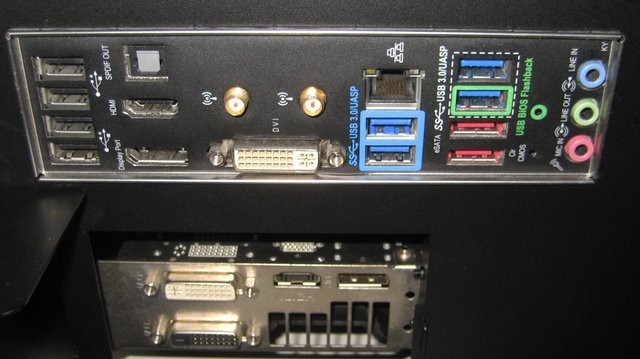
I/O Module.

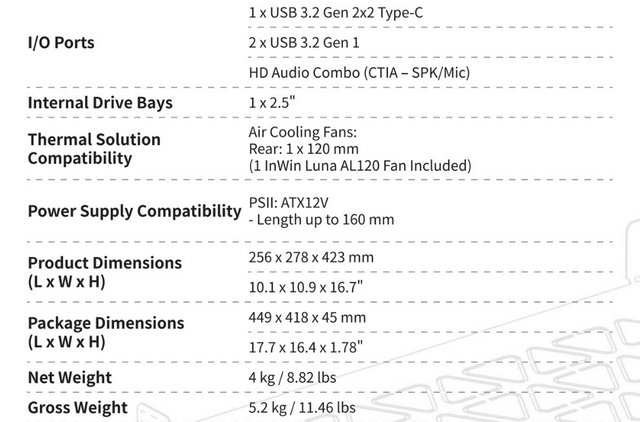
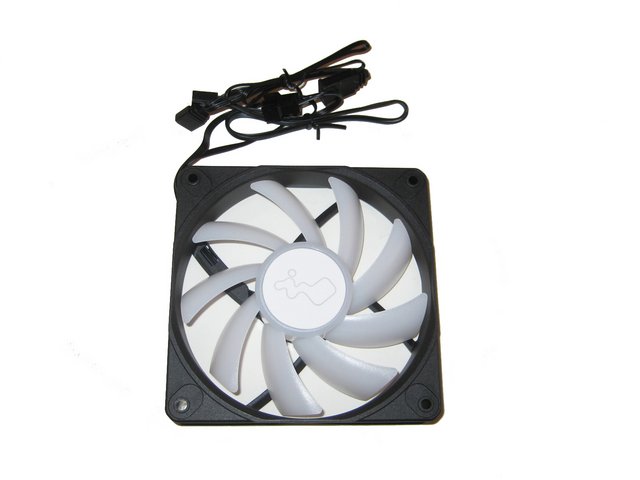
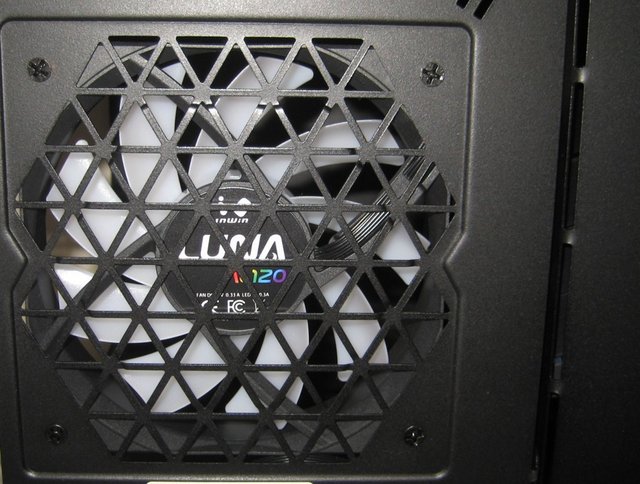
An InWin Luna AL120 fan with customizable RGB lighting is already included in the set.

LUNA AL120's speed can vary between 400 and 1800 rpm. At maximum speed, it offer a flow rate of 82.96 CFM for a static pressure of 2.31 mm / H2O.
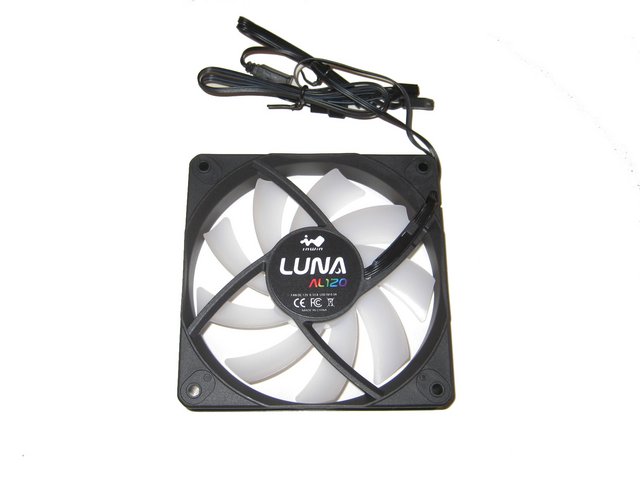
Features include 4-pin intelligent PWM control, plus built-in vibration-proof rubber mounting pads.
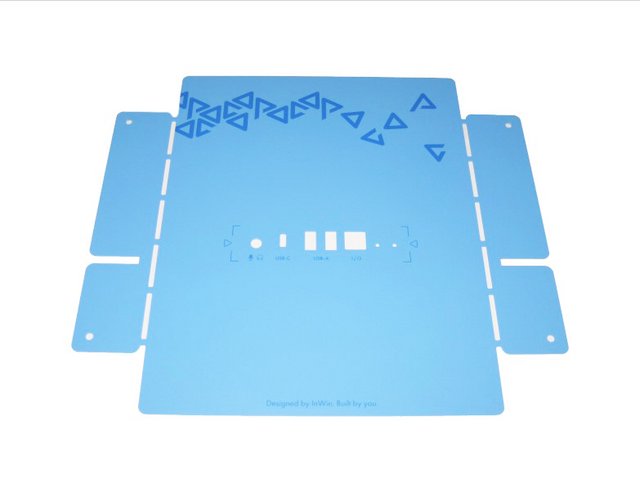
A Closer Look Outside
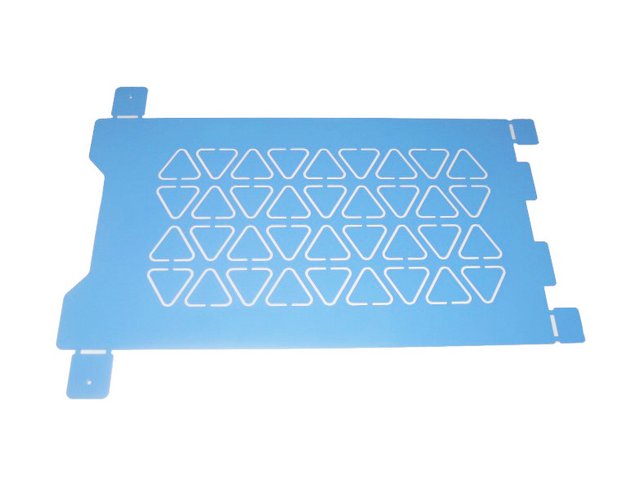
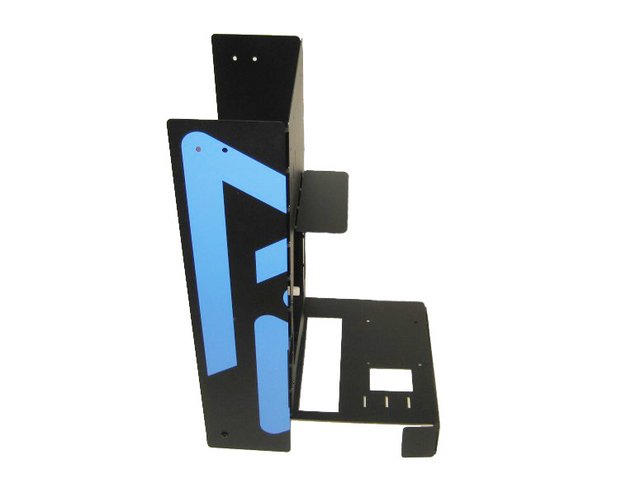
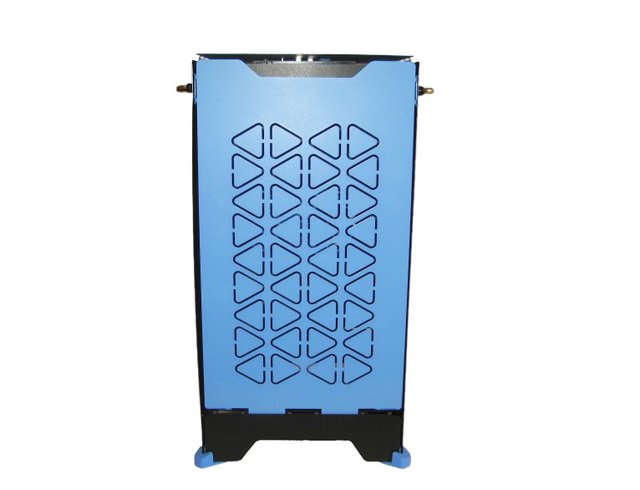
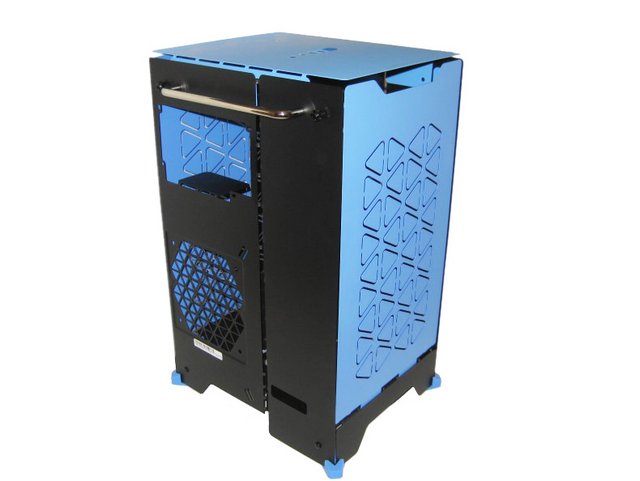
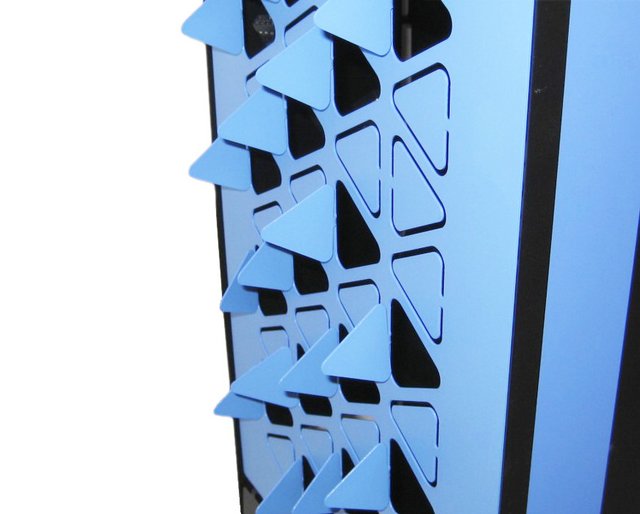
The InWin POC is a modular mini-ITX case that can be modified by bending. All panels are bendable and foldable and are said to be adaptable and foldable, similar to origami.
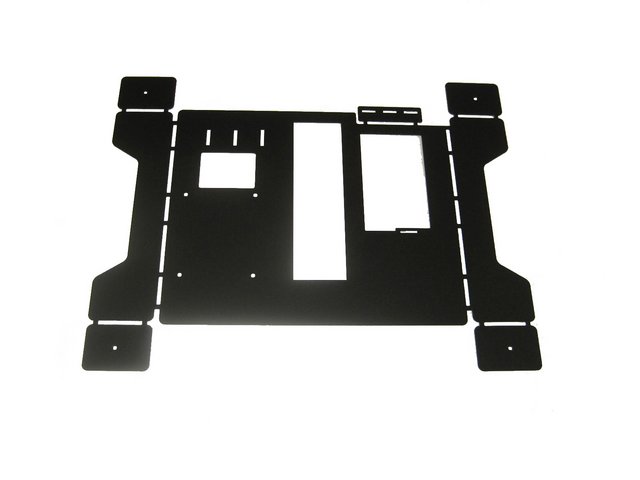
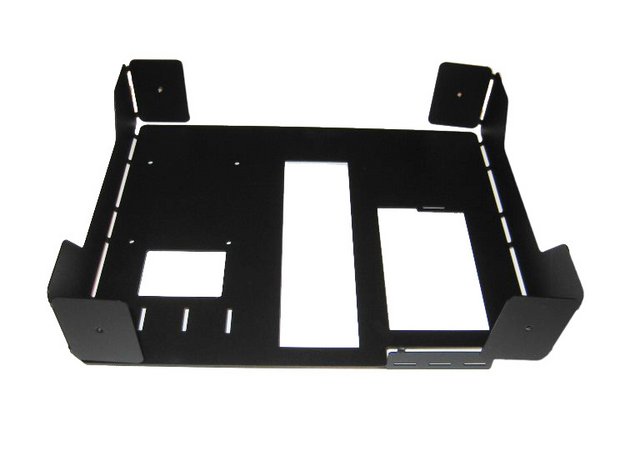
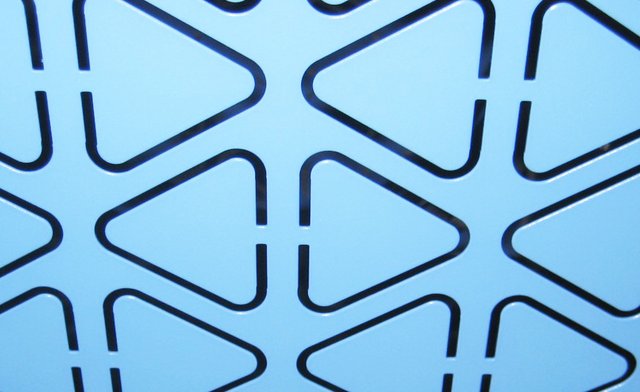
They are each made of 0.8mm thin SECC steel panels, which are particularly robust, lightweight and durable, and can be folded multiple times with ease.
If you have ever bent SECC steel you will probably be aware you don’t want to make a mistake with your initial choice of bend angle or metal fatigue will quickly do its work. Thus, it could be quite disastrous if you bent the tabs on one of the panels the wrong way by accident. Users are encouraged to bend out and/or snap off triangular vents from the case panels for improved airflow.
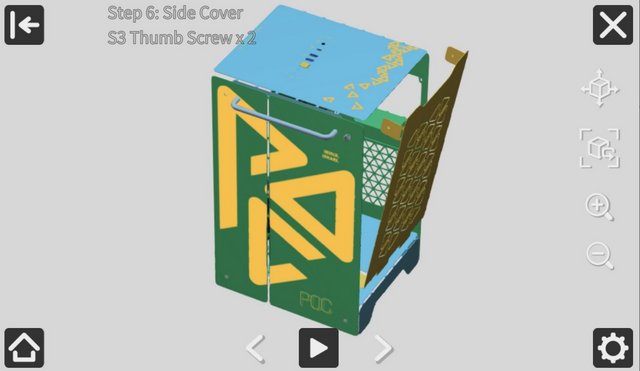
The individual steel surfaces are light and have a colorful design. The paint is flawless and the numerous mounting holes and feedthroughs are clean. The side parts are simply clipped on with thumbscrews and can also be removed without tools.

From myself, I can note that the assembly of the case is not difficult, moderately interesting and takes about 30 - 45 minutes. It does not make sense to describe each step, everything is intuitive, I will only note a point worth paying attention to:All elements slide easily and then screwed together with screws. Once completed, side-mounted handles are supplied for transporting.


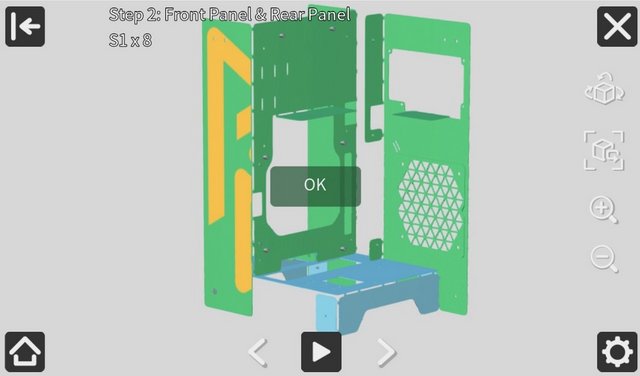
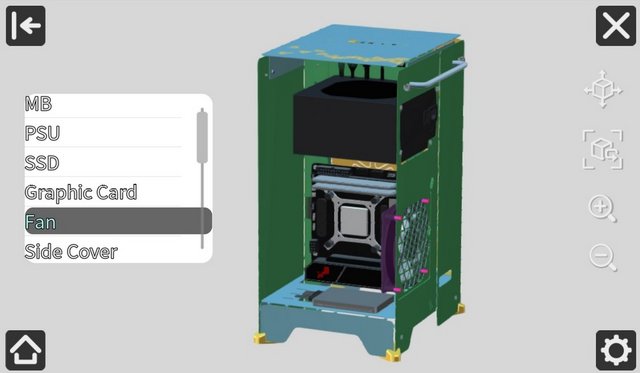
Building anything with a 2D instruction guide can be challenging. POC offer a 3D interactive assembly guide as a dedicated mobile APP.
https://in-win.com/assembly_guide/poc/


It should be noted that the front I/O is fixed with 2 screws and can be dismantled if necessary.

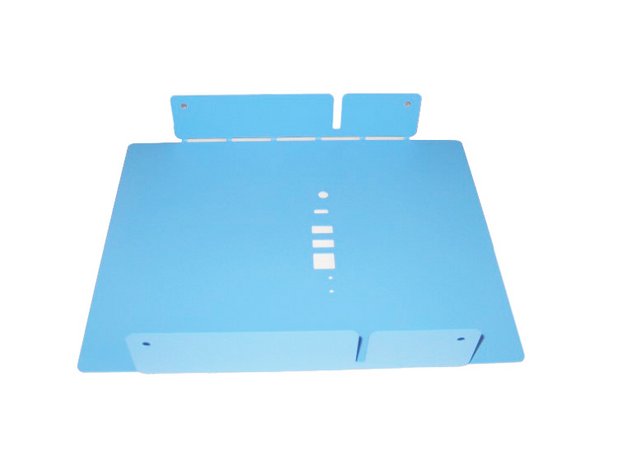
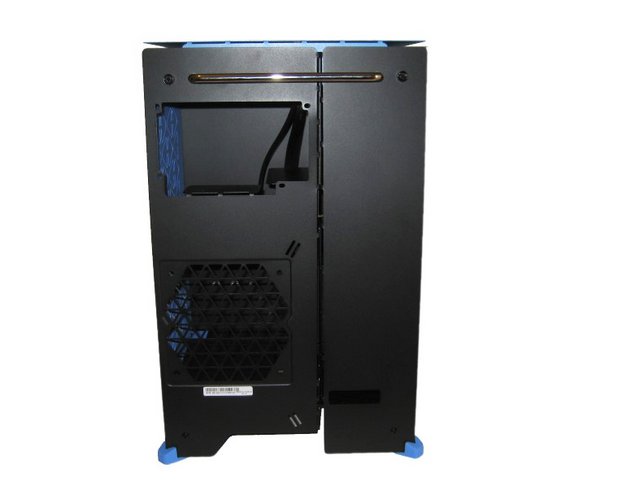
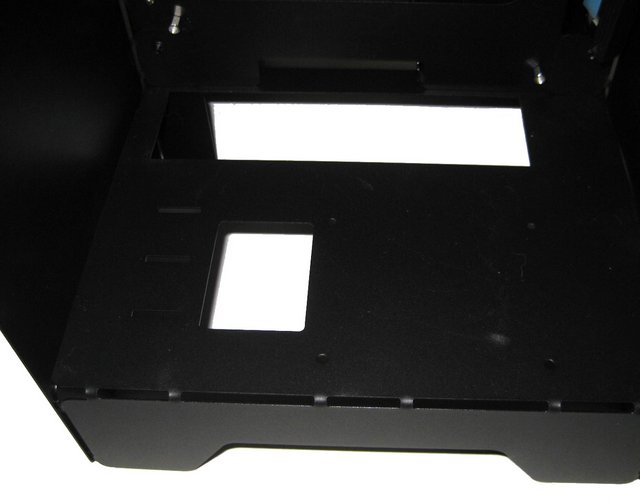
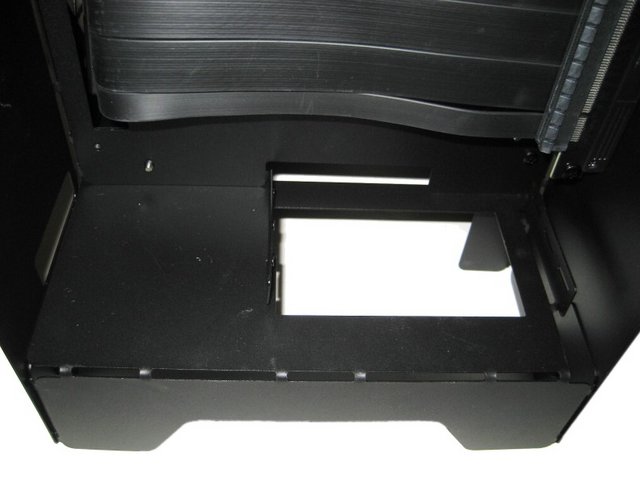
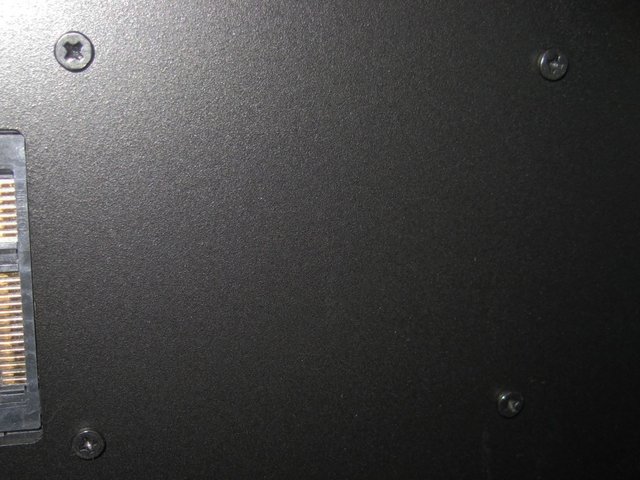
The underside is not mesh as it is part of the frame. There is a cutout for access to the GPU display connectors, PSU cutout and the usual motherboard cutout. If you look closely, you can see a set of simple mounting holes for an SSD.
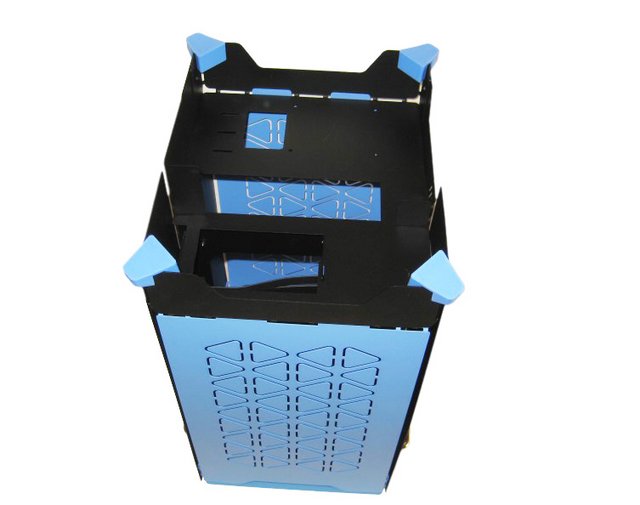
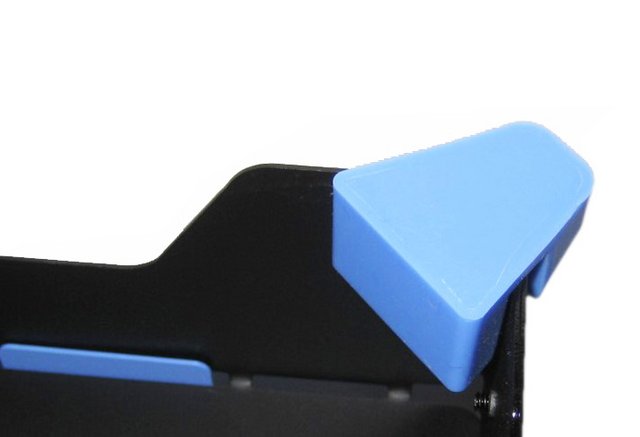
There are four blue colored rubber feet installed in each corner to lift the case from the ground for air intake.
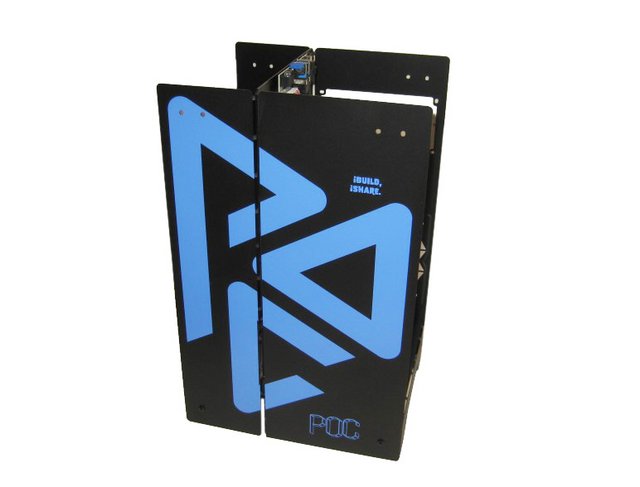
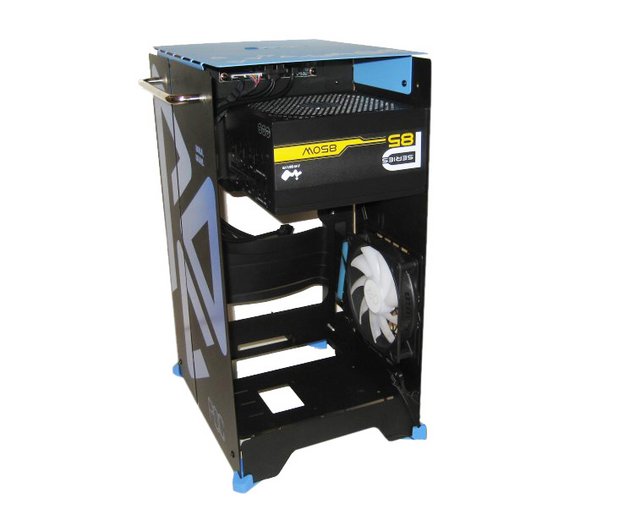
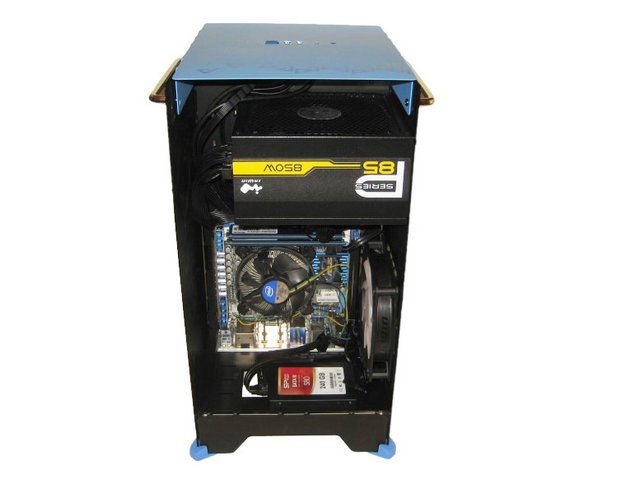
The seven-piece kit, when fully assembled, measures 256 mm x 278 mm x 423 mm. This is a Mini-ITX design, but is not the most compact. Probably one of the reasons for the size is the use of a dedicated GPU chamber with support for up to 346mm GPUs mounted vertically (PCIe 4.0 riser cable included). With a weight of about 4.2 kg, it is pleasantly light.
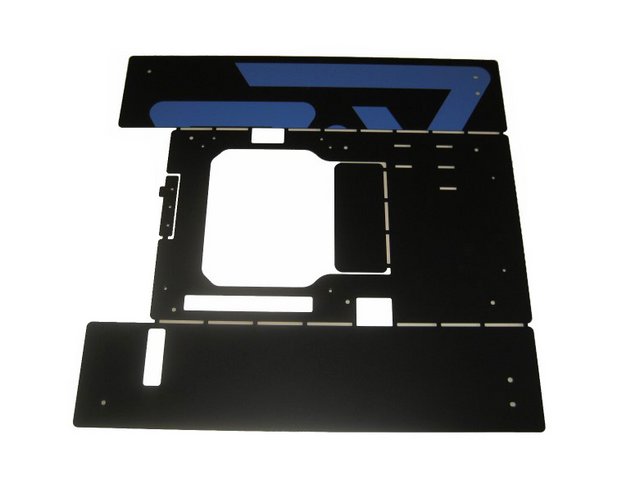
The POC is characterized by its clear cuboid shape and the high proportion of mesh. POC completely dispenses with dust filters. Anything that isn't kept out by the perforated plate can get into the housing.

Due to the design, it is relatively airy, so there is no real dust protection.
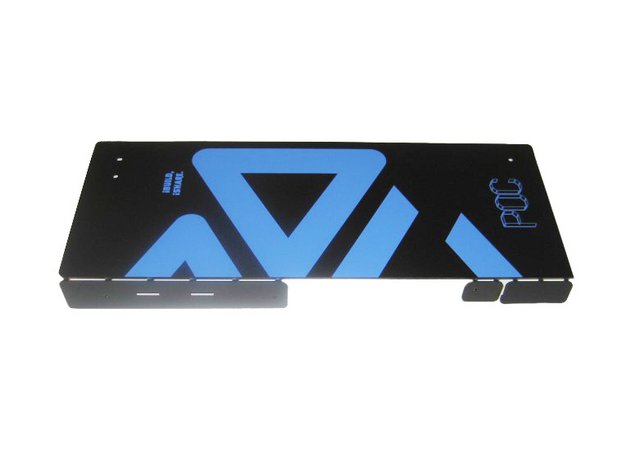
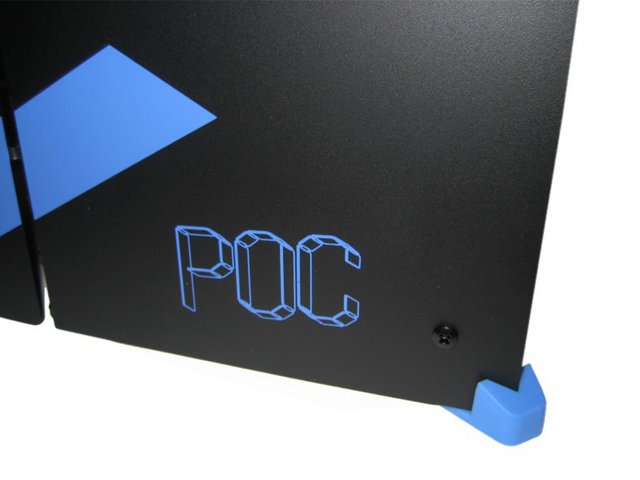
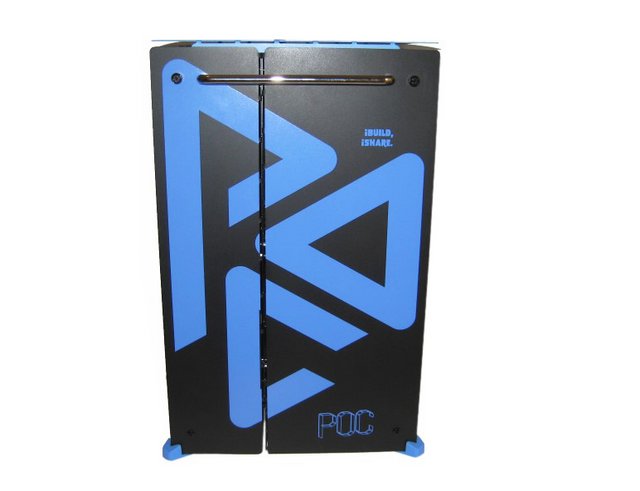
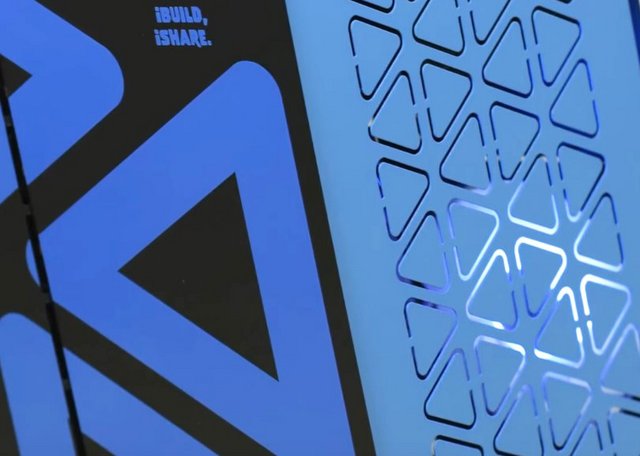
The black and blue design featuring triangular blue shapes across the side panel which spell out the POC name as well as a nice contrast across the case as a whole with the two colours. With its vibrant primary colors and interactive assembly guide, the POC seems more like an adult LEGO kit or Nintendo’s LABO cardboard line than a conventional PC case.

The design is travel-friendly with side handles (hello, GameCube!), but a little awkward to fit into a conventional desktop setup, with the front panel sitting squarely in the middle of the top of its rectangular frame.
The owner is also asked to organize the ventilation of the POC case himself. The sheet metal serving as the front panel has a series of symmetrical cuts.
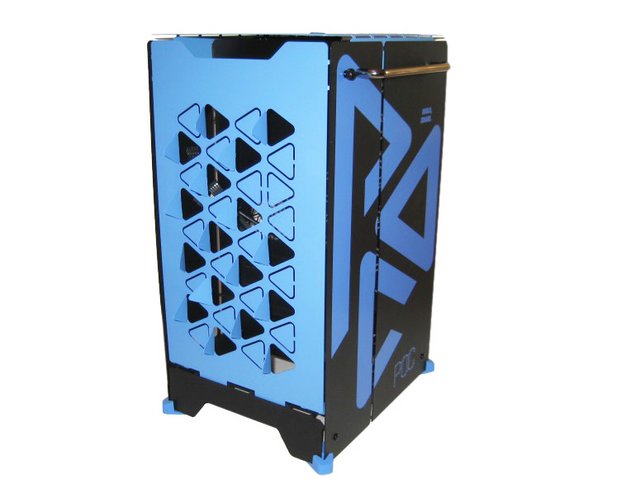
They can be bent to create additional fresh-skin flow to the components.
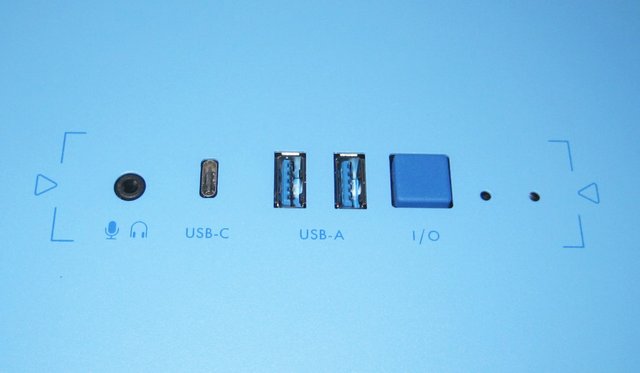
Easy access I/O ports include 1 x USB 3.2 Gen 2x2 Type-C, 2 x USB 3.2 Gen 1, and an HD Audio combo jack. These I/O ports are curiously situated almost central to the top panel, alongside a power button and power / activity LEDs.
A Closer Look Inside
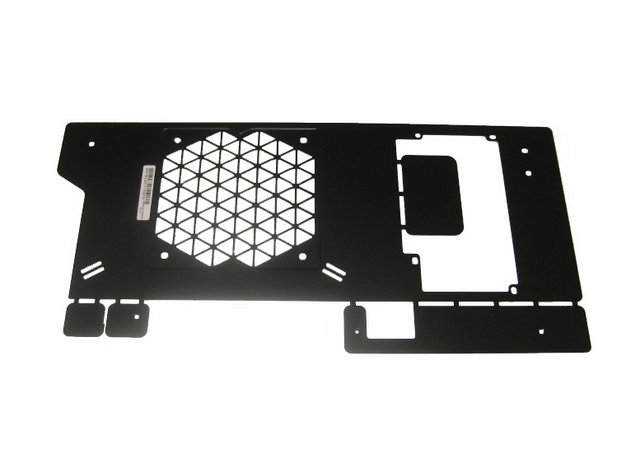
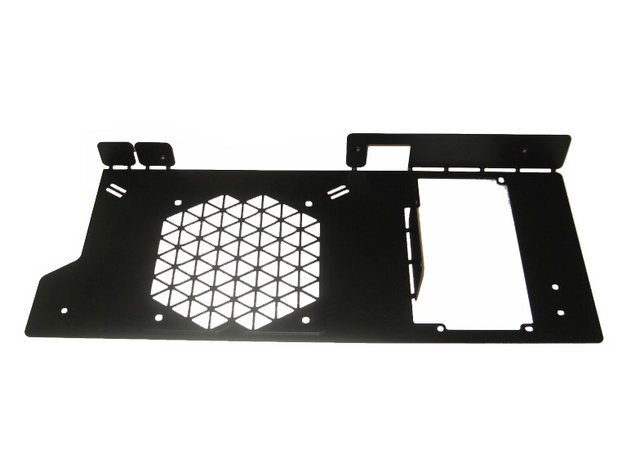
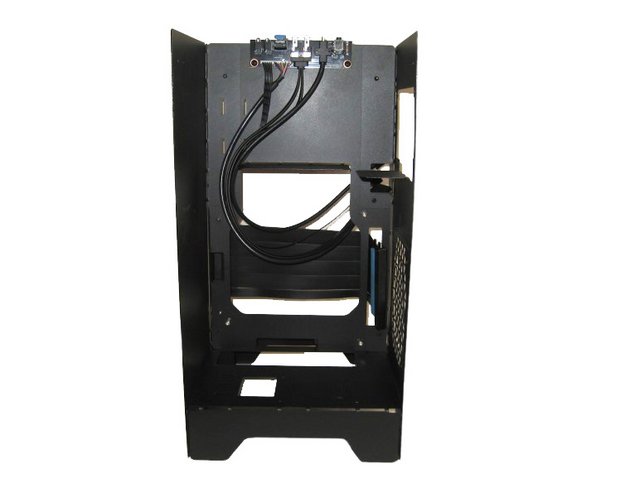
The motherboard side focuses on the brains of the system, along with the power supply above it. Divided into two areas, the interior of the case allows the use of a standard ATX power supply up to 16cm deep and to mount. There is only one mounting location for the included fan and no others, so those with high-power components and air cooling might want to pop out the triangular front-facing vents.
However, you will have to stick to the mini-ITX motherboard. The ITX motherboard mounting tray has a large cutout for easier access to the back of the motherboard, or that’s what one would assume…until we get to the next part.
It is possible to mount one 2.5" HDD/SSD on the floor. You will find a mounting position right on the frame. In total, the case space allows you to place only this 2.5" drive in this spot.
Separate space is allocated at the back for the graphics card. This allows you to extract heat from it more efficiently and also prevents additional heating from other PC components. There is area for a dedicated GPU with a size up to 3.5 slots and up to 34.6 cm long.
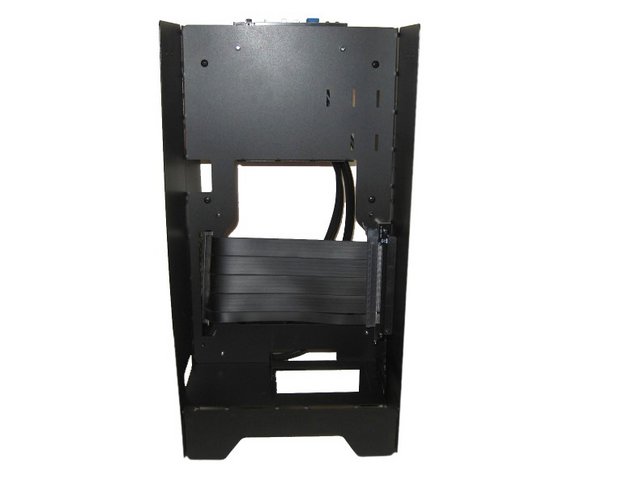
Due to the Motherboard being installed on the front side of the case, we need to flip the PCI-E x16 extension cable around, making the PCIe slot appear.
Τhere are two silver-colored metal bars which act as the mounting points for the vertically mounted GPU.
Installation Process & Finished Looks
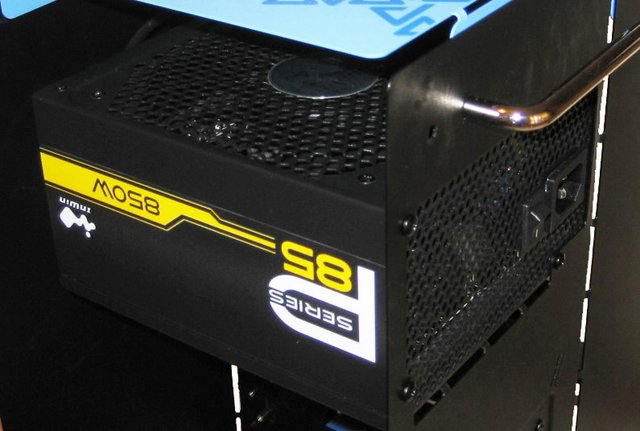
I dropped the PSU in first. Cable management inside the POC is a really hard task. Space is scarce, so a compact power supply with modular and flexible cables is an advantage. Those using an SFX PSU will have shorter leads and thus a cleaner final setup.
The POC accommodates a power supply unit that is up to 16 cm long.
The front offers the possibility to install one 120mm fan.
The Luna AL120 features a soft radiant glow from its own internal ARGB lighting, which can be controlled via ARGB compatible motherboard software.
That done, I was ready to install the motherboard.
I dropped the motherboard, complete with the cooler and RAM. The CPU cooler can be a maximum of 14.2 cm high. The Mini-ITX mainboard is mounted on four spacers in the tray.

One 2.5 inch drive can be mounted on the bottom. You may add it by using the specific mounting locations.
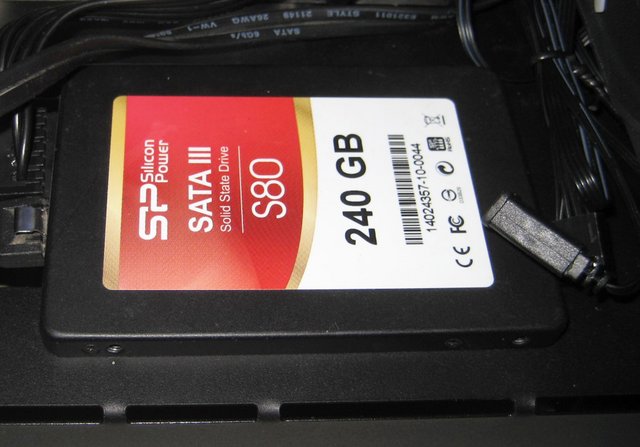
Underneath is where you go to add the four screws that holding the 2.5 inch drive in.
That done, I was ready to install the graphics card. The graphics card finds its place behind the mainboard tray. It is attached to the two silver-colored metal bars and connected to the mainboard via the riser cable. The PCI-E x16 extension cable is routed from the motherboard side to the GPU. The GPU is actually very easy to install in this orientation since the slot and locking mechanism can clearly be seen. You can also see how the PCIe power connector sticks up pretty far since the PCB is larger in that dimension. The GPU area is still clear of cables and you can still reach all the major areas around the motherboard well enough.
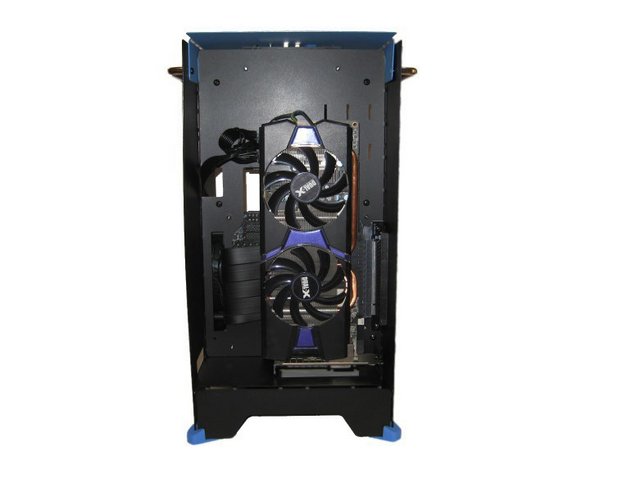
By supporting up to 34.6cm long 3.5-Slot GPUs, there is almost nothing that the POC cannot handle.
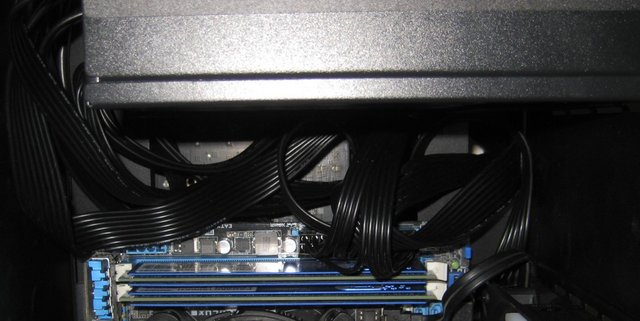
With everything installed in the POC, it was instantly clear that I had a bunch of excess cabling, mostly from the power supply and given that the case is so small, there was no place to effectively hide the mess. On the reverse side of the motherboard wall there is space for cable management, and so that the wires are not just stuffed. I bunched the cables together hastily with a few zip ties and velcro straps. So even if you do everything you can, cable management will never be an easy task inside the POC , and the only "tip" we can provide, is to use the shortest wires you can find.
With everything installed, you can still reach all the major areas around the motherboard well enough. All of the components fit nicely inside the POC for my air cooled build. The cable management is tough on a case of this size, but because of the POC’s design, the cables don’t obstruct air flow.
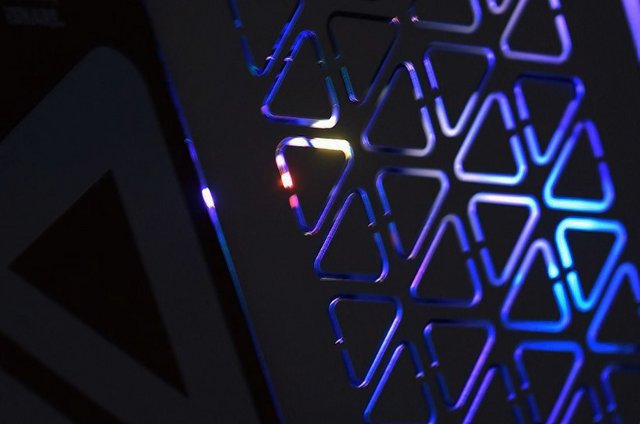
Once finished, the side panels can be placed back onto the chassis just as easily as they came off. If you install RGB components, you can also see the LEDs through the mesh.
In the dark, they become patterns through the perforated grid, for example on nearby walls.
Test Methology & Performance
In addition to the processing and equipment of the case, the temperature behavior is also of fundamental importance.

Test System:
Processor: AMD Ryzen 5 1600, 6x 3.2GHz
Processor cooler: Noctua NH-L12S
motherboard: ASUS ROG Strix X370-I Gaming
Random access memory: Crucial Ballistix Sport LT Red 16GB Kit (2 x 8GB) DDR4-2666
hard disc: OCZ Arc 100 SSD 240GB
Graphics card: Gigabyte AORUS GeForce GTX 1080 8G
OS: windows 10
In order to determine the processor's maximum temperatures, the CPU was loaded for 20 minutes using the free stress test tool Prime 95. Since experience has shown that the Small FFT test has the highest thermal dissipation performance, we use this mode and log the maximum processor temperature with AMD's Ryzen Master program. At the same time, the graphics card is fully utilized with Unigine Superposition. Unlike the previously used Furmark, the boost clock remains constant in this stress test. The graphics card fans run at 50 percent. We rule out that an automatic fan control can influence the measurement results. Due to the test system's effective power-saving mechanisms, we can do without idle measurements. Our measurements produced the following result:
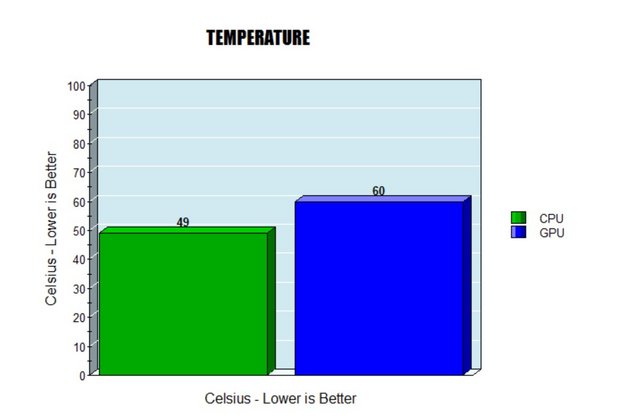
It is clear that the AMD Ryzen 5 1600 can be cooled more than adequately in the POC. The graphics card benefits less from the front fan, but can cool itself adequately through the mesh on the sides. The disadvantage is that there is almost no insulation and any kind of noise comes out of the mesh grid unfiltered.
Final Thoughts
A PC case is typically just a nice box for you to put all your parts in, with a few standardized mounting brackets, sufficient air ingress and egress for cooling, and maybe a USB port or two. But this year manufacturers seem to be stepping up their innovation, if only because PC-building customers are desperate for something new. The latest example is the POC from InWin, a Mini-ITX case that you literally assemble yourself by folding sheets of steel. InWin is encouraging creativity and dexterity skills for PC builders of all ages with their iBuildiShare series of cases. The InWin POC was able to win us over from the start. Typically, PC cases are shipped fully assembled. However, this means that the transport costs are in an unfavorable ratio to the product value, especially for cheap models. The InWin POC, on the other hand, is delivered in individual parts and assembled by the user himself. The concept is reminiscent of the products of a well-known Swedish furniture store. An interactive 3D guide is also available via the iBuildiShare app for smartphones and tablets, allowing young and old to assemble the case quickly and easily. InWin's marketing emphasizes the fun of tinkering when assembling the "origami case" and doesn't forget to emphasize the ecological advantages. It's certainly not perfect, but it's very well thought out and, above all, really, really well made. The design is travel-friendly with side handles (hello, GameCube!). With its vibrant primary colors, the POC seems more like an adult LEGO kit or Nintendo’s LABO cardboard line than a conventional PC case. But rest assured, once you’ve meticulously followed the instructions, complete with full 3D illustrations, you’ll have an ITX-compatible PC case ready to accept all your parts. A surprisingly capable case, thanks to an isolated and extended graphics card chamber, it can handle GPUs up to 3.5 slots wide and 34.6cm long. The connection between the mainboard and the graphics card is established using the supplied PCIe 4.0 riser cable. It accommodates a Mini-ITX system with an ATX power supply unit that is up to 16 cm long. The CPU cooler can be a maximum of 14.2 cm high. A few decent Air CPU coolers are also available for air-cooled systems up to 14.2cm high. The case incudes one Luna RGB 120mm fan and only one 2.5-inch hard drive bay but given many ITX motherboards include two M.2 slots (one often hidden on the back), that should suffice for most setups. As for the case interface, there is one USB 3.2 Gen 2×2 Type-C port, two USB 3.2 Gen 1 Type-A ports, and one audio port on the front panel. If you remove the side panels, you have very good access to the individual components despite the small size of the case. This structure makes the hardware assembly almost surprisingly user-friendly. The cable management is tough on a case of this size. With particularly compact Mini-ITX cases, cooling the components is a challenge. This is all the more true when a powerful high-end system is to be put together. The POC should offer a solution with its very airy structure. The temperatures in the POC are equally excellent for the CPU and GPU. The independent zones along with the almost open layout are a bliss for the hardware. POC’s customizable vent tabs on the side panels can be adjusted to add plenty of ventilation or a distinguishable aesthetic to your PC. The other side of the coin is the background noise caused by the open structure. Although the fans can turn a bit slower due to the good temperatures, it remains much more noticeable under load. Also there is no real dust protection.
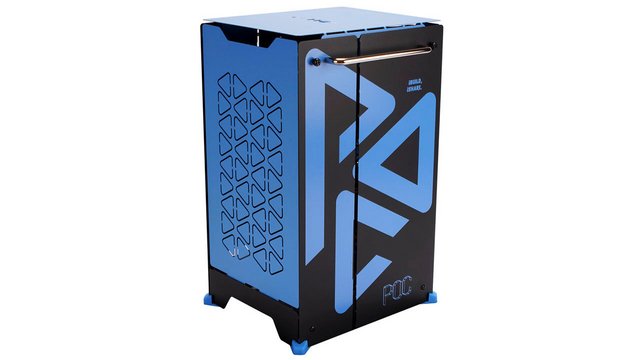
The InWin POC is available in bright blue and black (IW-CS-POCBLU) or bright green and yellow (IW-CS-POCGRE). A price around 100€ whatever the color is considered. In addition, the modular design offers excellent modularity options. For example, a top panel, side cover or front panel can be purchased separately for only 18€, while a replacement PCIe 4.0 mounting cable costs 59€. European customers also have the opportunity to add the BATMAT, an aluminium mousepad, valued at €25, plus an Nomic Mouse to their cart for only 10€ more. Now that’s value. I’m very happy to recommend this case to anyone looking for a attractive model with small footprint build, but not wanting to sacrifice performance.
https://estore.in-win.com/products/poc

Last edited by testman78; 05-07-2023 at 10:20 AM.
 Posting Permissions
- You may not post new threads
- You may not post replies
- You may not post attachments
- You may not edit your posts
-
Forum Rules


 Reply With Quote
Bookmarks