-
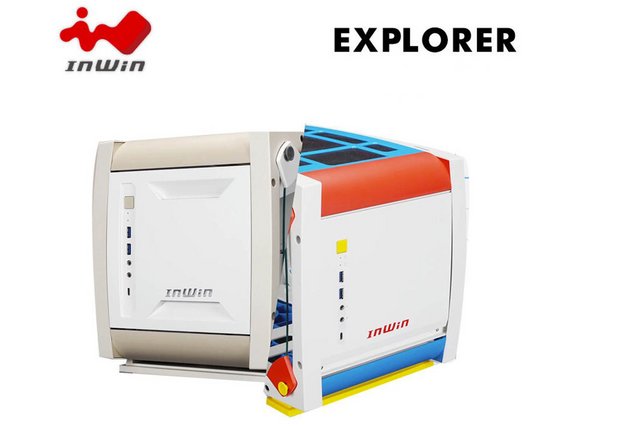
InWin Explorer
Introduction
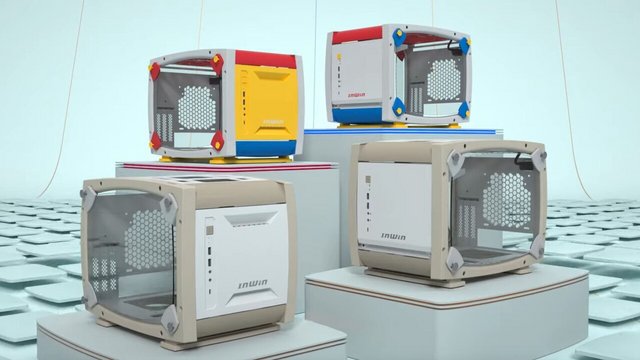
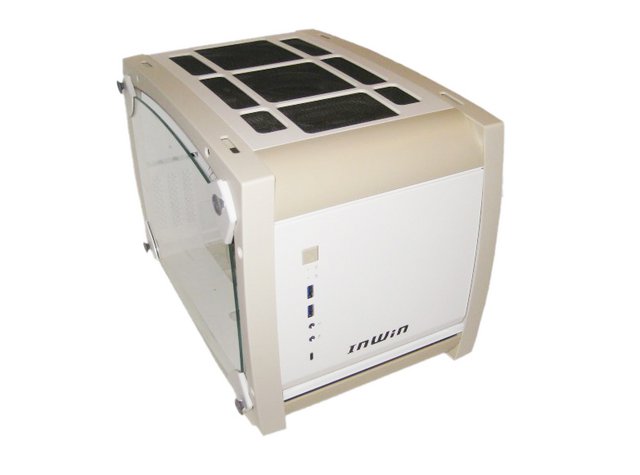
With ITX chassis popularity going strong, it makes sense for InWin to add their own all-new Explorer to the mix. Following the innovative Alice chassis for ultralight PC, the new Explorer is created for DIY enthusiasts who enjoy assembling modular and detailed gaming chassis themselves. Everything hooks effortlessly. The EXPLORER is said to be an impressive mini-ITX case. This include triple-slot graphics card support, m-ITX motherboard support, and multiple configuration potential. It makes use of form factors and components in its favour while offering some unique elements of its own. Plus, you can even dismantle the case all the way down to its motherboard tray. It is made of SECC galvanized steel and reinforced ABS plastic with tempered glass side panels. You can choose from a simple Bone White or Justice White with vibrant mixes of red, blue and yellow that users can assemble on the 10pcs modular mini-ITX chassis. Today in our InWin Explorer Mini-ITX Case review we have the Bone White case to show. Well discuss everything you need to know about it like its specifications, features, performance, and more. The product is a promising one, and it looks great too. However, is it as good as what InWin claims?
Specifications:

Packaging & Contents
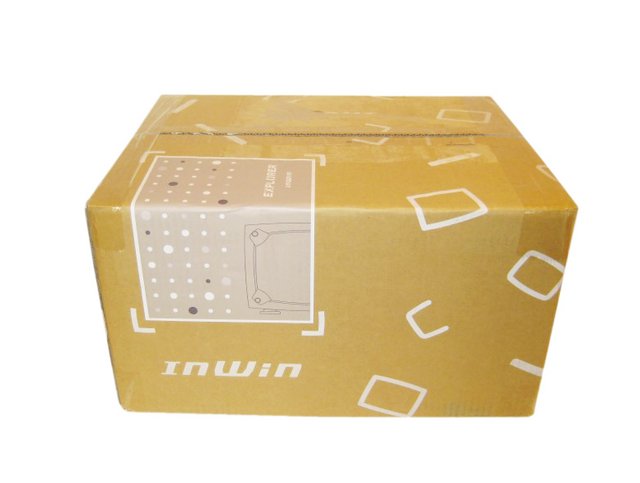
This section of our InWin Explorer Mini-ITX Case review will focus on the packaging and its contents. The Explorer ships in a simple cardboard box. Its a sturdy brown box that does a great job to protect the case. This cardboard face features the brand's name and logo. A piece of label appears. It shows a large line forming an angle.
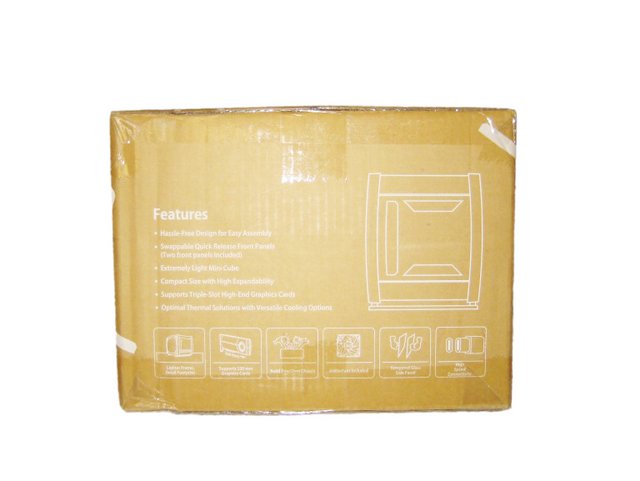
One of the first sides of the cardboard gives us some initial characteristics. According to InWin, the Explorer assembly is easy, it has Compact size with great possibilities, it Supports high-end three-slot graphics cards, it is Extremely light and will be able to accommodate many cooling solutions. We also see a drawing of the case and the usual logos related to transport and storage.
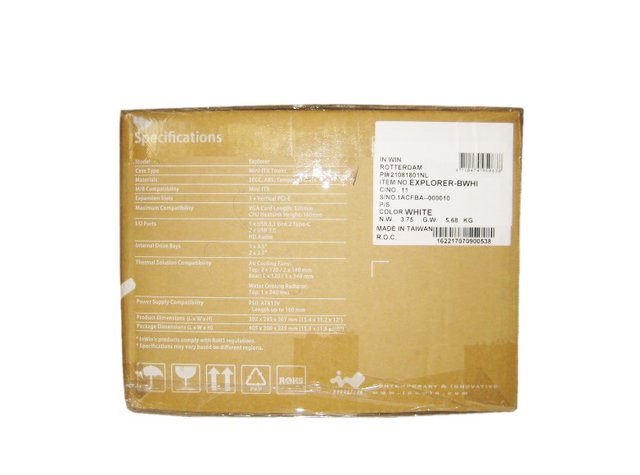
On the other side, InWin gives us the full specifications. We will not detail everything here. We just remember that it is a SFF case, measuring 392 x 285 x 307 mm, that it is made of plastic (ABS), steel (SECC) and tempered glass. InWin also details full hardware compatibility. We have a label with other details including color variant (white in our case) and the weight (3.75 kilos). Barcodes and other usual serial numbers are there too. The other two small sides do not bring any essential information. We have the other part of the label which bears the name of the case as well as the rest of the drawing representing a two-tone bone white and beige.
Out of the box, the inside is not a complete case, but a modular component, which needs to be assembled by the owner. There are two additional boxes within the package. The parts of the chassis are neatly stacked in individual layers within the box, starting with the small parts and accessories before the framing and glass panels at the very bottom.
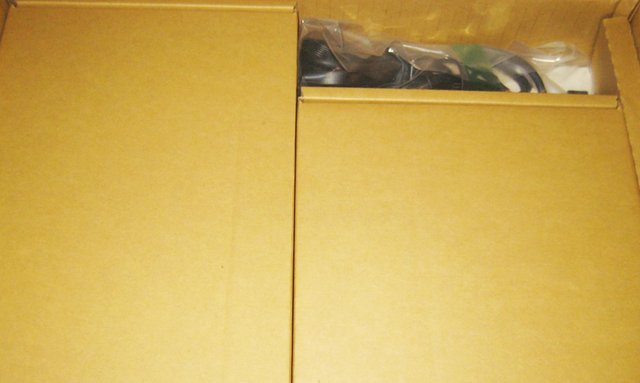
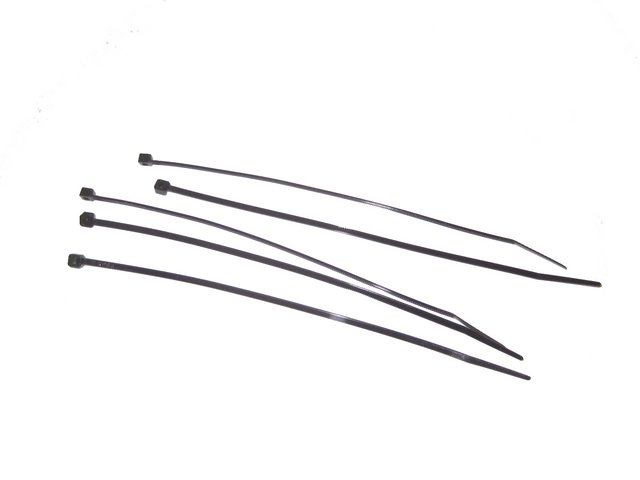
Inside the smaller package is a bag with black screws and several zip ties.
The InWin Explorer case model consists of 10 main parts. Most of them are made of steel and reinforced ABS plastic. The only parts that are actually metal are the front and back.
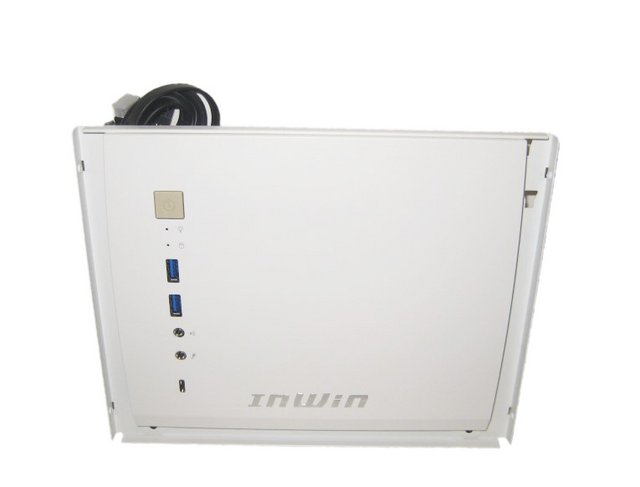
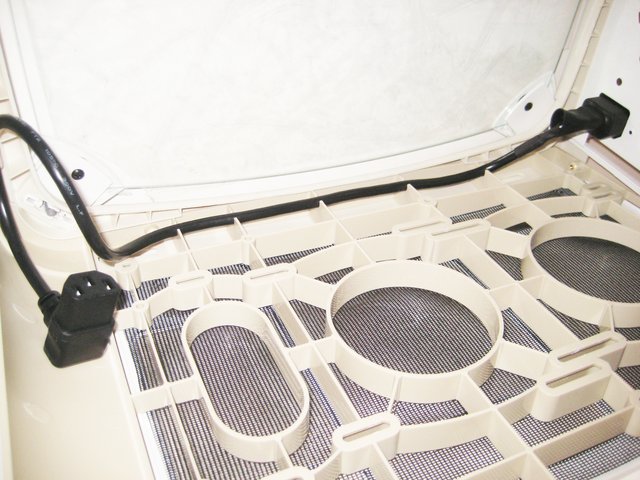
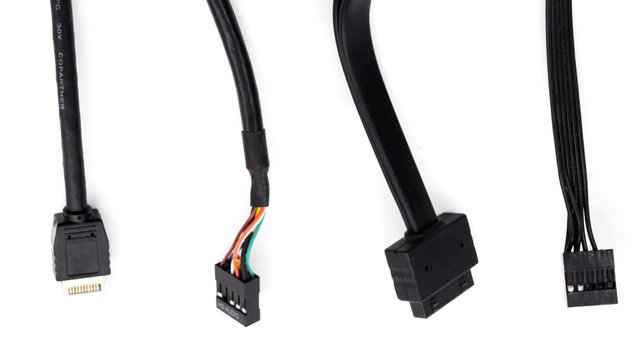
The front panel connector being a single plug instead of individual connectors will make your life a little easier as well.
You can choose between a ventilated front panel in ABS or SECC: both can be easily replaced at any time!
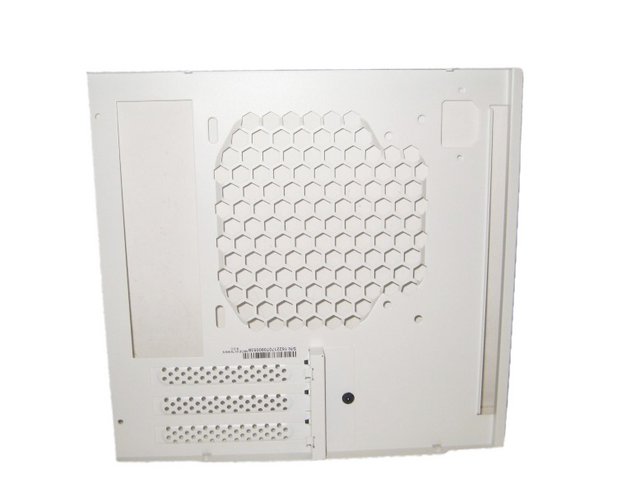
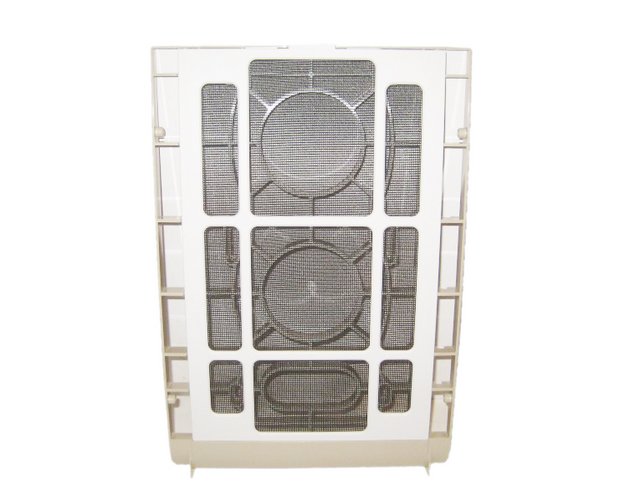
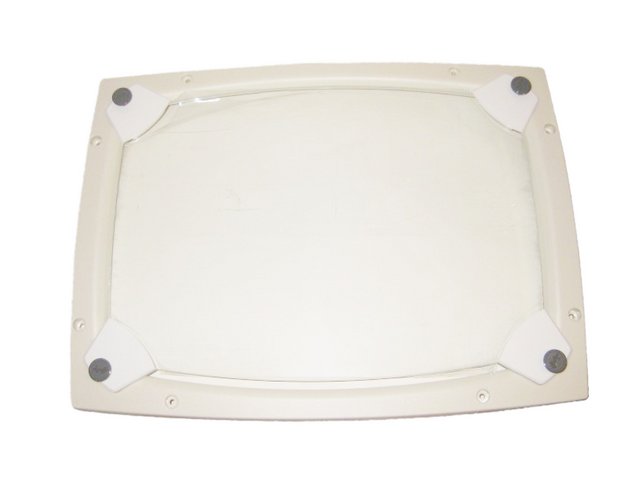
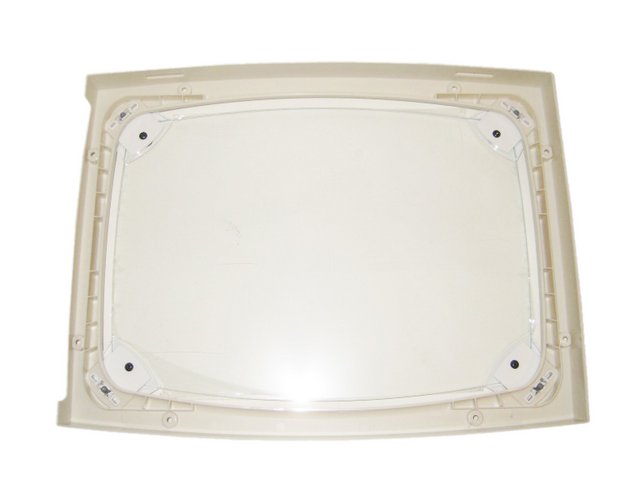
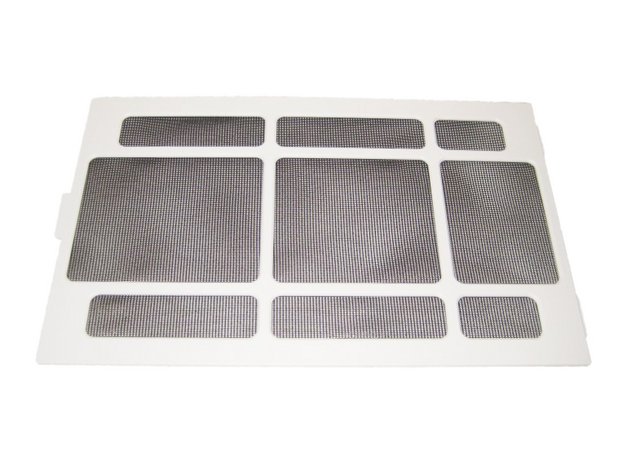
The Top panel has a honeycomb structure on which rests a black filter with a bone white plastic outline.
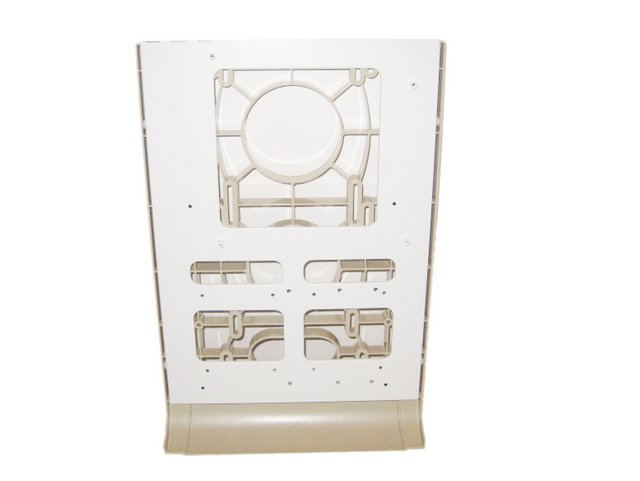
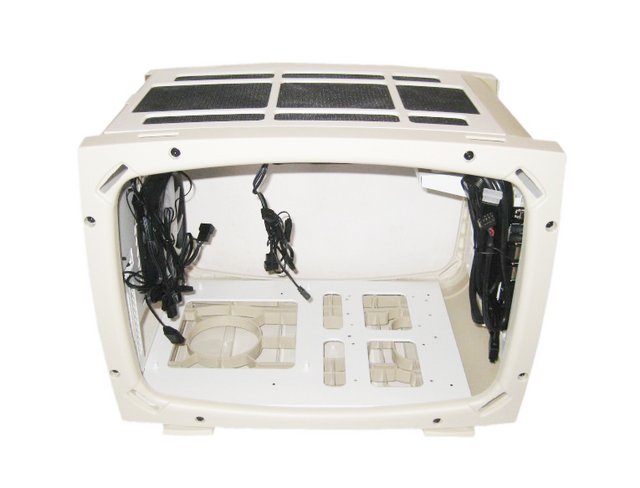
Taking a quick look at the underside of the InWin Explorer, there is that same symmetrical shape as in the top, as this is the same plastic part.
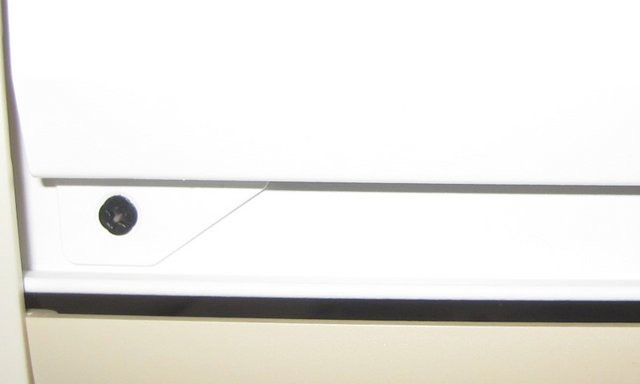
Both sides of the are made out of ABS. We have a total of eight screws which bind all the panels together.
The tempered glass panels are fastened by pins, which is easy to disassemble.

Included with the InWin Explorer Mini-ITX case is a tempered glass panel(3 mm thickness) which can help the case increase its aesthetics. This is especially true cause theres an RGB-packing system thats installed.
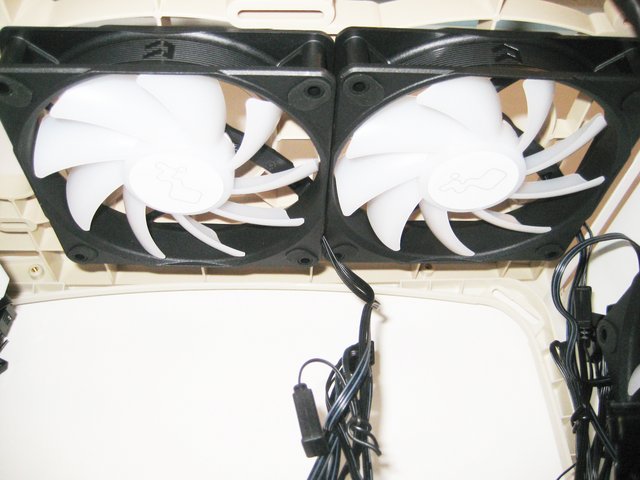
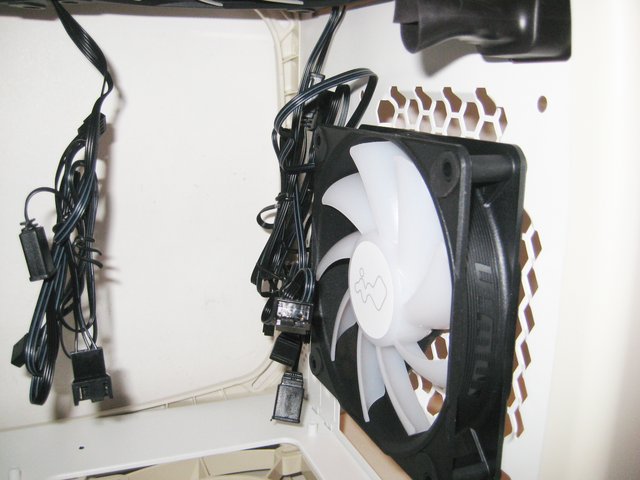
It comes with three premium Luna AL120 fans, ideal for both liquid-cooled radiators and for airflow into the case. Their speed can vary between 400 and 1800 rpm. At their maximum speed, they offer a flow rate of 82.96 CFM for a static pressure of 2.31 mm / H2O for 25 dB (A).
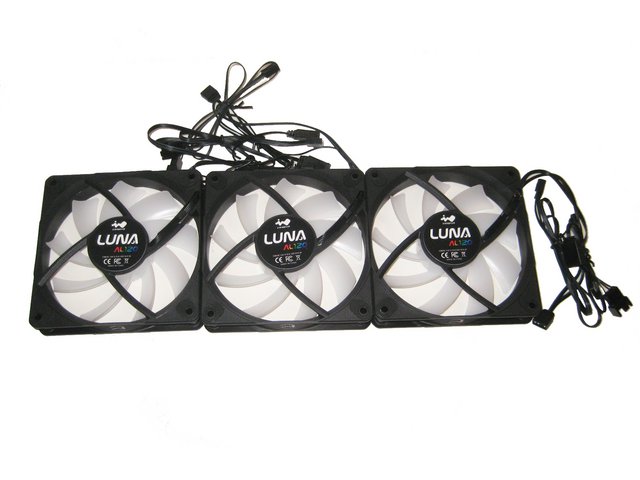
These fans offer a double connection, 4 pins PWM and ARGB 5V. Each cable is doubled to allow the fans to be chained together.
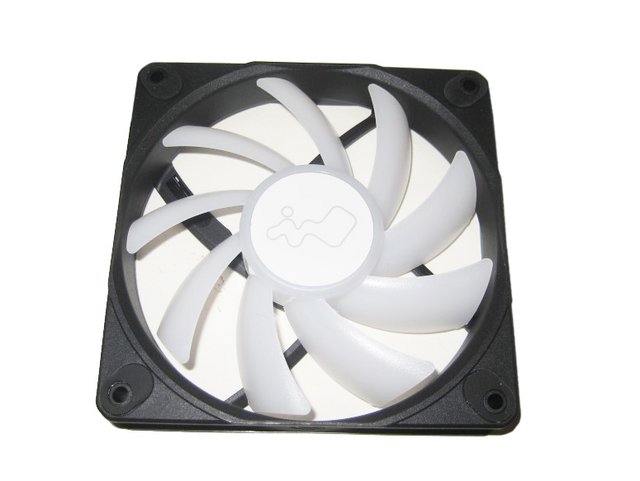
The Luna AL120 features a soft radiant glow from its own internal ARGB lighting, which can be controlled via ARGB compatible motherboard software.
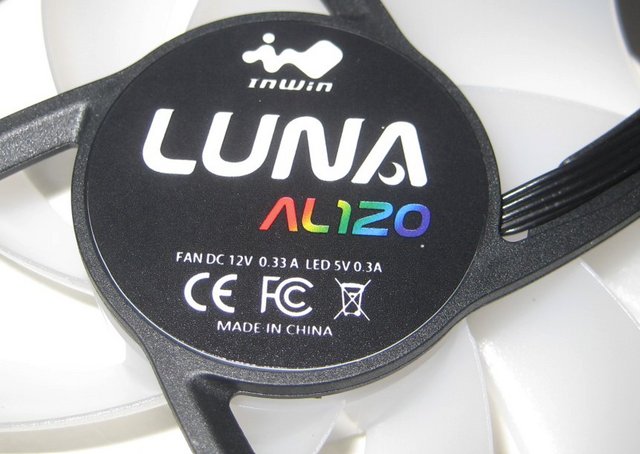
There are also an ARGB controller that can be used to adjust lighting effects and colors.

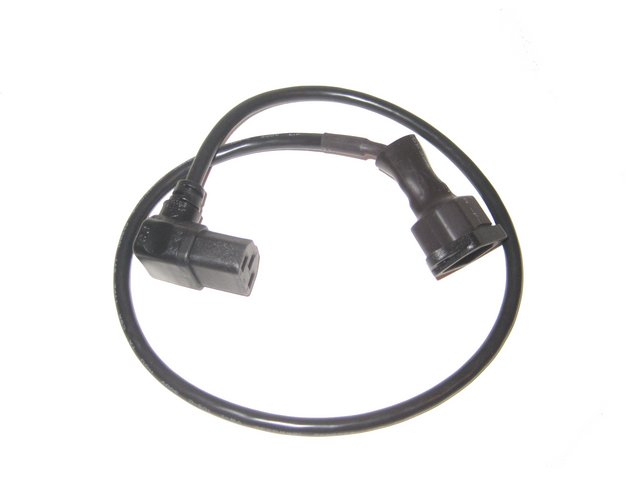
The power lead.
A set of long stands.

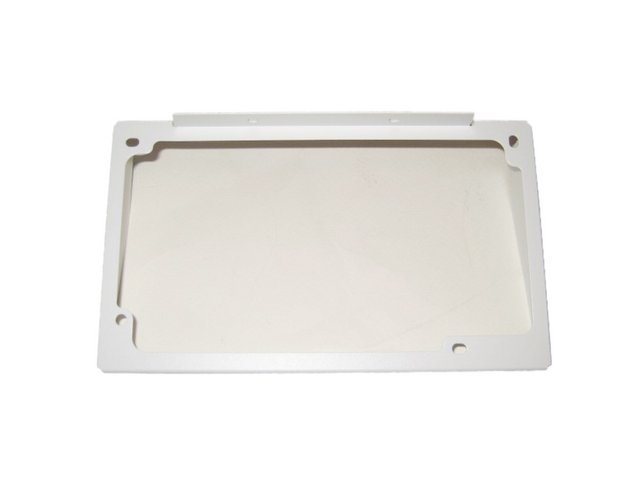
Power Supply Holder.
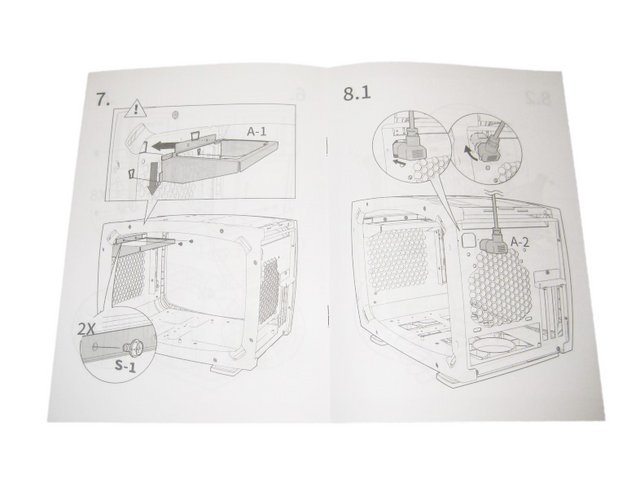
Lastly, there is an assembly manual to get the case itself built. For those needing help with putting in the system components, InWin has placed a QR code on the back of this booklet that takes you to a digital copy.
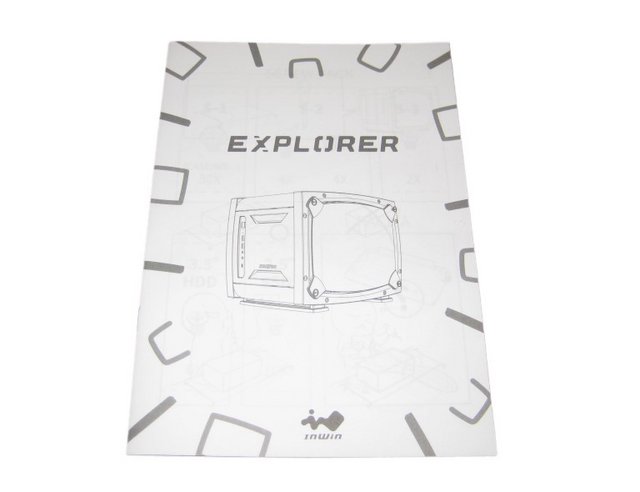
Everything in the manual is very well written and clearly illustrated.
A Closer Look Outside- Assembly
Now I will tell you how to assemble Explorer. The first is the combined frame. This part is the outer frame of the side panel, which is divided into upper and lower parts. Building the Explorer mostly revolves around using one of the bags of screws with the highest ammount. We first assemble the bottom of the case with the motherboard plate. Fixing is made by two screws. The two pieces are mainly of metal structure, and the outer frame of the bottom plate is a reinforced ABS plastic frame.
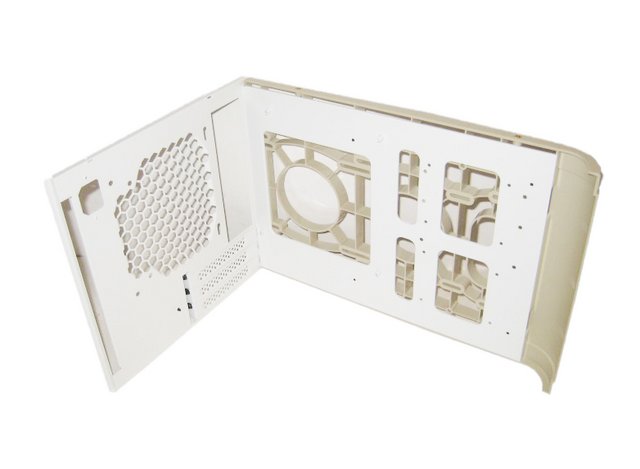
Then separate the glass side panels from the frame. The glass side plate is fixed by pins and can be removed by pulling it up, which is quite convenient.
The second step positions the first side panel over the first assembly and the top of the case. The panel is fixed at the corresponding screw holes.
In up-left corner at the back, you must put the power plug (we have already installed the power lead to the PSU unit).
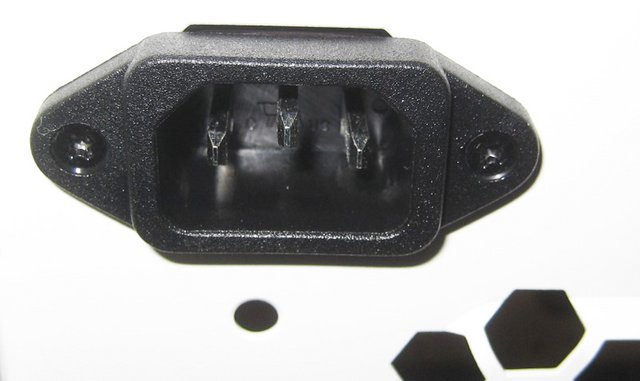
InWin has well thought out the hold of the cable since there are notches in the top for the passage of the cable.
The location of the power supply is at the front, and the mounting bracket is used. You need to install the Power Supply Holder by screwing two screws.
Then install the left side panel, and use screws to fix the connection. The side panels do not completely fit the outer frame, which is a somewhat open structure.
By design, the glass panels leave about 6mm of space with the case frame.

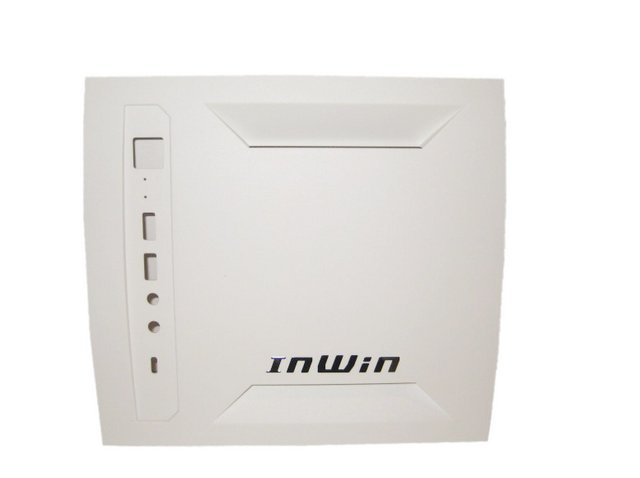
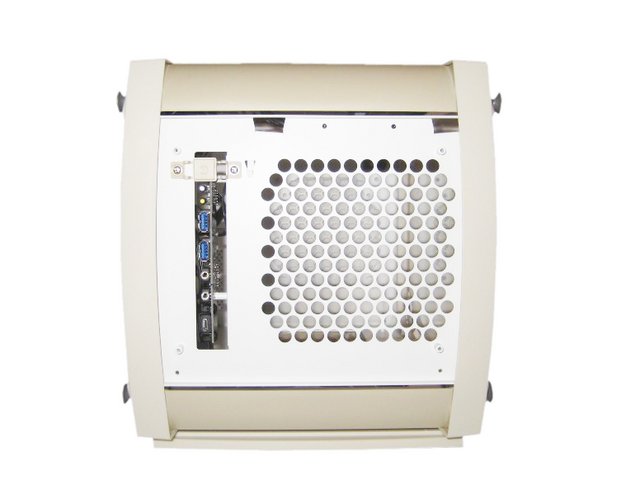
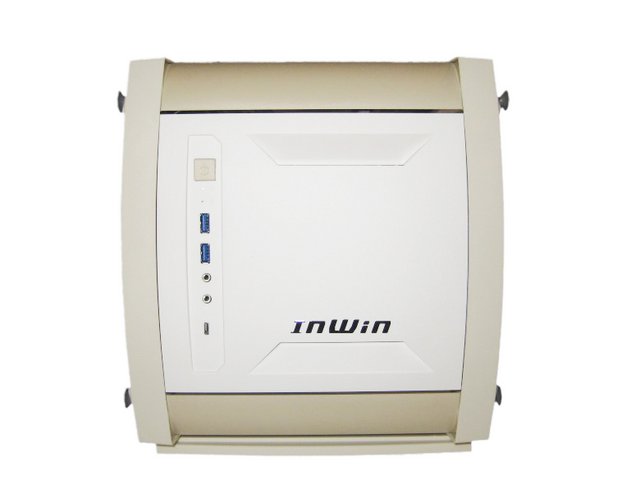
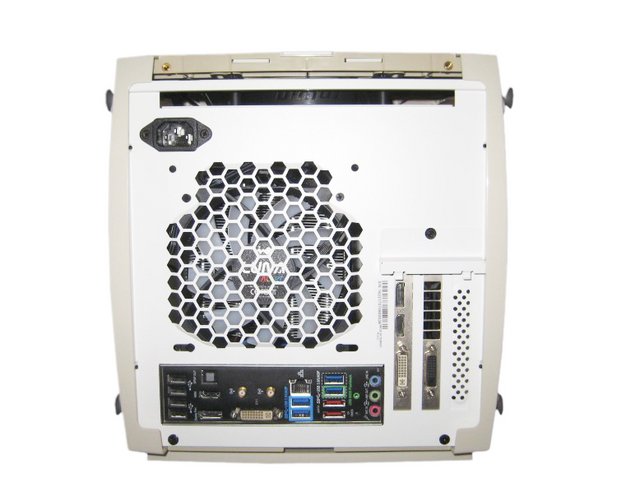
When it comes to its steel front panel, it isnt wobbly or shaky. Looking at the front, InWin has placed their logo on the front for branding purposes. There are two types of panels. The I/O is up top with the power switch, one USB 3.1 Gen2 Type-C, two USB 3.0 ports, and a combo audio jack.
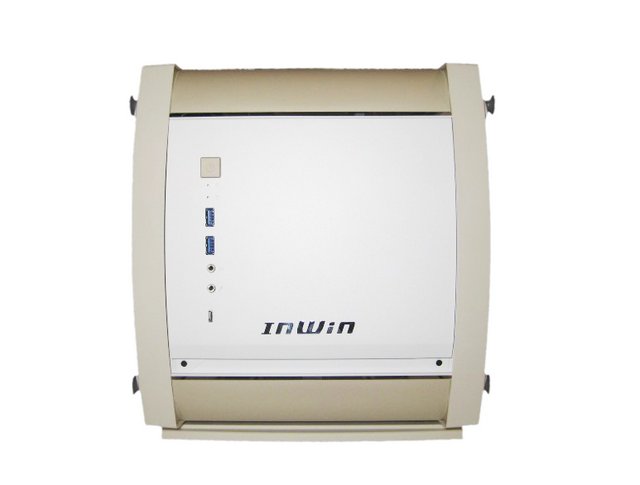
You can easily yank and pull out the front panel. With that, you wont have to worry about pulling the front panel I/O along with it.
The replaceable panel is made of plastic with vents on the top and bottom. The fixing method is different.
There are two screws under the metal for replacing it.
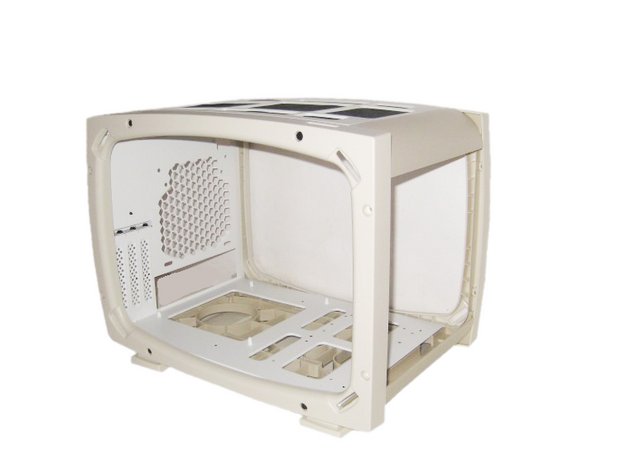
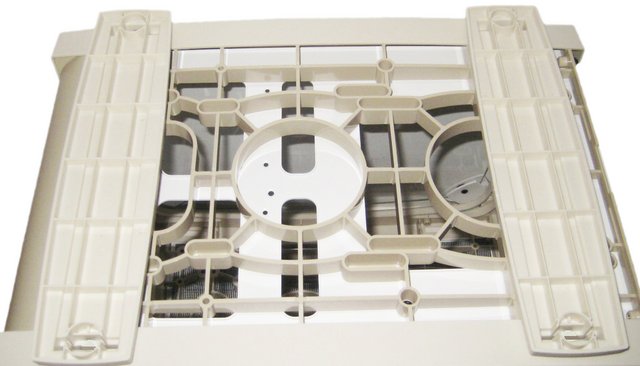
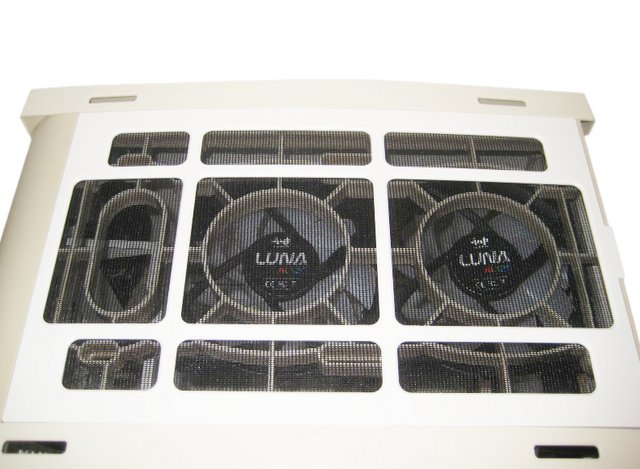
The Top part features a detachable air filter. It can be removed by pushing forward from the rear.
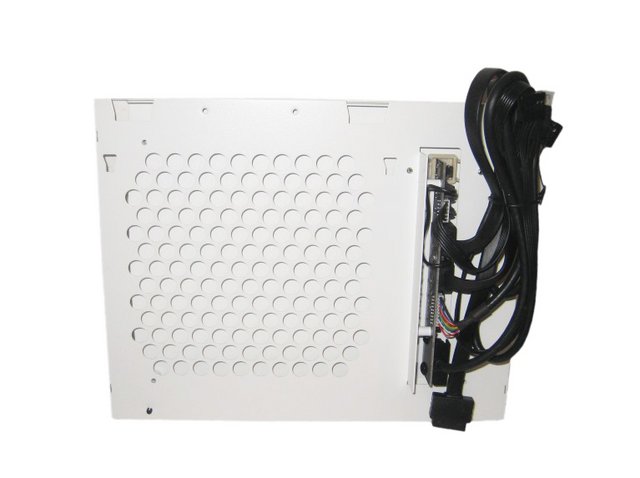
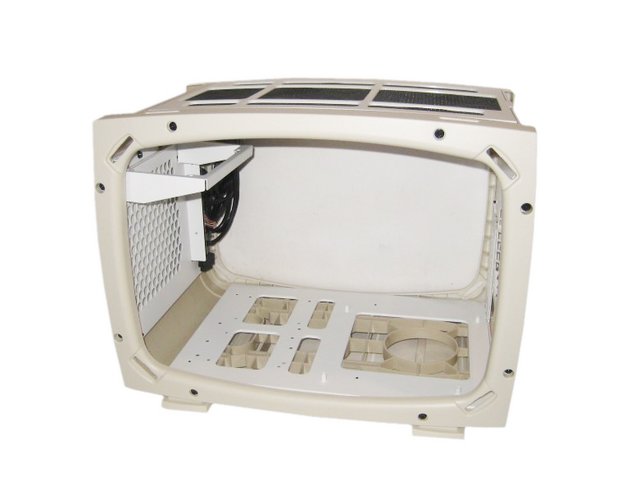
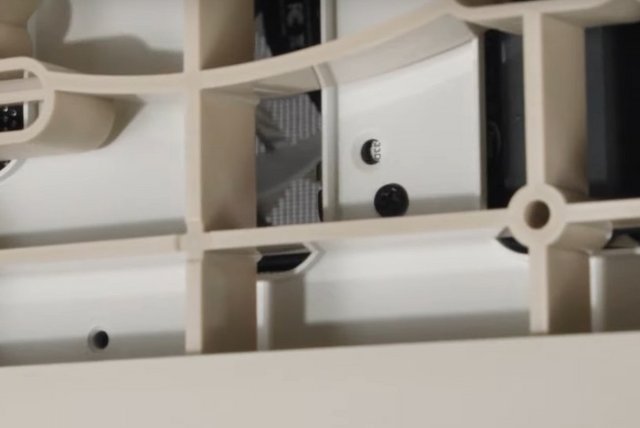
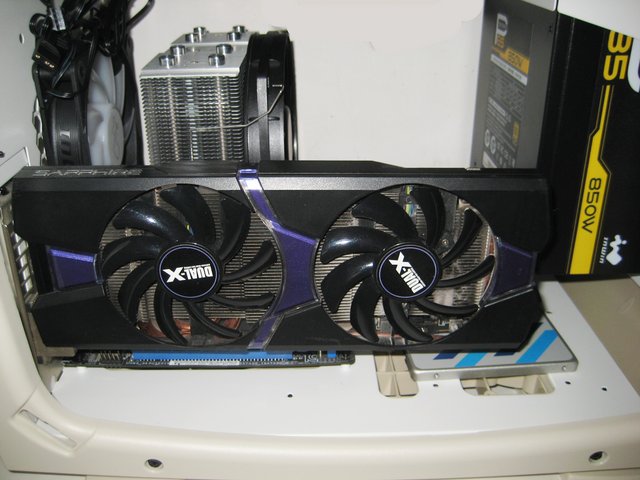
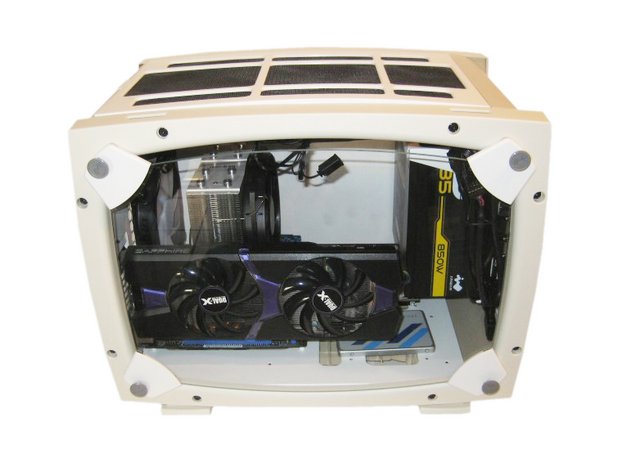
The area around it is vented, which is another reason why it makes sense, especially for mini-ITX boards. Board manufacturers utilise small fans that rest on the VRM heatsink. The three vertical PCIe slots are great for a mini-ITX system that allows a dual/2.5-3 slot graphics card. Taking a closer look at that area, the three covers are held in place by classic screws which are accessible from outside the chassis. To the left of that, the motherboard appears to be laid out in a classic fashion with the expansion slot on the bottom edge. Above the motherboard cutout is an 120/140 mm fan-sized cutout for one Luna AL120 fan.
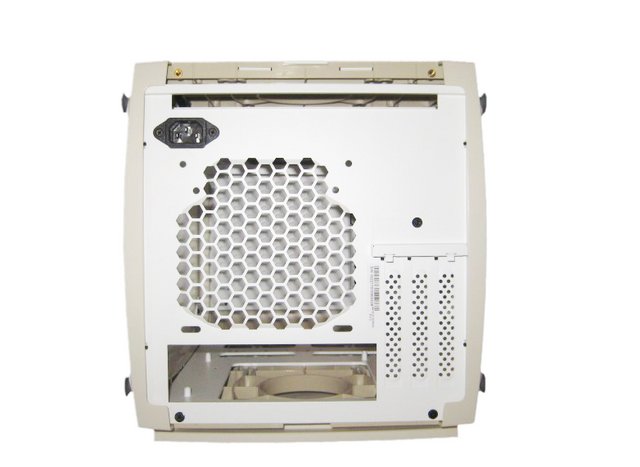
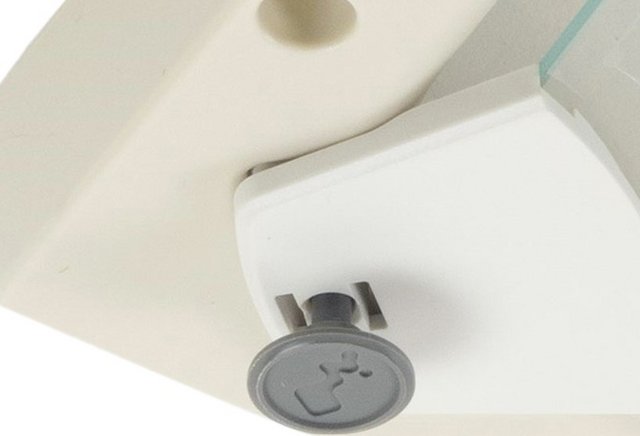
Looking at the underside of the InWin Explorer, you can see that this is the same shell piece as in the front and top of the chassis. InWin did not include a dust filter as it would not be easily removable due to the feet getting in the way. While that is understandable, one could argue that it would still be better to have a non-removable filter than none at all. Before being able to stand up the Explorer, you have to clip on the feet. There are two sets of long stands on which the chassis will sit.
After inserting the long stands on corresponding position, four regulatory screws are turned into the hole in the middle to fix them.
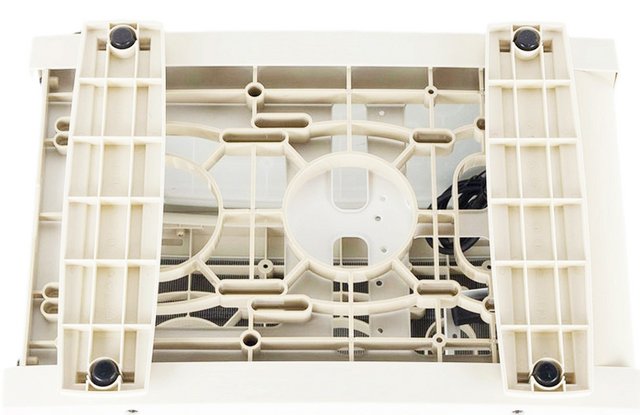
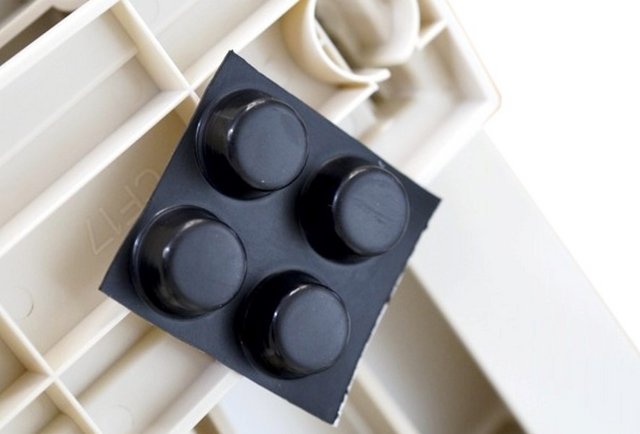
There are four anti-slip rubber pads that you can put them on the bottom of the stands. If you are afraid of the stability of the Explorer, the four rubber feet at the bottom of the case will please you. These make sure that the case never slips at any time. In addition, it conveniently protects the standing surface on which the Explorer is placed.
The Explorer's bone white case that were featuring in this review looks pretty cool. It isnt flashy nor is it painful to the eyes. We love how perfectly the paint was applied since there were no bubbles or imperfections.
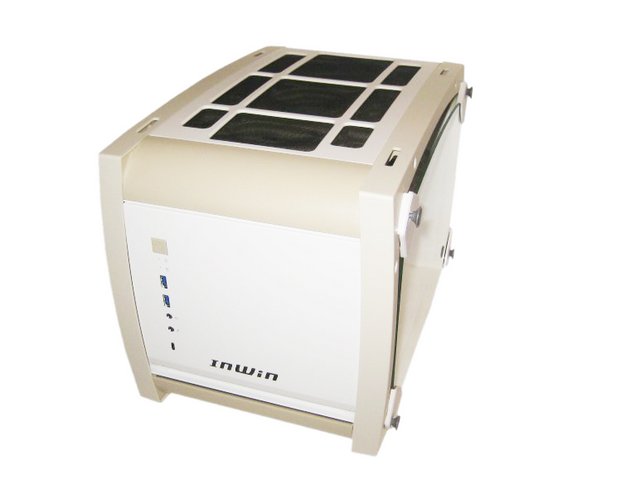
And although its sleek and simple, the case isnt boring at all. Supporting ATX PSUs is the only reason I can see for the case being this tall.
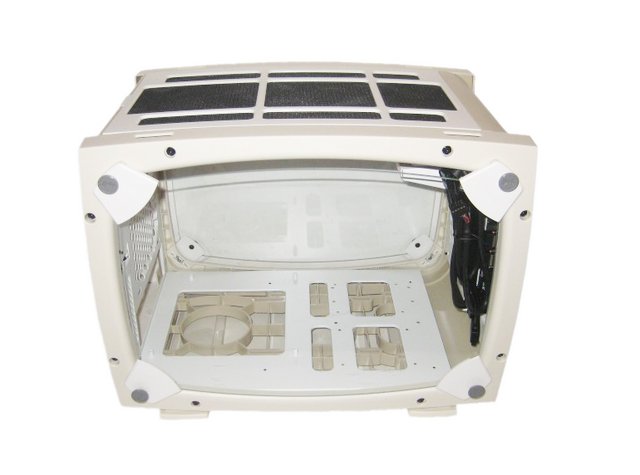
A Closer Look Inside
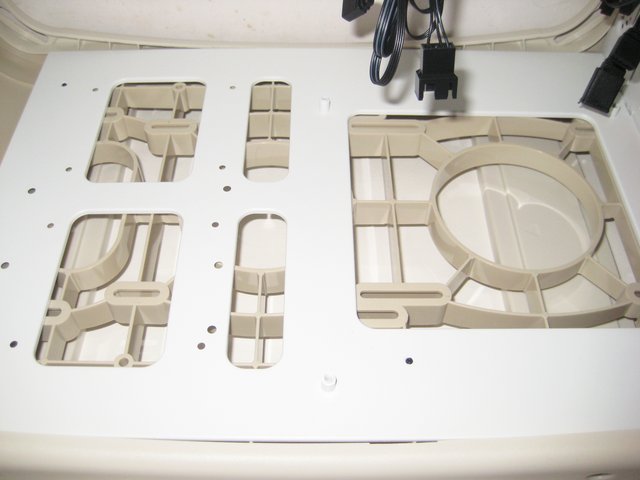
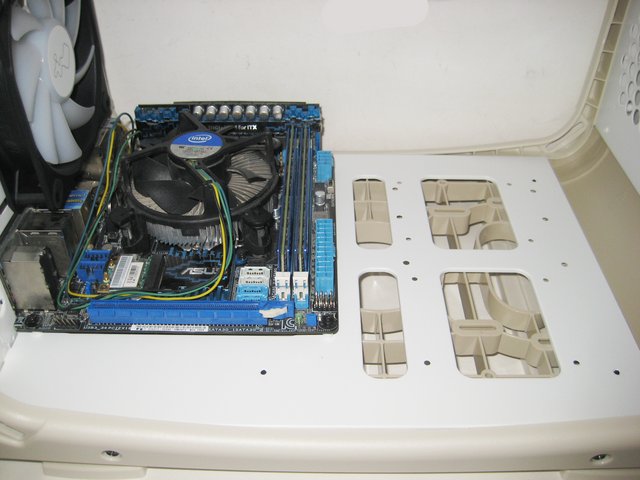
The Explorer Mini-ITX case fits standard mini-ITX boards.The Mini-ITX place for motherboard is positioned at the back of the case.
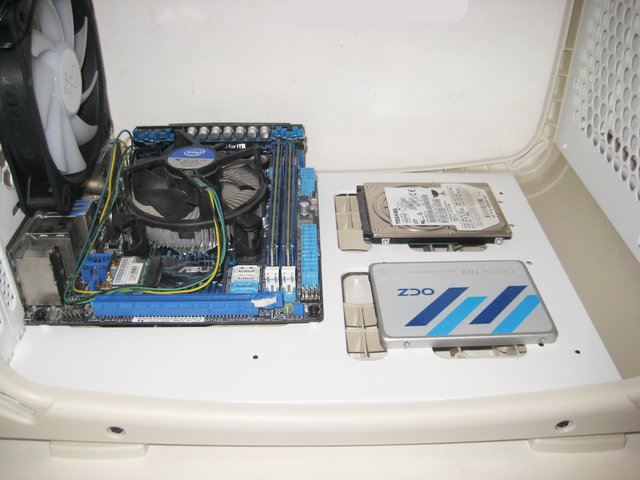
Two 2.5-inch hard drives or a 3.5-inch hard drive can be installed behind the front panel.
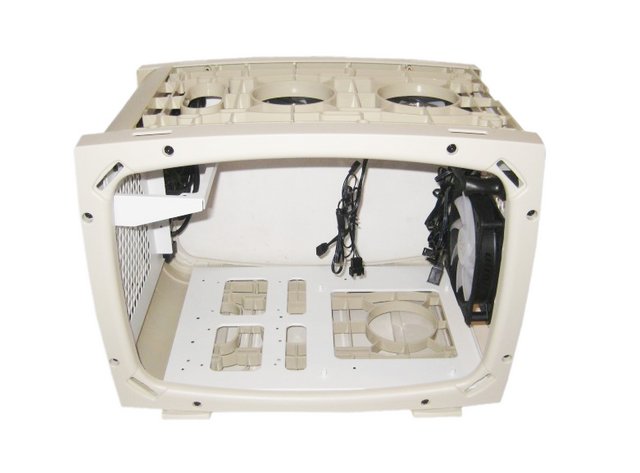
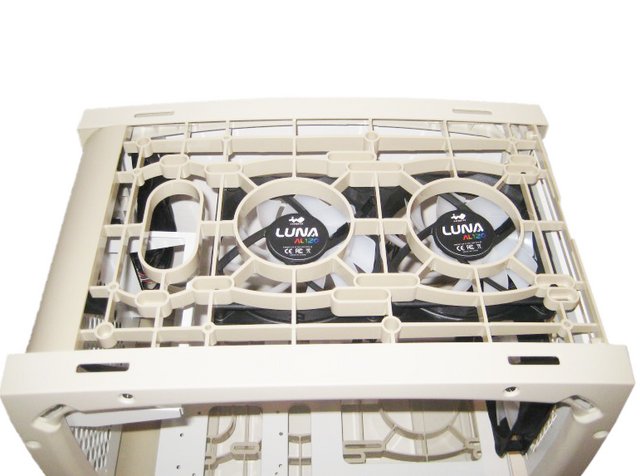
The Explorer arrives with three 120mm Luna fans. You must place them yourself in the ceiling and rear of the case. Taking a quick look at the ceiling of the InWin Explorer, you can see ample room for active cooling purposes, with the mounting for the fans or radiator centered.
Explorer offers three spaces for the case fans. Two upper and one 120mm/140mm on the rear.
Two 120mm or 140mm fans can be installed on the top, and it can also support 240mm water cooling.

At this angle, you can also see that there is loads of space above, so putting a 240mm radiator setup into the ceiling won't interfere with any components.
The mesh filter looks great.
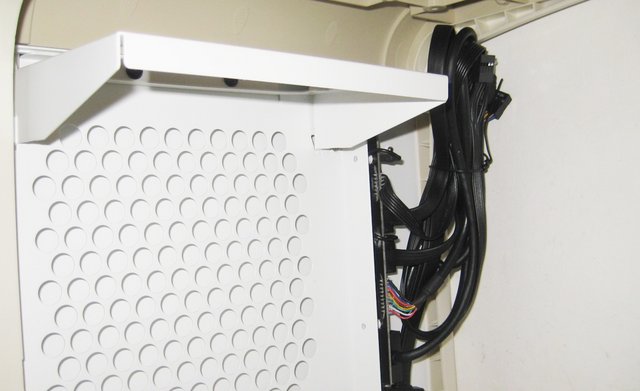
All the leads within are sleeved black and should present no issues, connecting properly to any modern motherboard.
Installation Process & Finished Looks
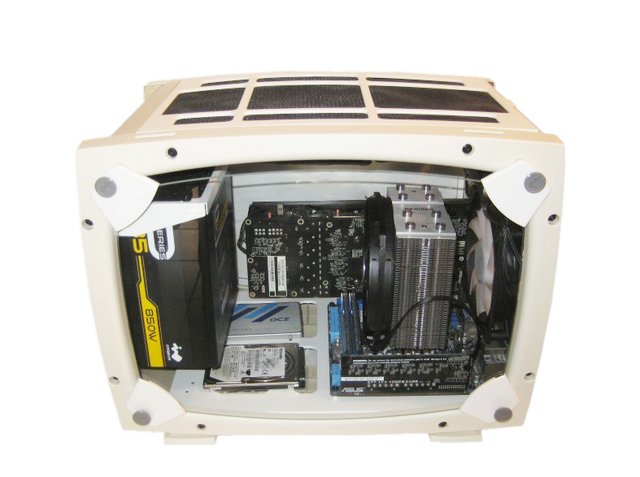
Installing a motherboard within the InWin Explorer is done by utilizing classic screws. There is lots of room around the ITX board. You can fit a modest size air cooler in here easily enough.
Theres plenty of room near the HDD-SSD area for storage. You could technically use it for a little cable management space if you really need it.
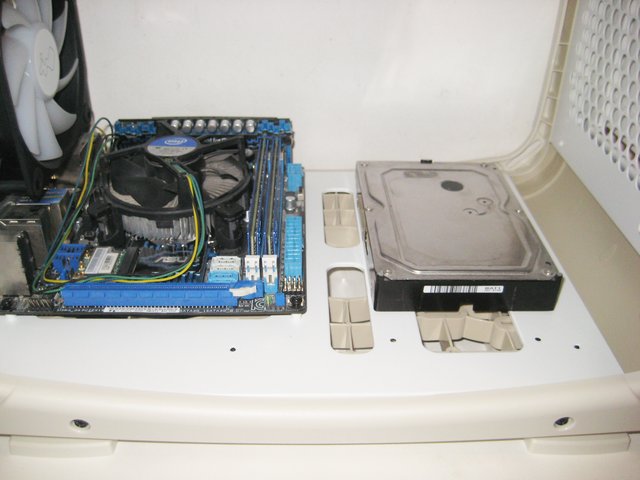
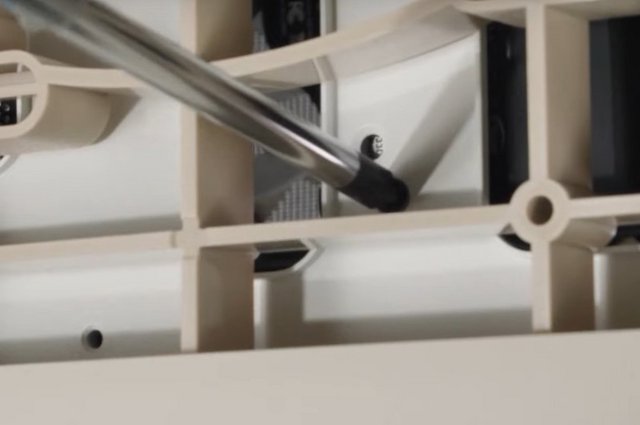
The storage drive screws down by putting the case on its side and removing the feet that cover the mounting holes.
You need to uninstall the Power Supply Holder by unscrewing the two screws. Screw your power supply to the bracket.
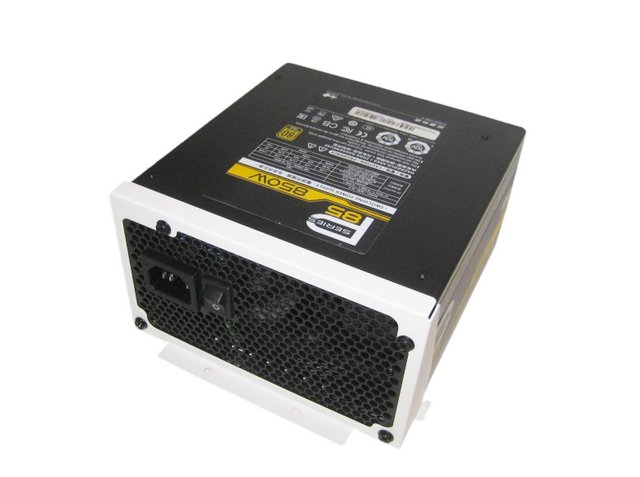
Connect the power cord to your power supply and install the bracket back to the chassis. The lenght limitation of the PSU for the InWin Explorer case is 160 mm.

A CPU Cooler can be installed with the same height.
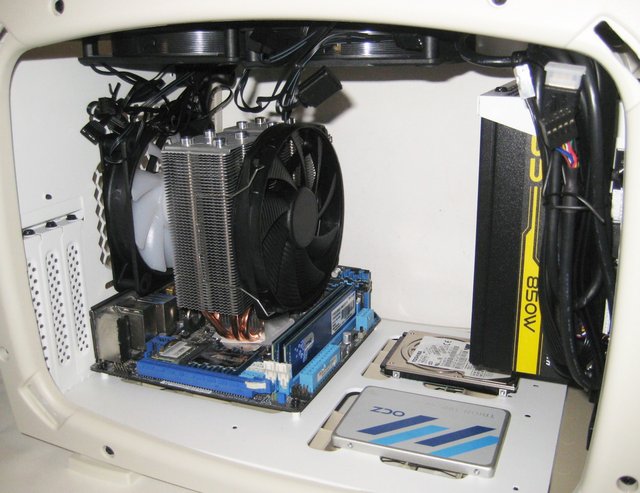
As there are three expansion slots on the GPU side, you are free to use 2.5 slot GPUs. The GPU installs right onto the expansion slot plate, and then installs easily into the case. The length of the expansion card is limited to 330 mm. This is also an easy way to connect the PCIe power cables.
With that done, the build is complete. I slapped all the paneling back on, of course using the glass panel for your viewing pleasure. Alright, I admit, with the glass panel things just got a whole lot less boring. This isnt going to help cooling one bit, but Im liking what I see a lot more now.
I appreciate the bundled front I/O cables because they stay in their housing and you dont have to plug them individually for power/reset/led, etc. Just make sure that no cables are touching the fan blades. In the rear, everything is where you would expect it.
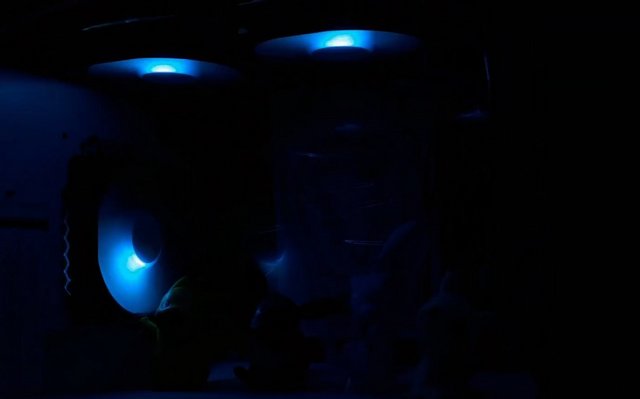
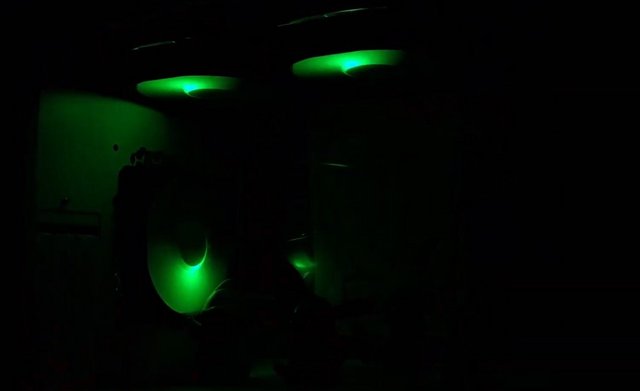
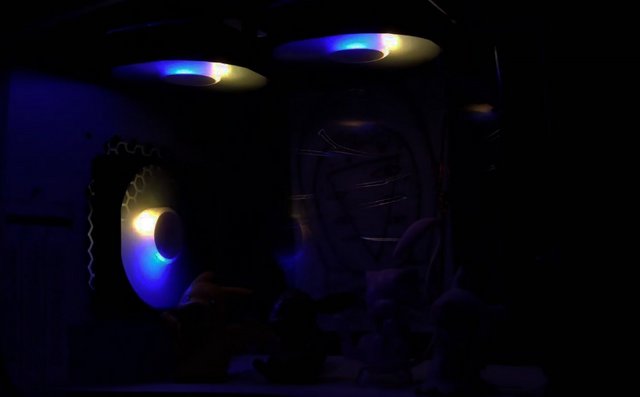
When you power your system on the RGB LEDs on the fans should light up in your system.

However, its the TOP part that really steals the show. Its not massively bright, but it does give a more premium gamer look to an otherwise rather simple chassis design.
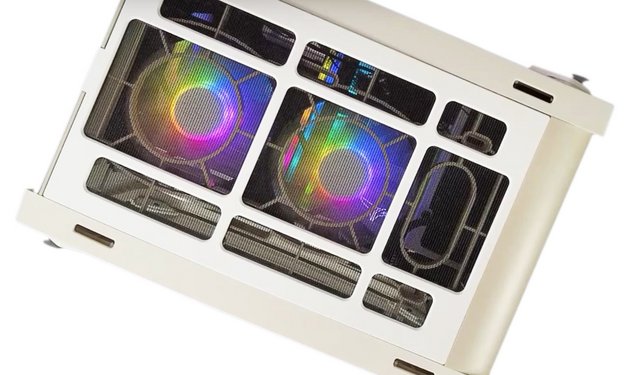
You can cycle through a range of colours, and even effects, by using the ARGB controller. There are plenty to choose from, and you can turn them off too if you so desire. A picture speaks a thousand words with RGB lighting though, so here are a few bonus shots of it in action.
Performance
Of course, we got hands-on with this case for our InWin Explorer Mini-ITX Case review. Although the case looks pretty cool and clean, its important to see how efficient it is. We tested the InWin Explorer with an AMD Ryzen 5 1600 mated to a Cooler Master MasterLiquid ML240 Mirror ARGB AIO all-in-one cooler, Gigabyte AORUS GeForce GTX 1080 8G and ASUS ROG Strix X370-I Gaming motherboard. For comparison purposes, we brought in the Fractal Design's Define Nano S and the NZXT H210i Mini ITX Cases, to give you a good idea how the InWin Explorer chassis compares to its competitors with similar sizes and feature sets. In order to determine the maximum temperatures of the processor, the CPU was loaded for 20 minutes using the free stress test tool Prime 95. Since experience has shown that the Small FFT test has the highest heat dissipation, we use this mode and log the maximum processor temperature with AMD's Ryzen Master program. At the same time, the graphics card is loaded with Unigine Superposition. In contrast to the previously used Furmark, the boost rate remains constant in this stress test. The CPU fan is operated for the temperature measurements at a moderate 1,000 rpm, the graphics card fans run at 50 percent. In this way we rule out that an automatic fan control can influence the measurement results. Due to the test system's effective energy-saving mechanisms, we can do without idle measurements. Our measurements produced the following result:
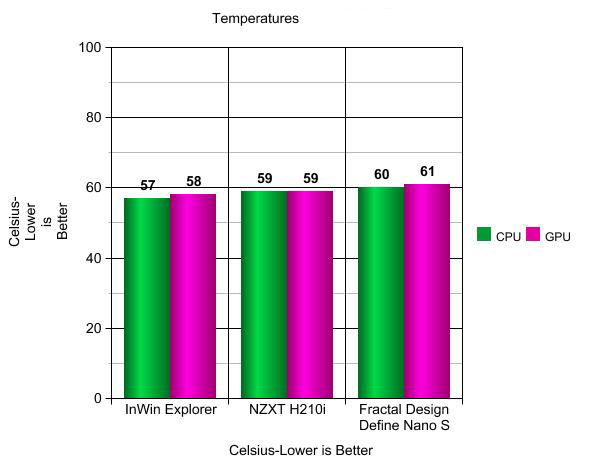
Compared to other SFF models the InWin Explorer hardware is kept significantly cooler.
Final Thoughts
The InWin Explorer aim to introduce the DYI assembly experience of PC cases to the mass market. Its not only the design that is innovative when it comes to computer, its also the way it is delivered to the customer. The case comes completely disassembled and is fully do-it-yourself, meaning that it has to be built from scratch. Every frame and panel thats part of the case can be dismantled with ease. Screws are present to secure the frame parts, allowing advanced disassembly and different angles to better work in the chassis. It also looks great thanks to its 2 tempered glass panels. The external panels with tempered glass, are properly secured with pins for easy removal. This facilitates faster access to the inner portion of the case without having to use any tools. A drawback to the Explorer would be the size. It's small, for sure, and takes Mini-ITX motherboards only, but the case is larger than competitor SFF offerings out there, and that's worth bearing in mind if you want the absolute smallest chassis possible. The increase in volume allows for more air to be pushed through, which aids in keeping temperatures low. While running some stress tests on the AMD Ryzen 5 1600 CPU and GTX 1080 GPU, even when overclocked, temperatures didn't surpass 57 degrees Celcius for the processor. The Explorer Mini-ITX case performed well and proved that little products can still pack high-end components. The case was much easier to build in compared to other small form factor cases thanks to the thoughtful design and extra space. By design, the panels leave about 6mm of space with the case frame. That means dust. Bad point for Storage installation, is the fact that you will have to remove the front foot to be able to fix your discs with the four regulatory screws.
The price of the Explorer is 119 on the InWIn site. The Explorer comes with three ARGB fans and a ARGB controller from the start. Its a pretty capable mini-ITX case. The fact you have room for tall CPU Coolers, full-length 2.5 slot VGA card, cooling expansion options, and even a ATX PSU is impressive. Its a little quirky, but its certainly a bit different too. For those who want a PC case that you want on top of your desk rather than tucked into a dusty corner, its certainly an interesting choice! In summary, the InWin Explorer is a Mini ITX case that perfectly combines great design and functionality. This is rounded off with flexible adjustment possibilities, which are expressed for example in exchangeable front panels. Only very few competitors can keep up with this.

 Posting Permissions
- You may not post new threads
- You may not post replies
- You may not post attachments
- You may not edit your posts
-
Forum Rules


 Reply With Quote
Bookmarks