-
Raijintek Ophion 7L
Introduction
We’re big fans of Raijintek here at Xtremesystems.org, time and time again they’ve delivered stunning products at very attractive prices and that’s something I’m hoping to see yet again with their latest product, the Raijintek Ophion 7L. Raijintek's Ophion range is growing and now welcomes this new model soberly called Ophion 7L. A model which therefore has a volume of 7 L. And you can put everything you need to have fun and set up a nice configuration to go to LAN or quite simply to have a sober office with a very compact case. Mini-ITX compatible, the case weighs just 2 kg with a 2.0 mm aluminum and 0.8 mm steel construction, without any tempered glass panels. The emphasis here is on sobriety, with however an original cutout on all the panels in order to allow as much air as possible. The Ophion 7L is an all-aluminum chassis is available in black and white colors, coating includes the interior of the chassis for a uniform appearance.

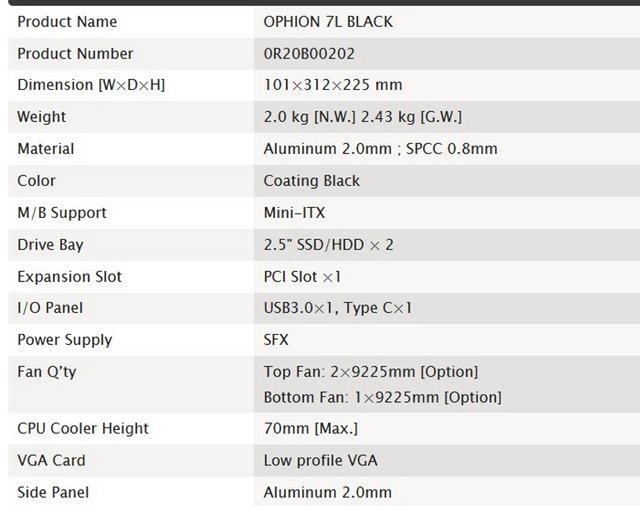
The Ophion 7L has the following specifications:
Packaging & Contents
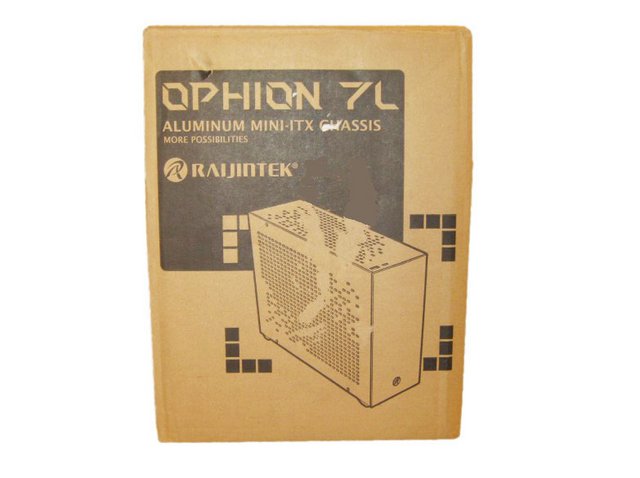
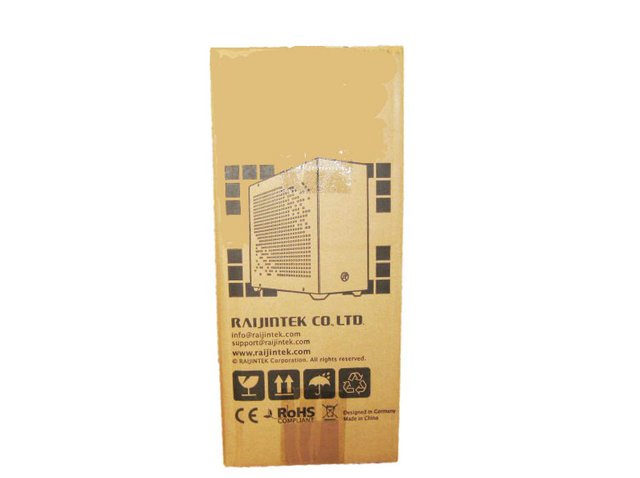
When you get the box, don’t be scared, again it is that small. And light. The packaging for the Ophion 7L was simple and to the point. It comes in a brown box with black print and the front has a drawing of the case and the model name. Under the Ophion 7L name, there’s a line that says “Aluminum Mini-ITX Chassis”.
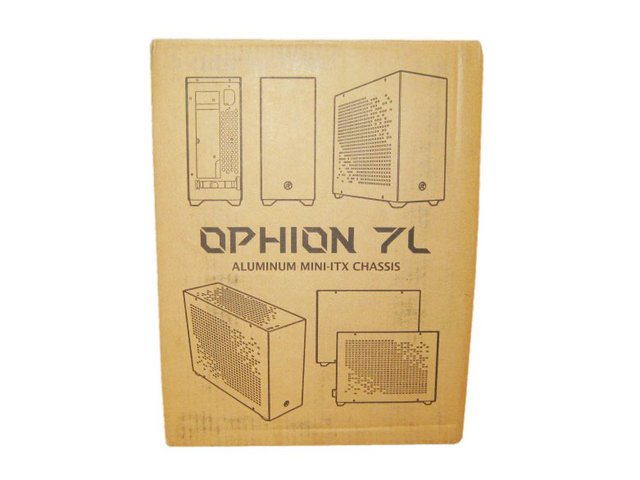
The back shows all the sides of the Ophion 7L so that potential buyers know what they’re getting.
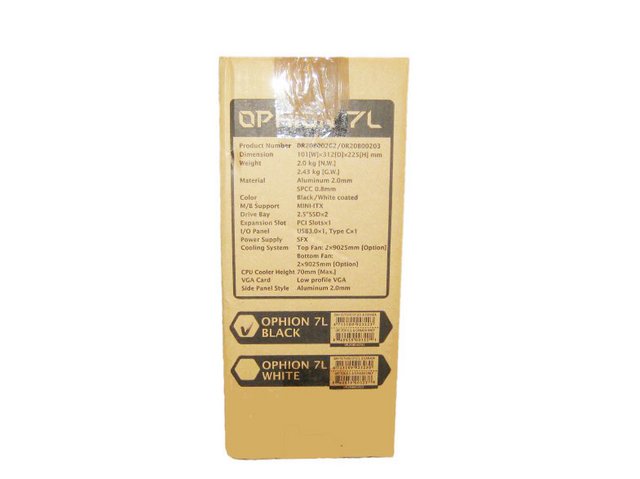
The left side give you the enclosure's specifications and which color variant you will find in the box.
on the other side, we find out that we also get some freebies. 1 broken wine glass, 1 pair of arrows and 1 umbrella (been needing one so thanks) and 1 set of broken bent arrows. These guys sure like their arrows.
Inside of the box, you have the case wrapped up in plastic and then two foam panels that hold the case up away from all of the edges and absorb some shock from when the box gets tossed around. The power supply bracket is secured with 3 screws. It is quite small as it supports only the SFX standard.
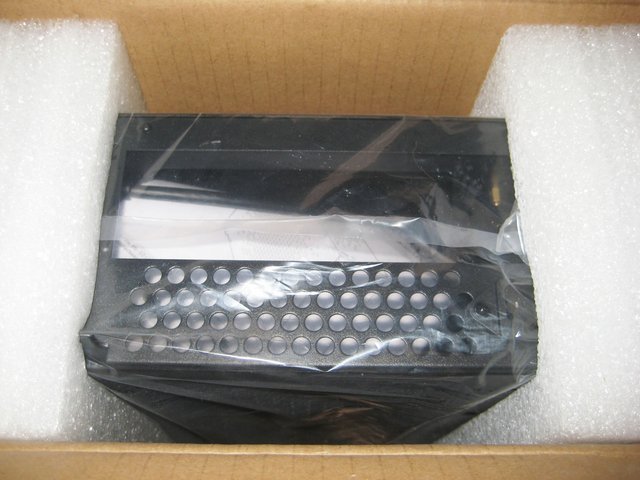
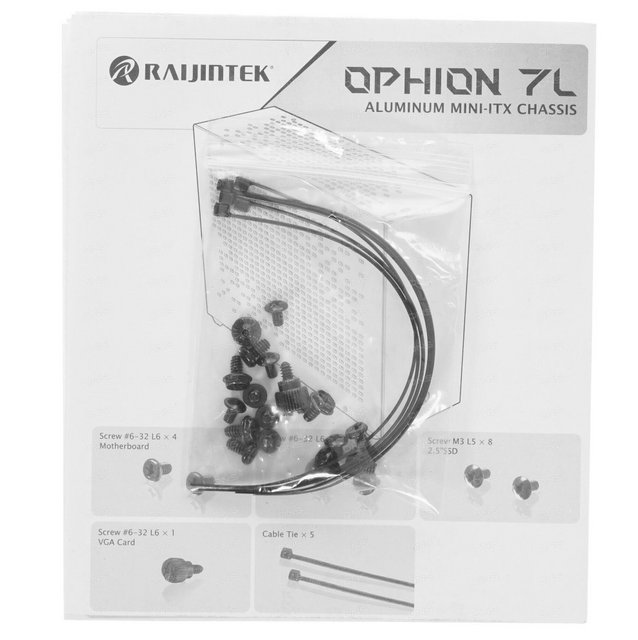
The components are delivered in a plastic bag. Inside we have the instruction manual, in German and in English. And it is very easy to follow. Also inside you do get some screws and zip ties. This is a small case and they give you a good amount of zip ties to get your wiring in order.
A Closer Look Outside
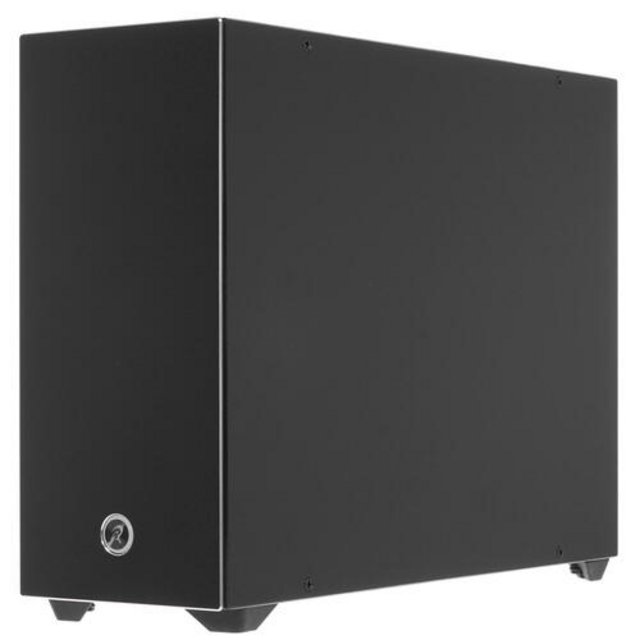
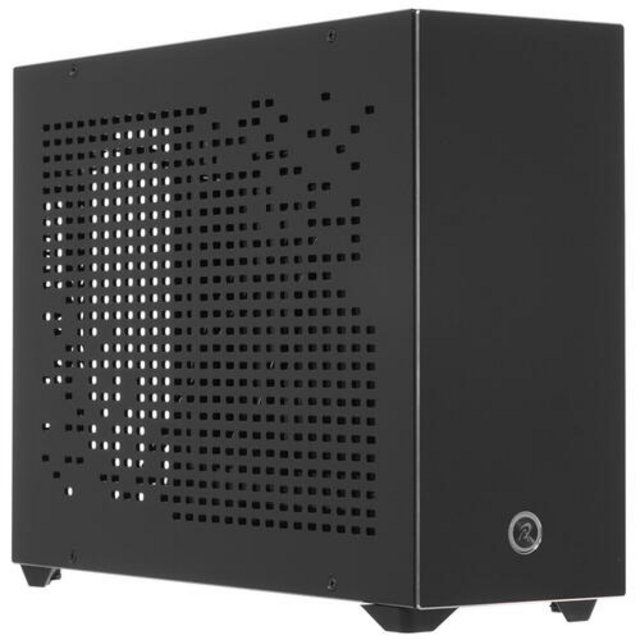
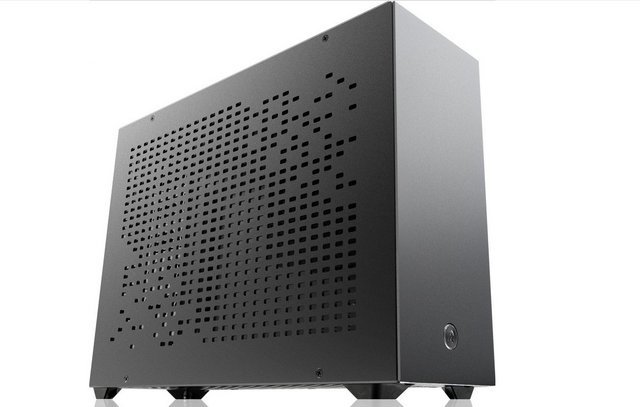
Out of the box, the Raijintek Ophion 7L looks super clean, which is intentional. It is by far the tiniest ITX chassis we have ever gotten for review, clocking in at a mere 7l in volume. The dimensions of the Raijintek Ophion 7L are 312 mm long, 101 mm wide, and 225 mm high. It's a really small size. It's light enough to hold with one hand. If your preferred PC case type is “minimalist metal,” with perhaps a sheet of glass or two thrown in, you’re going to fall hard for the Ophion 7L. As it comes from Raijintek, the chassis is aluminum.
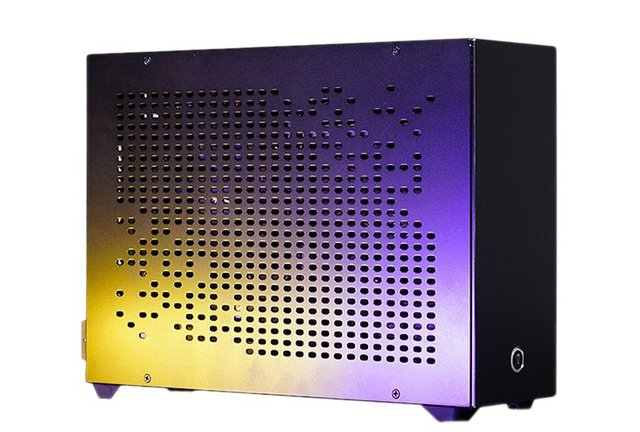
The right side of the Raijintek Ophion 7L is perforated to allow for much needed airflow. Unfortunately, this side does not comes with a dust filter, so finer particles will find their way into your system eventually. That said, popping the panels off gives you immediate access to any fans you may have, both for the CPU and GPU, so cleaning should not be rocket science. Both panels are screwed down with a pair of traditional screws and held in place by clips, so you could just keep the screws off if accessing your chassis often.
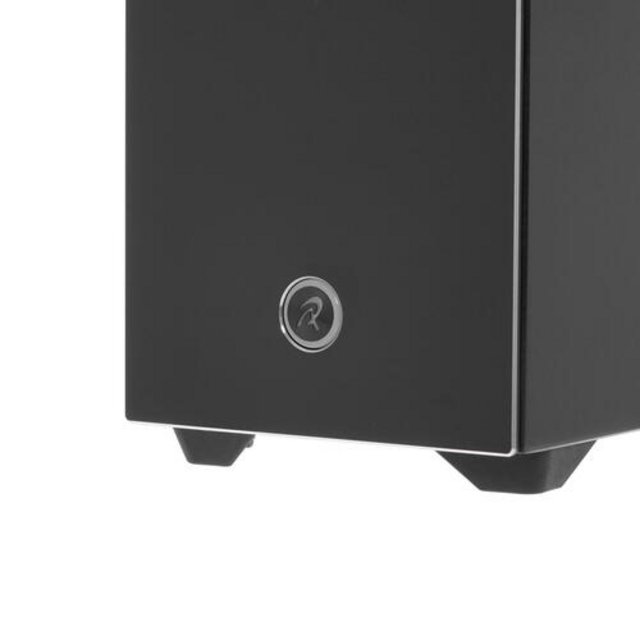
Looking at the front, there is not any opening. There is nothing else besides the power button.

The button is engraved with the Raijintek logo. The button has a soft feedback when pressed.
There are only two top I/O configurations: USB 3.2 Gen 1 Type-A x 1 and USB 3.2 Gen 2 Type-C x 1.
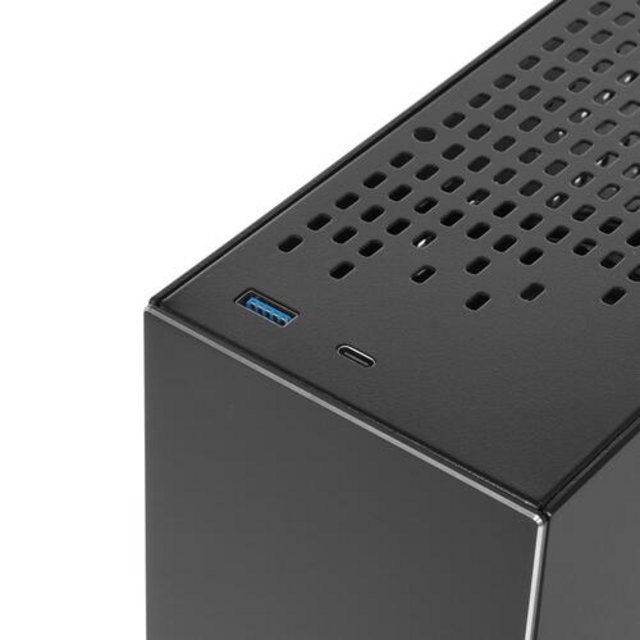
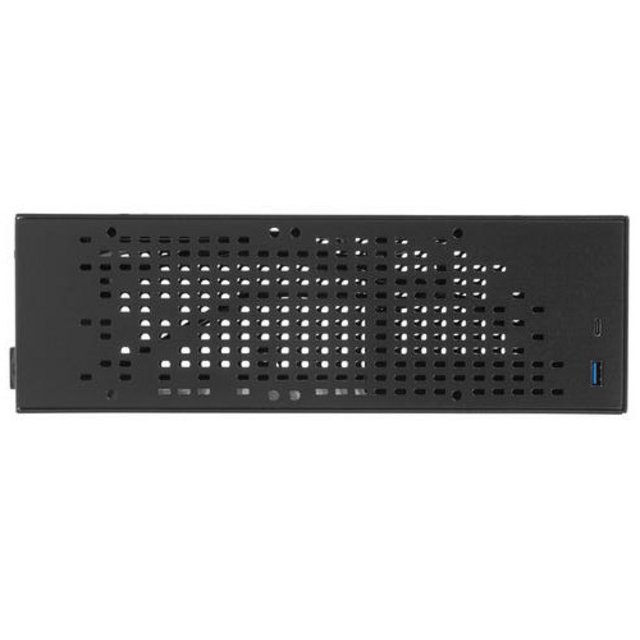
The top view – again the same perforated design for more cooling capability using the hot air’s natural tendency to rise above.
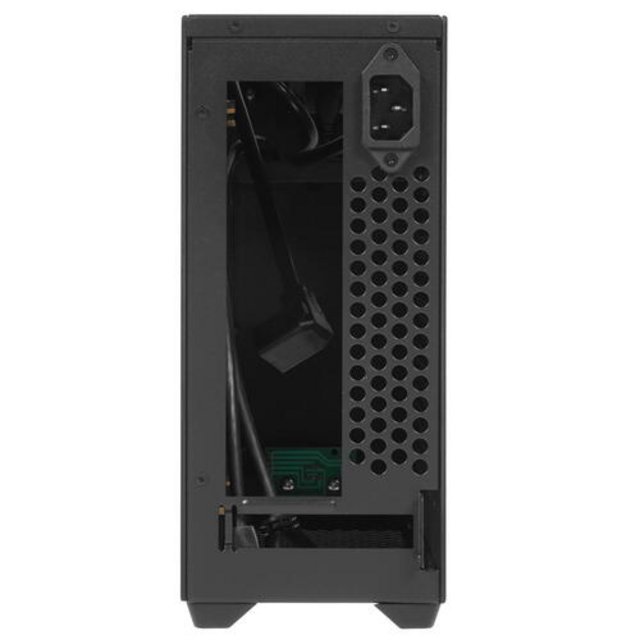
Moving to the rear of the case we start to see the chamber separation design – on the left the I/O motherboard cutout and on the right the dual slot PCI-E graphics card slots. It is unique in that there is only one rear PCI slot. In order to use the graphics card, you need to use a low profile VGA. Up, we have the power socket. From this angle, you can see that the interior is all black.
The bottom have air holes drilled also. On the underside, you will see four little rubber nubs as feet in order to keep the case non-slip. The support legs can be removed using screws.

A Closer Look Inside
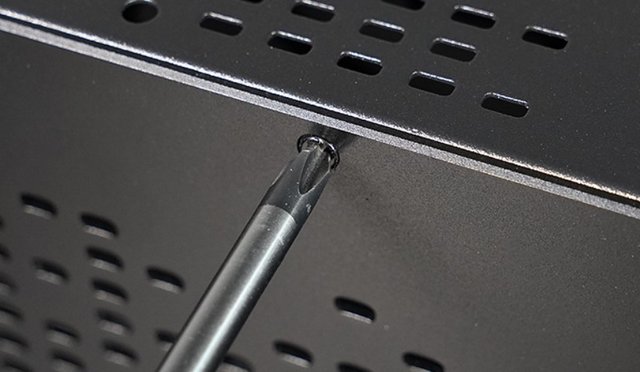
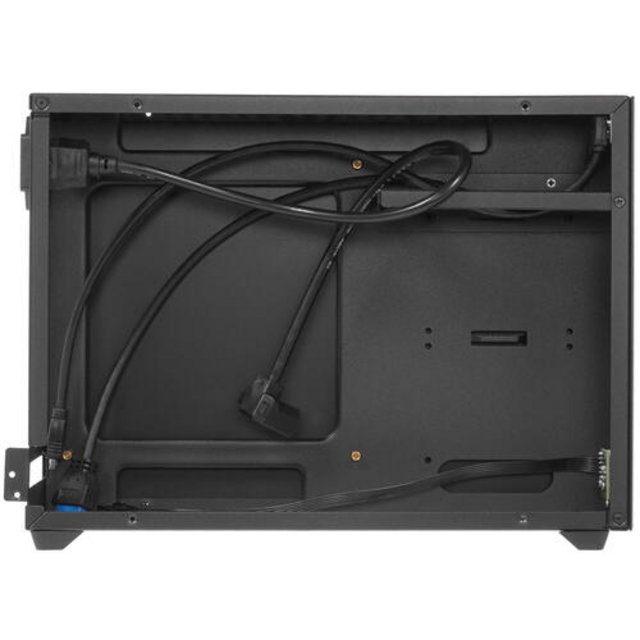
Both side panels are fixed with 4 screws. It can be removed using a screwdriver. I took it apart and looked inside.
The configuration is quite simple. A conventional layout is used in which the motherboard is on the right side wall. The components and power supply bracket have been removed.
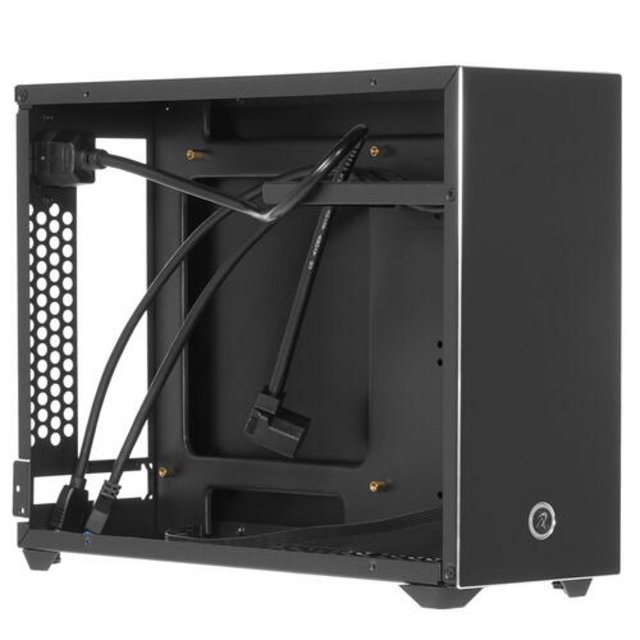
One side for the motherboard with the graphics card conventionally installed on a PCI bracket, and a slot for an SFX power supply at the front along the motherboard. And inevitably, restrictions apply since the graphics card must be in low profile format, with a single physical bracket. The ventilation may include two 92mm fans at the top, and one 92mm at the bottom depending on the graphics card installed. As for the processor radiator, it is limited to a maximum of 70 mm.
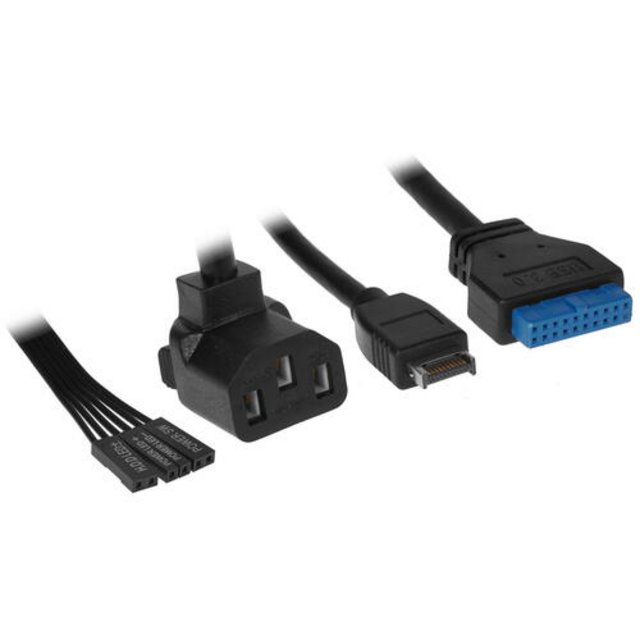
The familiar bundle of wires from the front panel offers connection of a power and reset button, indication of disk activity. The manufacturer has provided an independent connection for each port, and we have a full-fledged true USB Type-C connector, and not the usual USB 3.0 Y-hub, which provides data transfer rates up to 20 Gb / s.
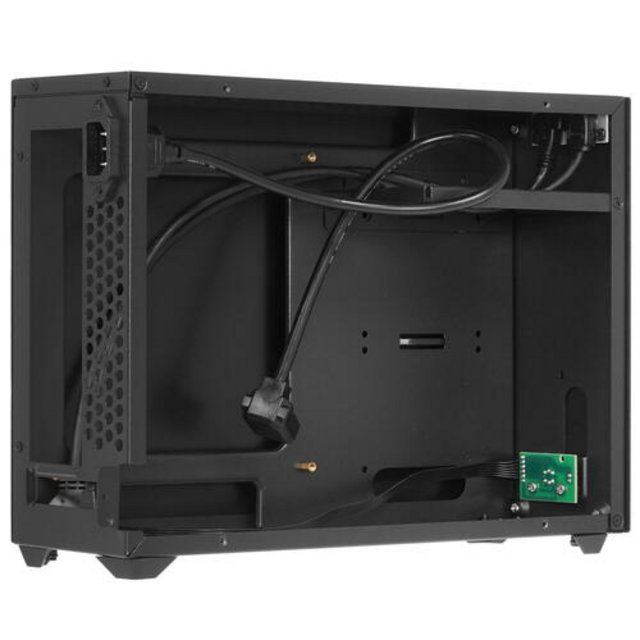
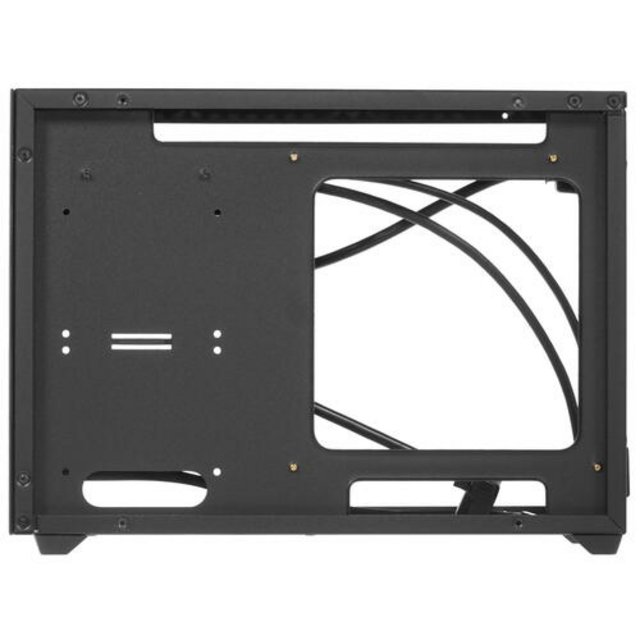
The space on the right side is about 9mm.For storage, up to two 2.5" SSDs or HDDs can be installed in the right space. The bottom and top slots have important technical functions - routing wires and / or placing additional cooling systems.
The components and power supply bracket have been removed. The layout is simple but efficient.
Installation Process & Finished Looks
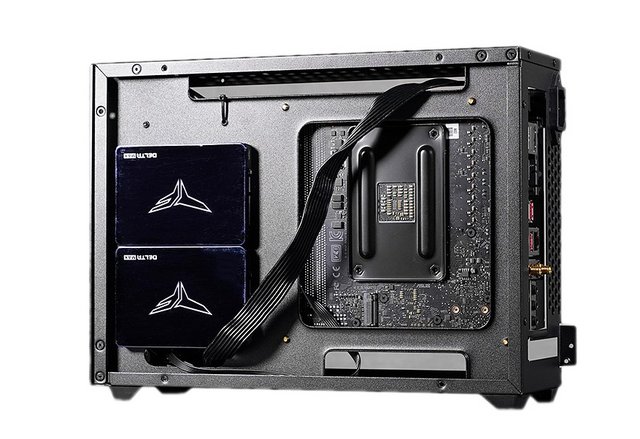
A build like this is challenging because you need to plan ahead especially to be careful what components you will use and triple check the compatibility. After that is out of the way, the same rule applies to foresee which route to undertake. We suggest to start to install the storage first. In our case, we used two ssd's. As expected, there is enough space to pass only the CPU auxiliary power cable to the right side of the right side.
Next is to install the motherboard. Installing the motherboard within the Raijintek Ophion 7L is quite simply as you just place it and screw it down in its slot. We are using an AMD stock cooler within the chassis but there are so many aftermarket low-profile air coolers out there that fit. Up to two 90mm cooling fans can be installed on the top and one on the bottom. Adding the PSU should really be done before you put your GPU in place so that you can pre-route cables for the motherboard and PCIe power for the graphics card in advance. The product manual states that only SFX is supported, but in fact, SFX-L standards could also be installed. The most high-performance LP type graphics card currently on the market is the GTX 1050 Ti, and considering that the length of the graphics card is 167mm~182mm, it can be installed without interference even with SFX-L power.
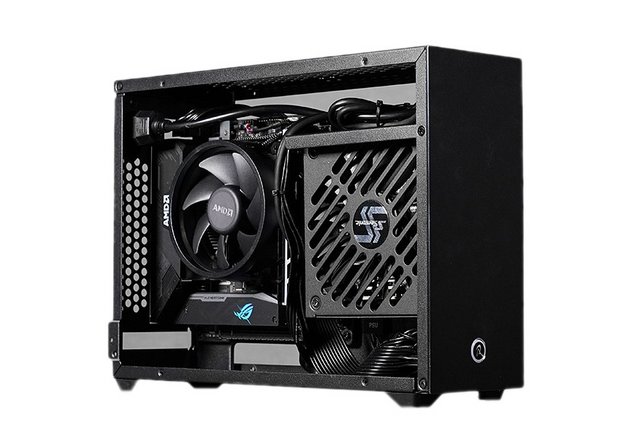
With everything installed, the Raijintek Ophion 7L chassis makes an excellent impression for such a tiny case and the use of space. While we have seen other compact ITX cases out there, this one really manages to keep things to the functional and useful minimum out of the box without any crazy wiring requirements.
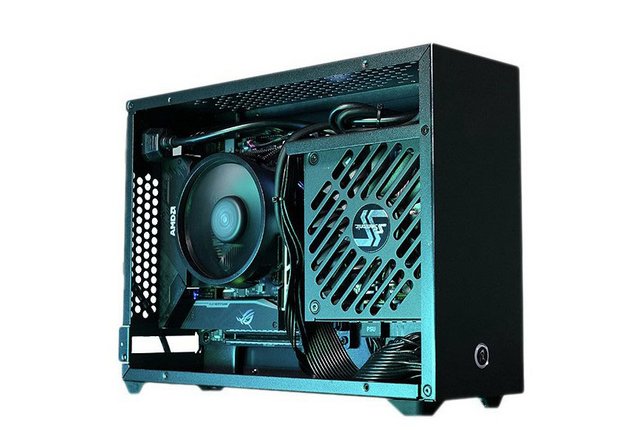
Once turned on, there is only the power LED visible element to let you know it is up and running. You will have to listen to the fans within to make sure it is. if you look closely, you can see the CPU cooler and GPU through the vents on the side panels, which also means these elements are getting plenty of access to fresh air. In the rear, everything is easily accessible with the power plug out of the way in the bottom-right corner.
6-Test System, Methology & Performance
All data from stresstests and benchmarks were logged with Aida64 Extreme 6.00.5100 in intervals of 1 second. Each test ran for 30 minutes, then 30 minutes "cooling time". The ambient temperature was also recorded every 30 minutes and is subtracted so that different ambient temperatures do not falsify the final result. All temperature data (dCPU & dGPU) are therefore delta values, thus the difference to the room temperature and not the direct component temperature. The maximum component temperature for every test is listed below each graph, but is for illustration purposes only!
Hardware:
Intel Core i5 6600K (Delid - 4,0Ghz @ 1,25V Locked)
Noctua NH-L9i / fixed at 60% PWM - 1750RPM
Gigabyte Z270N-WIFI (BIOS F6d)
2x 8GB Kingston HyperX Fury (HX421C14FBK2/16)
Inno 3D GeForce GTX 1050 Ti 4GB 1 Slot Edition
Samsung M.2 SATA SSD
Chieftec CSN-550C 550W SFX-PSU
We installed one fan at the top (Noctua NF-A9 PWM 92mm ran at 50% RPM)
3DMark FireStrike
Custom Run - Version 1.1
Only Combined Test
Loop enabled
Include Demo disabled
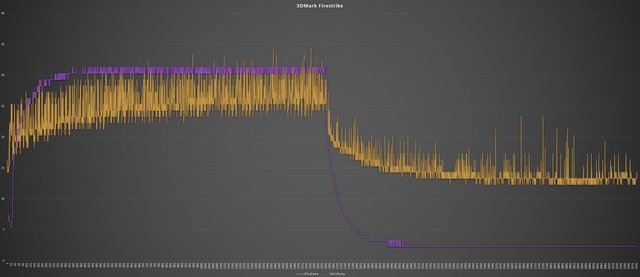
Peak Temperature: 57°C CPU Package - 55°C GPU Diode
Ambient: 22,7°C
Aida64 6.00.5100
Stress CPU
Stress FPU
Stress Cache
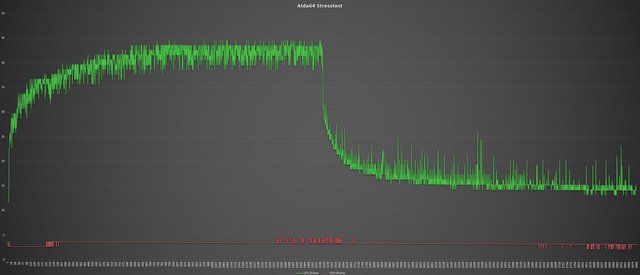
Peak Temperature: 67°C CPU Package - 27°C GPU Diode
Ambient: 22,3°C - 22,9°C
Unigene Heaven 4.0
Quality: Ultra
Tesselation: Extreme
Antialiasing: x8
Resolution: 1600x900 Fullscreen
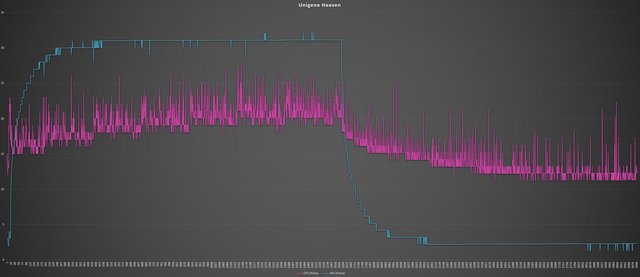
Peak Temperature: 51°C CPU Package - 55°C GPU Diode
Ambient: 23,0°C - 22,7°C
Aida 64 + Unigene Heaven
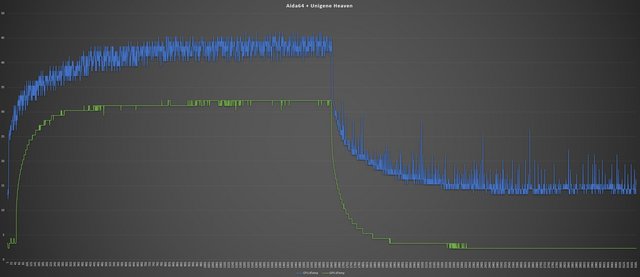
Peak Temperature: 69°C CPU Package - 55°C GPU Diode
Ambient: 22,7°C -22,7°C
Prime95 294b8
Small FFTS
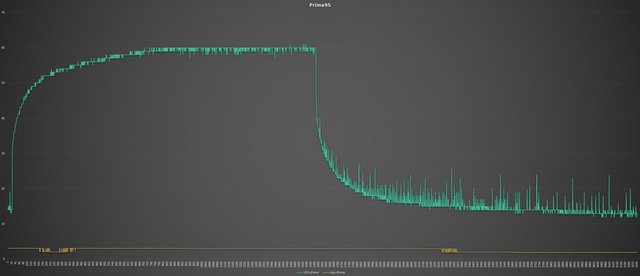
Peak Temperature: 83°C CPU Package - 26°C GPU Diode
Ambient: 22,9°C - 23,1°C
Despite the small cooler, the CPU can be cooled very well thanks to the perforated side-top panels, the graphics card also delivers very good values. Sometimes there are annoying noises at a small distance from the fan to the "air holes", but with this case it didn't occur. The 90mm fan in the case top also sucks the warm fans out of the case and prevents heat accumulation.
Final Thoughts
Raijintek has impressed us here at Xtremesystems many times in the past, with a great range of products that have shown great quality, style, performance and very reasonable price tags. I’m very happy to see that this trend has continued, as the Ophion 7L is one of the coolest Mini-ITX chassis in its class. The choice of colours are vibrant too, but I have a particular love for the black one we reviewed today, as it just looks so sleek and professional and would make a stylish HTPC system. There’s a lot of great applications for a chassis like this, as it would look great in your bedroom, next to your TV. Due to its layout, the model is more suitable for quiet office computers with a strong processor, but minor gaming ambitions. The workmanship is excellent and fits perfectly, there are no sharp edges. The Raijintek Ophion 7L focuses on a modern look. The outer skin is made of brushed aluminium and the body itself of steel. The case is kept visually as simple as possible. For example, the front, except for the power button and the two USB sockets, is completely smooth. As already mentioned, the case is also very small: it measures 312 mm long, 101 mm wide, and 225 mm high- the total volume is thus around 7 litres. The air flow in the Ophion 7L is vertical, so the air diffusers are at the top and bottom. The air flow can be directed from bottom to top. Make sure that you are already well trained with building your own PCs as building inside such a small case is a challenge from both a planning and executing standpoint. As mentioned in the assembly selection principle, the actual measurement results showed that the length of the power supply can be installed slightly more than the number indicated in the manual (you may want to refer to this section). There are a couple of things that could have been better. Only graphics cards in low-profile design with a single slot bracket can be used. In this format, the three-year-old entry-level GPUs Radeon RX 550/GeForce GT 1030 and some single shots GTX 1050 Ti Editions are the fastest chips. You can't use a GPU card and a bottom fan at the same time. Also there aren't any dust filters. Taking these few negative aspects into account, we are huge fans of this case.
The Raijintek Ophion 7L is currently available for around 95 Euros. This price tag places it pretty low compared to other small-form-factor cases as these tend to be much more expensive compared to normal-sized cases. Those small-form-factor cases have absolutely insane prices for basic-looking aluminum boxes, but the small production runs, niche market, and use of aluminum are presumably responsible for driving up the cost. In conclusion, regarding the Performance, Quality, and Price, we can absolutely recommend the case. Passion, vision and craftsmanship are a universal language.

Last edited by testman78; 10-20-2021 at 07:32 AM.
 Posting Permissions
- You may not post new threads
- You may not post replies
- You may not post attachments
- You may not edit your posts
-
Forum Rules


 Reply With Quote
Bookmarks