-
Yottamaster FS4RU3
Introduction
We talk about the benefits of NAS servers a couple of times a month around here. It really doesn't matter if you are storing a collection of family photos or your businesses tax returns, it's all important data that you wouldn't want to lose. The more data you have to store, the more expensive a NAS server can be. For home users a four to five drive NAS tends to be the optimal balance of protection and speed, but the cost can be as much as a new complete computer. As your own storage needs increase, chances are you will run out of places to put hard drives inside your computer, meaning you will need an external location to place your drives. One such option is an external RAID enclosure, like the Yottamaster FS4RU3 that I will be talking about today. Many people may feel unfamiliar when it comes to Yottamaster. After all, it is a brand new brand founded in 2016. The company primarily sells storage solutions like external hard drive enclosure, docking stations, M.2 enclosures, and other storage related devices/accessories.

This 4 bay hard drive enclosure adopt SATA III protocol. It features a versatile USB 3.0 interface with a transfer speed up to 5Gbps(MAX)to meet the needs of the flexible storage for demanding workflows. It is compatible with most Windows,Linux and Mac systems.


Packaging & Contents
The unit came in a box with a carry handle, which had a fairly decent size. The front of the package has mainly the appearance of the DAS and the promotion of the main features of this unit.

The back of the package has the basic information of the DAS, and the introduction is carried out in multiple languages. The package seemed to feature printing which was applicable to a wide variety of their models, and was not specific to the FS4RU3. With that said, the model number for this solution is to the right.

The features of the Yottamaster FS4RU3 are listed on the side of the box.

Yottamaster name.

The inner package secures the unit safely for transport and shipping. All of the accessories are inside of an additional box and it keeps them from bouncing around and scratching the unit.

The unit comes with a full product manual and notes on setup.


Yottamaster includes screws, a power cord and Type-B to Type-A USB cable, as well as a small screwdriver. There are 16 3.5-inch screws and 16 2.5-inch screws.


A Closer Look Outside
This unit made of Aluminum. Entirely in aluminum, your hard disks are protected from shocks and can cool more efficiently than if it was plastic. The unit itself tries to be simplistic and elegant in its aesthetic.

Front and rear panels designed with honeycomb heat dissipation holes. There are not any buttons on the front portion. Only the drive bays can be seen at the front and LED indicators near them. The indicator light turns blue during normal operation. The blue light flashes when reading data. At the left side of the door is the number of the hard disk drive bays. The LED on the front of the drive's door is flashing red when problem occurs.

Yottamaster's brand name is printed on both sides.

The back of the unit is where most of the action is. Here we see the ports that you can use to connect the unit to your PC or Mac. The enclosure came with a USB 3.0 Type-B connection.

Also on the back are the power switch, DIP switch for the different RAID modes. For the management of the RAID, you have 2 option: by Yottamaster software, or physically to the rear of the case. Above them you can see a perforated Yottamaster logo. The fan that exhausts air away from the internal drives via holes , effectively improving the heat dissipation performance of the whole system.

The FS4RU3 has non-slip foot pads around the bottom.

Installation
The installation couldn't be any easier than it is. The tool-free and trayless design makes removing a drive just as easy as plugging it in.

The drive bays are quick change, with the sleds popping out when you slide a large, recessed button to the left.

The frame itself is solid metal, whereas the sides and the front portion is plastic. The pull tab is plastic covered with perforated metal.

The drive bays not only supports 3.5-inch mechanical hard drives, but also reserves 2.5-inch mechanical/ With the mounting holes of SSD solid-state hard drives.


The long-leg screws are suitable for 3.5-inch hard disks, and the short-leg screws are suitable for 2.5-inch hard disks. Both screws can be installed with the supplied screwdriver.


You will need to setup the drives on your raid controllers interface or software, of course, but that?s a given. Note that setting to a new RAID mode requires first putting the drive into normal (separate disks) mode, then into the new RAID mode. It supports RAID 0/1/5/10 / JBOD / CLONE/Normal RAID modes. You can manage massive amounts of media with up to 64TB of RAID storage in one system.

A Closer Look- Inside
Always ever-curious as to what powers the unit, the first thing I did was to tear it apart. A few screws on the back panel can be undone to remove the back panel, and examine the internals closely. One of the first things I noticed on the FS4RU3 was the choice of an 150W internal power supply, and this is great. Yottamaster knows a thing or two about power supplies and they opted to use that knowledge rather than just bundle a less efficient power brick. It works with both 110V and 230V power outlets and uses a normal 3-pin power connector for universal operation everywhere. Opening the bays and peeking inside, we can see the use of a PCB backplane to connect with the drives.

A look at 80mm fan.

The main ICs involved are two Jmicron chips. It is clear that the topology of the unit involves the JMB394 RAID Port Multiplier performing the RAID features, with the JMS578 performing the USB 3.0 to SATA functions. The JMB394 RAID Controller is accompanied by an MXIC serial flash for its firmware.

Well, as for the USB 3.0 port, it owes its existence to the SATA II ↔ USB 3.0 bridge installed on the motherboard not far from one of the RAID controllers. We are talking about the JMS578 microcircuit. The circuitry listed above, according to the manufacturer, allows the device to achieve data exchange rates of more than 200 MB / s. Whether it is true or not, our testing will show.

Software
The setup for this enclosure is SUPER EASY. It literally requires 1 min. The documentation may be minimal but just follow the given instructions EXACTLY to setup. Firstly, I installed the accompanying software. Personally, I found the software to be a little 'clunky' in appearance, but it did everything I wanted it to do, and did it well. You will not be spending much time in this software once you have everything setup to your liking. The software that monitors the unit is called Yottamaster RAID Manager. Once installed, with the array hooked up and powered on, the software allows you to see the condition of your RAID array.

The default screen shows you all of the disks, the RAID array type and the status. From here, it is possible to drill down to individual drives to find the member information. Here you will see the first screen when you install your blank HDD's. The software will identify all their make, model, capacity and current state.

The second icon down is the event log.

The next icon down is for settings, the basic RAID configuration screen. Here you will need to select the RAID configuration that best suits your needs. My setup is a bit sloppy, not having four matching drives, but there are still several options to choose from.

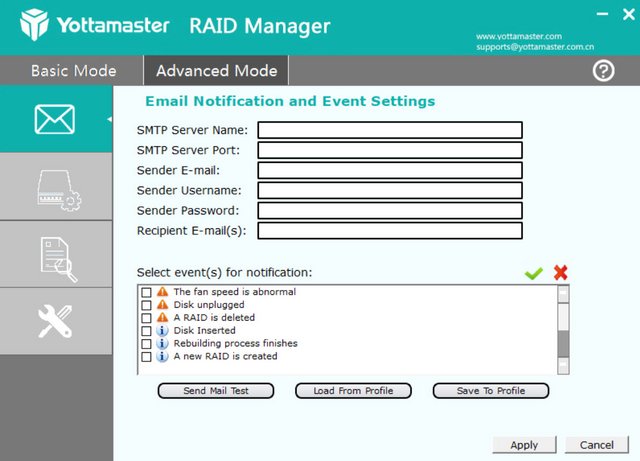
The Advanced Mode tab allows you access to even more features, such as an ability to send alert e-mails on certain array events. Unfortunately, I can't confirm it works with SSL-based mail servers, as there doesn't seem to be anything that claims support for SSL, so it might be of limited use. I'm also not sure that the chipset itself has temperature or voltage monitoring. Also, it is possible to create and configure the arrays via the software, rather than the DIP switches, which is more user friendly.
An advanced RAID creation tab is also available for those who want to create multiple arrays using the pool of drives, or to use only a limited area of the disks. I did not explore the full abilities and limitations of this mode.

A firmware upgrade page is available for upgrading the firmware of the hardware RAID port multiplier chipset, but no firmware upgrades have been released.

The final tab configures the rebuild priority and sleep timer settings. I set my sleep timer to 0 which seems to disable the feature. In all, the software isn't a critical requirement, but having it allows you easier access to information about the RAID in case of problems (in theory) and can help you diagnose problems ahead of time.

Test System & Methology
Gigabyte Z370 Aorus Gaming 7
Intel Core i7 9700k
Corsair Vengeance 1866MHz 16GB
AMD Radeon HD 7970
Corsair H100i
Corsair HX1050W
Kingston HyperX 240GB SSD
4x Western Digital Se 4TB

Many different software applications are also used to gain the broadest spectrum of results, which allows for the fairest testing possible.
Software used:
ATTO
CrystalDiskMark
Anvil's Storage Utilities RC6
With each RAID configuration setup, we run the above list of benchmark utilities to get a broad set of data to show how the system copes with varying data types.
Performance
Within ATTO we can see that the Yottamaster FS4RU3 is able to give a good level of performance.
RAID10:

JBOD:

CrystalDiskMark again gives some very strong and more importantly consistent performance figures showing the unit can give a great set of speeds when connected via USB3.0.
RAID10:

JBOD:

Anvil's Storage Utilities is completely free to download and has the ability to test mainly hard drives and solid state drives, but also any other form of storage medium that you can throw at it. As well as testing the drive in a variety of benchmarking tests, it also has a drive endurance test that consistently reads and writes data to the selected medium to give days, months and potentially even years of use in a shorter period of time to see how the drive copes in the longer term.
RAID10:

JBOD:

Final Thoughts
Storage enclosures have been around for quite some time, they are an integral part of allowing us to store large amounts of data in a compact form factor. Of course, there are many different types of enclosures ranging anywhere from single bay solutions all the way up to full racks housing 16 drives and more. The Yottamaster FS4RU3 uses four hard drives (that you must provide later) and supports the usual levels of RAID that keep your data secure. It is a very solid build unit, from start till end. The overall weight of the device gives it a firm stand on the four large rubber feet. Every part of the case is connected to each other far better than would be needed, making sure that nothing will rattle lose, vibrate or otherwise misbehave even after long periods of use. The aluminium finish also give the unit a sleek look to go along with the functionality. Yottamaster FS4RU3 four-bay hard disk unit supports Windows, Mac, and Linux systems at the same time, and the compatibility is very good. The built-in PSU is another thing I see as a bonus. It will provide a more stable and efficient power than an external brick, but in return sacrifices the ability to easily replace it in case of failure. The security and stability does take priority for a external data enclosure that most likely will be running 24/7 and Yottamaster has certainly made all the right choices here. It allows for easy expansion of systems with limited drive bays without sacrificing configuration abilities or speed. Configuration and setup is simple. And besides, it's easy to set them up with the switches on the back! The 80mm fan in the unit did a great job of keeping the drives cool. My Western Digital Se drives stayed below the 40 degrees marker, even after days of continuous benchmarking. And I've found the performance to be good, with as-expected transfer speeds over USB 3.0. You won't notice any difference whether your drives are connected internally or through this Yottamaster FS4RU3.

The Yottamaster FS4RU3 could very well be the perfect external RAID enclosure. The Yottamaster FS4RU3 is well-priced at $259.99 and is at least as good as some name-brand alternatives.The FS4RU3 carries an 18-month repair warranty on top of a 30-day money back guarantee.

Last edited by testman78; 06-05-2021 at 02:31 PM.
 Posting Permissions
- You may not post new threads
- You may not post replies
- You may not post attachments
- You may not edit your posts
-
Forum Rules


 Reply With Quote
Bookmarks