-
Be Quiet Pure Rock 2
Introduction
be quiet! is a top-tier manufacturer of a tremendous number of PC products. They are not a brand that just pads shelves with products as many of their offerings have won numerous awards from reviewers and readers alike. You could say that be quiet! has earned its popularity by following through on its mantra of "no compromise silence and performance." Considered on par with Noctua in regards to quality and performance, it's not hard to guess that their latest products will once again be quite impressive. In today's review, I will be taking a look at the Pure Rock 2. This update to the highly successful, entry-level Pure Rock cooler from 2014 ticks all the right boxes as the ideal upgrade from stock coolers by Intel and AMD.
For a bit of a hint, let's take a look at those all important Technical Specifications shall we.

Packaging & Contents
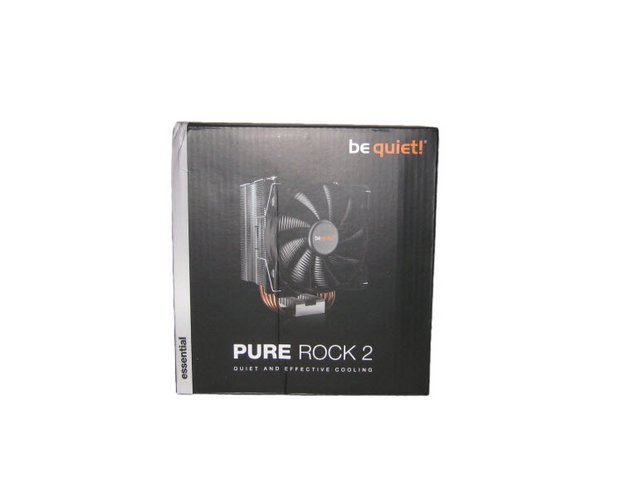
The Pure Rock 2 is delivered in a cardboard box with an all-black design and orange accents. The front side of the packaging features a profile photo of the cooler with the complete product name printed on the lower side.
The back of the packaging follows the same design as the front, having two profile photos of the cooler.

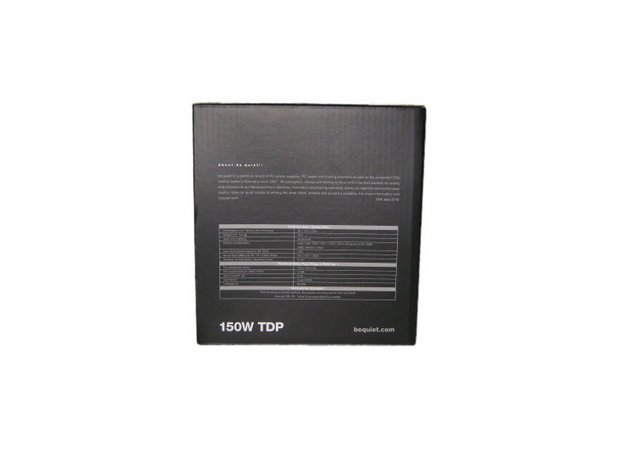
The left side of the box have the complete technical specifications for the heatsink and the included 120mm fan.
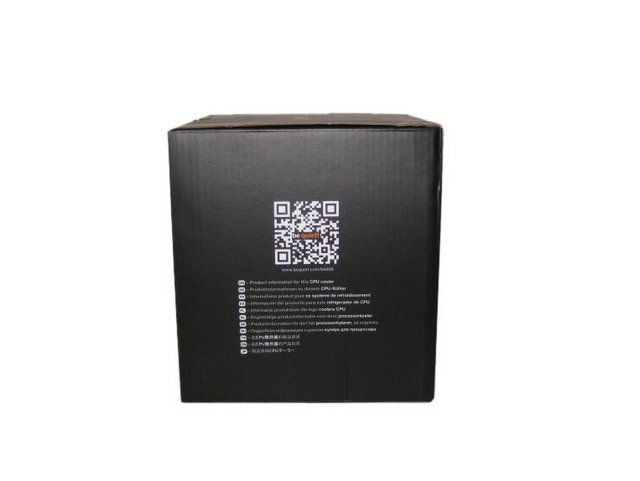
There is also a QR Code printed on the opposite side of the packaging, alongside the description of the QR Code link in 11 different languages.
The top of the box just mentions the product name,and TDP.

The cooler is packaged well, cushioned and bundled safely in the box.

Contents of the packaging include a smaller brown box filled with accessories.

Once unboxed you'll spot the cooling unit consisting of the heatsink assembly, fan, and brackets + back plate that supports a very wide range of AMD and Intel processors.
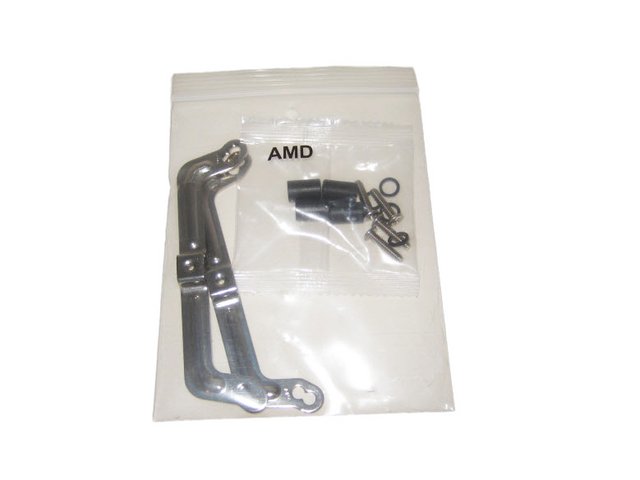

A spare set of clips is included if you wish to add a second fan to the rear.

They have included a instruction booklet.

A Closer Look
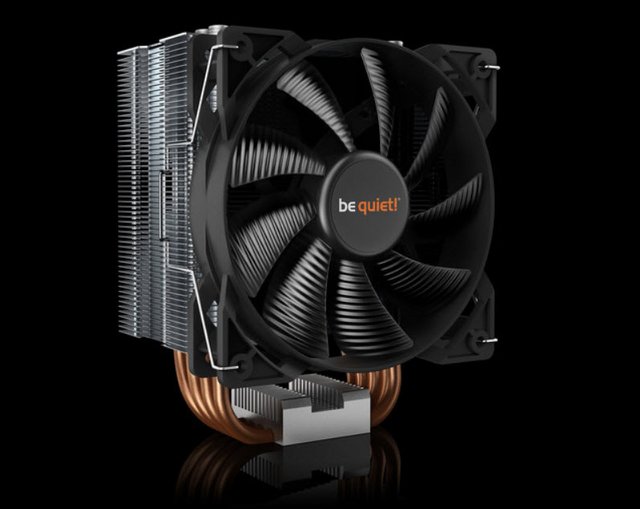
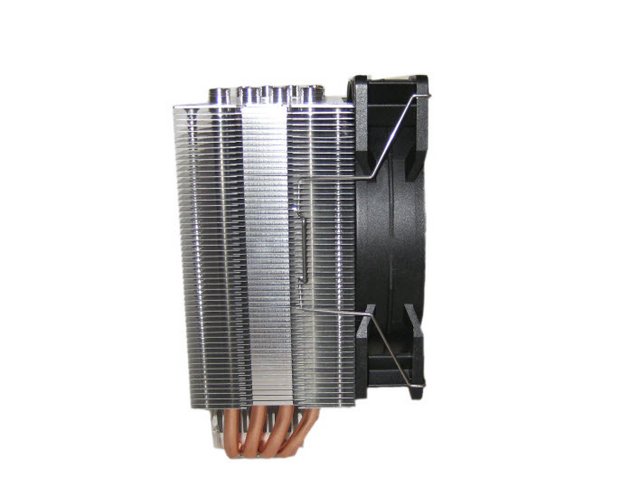
The heatsink is similarly tidy. Measuring 87mm (L) x 121mm (W) x 155mm (H) in size and weighing just over 575g, it adopts an asymmetric design to avoid spilling into any nearby memory slots.

Hmm yeah, aesthetically Pure Rock 2 will win anytime. A high-grade brushed aluminum finish and the aluminum caps guarantee a nice appearance. I do miss the black powder coating.

The heatsink has a single tower design and uses a total of 55 aluminum fins.
The top plate of the cooler is thicker than the cooling fins and has a aluminium cover plate.
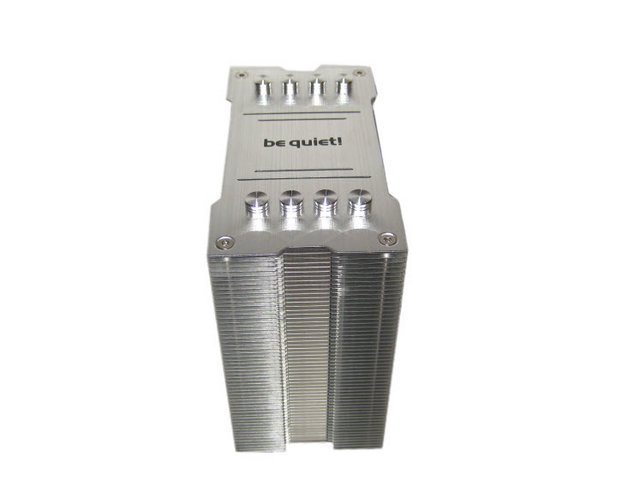
At the center, a reflective Be Quiet! logo is placed into the surface of the top plate.

Running through the aluminium fin stack are four 6mm nickel-plated copper heatpipes that make direct contact with the CPU.

The base of the cooler is made from the same type of nickel-plated copper as the four heatpipes. The base of the Pure Rock 2 features a square thermal transfer plate with a healthy covering of thermal compound pre-applied.

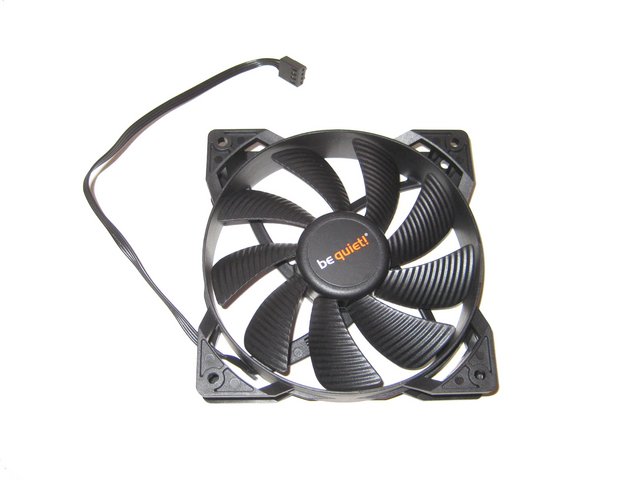
The supplied Pure Wing 2 120mm PWM fan clips on with ease and can hit speeds of up to 1,600RPM.

The Pure Wing 2 fan has the model number BQ PUW2-12025-MS-PWM, and has a minimum speed of 300 RPM and a maximum speed of 1500 RPM. Nine airflow-optimized fan blades reduce noise-generating turbulence and increase air pressure.

Thanks to their impeccable build quality, Pure Wings 2 fans have a lifespan of more than 80,000 hours. The cable of the fan is shorter than usual, it is long enough to reach all fan headers located around the socket, but too short to be used as a case fan. In addition, the cable is covered by high quality sleeving and has a 4 Pin connector for power.
Installation Process
When installing the be quiet! Pure Rock 2, users will need to first prepare the backplate. Slide the screws into the right slot on the backplate to then use the rubber o-rings to secure them. At this point, you can position the backplate on the motherboard.

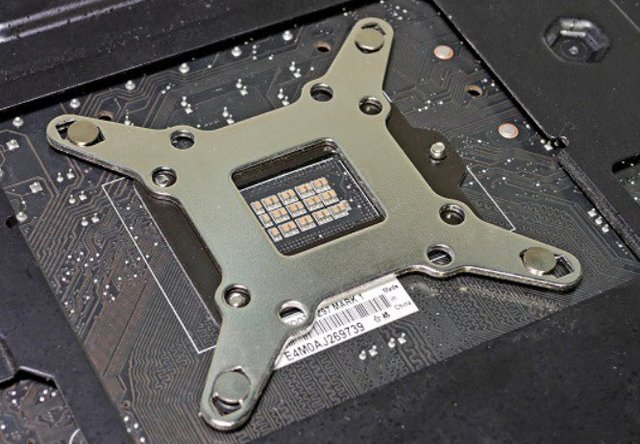
Next, use the standoffs to secure the backplate to the motherboard to then secure the mounting arms to the standoffs. Place the crossbar onto the heatsink's base and line the cooler and crossbar up with the CPU and the two holes on the mounting arms. Screw the crossbar down to secure the heatsink once everything has been lined up properly.
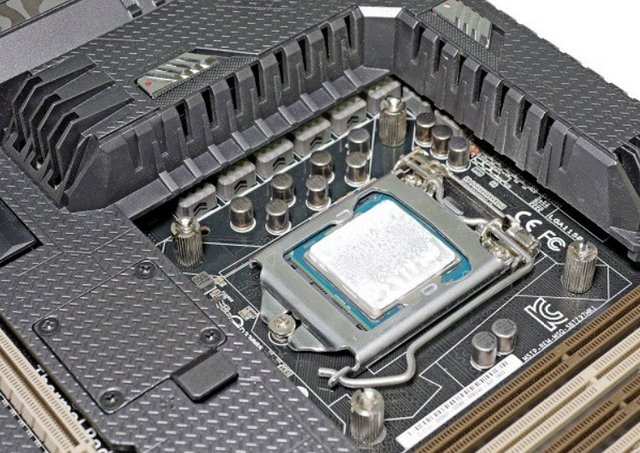

With this, the heatsink itself is now properly secured. The final and easy bit is to attach the fan and plug it into the fan header. That's it, all done.

The system works extremely well and is very straightforward. In terms of difficulty, I would rate its installation a 9 on a scale of 1 (hardest) to 10 (easiest).

Test System & Methology
Test System:
Cpu:Intel Core i7-7700K@5 GHz and 1.345v
Motherboard:Gigabyte Aorus Gaming 9 Z270
Memory:G.Skill - Trident Z 32GB (4 x 8GB) DDR4-3200
Graphics Card: EVGA GeForce GTX 1080 Ti 11GB SC2
Power Supply: EVGA SuperNova 1200 P2
Storage Drive: 3TB Seagate Barracuda
Boot Drive: SSD 850 PRO 2.5" SATA III 2TB
Chassis: Dimastech Bench Table Easy V2.5
Windows 10 64-bit

Software:
Speedfan
CPUID HW Monitor 1.23
CPUID CPU-Z 1.65
Prime 95
I am testing the performance as follows:
Ambient temperatures are kept at 23C throughout my tests.
The CPU Fan is set to 100% to eliminate inconsistencies as a result of PWM control.
Idle temperatures are obtained after booting the PC and idling on the desktop for 30 minutes.
Load temperatures are obtained after running Prime 95′s for 30 minutes.
Temperature Results
The performance figures are not mindblowing. But again, remember that this is a single fan air cooler. In that context, it does exceptionally well in standard performance.
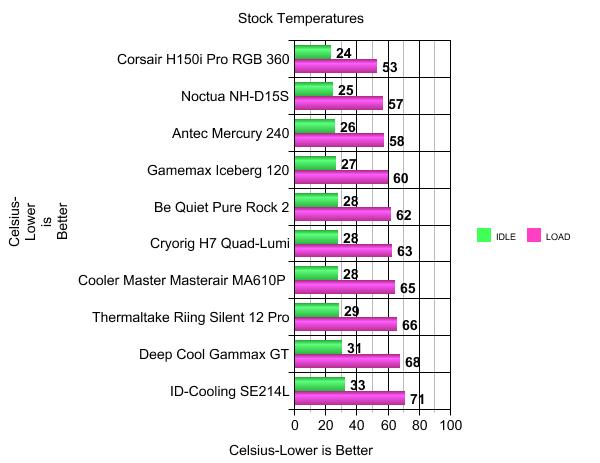
While some may consider 70c to be a little toasty for an Intel processor, this was the average maximum achieved under full load. In this instance, it has outperformed many bigger and better-known brands.

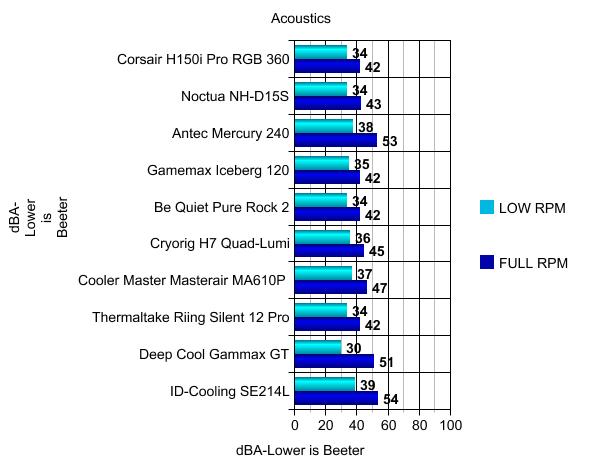
Acoustics
Noise levels are quite low, too, which definitely helps matters. Even when running an overclocked CPU under 100% Prime95 load, the fan does not spin past 1500 rpm so it is far from intrusive.
Final Thoughts
Pure Rock 2 offers an excellent price-performance ratio with a great cooling efficiency of 150 watts TDP, low noise level, and high memory compatibility. As far as tower coolers go, you won't find a fancy design here. Instead, you get a simple but tried and true design. Build quality is pretty good as well as there are no major issues to report on. Meanwhile, the mounting hardware is easy to work with. This makes for an easy installation, and the extra fan clips mean a dual-fan configuration is possible. The offset design of Pure Rock 2, which moves the heatsink back towards the exhaust of the case, avoids blocking the memory slots next to the processor socket. Compatibility with all current CPU sockets from AMD and Intel (except TR4 and sTRX4) make Pure Rock 2 an ideal upgrade from stock coolers and due to its modest dimensions of 155 x 121 x 87 millimeters, this tower cooler will fit into almost any PC configuration.

The new Pure Rock 2 CPU cooler will keep things simple, just like its predecessor. Overall, the Be Quiet Pure Rock 2 is a solid offering. It offers decent performance and low noise levels - all in a typical highly compatible tower cooler design. There are two models available: the standard version which is aluminium/silver like its predecessors, and a fully black version too. The be quiet! Pure Rock 2 is available starting at $39 for the standard version, and $44 for the black version. Customers benefit from a three-year manufacturer's warranty for Pure Rock 2.

Last edited by testman78; 06-05-2021 at 02:28 PM.
 Posting Permissions
- You may not post new threads
- You may not post replies
- You may not post attachments
- You may not edit your posts
-
Forum Rules


 Reply With Quote
Bookmarks