-
iXsystems FreeNAS Mini
Introduction
Today we will have a look at FreeNAS Mini from iXsystems.iXsystems has decades of experience in producing rock-solid solutions on an open source foundation.With thousands of clients,they have a proven history of building and delivering the right solution every time- for Open-Source-friendly enterprise servers and storage solutions.Thousands of companies, universities, and U.S. Government departments have come to rely on iXsystems' customer-first commitment to excellence.All of their products are assembled, tested, and shipped from company headquarters in Silicon Valley, and technical support is provided in-house by the same engineers that build their systems.iXsystems champions the cause of Open Source technology by dedicating extensive resources to several FreeBSD community projects:FreeNAS,PC-BSD,FreeBSD,TrueOS,and OpenZFS.The FreeNAS project and software were founded in 2005 on the principle that network storage be made available to the world at no cost and unencumbered by license restrictions.The FreeNAS Project has a mature community and a team of developers dedicated to meeting that goal and providing the best (open-source) network file storage solution in the world.FreeNAS is an operating system that can be installed on virtually any hardware platform to share computer data storage over a computer network.'Free' as in 'free and open source' and 'NAS' as in "network-attached storage", FreeNAS is the simplest way to create a centralized and easily-accessible home for your data.
This new model is the third iteration of its FreeNAS Mini Home and Small Office storage device.The new FreeNAS Mini hardware has been completely redesigned to support the new features that have been added to the FreeNAS software over the past two and a half years.The new model ship with FreeNAS 9.3 and have the performance necessary to serve multiple streaming HD clients over the same network,ranscode HD video to mobile devices,support multiple independent FreeNAS plugins and support more filesystem and media sharing protocols than ever before, all with lower latency and increased throughput.The new Mini draws extensively on feedback from the FreeNAS community. The most important new feature is the addition of ECC RAM, which prevents in-flight corruption of data, before the error-correcting properties of ZFS come into play.The CPU has been upgraded from two to eight cores,in response to requests for a CPU that can support both the I/O and encryption demands of ZFS and the parallel processing requirements of many FreeNAS plugins.A second gigabit ethernet port has been added to accommodate additional performance or for link failover, and a dedicated remote management interface is also included. Default system memory is 16GB, though an option to double the RAM to 32GB also exists in response to demand for a Mini that can leverage the full power of ZFS, without the footprint of a full-size server.Some key features of the new Mini include:

Packaging & Contents
iXsystems packaging is no-frills,using a typical brown box with the FreeNAS printed logo on the front.

The box is sturdy and didn't find any issues with this type of packaging.

Opening the box you can see that the main hardware is double boxed.


The FreeNAS Mini is held in place by fairly thick Styrofoam spacers,and a plastic bag protects it from scratches and fingerprints, so you should get a chassis in perfect condition.
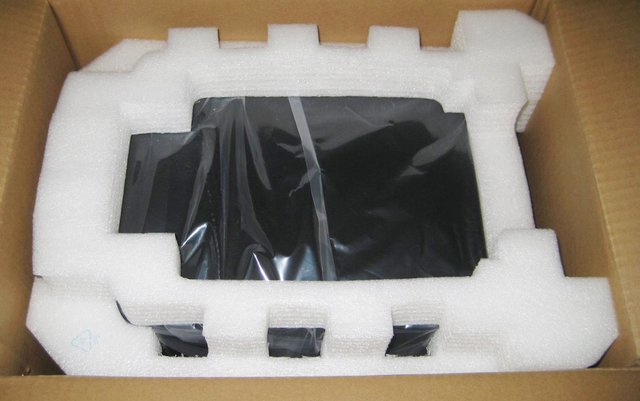
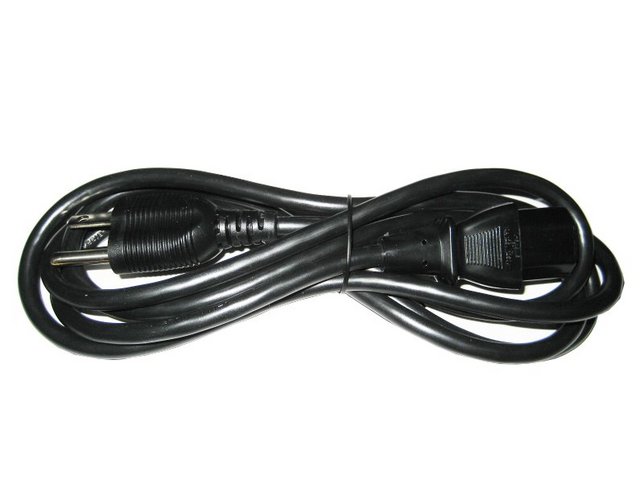
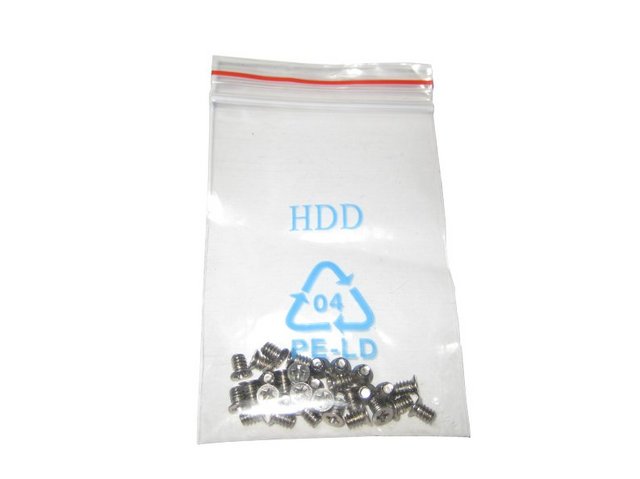
The box for the FreeNAS Mini included the power cord,mounting screws for the hard drives,two keys for locking the front door,one Ethernet cable and a sheet of paper that talks about Beastie(FreeBSD mascot).


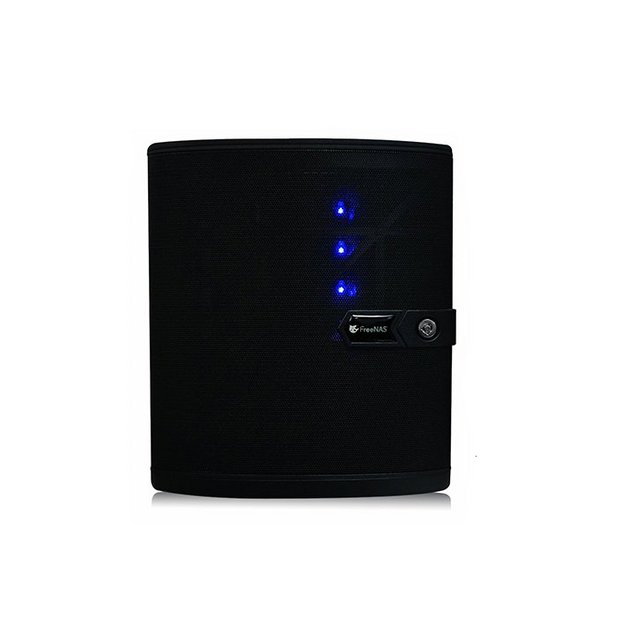
The Nas
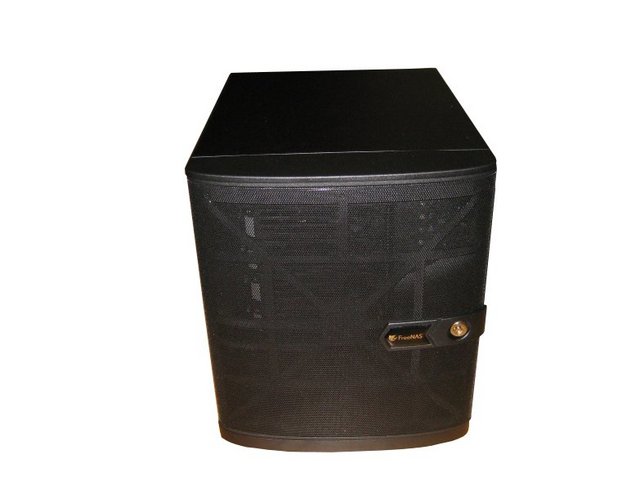
The FreeNAS Mini measures 210mm in length, 240mm in height and 240mm in width.

Unlike units by other brands we see that iXsystems prefers a more industrial like design for theirs.
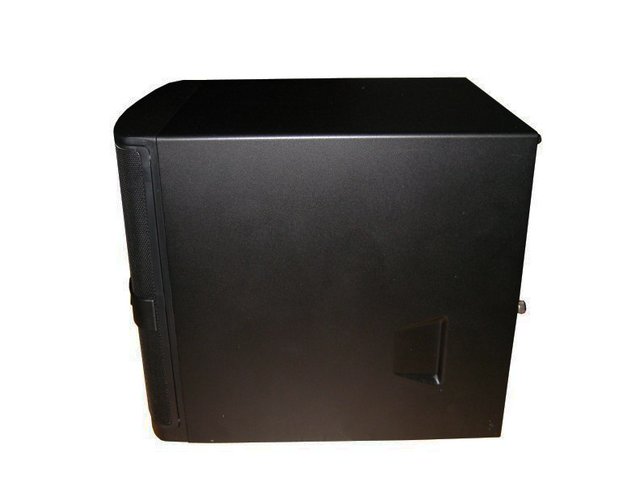
Both left and right sides of the FreeNAS Mini are quite plain and do not feature additional ventilation holes.

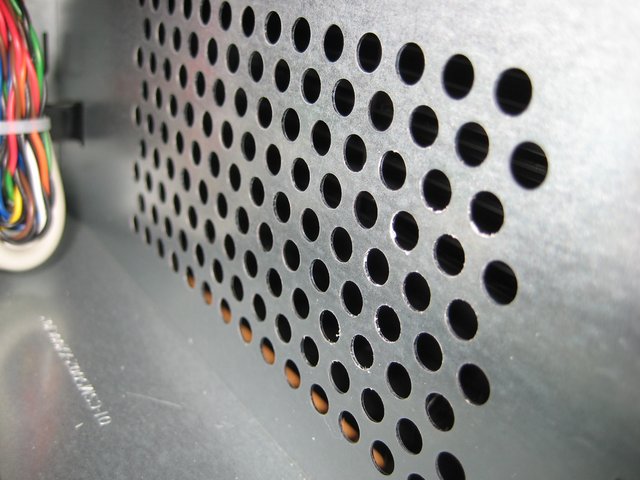
In the front panel,iXsystems has used a metallic mesh in order to help with the ventilation.

The case has provisions for a slim CD-ROM.

FreeNAS logo.

The unit can be locked if you are concerned about unauthorized access and potential theft.

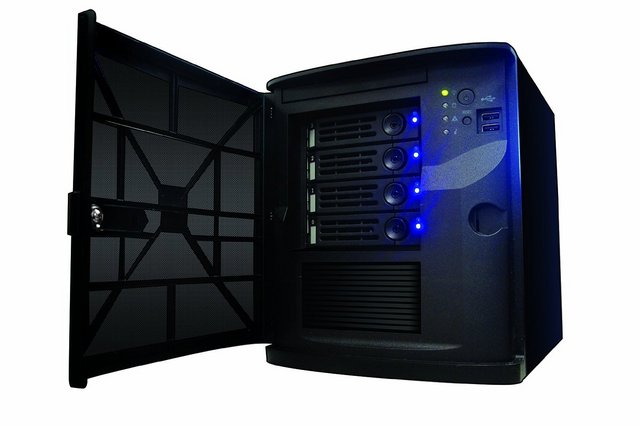
The frontal plastic door opens up with ease in order to reveal the four trays.

Opening the front door,you can see the four bay complete.

The frontal area of each tray has a ventilation grill.There are labels on each drive.
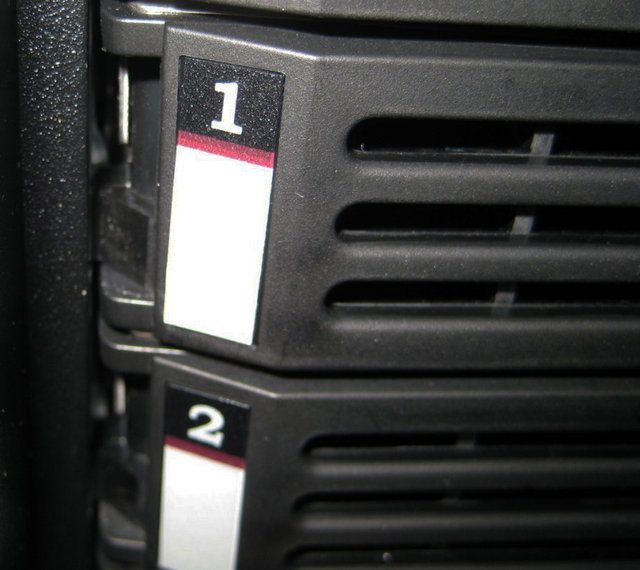
To eject you simply slide the circular button to the right which ejects the handle.Then you grab the handle and pull straight out.

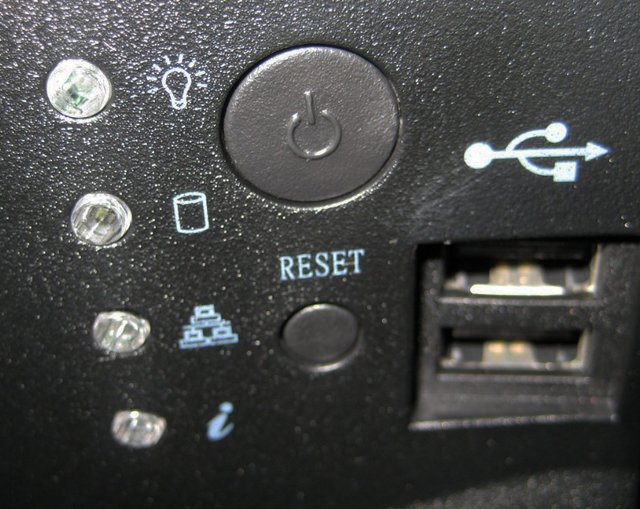
On the right side of the bays we have the status LEDs present.Near them are two USB 2.0 ports along with the Power and Reset buttons.
The lower part comes with a vent.

Now a short look at the back side of the unit.The same industrial look extends at the rear of the device.
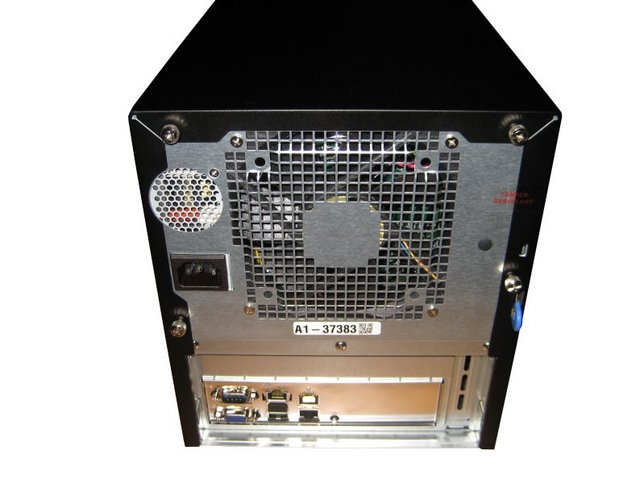

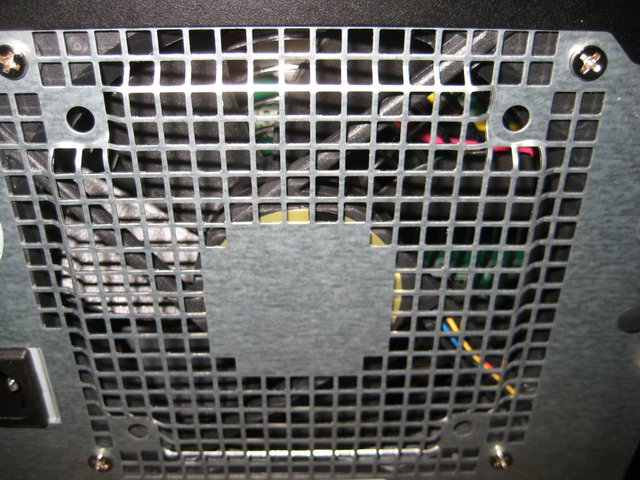
The central 120mm system fan takes care of keeping the internals cool while the power supply is equipped with a smaller 40mm fan.

The rear panel is fairly bleak,based on ASRock placing all the SATA ports on the left hand side of the motherboard.We have the AST2300 VGA port, a COM port, the management NIC above two USB 2.0 ports and finally the two Intel I210 network ports.The button at the end is actually an LED toggle such that an engineer can find the system in a server rack.This LED can be controlled via the management software.

On the right side,we will be able to spot an padlock to prevent access to the inside.

Here we can see the half-height PCIe 8x slot.

On the bottom side of the unit we will find a label with the model number.

Four medium-sized rubber feet.

Installation
The trays,are pretty sturdy,by having a combination of aluminum and plastic.The caddies are of good quality and can host 3.5" or 2.5" disks,that is,if you are rich enough to invest into high capacity SSDs.
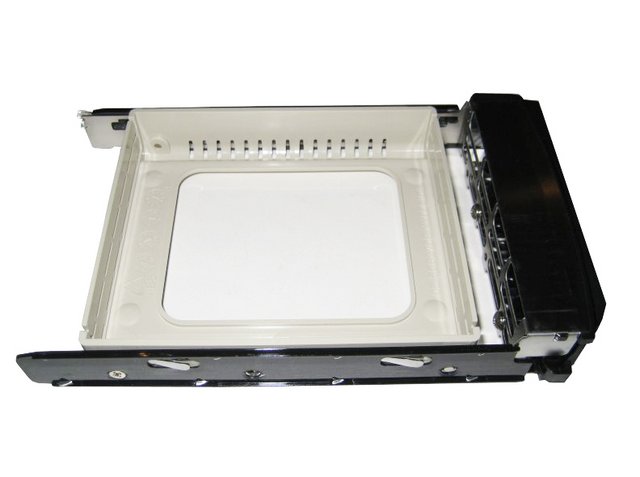
The hard drive trays are not tool-less,so you're required to use a screwdriver to mount each of the disks to the tray.iXsystems includes a lot of screws, more than you'll need for the four drives.On the side of the trays,we have the pre-drilled holes marked.

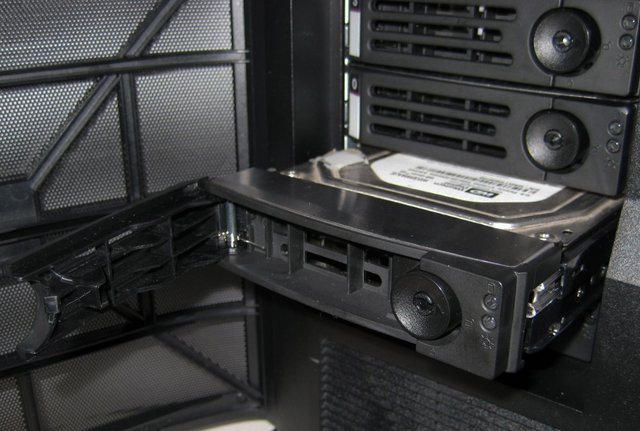
Once the drives have been inserted into the FreeNAS Mini you must close the lever to ensure the drive is pushed into the back where the SATA data and power connection can be made.
Hardware
It's time now time to strip FreeNAS Mini down to discover which components it hides inside its casing.The top cover can be removed by working with the four thumbscrews located in the back.

Reaching so deep inside the FreeNAS Mini isn't the easiest thing in the world but my experience with NAS products made the whole process go smoothly.
There's a slot for adding a 2.5" SSD to the case.


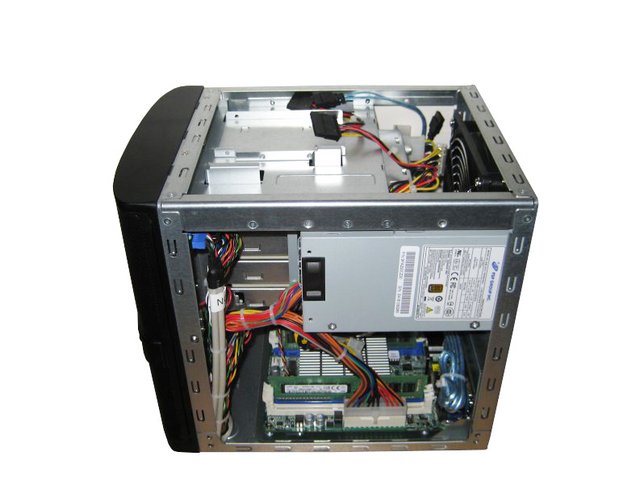
I removed all caddies to offer you a view of the internals.To the internal motherboard we have a daughter board attached.The PCIe expansion card holding all SATA ports is directly powered by the PSU through a 12-pin connector.

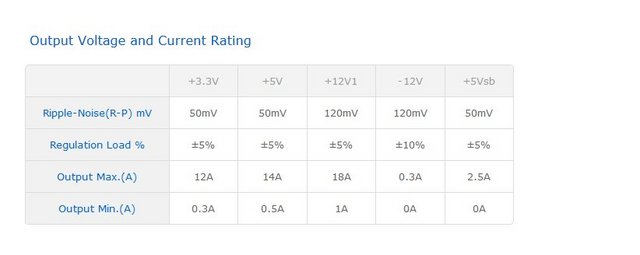
On top of the unit we can see the psu of the unit.The FSP250-50LCis an industrial level of switching power supply.The power supply comes to offer the total power capacity up to 250 Watts,and uses unique active PFC (Power Factor Correction) circuit design with its high-load electrical components, makes it to be perfectly used in an industrial environment.The product also complies with the latest safety and EMC standards, which is perfectly to meet various regulations worldwide.It is 80 Plus Bronze certified.It can provide up to 18 A on the +12V rail and 14 A maximum on 5V, which will easily cover the needs of the FreeNAS Mini.

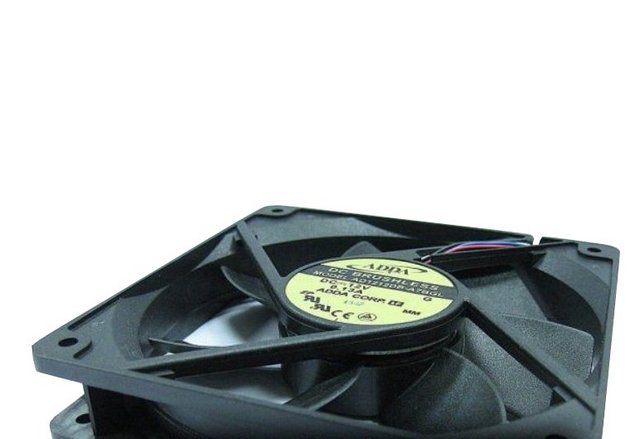
The 120mm cooling fan is provided by ADDA.Its model number is AD1212DB-A7BGL(12 V,0.13 A,480-1500 RPM,57.2 CFM,27.2dba).

It uses ball-bearings and will, as such, last fairly long.
On the bottom of the unit we can see the motherboard,which has a decent amount of space available for ventilation.
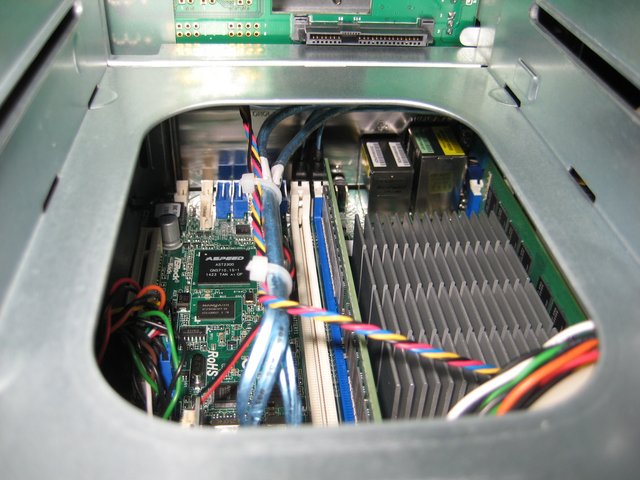
One of the purposes of Intel's Avoton CPUs is cold storage.ASRock produced the C2750D4I for that need a mini-ITX motherboard with a 25W eight core CPU, support for 64GB of DRAM, external server management and twelve SATA ports.In order to achieve twelve SATA ports, ASRock has equipped the motherboard with additional Marvell controllers.iXsystems has built the FreeNAS Mini around this idea.

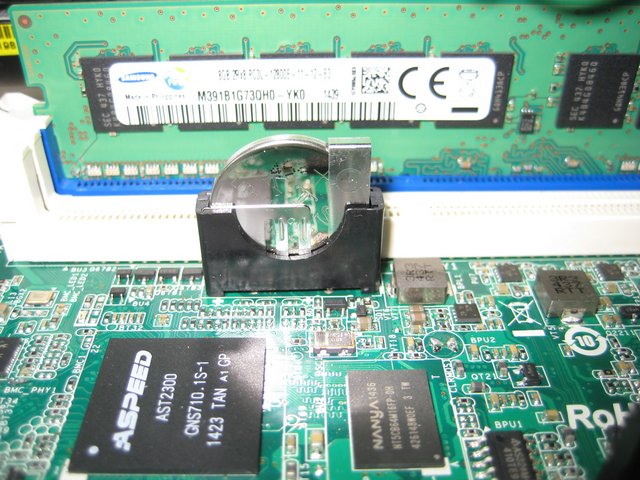
One 3V battery is present on the board for keeping the CMOS settings saved.
The central processing unit is cooled by only a large aluminum heatsink.The CPU heatsink uses tall fins to increase surface area for cooling.
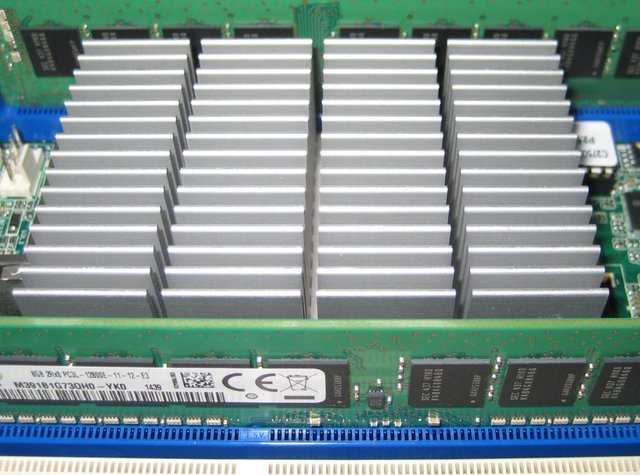
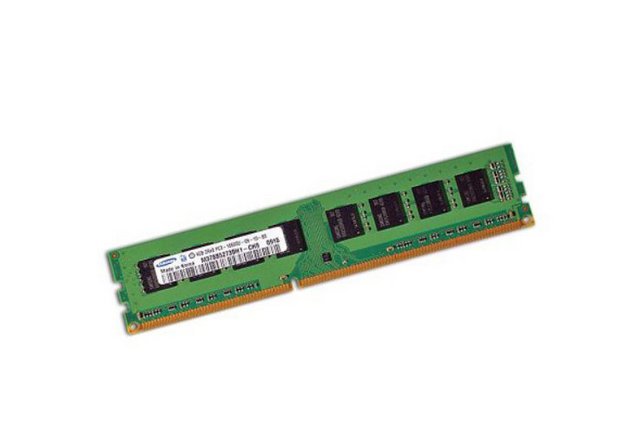
The C2750D4I not only boasts an 8-core Atom processor,but it also features four DIMM slots supporting up to 64GB DDR3 ECC and UDIMM memory.The DRAM slots use the single-sided latch mechanisms similar to high end socketed motherboards which means that users should ensure all DIMMs are firmly installed at both ends. The DRAM slot with the wider latch (in blue above the CPU) is marked as DIMM slot number one.There are two Samsung 8GB DDR3 PC3-12800 (1600MHz)P/N:M391B1G73QH0-YK0 memory modules already installed on the mainboard.
There is no 4-pin CPU power connector, and the 24-pin ATX power connector is aligned at the top of the motherboard to aid with cable management. The four fan headers in this area on the motherboard are all located to the right of the CPU and are all 4-pin.

More importantly,it offers not eight but rather 12 SATA ports via two Marvell controllers.The SATA ports are organized such that those in white are SATA 6 Gbps, and those in blue are SATA 3 Gbps. The chipset SATA ports are on the left hand side near the rear IO and the Marvell SATA ports are on the right. Next to these SATA ports on the right are two additional fan headers, again both 4-pin.


The chipset diagram gives an interesting paradigm to consider. ASRock is using a PLX 8608 PCIe switch (an x4 to 4 x1 slots) in order to have enough controller based end-points to go around (many thanks to user bombshelter in the comments for this clarification). This chip shares the Marvell 8172 (dual SATA 6 Gbps ports), the two Intel I210 NICs and the Aspeed AST2300 chip.Typically using a PCIe switch if many of these features are used at the same time, there could be peak bandwidth issues, but as the total bandwidth going in is the same as going out, this should not be an issue.So while the C2750D4I has many interesting features, perhaps describing what is missing is more telling. Ideally we would have USB 3.0 on board, either via a header or ports on the rear. There is also no audio, meaning that home users who want to double purpose the system as a NAS/HTPC will have to invest in a USB DAC and a USB hub (assuming two ports are needed for a USB mouse and keyboard), or a GPU and pass audio through the HDMI port.


In terms of actual connectivity, the C2750D4I is lacking compared to a Mini-ITX board destined for a desktop system. In fact, other than the three Gigabit Network ports, users only get two USB 2.0 ports, a COM port and a D-Sub VGA output.Above the PCIe 2.0 x8 slot is the Aspeed AST2300 management chip paired with some DRAM. The AST2300 uses an IPMI from American Megatrends for its control via a Realtek RTL8211 gigabit Ethernet port on the rear panel. The AST2300 is actually an ARM9 chip running at 400 MHz, and manages any 2D output via the D-sub/VGA port on the rear IO.
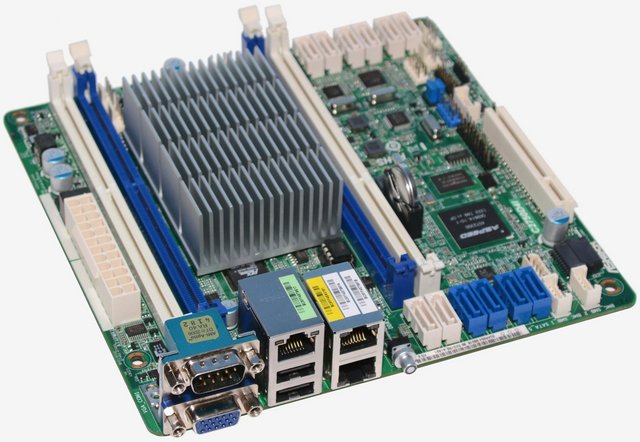

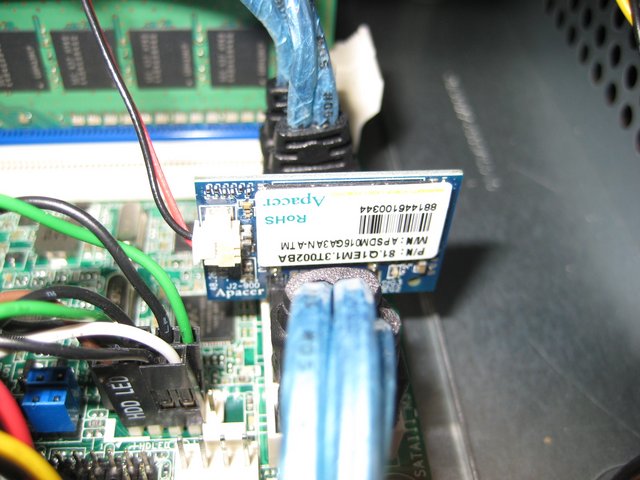
There is a single PCI Express x8 slot, though there is no need for a SAS card here so that can either be used for a PCIe SSD or possibly a graphics card.The flash memory is provided by Apacer.
FreeNAS Initialization
FreeNAS is a powerful server software operating system designed with home and small office use in mind. Despite its free nature, however, it is feature rich and can provide many server applications.The FreeNAS operating system is installed to at least one device that is separate from the storage disks.The device can be a USB stick,compact flash,or SSD.Technically,it can also be installed onto a hard drive,but this is discouraged as that drive will then become unavailable for data storage.
FreeNAS 9.3 can be downloaded from http://www.freenas.org/download with version 9.3, FreeNAS must be installed using a menu-driven installer, as the ZFS boot partition is created during the installation. To perform an installation, download the .iso file and write it to either a CD or a USB stick.To burn the .iso file to CD, use a CD burning utility.The command which is used to burn the .iso file to a compact flash card or USB thumbdrive depends upon the operating system. This section demonstrates utilities for several operating systems.On a FreeBSD or Linux system, the dd command can be used to write the .iso file to an inserted USB thumb drive or compact flash device. Example 2.2a demonstrates writing the image to the first USB device (/dev/da0) on a FreeBSD system. Substitute the filename of your .iso file and the device name representing the device to write to on your system.Windows users will need to download a utility that can create a USB bootable image from the .iso file.This section will demonstrate how to use Win32DiskImager to burn the .iso file. When downloading Win32DiskImager, download the latest version that ends in -binary.zip and use 7-Zip to unzip its executable.Once installed, launch Win32DiskImager and use its 'browse' button to browse to the location of the .iso file. Insert a USB thumb drive and select its drive letter from the 'Device' drop-down menu. Click the 'Write' button and the image will be written to the USB thumb drive.With the installation media inserted, boot the system. This should load the FreeNAS installation's GRUB menu.

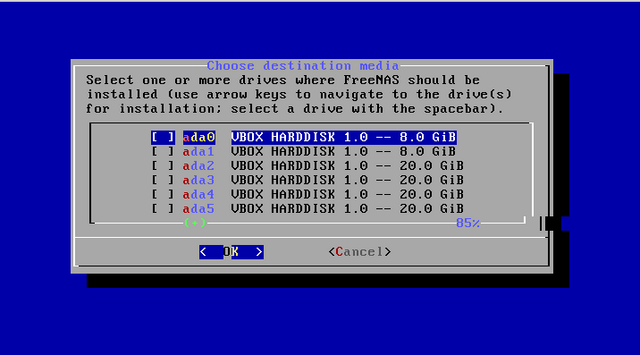
Press Enter to select the default option of '1 Install/Upgrade'. The next menu,will list all available drives, including any inserted USB thumb drives which will begin with da. In this example, the user is performing a test installation using VirtualBox and has created a 8 GB virtual disk to hold the operating system.

Use your arrow keys to highlight the USB, compact flash device, or virtual disk to install into and press the spacebar to select it. If you wish to mirror the boot device, arrow to the second device and press spacebar to select it as well. After making your selections, press Enter. FreeNAS will issue the warning,reminding you to not install the operating system onto a drive that is meant for storage.Press Enter to advance to the screen.
Setting a password is mandatory and the password can not be blank.Since this password provides access to the administrative GUI,it should be a hard-to-guess password.Input the password, press the down arrow key, and confirm the password. Then press Enter to start the installation.

Press Enter to return to the first menu.Highlight '3 Reboot System' and press Enter.If booting from CD,remove the CDROM.As the system reboots, make sure that the device you installed to is listed as the first boot entry in the BIOS so that the system will boot from it. FreeNAS should boot into the 'Console Setup' menu described in Initial Configuration Wizard.

When you boot into FreeNAS,the Console Setup, will appear at the end of the boot process. If you have access to the FreeNAS system's keyboard and monitor, this Console Setup menu can be used to administer the system should the administrative GUI become inaccessible.

Once the system has an IP address,input that address into a graphical web browser from a computer capable of accessing the network containing the FreeNAS system.You should be prompted to input the password for the root user.

Software PT1
Here is the main FreeNAS Graphical Configuration Menu.

Beginning with FreeNAS 9.3, a configuration wizard automatically starts the first time the FreeNAS GUI is accessed.This wizard walks you through the steps needed to quickly configure FreeNAS to start serving data over a network.
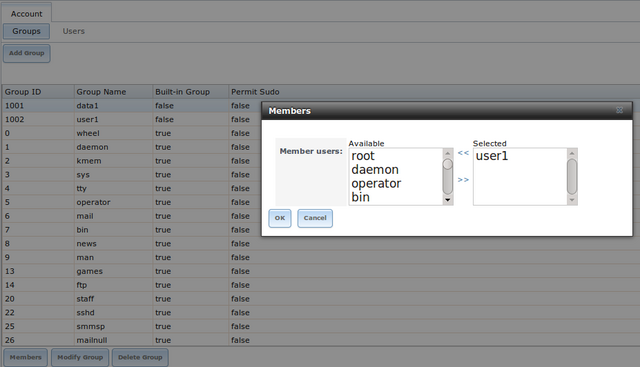
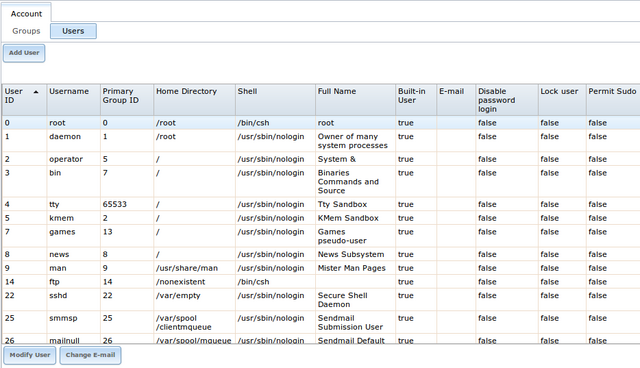
The Account Configuration section of the administrative GUI describes how to manually create and manage users and groups.
The network time protocol (NTP) is used to synchronize the time on the computers in a network. Accurate time is necessary for the successful operation of time sensitive applications such as Active Directory or other directory services. By default, FreeNAS is pre-configured to use three public NTP servers. If your network is using a directory service, ensure that the FreeNAS system and the server running the directory service have been configured to use the same NTP servers. To add a NTP server on the FreeNAS system, click NTP Servers ‣ Add NTP Server.

Beginning with version 9.3, FreeNAS supports a feature of ZFS known as multiple boot environments. With multiple boot environments, the process of updating the operating system becomes a low-risk operation as the updater automatically creates a snapshot of your current boot environment and adds it to the boot menu before applying the update. If the update fails, simply reboot the system and select the previous boot environment from the boot menu to instruct the system to go back to that system state.As seen below, two boot environments are created when FreeNAS is installed. The system will boot into the default boot environment and users can make their changes and update from this version. The other boot environment, named Initial-Install can be booted into if the system needs to be returned to a pristine, non-configured version of the installation. If you used the initial configuration wizard, a third boot environment called Wizard-date is also created indicating the date and time the wizard was run.

Advanced is shown.The configurable settings are summarized below.

Email Screen.

The system dataset can optionally be configured to also store the system log and Reporting information.If there are lots of log entries or reporting information, moving these to the system dataset will prevent /var/ on the device holding the operating system from filling up as /var/ has limited space.

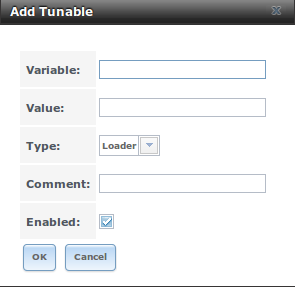
Tunables can be used to manage the following:
*FreeBSD sysctls: a sysctl(8) makes changes to the FreeBSD kernel running on a FreeNAS? system and can be used to tune the system.
*FreeBSD loaders: a loader is only loaded when a FreeBSD-based system boots and can be used to pass a parameter to the kernel or to load an additional kernel module such as a FreeBSD hardware driver.
*FreeBSD rc.conf options: rc.conf(5) is used to pass system configuration options to the system startup scripts as the system boots. Since FreeNAS has been optimized for storage, not all of the services mentioned in rc.conf(5) are available for configuration.
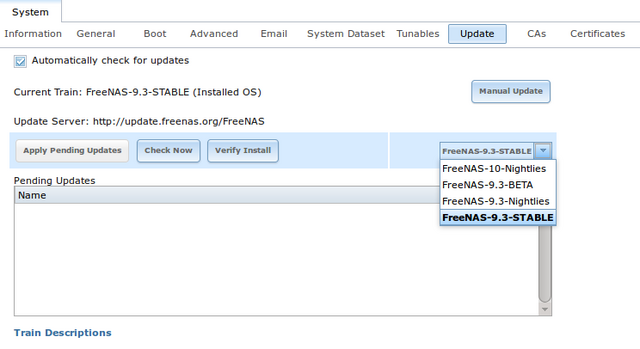
FreeNAS uses signed updates rather than point releases.This provides the FreeNAS administrator more flexibility in deciding when to upgrade the system in order to apply system patches or to add new drivers or features. It also allows the administrator to 'test drive' an upcoming release. Combined with boot environments, an administrator can try new features or apply system patches with the knowledge that they can revert to a previous version of the operating system, using the instructions in If Something Goes Wrong. Signed patches also mean that the administrator no longer has to manually download the GUI upgrade file and its associated checksum in order to perform an upgrade.
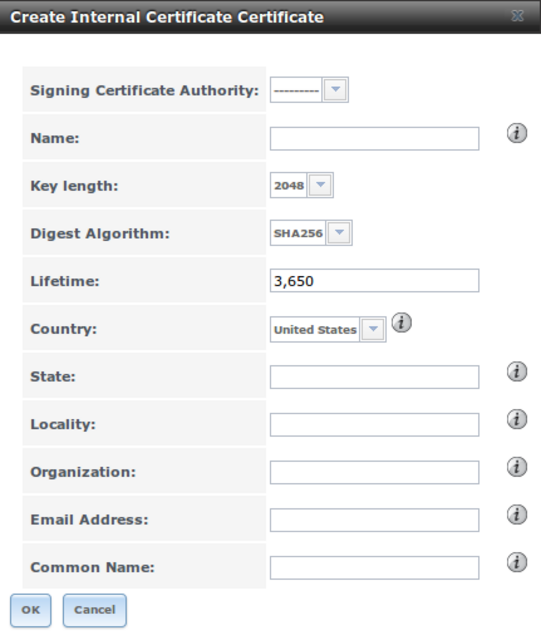
FreeNAS can act as a Certificate Authority (CA). If you plan to use SSL or TLS to encrypt any of the connections to the FreeNAS system, you will need to first create a CA, then either create or import the certificate to be used for encrypted connections. Once you do this, the certificate will appear in the drop-down menus for all the services that support SSL or TLS.
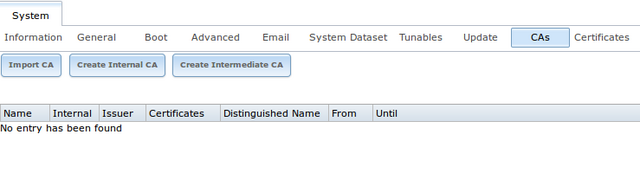
FreeNAS can import existing existing certificates, create new certificates, and issue certificate signing requests so that created certificates can be signed by the CA which was previously imported or created in CAs.

Software PT2
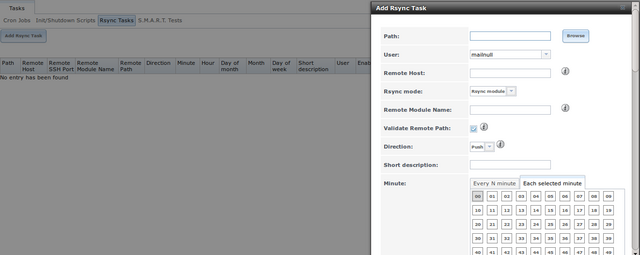
The Tasks section of the administrative GUI can be used to configure the following repetitive tasks:
*Cron Jobs: allows you to schedule a command or script to automatically execute at a specified time.
*Init/Shutdown Scripts: used to configure a command or script to automatically execute during system startup or shutdown.
*Rsync Tasks: allows you to schedule data synchronization to another system
*S.M.A.R.T. Tests: allows you to schedule how often disk tests occur.

The Network section of the administrative GUI contains the following components for viewing and configuring the FreeNAS system?s network settings:
*Global Configuration: used to to set non-interface specific network settings.
*Interfaces: used to configure a specified interface's network settings.
*IPMI: configures hardware side-band management should the appliance become unavailable through the graphical administrative interface.
*Link Aggregations: used to configure link aggregation and link failover.
*Network Summary: provides an overview of the current network settings.
*Static Routes: used to add static routes.
*VLANs: used to configure IEEE 802.1q tagging.


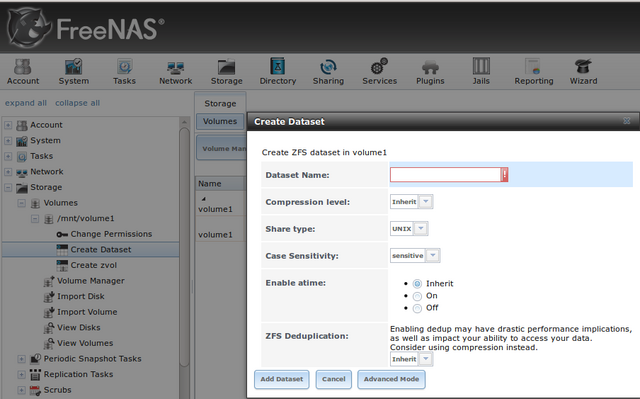
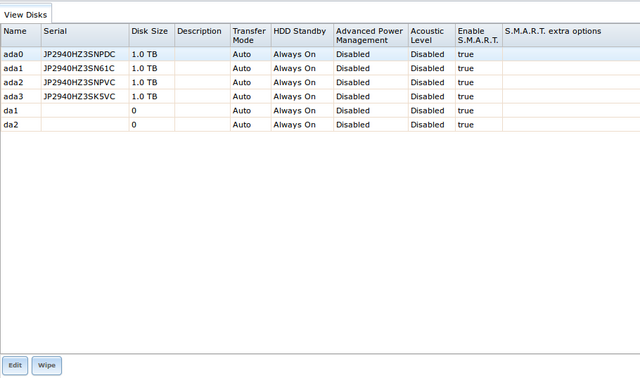
The Storage section of the graphical interface allows you to configure the following:
*Volumes: used to create and manage storage volumes.
*Periodic Snapshot Tasks: used to schedule the automatic creation of filesystem snapshots.
*Replication Tasks: used to schedule the replication of snapshots to a remote system.
*Scrubs: used to schedule scrubs as part of ongoing disk maintenance.
*Snapshots: used to manage local snapshots.
*VMware-Snapshot: is used to coordinate ZFS snapshots with a VWware datastore.


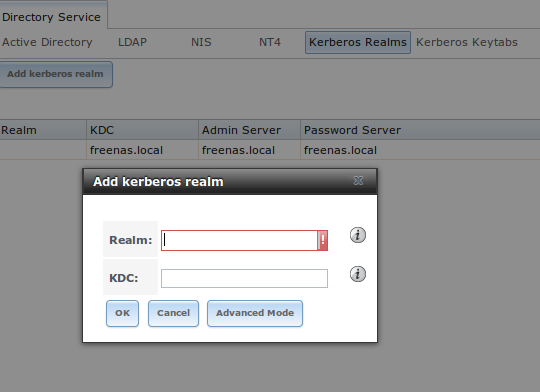
FreeNAS supports integration with the following directory services:
*Active Directory (for Windows 2000 and higher networks)
*LDAP
*NIS
*NT4 (for Windows networks older than Windows 2000)
It also supports Kerberos Realms and Kerberos Keytabs.

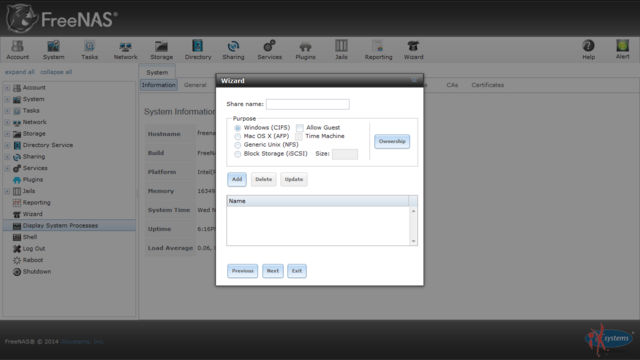
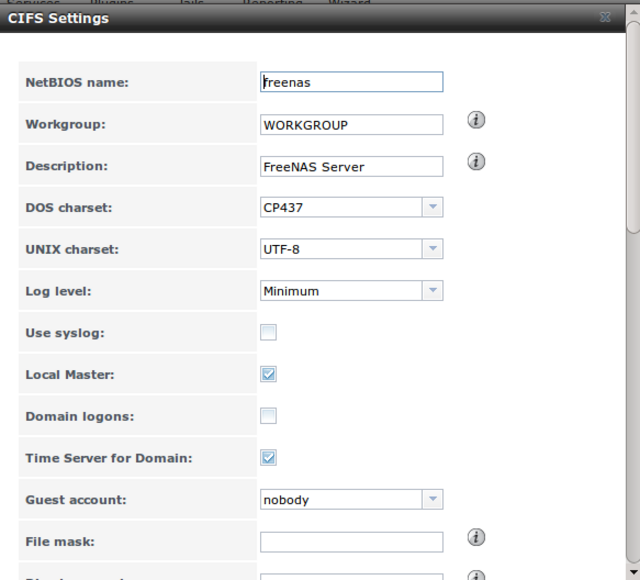
Once you have a volume, create at least one share so that the storage is accessible by the other computers in your network. The type of share you create depends upon the operating system(s) running in your network, your security requirements, and expectations for network transfer speeds.FreeNAS provides an Initial Configuration Wizard for creating shares. The Wizard will automatically create the correct type of dataset and permissions for the type of share, set the default permissions for the share type, and start the service needed by the share. It is recommended to use the Wizard to create shares, fine-tune the share settings using the instructions in the rest of this chapter if needed, then to fine-tune the default permissions from the client operating system to meet the requirements of the network.

FreeNAS supports integration with the following directory services:
*Active Directory (for Windows 2000 and higher networks)
*LDAP
*NIS
*NT4 (for Windows networks older than Windows 2000)
It also supports Kerberos Realms and Kerberos Keytabs.
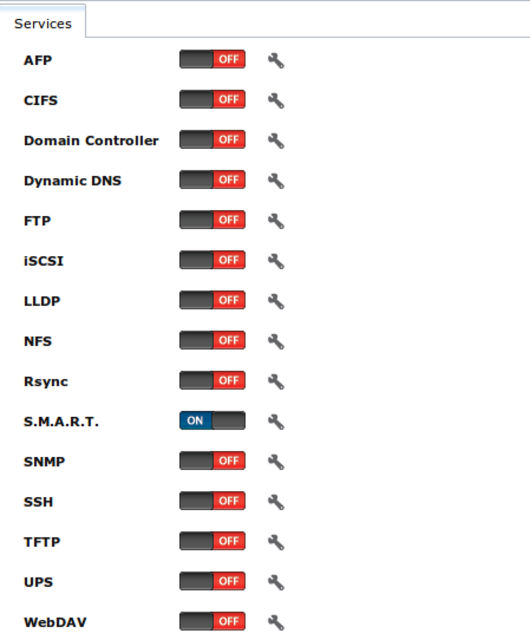
The Services section of the GUI allows you to configure, start, and stop the various services that ship with the FreeNAS system. FreeNAs supports the following built-in services:AFP,CIFS,Domain Controller,Dynamic DNS,FTP,iSCSI,LLDP,NFS,Rsync,S.M.A.R.T.,SNMP,SSH,T FTP,UPS,WebDAV.

FreeNAS introduced the ability to extend the built-in NAS services by providing a mechanism for installing additional software. This mechanism was known as the Plugins architecture and is based on FreeBSD jails and PC-BSD PBIs.This allowed users to install and configure additional applications once they had created and configured a plugins jail.FreeNAS 9.3 simplifies this procedure by providing two methods for software installation. The Plugins method, described in this section, is meant for users who prefer to browse for, install, and configure available software using the GUI. This method is very easy to use, but is limited in the amount of software that is available. Each application will automatically be installed into its own jail, meaning that this method may not be suitable for users who wish to run multiple applications within the same jail.The Jails method provides much more control over software installation but assumes that the user is comfortable working from the command line can and has a good understanding of networking basics and software installation on FreeBSD-based systems.


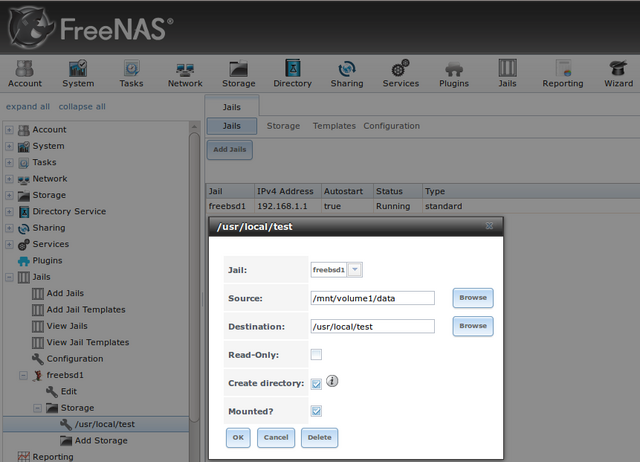
This section describes how to use 'Jails', which allows users who are comfortable using the command line to have more control over software installation and management. Any software installed using 'Jails' must be managed from the command line of the jail. If you prefer to use a GUI to manage software, use Plugins instead.While FreeNAS automatically creates a jail whenever a plugin is installed, it does not let the user install multiple plugins into the same jail.In contrast, using 'Jails' allows users to create as many jails as needed and to customize the operating system and installed software within each jail.In FreeNAS 9.3, two types of jails are supported:
*By default, a FreeBSD jail is created. This provides a very light-weight, operating system-level virtualization. Consider it as another independent instance of FreeBSD running on the same hardware, without all of the overhead usually associated with virtualization. The jail will install the FreeBSD software management utilities so that you can compile FreeBSD ports and install FreeBSD packages from the command line of the jail.
*A Virtualbox template is also provided. This template will install an instance of phpVirtualBox, which provides a web-based front-end to VirtualBox This can then be used to install any operating system and to use the software management tools provided by that operating system.

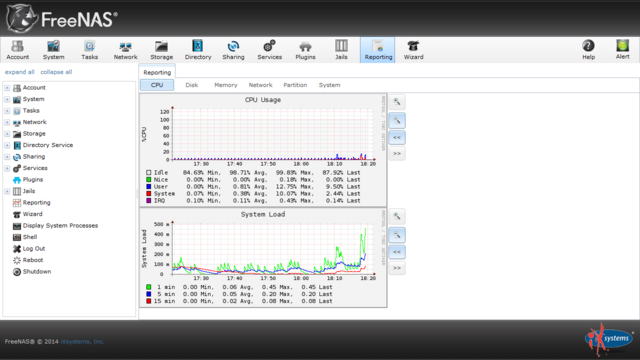
Reporting displays several graphs, as seen below.
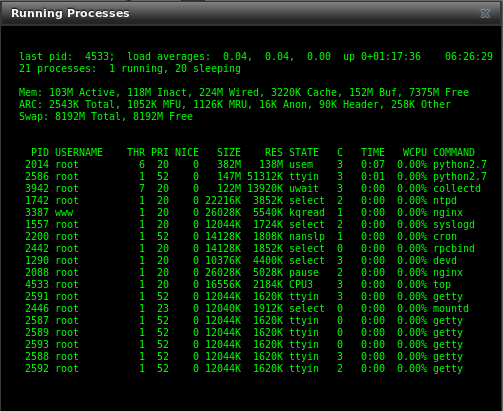
If you click "Display System Processes", a screen will open showing the output.The display will automatically refresh itself. Simply click the 'X' in the upper right corner to close the display when you are finished. Note that the display is read-only, meaning that you won't be able to issue a kill command within it.
The FreeNAS GUI provides a web shell, making it convenient to run command line tools from the web browser as the root user. The link to Shell is the fourth entry from the bottom of the menu tree.

FreeNAS provides an alert system to provide a visual warning of any conditions that require administrative attention.

FreeNAS provides a reST API which can be used as an alternate mechanism for remotely controlling a FreeNAS system.

FreeNAS Training and Certification
iXsystems provides a series of live online FreeNAS professional training courses. This initiative will give members of the FreeNAS community the opportunity to receive focused instruction on how to get the most out of FreeNAS and ZFS, and ultimately administer and maintain complex/commercial FreeNAS systems. The first available professional training, "Intro to FreeNAS and ZFS", walks students through the basic steps necessary to get a FreeNAS system up and sharing files. This class is free.The professional instructor(Linda Kateley) of these trainings has more than twenty years of experience with Solaris, the progenitor operating system of ZFS, and has spent more than ten years as a technical instructor, including teaching Fortune 500 companies how to use ZFS when it was first introduced. These in-depth professional trainings apply this expertise to FreeNAS and make it available around the world.

There are 4 classes that can be taken together or individually.The first class focuses on FreeNAS administration including disk management and upgrade process. Most of this class focuses on storage administration. We go into detail on ZFS features like caching, checksums, and replication. The second class in the series dives deep into the configuration of the different sharing protocols including simple and complex configuration. FreeNAS is an enterprise NAS utility, so we focus on how to ensure files are not viewed by anyone who doesn't have access and authentication. The third class focuses on how to build systems based on different use cases. Setting up RAID levels, caching and tunables are discussed for using the system for storage of virtual machines, workgroup file sharing and backup/archive. The fourth class is Advanced Admin. This class focuses on network and network services. We setup Active Directory. This class also teaches the use of utilities for debugging problems that may occur.The introductory price for the individual classes is $300. The regular price is 349 US Dollars which will go into effect April 1. We also have a introductory promotion for all 4 classes for 1000 US Dollars.Signups and schedules are available at www.freenas.org/freenas-zfs-training/. Contact linda@ixsystems.com for more info. Ask us about group or non-profit discounts. A video option will also be available later this year.ZFS is the powerful, modern filesystem at the heart of FreeNAS. More people use ZFS on FreeNAS than any other platform, and FreeNAS continues to lead the open source community in adoption of new ZFS features. Many of the features of ZFS, including the built-in software RAID, remote snapshot replication, and hybrid flash cache support benefit from planning by a knowledgeable administrator. FreeNAS professional training from an iXsystems professional instructor will give FreeNAS users the skills to design and administer a FreeNAS solution that uses the full potential of ZFS.
Test System & Methology
For throughput evaluation,every NAS product received one test transfer followed by at least three timed transfers.Each test file was sent to the Seagate 4TB NAS HDD (ST4000VN000) hard drives installed in the NAS for a timed NAS write test, and that same file was sent back to the RAM Disk in the test system to perform a NAS read test.Each test was repeated several times, the high and low values were discarded and the average of the remaining results was recorded and charted.

An interesting feature on the iXsystems FreeNAS Mini is the presence of two Gigabit LAN ports.The ports can be daisy-chained to achieve fast read/write transfers.More often than not, you would need additional hardware to attain these numbers.While high-end routers come with Gigabit LAN and WAN these days,the iXsystems FreeNAS Mini makes use of a technology called link aggregation,an IEEE 802.3ad standard through which two or more Ethernet ports can be used in parallel for increased throughput.To use link aggregation,you need to use a switch that conforms to the IEEE 802.3ad standard,connect the two LAN cables from the FreeNAS Mini to the switch,and select the IEEE 802.3ad Dynamic Link Aggregation setting from the control panel of the FreeNAS Mini.You also have to enable link aggregation on your switch.You can also tweak the firmware of your existing router,negating the need for a switch.For this I'm using a Intel i350-T4 NIC and a HP ProCurve 1810G-24.I also put on 4 OCZ AMD Radeon R7 (240GB) SSD's that connected by Raid 5 technology.

Peformance
Performance from the unit is strong.The iXsystems FreeNAS Mini manages to compare favorably against the other 4-bay solutions i have evaluated before. The benchmark numbers are provided in the graph below.

Multi-Client Performance & Link Aggregation
I put the FreeNAS Mini through some IOMeter tests with a CIFS share being accessed from up to 25 VMs simultaneously.The average response times are excellent and the maximum response times are kept well under control.Enabling link aggregation with all two ports allows maximum throughput numbers in the order of 400+ MBps for pure read workloads.
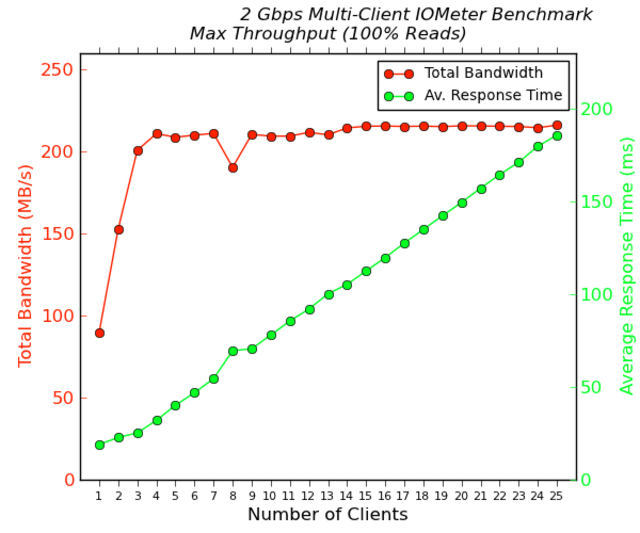


Link Aggregation doesn't mean a single PC can achieve a throughput of 200MB/s+. What it means is multiple users can access the FreeNAS Mini at the same time without having to all feed through a single Gigabit link.Theoretically more than one users could access the FreeNAS Mini at the same time and still max out their Gigabit Ethernet connection if the CPU was fast enough.

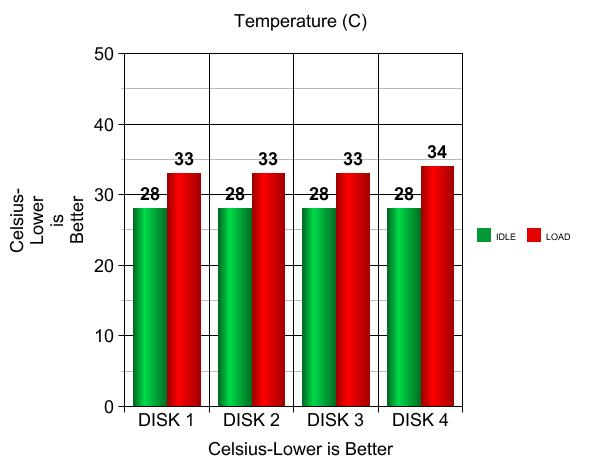
Noise,Power Consumption & Temperature
Not only does the iXsystems FreeNAS Mini perform well, it is also energy efficient while doing so.During full network throughput and with four HDDs installed, it only sapped 62.8 W, while it consumed 40 W in idle with the same configuration.Such low power consumption will keep electricity bills low even though NAS servers like the iXsystems FreeNAS Mini operate continuously (24/7).

In "real world" terms you would be hard pressed to hear the 120mm fan spinning at all.I didn't notice any change in fan noise levels when both drives were busy reading and writing data. The fan seems to lock to a specific speed and remain at that.

The large 120mm fan spins very slowly but still manages to produce a reasonably strong air flow to cool the four hard drives.My room was held at 22C ambient during the testing.
Conclusion
I'm happy to say that FreeNAS does a great job storing and sharing my files.Overall i was impressed with the performance of the 8-core processor.The 8-core Atom processor is able to handle complex, smaller data streams without suffering from dramatic performance losses and it outperforms my other Nas devices, which i have used in an office environment now for a very long time.Like almost all of today's higher-end NAS devices the FreeNAS Mini supports Link Aggregation and this is an excellent feature that can boost read and write performance. Power consumption of the unit is noteworthy and will not inflict noticeable damage to an electric bill, consuming between 22 and 40 watts most of the time with all drive bays populated. The inclusion of a high grade 120mm ADDA fan ensures that noise emissions are never a concern.I highly recommend the FreeNAS Mini for a demanding home or small business environment.It is capable of very quick data transfer speeds, doesn't drain a lot of power at the socket and is whisper quiet.If we look at the motherboard on paper it makes for interesting reading, and that functionality comes across as positive, however there are a couple of misses.The lack of USB 3.0 might be a cause for concern should a user need to transfer a sizable amount of data that way.The motherboard offers a possibility of a dual NAS/HTPC combination in the home, however the lack of onboard audio means that other methods will have to be used in order to do the HTPC part.FreeNAS is a popular FreeBSD-based operating system for network-attached storage (NAS) especially if you love to use ZFS as your filesystem.Thanks to the easy-to-use web interface, you don't have to know anything about the FreeBSD base under the hood to share your files.First of all FreeNAS provides a much greater set of features than typical NAS systems on the retail market offer.Secondly building the system yourself allows you to customize the hardware to meet the needs of your environment.FreeNAS supports sharing your files using FTP, NFS, CIFS (Samba), AFP, rsync, iSCSI, and so on, and it also offers software multipler RAID modes. With many advanced features, including Oracle's ZFS file system, it's the perfect companion to store files for your Linux desktop computers in a central place.The web interface gives access to a plethora of information and settings.iXsystems has turned FreeNAS 9.3 into a modern, modular and future-proof NAS operating system. The new web interface is really easy-to-use without hiding the advanced features.Jails! Plugins Owncloud, plex, sickbeard, transmission, and more! Django! Samba4! Domain controller!Shiny!Perhaps the best single feature in FreeNAS is its optional use of the zettabyte file system (ZFS), first developed by Sun and now actively maintained as a FreeBSD project.A ZFS system can hold a 16-exabyte file (about 18 million terabytes) or 200 million files. Even in a Big Data world, capacity isn't going to be a problem with ZFS.
In the end with you'll have a much more powerful and versatile storage system.While the FreeNAS Mini seen here today does lack the capability to output video straight to the HDTV via HDMI,it does offer a pure storage solution.From within the software, the FreeNAS Mini unit opens up a host of capabilities such as a DLNA media server.I heartily recommend FreeNAS if you are looking for a free solution for a file server. You will need to know some basic technical information about your home network, like your IP address setup, and you will need to have a multiple port router or switch on your home network, but beyond that, it is relatively easy to manage and expand.The new FreeNAS Mini is available in the following capacities and prices: 16TB (4 x 4TB Drives at $1895), 12TB (4 x 3TB Drives at $1695), 8TB (4 x 2TB Drives at $1495), 4TB (4 x 1TB Drives at $1295), and a bare-bones model with no included drives at $995.

Last edited by testman78; 08-10-2021 at 08:05 AM.
Reason: iXsystems FreeNAS Mini
 Posting Permissions
- You may not post new threads
- You may not post replies
- You may not post attachments
- You may not edit your posts
-
Forum Rules


 Reply With Quote
Bookmarks