-
Raijintek Ophion M EVO
Introduction
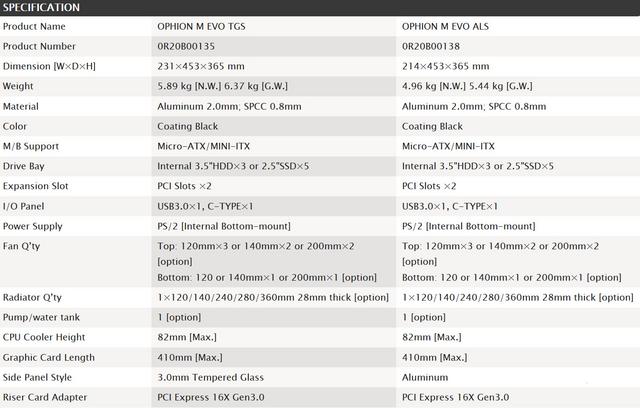
Today Raijintek brings us the Raijintek Ophion M EVO which is a big step up from the Ophion EVO as it supports motherboards up to Micro-ATX. Raijintek has actually taken the time to re-tool the case and make it wider. They have created also some pretty cool features for the case as well. The two versions that Raijintek includes are differentiated by their exclusive side panels, since the TGS version will include two tempered glass panels of 3 mm , providing greater thickness to the set, while the ALS version will incorporate traditional aluminum panels and therefore It will have a smaller width. In the same way, both versions are manufactured in full black matt aluminum of 2 mm and in SPCC steel of 0.8 mm. The weights vary logically, since in the tempered glass version we will have 5.89 Kg , while in the ALS full aluminum version this will be 4.96 Kg.

We recevied the non-windowed version of the case.
Packaging & Contents
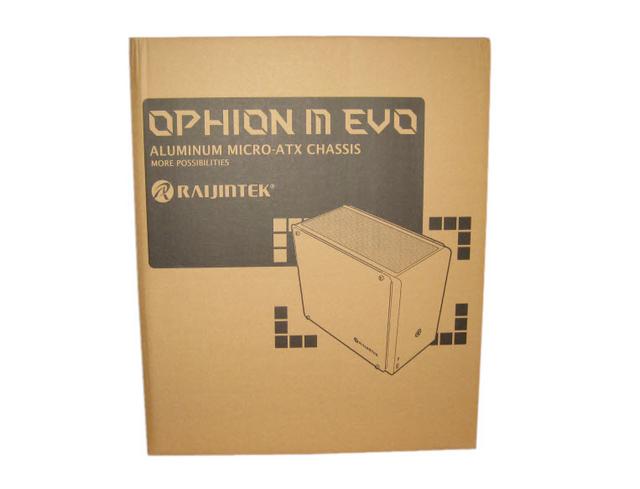
The packaging for the Ophion M Evo was simple and to the point. It comes in a brown box with black print and the front has a drawing of the case.
The back shows all the sides of the Ophion Μ Evo so that potential buyers know what they're getting.
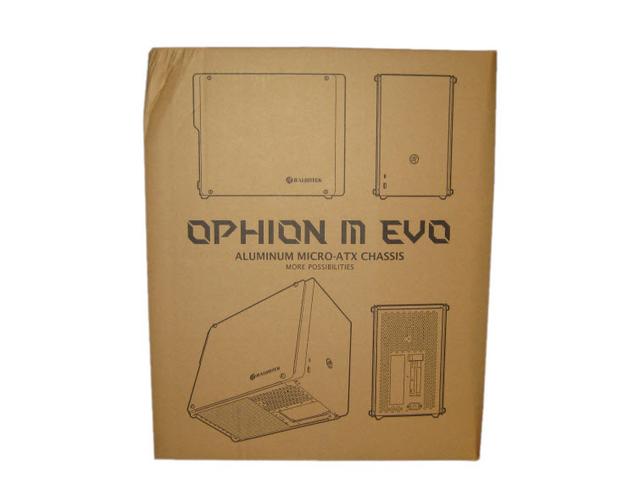
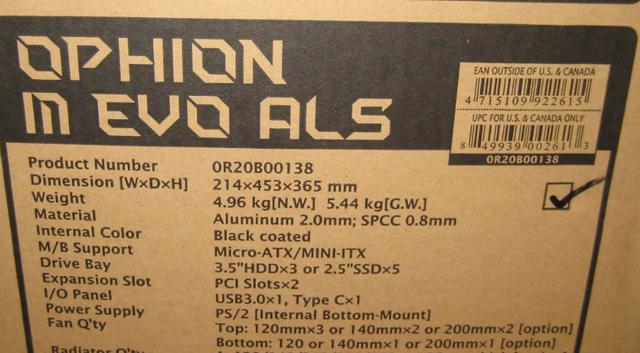
One side shows an isometric back/bottom shot, and the other side has a table of specifications.


Notice the box icon checked on the right down corner? That is the ALS version and thus this is our unit.
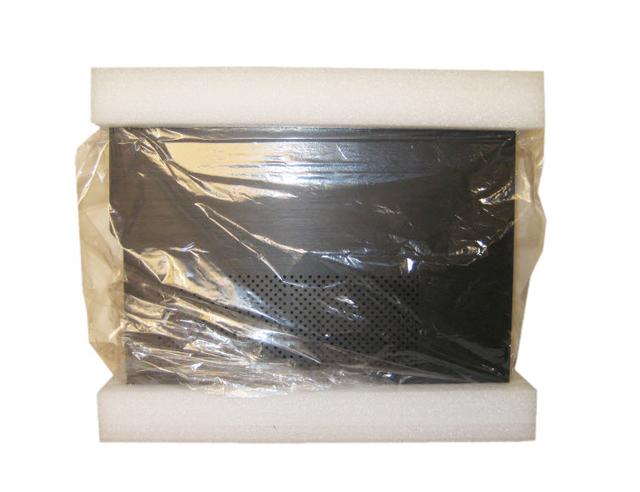
Inside of the box, you have the case wrapped up in plastic and then two foam panels that hold the case up away from all of the edges and absorb some shock from when the box gets tossed around.
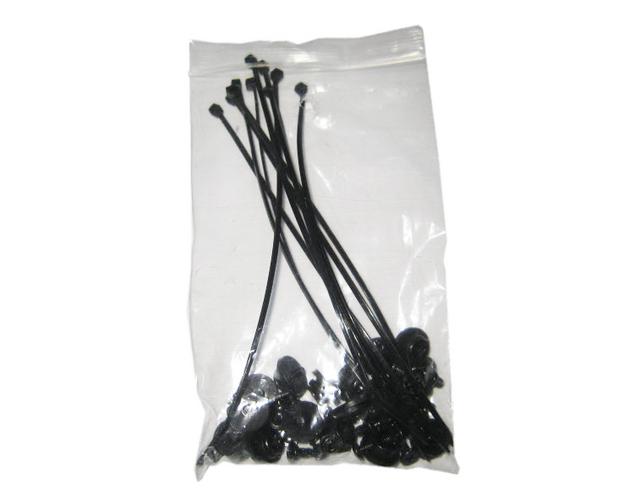
Then you get a bag filled with the case screws, rubber hard drive mounts, and zip ties.
Also inside you do get an instruction manual.

A Closer Look
The case is a mid-tower and has the official dimensions of 365 x 231 x 453 mm. As I mentioned earlier we recevied the non-windowed version of the case, but there is of course a version that comes with a window. The Ophion M EVO ALS sports clean, straight lines without any fancy lighting elements or cut outs, which makes the chassis timeless and yet suitable to many different scenarios. Both sides of the exterior are identical with the main feature being aluminum panels.
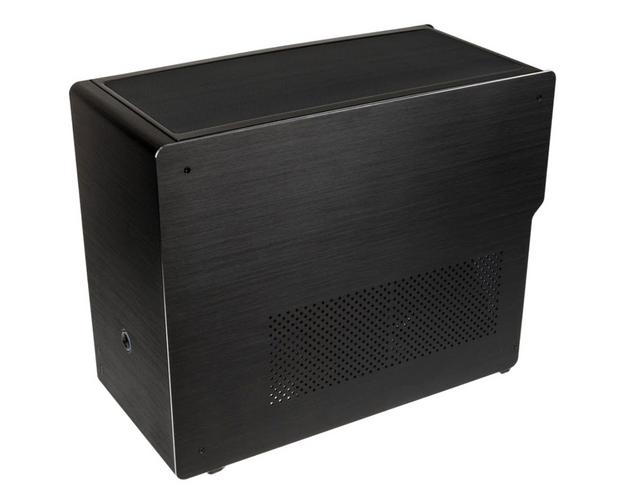
The aluminum side panels measure in at just under 1.9mm thick. The two panels, as well as the front curved portion are made from the same thickness material. These panels are sturdy. Τhey are made of very high-quality aluminum and fit perfectly on case. Each of these panels is vented, which is absolutely going to be required to keep a system cool in these cramped quarters.

The front of the case makes use of a curved aluminum panel with a brushed finish.

There are two USB 3.0 connections with one being Type-A and one Type-C. The power button features Raijintek's "R" logo on top of translucent plastic so that it stands out when the LED is on. The button has a soft feedback when pressed. I'd say that the front panel looks great and is pretty minimal

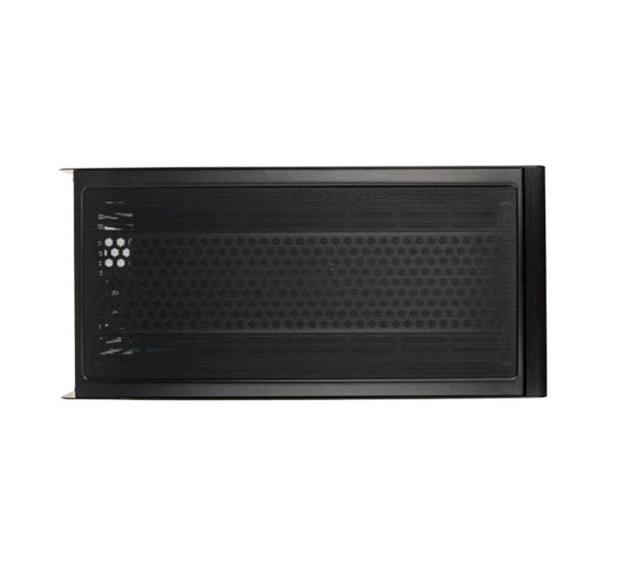
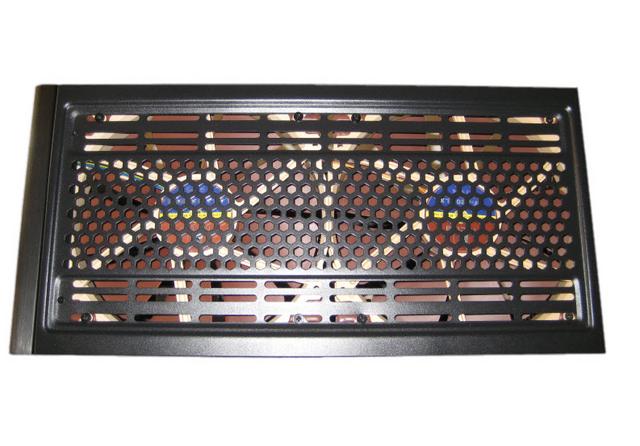
Τhe top doesn't have an aluminum panel and is part of the steel frame. With the filter removed, we can see there are ventilation holes spanning the entire top of the case with various mounting positions for fans and radiators.
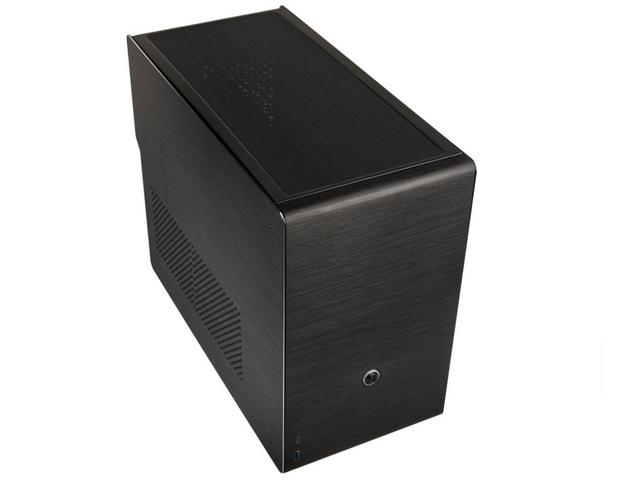
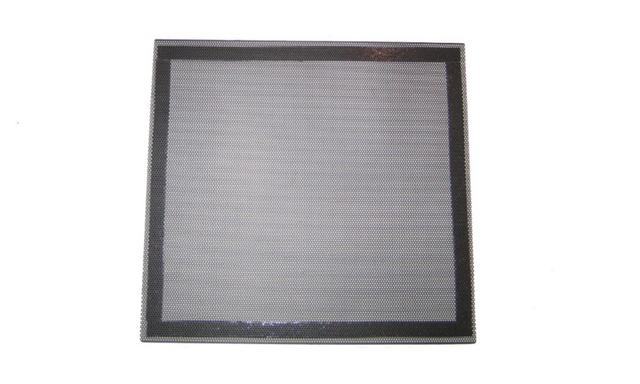
A large magnetic dust filter covers the top of the case and is easy to remove and replace. Such a filter prevents passive dust accumulation. Dust that enters your system via gravity and regular airflow once your system is powered down. Plus, it smooths out the aesthetics!

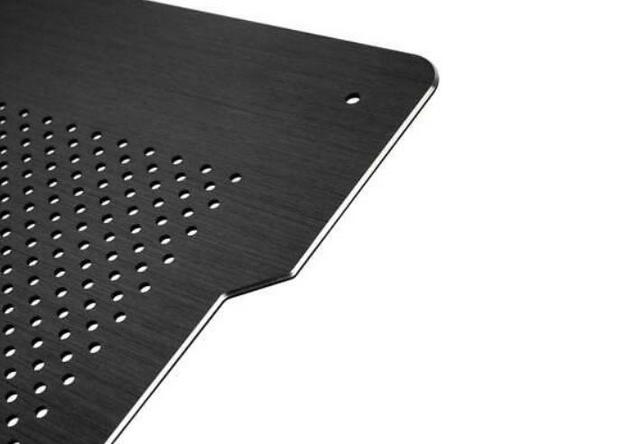
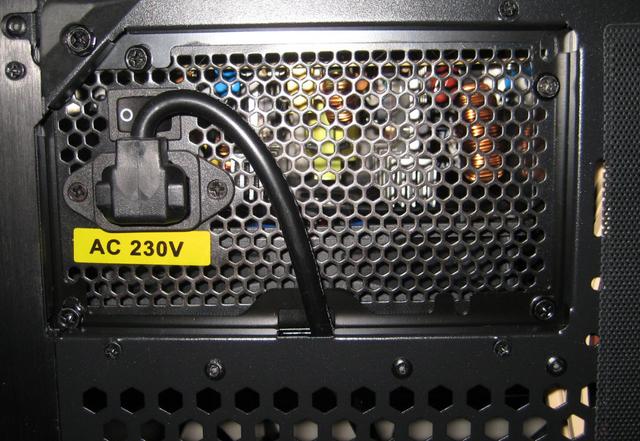
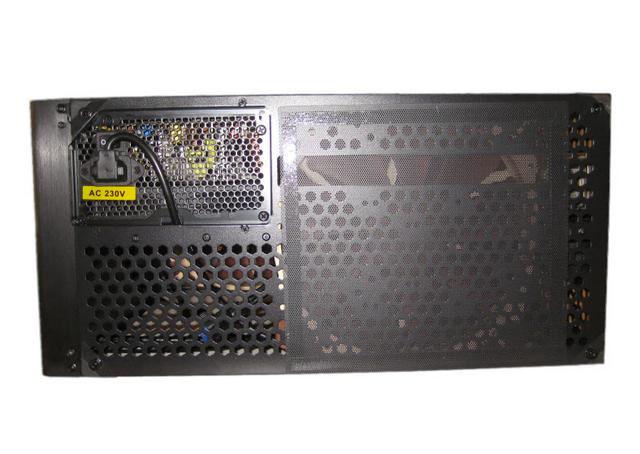
The base also has a smaller dust filter, but there are a few areas that are not catered for with regards to dust protection. Τhe PSU mount is vertical with the base of the PSU facing the bottom of the floor and an extension cable connecting to the PSU then running to a standard kettle lead port on the rear of the case. The bottom of the case offers a storage mount with an optional dual 3.5/2.5-inch Discs, and the enclosure sits on four rubbery feet.
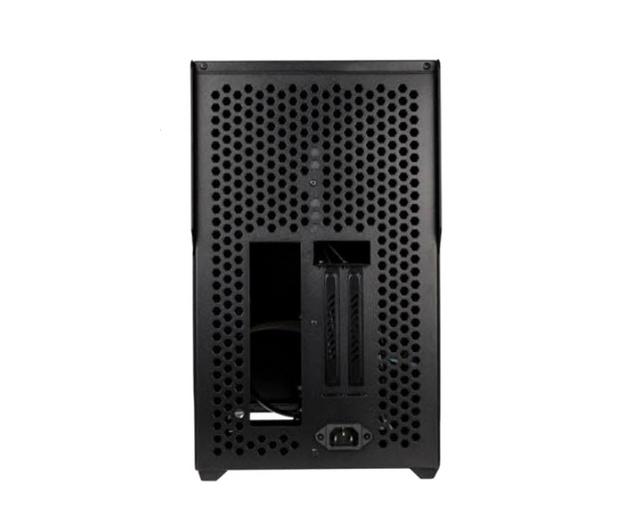
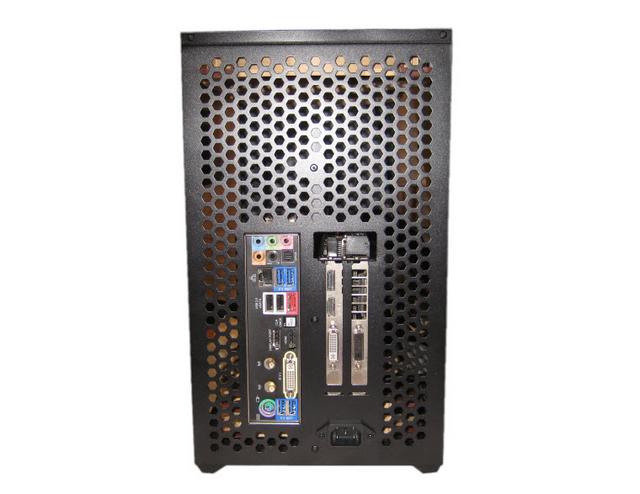
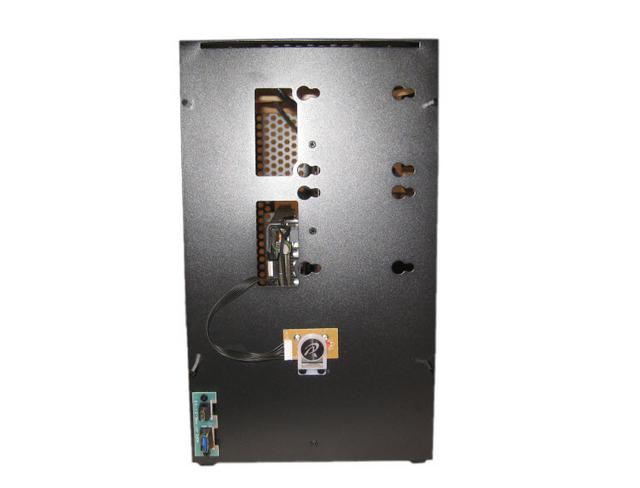
The back of the case has the standard cutouts for the motherboard rear I/O, GPU outputs, and a male C14 power port. There are hexagonal ventilation holes covering the rest of the back panel.
A Closer Look-Inside
Step one in building with any computer case: remove the side panels! These aluminum sides are each connected with two screws on the bottom and two screws on the top. The screws are an interesting addition, but do make the case feel quite solid when it is assembled.
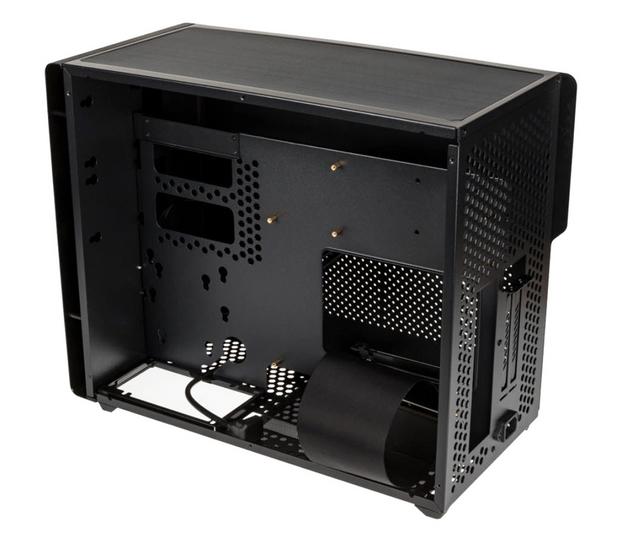
After removing both side panels, we first look at the left side. Inside the Ophion M EVO features a dual-chamber design. This is the chamber intended for the graphics card. The PCIe riser cable is threaded underneath the motherboard to the other side of the case, with the mount for the graphics card located low enough to allow monster-wide cards to be installed with the mount itself acting as a support for the card along with the expansion slots. The riser hard mounts to the case, adding a second point of rigidity to the card mounting, meaning that the rear bracket alone isn’t responsible for holding an expansion card.

In addition to the graphics card connector, here are the extension cable for the power supply and the cables for the front panel.
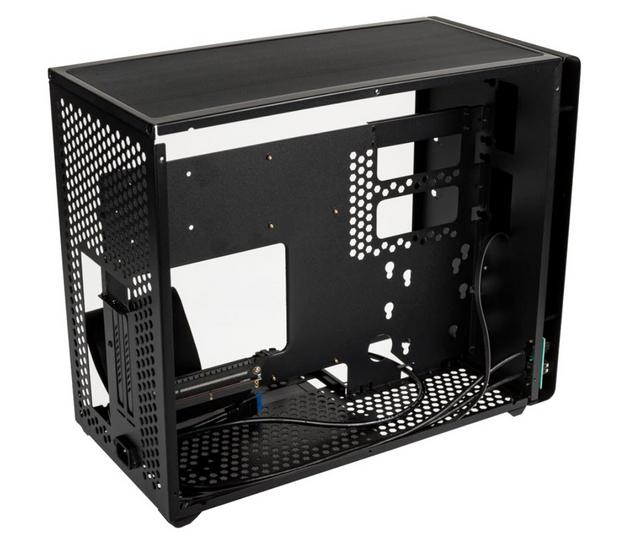
On this side the motherboard and ATX power supply are attached, and you will notice the PCI Express riser card cable already installed. The flat cable you see here is the front panel header stuff – power button, drive LED, power LED. Disappointingly, the cable ends in individual headers.

The PSU mounting point is at the front of the case so that the cables are located on top of the PSU when installed. This installation orientation is the reasoning behind the right-angled C14 extension cable routed from the PSU to the back of the case. At the bottom of the case toward the back is where fan, or drives can be mounted.

The motherboard mounting tray has a large cutout for easier access to the back of the motherboard, or that’s what one would assume…until we get to the next part. We can see the empty space at the top for a radiator and fans. Hiding between the main chassis and the front panel is the front IO – leaving the interior of the chassis clean and well organised.
Building the System
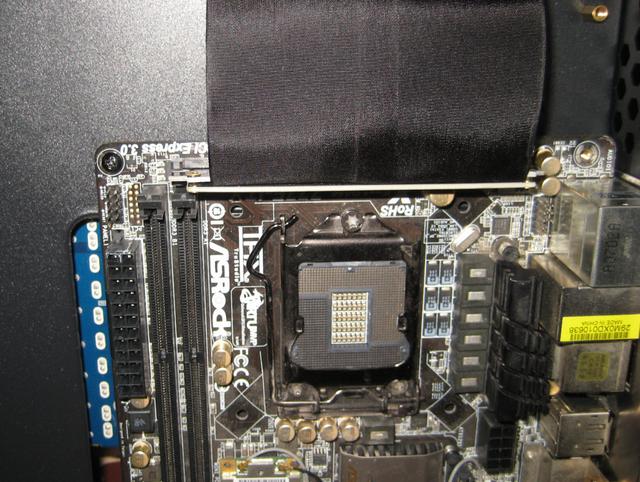
A build like this is challenging because you need to plan ahead especially to be careful what components you will use and triple check the compatibility. After that is out of the way, the same rule applies to foresee which route to undertake. We suggest to start to install the motherboard first. Installing the motherboard is done by traditional means, with the use of screws and spacers. The motherboard is installed in an inverted orientation, which actually works perfectly for managing cables with so little space, given the placement of motherboard power connectors in relation to the PSU.
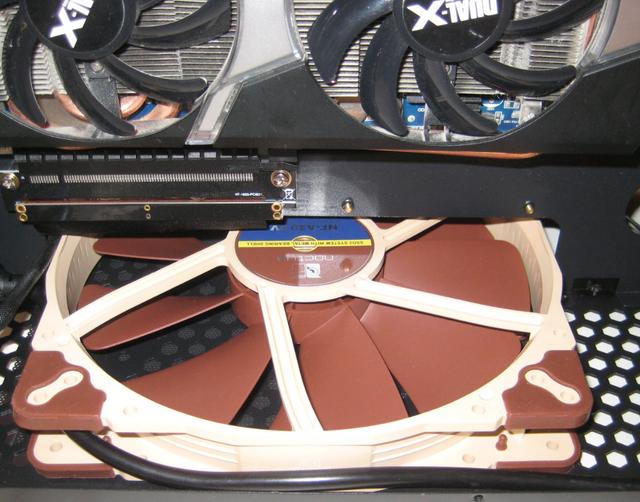
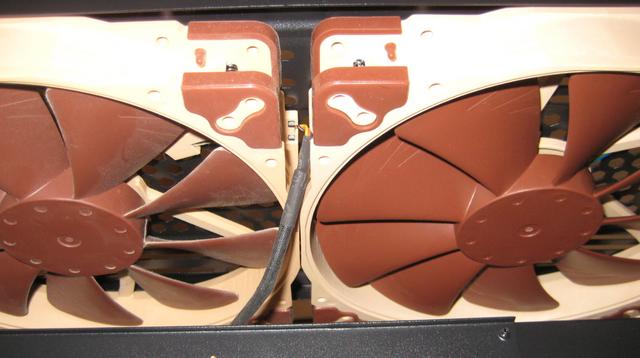
The cooling options go through three fans of 12 cm and one of equal size in the ceiling and floor , two of 14 cm in ceiling and another one in the floor or finally 2 fans of 20 cm in ceiling and another one in the floor. On the other hand, liquid cooling options are summarized in 5 options for radiators and only in its ceiling: 120 mm, 140 mm, 240 mm, 280 mm and 360 mm, where the maximum thickness is 28mm. It also has mountinh holes and enough space for pump and reservoir as well.
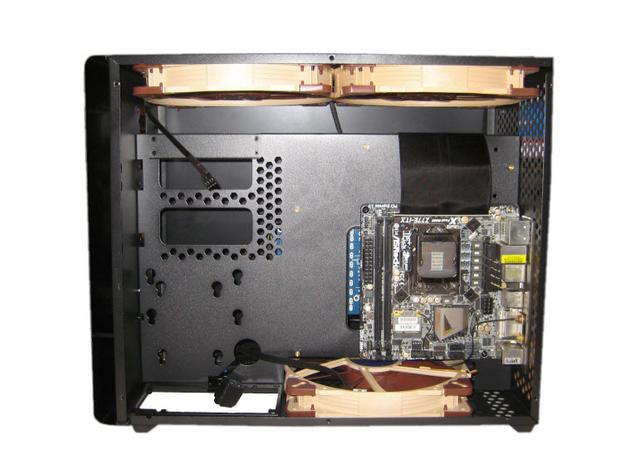
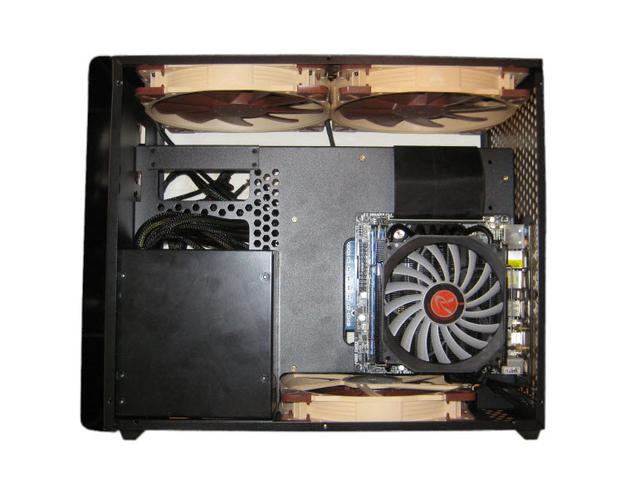
CPU cooler height is limited to 82 mm, which still allows for quite a few options from various vendors. This Raijintek Pallas 120 RGB (which I reviewed before) comes under the limit at 68mm. Other options will fit as well, and finding a good cooler for your CPU under $50 should be simple with this amount of clearance.

My ATX power supply is a non modular design but I had no trouble connecting everything. Using an ATX power supply would make things more difficult, especially longer length units. An SFX or full modular design PSU would make things easier. Quick tip: install the cables into the PSU first before you put it into the case.

I was concerned about PSU fitting properly, and while it was a little snug it did work with the drive bracket installed. Don’t forget to turn on the power supply because later you can’t access the button anymore without turning the case upside down.
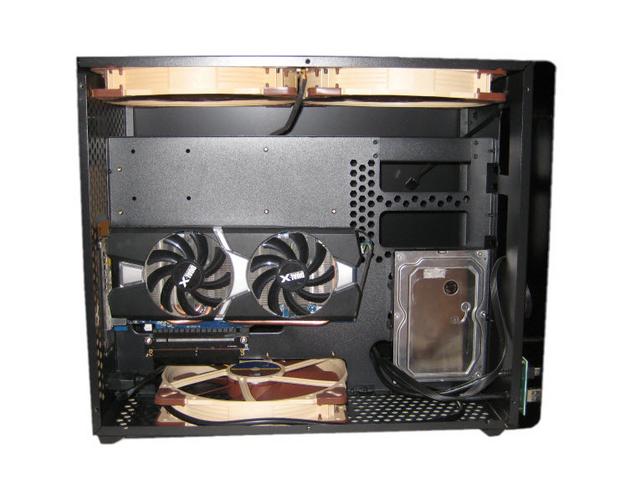
Looking at the other side we see the largest GPU I had on hand, an aftermarket AMD Radeon R9 280 from Sapphire that features a longer (and taller) cooler than the reference card. The 410mm GPU length limit is more than sufficient, and I had a lot more vertical space than I needed as well.
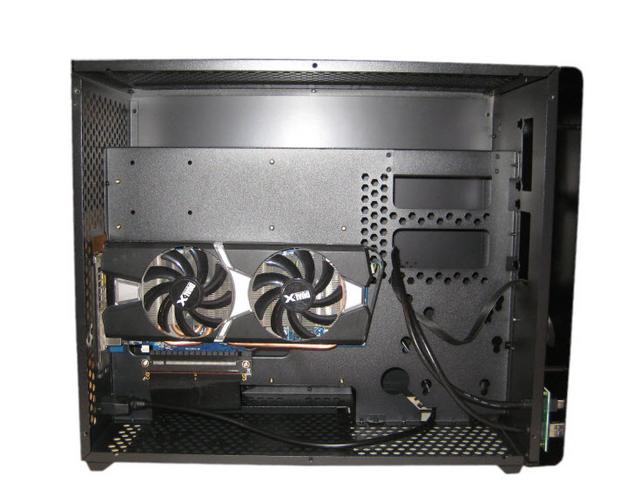
It should be possible to accommodate graphics cards with up to three-slot coolers in the case.
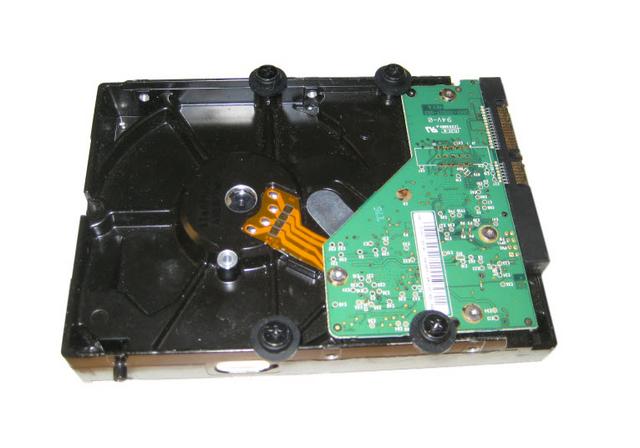
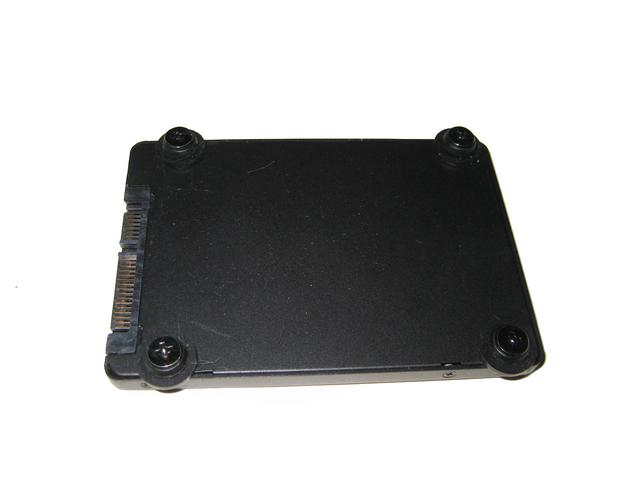
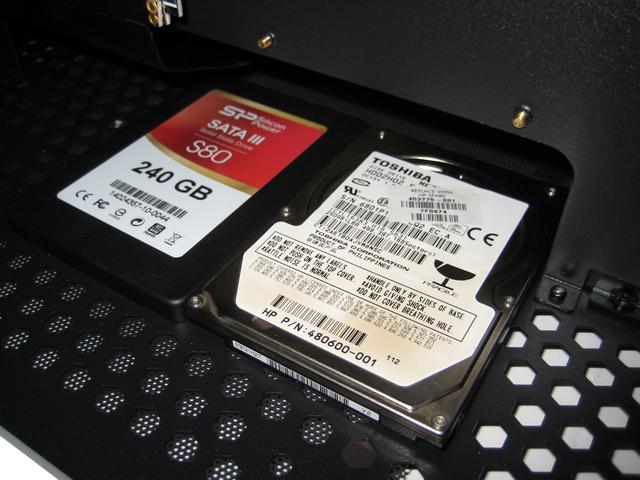
A SSD or HDD can be installed on this side of the case if a shorter VGA card is used. To do so, simply screw the rubber rings onto the drive.


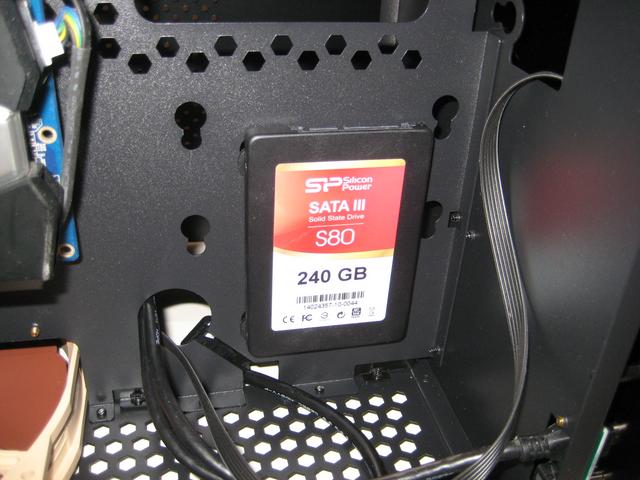
Storage mounts are dotted around all over the place, with a dual 2.5" mount in the front of the case, revealed if you pop off the front panel. With the four screws (two at the top, two underneath) removed from the front panel, it slides off easily. The front of the case offers two cutouts for wire management.
To do so, simply screw the rubber rings onto the drive.
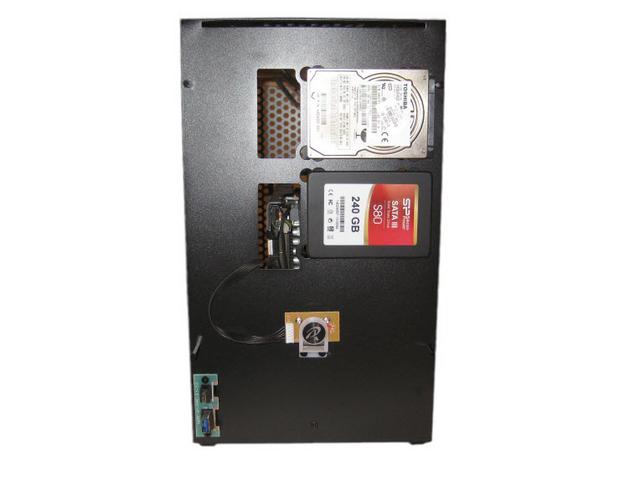
If needed, two 3.5/2.5-inch drives could be mounted directly to the floor of the case.
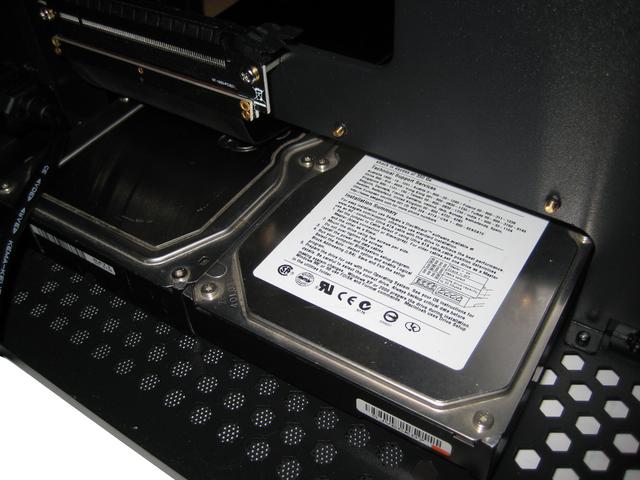
With everything in place, and all the panels snap into place easily, the system does not look any different than in the very first shot we took. Turn it on and the power button's blue LED will light up to let you know your system is up and running. Besides that, there is no visual reference or lighting element in the front. The rear, very clean, also offers readily available access to all installed elements, with the PSU plug as far away from everything else as possible. Bottom and top give you a bit of insight into the interior of the chassis.You can clearly see the 200mm fan doing its job. I assembled what is only a mid-range system by current standards, but nothing would prevent a build with most powerful micro ATX/mini-ITX platform and processor, and GPUs up to the top of the line from AMD or NVIDIA. SFX power supplies have now reached 800W, which is overkill for a single-GPU system anyhow, and my 750W PSU would power just about anything I could fit in here. Next we'll check out thermal performance.
Test System & Methology
Test System:
Processor: AMD Ryzen 5 1400 (Retail) - Turbo off
Motherboard:MSI B350M Mortar
Cpu Cooler: Raijintek Pallas 120 RGB
Memory: 2x8GB Corsair Vengeance LPX @ 2666MHz
Graphics Card: MSI Radeon RX 580 Gaming X
Power Supply: Antec HCG 750W
Chassis: DimasTech Bench/Test Table EasyXL
Boot Drive: Ocz Vector
Storage Drive: Corsair MP500 240GB M.2 NVMe

Software:
Windows 10 Pro x64
CoreTemp
CPUID HW Monitor 1.23
CPUID CPU-Z 1.65
GPU-Z
Prime95
FurMark
I am testing the Raijintek Ophion M EVO performance as follows:
Room temperature is kept at 22C throughout my tests.
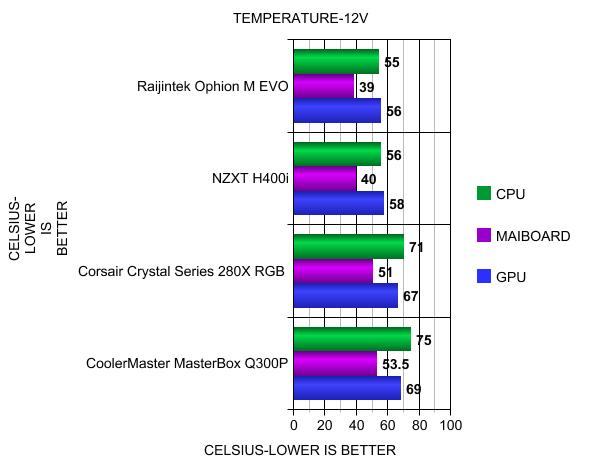
We disable the motherboard's onboard CPU fan control and all CPU power management features. The CPU fan is fixed at 7V with an adaptor while the graphics card fan is locked at 70 percent speed using MSI Afterburner. The system is loaded using Prime95 25.11 and Unigine's Heaven 4.0 benchmark. We use CoreTemp and GPU-Z to monitor the temperatures, taking the maximum values after 15 minutes - enough time for the readings to plateau. Raijintek's Ophion M EVO tested with 2x120mm MACULA 12 Rainbow RGB fans installed at the top and 1x120mm MACULA 12 Rainbow RGB fan at the bottom.
Results - Temperature
We begin with a look at 7V temperatures, which were very good thanks to the excellent ventilation. With the top, back, sides, and bottom of the case vented there should not be an issue keeping components cool even under these cramped conditions.
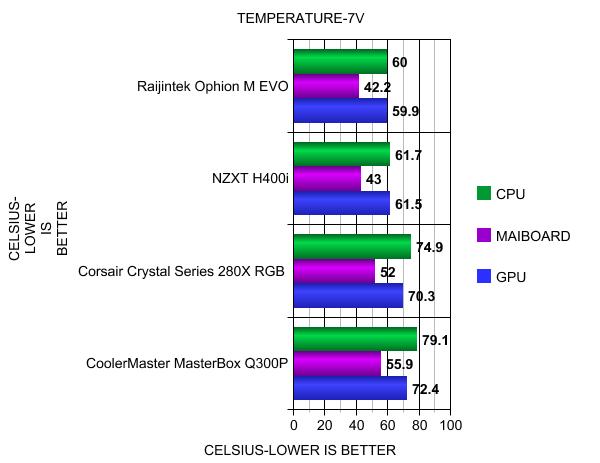
The Raijintek Ophion M EVO is clearly ahead of the other three tested mATX housings and is therefore more suitable for strong systems.
Results - Noise Level
Due to the relatively open design, the volume in the Raijintek Ophion M EVO is slightly higher than two out of three tested mATX enclosures.

Conclusion
The Raijintek Ophion M EVO is an amazing chassis and looked at on its own deserves a full 10/10. Numerous big case brands have tried creating the perfect Micro-ATX chassis to fit as much as possible into as little space as possible and here is Raijintek out of the gate that pretty much leaves absolutely nothing to be desired. The flexibility and choice presented within the Ophion M EVO are amazing, as are the ease of assembly, quality, and its cable-management potential. It’s evident that hardware enthusiasts note some key similarities between Raijintek’s Ophion M EVO and DAN Cases A4. There certainly are indeed some likenesses, but Raijintek seem to have improved on this popular chassis both in features and more importantly, on price($169). Made from a mix of aluminium, steel and tempered glass, offering what could be a value for money focused chassis. Finished in a black anodising, with a diamond-cut style edge, the Ophion M EVO is going for a premium look, not a particularly flashy one. Leave that to the lighting, I figure. The use of thick aluminium panels means this chassis is very strong and well made. It’s not as light as you might think though, aluminium may not be heavy, but there’s plenty of it here to make up the weight. Everything screws together snug, everything fits with ease, and the overall layout and ergonomics work really well. A lot of thought has gone into the design here, despite looking rather simplistic on the exterior. Both side panels are perforated to allow for air to enter the compact chassis, whether passive or with the help of fans. Semi-open design means the system is louder than in an otherwise “closed” case. This variant of the Ophion line is focused on watercooling, be it custom loop(it has mounting points and enough space for pump and reservoir) or a closed loop cooler. Inside, the chassis can accommodate a range of different hardware. Although we are limited to 82mm with the CPU cooler we do have support for 360mm liquid cooling and for graphics cards up to 410mm – covering all options out there on the market. I do like the the fact the PCIe cable is pre-installed, and the hidden 2.5″ drive mounts. I recorded temperatures only slightly above bench testing numbers, a sign of the great airflow design of the chassis. Even though Raijintek Ophion M EVO is a fine example of a premium Mini-ITX chassis, there are some improvements which can be made. A removable top panel to make installation of fans or AIO cooler as easy as possible. There is also lack of out-of-sight stowage for cables, so keeping cables to a minimum either by using a modular PSU or M.2 SSDs is important.

The moment I say this chassis, I knew I was going to love it. I know you shouldn’t judge a book by its cover, or a chassis by its external look, or whatever. However, I made up my mind pretty quick with this one. That’s easier to do when there’s hardly anything to it, what you see is what you get. The Raijintek Ophion M EVO is the perfect high-end Micro ATX chassis, and I am sure other brands will take notice! Passion, vision and craftsmanship are a universal language. Raijintek, we salute you and thank you for this case!

Last edited by testman78; 04-30-2020 at 08:59 AM.
 Posting Permissions
- You may not post new threads
- You may not post replies
- You may not post attachments
- You may not edit your posts
-
Forum Rules


 Reply With Quote
Bookmarks