-
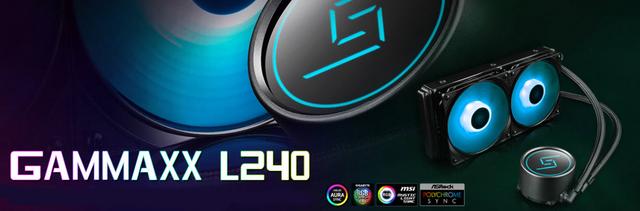
Deepcool Gammaxx L240
Introduction
In today's review, I take a good look at the Deepcool Gammaxx L240. House Gammaxx is a great clan of Deepcool, ruling a vast territory of CPU coolers. From this noble family, many have earned their fame through battles of performances and prices, such as Gammaxx 400 and Gammaxx GT. In the past few years, more and more liquid coolers have been taking the stage, yet not so many enthusiasts are lucky enough to own one. To allow everyone to enjoy liquid cooling, the first liquid cooler of the House, Gammaxx L240 is finally ready to serve the world, after years of cultivation. The 240mm radiator self-contained solution is the first in the new series, sporting a new design and of course, RGB LEDs.
The Gammaxx L240 supports Intel LGA 115X, as well as LGA20XX sockets. Furthermore, it also supports LGA1366 (if you happen to still have one of these around). For AMD users, it is also readily compatible with the current AM4 socket, along with the previous generation AM3+/AM3/AM2+/AM2/FM2+/FM2/FM1. The absence of AMD Threadripper support is understandable considering how large its IHS coverage requirements are. Which is basically more than twice that of a mainstream CPU.


Packaging & Contents
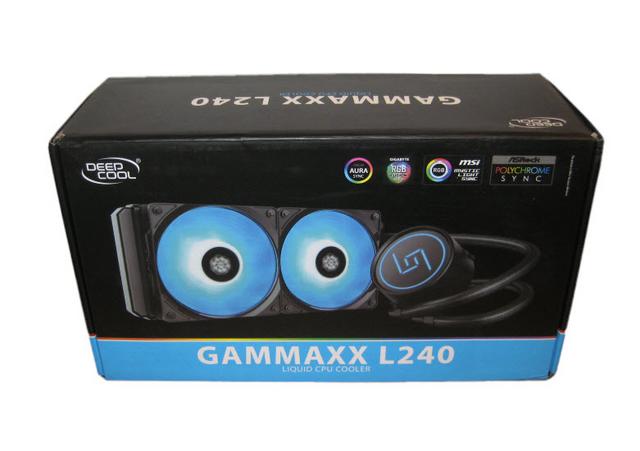
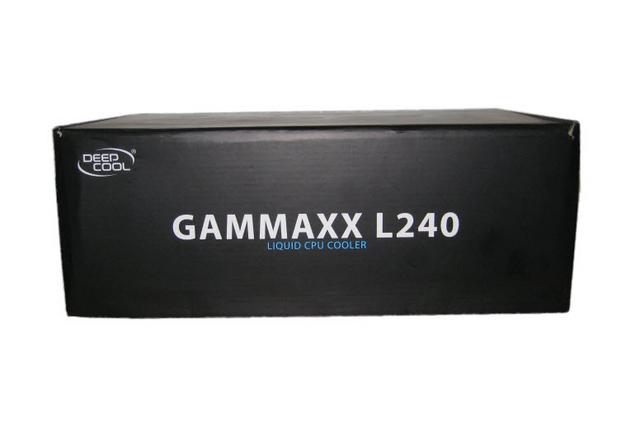
The Deepcool Gammaxx L240 box is robust and sturdy. The front of the box shows a massive close up of the AIO cooler and the name of the product, that's about it. Only the ASUS AURA, Gigabyte, MSI, Asrock logo is displayed on the front, indicating RGB compatibility.
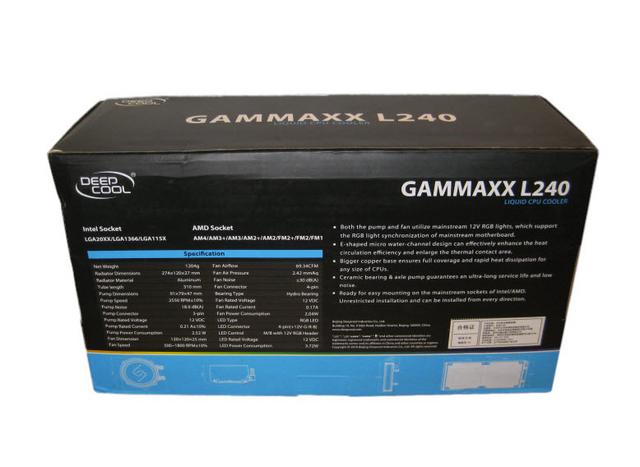
Turning the box around shows a list of bullet point features and technical specs.
Both sides have the Deepcool brand name and logo printed on the top left corner. Serial no sticker is pasted on the bottom right side followed by a printed sticker having Part No printed on it.
The bottom section of the box has the cooler's name printed in enlarged font size in the middle.
When you open up the packaging you are met by a fantastically clean design. The components fit well into the box and everything has a nice crisp look. It's a small factor as well, but the whole interior packaging contrasting against the black exterior really sets this cooler off.

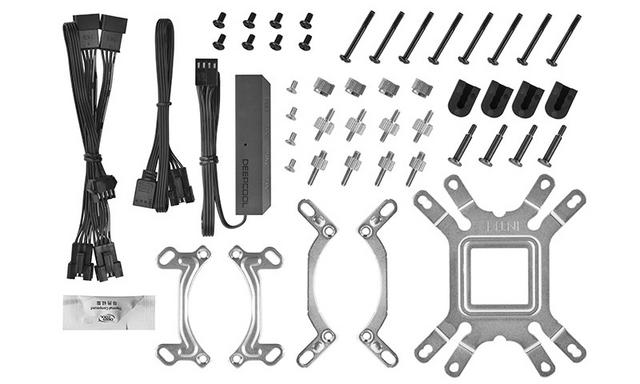
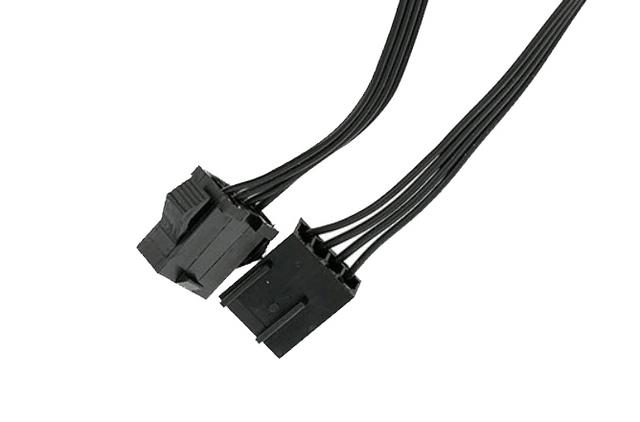
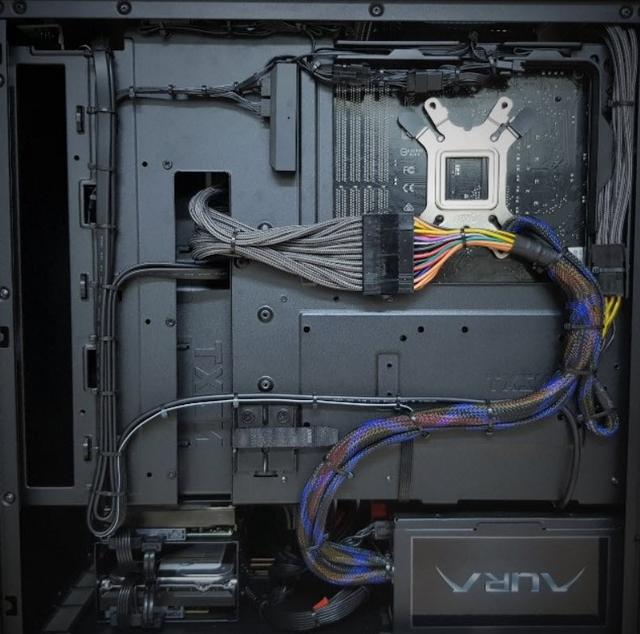
There are quite a few cables for connecting and controlling the fans, and CPU blocks LEDs. The core cable is a proprietary 3 pin RGB connection splitter for connecting all the aforementioned LEDs, as well as adapter cables for connecting the cooler to your motherboards addressable RGB header. The Gammaxx L240 also boasts support for all major motherboard lighting software packs, Asus Aura Sync, Gigabyte RGB fusion, MSI's Mystic lighting Sync, and ASRock's Polychrome Sync. A SATA powered RGB controller is also included if your motherboard doesn't support this header. You also get a PWM fan hub for connecting up to four fans.
Inside, the manual is quite brief but is straightforward and easy to follow.
A Closer Look
The first thing I noted when removing the cooler from the packaging is that it is remarkably light. I've worked with a lot of 240mm coolers in the past and this one felt about half as heavy as those. That doesn't mean to say though that design quality has been skimped on. Everything feels very solid and durable.
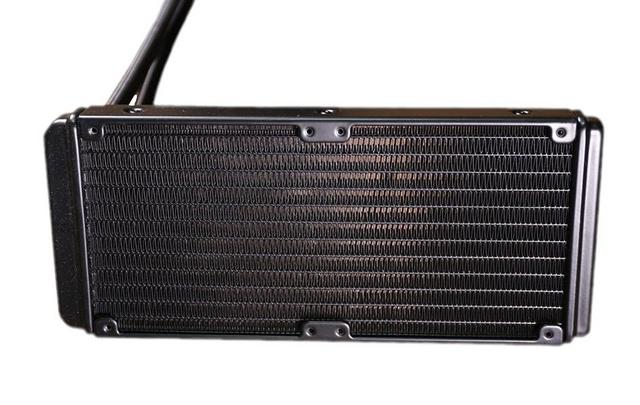
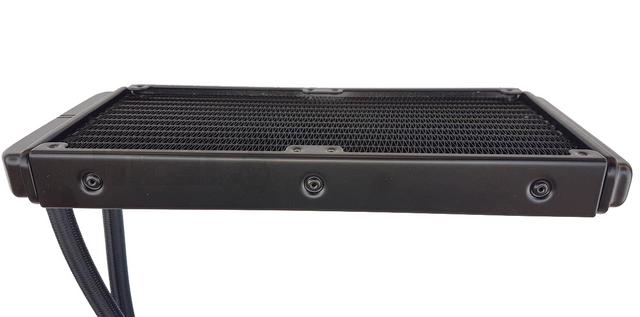
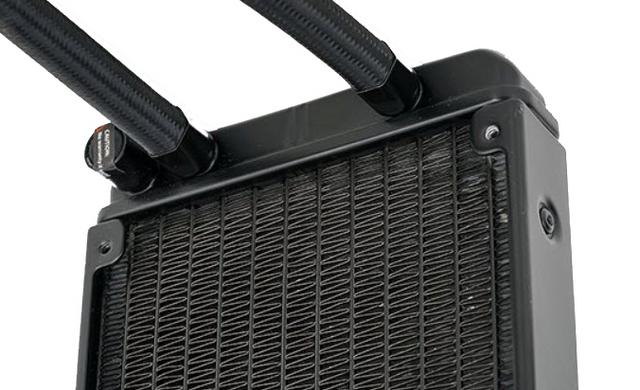
Aside from the lightweight, there isn't much to say regarding the radiator. It's black and fairly standard if we're honest. The radiator measures 274x120x27 mm (LxWxH). With 25mm fans the overall thickness would be 52mm.It should be easy to install it in most modern cases.
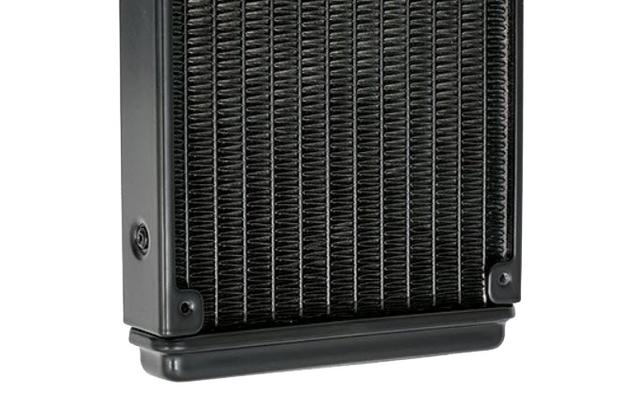
The blocks on both ends of the radiator are not rectangular and have rounded edges. Fin stack is dense and taking into account the left and right side channels, it has a total of 12 channels for water flow. It is following the double tunnel configuration. It has a standard inlet and outlet blocks for the water flow. There is a gap of 105mm between any two fan mounting holes on the radiator.
There is a refill port on the radiator. Surprisingly, it has a Warranty Void sticker pasted on it. Refill port helps the users to refill the coolant should its level drop affecting the performance of the cooler.
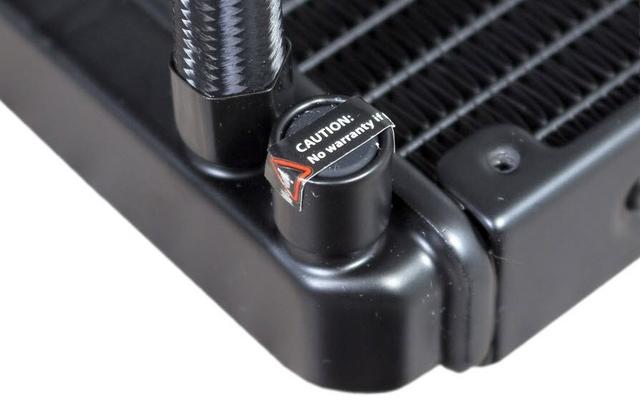
The tubes are braided, which makes them more durable and allows you to orient them in the best possible way. The soft tubing is made from upgraded anti-explosion rubber tube manufactured using an anti-corrosion, crush resistant and thermostable material.
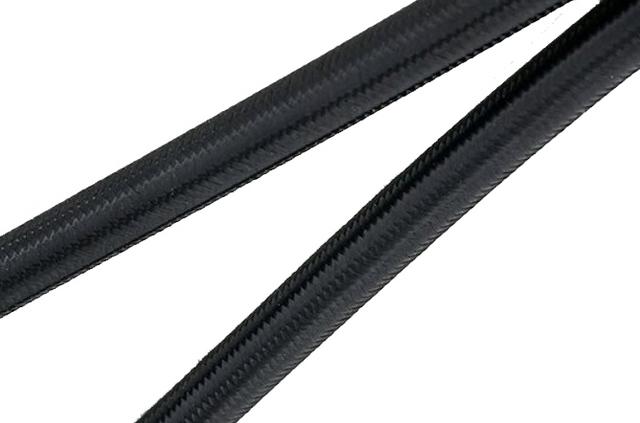
The soft material tubing is bit flexible and doesn't produce kinking which is always a plus. Deepcool is using mesh sleeve on the hoses to give them clean look. The length of the tube is approximately 310mm.
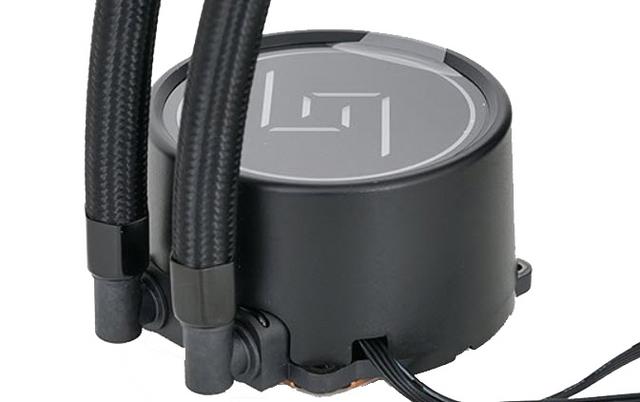
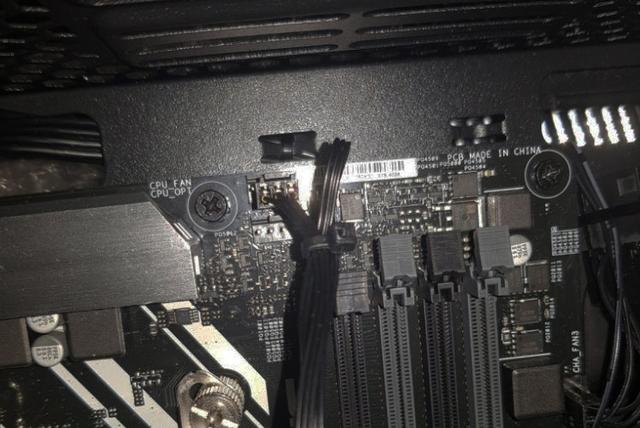
The CPU block has two wires. One is plugged into the CPU fan header on the motherboard, and the second one is for RGB control. Overall - quite a lot of cables, right? But in reality it's quite easy to manage it all in a clean way.
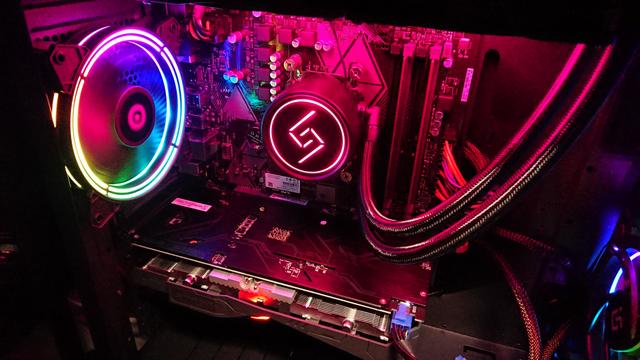
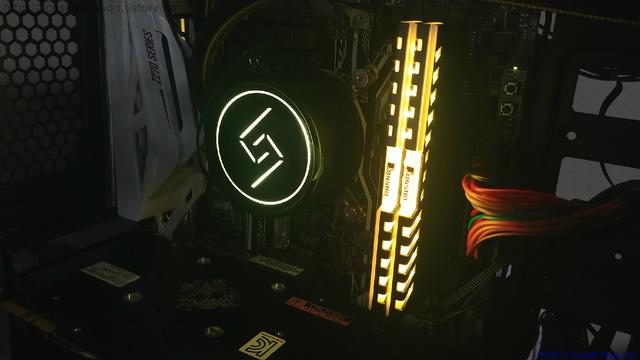
Once powered on, we can see a color Gammax logo in the center and with the rainbow effect applied, it gives a spinning impression which looks that good in person. The tubes are installed in 90 degrees angle mount on the base of the block making them protrude by approximately 18mm. The finish of the block seems to be sandblasted. The Deepcool is using the closed impellers driven by three phase induction motor to deliver strong liquid flow. Tubes can be rotated to the left or right side position though there is a limited movement due to their orientation. Deepcool has implemented an optimized E-shaped micro water channel design to effectively enhance heat circulation efficiency and enlarges heat contact areas.
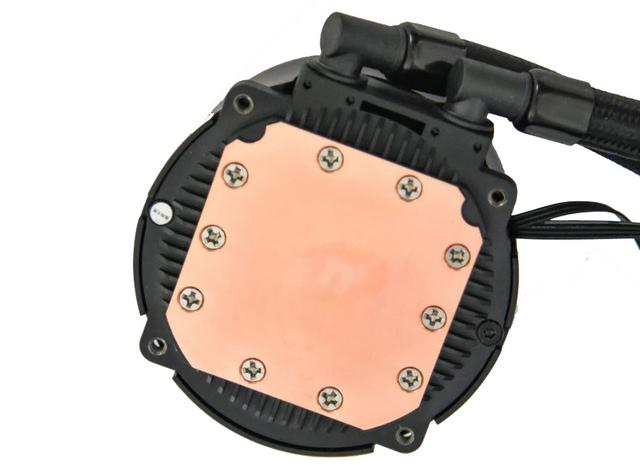
After flipping the block/pump you can see an all-copper base. There's no mirror finish, but it does look polished enough not to cause any problems with transferring heat from the CPU. Deepcool provided a small tube of thermal paste that should be enough for about 3-4 applications for a typical CPU.
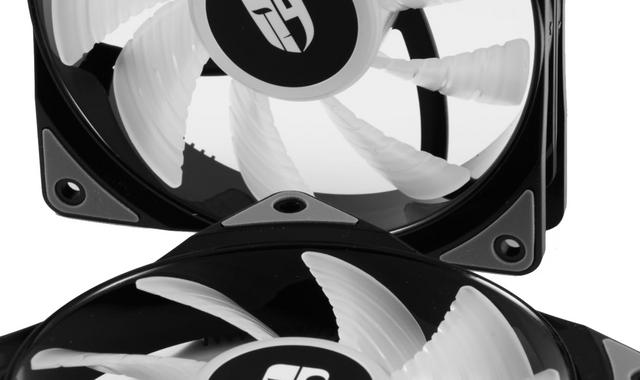
The fans provided with the cooler are manufactured by DeepCool themselves. These fans have a unique ribbed design. It's unclear whether this is specifically to promote airflow or the highlight the RPG effects when operating. Either way though, they look very impressive and in the past, we've never had any problems with them. You need to screw the fans to the radiator. Each of them has two wires. One is for power and it's connected to the MB or attached to the Fan Hub, whereas the second one is for LED control.

The dimensions of the fans (with Hydro Bearings) are 120x120x25 mm. They are controlled by PWM (4 pin connection). The fans have 9 transparent blades with grooves that improve airflow. Fan speed ranges between 500 and 1800 rpm, with a max airflow of 69.34 CFM and air pressure reaching 2.42 mm H2O. Noise levels range between 17.8 and 30 db(A) according to the manufacturer. The Deepcool has enclosed a 4-port fan hub in the parcel which is really good on their part. Should a user wants to go push/pull setup on this unit, the 4-port fan hub will come handy as it will allow all the four fans to be connected to this hub and then a single 4-pin PWM cable coming out of this hub can be connected to the motherboard's fan header for speed regulation.
Installation Process
Installation is pretty simple and helped hugely by the large image-heavy instructions which break the process down into easy stages. The first stage requires setting up the cooler's backplate based on your motherboard's socket. You use the longer included screws, which are set in place based on your socket, and then held to the backplate using four plastic clips. These are essential to prevent the metal of the backplate contacting the back of your motherboard. The backplate can then be fitted with the screws passing through the motherboard. It is worth noting that there are no additional standoffs to hold the backplate in place. Setting up the CPU block requires screwing your sockets mounting brackets to the base of the block. It is definitely worth looking over the manual to ensure for best performance, as there is recommended orientation for the CPU block depending on whether you're installing in an ATX or E-ATX system. Thermal paste can then be applied and the block is held in place using four thumbscrews. For mounting the radiator and fans, Deepcool has included both long fan screws and shorter case screws depending on your mounting preferences.

Once physically installed in your case, you can plug in the fans, using the included fan splitter hub, and choose the correct adapter for connecting the RGB LEDs.
Using the included motherboard header adapters would offer much more flexibility through programming if there is a particular pattern or set of colours that you prefer as well.
With the cooler's LEDs powered up, you get a much better idea of why the addressable RGB LEDs are something to shout about.

The modes accessible through the controller are relatively standard spiraling and breathing modes, but a really unique touch is the spiraling colour effect which matches complementary colours.
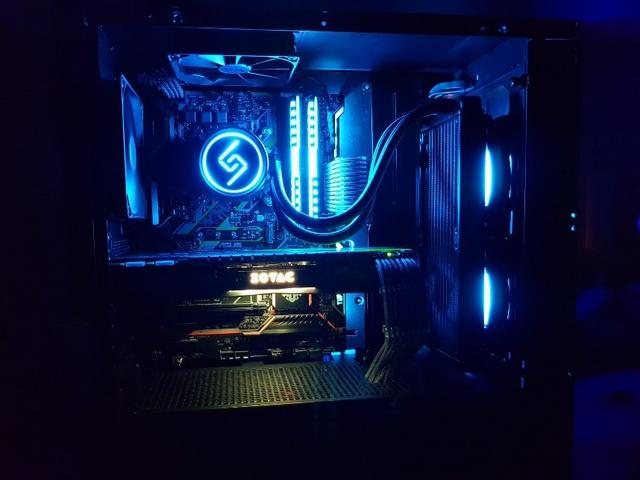
Standard pulsing on and off, and static colour modes are also available through the controller, but one of the better-looking options is the rainbow spiral effect which transitions through colours incredibly smoothly. The lighting is not just on the pair of 120mm fans (each having 6 LED pieces), but on the pump-block as well. This illuminates the Gammaxx logo and a surrounding ring.

Installed - Memory Clearance
As with pretty much every closed-loop liquid cooler, clearance is more than adequate. There are no obstructions around the socket to speak of.
System memory is not limited by height, nor is the choice of GPU on Mini-ITX systems.

Test System & Methology
[SIZE=4]Test System:
Cpu:Intel- Core i7-6700K Stock and OC@4.7GHz
Motherboard:Asus Z170 Pro Gaming
Memory:G. Skill Trident Z RGB F4 - 3866 C 18 Q - 32 GTZR
Graphics Card: Sapphire HD 6970
Power Supply: Antec HCG 750W
Storage Drive: 3TB Seagate Barracuda
Boot Drive: Ocz Vector 480GB
Chassis: Dimastech Bench Table Easy V2.5

Software:
Prime 95
CPUID HW Monitor 1.23
CPUID CPU-Z 1.65
I am testing the performance as follows:
Prime 95 and is run for 10 minutes and then the average maximum temperatures as recorded by CPUID HWMonitor are noted.The average temperature across the four cores is taken on our quad core processor.Celsius temperatures are used and i keep the ambient at 22 (+/- 1) degrees for all testing.Celsius temperatures should correct for any marginal ambient differences between 21-23 degrees.Acoustic measurements are taken 10cm horizontally away from the CPU cooler with the VGA fan disabled,hard drive in idle and power supply isolated. These are taken at desktop idle and Prime95 load.Voltages are fixed to prevent inaccuracy between comparisons.Each test is repeated 3 times with 3 remounts for consistency of results.
Temperature
The Deepcool Gammaxx L240 looks good while the system is overclocked at stock load. Granted, I don't put much emphasis on stock temps. Moving on to the set of typical OC load temps, it is clear that the Deepcool Gammaxx L240 performs extremely well.

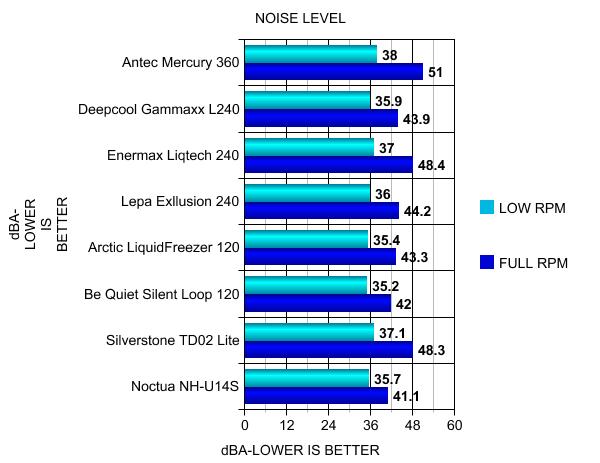
Noise Level
Even with two fans, we found the cooler to be very agreeable in terms of acoustics. It’s on par with many high-end silence focused coolers and many dual fan designs. When overclocked, the acoustics crept up a bit, but no more so than any other 240mm radiator design.
Final Thoughts
The AIO market continues to become more popular and more competitive. Prices are going down and so are system temperatures, and that’s a great thing for the consumer. Like it or not, but RGB lighting appears to be the major current trend not just with coolers, but with practically any PC component these days. For a product in this price range, particularly for RGB coolers, it’s not unusual for a manufacturer to try and go cheap where they can. In terms of the Deepcool Gammaxx L240 though, that definitely isn’t the case. In terms of the actual components to this cooler, I have no complaints. The overall quality is nothing amazing or innovative to my eyes, but it’s certainly on par with the competition and better than expected for the price range. Build quality is as good as it gets, as everything feels robust and has a good weight to it. The tubing is flexible, but feels very strong and comes fitted with premium quality screw mounts on both the pump and radiator ends. The mounting system is as good as they get in terms of ease of use. In terms of temperature performance, without doubt, the Deepcool Gammaxx L240 did operate forwards in the higher end of the scale (in comparative testing). When we consider the noise levels, things are excellent. The pump block itself ran quietly without any gurgling and the fan noise levels were definitely up there with the best. As above, I suspect that a balanced performance can be found with this cooler if you take the time to adjust fan speeds accordingly to suit what you want. Now, the price at the time of the review brings the Gammaxx L240 to us at around $89.99 USD/€89.99 EUR and I think that’s priced very fairly. This allows the cooler to just sneak into the level of what could be considered the entry-level of 240mm AIO coolers. At least, those of a quality build. This is particularly notable when you consider the plethora of RGB functions this cooler has. You get a very aesthetic 240mm AIO with all the bells and whistles that you’ve come to expect from what is a fairly well-known brand.
The Deepcool Gammaxx L240 could be one of the best value AIO coolers out there at the moment. This, when taking into consideration the quality, performance, looks, acoustics and RGB lighting effects.

Last edited by testman78; 02-15-2022 at 06:43 AM.
 Posting Permissions
- You may not post new threads
- You may not post replies
- You may not post attachments
- You may not edit your posts
-
Forum Rules


 Reply With Quote
Bookmarks