-
TerraMaster F2-221
Introduction
Affordable storage device is not hard to find nowadays. There are a bunch of manufacturers that offer numerous features and different redundancy options. Most of the affordable storage devices we find in the market today are oriented towards home or small business users. It has been my experience that the price range between simple and advanced NAS devices can vary greatly. With simple NAS devices you should expect to get a handful of features such as multiple file services and simple web services. Advance network storage devices come with a variety of features and a list of downloadable content that can be used in conjunction with traditional storage features. For small home office and personal use you might need something that has two bays similar to F2-221 device. F2-221 is a network attached storage device that is manufactured by Terra Master. TerraMaster might not be the most known NAS vendor, but they have a quite nice line-up of both NAS and DAS devices and today I'll be taking a closer look at the TerraMaster F2-221 small business and home cloud storage NAS server.

Specifications.

Packaging & Contents
TerraMaster packed the F2-221 in a beautiful blue box. TerraMaster F2-221 packaging doesn't have much to it. The shipping box does not have any information about the unit inside and it makes it hard to figure out what is actually inside. The only markings on this box is Terra Master logo and that's pretty much it. To make it easy to carry around there is a plastic handle sticking out on the top of the box.

The only other information on the box is the sticker on the site that tells us what's inside.

Internal packaging is well done. Actual device is protected by plastic bag and secured with a foam insert.

In front of the packaging there is an accessories box where you will find everything to get you started in no time.

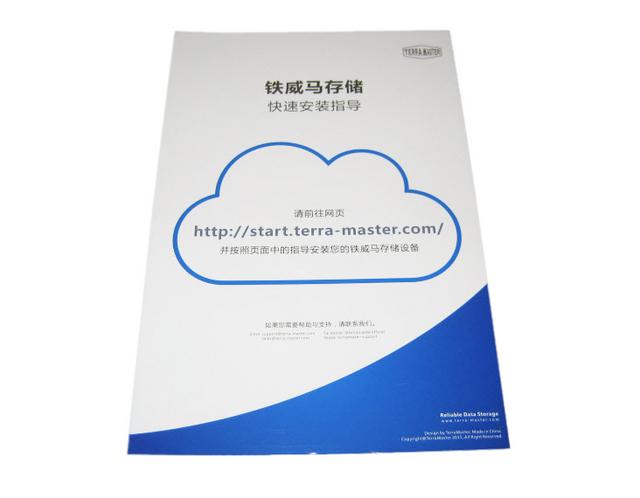
Inside the box is a quick installation guide that we'll use on the following pages and a network cable to hook it up to our network.
TerraMaster didn't just include screws for both 2.5-inch and 3.5-inch drives, they even included a screwdriver too. This mean that you don't need anything that isn't in the box to get started, besides hard disk drives.

The included power supply is neatly wrapped up. The adapter can deliver roughly 48W, plenty for this system.

There are also two leaflets for the warranty and 2.5'' and 3.5'' labels for bays. We think that the stickers are pretty useful since these will help you determine what data you put on each drive. You just need to stick these, label them, and you?re all set.


A Closer Look-Outside
The F2-221 is quite a powerful device despite its small form factor. The NAS itself is barely higher than a hard drive and not much longer either. Dimensions of the entire device is 227x119x133 mm. Majority of F2-221 is made from lightweight aluminum.

The front and rear bezels are made from ABS plastic and are also very light. Both front and rear bezels are painted silver and have a little reflection if you look at them with direct light.

The aluminium-silver chassis looks great with its simplicity. The chassis also serves a double function as the material features natural heat dissipation so the built-in fan barely has to work and it is already a low-noise fan.


The sides of the unit have a TerraMaster logo.

Despite the beautifully simplistic design, the NAS has pretty much everything you'll want from such a device, including hot-swapping drive trays. The front-IO panel is quite simple. We have individual LEDs for each of the installed drives, one for power and one for the LAN connection. Other than those, there's just the power button. A sleek appearance. Unlike some thoughtfully designed NAS boxes we've seen, there?s no front USB or quick-copy button for camera and video buffs looking for easy offloads.

The back of the unit houses a 80mm cooling fan followed by , HDMI, 2x USB 3.0 ports, 2x Gigabit ethernet ports and DC input.

The bottom features four rubber feet that will help absorb any vibrations between the NAS and the surface it's placed upon. I do have to say that on glass or flat surfaces F2-221 is extremely stable. There are also a bunch of air-intake holes for the ventilation of the system in combination with the built-in fan.

Installation
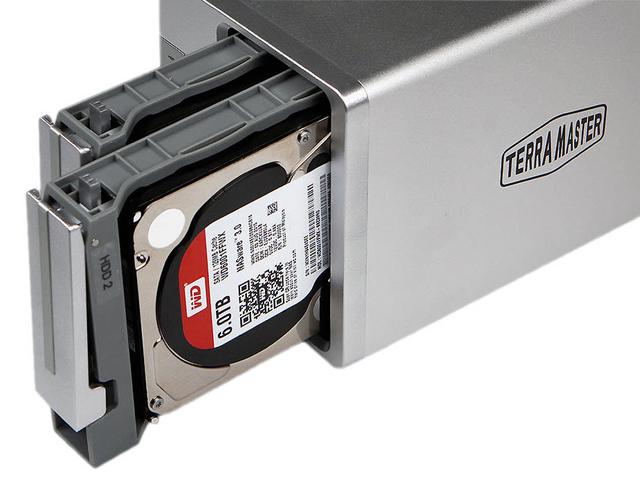
At the bottom of each drive bay is a latch that will release the tray and allow you to slide it out. This makes it very easy to get your drives installed.

Hard drive sleds are made entirely out of plastic which helps keeping weight of the whole unit to a minimum. F2-221 can support 3.5 and 2.5 inch hard drives. If you are planning to use 2.5 inch hard drive, you must use proper holes to secure hard drives to the sleds. Using SSD drive also an option in F2-221. Screws are used to secure the hard drives to the sleds thus the installation is not toolless and will require at least a Phillips screwdriver.

Officially, the NAS supports drives up to 12TB each which most likely is due to the EXT4 file format used. Bigger drives would exceed the 24TB limitation, at least in theory, but you should still be able to use 12TB drives in a single-drive setup. Whether you want to install 3.5-inch or 2.5-inch drives doesn’t matter either as the drive bays have holes to mount the smaller drives and the NAS comes with all the screws included. It even supports 2.5-inch SSDs, should you want and need that extra performance over capacity. With two drives at our disposal, we have access to RAID 1, RAID 0, JBOD, and single-drive setups. Whether you want redundancy and failover, capacity, or speed – the choice is yours. Match the setup to your needs, as it should be. More capacity can also be added through the USB ports.

One you have your drives install and back in the F2-221 all you have to do is connect it to power and to your network and you are good to go! Press the power button on the front and you are ready to set it up for the first time.
A Closer Look-Inside
Loosening the four screws on the rear allows us to take the unit apart and have a look at the interiors as well as this thick aluminium enclosure that helps to run the F2-221 as a passive unit at most times.

Front panel is very small and has set of LEDs with one switch. This panel is connected to Main board via ribbon cable. What I did found odd is that all ribbon cables that are connected to the Main board were glued.

Below is a photo of the board bottom. Note the SODIMM memory expansion socket on the left side of the board.

Memory is expandable to 4 GB total using this connector (RAM type: 1600/1333MHz DDR3L 1.35V).

The other side of the main PCB is where all the goodies are. It is packed quite full with a lot of things to discover.

The small mainboard only uses passive cooling since the TDP of the CPU is pretty low at 10 W. The heatsink that cools down the CPU is wide. The TerraMaster F2-221 has a 64-bit, dual core Intel Celeron J-3355 processor. This provides exceptional data transfer speed, a huge storage volume control, as well as a 10-bit, 4K H265 video transcoding on the go.

The standard 2GB RAM is soldered onboard and they’re made my SK Hynix.

It is also nice to see the use of solid capacitors all the way through the system.

The installed drives will connect to the PCIe bridge controller and it should do so with great power accuracy, judging from the installed components on this daughter board.

The system's flash memory actually is a USB flash drive with a capacity of 8 GB. It is installed to an internal USB port.
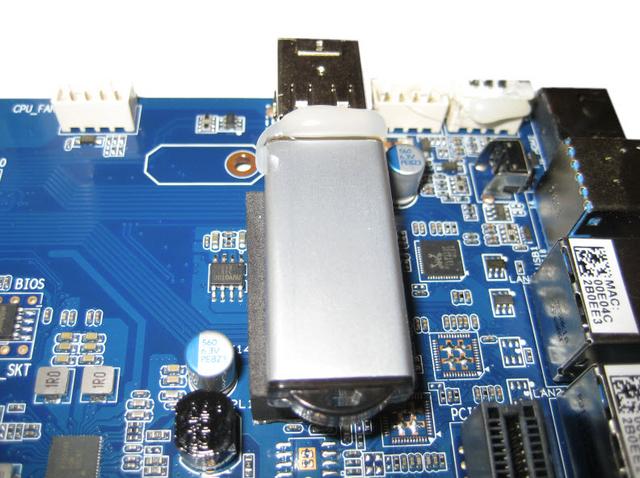
Here is the battery that keeps the BIOS data intact when power is removed.

The monitoring IC is an ITE IT8613E.

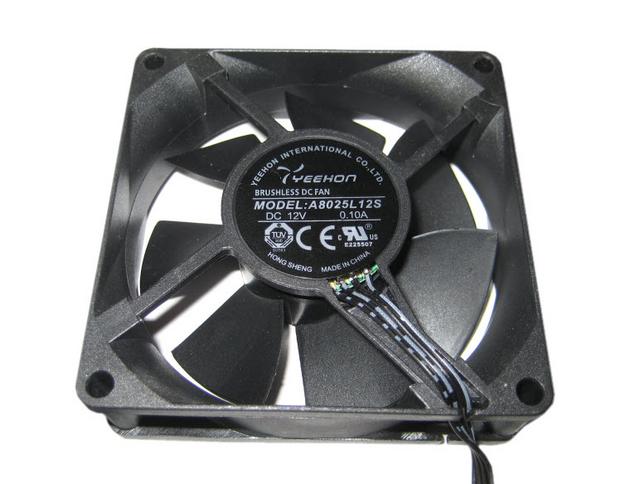
The cooling fan is installed onto a plastic frame. It's model number is A8025L12S (80 mm, 12 V, 0.1 A) and it is made by Yeehon.
Initialization
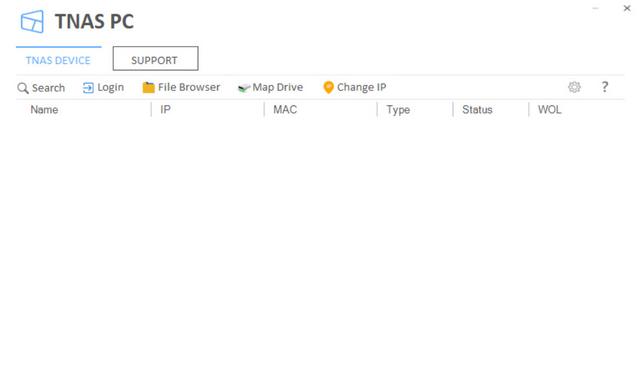
Before you can actually start to configure your device you need to go to http://start.terra-master.com in your browser and download User Guide and TNAS Desktop application. Currently there are two separate versions for Mac and Windows. Once you have downloaded the TNAS software and have installed it you can use search functions of it to find your device’s IP address. This little application is useful for initial set up and File Manager. To manage files on the device you can use File Manager in TNAS application.
F2-221 could be managed from the cloud and the quickest way to do that is to either go to “Remote Login” in TNAS software of go to http://www.tnas.online. Help menu has some helpful items as well. Here you can submit a feedback or contact Terra Master for support and help with your device.

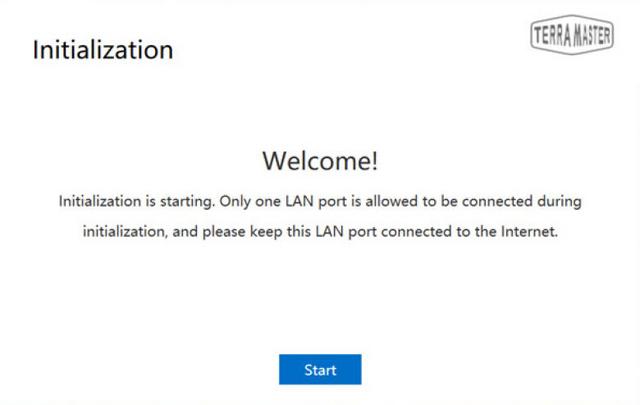
To get started with the Initialization you should have your hard drives already installed and unit connected to LAN and powered on. Device will use DHCP to get IP address. To find what IP address has been assigned to F2-221 you either need to run TNAS tool or a simple IP scanner on your network. Once you know the IP address of F2-221 you can enter it in your browser and follow friendly installation wizard.
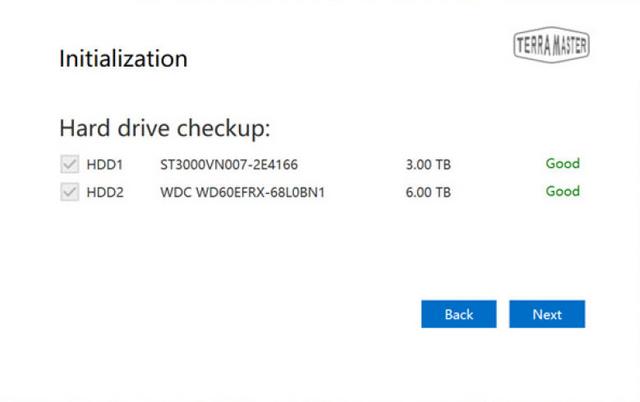
Since this device only had two hard drives, two drives are going to be listed in the Hard Drive checkup screen. If the drives are bad or have issues this is the screen that is going to tell you not to use them.
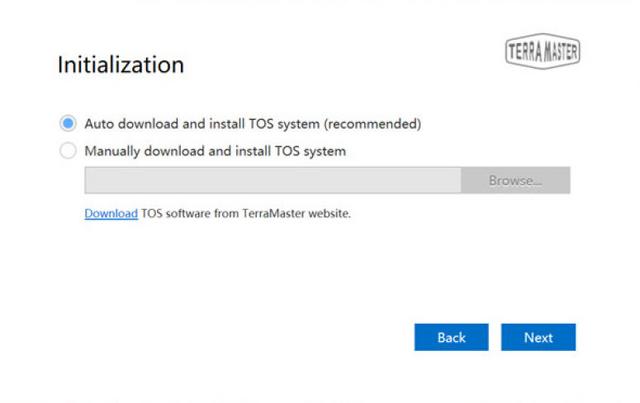
Installation of TOS system is being done in two ways, automatically or manually. In automatic mode wizard download the OS from the Terra Masters website. Before installation, all of the old data on the hard drives will be removed. This is your last step before wiping hard drives. The downloading and installation of TOS takes about 10 minutes. After successful installation system will restart and you will be placed in to the configuration of settings.
Interface Part I
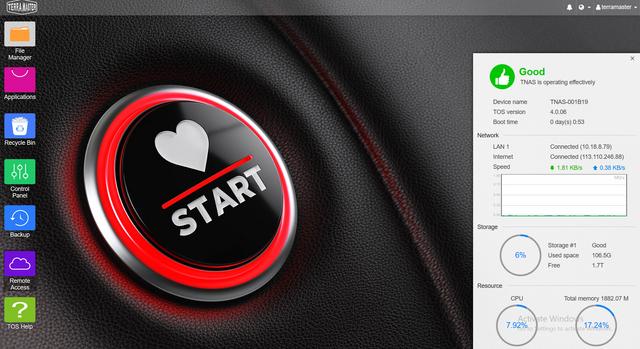
TOS Dashboard is version 4.0. It appears that Terra Master uses TOS across all of their NAS platforms and that they do frequent update of the OS. TerraMaster hasn’t been a NAS player as long as others, but their OS still shines with great features. The OS works the same way that your PC does with a desktop, icons, and a taskbar. You get all the user and sharing options you could want with cross-platform sharing to almost any system.
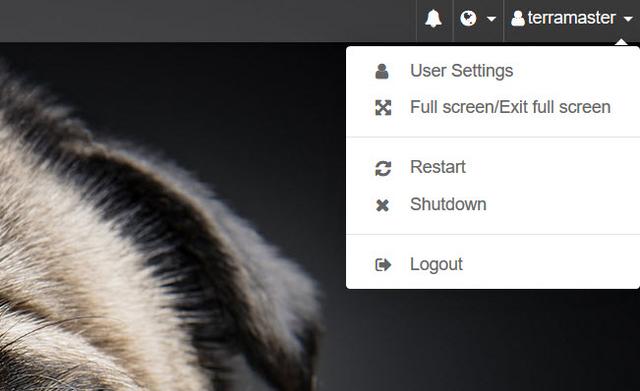
The administration menu this time include the shutdown and restart options.
The administrator's options include the password change menu.

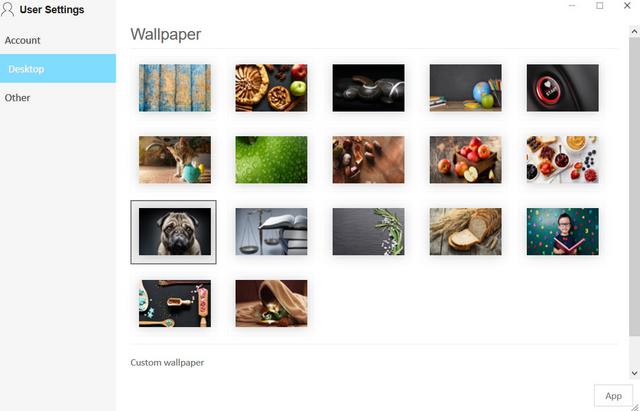
The administrator's options include settings related to the theme and wallpaper.
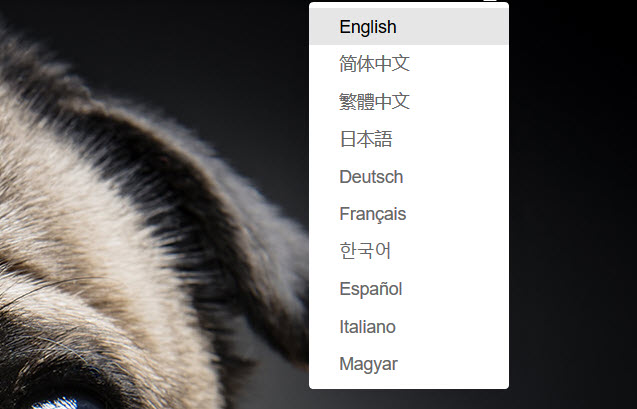
There are many supported languages.
There’s also a system information widget which will pop in from the bottom right corner. The amount of information will depend on your setup, and the area will grow when needed.

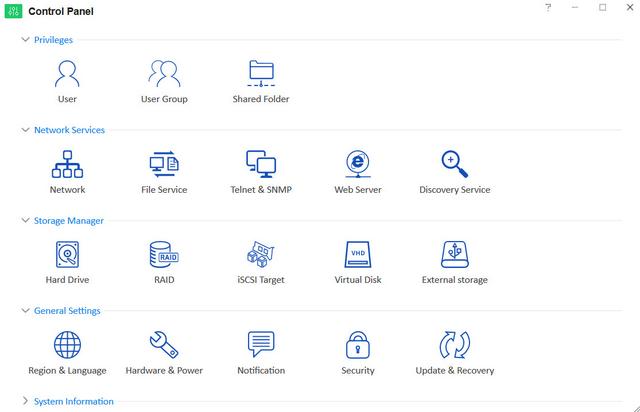
The most important icon on the desktop is the one that leads to the Control Panel. The Control Panel is divided into five main groups: Privileges, Network Services, Storage Manager, General Settings, and System Information.
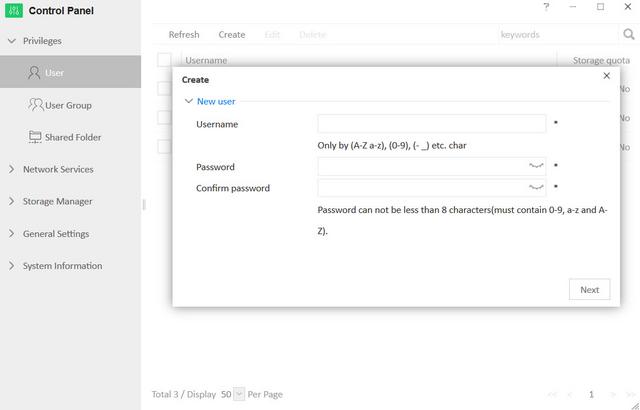
You can use the Privileges options to create and add new users and set user groups and shared folders. You can create a nearly endless amount of users, one for everyone you want to give access to your NAS and the files stored on it.
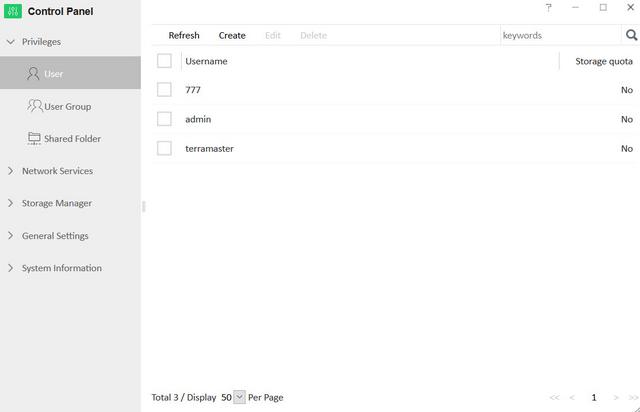
Each user can have assigned storage quotas as well as a security email address and SSH access. Or you can leave it at a name and a password.
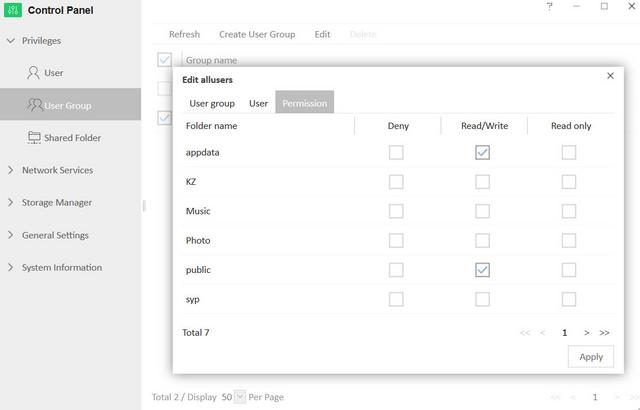
User groups make the management a lot easier. Instead of assigning rights to every user individually, you assign them to a group. Now you set your access privileges for the group instead of every single user individually. Without a doubt, a lot of users will share the same access rights.
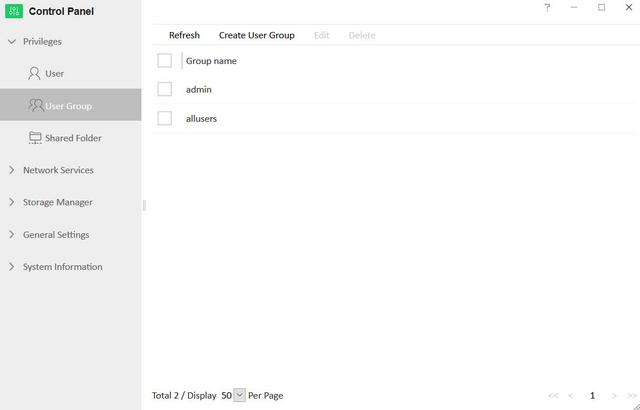
Each group has the same access options as a single user does. You can assign specific rights to each shared folder.
Shared folders are what you’ll be seeing as network drives on your systems. Create as many as you like on your various drive volumes. Each share has individual rights for users and group-based rights as well.
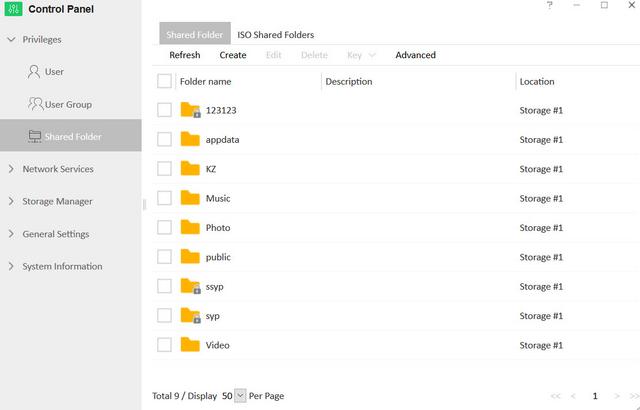
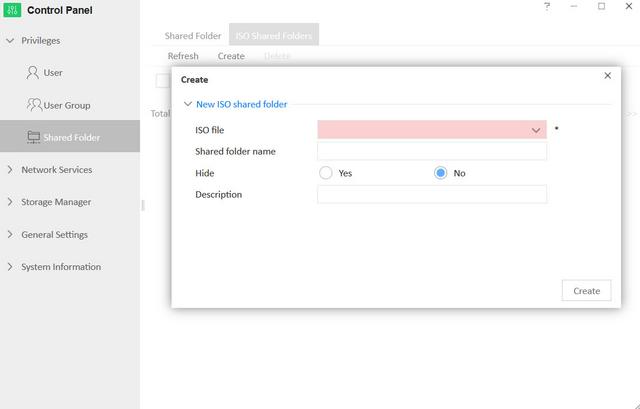
You can also mount ISO files as network drives. A useful feature for ISO’s you’ve grabbed of commonly used drives.
Interface Part II
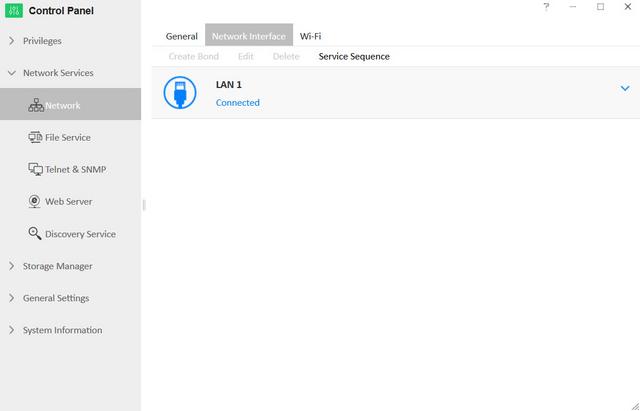
The Network Services menu allows you to configure all network-related options. The Network Interface tab is the one hiding the most interesting options.
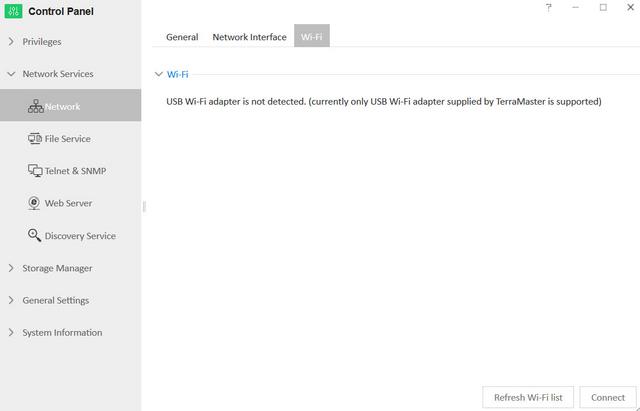
TerraMaster's NAS can also be connected to Wi-Fi networks. However, this feature requires a USB Wi-Fi adapter supplied by TerraMaster. Since the OS is Linux-based, there is a theoretical option of manually installing drivers for other dongles.
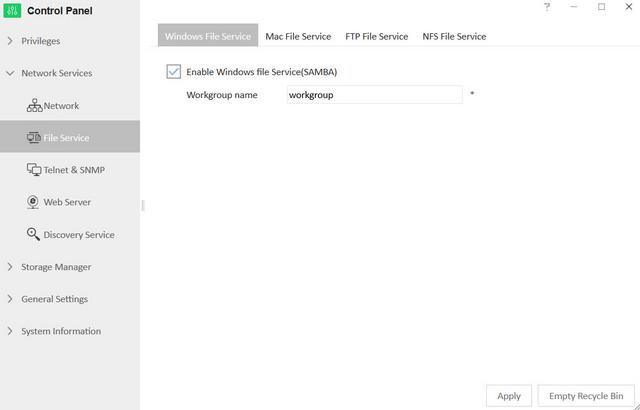
All major systems are covered when it comes to sharing your files across the network. There is Samba for Windows, Mac File Service for the Apple users, and NFS for Linux and Unix.
TerraMaster OS also comes with a built-in FTP server for remote as well as local connections.

Telnet and SSH connections to the prompt are naturally supported too. Anything else would be surprising.

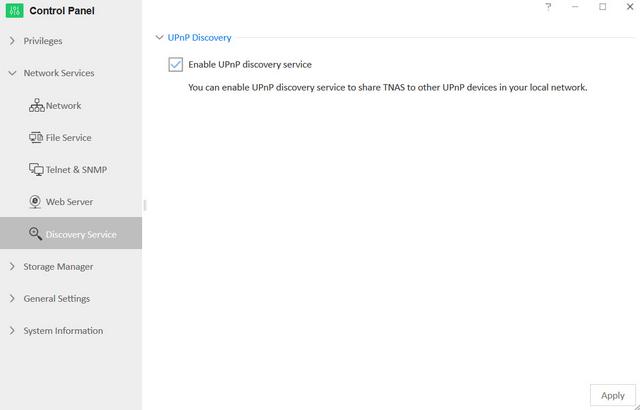
With UPnP, the NAS can automatically tell other devices of its presence. Whether this is a desired feature or not depends on you and your setup.
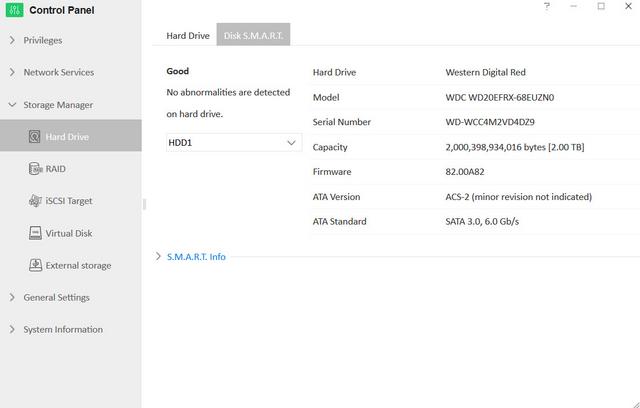
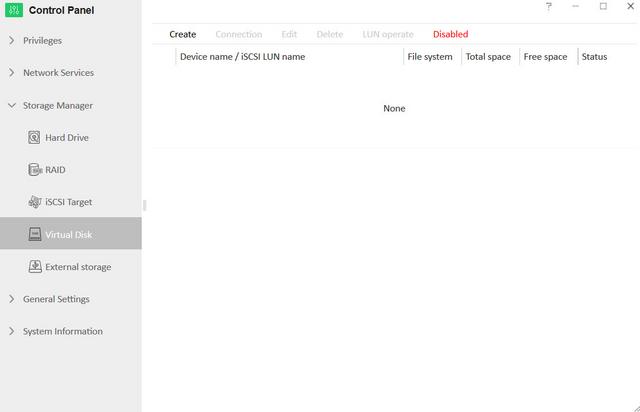
The Storage Manager contains all RAID configuration options and provides you with the ability to check on the health of installed HDDs and SSDs.

The second page is for the details of each drive. This page will list things such as serial number and firmware along with the available S.M.A.R.T. details. There is no support for Seagate IHM in TerraMaster OS, not at this point. I’m sure it will be added at some point.
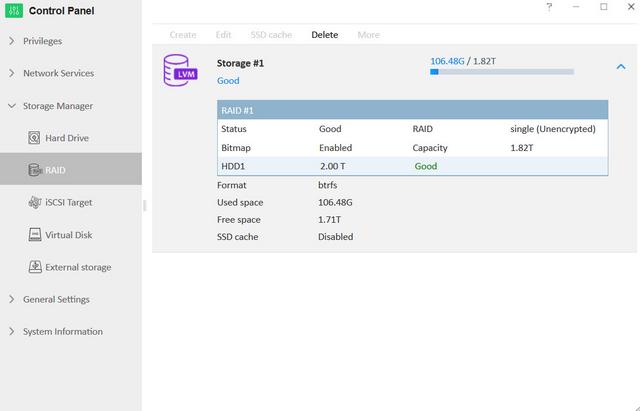
Use the RAID icon to set or edit your drives configuration.
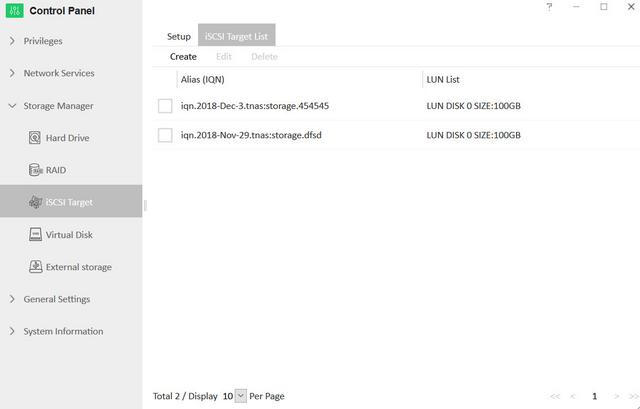
Depending on your usage scenario and setup, an iSCSI setup might be the way to go. TOS supports this in full. LUNs and targets can be set as you need them.
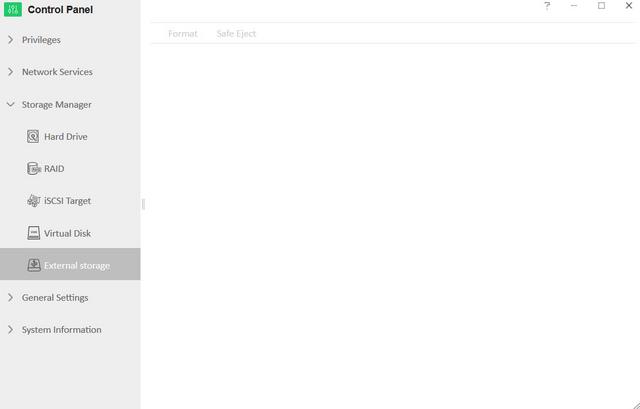
Connected storage can be viewed on the External Storage page from where you can format the drives too. Drive ejection is done from the status bar.
Interface Part III
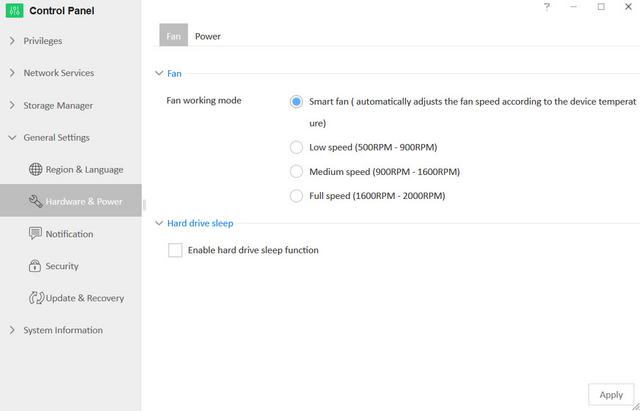
The general settings menu includes the following options: Region & Language, Hardware & Power, Notification, Security, Update & Recovery. To timestamp events and files properly, the NAS needs to know where it’s located. The regional settings include timezone settings and automatic updates via NTP servers.

You can set the fan's operation to four different modes. We suggest you to use the Smart Fan setting.
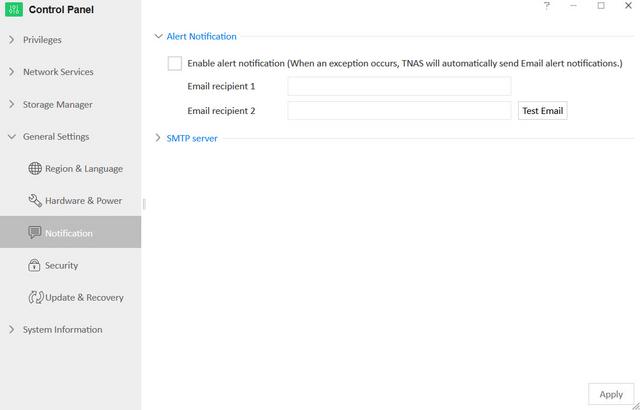
There are two ways to get notification from your TerraMaster NAS. Either the default email or you can send it to an SMTP server.
There aren’t any special security features in TerraMaster OS. The only thing located in this section is the SSL certificate for the NAS.

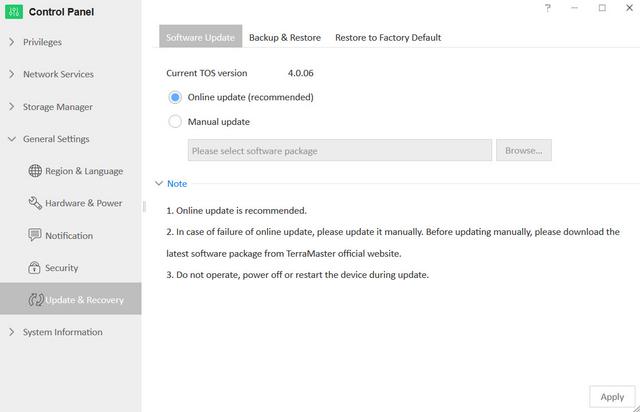
Updating software is a straightforward procedure you can take care of with a single click. You can also store the configuration of the OS to a file or restore the system to its default settings.
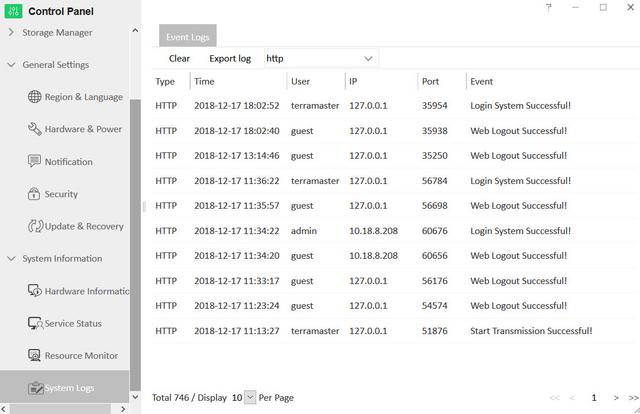
The System Information page includes four options: Hardware Information, Service Status, Resource Monitor, and System Logs. First, we have the Hardware Information. Here we get basic information about the CPU, memory, and cooling of the unit.

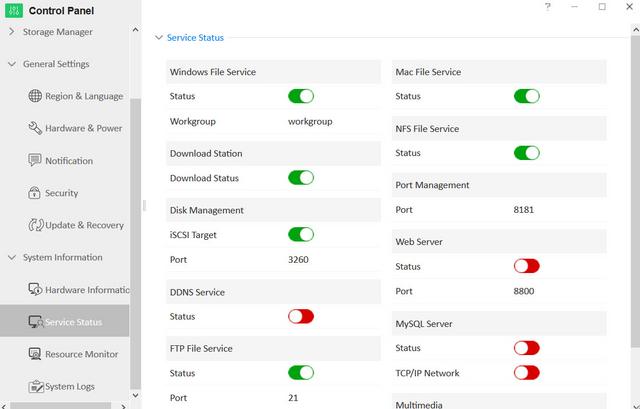
Here's an overview of all active services.
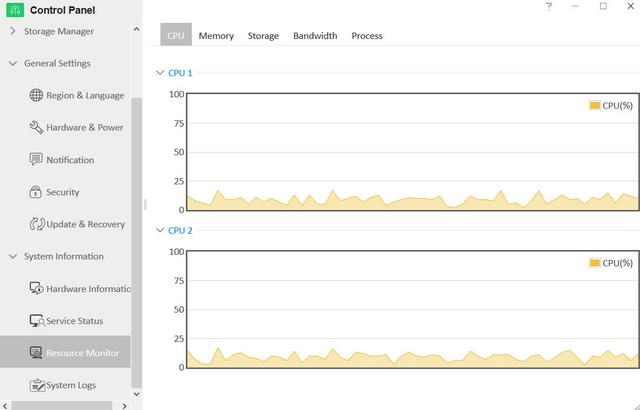
The Ressource Monitor allows you to get a clearer picture of everything. The CPU is detailed by core and over time.
The storage information is limited to a pie chart of used space for each volume.
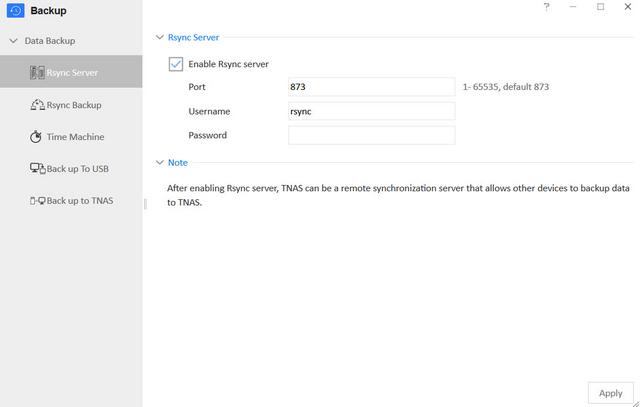
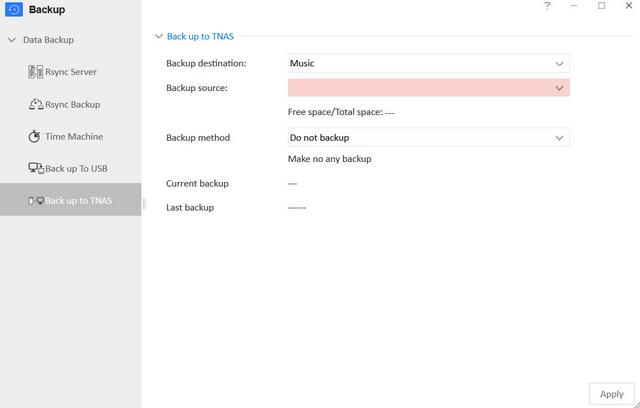
Backup functionality is very important to a NAS server. Your TerraMaster NAS can easily become your Rsync Server and be the target for all your systems.
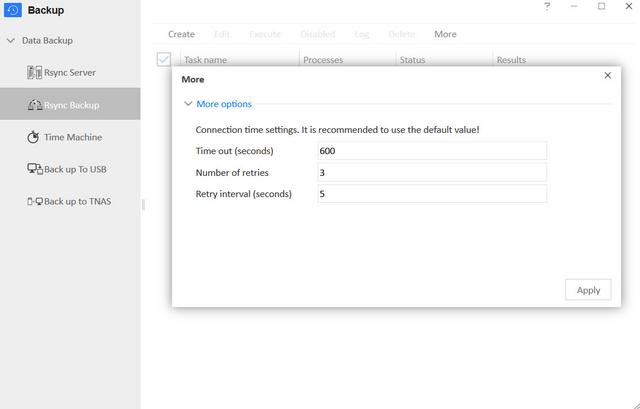
You can also have it the other way around and connect your TerraMaster NAS to another Rsync server.
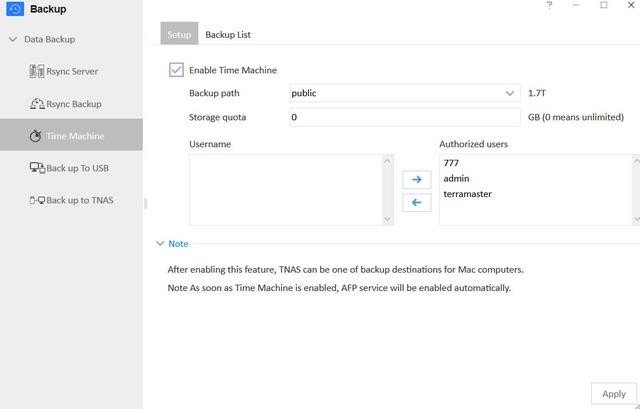
AppleOS users will love the built-in Time Machine backup solution.
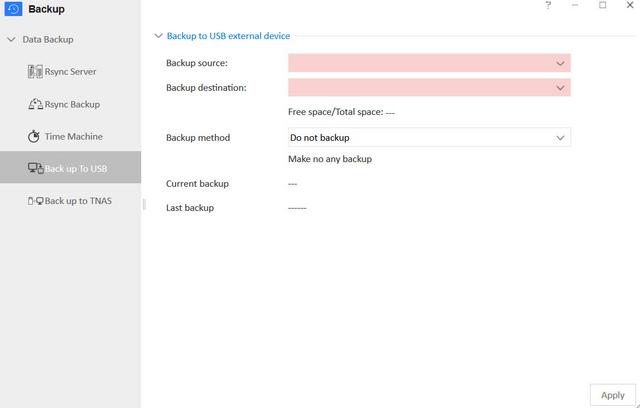
You can backup the server's files to an external storage device.
You can also have USB drives downloaded to the NAS automatically as soon as you connect them. No need to interact with the NAS when it isn’t needed. Let it do the work for you.
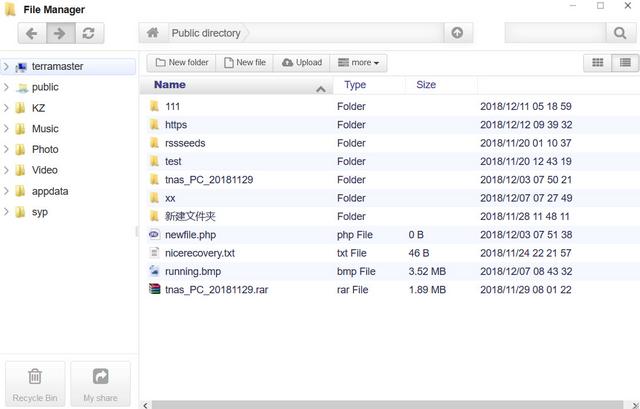
The file manager allows you to create and edit all folders and files.
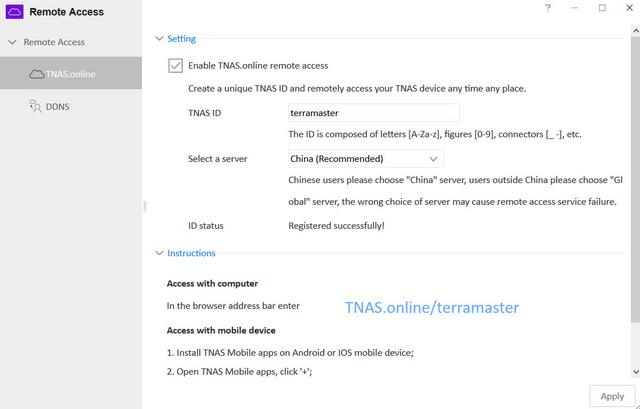
With services such as the FTP server, remote access gets desirable. You have two options to make this easy, even if you have a variable IP address. With DDNS services, you get an easy-to-remember name instead. TerraMaster has their free TNAS.online service, which is available for all TerraMaster NAS owners.
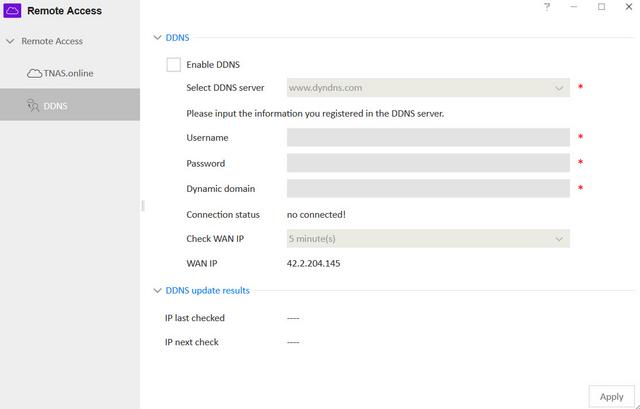
NOIP and DynDNS are also supported. Whichever you want to use, they’re all found in the separate Remote Access app.
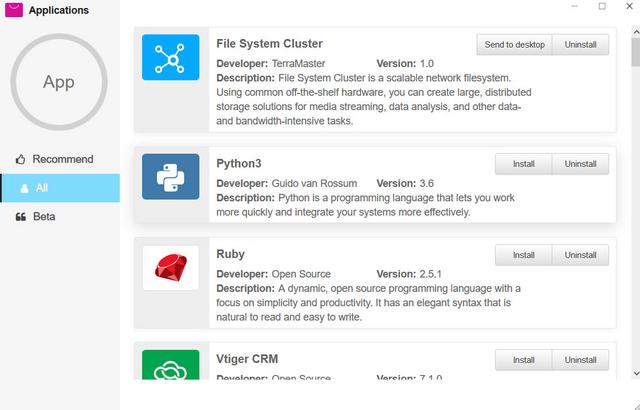
TOS-Apps
Terra Master offers some applications that could be pulled down from the Internet and installed on to the F2-221 itself. Following is the list of applications that could be installed:
SVN Server
Clam Antivirus
Plex Media Server
Dropbox Sync
iTunes Server
Download Station
MySql Server
Mail Server
Download Center
Java Virtual Machine
Python3
File System Cluster
Ruby
Transmission
WordPress
SugarCRM
Apache Tomcat
Node.js
rclone
Vtiger CRM
IceHrm
MantisBT
OrangeHrm
Piwik
PrestaShop
Joomla
phpBB
phpMyAdmin
Snapshot
Git
Docker
Emby Server
ElephantDrive
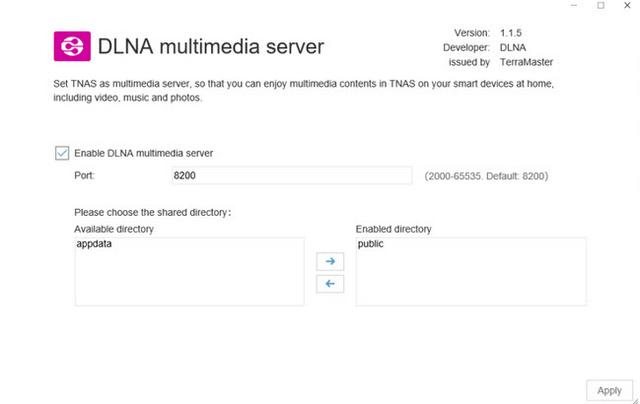
Multimedia Server
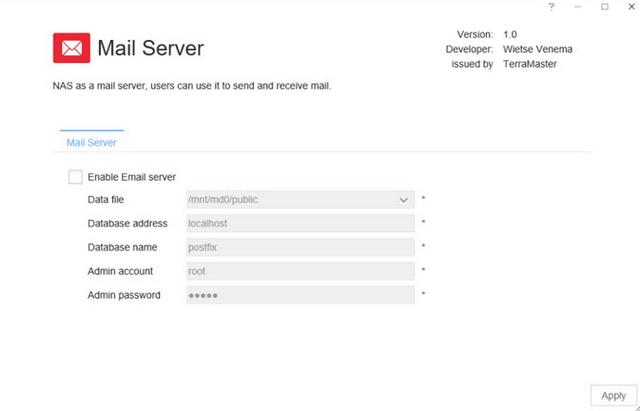
Mail Server
The DLNA media server application is one of the first apps you will want to install, as that ensures your files can be accessed by all devices on your network, such as your Smart TV, Sonos sound system, portable WiFi devices and home consoles.
For those that want to run a fast and reliable email server, you will need to install the mail server application. This will let you not only enable an email server hosted on your NAS, but also set-up multiple domains and communication to and from the NAS for business.
Probably the most popular application right now for Terramaster NAS and definitely for users looking at the F2-221 because of its low price versus large storage and hardware is the Plex Media Server app. Like other apps available on TOS 4.0, it is free and can be set up in less than 2 minutes. Once the app is installed and you set up a free Plex account, you can set up directories to the folders you set up in the file explorer earlier, scan them, and then you can access these media files via the Plex app on your mobile phone, smart TV, console and more.

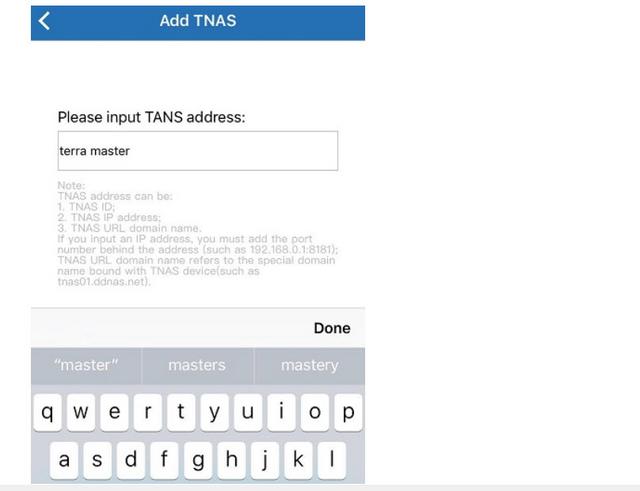
TNAS Mobile
TNAS mobile is a dedicated mobile APP for TerraMaster TNAS devices. With TNAS mobile, you can access TNAS locally and remotely on mobile devices, back up photos and videos from mobile devices, browse office or PDF documents, upload or download files, browse and play multimedia files, and you can even initialize your TNAS device with TNAS mobile.

Test System & Methology
I now begin the benchmark portion of this article, but first let me show you my test system:

OCZ Vertex 4 512GB SSD
Mainboard X79 MSI GD65 - Intel SATA 6G controller in AHCI mode
Processor Core i7 3960X at default configuration
Graphics Cards GeForce GTX 580
Memory 16 GB (4x 4096 MB) DDR3 1600 MHZ
Power Supply Unit 1200 Watt
Monitor Dell 3007WFP - up to 2560x1600
OS related Software Windows 7 64-bit SP1
Using two HDD WD Red 1TB 3.5 NAS Internal Hard Drives(WD10EFRX) for testing the NAS.

Performance
First, I ran a few quick tests using CrystalDiskMark. This benchmark tool measures the performance of a storage device by testing its sequential read and write speeds as well as its random read and write speeds using blocks 4KB and 512KB in size. TerraMaster doesn't really say what kind of speeds the F2-221 is capable of when not using encryption. Using CrystalDiskMark we can see that the NAS is able to read at 118.4 MB/s and write at 117.8 MB/s when connected to 1GbE network.
RAID-1

RAID-0

Thanks to its hardware encryption engine, the TerraMaster F2-221 also performed pretty well when doing encrypted file transfers. Once again, it was able to read at 118.4 MB/s and write at 117.8 MB/s. However, its performance dropped by nearly 20 MB/s when doing 4K random writes at high queue depths.
RAID-1

The F2-221's performance was about the same when tested with ATTO. With the two hard drives in a RAID 1 array, the unit topped out at 118 MB/s when reading and 117 MB/s when writing.
RAID-1

RAID-0

Next, I ran a series of tests using Iometer. This tool can be configured to benchmark a number of things. In this case, I used it to measure the F2-221's sequential read and write speeds using blocks ranging from 512B to 2MB in size. The tests were run using random bytes and a queue depth of 3. The RAID configuration had very little impact on the F2-221's sequential read performance. In both cases, the NAS was able to read at speeds as high as 112 MB/s.

The F2-221's sequential write performance varied a bit when tested with Iometer. While it was able to write at more than 98 MB/s when configured for RAID 0, its write speed topped out at only 95 MB/s when using RAID 1.

The F2-221 reached some respectable speeds when streaming HD video and copying large files to and from the server. As with other NAS devices though, its transfer rates dropped considerably when creating content and copying directories full of small files to the NAS.

With the 2 GB of standard RAM, the NAS is reactive and has the expected consumption. 5.7 watts with standby disks, and 25-30 watts with disks running. The below graph peaks are due to a 4K and Full HD H.265 playback test.

The TerraMaster F2-221 also scores in terms of smoothness and volume. The built-in fan is hardly audible during operation. Vibrations and running noises of the hard disks depend of course on the respective model.

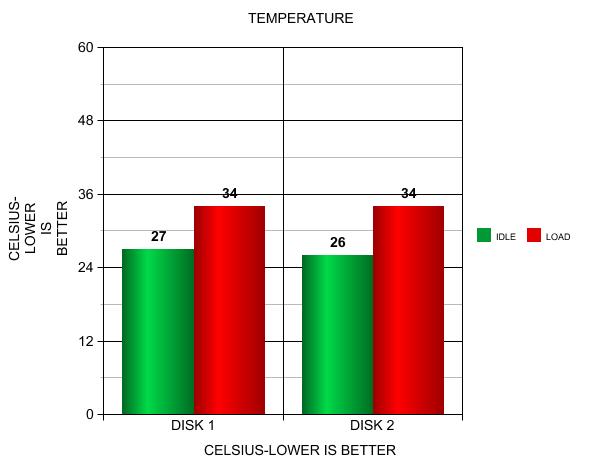
As it seems, the aluminum enclosure plays its part in removing any internal heat build up.
Final Thoughts
The F2-221 is a worthy successor to the F2-220 and offers homeowners a great option for setting up and managing a home or small business server for file storage and media streaming. The design of the NAS follows the previous units, so it’s difficult to spot the exact model from just looking at it. The device itself looks great and is made of quality materials. The product comes with a solid construction of both plastic and aluminum and the drive trays are very accessible. Obviously its color scheme is made to match Mac computers, but it will look great on anyone’s desk. Another noticeable advantage of this NAS is that HDMI connector serves to monitor the running status of the NAS. The two Ethernet ports , besides the HDMI port, are nice additions. The Apollo Lake CPU adds that bit of grunt that was lacking with Braswell when it came to general use. The F2-221 performed relatively well, reading and writing at more than 117 MB/s throughout our tests. The RAM quantity is user upgrade-able so we can add one more module for a total quantity of 4GB. We really liked that this included a 82-millimeter fan on its rear to keep its internal parts cool and within its thermal operating limits. Being both silent and using little power you won't know it's there and it's hardly a problem to keep it on 24/7. Having the unit idle at just 5-6 watts when active is pretty nice. Power consumption dies to nothing when the unit goes to sleep, effectively registering 0 watts (or close enough to it). Along with the F2-221 comes comes TOS 4.0.06, the latest version of the company’s operating system. It is a large upgrade that hugely improves the experience and compatibility. It wasn’t bad before, not at all, but it’s better now. One advantage of a NAS is the easy management, and that includes novice users and first-timers. You don’t need a degree in computer science or years of experience to use TOS. If you can read what’s on the screen, you can do it. Speaking of the GUI, I like the new windowed operating system, but TerraMaster programmers still have a lot of work ahead of them. It would be nice if more mobile apps were available. Moreover, there is no surveillance app, which can be a major letdown to the ever-growing user base looking to use NAS servers with home- or even business-centric security applications.

If you’re looking for a NAS device, we highly recommend TerraMaster’s F2-221. You won’t go wrong with this choice and it has sufficient power that will last you the next five years. The TerraMaster F2-221 is a risk-free purchase. Partly because it’s relatively affordable, costing less than $270 (disk-less). The real reason, though, is that the server has a lot to offer.

Last edited by testman78; 09-10-2019 at 05:52 AM.
 Posting Permissions
- You may not post new threads
- You may not post replies
- You may not post attachments
- You may not edit your posts
-
Forum Rules


 Reply With Quote
Bookmarks