Results 1 to 12 of 12

Thread: Banchetto MbK

  1. #1
    Xtreme Member
    Join Date
    Aug 2010
    Location
    netherlands
    Posts
    264

    Banchetto MbK


    Hi my fellow forum friends,

    It's been a long time ago since I've post a build, but here is another one from MBK.
    Been very busy with various assignments and other mod stuff, but now... finally a good old-fashion forum mod again.

    First I want to thank a number of people who make it possible for making this build.

    Big thanks goes out to Bernice from Gigabyte


    Also respect and big thanks to Vincent and Lily from Bitspower


    And for this build, I have access to a number of testbenches from Microcool. Frederico from the Italian brand MicroCool has made this possible, so thanks for this Frederico.


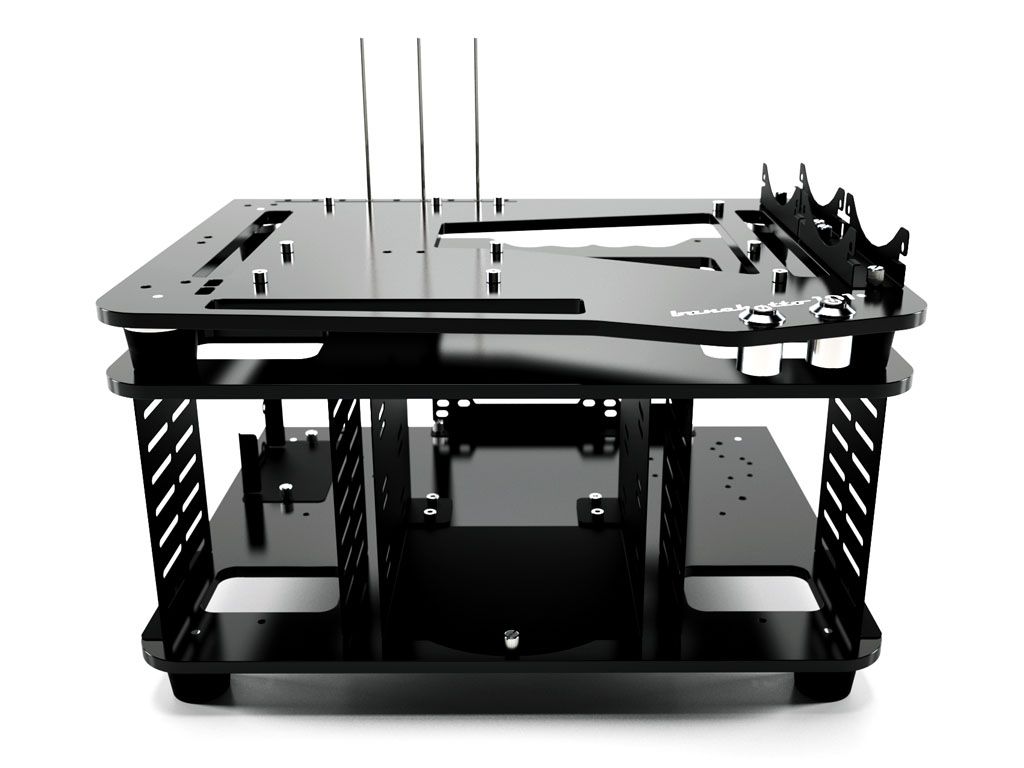
    MicroCool has about 3 beautiful benches marketed with names Banchetto K, Banchetto 101 and 103. Which are great Italian designs as shown below in the pictures.

    The Banchetto K


    Also for the Test benches I have made some unboxing vids.


    For this build I'm also going to use a Banchetto 101

    Pictures from the Banchetto 103


  2. #2
    Xtreme Member
    Join Date
    Aug 2010
    Location
    netherlands
    Posts
    264
    The unboxing vid:


    After some brainstorming to see how I can merge these two benches. I have the idea is too make different layers of acrylic to stack it all up.

    Here I have cut some acrylic same size with the shapes of the original K and 101.


    Because Gigabyte provided me a very nice Gigabyte G1.Sniper 3 (more info on this later) the color will be black and green in this build.


    In order to enter the height, and the layers acrylic to be applied, I have used the parts of the 101.


    Because I want a good view at the hardware and apply nice ideas with rigid tubing I have placed the mobo tray in an angle.


    That's it for this update, but more very soon

  3. #3
    Xtreme Member
    Join Date
    Aug 2010
    Location
    netherlands
    Posts
    264


    Update!!!


    I already have quite a few pictures with some progress to show, so selected a nice collection for this update

    In this build I'm going to place (at least) 2 x 240 rad applied with Nanoxia fans. And will put them between the acrylic layers.

    Drawn some holes and stuff on one acrylic layer and went to work with my jigsaw.


    After the sawing and filing, the result...


    Placed the radiators and fans.


    Installed it again to see how it looks.


    Enough space for the air in/out


    Now this looks good, removed the tape and cleaned the plate.


    Made it black (glossy vinyl).


    And the whole unit.


    For the green and black color combo I came to the idea to use 6mm UV green strips between the horizontal plates. So cut and bent the strips.


    With this kind of green I always like the frosted looks the best. And I think this is a great match with the green of the Gigabyte motherboard, So picked up my sandpaper and go to work again.


    But it's taking too long


    Need more frosting but just to let you see how it will look like.


    Luckily I have at some great machines to work with... glass blasters.
    This is making it a lot easier.


    After some blasting....


    The strips totally frosted.


    More about this later.

    Thanks to Gigabyte this Bench will become a monster rig. because they've provided me with 2x Gigabyte Titan Black: GV-NTITANBLKD5-6GD-B
    Was not expecting this, so caused a moment of silence and admiration when looking and testing these beauty's.


    Exhibited and tested on a different setup


    Last but not least, a nice picture from the rig with frosted strips.


    More coming up!!!

  4. #4
    Xtreme Member
    Join Date
    Aug 2010
    Location
    netherlands
    Posts
    264


    Update!!!


    Just a small update before the waiting begins for the water cooling stuff.
    Last update was with the frosted strips, which are looking great now I think.


    I have cut the plate from the Banchetto 101 that was left over and used it for the back cover.


    And added some small details, such as a cover for the I/O stuff. The blue VGA looks ok ... but not in this build

    So made a cover with some slots and black green details:


    It will take some time till the next update, because I have to wait for the water cooling products. But once I've got them, you will be the first to know

  5. #5
    Xtreme Member
    Join Date
    Aug 2010
    Location
    netherlands
    Posts
    264


    Update!!!


    Time for an update!! Received great products from Bitspower and Highflow

    To begin.... a lot of Bitspower products.


    After a hour removing bags....


    Beautiful fittings


    But first I will show you and installed the beautiful Bitspower... The VG-NGTXTITAN


    Filled with some liquid to see how it looks


    Also ordered a nice backplate, the NGTXTI780 Carbon Black


    Everything included


    After some work


    Presenting you the Gigabyte GV-NTITANBLKGHZ-6GD-B with the VG-NGTXTITAN

    Looking good!!!


    Placed it to see how this will looks


    Installed some fittings and stops, like the Bitspower Matt Black Enhance Rotary


    And twice a G1/4" Matt Black Stop Fitting


    For the pumps and reservoirs I had plans for Using the modkit D5, D5 top and res updrage kit next to the testbench


    To get this kind of setup I have used a D5/MCP655 MOD KIT


    And a Bitspower D5 MOD TOP


    Also a Dual / Single D5 Top Upgrade Kit 250


    And last but not least... two amazing pumps from Highflow: De Alphacool D5-VPP655


    To make this looks better I have lowered the bracket/ pump.


    And made this black


    Installed the modkit/ top/ res/ pump.


    After this installed the bench again


    Think it looks quite nice allready


    More updates soon

  6. #6
    Xtreme Member
    Join Date
    Aug 2010
    Location
    netherlands
    Posts
    264


    Update!!!


    Last time I mounted the reservoirs with the modkits. For the next step I made ​​an acrylic plate where the flow sensor and input from the reservoirs goes through.

    For this I've used the Bitspower flow indicators (BP-FI-CLBKMBK)


    And mounted them like this:


    Also in this build NO bending, so I've chosen for a big amount of Bitspower Enhance 90-Degree Dual Multi-Link Adapter


    Connected everything


    The CPU block I've chosen is the Bitspower CPU Block Summit EF (BP-WBCPUIAC-CUMBKCL)


    And also here I have made an acrylic plate made ​​for the rigid tubing for the GPU and the CPU.


    Which will look like this


    Placed the 2e GPU


    Backside will be like this


    Again used the 90 degrees adapters, but also the 30 graden adapters (BP-MBE30DML) to get the perfect angle.


    To connect al of this... another acrylic strip.


    With fillports (BP-MBWP-C04)


    And Multi links ( BP-MBEML)


    Once connected it looks like this


    To be continued!!!

  7. #7
    Xtreme Member
    Join Date
    Aug 2010
    Location
    netherlands
    Posts
    264


    Another Update!!!

    It's holiday time so did a lot of work on the Banchetto mod, and took lots of photos. Therefore, another updated for you guys

    After some puzzling and excessive use of adapters... pretty happy regarding the completion of the loops.


    The adapters that I have used includes:

    2x Multi-F Block (BP-MBMTFMB)


    The mini valves (BP-MVV-MBK)


    Small adapters to create the right heights to connect everything


    The adapters are:

    Extenders BP-MBWP-C40, BP-MBWP-C60, BP-MBWP-C62 and some Mini Dual G1/4" Extenders


    In order to get some more green details, ordered a green plate UV green


    Next step was to create a back plate, so cut to the right size and made some openings


    The square holes on the right side are for the extension and the on/ off button from the PSU


    Removed the tape


    Also cut the plate for the upper section.


    And placed it


    Meanwhile, added some more small details... bought some nice UV green bars which I found in the shop where I've got the UV green plate from. Bend with a heat gun


    Mounted this with acrifix glue


    Think it's to much green now so I will add more black accents. More on this later.


    Thanks to Highflow I've got the perfect UV green liquid

    For this build, the choice is Mayhems X1 UV Green


    Here's a little preview of the filling vid... full movie coming your way this summer


  8. #8
    Xtreme Member
    Join Date
    Aug 2010
    Location
    netherlands
    Posts
    264


    Final Update!!!....For today

    Got a lot of catching up to do. So one more for today With little text and a lot of pictures from the filled Banchetto mod.

    Here the backside. Now with a lot of green, but as said before ... Will add some more black soon.


    And the front


    That's it for today

  9. #9
    Xtreme Member
    Join Date
    Aug 2010
    Location
    netherlands
    Posts
    264


    Cover-up Update!!!


    Another update only this time I'm going to hide some things ...

    The reason is too much green. It is much better to add more black now the liquid is in.
    Also I don't like the frosted green parts anymore. That's why I replaced the side strips with clear UV green ... and cutout some shapes.


    To hide some green, I have sawn a new plate 1cm smaller than the original


    And copied everything that was in the original


    Removed the tape


    First pasted white and then black vinyl. White is for better light distribution so the edges will glow nicely.


    Kept a small distance between the panels.

    Result:


    Same story with the top plate


    Also did some things to the front to get more black accents But first sawn a cover UV green.


    Which will be placed like this.


    Made the shape of the black plate like this after some puzzling.


    And again pasted it with black and white vinyl.


    Also a little distance between the plates


    Result:


    Beginning to become what I had in mind, so no more big changes.

    But ... we're not done yet

  10. #10
    Xtreme Member
    Join Date
    Aug 2010
    Location
    netherlands
    Posts
    264


    Update!!!


    This will be one of the last updates my friends because its almost finished. Just wanna to say thanks for all the great comments.

    So here we go.... Just a few more things to do in this build and then the final shoot coming your way

    Behind the middle section I've got some nice space for a Bitspower X-station


    LED color green


    To hide this and for a little eye catcher I called my CNC friend Pascal...Thanks mate!!!


    Nice result on a rainy day


    Once placed.


    To get a better effect regarding the UV stuff, I placed some UV LED strips


    Since I have a bit of a trauma from too much sleeving in the past, I have chosen the easy way. Ordering Bitfenix alchemy sleeve from my favorite modding shop Highflow

    A black ATX 24-pin extension


    also a 8-pin EPS extention


    2x a 6-pin PCI-E extension


    and last 2x een 8-pin PCI-E extension


    After some pulling, bending and swearing, got some nice curves


    GPUs where the hardest to get in shape, but it's ok now I think


    Next the final shoot... small preview pic.


  11. #11
    Xtreme Member
    Join Date
    Aug 2010
    Location
    netherlands
    Posts
    264


    Final Update!!!

    Hi my dear modding friends,

    Because of some personal stuff I couldn't make time to post the final shoot.
    But here it is!!! .... The final shoot Banchetto MbK


    That's it!!!

    Special thanks goes to:

    Bernice from:


    Vincent and Lily from:


    Freddy from:


    And Federico from:


    Very sad to share with you my friends, but for personal reasons this will be one of the last builds that I make. I still have two special builds which I've started that I will finish.

    But after this.... it's over.
    Last edited by kier; 10-16-2014 at 10:44 AM.

  12. #12
    Xtreme Member
    Join Date
    Aug 2010
    Posts
    397
    Very imperssive work.

    i7 2700K 4.8 | P67A-UD5-B3 | GTX670 1254/7200 | 8GB RAM | INTEL SSD 160GB | SEASONIC 500W | DELL 2412M | Lian Li A7110

Bookmarks

Bookmarks

Posting Permissions

  • You may not post new threads
  • You may not post replies
  • You may not post attachments
  • You may not edit your posts
  •