Results 1 to 15 of 15

Thread: Pr3ds Scratch built w/c'd mATX case (Lots of pics)

  1. #1
    Registered User
    Join Date
    Sep 2009
    Location
    Sydney, Australia
    Posts
    46

    Pr3ds Scratch built w/c'd mATX case (Lots of pics)

    Hey all!

    This build log was originally posted over at OCAU, so its all finished now. Thought i would share the complete log with you fine folks tho and hopefully get some feed back !

    Ill start of with whats going in it and then just post up all my perty pictures.

    CPU: Intel Core i7 4770
    MOBO: ASUS Maximus VI Gene
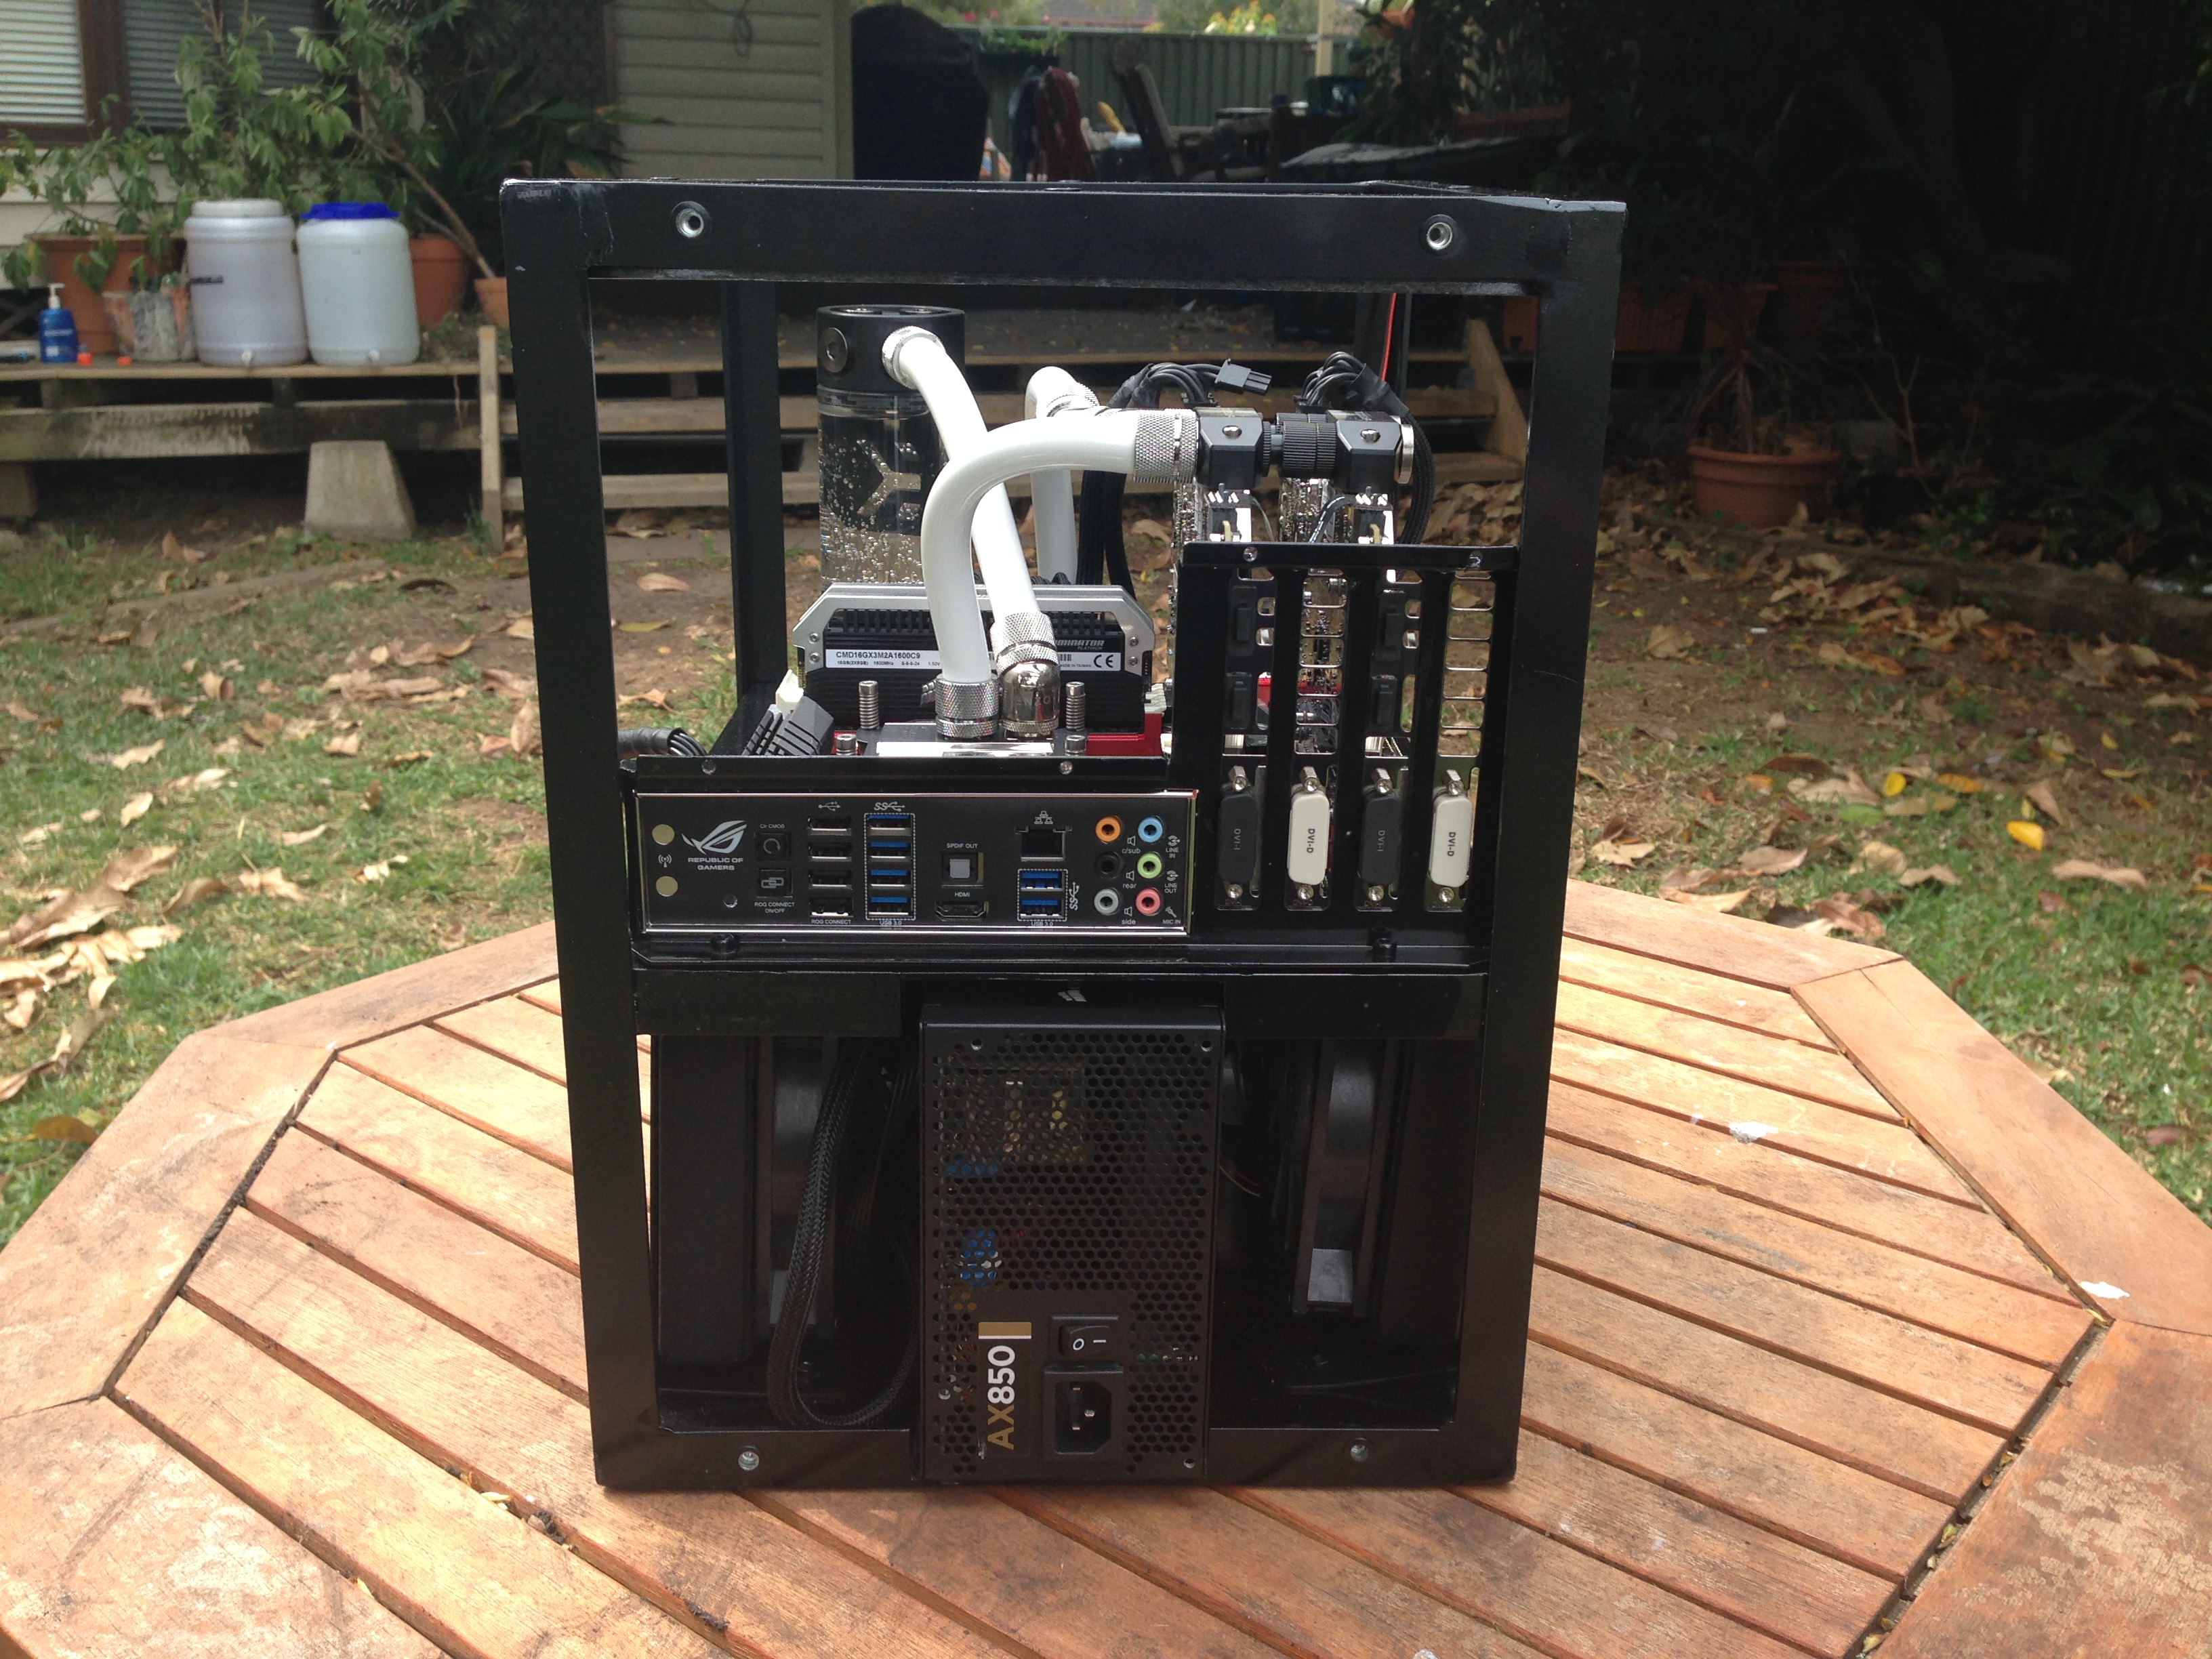
    RAM: Corsair Dominator Platinum CMD16GX3M2A1600C9 16GB
    GPU: EVGA GeForce GTX 780 3GB (2 in SLI)
    PSU: Corsair AX850 (I think lol its still in my Tj-08 build)

    CPU Block: Watercool HK CPU Rev.3
    GPU Block's: Heatkiller GPU-X3 GTX 780 - Hole Edition


  2. #2
    Registered User
    Join Date
    Sep 2009
    Location
    Sydney, Australia
    Posts
    46
    FRAME WORK

    I used 3mm thick 20mm x 20mm Aluminium angle for the frame. This awesome band saw that also has the feature of like a drop saw made it easy to cut the angles at 45 degs.


    The peices welded together and then cleaned.


    This vise made sure that when we were welding, the pieces were kept at a right angle. Made life alot easier.


    Here is all the frame work in place and a PSU roughly inplace to give you an idea of the layout and size


    The middle section of the frame i made removeable to make it easier to access the lower compartment. I use these little fellas called "nutserts" which are essentially rivots with thread in them!


    The Nutsert tool. Its pretty much just a rivot gun with interchangable threads on the end depending on the thread of the nutserts. I used M4


    I originally bought Xigmatek Gigas in the hopes of modding it for this build. http://www.xigmatek.com/product.php?productid=134 I ended up removing the motherboard tray and cutting some holes to allow for cables to pass through and CPU backing plate.

    Here it is sitting ontop of the frame


    Welding the tray to the mobo frame


    Took the I/O bracket off this lian li mobo tray and attached it to my mobo tray


  3. #3
    Registered User
    Join Date
    Sep 2009
    Location
    Sydney, Australia
    Posts
    46
    TEST FITTING

    And here is a couple photos with place holder components sitting roughly in place to give you an idea of what my plans were


  4. #4
    Registered User
    Join Date
    Sep 2009
    Location
    Sydney, Australia
    Posts
    46
    RADS & RES


  5. #5
    Registered User
    Join Date
    Sep 2009
    Location
    Sydney, Australia
    Posts
    46
    PANELS

    I got my panels cut with a CNC, they turned out great!

    Front and rear panels


    Side panels


    Top panel


    I mentioned earlier that I had a Xigmatek Gigas that I stole the motherboard tray from. Well this was another piece that i stole from it!


    Mounted to the front panel


    Pulled the fan controller out of my tj-08 build and pulled it apart and modified it so i could mount it on the front panel.


    Had to file down each of the knobs so that it would clear the panel.


    The end result


    I Ordered some Modright Modders Mesh from FrozenCPU to use as the grills for the lower rad compartment and the rear exhaust fan. Its pretty awesome stuff!


  6. #6
    Registered User
    Join Date
    Sep 2009
    Location
    Sydney, Australia
    Posts
    46
    CASE SO FAR


    One thing that i did stuff up was, when I sent the dimension away to get the panels CNC'd, I made them the same as the frame. If i was to do it again I would add some length to all the panels so that they would meet up and make a nice corner. Oh well im still very happy with it!


  7. #7
    Registered User
    Join Date
    Sep 2009
    Location
    Sydney, Australia
    Posts
    46
    AFTER PAINT

    While my cladding was drying, it was really windy and a bunch of dust got blown into the gloss coat. So i did my best to sand it all back and give it a polish. In the mean time I shall keep you entertained with photos!


    Here is what the cladding looks like so far (havent cleaned off the polish yet)


  8. #8
    Registered User
    Join Date
    Sep 2009
    Location
    Sydney, Australia
    Posts
    46
    FINAL SHOTS

    All done! Still not 100% happy with the paint on the cladding but its as good as i am going to get it. Enjoy the pics!


    Some shots with the lights on. Photos make them look like blue lights....but they are white i promise :P


    And here is a shot for size comparison next to a coke can and my 30" dell


  9. #9
    Registered User
    Join Date
    Aug 2013
    Location
    Leverkusen (Germany)
    Posts
    78
    Fantastic work, really good. Thank you for sharing.
    How many hours did you spend to do this?

  10. #10
    Xtreme Member
    Join Date
    Mar 2006
    Location
    Arcadia, CA
    Posts
    166
    Outstanding! Thanks for sharing.

  11. #11
    Registered User
    Join Date
    Sep 2009
    Posts
    13
    Very nice!!

    Show off

    I'd imagine you would get alot of dust being pulled into the case though with such a big rear fan. If you reverse the air flow you will create possitive pressure inside the case, and the rear dust filter will make cleaning much easier/less frequent. Might detract slightly from the look though.

    Very impressive build!1

  12. #12
    Registered User
    Join Date
    Sep 2009
    Location
    Sydney, Australia
    Posts
    46
    Quote Originally Posted by GliderHR View Post
    Fantastic work, really good. Thank you for sharing.
    How many hours did you spend to do this?
    The whole build did over a period of a little more than 3 weeks i think. thanks for the positive feedback guys

  13. #13
    Xtreme Addict
    Join Date
    Apr 2011
    Location
    North Queensland Australia
    Posts
    1,445
    Ahhh this is the build I saw on PCCG!

    Nice work!

    -PB
    -Project Sakura-
    Intel i7 860 @ 4.0Ghz, Asus Maximus III Formula, 8GB G-Skill Ripjaws X F3 (@ 1600Mhz), 2x GTX 295 Quad SLI
    2x 120GB OCZ Vertex 2 RAID 0, OCZ ZX 1000W, NZXT Phantom (Pink), Dell SX2210T Touch Screen, Windows 8.1 Pro

    Koolance RP-401X2 1.1 (w/ Swiftech MCP35X), XSPC EX420, XSPC X-Flow 240, DT Sniper, EK-FC 295s (w/ RAM Blocks), Enzotech M3F Mosfet+NB/SB

  14. #14
    Registered User
    Join Date
    Aug 2012
    Location
    The Netherlands
    Posts
    35
    Great stuff

  15. #15
    Registered User
    Join Date
    Sep 2009
    Posts
    13
    Quote Originally Posted by Pr3dator8 View Post
    The whole build did over a period of a little more than 3 weeks i think. thanks for the positive feedback guys
    3 Weeks? My 'ordinary' build took 5 years...

    http://www.xtremesystems.org/forums/...rst-time-build!

    What are your temps like?

    My loop temps aren't great at the moment - 12C delta at idle, 14C delta at load.. My second Silverstone AP181 18cm fan died on me.

Bookmarks

Bookmarks

Posting Permissions

  • You may not post new threads
  • You may not post replies
  • You may not post attachments
  • You may not edit your posts
  •