Page 1 of 4 1234 LastLast
Results 1 to 25 of 82

Thread: [MNPCTech] Project: Rebel Alliance CMII

  1. #1
    Registered User
    Join Date
    Jan 2013
    Posts
    8

    [MNPCTech] Project: Rebel Alliance CMII

    Hello everybody!

    As some of you may know, I have been working closely with Bill Owen at MNPCTech over the past year learning and soaking up as much as I can as his intern. We have done several case reviews and mod guides together, and it is time for me to step it up a notch and take on a big themed build.


    - Theme -


    This is going to be influenced by oldschool Star Wars, and specifically Rebel Alliance equipment. I love the look of their gear, machinery, technology, and spacecraft, so this will take many ideas from that. We're starting with the Cosmos II, and will end up with something that looks dramatically different in the end.


    I first must thank CoolerMaster for the sponsorship of the Cosmos II and Silent Pro Hybrid 1300w powersupply, EK for sponsoring the watercooling components, Lutro0 for sponsoring their beautiful sleeving work, Mayhems for supplying their world class coolants and dyes, Cheapskate for dedicating his time into designing custom waterblocks for the 680s, Brian Garrity for his time as the camera man for the upcoming video of this project, and of course Bill and MNPCTech for everything he has taught me and given me during my time working with him.


    - Components -

    Asus Rampage IV Extreme
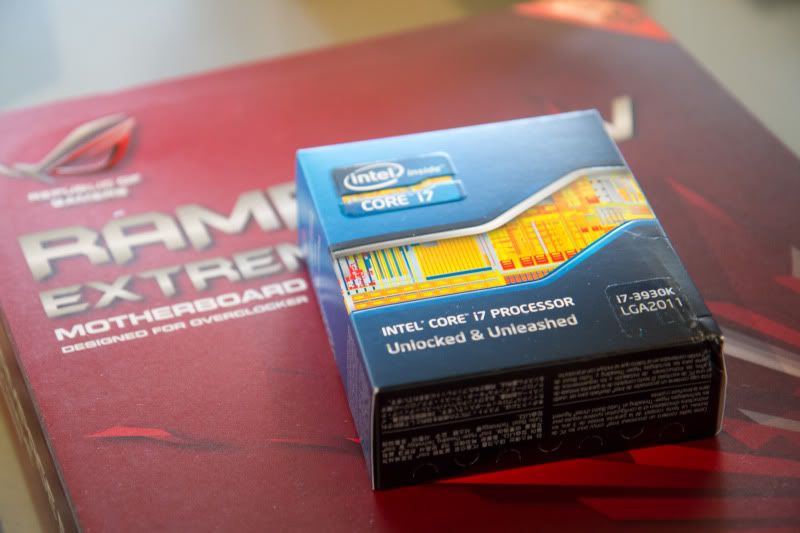
    Intel 3930k
    Quad SLI GTX 680 Classified's
    32gb of Corsair Dominator 2133mhz
    CoolerMaster Silent Pro Hybrid 1300w
    512gb Vertex 4 SSD
    3x 3tb Seagate 7,200rpm storage drives
    Cosmos II
    Full dual loop EK watercooling setup with custom GPU waterblocks designed by our very own Cheapskate
    • Supremacy Elite socket 2011 Nickel CPU block
    • R4E Nickel CSQ mobo block
    • 2x Ram Dominator X4 blocks
    • 2x 480 XT radiators
    • 2x DDC-3.2TP pumps
    • 2x X3 150mm res
    • Black Nickel fittings
    • Custom Classified blocks by munkeybutt

    Time for the pics to do the talking!
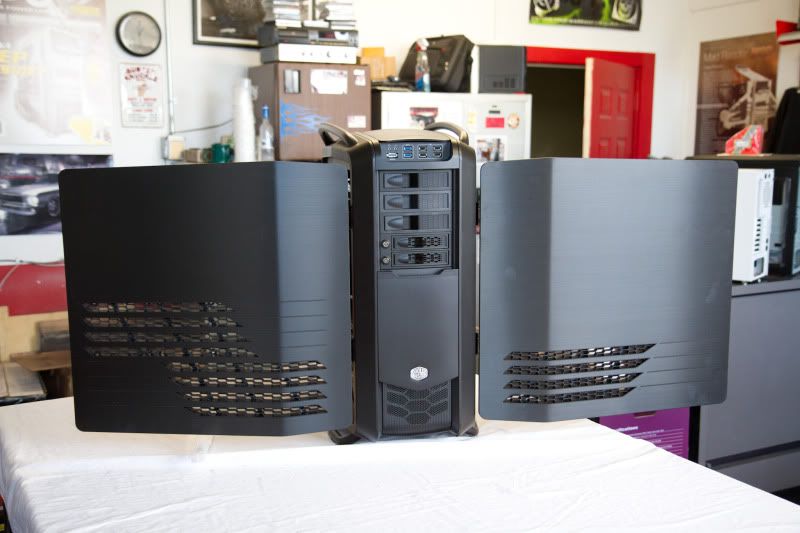

    The Cosmos II


    It's a bird. It's a plane...


    Cosmos II opened up - I hate that mess of useless crap dangling there.


    The build will feature MNPCTech's new Cosmos II Full Acrylic window side panel! Available soon for order. This is a serious chunk of acrylic!


    A few components going into the system


    Classified unboxing


    These cards are bigger than 690's...


    Shiny!


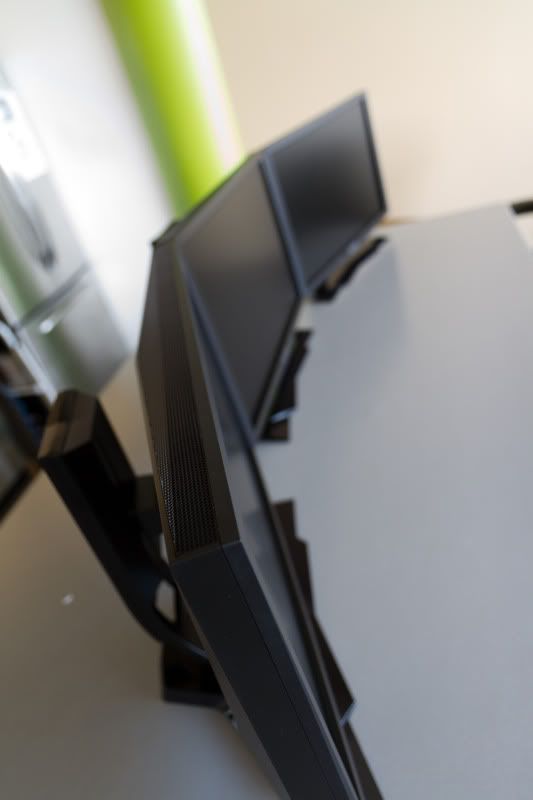
    Why is quad sli not overkill? 6000x1080-across-three-monitors-gaming is why. Even the Rebel Alliance has to game from time to time!


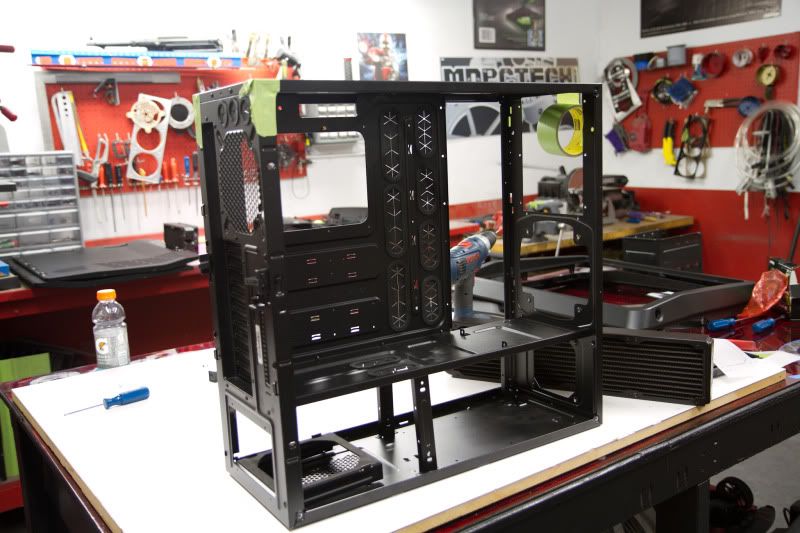
    Stripping down the CMII for some modding.


    Taping off the top to cut room for a 480mm rad.


    Lining up the top rad


    Cages removed to make room for a 480mm rad in the front


    Creating the mounting system for the 480 in the front bezel


    Rad mounted into front bezel. I will be doing more in between the rad and the edges to make it more connected.


    Front rad mounted in the case


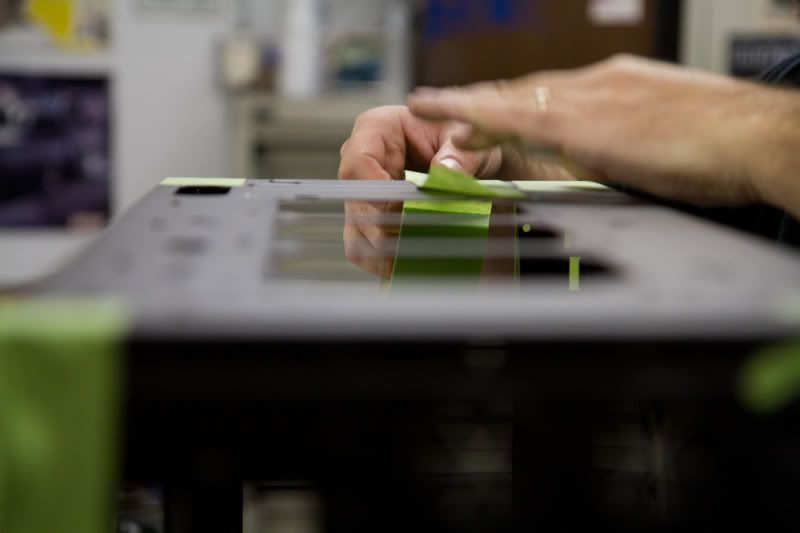
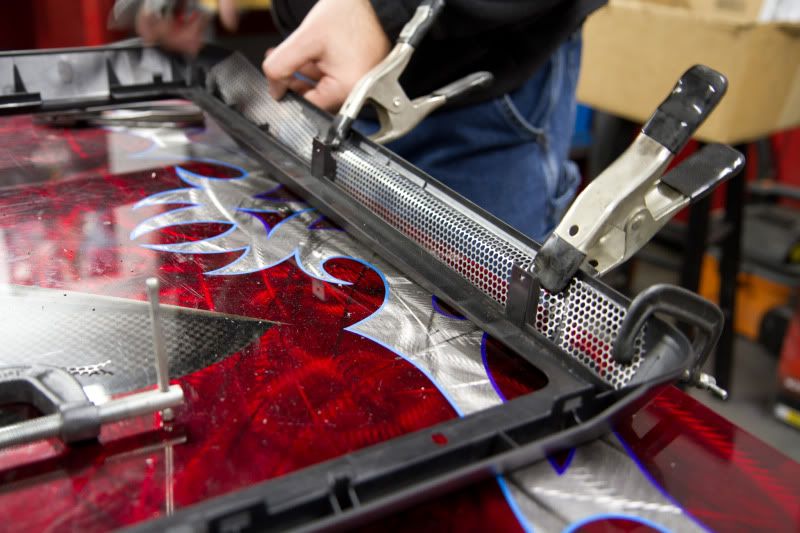
    I wanted to do something special with the edge frame work, so I decided on cutting out slots and putting some modders mesh behind it


    Clamping down the mesh for some epoxying


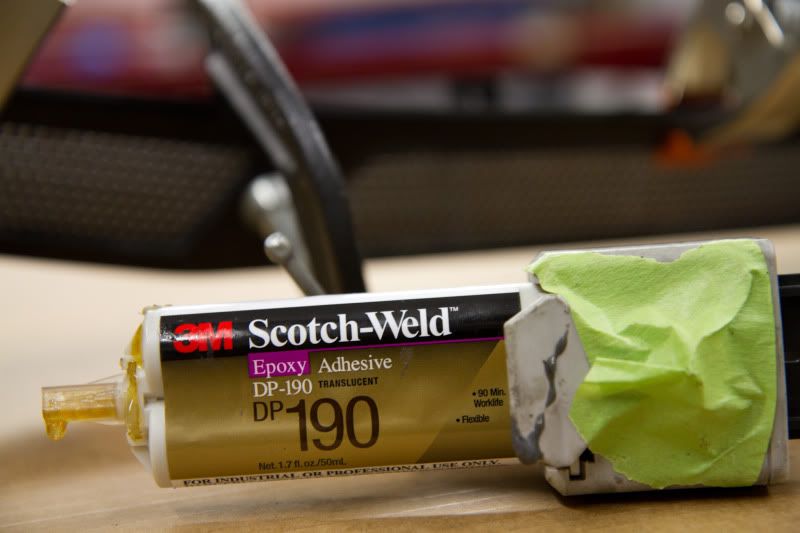
    This stuff is the best for all kinds of modding. Epoxy of the gods I say!


    Removing the stock top panel mesh


    Mounting a hinge on the top panel for some flap movement


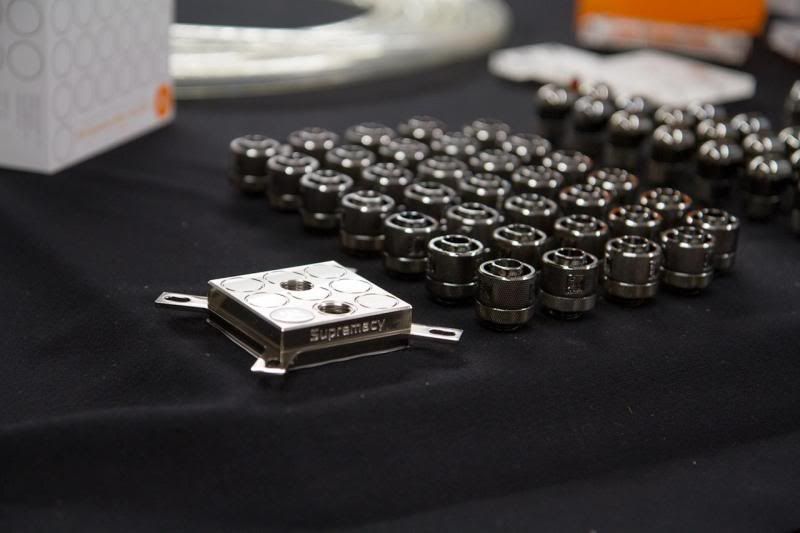
    Watercooling time! Supremacy 2011 block and black nickel fittings


    I love the frosty tops on these blocks!


    DDC's and tops


    An army of black nickel fittings! So prettttttty!


    -- Updates 1/1/13 --


    Thanks for following guys! Here are some updates on what is in the works...


    Measuring out pieces to make dual res holder from 1/4" thick Black Opaque acrylic sheet


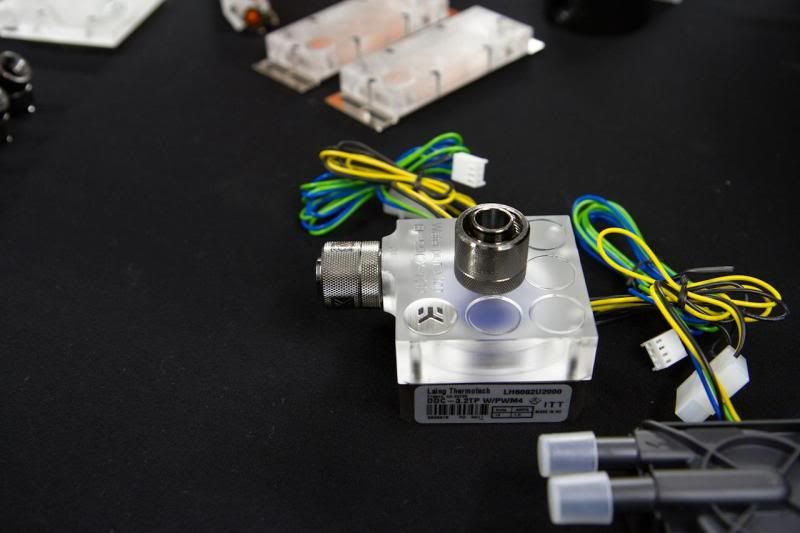
    Custom Dual Res tube holder for the EK Res X3s


    EK Res X3s, ready for mounting


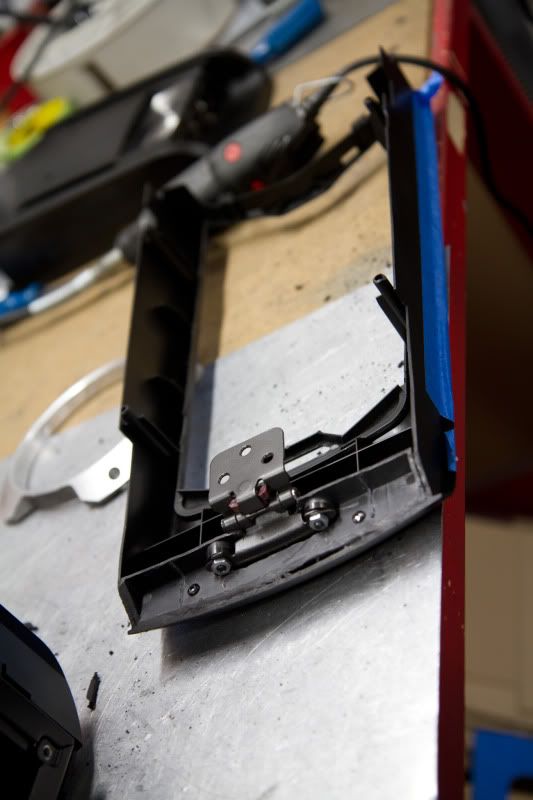
    What remains of the factory front I/O, this was part of the CM II's top panel. This will flip open.


    Modified "Laurey" style cabinet hinge, this spring loaded, and found at WoodCraft, http://www.woodcraft....ount-Pair.aspx


    Spacer for hinge made from 1/8" acrylic, this will be painted later


    Dual EK Res X3s mounted. This location will be ideal when it's time to fill the two loops.


    The flip cover, creates easy access for inspecting the loops, if ever needed in the future.


    The rear cover flips open now too!


    I wanted to use an ipod touch for monitoring and fan control. This will be mounted in the front top panel and running through the Bitfenix Recon phone app.


    Making the front phone mount


    Initial looks of the front phone fan control module. Think Luke Skywalker's targeting computer />


    Custom shroud for the reservoirs


    -- Update 1/6/13 --

    Update time! I appreciate the comments and follows guys! I'm very dedicated to making this a very clean build internally, which is why shrouding everything is a must. I also want to keep the interior of the case very open and uncluttered, so there will be next to nothing inside the main compartment other than the mobo and what's attached to it. No drives, pumps, anything located here. It's all about the aesthetics!


    Cutting 1/4" thick cast acrylic to use as a shroud for the lower portion of the chassis


    1/4" acrylic over lower portion which will be easily removable with thumbscrews, 1/8" acrylic shroud on back wall will hide liquid tubing


    The mid section has 1/2" thick acrylic floor so it's flush with the outter edge of the chassis


    Using weld-on to attach lip to the tubing shroud for the back wall of the chassis, this will be painted later to match the exterior of the case.


    Temporarily installing Mnpctech's CM II clear panel to determine the two 120mm fan hole openings in the removable lower chassis shroud


    The two 120mm fan hole openings are aligned with opening in the clear panel


    The epoxy on the side bezels has dried and I really like how they look with the mesh


    Now it's time to do the same thing with the non-window'ed side panel. Cutting the double layered panel was a bit of a challenge, but it's cleaned up and time for more epoxy. I plan to mount an acrylic Rebel Alliance logo on the mesh and illuminate it.


    As far as the custom classified waterblocks are concerned, Cheapskate has made great progress (though he has reminded me how complex these little buggers are going to be /> This is current design phase with an "X Wing" style backplate that will have the Rebel Alliance logo in the red circle. The layers in the pic are backplate, full copper block, acrylic top, and stainless top cover.


    More to come soon! We'll have a video worklog as well, so make sure you subscribe to MNPCTech's Youtube Channel!

  2. #2
    Xtreme Member
    Join Date
    Nov 2010
    Posts
    140
    Subbed
    It promises to be tasty...

  3. #3
    Xtreme Member
    Join Date
    Jul 2009
    Location
    Mnpctech.com
    Posts
    451
    The term "Heavy Metal" comes to mind, whenever I think about those blocks....

  4. #4
    Registered User
    Join Date
    Jan 2013
    Posts
    8
    Time for another update!


    Taping off a section of the side panel to cut an opening that will be backed with mesh and a Rebel Alliance logo


    Mmmmmm hot plastic spray


    Cleaning up the back side of the opening - not an easy task with the over engineered cosmos II side panels


    The triple layer madness has been dominated.


    Time to clean up the cut with a hand file


    The side panels just feel really bland from the factory, so a few more additions will help to add some character to the Starwars tech feel


    To mount two of the three 3.5" drives, I'll be using 1/8" cast acrylic for a mounting plate


    The drives will be hidden behind the PSU and attached with thumb screws


    The stock support was removed and a custom beam was created with 1" thick acrylic which the hard drive mounting plate attaches to


    For the rear case fan, the stock grill was removed with a jigsaw and 18 TPI bi-metal cutting blade


    I'll be using a combination of a custom one-off grill and Mnpctech 120mm Overkill ring. I have yet to decide on exactly what combination, as a few options look good.


    Dropping in the EK waterblocks for a preliminary test fitting.


    Spacing things out in the case. Subsequently Bill finds out I'm OCD about watercooling tubing and fittings :P


    Getting up close and personal with the preliminary fitting


    Everything is coming together nicely. The front will be covered by a huge 480mm machined grill and shrouding around the edges up to the fans. Materials TBD


    Cable management will be super clean as we have created a custom acrylic plate that the mobo is mounting on, and this allows for slots to be cut behind the mobo instead of next to it avoiding a visual mess.


    More coming soon! Thanks for watching.

  5. #5
    Registered User
    Join Date
    Jan 2013
    Posts
    8
    Time for another small update. Making some serious progress on the internals now! In addition to the iphone control up front, I also wanted something to make the inside shrouding a bit more interesting... so I went with an Aquaero. This will be used for some fan control, flow senors, inline water temp readings, etc. I like their graphs.


    A few of the LED strips I'll be using around the case to give a little glow.


    I made a Rebel Alliance logo by hand which will likely be used on the side panel, and I may need to bust out a few more for placement among the build. A little time consuming, but worth it.


    The interior is just about ready to head in for paint. The acrylic will all be painted the same color as the exterior (a metallic gray). The side shroud with fan holes is removable via thumb screws if I should ever need to access the lower compartment which will house the pumps.


    Here you can see the placement of the Aquaero. The acrylic will be cut to fit it in perfectly and will be used for reading water temps, flow, and controlling some fans.


    Holes are in place for tubing pass through to the quad GPU setup. The acrylic is flush with the case.


    A sneaky view of the lower compartment that will house the PSU and pumps. The custom support brackets are made from 1" acrylic and also support the hidden hard drive mounting bracket behind the PSU.

  6. #6
    Xtreme Member
    Join Date
    Jul 2009
    Location
    Mnpctech.com
    Posts
    451
    looking forward to getting everything painted...

  7. #7
    Xtreme Member
    Join Date
    Dec 2012
    Location
    Buenos Aires
    Posts
    306
    Looks awesome so far...subbed.

  8. #8
    Registered User
    Join Date
    Jan 2013
    Posts
    8
    Thank you!

    Fans all taped up and ready to paint. You may ask why we'd do this instead of taking them apart, but these have a tiny pin in the hub that is really easy to screw up, so instead of risking bricking a bunch of fans, I spent a long time taping them up

    The hubs will be painted "Rebel Alliance" red to play off the other red accents.


  9. #9
    Registered User
    Join Date
    Jan 2013
    Posts
    8
    The first batch of parts have been painted. I really like how the color and finish turned out!


  10. #10
    Administrator
    Join Date
    Nov 2007
    Location
    Stockton, CA
    Posts
    3,568
    WoW no comments yet.

    I really like what your doing here, love the two res's on top
    Can't wait to see more

  11. #11
    Xtreme Member
    Join Date
    Oct 2010
    Posts
    250
    I'm watching this build very closely!! Keep going, super fine job you're doing there.
    Case: HAF-X
    CPU: AMD phenom II X6 1090T@4GHz
    Motherboard: Asus CHIV formula
    GPU: 2x 6870
    RAM: Patriot Sector 5 2x4GB
    HDD: Crucial M4 256GB

    Can you? On AIR
    Better? -- On AIR

  12. #12
    Registered User
    Join Date
    Jan 2013
    Posts
    18
    This thread is pure eye candy!

  13. #13
    Xtreme Member
    Join Date
    Jul 2009
    Location
    Mnpctech.com
    Posts
    451
    the color combo is turning out nice

  14. #14
    Registered User
    Join Date
    Jan 2013
    Posts
    8
    Brad spent time mixing up the custom House of Kolor red to match the liquid. This will be used for the fans and custom airbrushing around and inside the case. More paint pictures should be up tomorrow..


  15. #15
    Registered User
    Join Date
    Jan 2013
    Posts
    8
    Just a small update with a few current progress pics from our Midwest Modder's meet up last weekend.


  16. #16
    Xtreme Enthusiast
    Join Date
    Jan 2003
    Location
    Littleton, Colorado
    Posts
    740
    Wow... Stunning.
    Heatware

    Main
    intel i5 3570k @ 4+ GHz | Gigabyte Z77X-UD5H Rev 1.1 |Crucial Ballistix Tactical VLP 2x8GB DDR3-1600
    intel 335 240GB SSD | WD Black 640GB HDD
    Sapphire AMD 7870XT 2GB w-Boost (Tahiti LE)
    Creative X-Fi Titanium PCI-e

    HTPC
    AMD FX 6300 Vishera | ASRock 970 Extreme 3 | Kingston HyperX Black 2x4GB DDR3-1600
    intel 320 120GB SSD | Seagate Barracuda 640GB HDD
    AMD Visiontek HD7850 2GB
    Dlink DWA-556 Wireless N Adapter

    Tablet
    Lenovo IdeaTab A2109 - Running rooted J-Bean & ADW

  17. #17
    Xtreme Member
    Join Date
    Nov 2008
    Posts
    137
    That looks GREAT! I like the res's at the top a lot.
    ASRock Z77 Extream6
    Intel i7 3770K
    G.SKILL Sniper Series 16GB (4 x 4GB) DDR3 1866
    OCZ Agility 3 120GB SATA III
    Western Digital Caviar Black 640GB
    CORSAIR HX1050
    GIGABYTE GTX 770 4GB

  18. #18
    Xtreme Member
    Join Date
    Jul 2009
    Location
    Mnpctech.com
    Posts
    451
    we're working on machined aluminum shroud for the 480 radiator for this beast, next....

  19. #19
    Xtreme Member
    Join Date
    Jul 2009
    Location
    Mnpctech.com
    Posts
    451
    Andrew will installing Mnpctech's Machined aluminum "Diamond Knurl" pc case feet on his CM II, which are made in HAAS cnc lathe.


    The base diameter is 1- 3/4" with height of 1" to elevate the case for improved airflow beneath it.


    They've been painted House of Kolor Kandy Red


  20. #20
    Xtreme Member
    Join Date
    Jul 2009
    Location
    Mnpctech.com
    Posts
    451
    Here are screen shots of the custom water blocks and liquid channeled bridge designed by Cheapskate. The blocks will be milled from Copper with Clear acrylic cover and top plate with design inspired by X-Wing fighter wing.These are for Andrew's eVga 680 GTX Classified graphics cards.


  21. #21
    Xtreme Member
    Join Date
    Dec 2012
    Location
    Buenos Aires
    Posts
    306
    OMG!!! Them waterblocks!!!! :o

    Amazing man
    Now I feel like having an AT-AT shaped case with legs :p

  22. #22
    Registered User
    Join Date
    Feb 2013
    Posts
    34
    Spectacular, following this closely.

  23. #23
    Xtreme Member
    Join Date
    Apr 2007
    Location
    Oregon
    Posts
    131
    love the blaster marks on it.

    although i personally prefer a more elegant weapon, for a more civilized age... :bleh:
    i5 3570k @ 4.4 | 16GB Kingston HyperX DDR3-1600 @ 1866 | Asrock Z77 Extreme4-M | EVGA GTX 680 SC | Xigmatek Night Hawk | Seasonic X-850 | Win8 64 | Dell 2407 | Lian Li PC-V700

  24. #24
    color red illidan's Avatar
    Join Date
    Mar 2005
    Posts
    1,485
    really like the whole progress so far. paint scheme is awesome, great red!

  25. #25
    Xtreme Addict
    Join Date
    Mar 2008
    Location
    Minnesota
    Posts
    1,653
    Looking amazing so far!
    i5 2500K @ 4.9GHz+ 8GB G-Skill RipJaws DDR3-2000 @1600Mhz CAS 6 Asus P8P67 Pro CrossFire 6970's @ 950/1450
    Xeon X5677 @ 4.5Ghz 6GB G-Skill RipJaws DDR3-2000 @1600Mhz CAS 7 Gigabyte EX58-UD5 4870x2
    i7-880 @ 4.2Ghz+ (still playing) 4GB G-Skill RipJaws DDR3-2000 @2300Mhz CAS 9 Asus Maximus III Formula MSI Hawk 5770

Page 1 of 4 1234 LastLast

Tags for this Thread

Bookmarks

Bookmarks

Posting Permissions

  • You may not post new threads
  • You may not post replies
  • You may not post attachments
  • You may not edit your posts
  •