Page 6 of 8 FirstFirst ... 345678 LastLast
Results 126 to 150 of 191

Thread: lowfat's Big Lian Li

  1. #126
    I am Xtreme
    Join Date
    Oct 2005
    Location
    Grande Prairie, AB, CAN
    Posts
    6,140
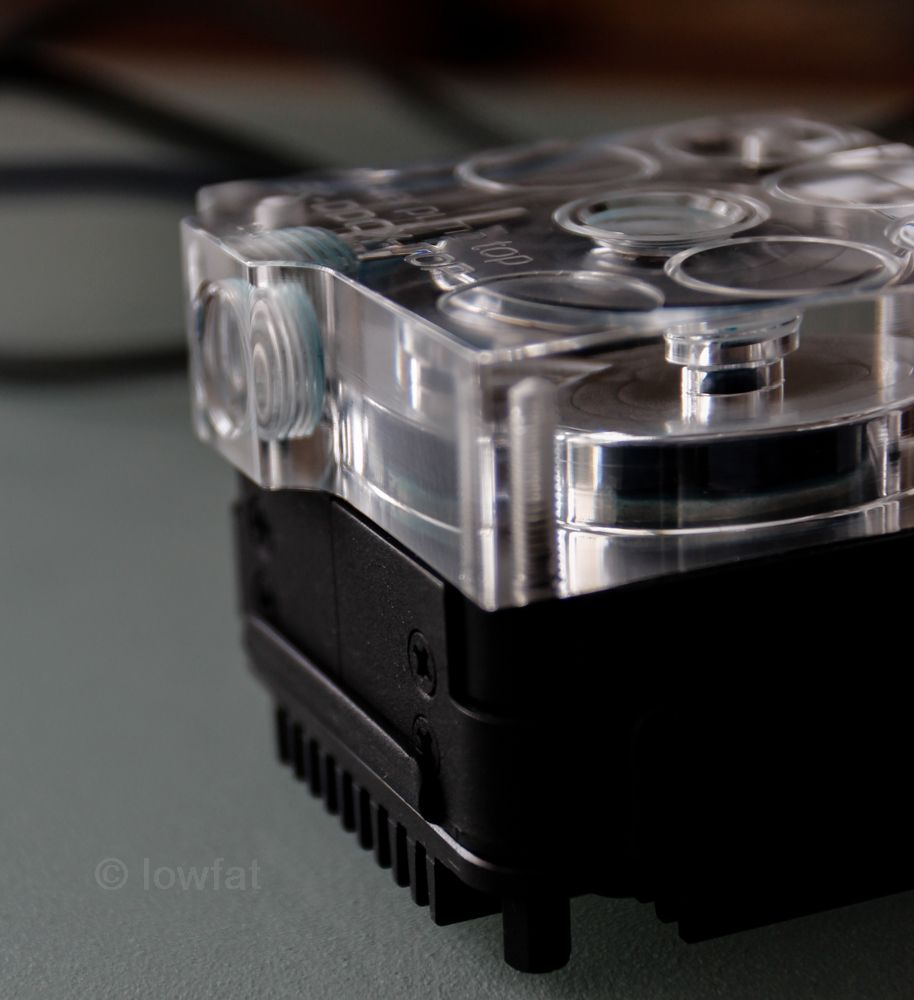
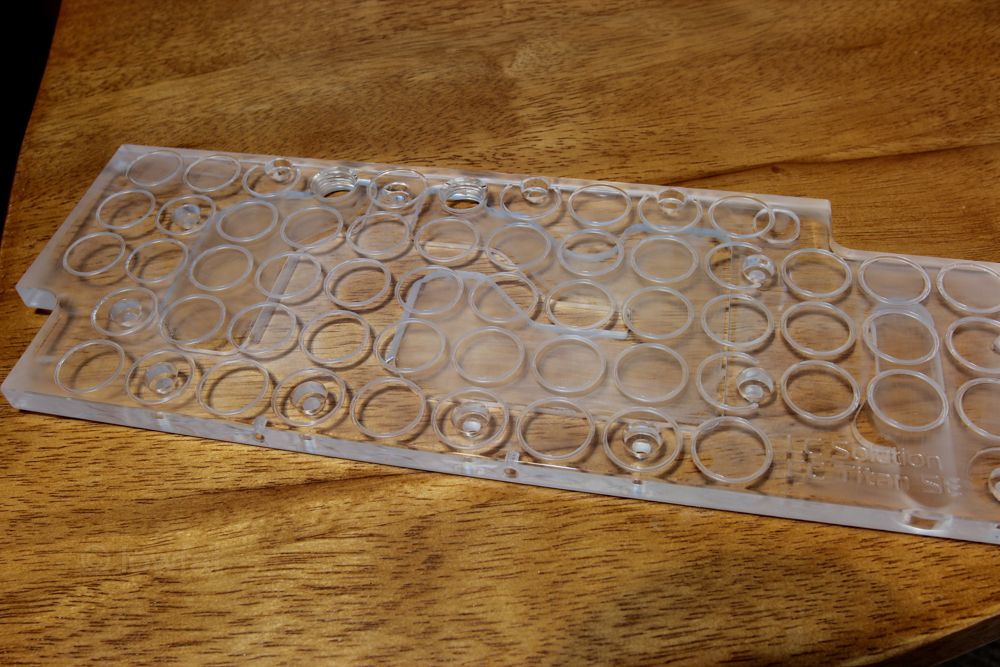
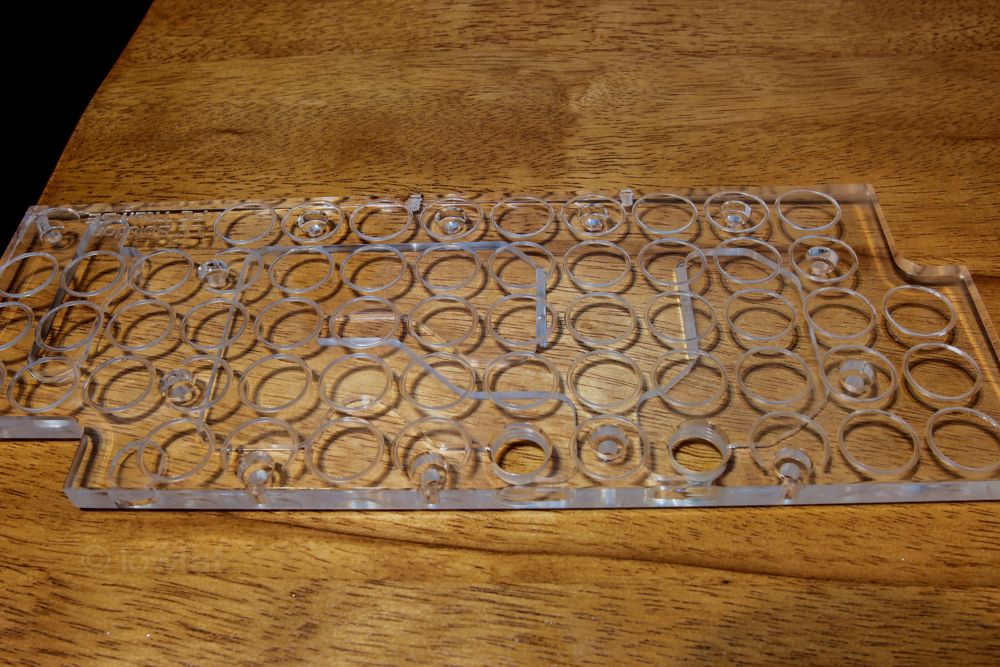
    Over the last few days I worked on cleaning up and painting my pump and reservoir. Resanded the reservoir w/ 400g. Then painted the top, base, and mounts. Repolished the top on the pump making the threads a bit cleaner. Then painted the Koolance pump casing flat black.


  2. #127
    I am Xtreme
    Join Date
    Oct 2005
    Location
    Grande Prairie, AB, CAN
    Posts
    6,140
    Been working on the case a bit today. Mostly filing. I removed one of the sides of the 5.25" bay things. It will be reinstalled but cut down to only hold the front 5.25" covers in place. I hope to have the radiator supported by the one side only. That way you'll be able to see the radiator, reservoir, and pump entirely w/o them being hidden. Next up is cutting the new motherboard tray.


  3. #128
    I am Xtreme
    Join Date
    Oct 2005
    Location
    Grande Prairie, AB, CAN
    Posts
    6,140
    Continued to work on the motherboard tray on and off all day yesterday.


    Tray cut and doing mockups.


    IO panel added.


    Using the original tray to get measurements. Made it hella easy to mark the new holes.


    It fits.


    In the case.


    Mockup w/ the radiator in place.

  4. #129
    I am Xtreme
    Join Date
    Oct 2005
    Location
    Grande Prairie, AB, CAN
    Posts
    6,140
    Here are a few pics w/ better lighting of how the case was yesterday.


    My modding koozie.


    Working on the cable management floor plan. I don't want to be drilling a million holes this time around. Planning out every single cable before I do any cutting.


    I attempted to counter sink the rivet holes on the back of the case. Carefully used a 1/4" drill bit to sink them. The grade on them isn't perfect but I wasn't able to find counter-sinking tools that were designed to under 1mm drill depth.


    Also finished cutting out the center of the backplate. Have a few small mistakes but I am happy w/ the outcome. Especially for a first time and doing it by hand. If only I had a CNC.


    Got some new nibblers today. Bessey again. They work so much better than my older ones. Except they mouth on them doesn't open as wide so they cannot be used w/ anything larger than 1.5mm. Also got a new pair of Bessey snips.


    I started work on drilling out the holes on the motherboard tray for cable management. I thought that flush mounting the bolts so they couldn't be visible from the front side would look good. Since I don't have the tools to drill precisely 1.5mm in to the aluminum I ordered some aluminum epoxy filler, which should be powder coatable according to their website. Pricey stuff unfortunately.

    Epoxy Filler, Aluminum Epoxy, Epoxy Putty, high temperature epoxy - Alvin Products - Metal Restoration and Repair

  5. #130
    Crunching For The Points! NKrader's Avatar
    Join Date
    Dec 2005
    Location
    Renton WA, USA
    Posts
    2,891
    wow..

    so much awesome..

  6. #131
    I am Xtreme
    Join Date
    Oct 2005
    Location
    Grande Prairie, AB, CAN
    Posts
    6,140
    Quote Originally Posted by NKrader View Post
    wow..

    so much awesome..
    Thanks.


    About 90% done w/ the holes on the motherboard tray. Still need to do the 4-pin connector cables for the pump/fans. But I don't exactly know where it will go yet so it will stay uncut. I won't be using spacers/standoffs for the cable management clamps this time. There will be two plates that go on each set of screws. One between the two layers of sleeving and one on top. Held in place w/ a pair of nuts. The screws will then be cut down to length. Doing it this way will allow for better tension. Plus being able to comb the sleeving since both layers of the sleeving will be separated at each clamp. Didn't realize some of the screws weren't in all the way and were leaning when I was taking the pics. The battery light on the camera was flashing I was in a hurry to get the pics taken. The plan is to cut off all the heads of the screws on the front side of the motherboard tray and use some metal epoxy to flush them. I have ordered some stuff that claims to be powder coatable.

    I have also cut all the holes required for the cable pass-throughs. I tried to keep them as small as possible. Each one will definitely require the connectors to be removed for the cables to get through.


  7. #132
    I am Xtreme
    Join Date
    Oct 2005
    Location
    Grande Prairie, AB, CAN
    Posts
    6,140
    Finished the first set of cable retention clamps. Only 14 more clamps to make.


    My sleeving combs that I now use to clean and straighten out the sleeving when putting it the case. A good 10x better than those cheap 3 and 4 mod smart ones I was using in the past. Way easier to install and remove and significantly easier to work w/.


    And the outcome. Only took me about an hour to feel the 24-pin one cable at a time through the hole and straighten them out.


  8. #133
    I am Xtreme
    Join Date
    Oct 2005
    Location
    Grande Prairie, AB, CAN
    Posts
    6,140

  9. #134
    I am Xtreme
    Join Date
    Oct 2005
    Location
    Grande Prairie, AB, CAN
    Posts
    6,140
    Cleanup up my tenkeyless Filco.


    Continuing working on the 24-pin. Third set of clamps done.


    Time to adjust the lengths of the cables.


    ....


    My staple method of depinning.


  10. #135
    I am Xtreme
    Join Date
    Oct 2005
    Location
    Grande Prairie, AB, CAN
    Posts
    6,140
    Half finished the 24-pin. It is getting very hard to keep the non-overlapping look here. The run is just too long without bracing. I may look in to buying an acrylic comb that sits between the wires.


    Repolish and resanded the WC stuff. Ended up sanding everything down to 1000 g, then 2000, then the polish.


    After polishing


    Bunch of pics if the blocks/pump. Ended up removing almost every EK badge. The reason I kept them the first time was due to the fact that the area under neath wasn't finished. After a bunch of sanding it looked good. Although the circles are recessed.


    Also painted the caps, the edge of the pcb, the power connectors, and heatshrinked the fan and led connectors.


    Frosted a tube. Didn't like it. Looks like I'll be sticking with clear.


    Painted the battery.


  11. #136
    Registered User
    Join Date
    Apr 2013
    Location
    California
    Posts
    35
    Love your attention to all the little details. We will never be able to identify all the little things you've done, like painting the CMOS battery, but we'll surely notice the effect on the overall build quality.

  12. #137
    I am Xtreme
    Join Date
    Oct 2005
    Location
    Grande Prairie, AB, CAN
    Posts
    6,140
    Quote Originally Posted by Lord Brand View Post
    Love your attention to all the little details. We will never be able to identify all the little things you've done, like painting the CMOS battery, but we'll surely notice the effect on the overall build quality.
    Thanks.

    A few new pics.


  13. #138
    I am Xtreme
    Join Date
    Oct 2005
    Location
    Grande Prairie, AB, CAN
    Posts
    6,140
    Finished off the 8-pin. A few of the 24-pin wires are slightly too long. I'll fix them after the rest of the wires are in place. I believe I may have underestimated how many cables will be passthrough the back side of the motherboard tray.


    Making the retention bars for the GPU cables.

  14. #139
    I am Xtreme
    Join Date
    Oct 2005
    Location
    Grande Prairie, AB, CAN
    Posts
    6,140
    Working on the GPU cables and straightening out the cables on the back at the moment.


  15. #140
    I am Xtreme
    Join Date
    Oct 2005
    Location
    Grande Prairie, AB, CAN
    Posts
    6,140
    I got back from my holidays yesterday. Worked on the GPU cables.


    Pics of the new Dell Venue Pro I bought recently.


    And a teaser pic of the case I recently bought for my NAS rebuild.

  16. #141
    I am Xtreme
    Join Date
    Oct 2005
    Location
    Grande Prairie, AB, CAN
    Posts
    6,140
    New WIP pics.


    Have to take out the mobo to do modding on the tray.


    Holy stubby fingers batman. :o


    New rad fans.


    Some Monsoon silver bullet things.


    SSD and fan controller mounted.


  17. #142
    I am Xtreme
    Join Date
    Oct 2005
    Location
    Grande Prairie, AB, CAN
    Posts
    6,140
    Really need to get this thing finished. It sucks not having a computer. I am doing all my updates via my HTPC and tablet. Getting close though.

    The last days I have worked on the cabling again.


    Just need to crimp on some new crimps.


    Purolator lady was nice to me this week.


    Also got a new SSD. Mushkin Chronos Deluxe 480GB. Immediately took off the label. Love the brushed black aluminum look to it.


    Yesterday morning I 'finished' the PSU wiring. That is a first for this build.


    Then I started working on aluminum. Cut a new false floor and a frontside 5.25" drive bay cover. Still need to mount them properly.


  18. #143
    Crunching For The Points! NKrader's Avatar
    Join Date
    Dec 2005
    Location
    Renton WA, USA
    Posts
    2,891
    jesus.. makes my case look like peasant build

  19. #144
    Registered User
    Join Date
    Feb 2013
    Posts
    34
    This wiring is blowing my mind.

  20. #145
    I am Xtreme
    Join Date
    Oct 2005
    Location
    Grande Prairie, AB, CAN
    Posts
    6,140
    Thanks.


    Nibbled a new 5.25" side cover. This one is a bit larger to fit the radiator a bit better. Also mounted the false floor properly.


    Then I mounted the front radiator.


    A few pics w/ the hardware reinstalled.


    The last few days I have been attempting to use the Monsoon mandrels. It hasn't been going so good. I went through 8 feet doing this single run and it still isn't right. It is 2-3 degrees off.


  21. #146
    I am Xtreme
    Join Date
    Oct 2005
    Location
    Grande Prairie, AB, CAN
    Posts
    6,140
    First draft of the acrylic done. I will redo a few bends after I buy more tubing.


  22. #147
    I am Xtreme
    Join Date
    Oct 2005
    Location
    Grande Prairie, AB, CAN
    Posts
    6,140
    Some of the work is starting to get tedious. Not much work left but most of it is boring and seems to require a lot of dismantling. Lat few days I have been working on fan/pump cables, filing down standoffs, mounting pump, etc.


    Macros of some brass filings.


    Mounting the pump.


    Pic from the other side of the radiator to show how it is setup.


    Got bored and heatshrinked my entire screw driver.

  23. #148
    I am Xtreme
    Join Date
    Oct 2005
    Location
    Grande Prairie, AB, CAN
    Posts
    6,140
    Dyed my radiator fans.


    Finished sleeving the top rad fans. Then reinstalled the system back in the case.


    Was able to power on the system last night. Had a few issues at first but after resolving them she works great.

  24. #149
    Xtreme Member
    Join Date
    Aug 2010
    Posts
    397
    I have question: are you going to eventually poweder coat/paint interior of the case?
    Personally I think that clean raw aluminium, even with all those scratches looks good, and more original than most builds these days, since cases just come in finished form (everything is black).

    i7 2700K 4.8 | P67A-UD5-B3 | GTX670 1254/7200 | 8GB RAM | INTEL SSD 160GB | SEASONIC 500W | DELL 2412M | Lian Li A7110

  25. #150
    I am Xtreme
    Join Date
    Oct 2005
    Location
    Grande Prairie, AB, CAN
    Posts
    6,140
    Quote Originally Posted by aerial View Post
    I have question: are you going to eventually poweder coat/paint interior of the case?
    Personally I think that clean raw aluminium, even with all those scratches looks good, and more original than most builds these days, since cases just come in finished form (everything is black).
    It will be powder coated. I don't like bare aluminum unless it is brushed or polished. I can't do either since I'll be using epoxy in a bunch of places.


    Drained the water and refilled the loop w/ the blue coolant.


Page 6 of 8 FirstFirst ... 345678 LastLast

Bookmarks

Bookmarks

Posting Permissions

  • You may not post new threads
  • You may not post replies
  • You may not post attachments
  • You may not edit your posts
  •