


Hardware
MOBO: MSI Big Bang Marshal B3
CPU: 2600k
RAM: 8GB Corsair Dominator GT 2133
GPU: 2 x MSI NGTX560 Ti Hawk
SSD: OCZ Agility 3
HDD: WD Raptor 74 GB RAID 0
Watercooling
Pumps: 2 x Swiftech MCP655 on Dual Serial Bitspower Top
Radiators: 2 x Phobya Xtreme 400
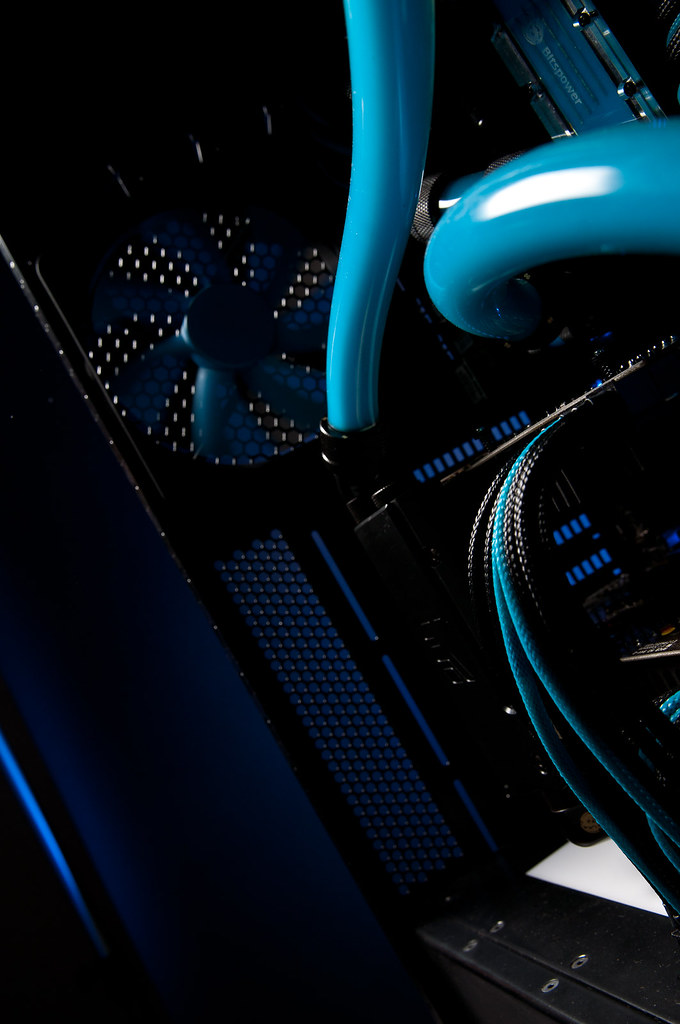
Fans: 4 x Phobya G-Silent 180
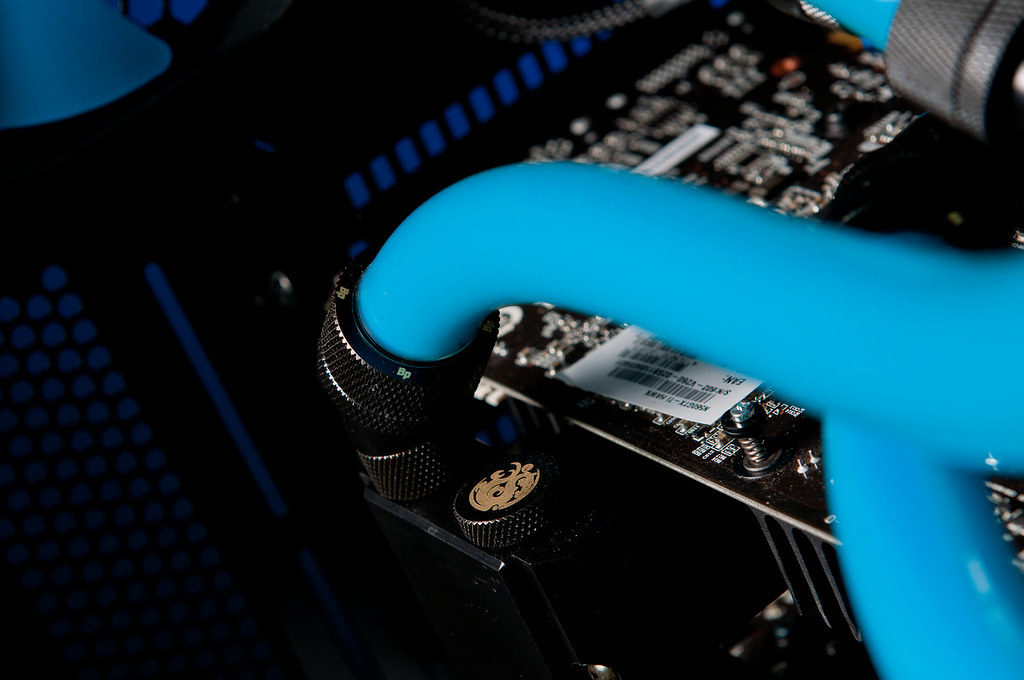
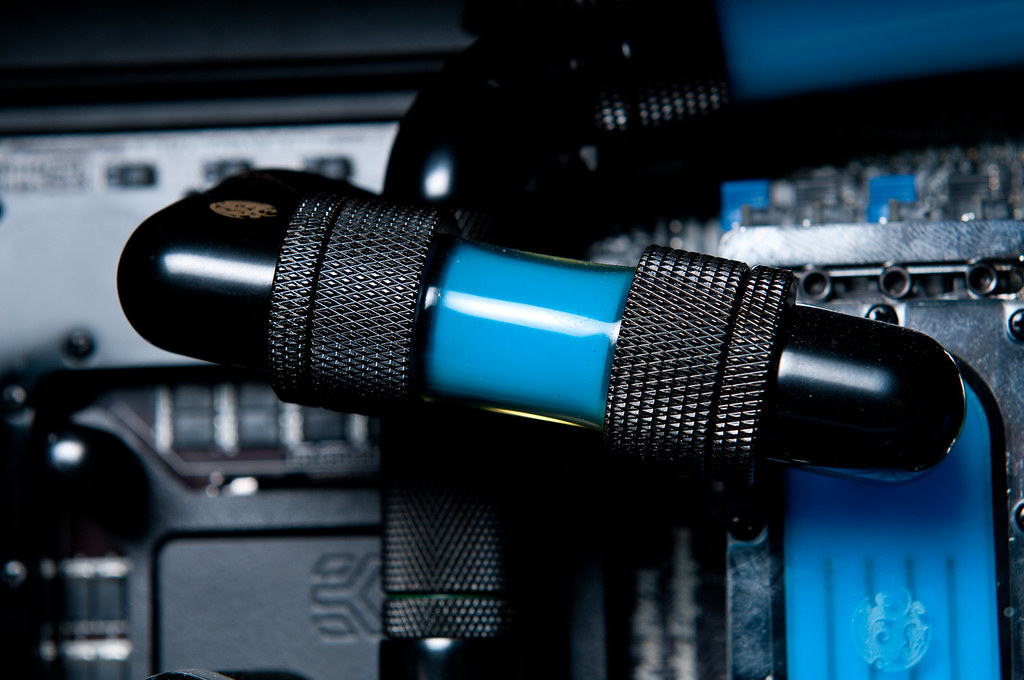
Fittings: Compression 13mm-19mm Bitspower Fittings
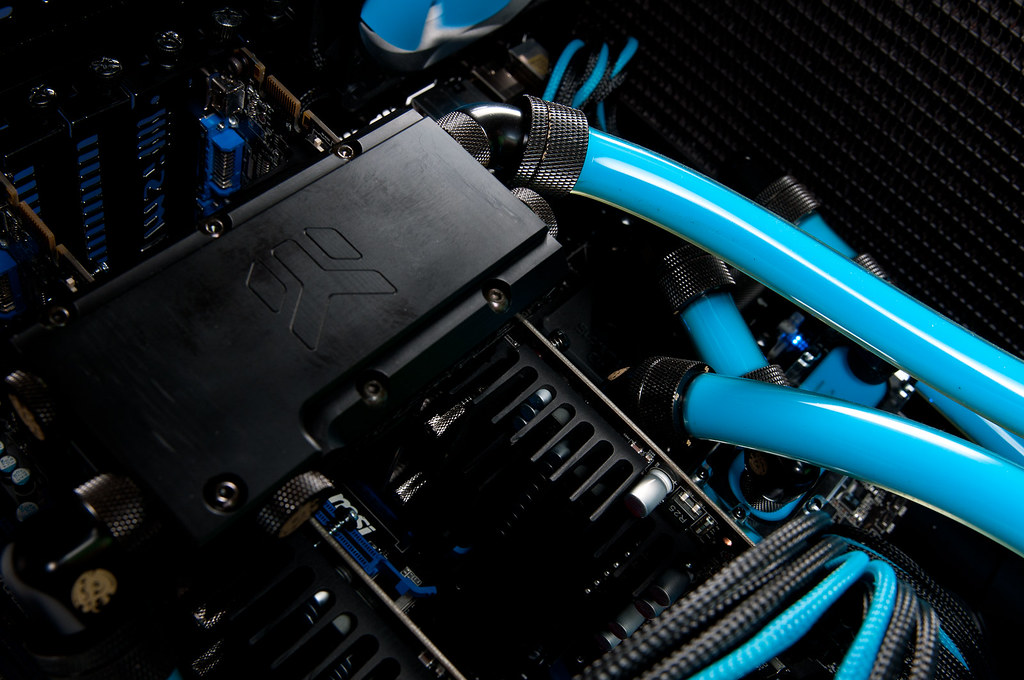
CPU Waterblock: EK Supreme HF Full Copper
GPU Waterblock: EK Supreme HF Bride Edition
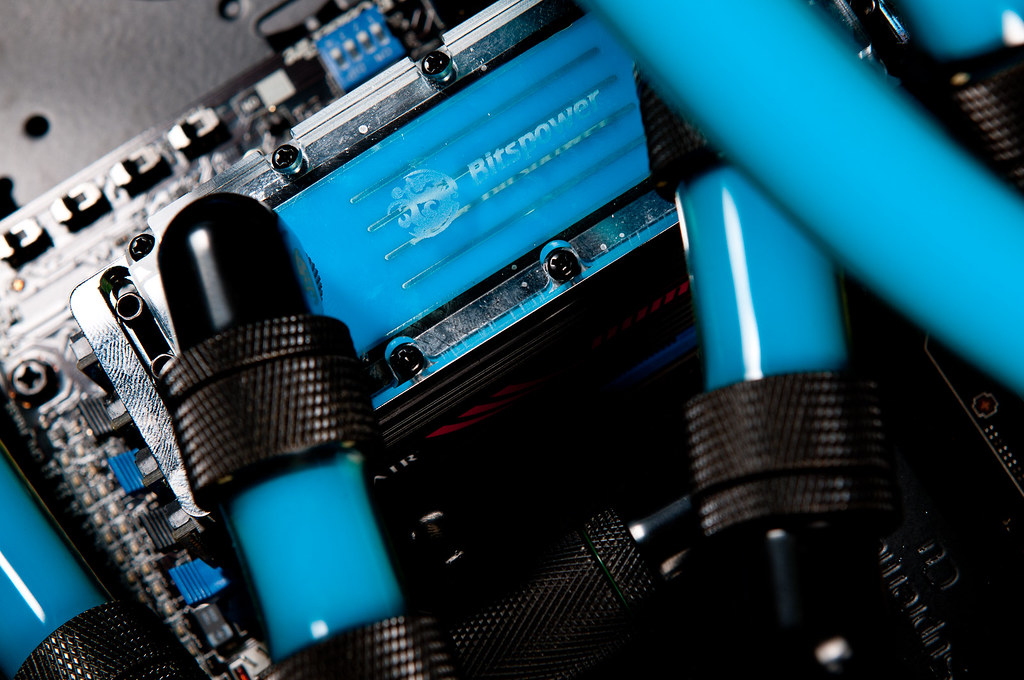
RAM Waterblock: Bitspower 4 DIMM Waterblock
MOBO Waterblock: Bitspower Full Cover Block
Special thanks to Bitspower and Phobya for sponsoring the project.

Lets start with some photos of the parts that i ll be using..
Phobya xtreme 400
Some Bitspower Compression Fittings 13/19
Phobya G Silent 180
Ek Supreme HF - It started as full copper but i nickeled it and then powder coated the cover.
Some more parts from Ek..
The full cover block for MSI Big Bang from Bitspower
What i love about bitspower is that in their packaging they include spare o-rings and screws etc..
Naked Board getting preped for the waterblock
The block is on.. it looks lovely but there is too much dust on it..
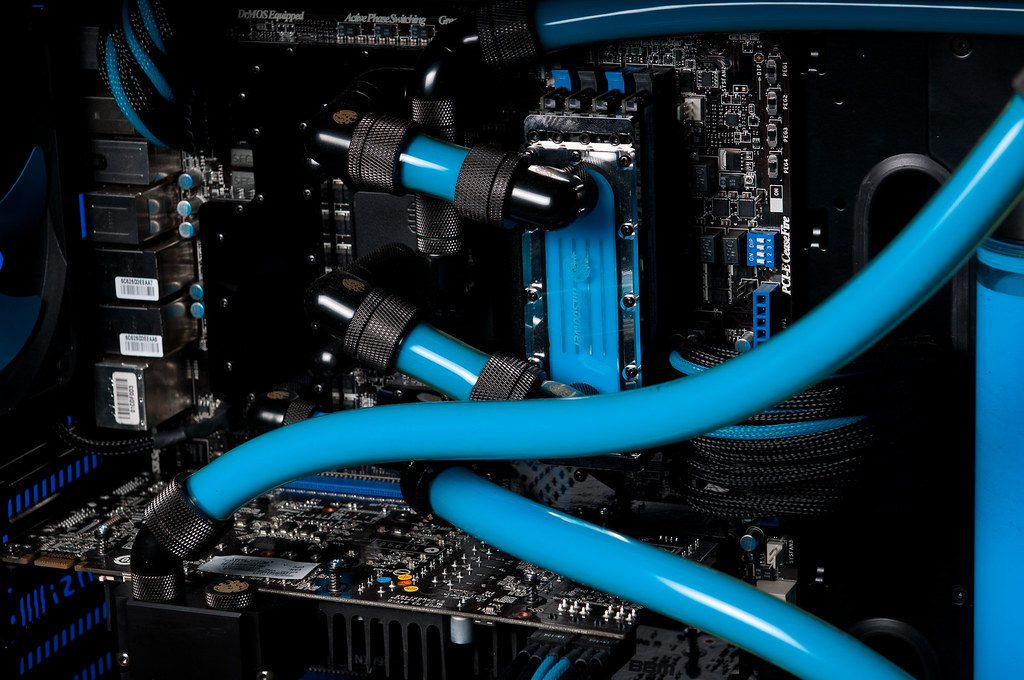
Clear link from one part to the other.. it looks pretty awesome..
Naked GPU's waiting for their blocks
Some more parts from Ek..
And the magic coolant
So .. lets start doing some work now...
I took a small project box to house the power connections for the 2 pumps, so now with 1 4pin molex i power both of the pumps without any wires being uncovered.
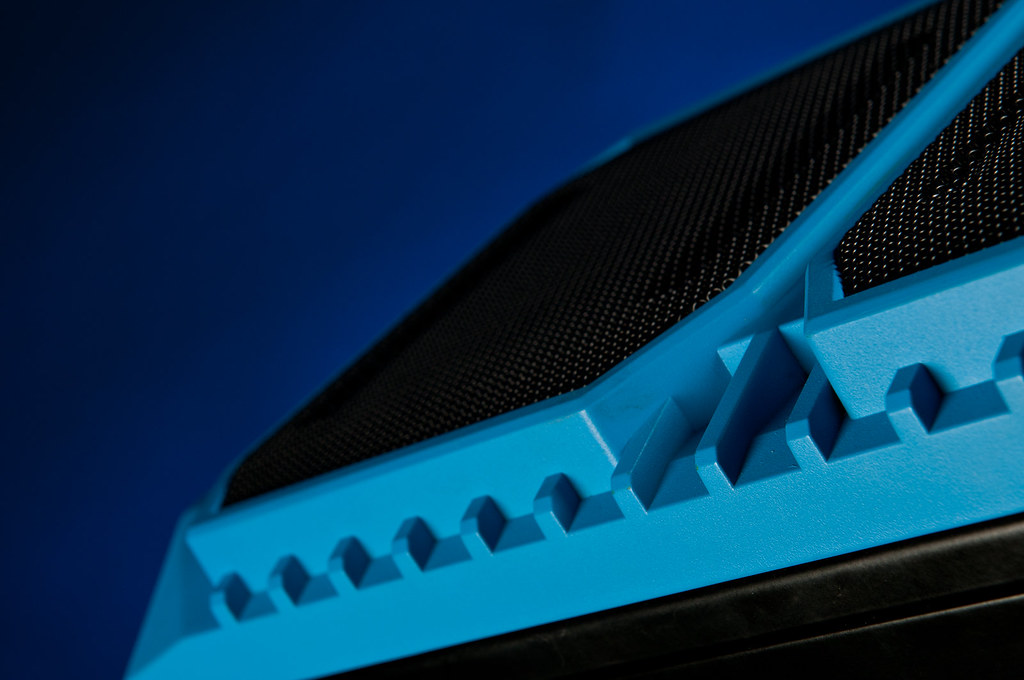
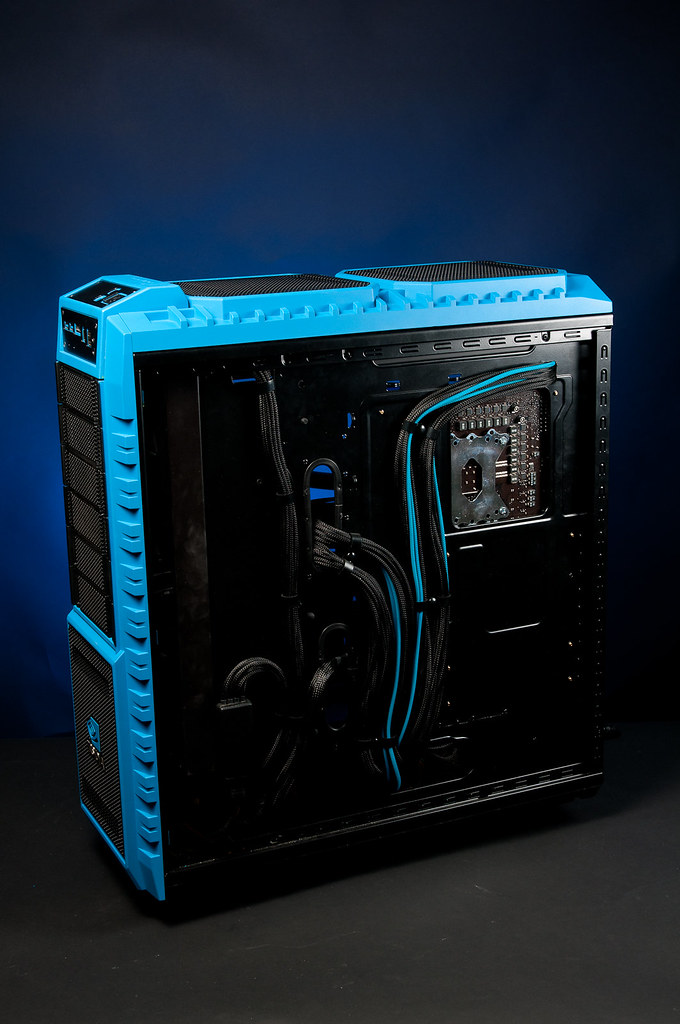
The case that i ll use is a Coolermaster HAF X, the idea is to remove all of the drive/hdd bays etc and have an empty case to modify as i want.. So i took all the 5.25 bays off and from the HDD cage i cutted out 2 slots and throw the rest of it away
Dremel..
Temporarilly placed it behind the pumps to check the free space that i have..
Now i took some cardboard to make a prototype of the covers that i ll make..
Cardboard made to steel, more of a dummy to check for faulse measurements etc.
After a couple of dummies i finally made it to go for the aluminum, now everything is measured correct and i added some throwpasses for cables etc.
3 mm Plexi on top of the cover..
HDD trays accesible from the fron of the cover..
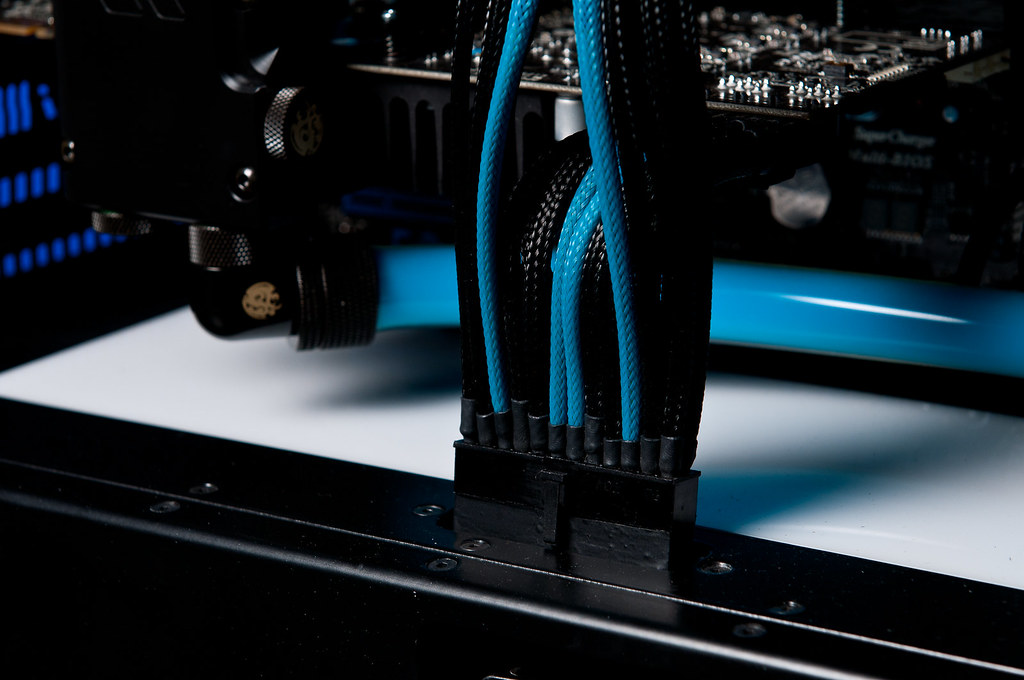
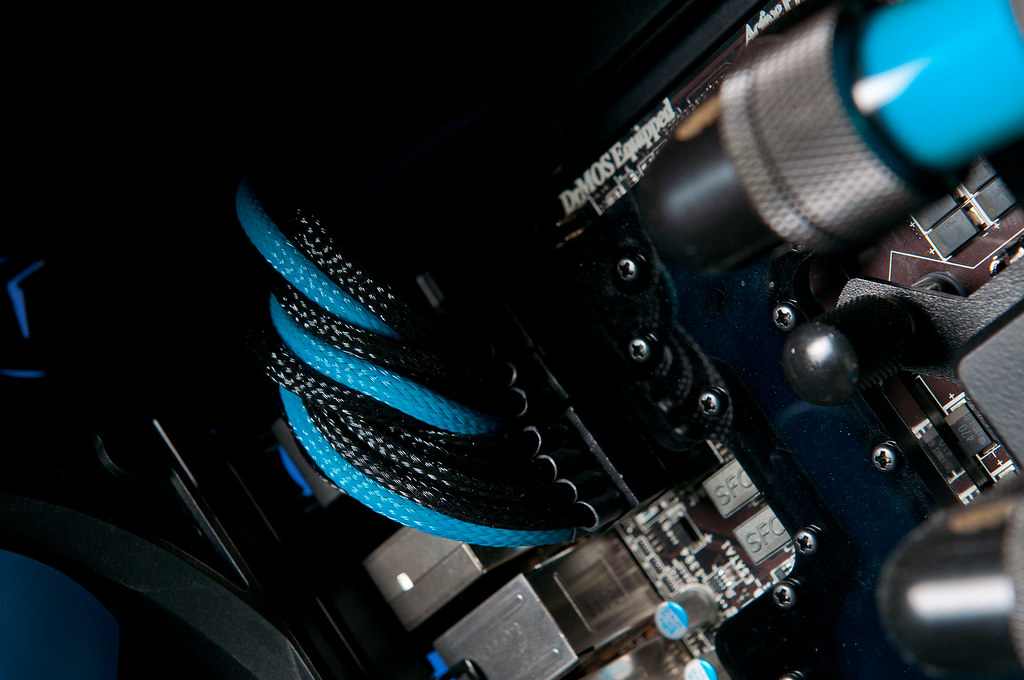
Time for sleeving, i used MDPC sleeve.. Thanks Nils!
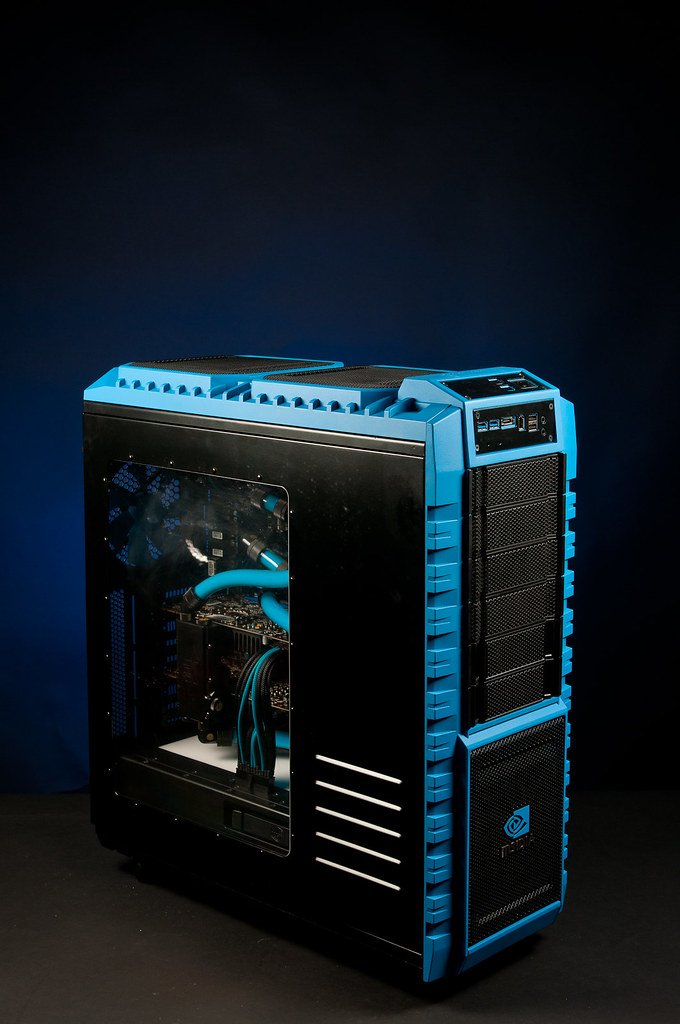
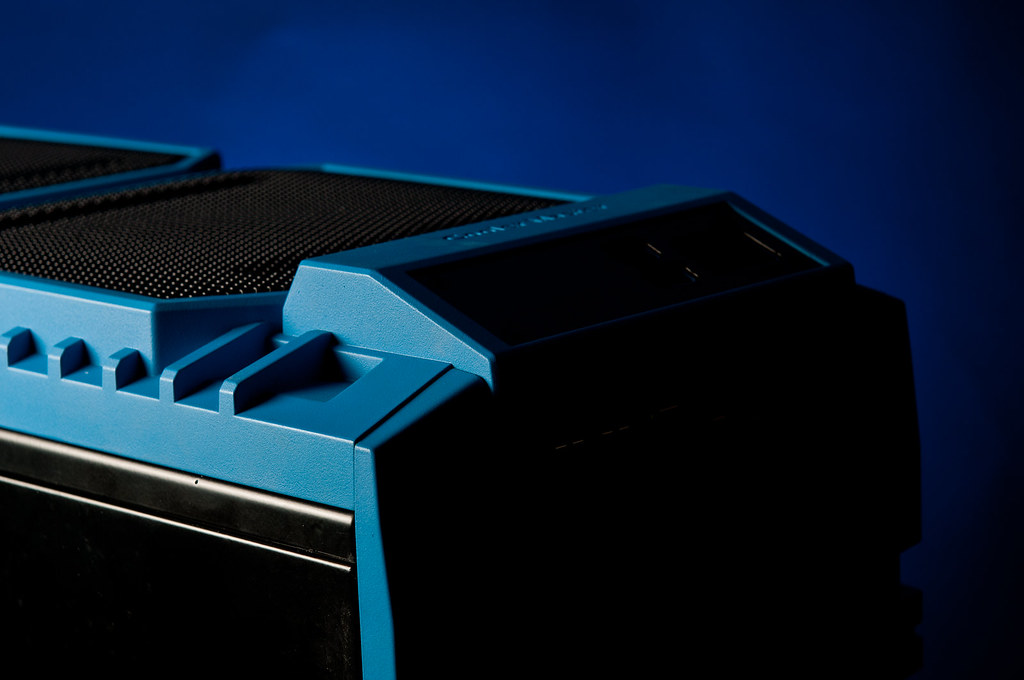
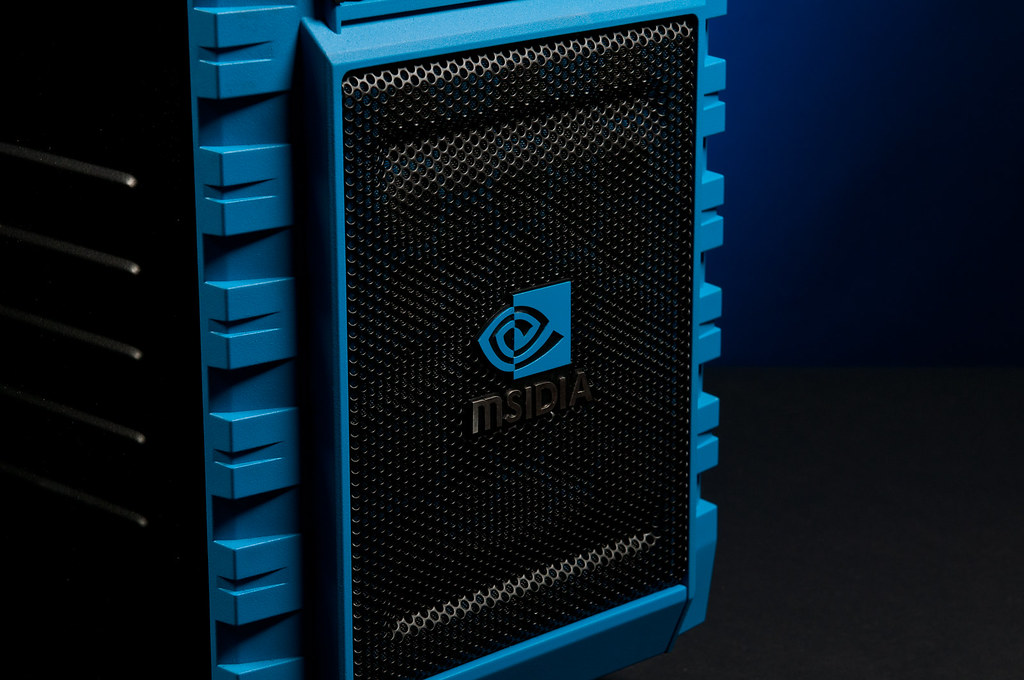
I got the plastics back from painting, thanks to George ( a.k.a Kopritis ) the outcome is really what i had in mind.
Fan blades at the same color..
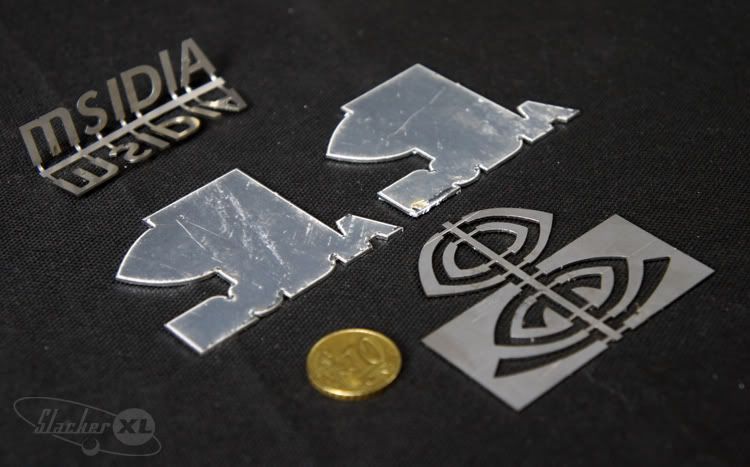
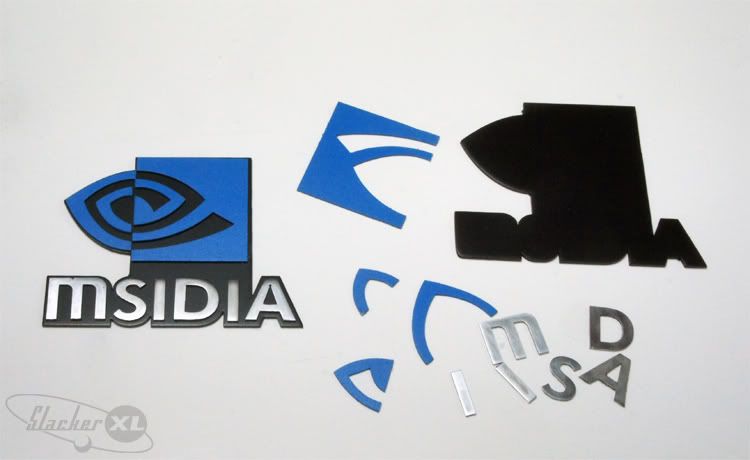
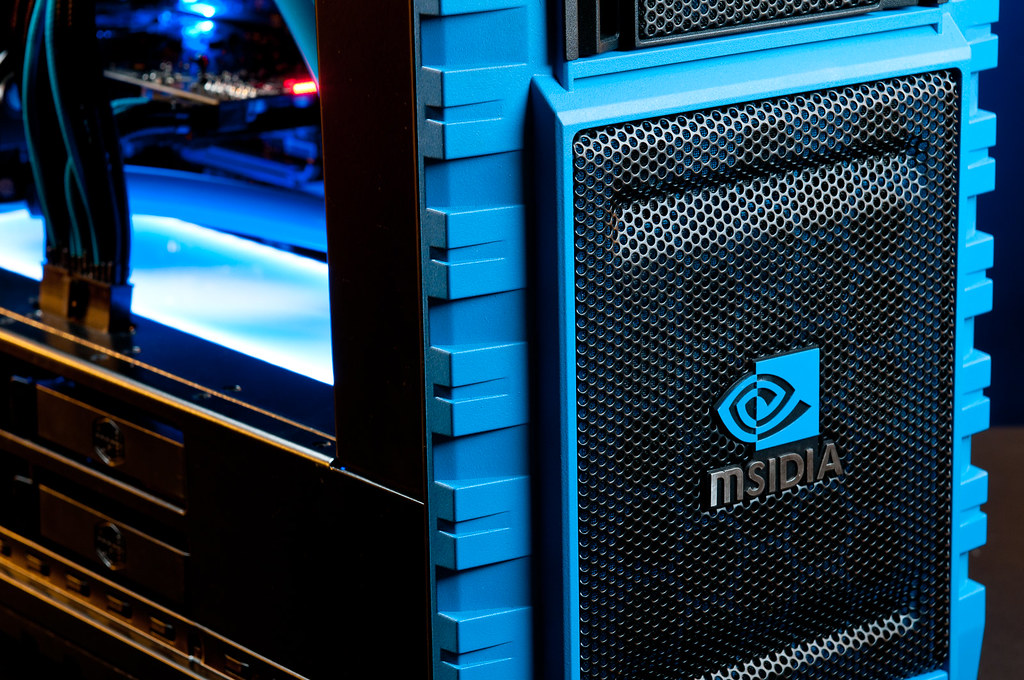
Custom made logo.. i am really happy with the result, i love the fact that it have that "Stock" look..
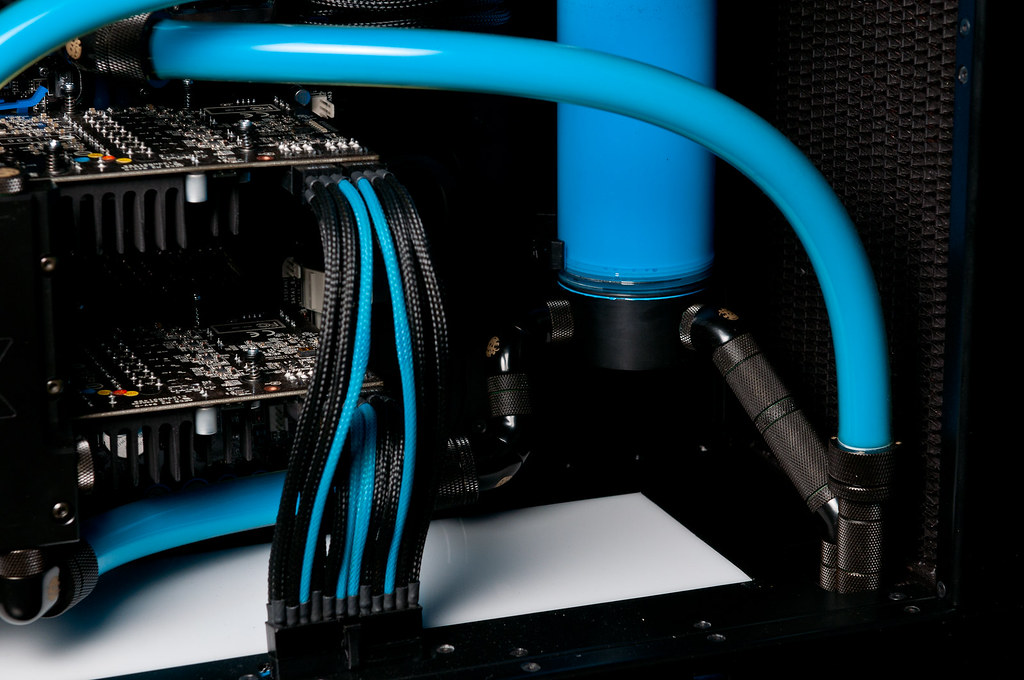
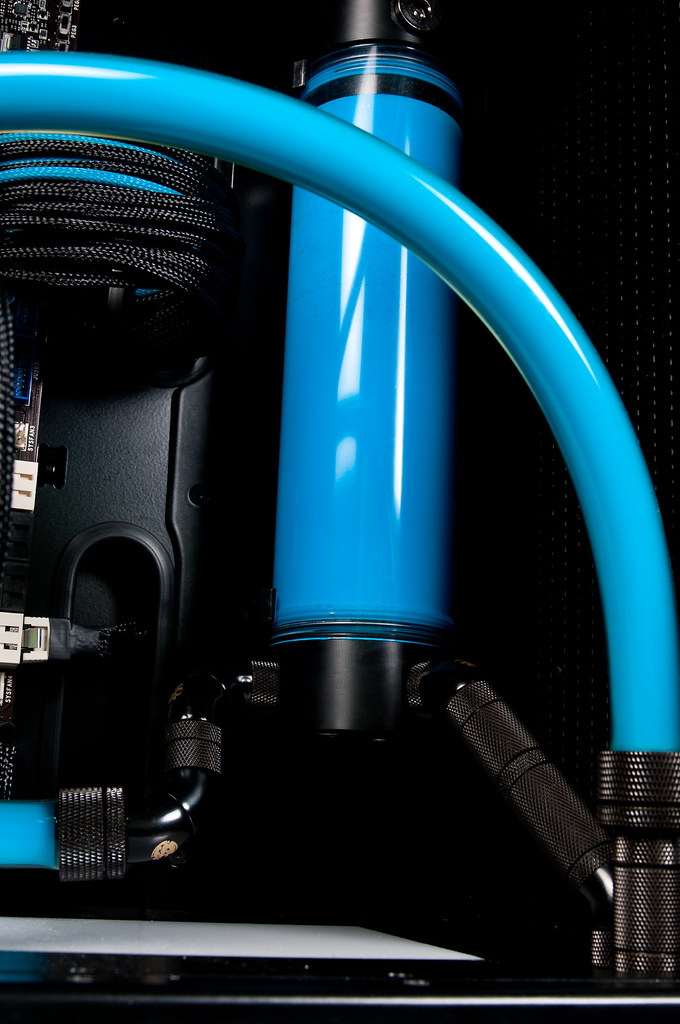
At this point i am trying to figure out the loop path...
A small holding bracket for a 24pin molex made of plexi..
Time to do some soldering..
Some more soldering
Now.. its time for the hard part of the VGA cooling..
As we know there isnt any full cover waterblock for the 560 Ti Hawk on the market.. so i had to find a way to cool the vrm's and the memory..
This is the fatory plate that keeps the card component cool.. i measured everything and went to the waterjet
I took 2 pieces of Fischer heatsink
Thats what is left from the heatsink.. that waterjet is a reall piece of machinery!
And thats what i have now!
I lowered the height of some fins so the bridge of the waterblock can pass through it..
After many many days of searching for someone to anodize the heatsinks.. i didnt find anyoneSo i had to paint them, i used heat resist black matt spray, the result is really nice
Drilled some holes on the heatsink and open threads for 2.5 mm screws, i used little springs to tension the heatsink on the vga.
Sleeving time again..
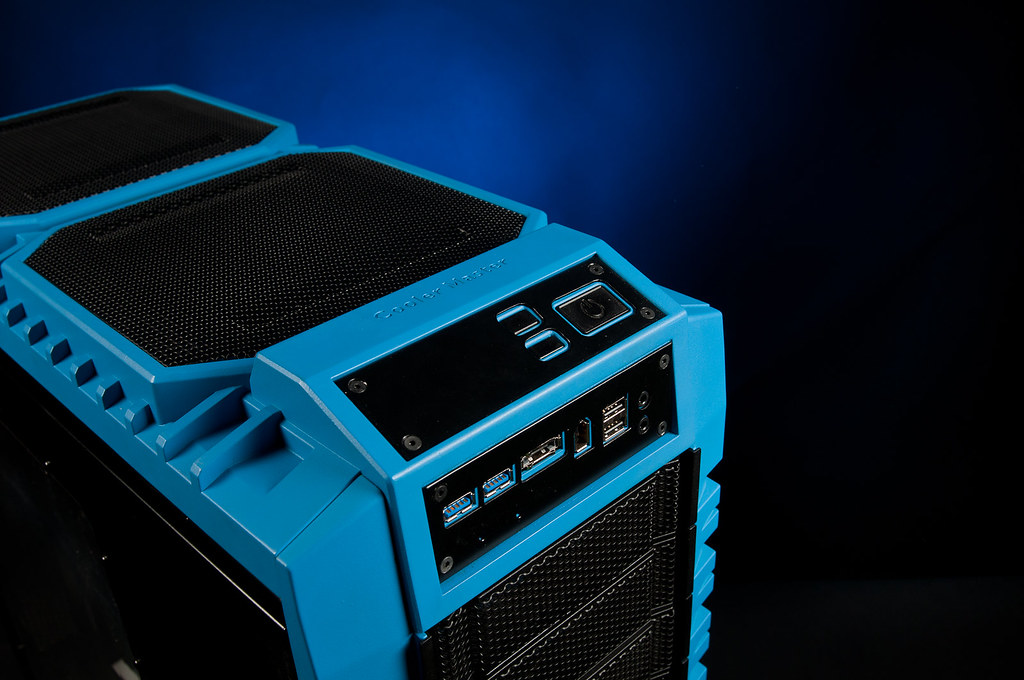
I wanted to somehow change the fronpanel.. i decided to remove the slide panel that haf x has and replace it with 1 mm aluminum covers
Black Powder coat
Starting to take shape..
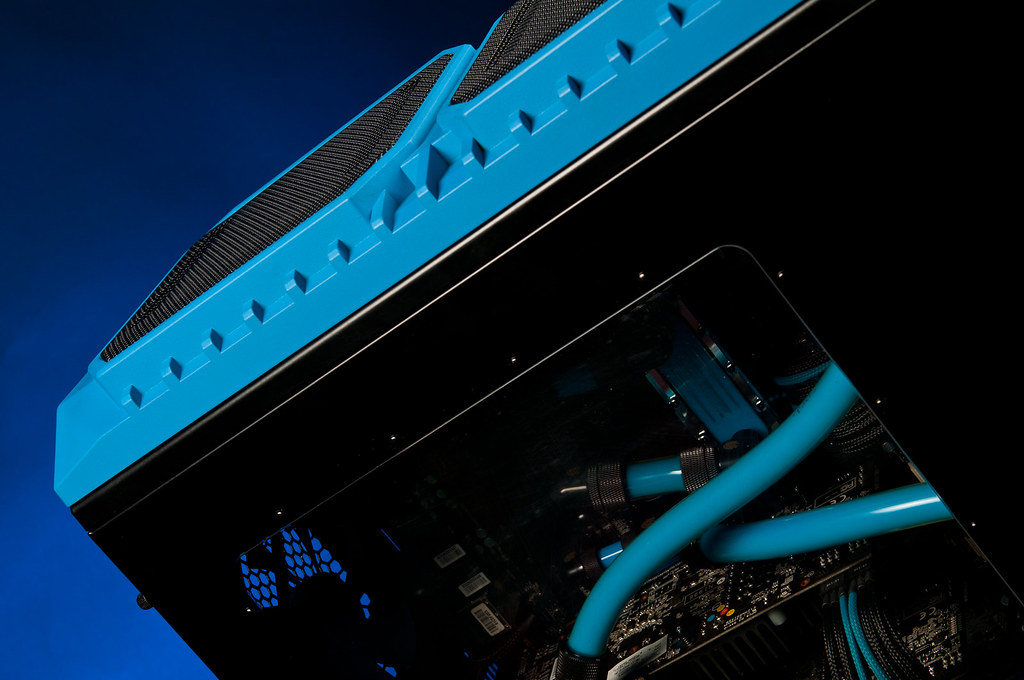
Some cable managment on the back
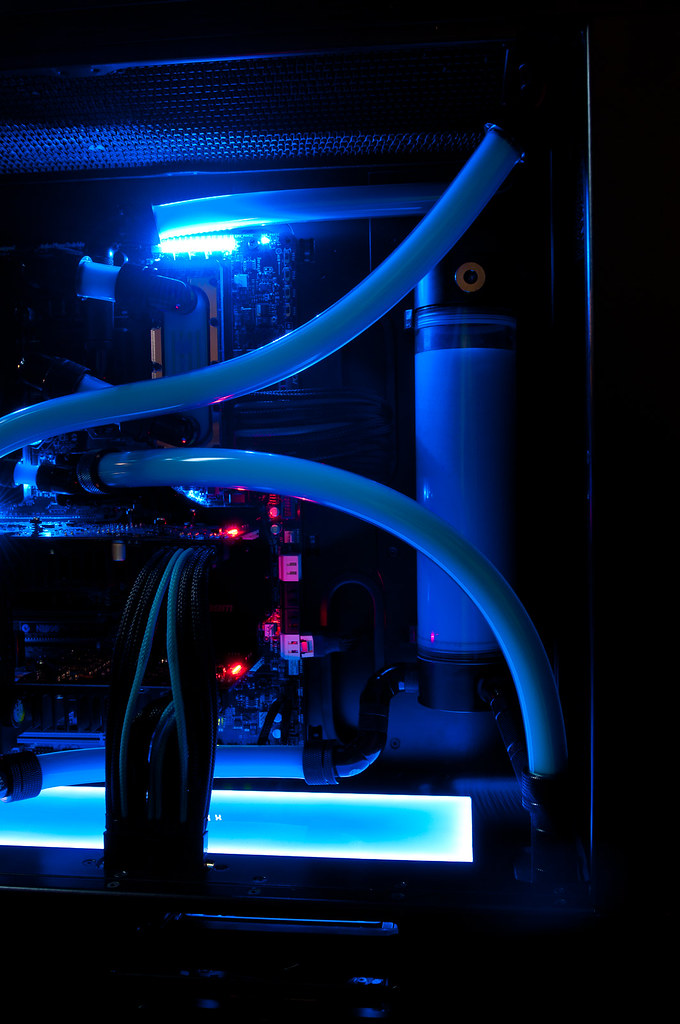
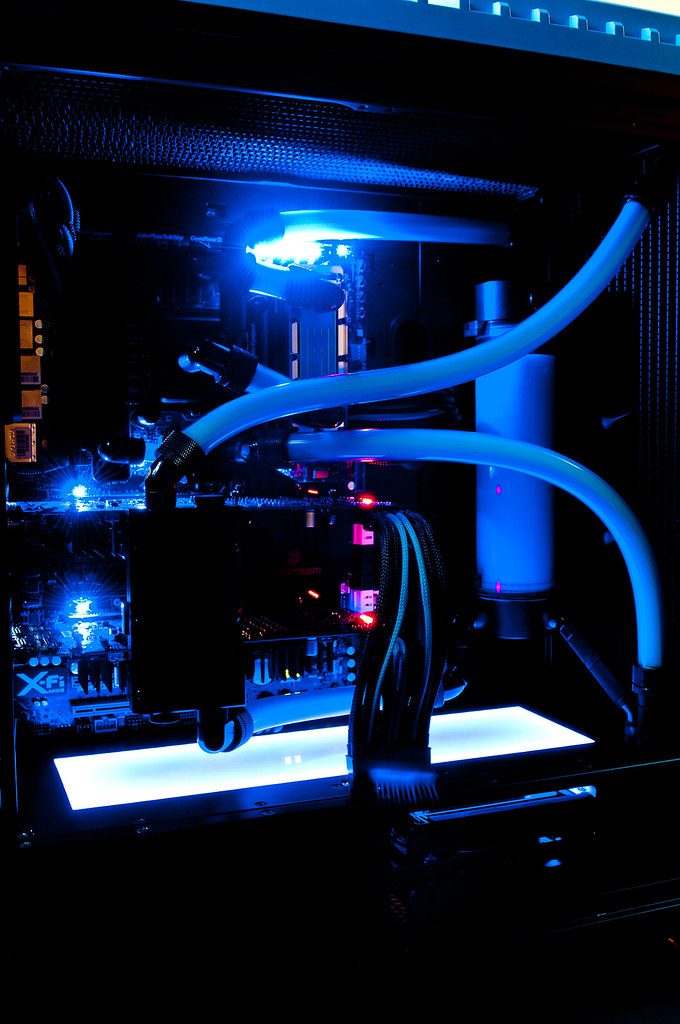
After many many hours of testing and testing i finally found the way to illuminate the plexi without being clear the position of the source of light.. What do you think of the outcome?
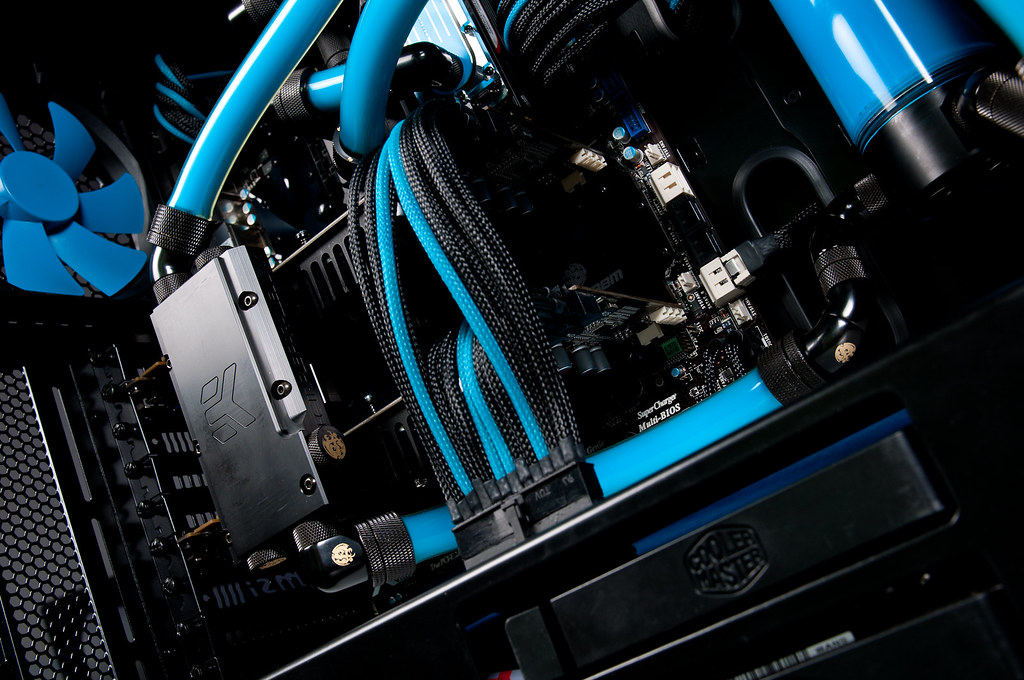
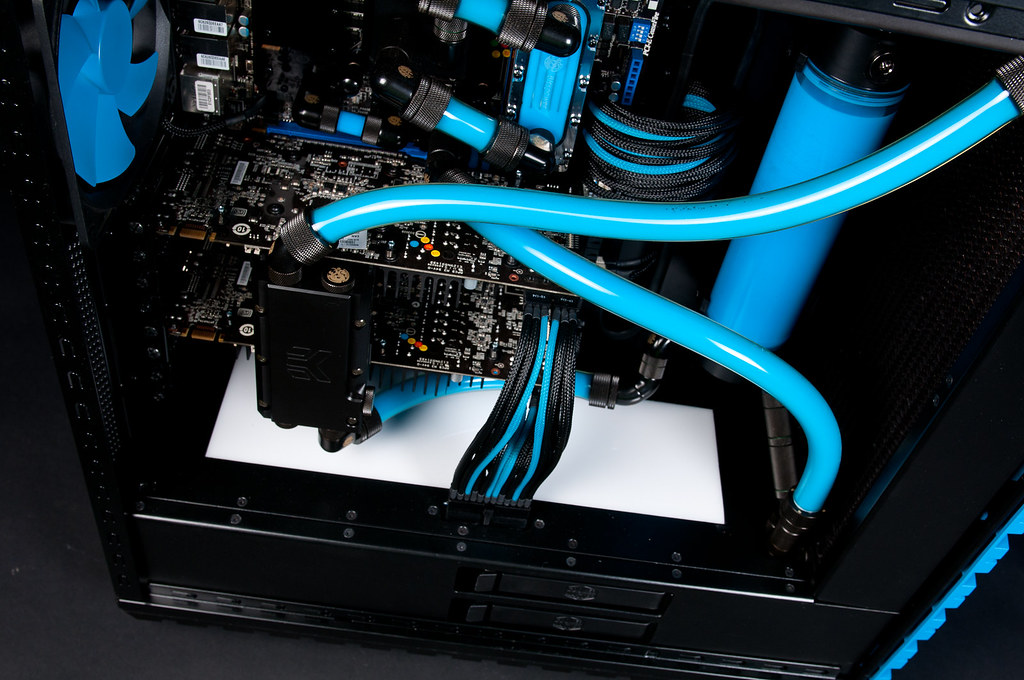
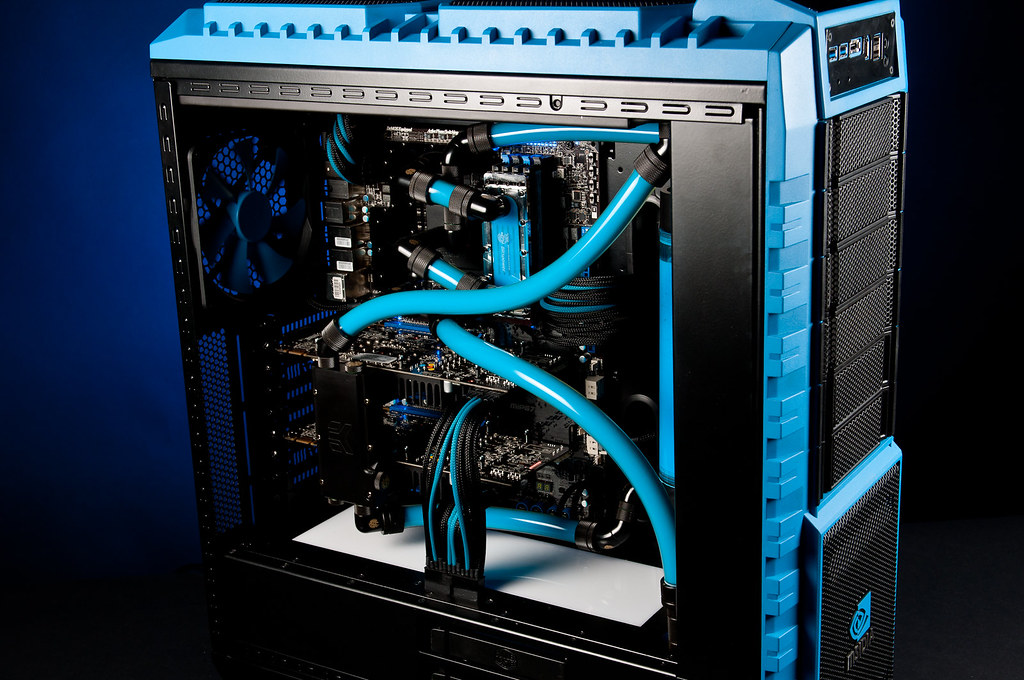
The board is on...
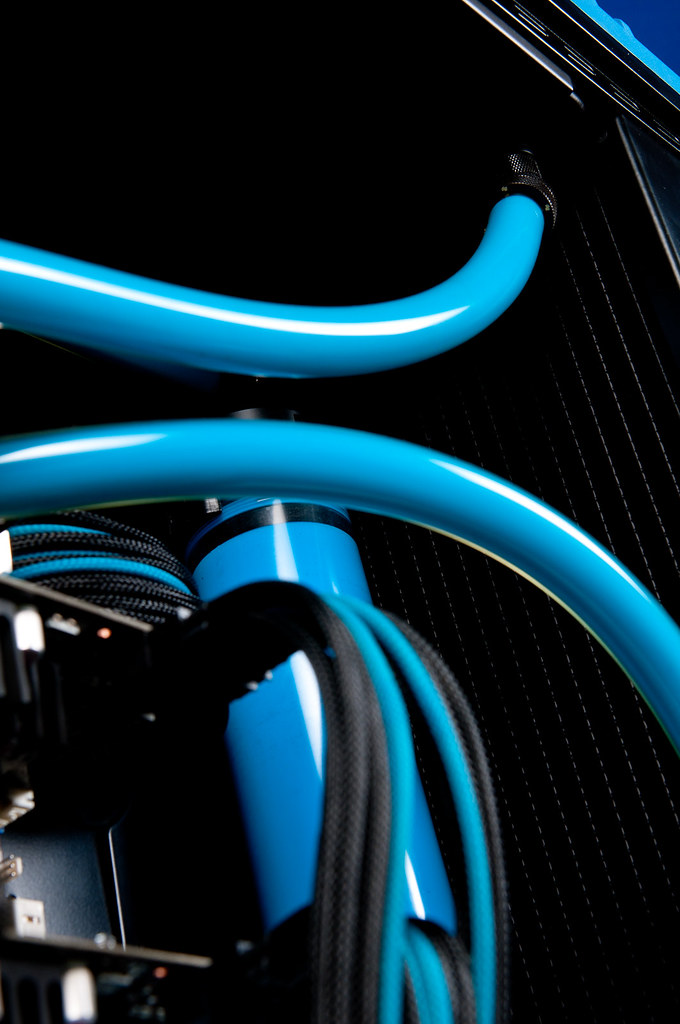
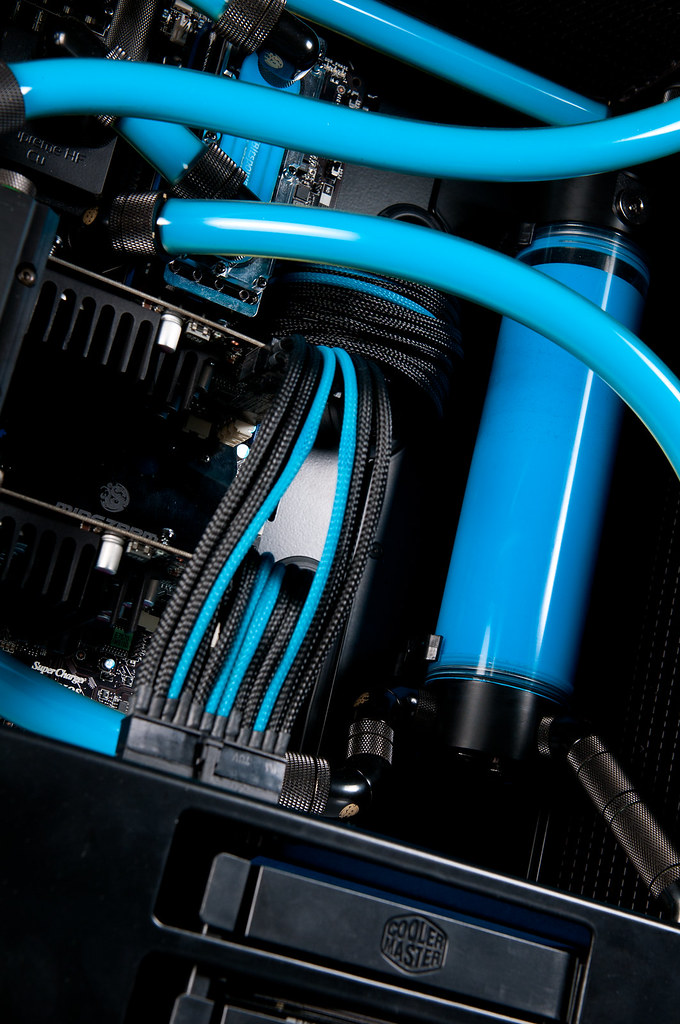
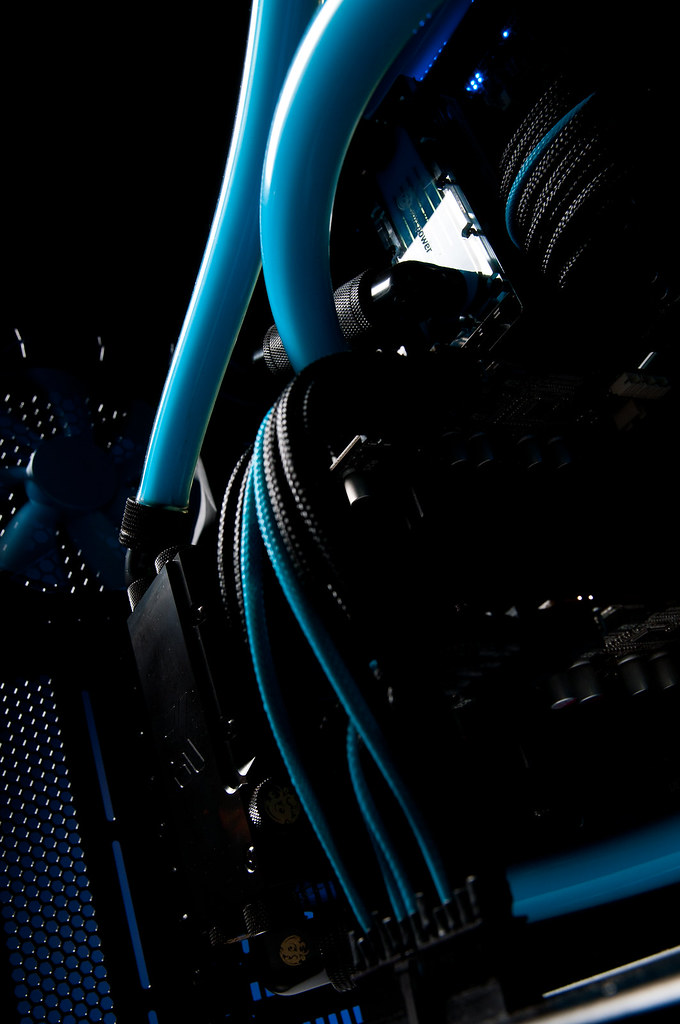
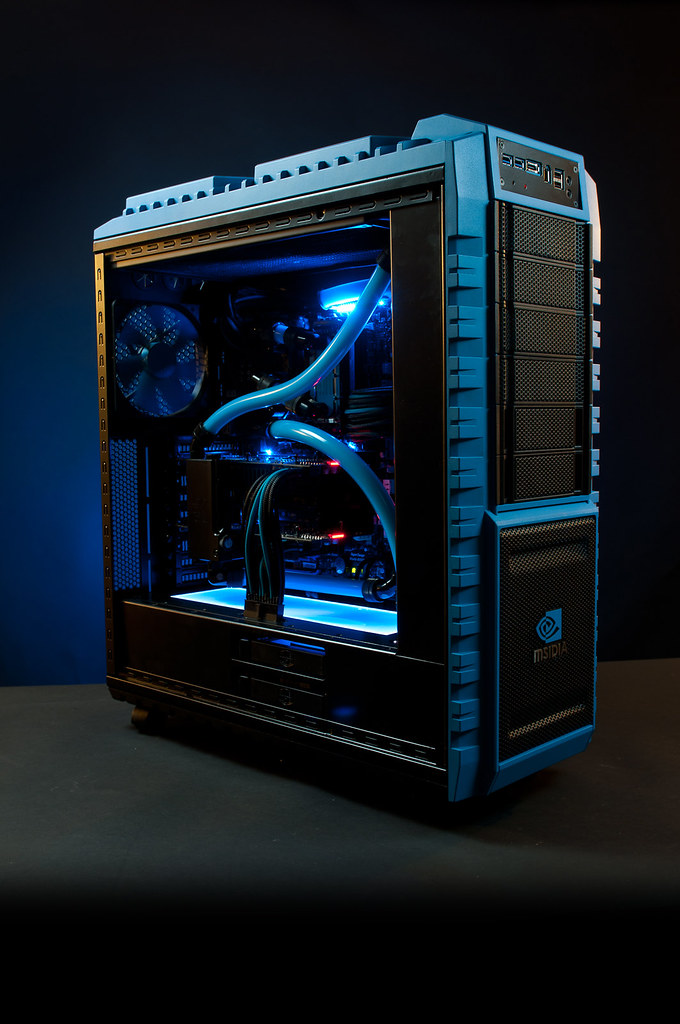
Some more assembling and we are done..
Time for the photoshooting.. Special Thanks to Mike a.k.a Barfastic for helping me with the project and for the time he took to photoshoot it..
This project is done and i am really happy with the result. I hope you like it as much as i do. Comments and constructive feedback is welcome, i really want to see what you like or dont like about it.. I hope i can find money and time to start something new!
Special thanks to Bitspower and Phobya for sponsoring the project.


 Reply With Quote


Bookmarks