

So... I slacked on the last update... but a massive update is coming, i swear! :P
As a teaser for it:


So... I slacked on the last update... but a massive update is coming, i swear! :P
As a teaser for it:
EVGA z77 FTW -- 16GB of Samsung MV-3V4G3D/US -- Intel Core i7-3770k -- EVGA GTX680 -- Corsair AX850 PSU -- Lian-Li PC-v2000b -- 2x XSPC RX480 Rads -- EK-RES-250 -- EK-DDC Dual Top/pumps -- EK-FC680EN Full Cover block -- Swiftech Apogee HD Block
All right, finally that update I keep promising. First... I spent memorial day weekend building myself a workspace in the corner of my garage. Now I should have a much better workspace, as opposed to a couple of sad fold-up tables in the middle of my garage...
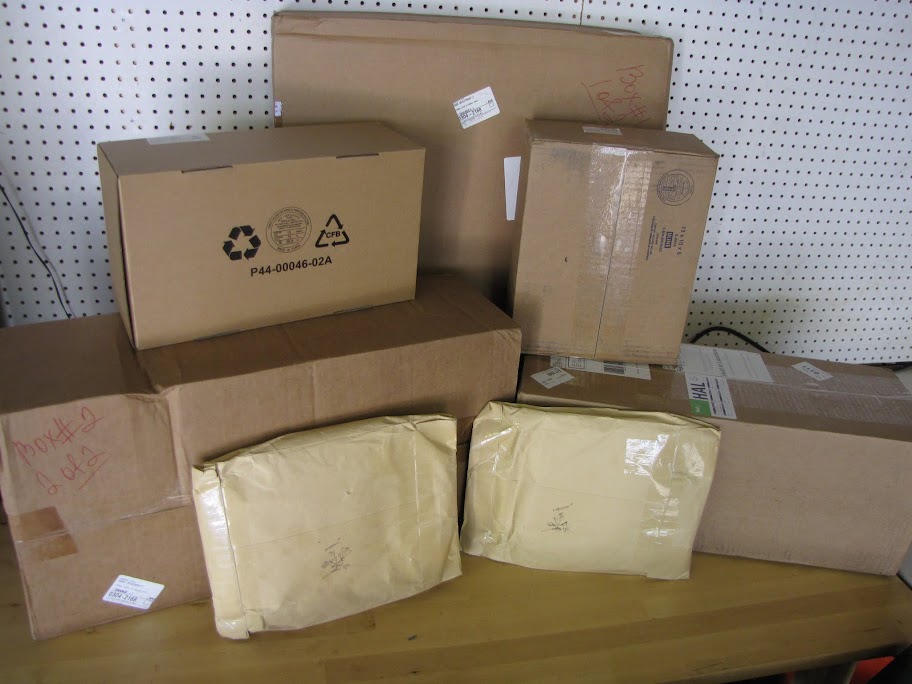
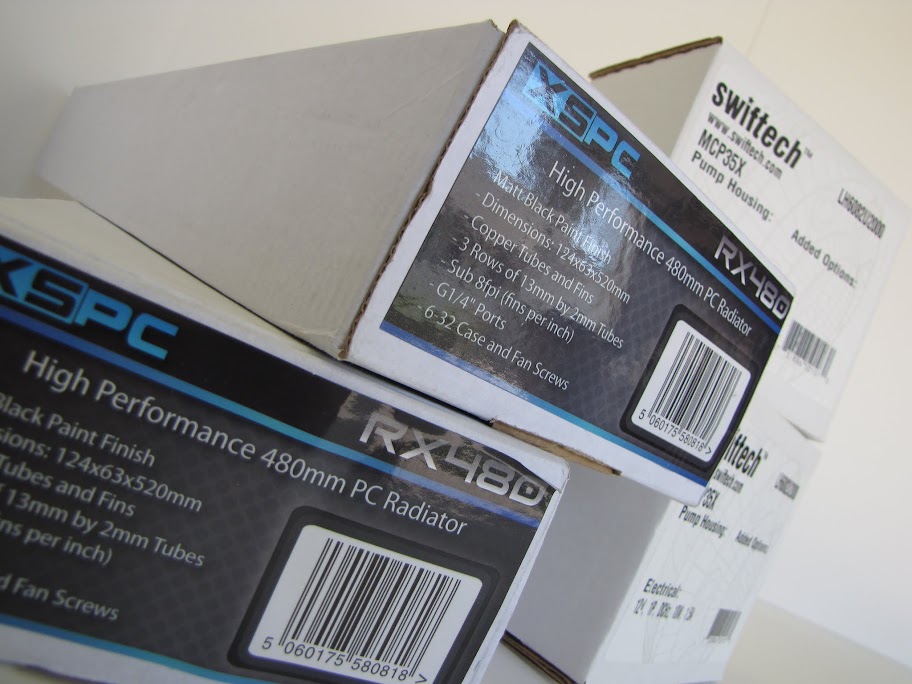
Next... All my hardware finally showed up! I spent a fair amount of time playing with my camera and lighting, just collecting shots of unboxings:
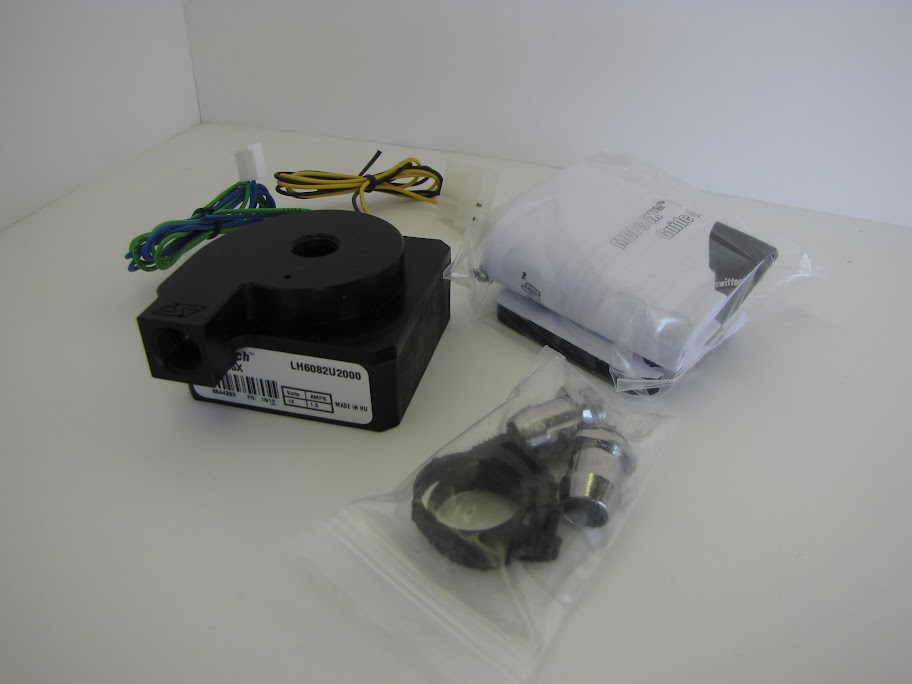
First items out of the box... my XSPC RX480's and some Swiftech MCP35x's:
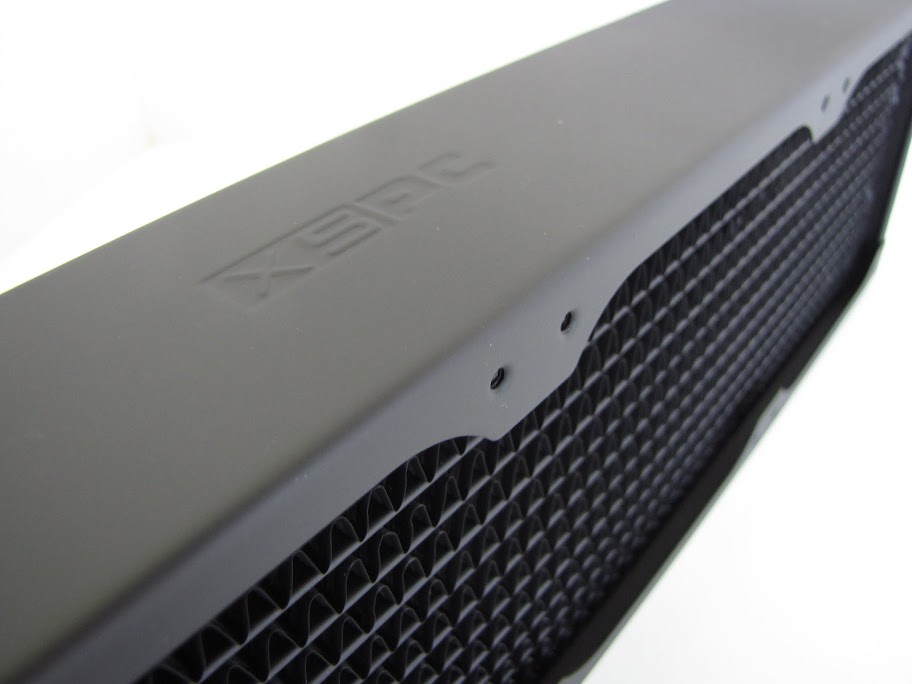
The Radiators had a great finish on them... no dings or blemishes, and only very minor fin damage, almost negligible.
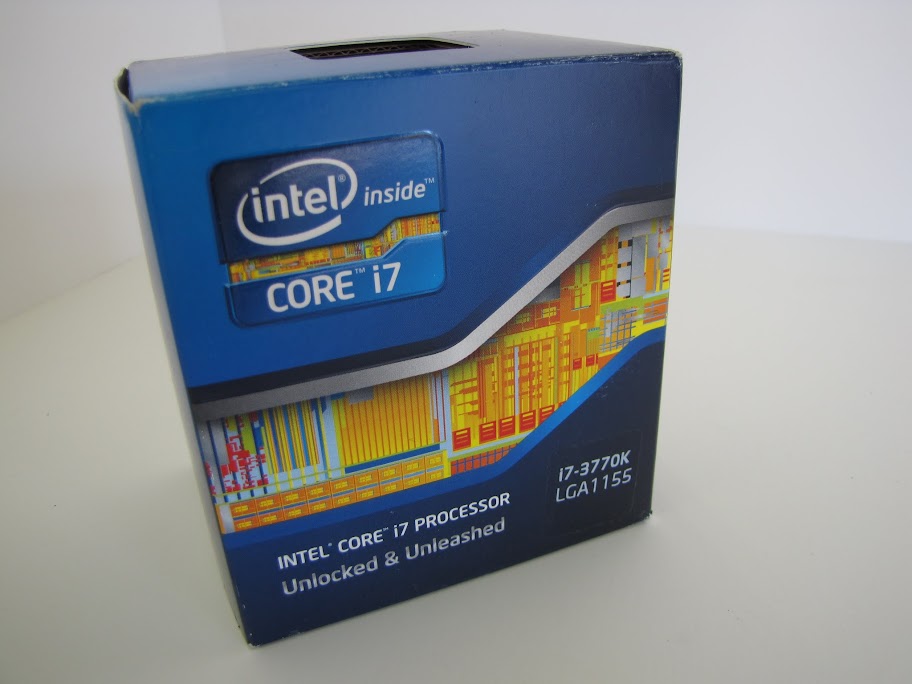
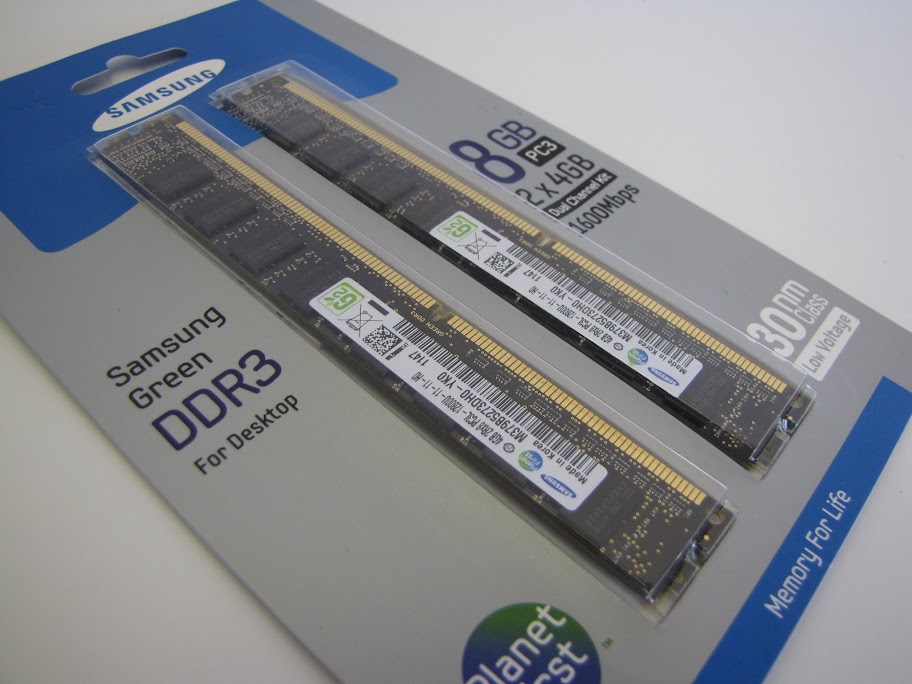
Next, The processor and ram:
This ram is supposedly a monster overclocker... can't wait to heat em up and see what they can do.
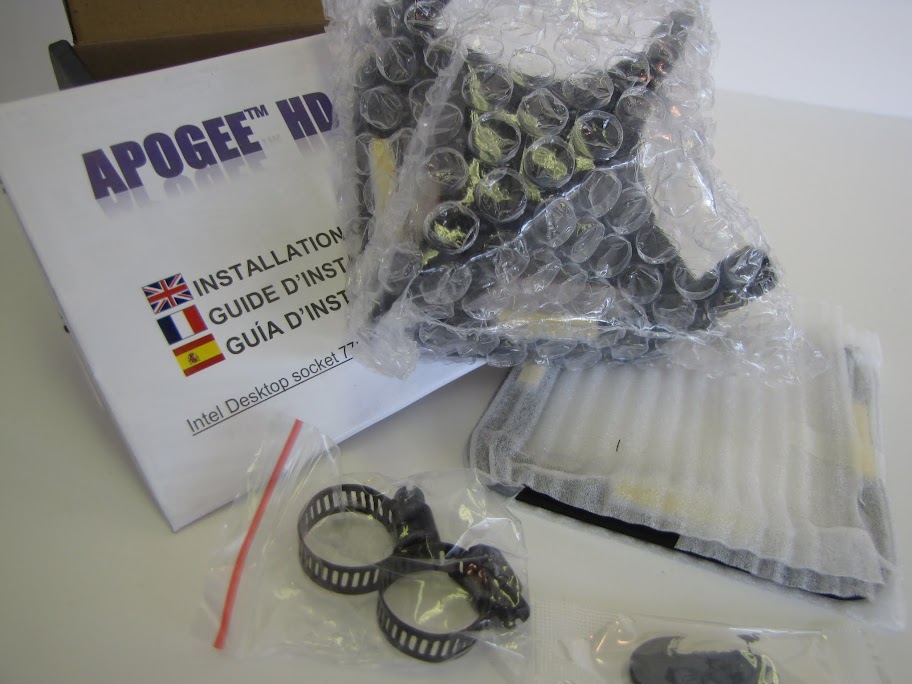
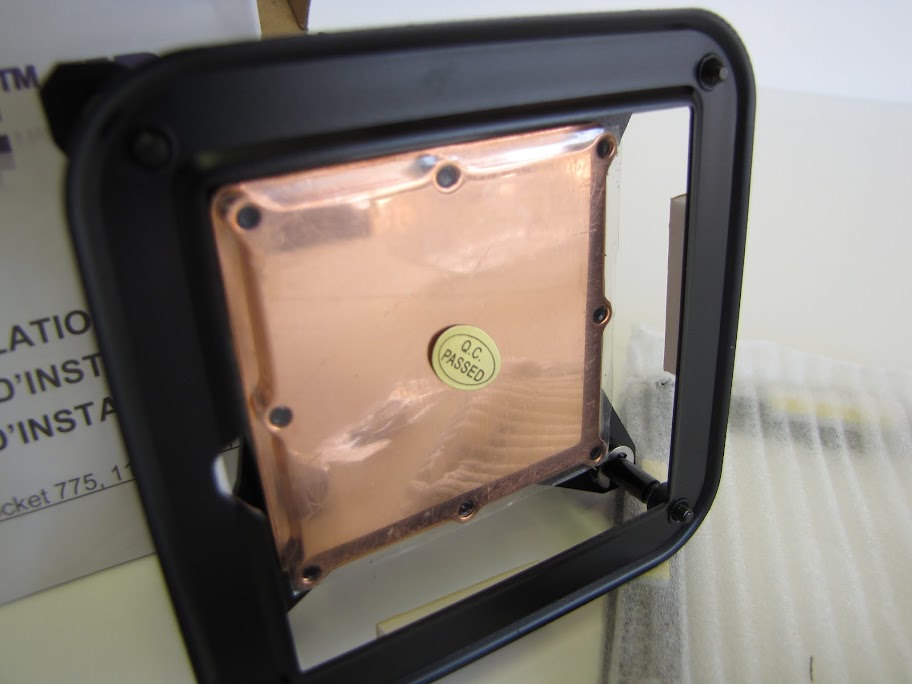
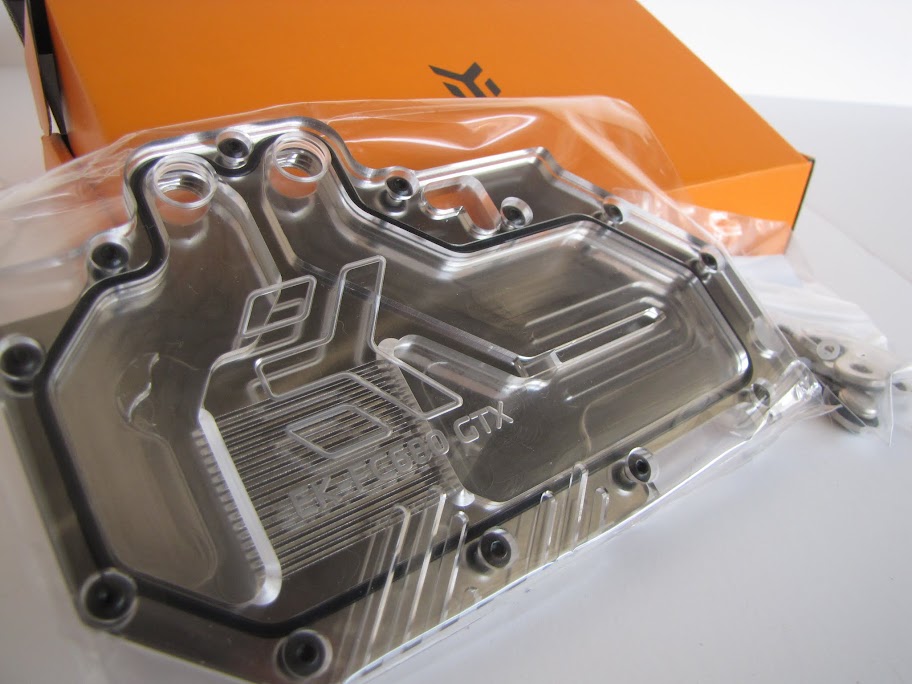
Now, the CPU and GPU water blocks... a Swiftech Apogee HD and a EK waterblock for the GTX680:
When I flipped the CPU block, I was horrified to find a QC sticker stuck to it... upon closer inspection, though, it was just stuck to a protective plastic sheet. :p
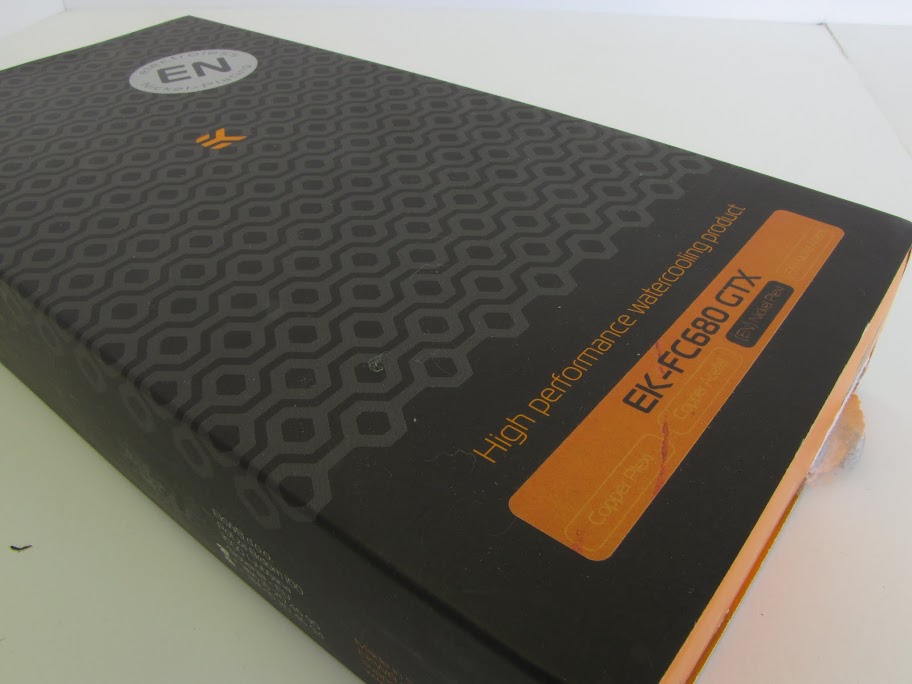
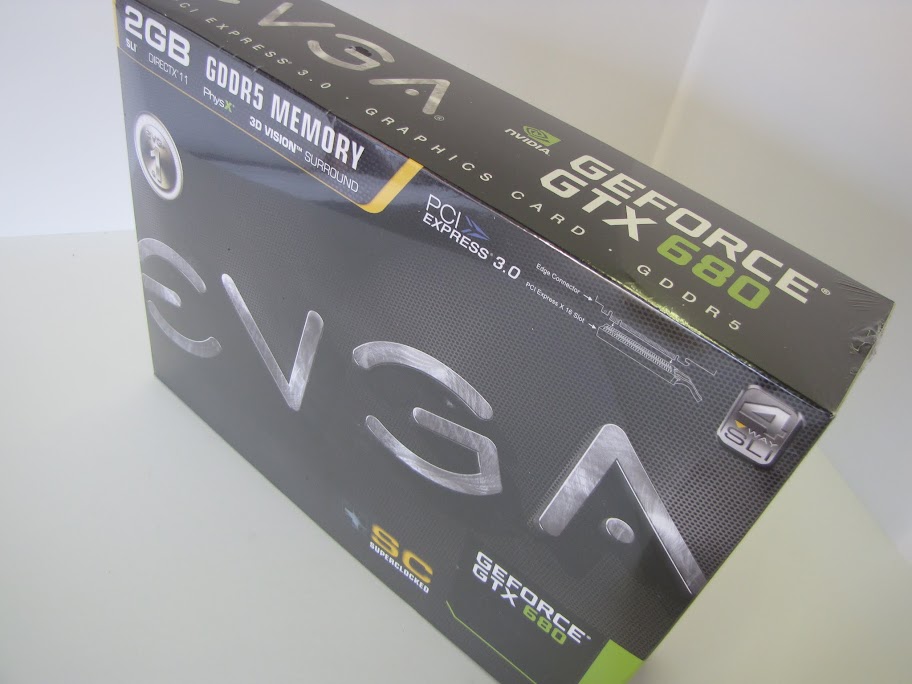
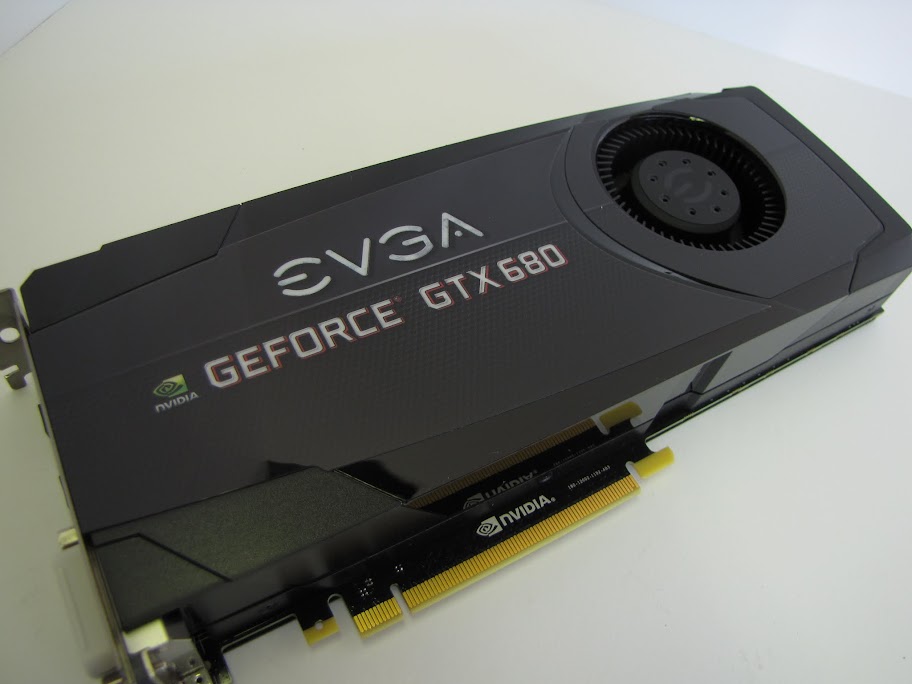
And now, the most expensive part of my build thus far:
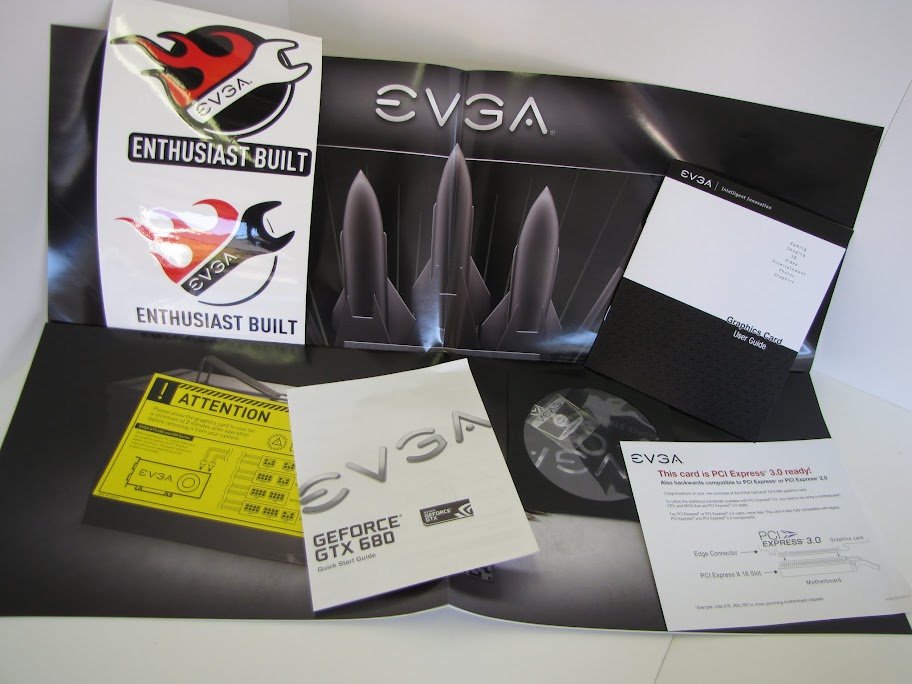
It came with a bunch of stickers, a poster, and the usual manual junk:
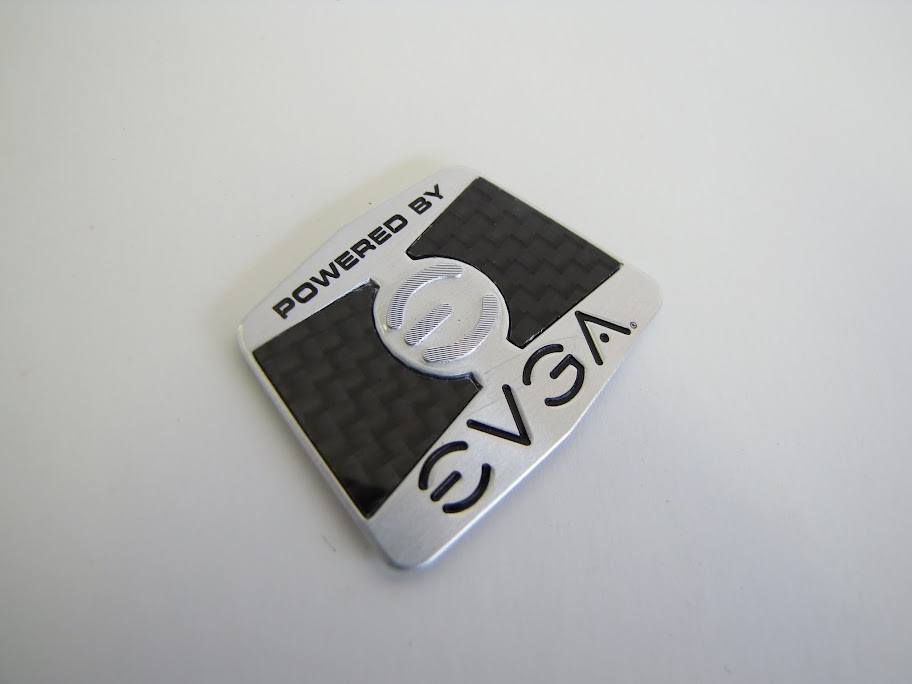
It also came with a really nice looking metal/carbon fiber case badge. Shame it wont get used. :p
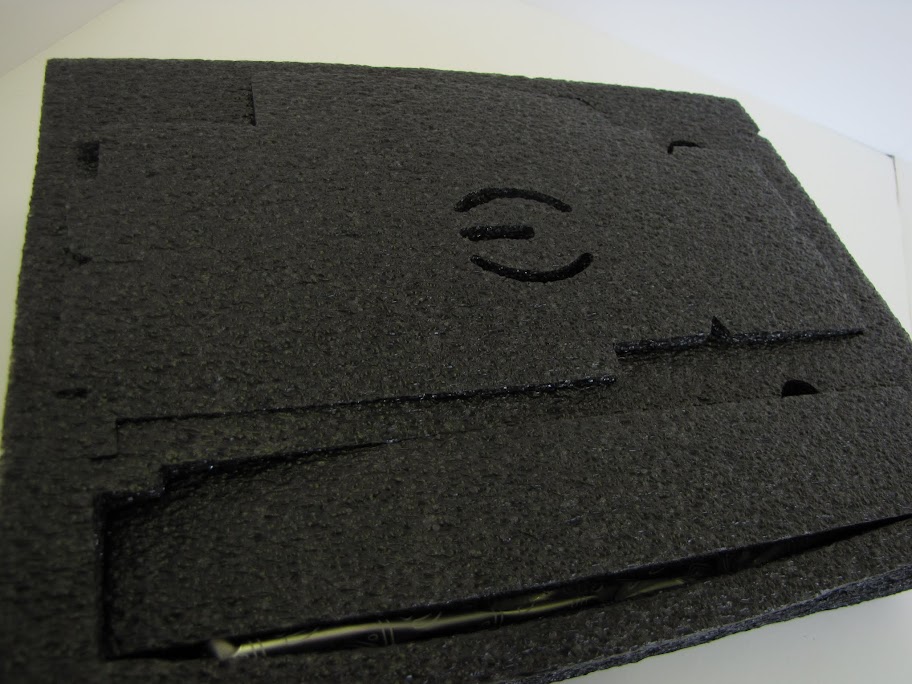
The packing is even fancy... specialized compartments for each item, and an EVGA logo carved into the main section:
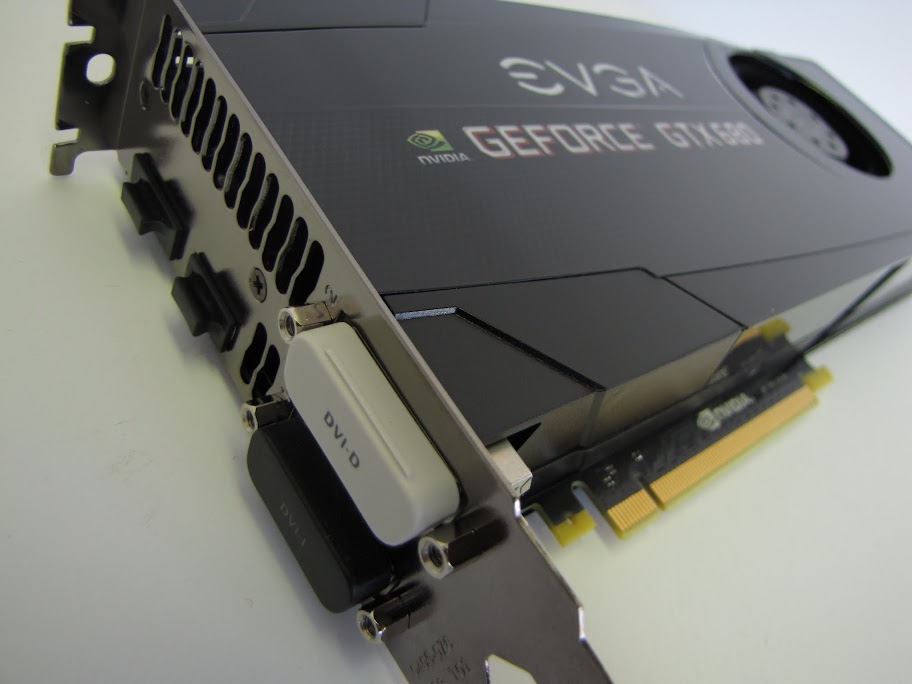
The card is a monster:
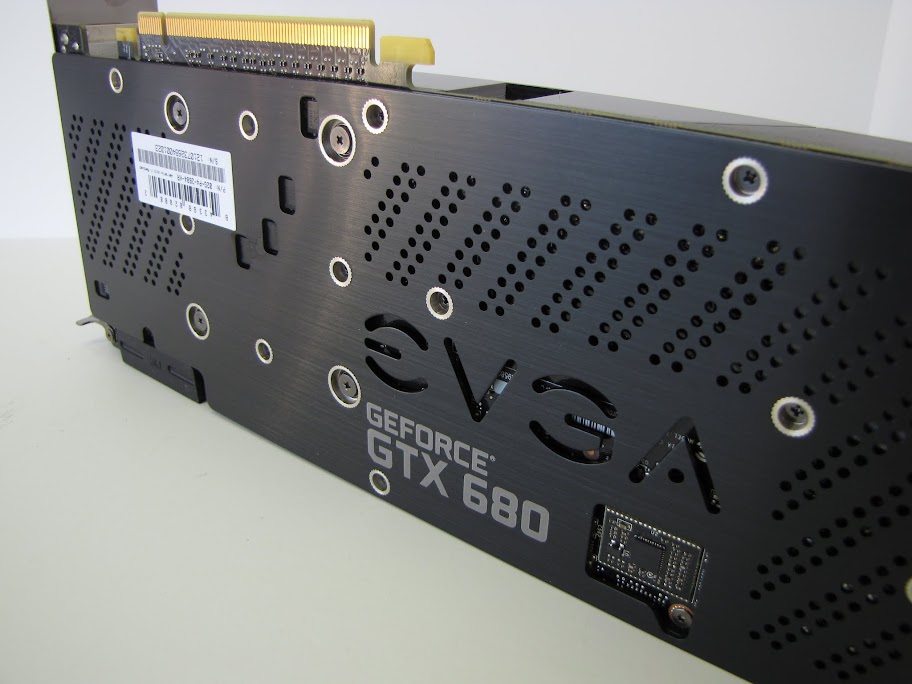
I got the SC+ version, so mine came with a fancy backplate, too. Nice, considering my motherboard is inverted on this case, so this is the side everyone will be looking at, mostly:
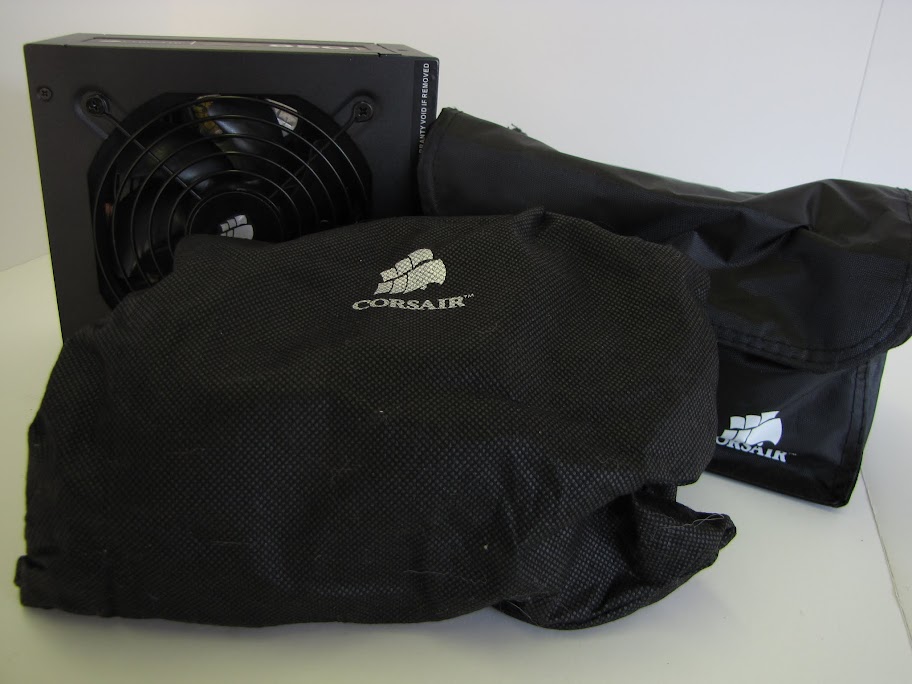
And then, there's the Corsair AX850 PSU:
I got this one for half off, due to it being open box... heck of a deal if you ask me... but it looks like i'm paying for it:
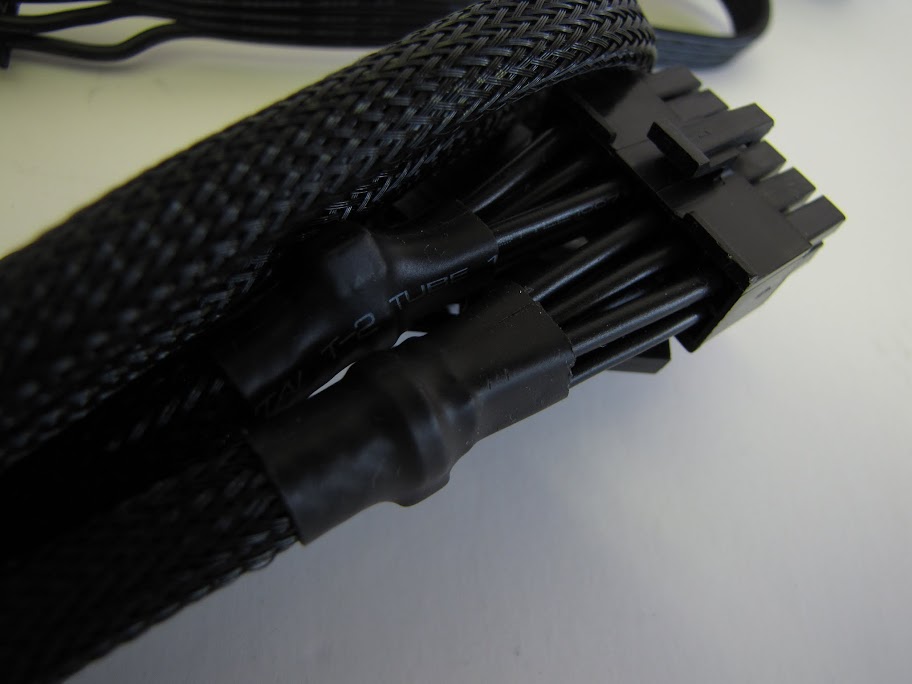
Oh well, no matter. I was planning on painting it anyway. :p The sleeving and heatshrink is a nice thought, but it's kinda cheap... I'll be sleeving all of my case anyway, so I'll re-do these at the same time!
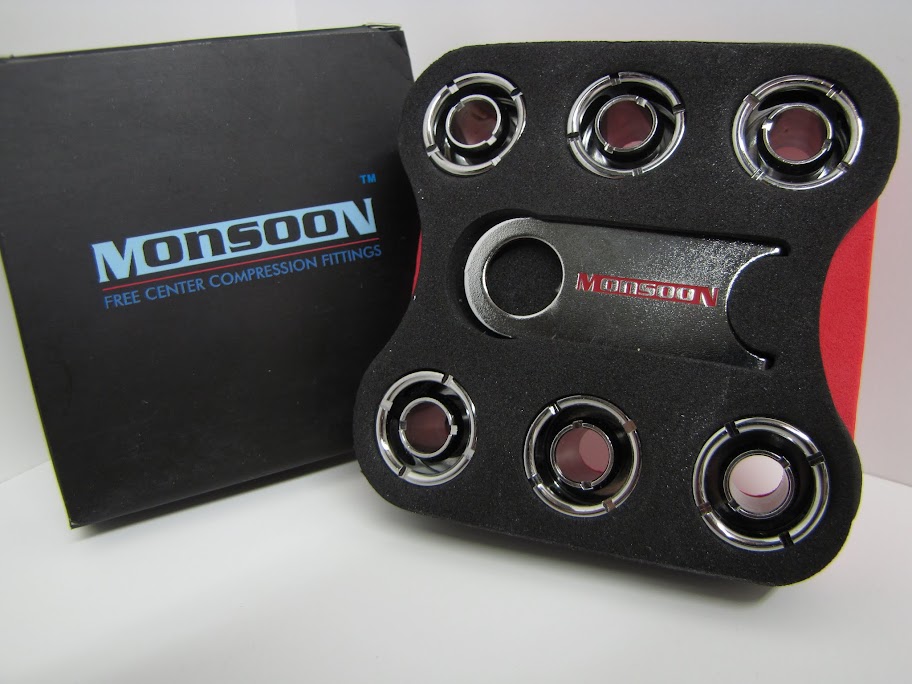
Finally, all the fittings and miscellaneous stuff... starting with some VERY good looking Monsoon fittings. I saw these in a few cases, and just had to get some to try em out:
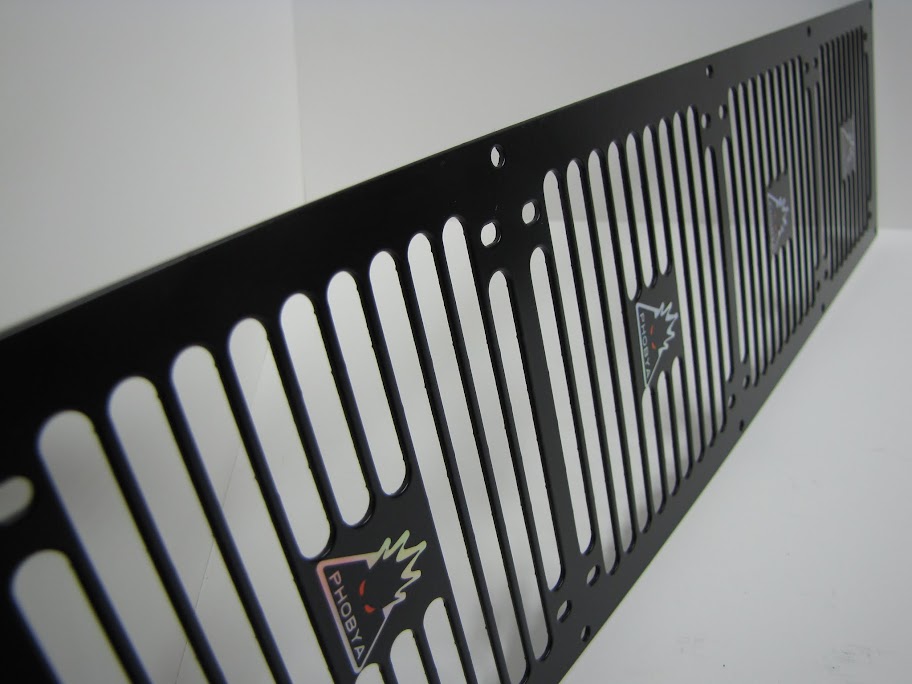
I also got some Phobya Radgrills for the outside of my case... the finish is a bit ugly though, and the sticker/middle has to go... nothing a little dremeling won't fix.
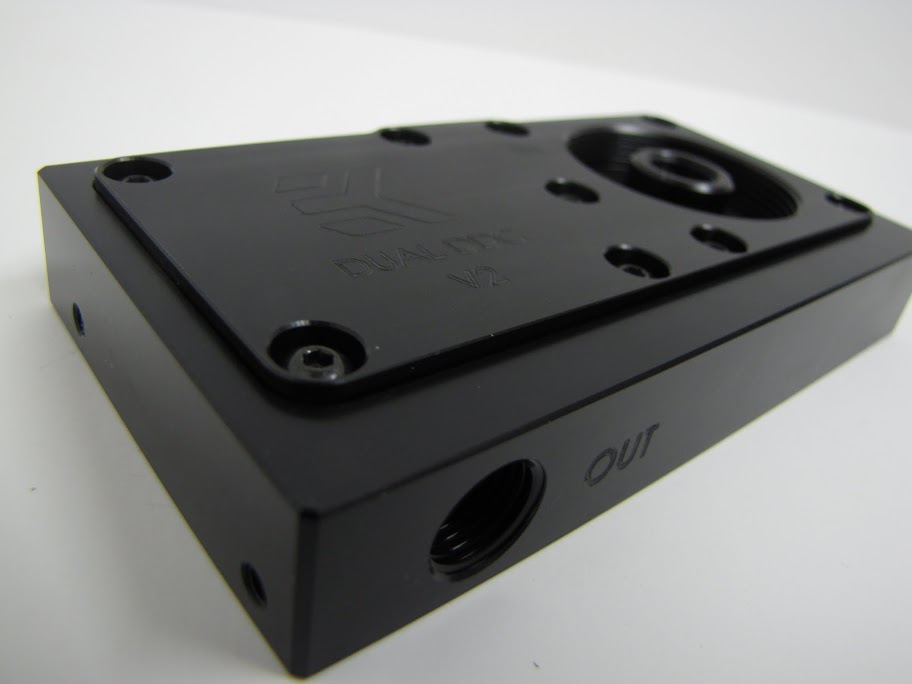
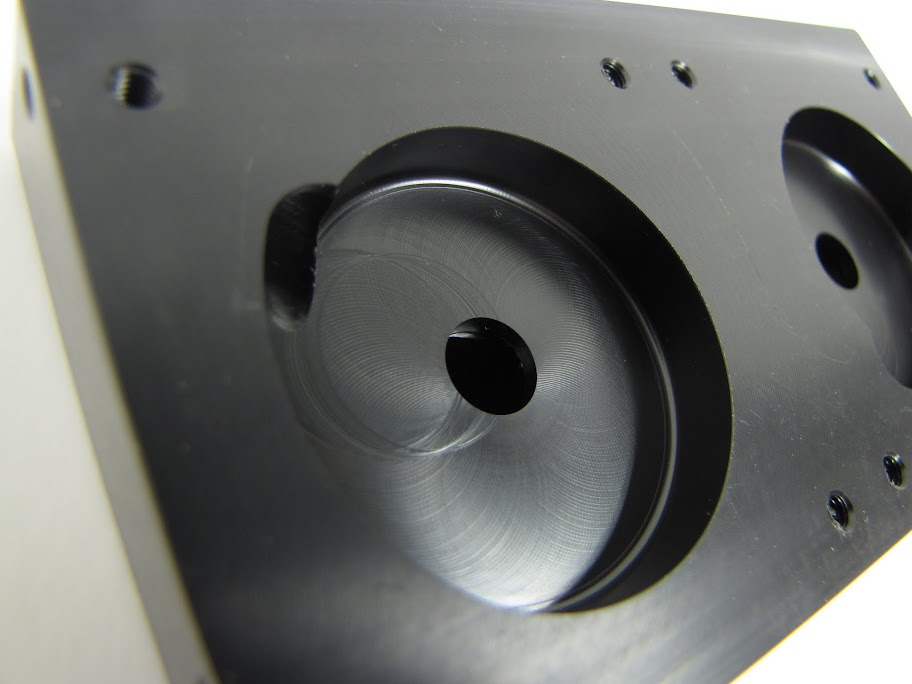
And then there's the EK DDC-Dual Top, to gang my two pumps together:
It came with some hardware to mount it in a 5 1/4 bay, and some anti-vibration stuff. The machining on this piece is particularly high quality. Shame it's not visible.
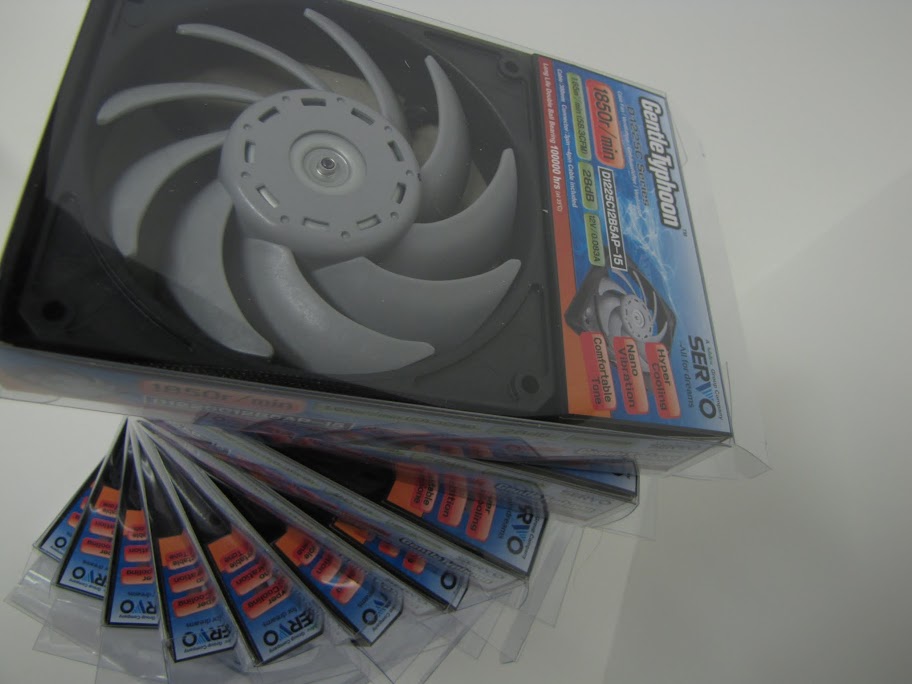
What case build is complete without a massive pile of fans? Gentile Typhoon AP-15's in my case.
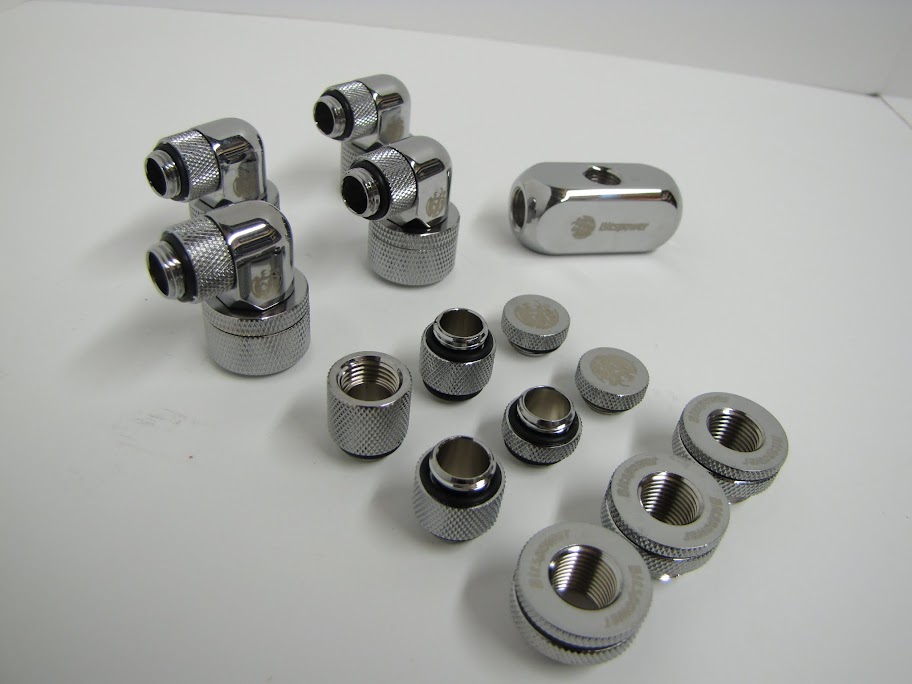
And last, but certainly not least in the extras category, the many many Bitspower fittings that will bring it all together. The quality is excellent... well worth then chunk of change I plunked down for all of it:
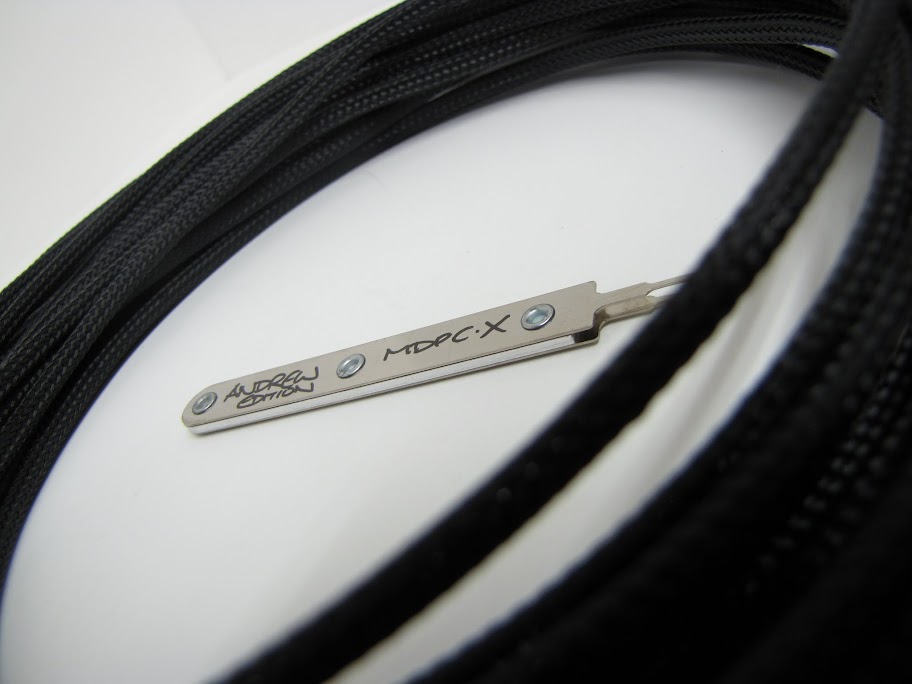
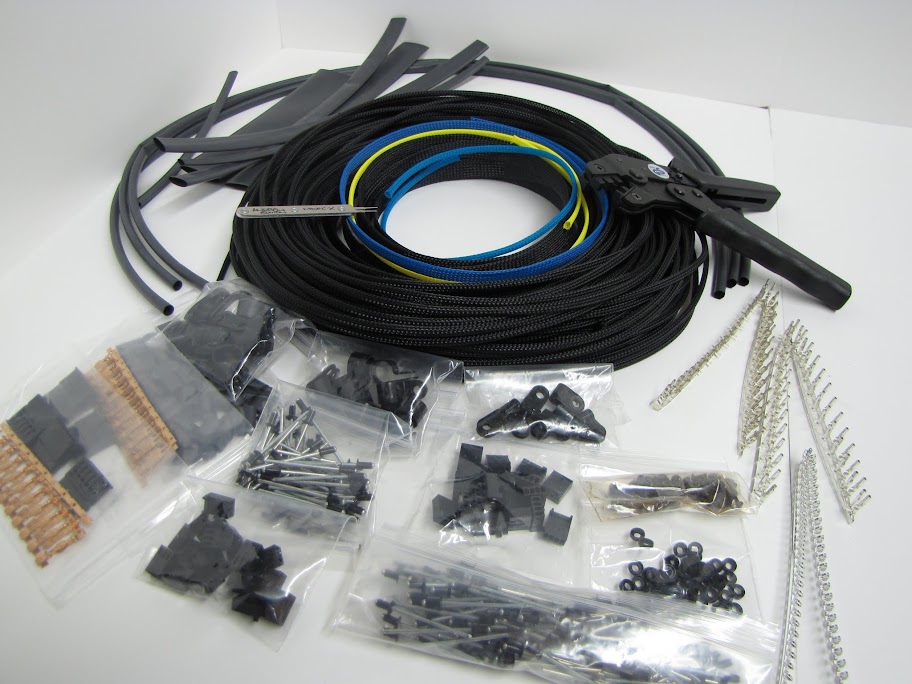
Finally, one of the best looking pieces of my pile of components... some sleeving and miscellaneous connectors/tools/fittings from MDPC! I cannot recommend Nils' sleeving enough. Just go buy some, and you'll understand.
I bought basically one of everything in his store!
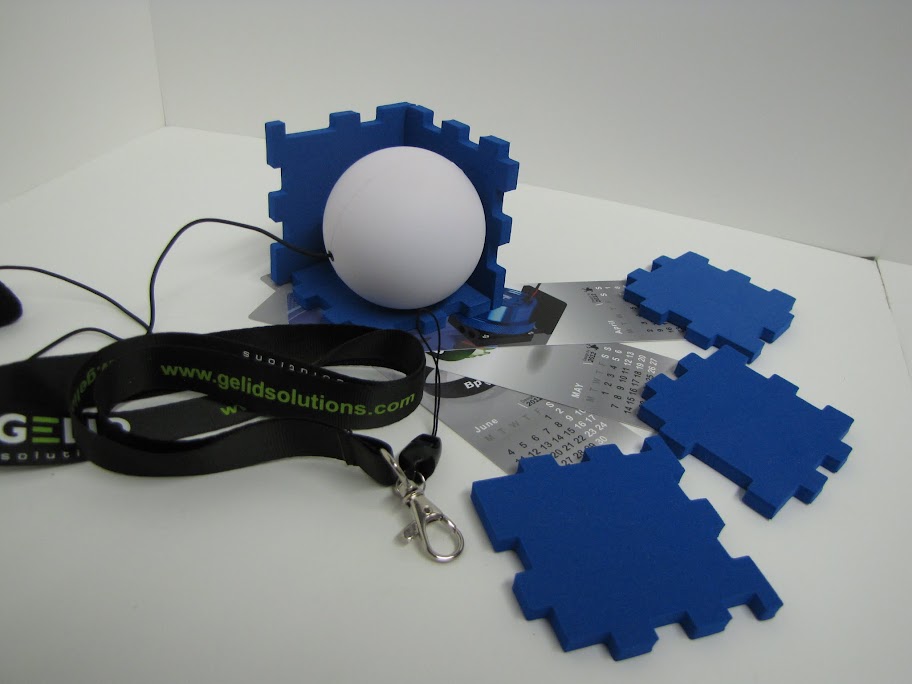
Performance-pcs.com... the place where I got most of this... also sent me a bunch of random desk toys... I guess as a reward for all the money I spent with them?
Now that all of that is out of the way... time for some actual progress! I did some experimenting with painting, filling, and acrylic:
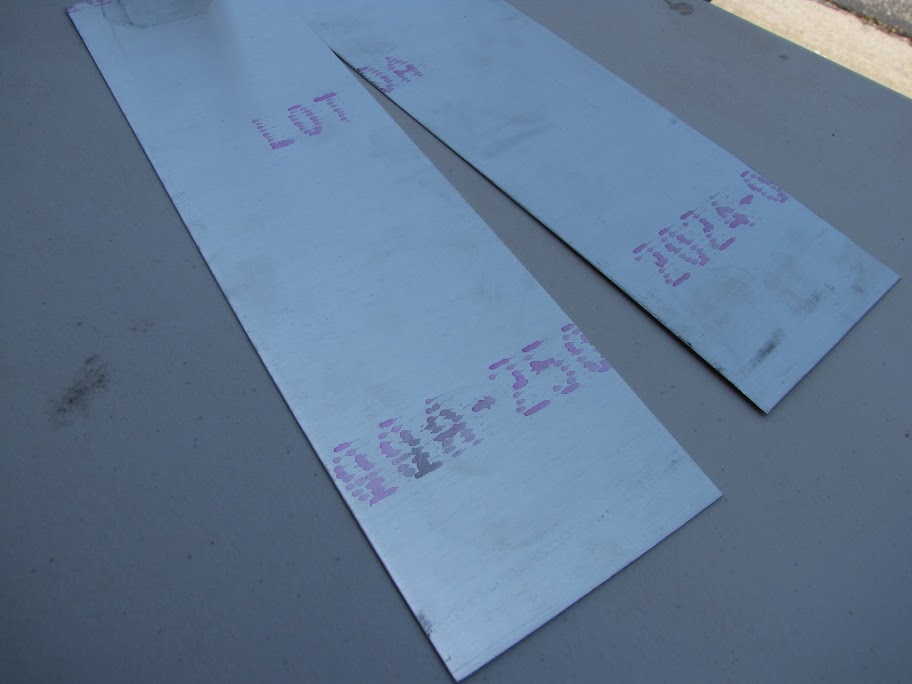
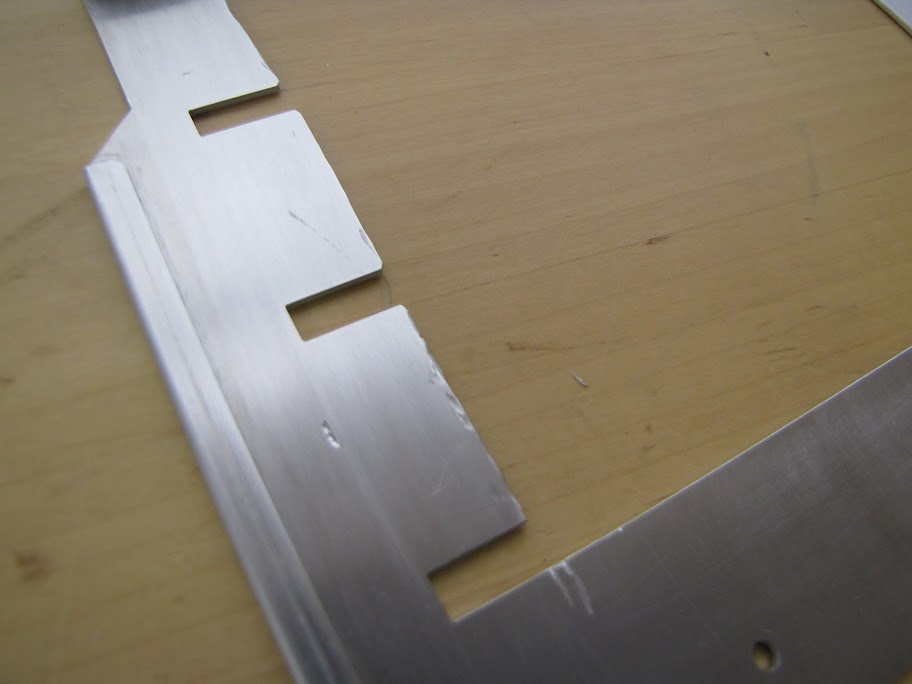
I started out with some blank strips of aluminum scrap that I had laying around... scuffed, marked, dented... time to fix em up, so I can use them to see what the paint looks like, and so I can get my painting techniques right:
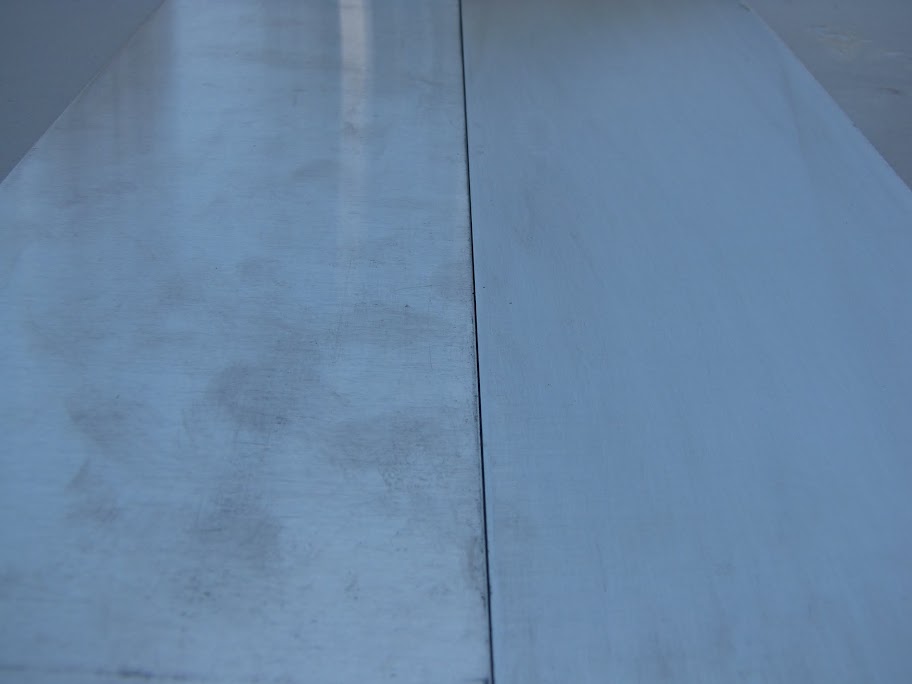
I started by sanding the blank sheets down with some P400, to get rid of the marking, scratches, and such, and to give a good grip surface for the primer. The standard blank is on the left, and the sanded one is milky/solid, on the right. Ready for priming!
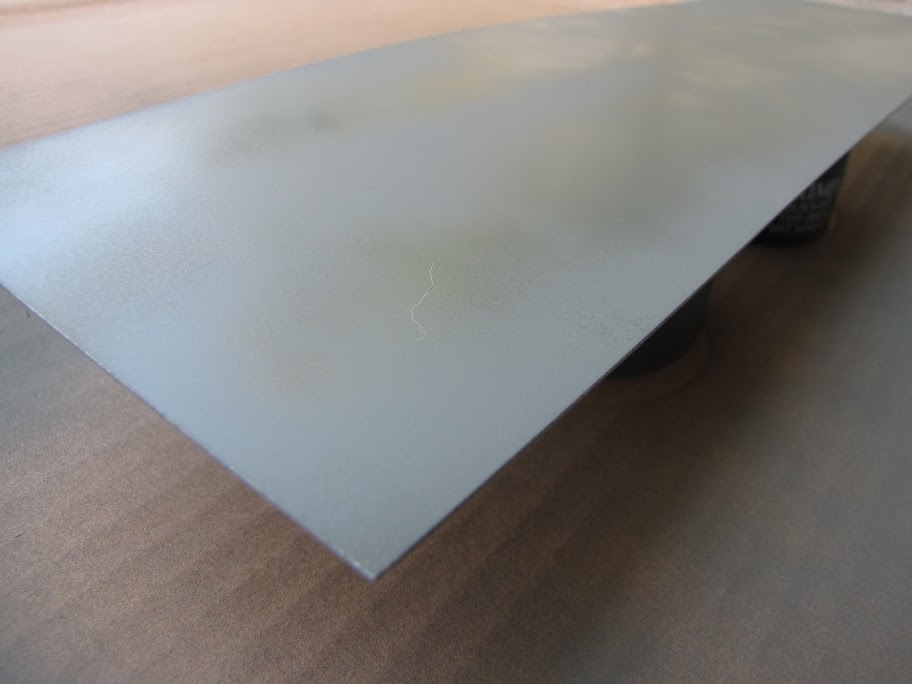
I primed in light, even strokes from edge to edge, waiting two minutes between coats (as per the instructions on the can. I used Self Etching primer, as it provides better adhesion than standard primer when used on aluminum and other metals:
(without fail, a hair landed on it right after I finished the final coat.)
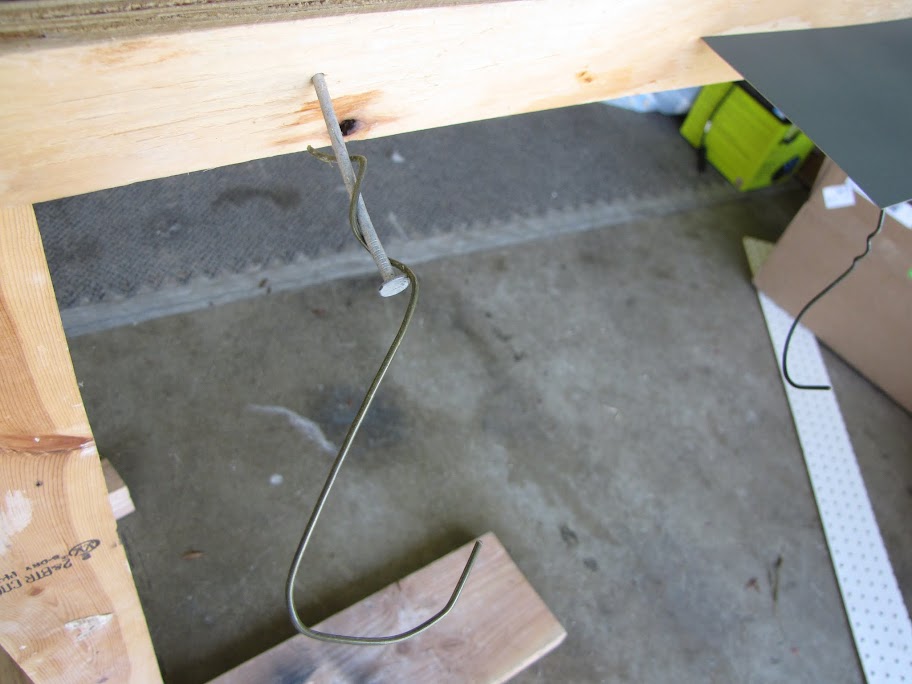
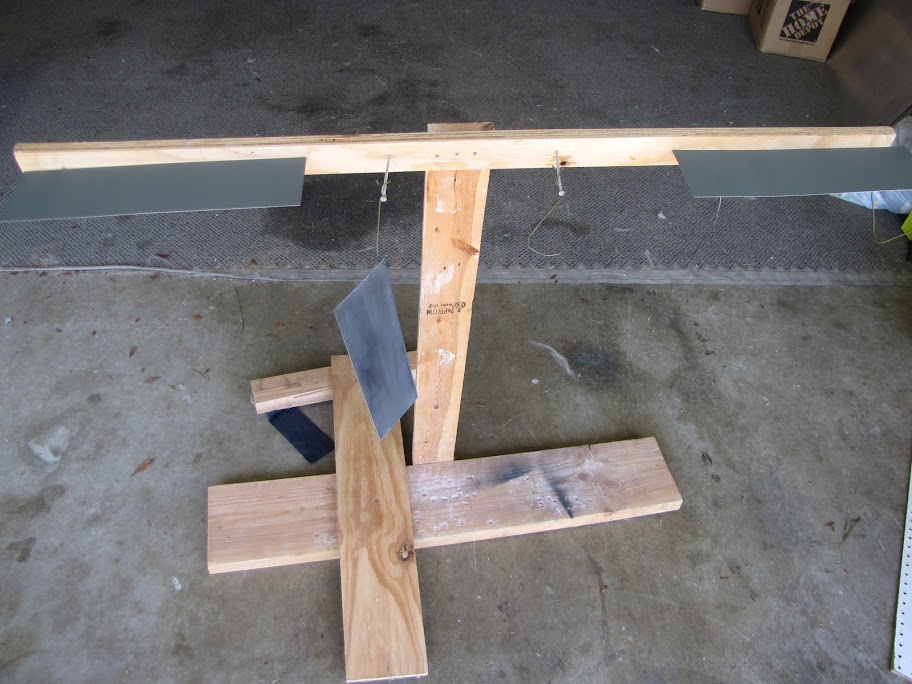
I took a bunch of scrap wood laying around and threw together a quick drying rack for my pieces and parts, too. Crude, but effective! I'll probably use it to hang parts for priming and painting, too, so I can get all the sides on each coat, cutting down on the number of passes I have to make on each piece:
After the primer dried for 15 minutes (per the can instructions), I moved on to wet sanding using P1000. I know, the grit was a little high (the can called for P450, but that seemed low). Just meant a little more elbow grease, but a smoother finish in the end:
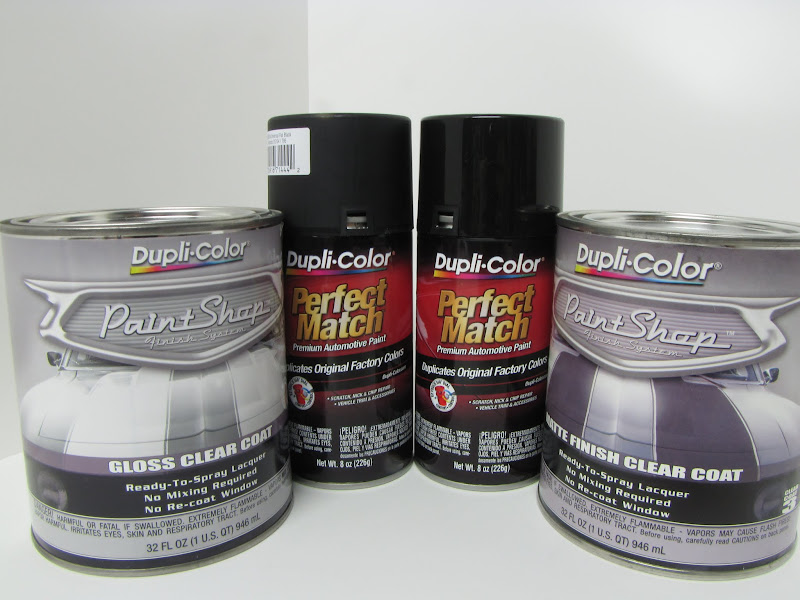
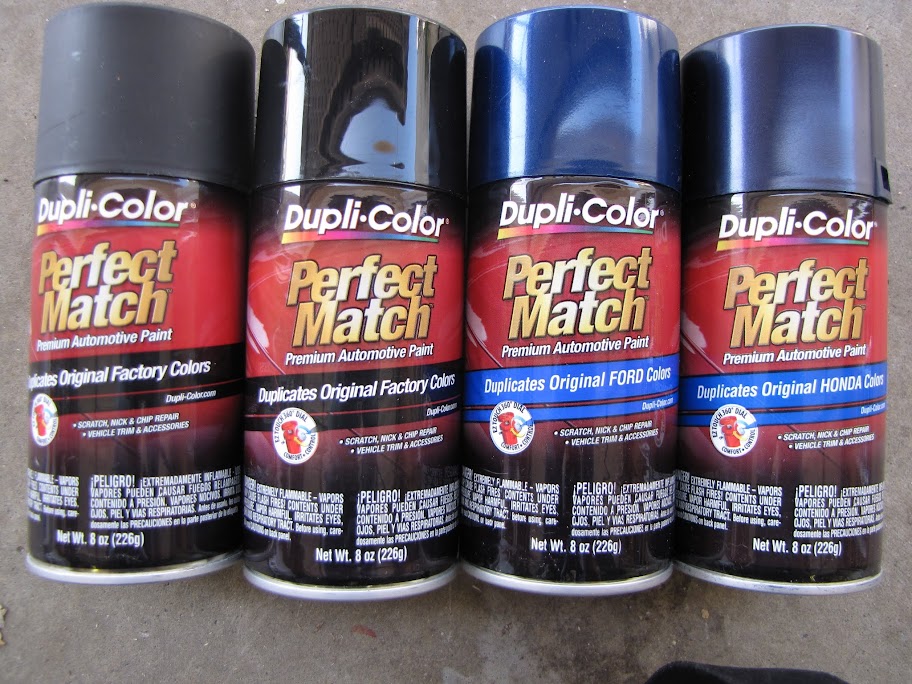
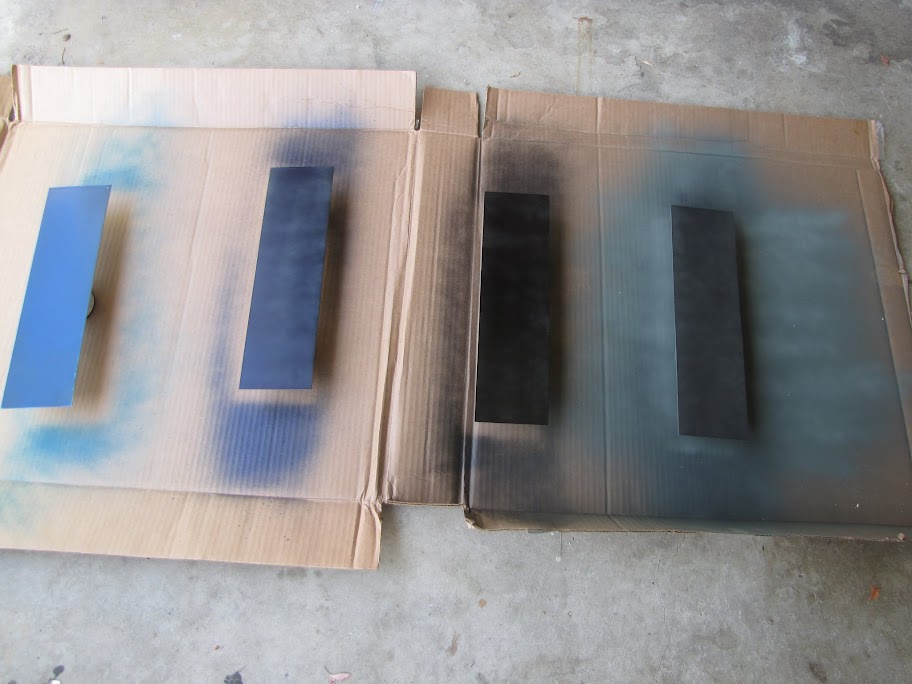
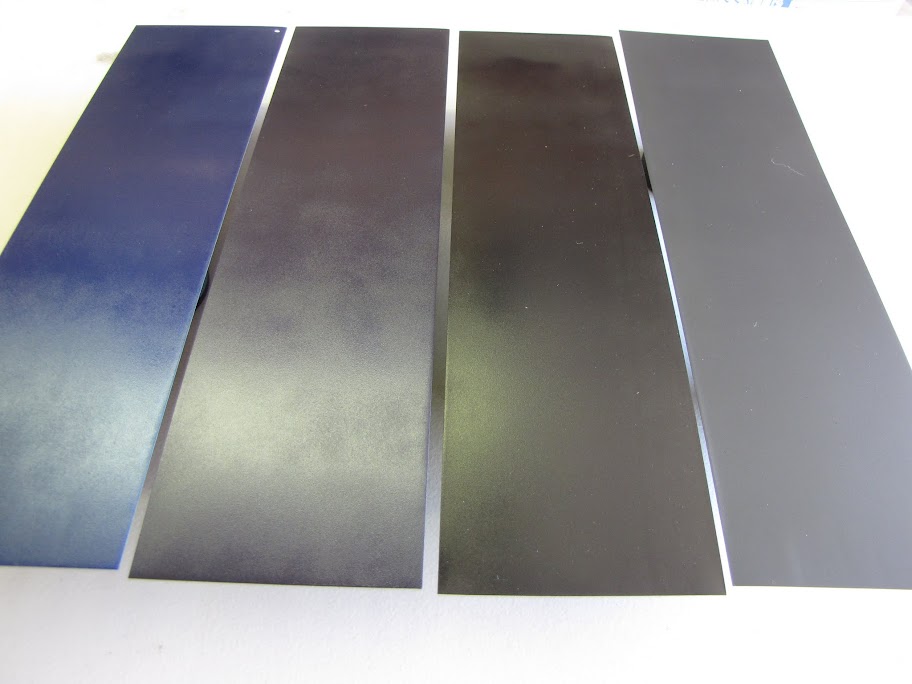
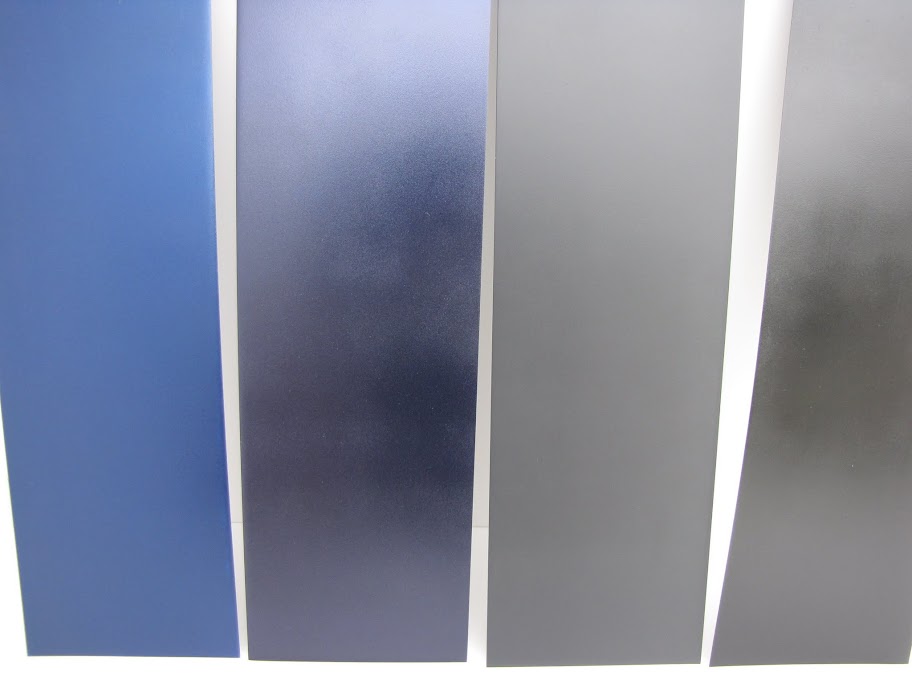
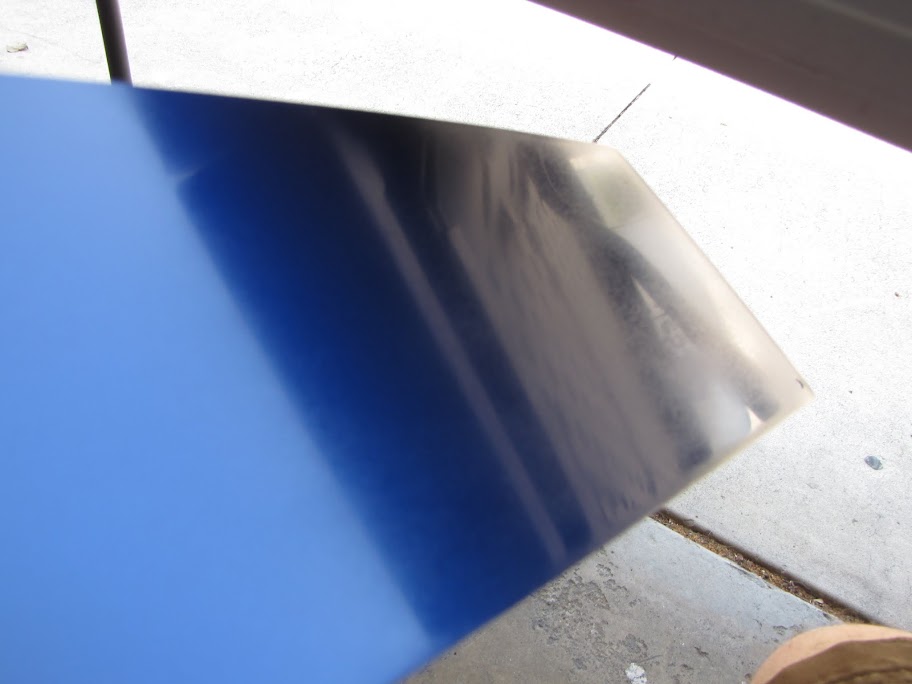
Next, after letting the primer dry for a few hours, I broke out the paint. I grabbed a few random colors at the local hardware store... just to see which one I ended up liking more:
(I was originally thinking of making my case Black/Blue... but now I am leaning towards Black/Black... so the blue paint is more for fun at this point. :p)
First coat, using a highly scientific method of propping the subjects up on spray paint caps on top of a cut up cardboard box.
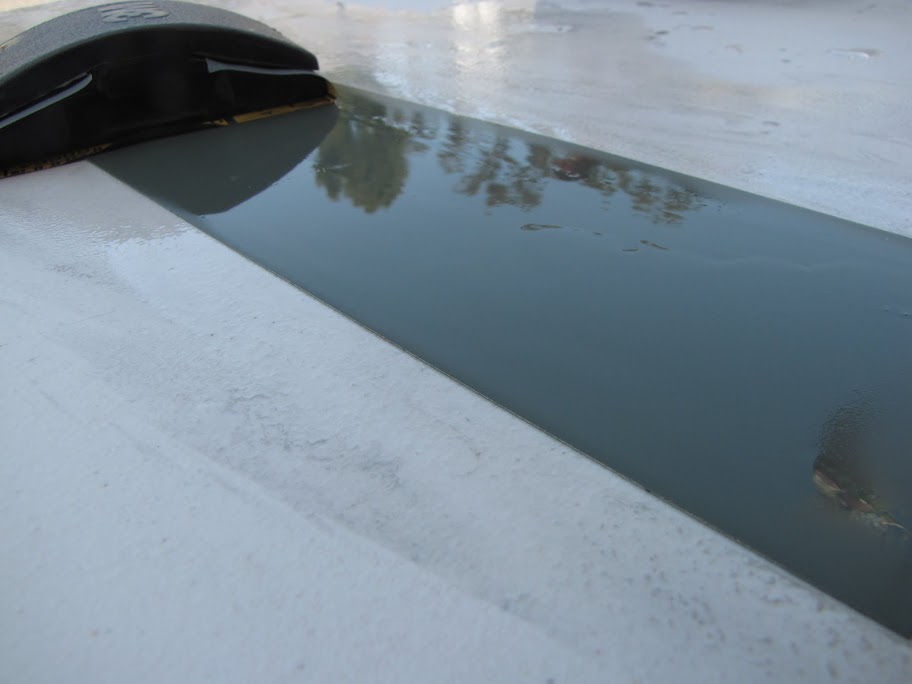
The finish came out pretty well, for a first coat. Just goes to show that a good coat is all in the preparation. Still a little splotchy, but I think additional coats will clean that up:
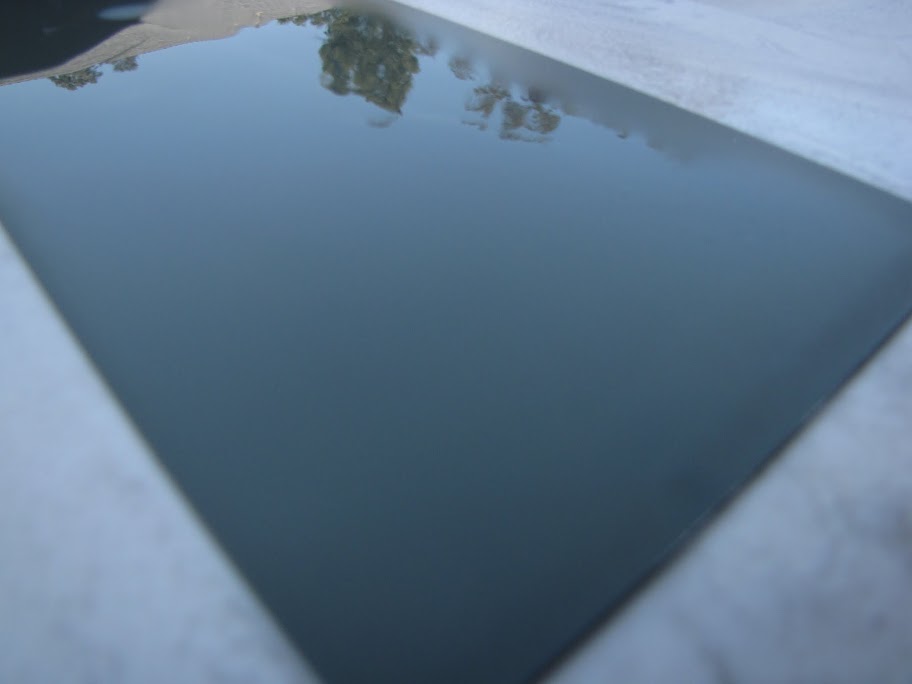
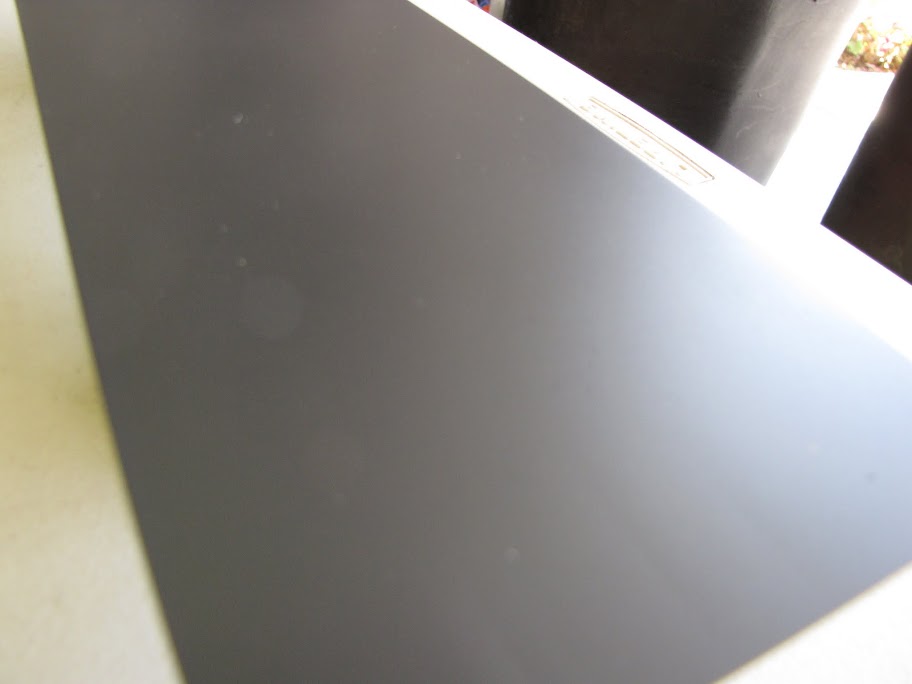
I really like how uniform the matte black came out. Highly considering a black/matte black combo for my case right now:
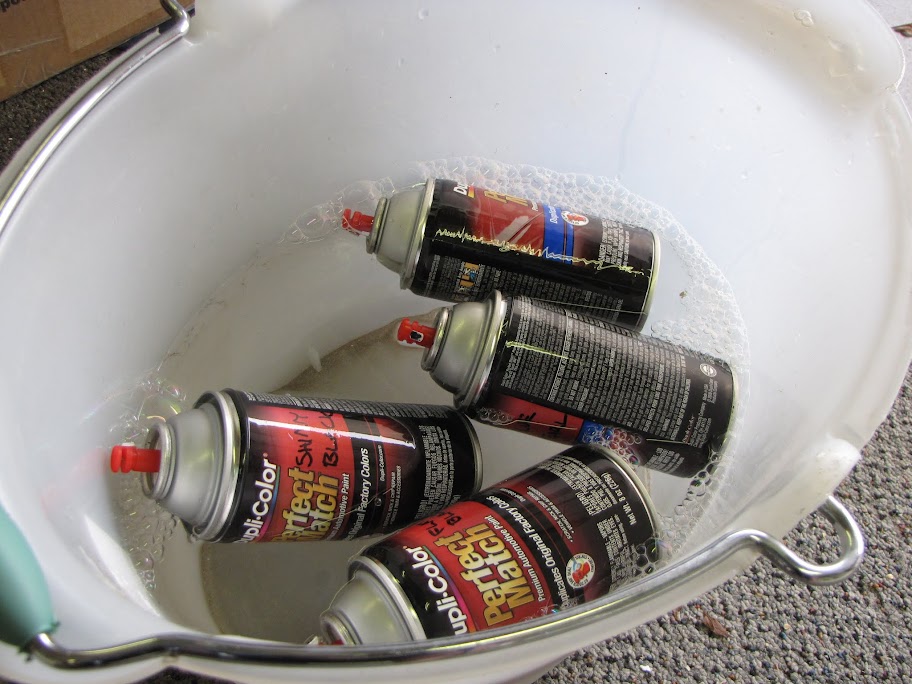
While waiting for the paint to dry, I decided to do some additional light reading on spray painting for various finishes. Many recommended warming the cans in hot water prior to using them. The difference in how easily the paint applied / how uniform it dried was astounding. Needless to say I'll be soaking all my paint going forward.
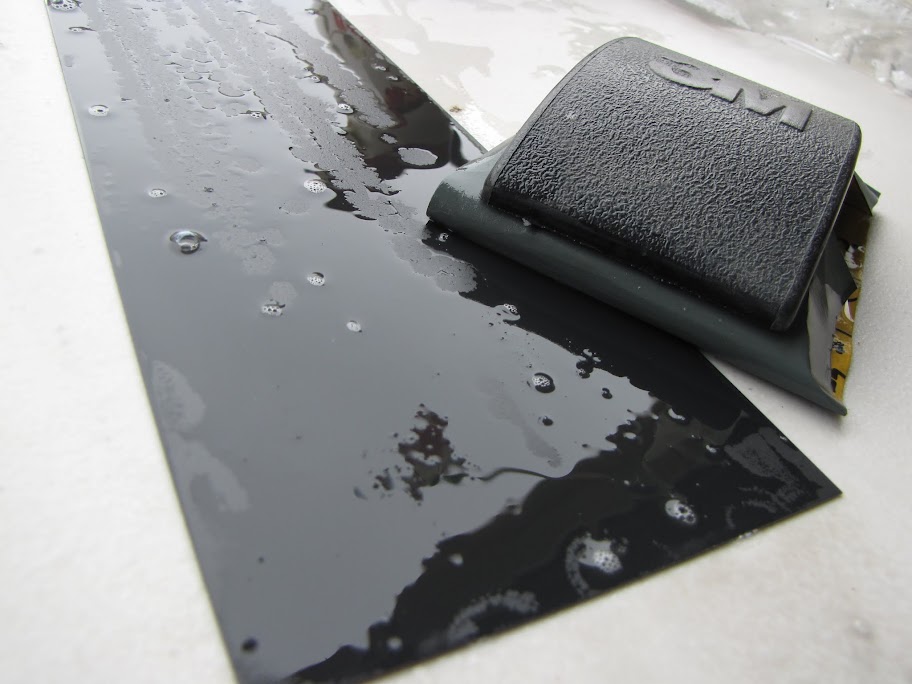
I started the next coat by sanding it with P1500, getting a smooth finish and clearing off all the dust/hair/bugs:
Another few coats... looking pretty good so far:
Next step, clear coating! Still waiting for this coat of paint to dry though... so that'll be in the next update!
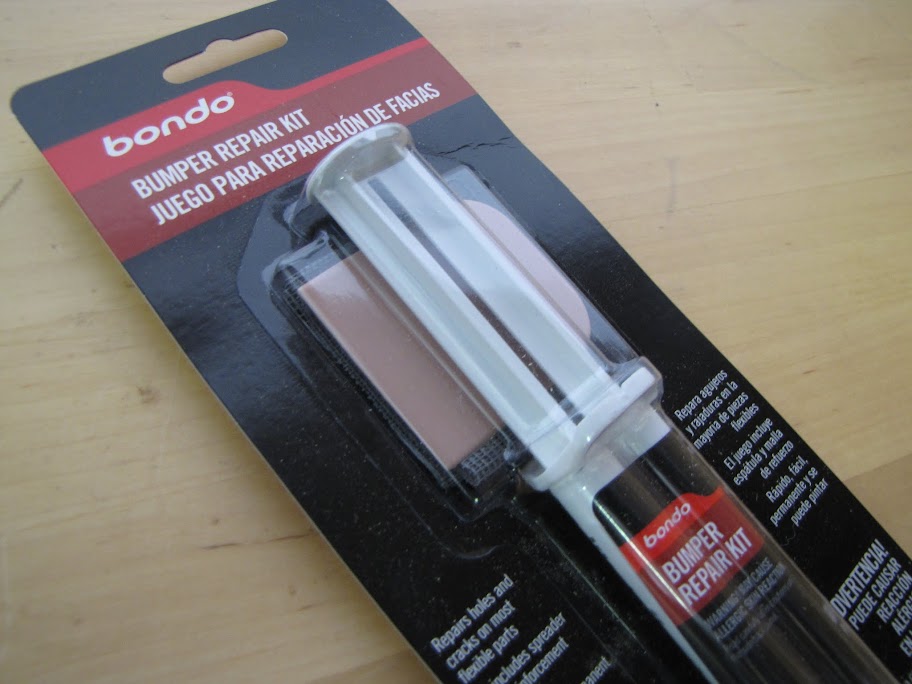
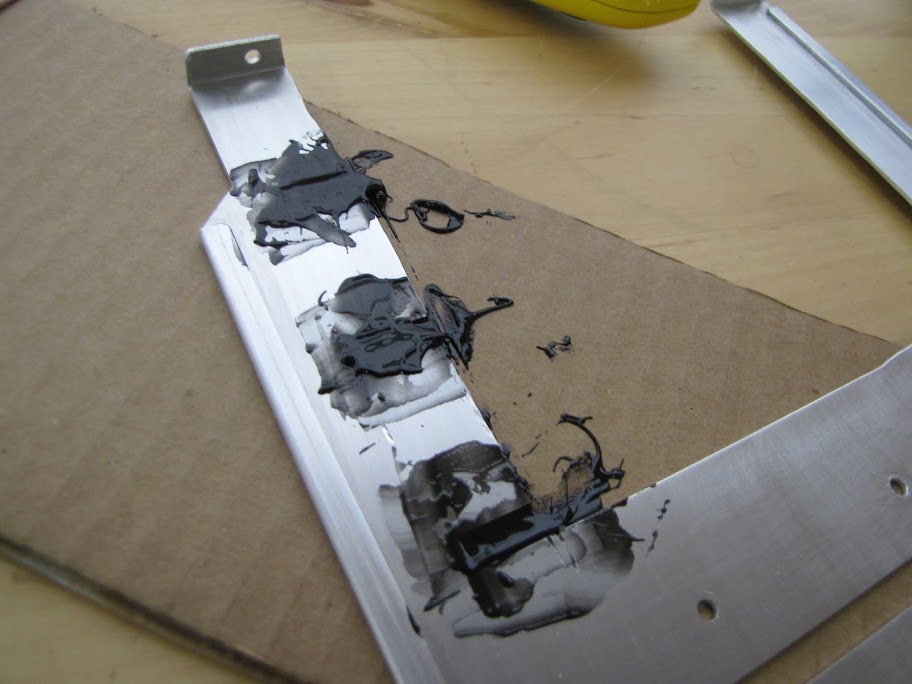
Moving along... I did some experimenting with patching up holes in aluminum. I have two fairly large holes in the midplate of my case that I would like to fill... but I've never tried anything like that before. I picked out a piece of my case that I didn't plan on using in the final design, and I decided to give some Bondo bumper repair a try, just because that's what the supply store happened to have handy:
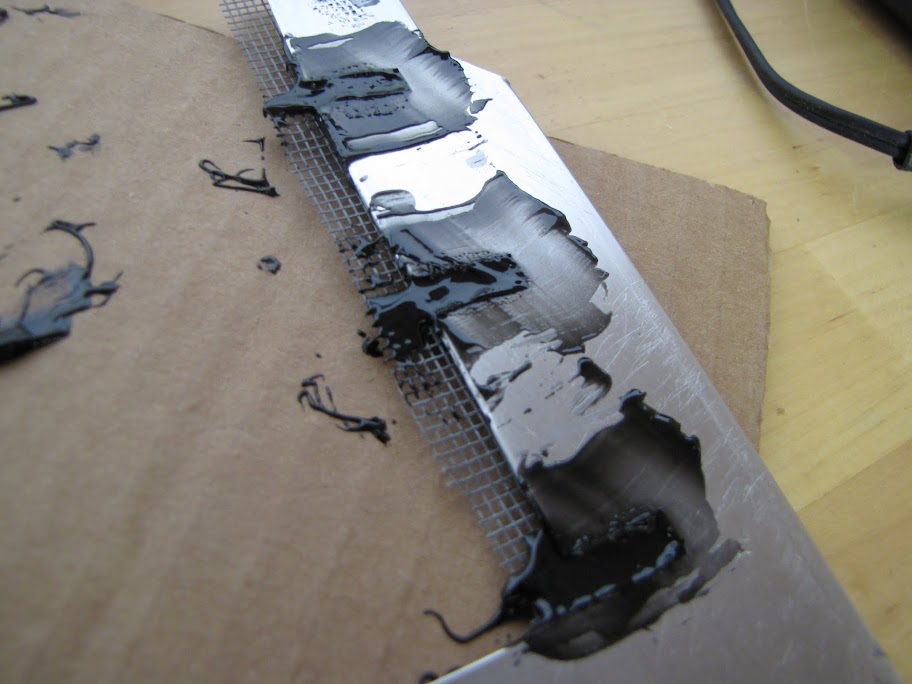
I started out thick... basically just trying to fill the holes. After a few botched attempts, I decided to use the screen stuff that came with the bondo, to see if that would help. Man, it worked wonders!
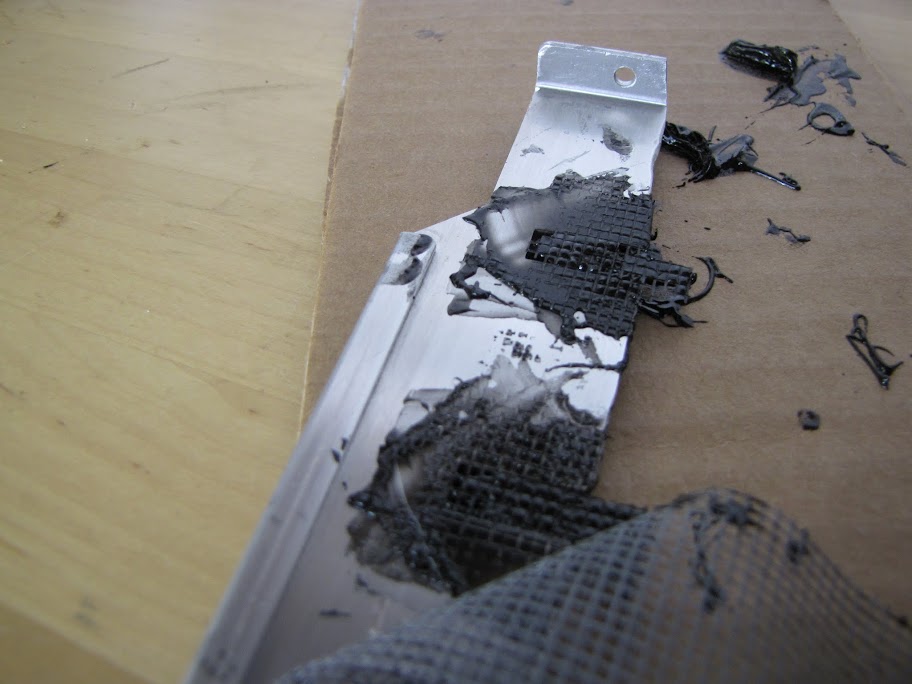
After waiting a few minutes, it just peeled right off leaving the holes roughly filled.
I gave the patches another quick coat of bondo to fill the holes and imperfections, then cleaned it up to get it as flat as I could, knowing what was coming next:
... Sanding!
... and more sanding!
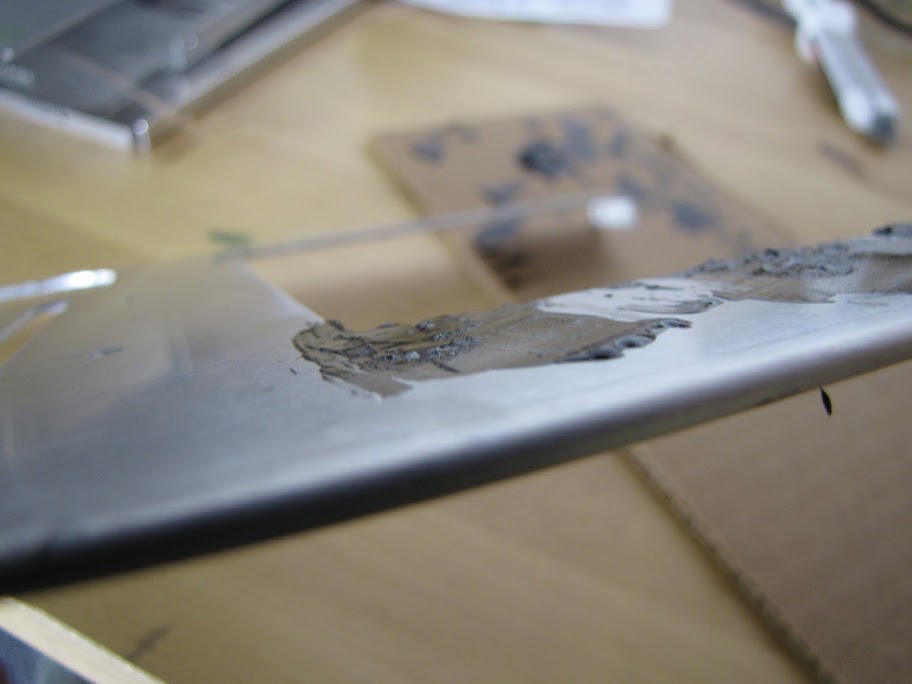
Finally, after 30 minutes of assault with P80, I had all the excess removed:
I then went over the whole deal with P150, to remove some of the excess scratches in the aluminum:
Another painting tip I learned... prop stuff up standing up, rather than laying down. Helps cut down on the drips and splotches, as the rattle cans seem to like spraying forward instead of down:
Primed, and ready to dry:
Whew... what an update! Next time... more painting, and some Acrylic work!
EVGA z77 FTW -- 16GB of Samsung MV-3V4G3D/US -- Intel Core i7-3770k -- EVGA GTX680 -- Corsair AX850 PSU -- Lian-Li PC-v2000b -- 2x XSPC RX480 Rads -- EK-RES-250 -- EK-DDC Dual Top/pumps -- EK-FC680EN Full Cover block -- Swiftech Apogee HD Block
It's finally here! The EVGA z77 FTW I've been waiting weeks for is finally here.
Tonight will be a long night, I have a feeling...
EVGA z77 FTW -- 16GB of Samsung MV-3V4G3D/US -- Intel Core i7-3770k -- EVGA GTX680 -- Corsair AX850 PSU -- Lian-Li PC-v2000b -- 2x XSPC RX480 Rads -- EK-RES-250 -- EK-DDC Dual Top/pumps -- EK-FC680EN Full Cover block -- Swiftech Apogee HD Block
Had a hell of a week last week... so while I did work on my system a bit, I didn't get a chance to come back and post until now... sorry for the delay! :P
Anyway, on to the update! First, I did a bit of work with my side project, that Acrylic thingy I was showing before. I've never worked with Acrylic before now, so I figured I should get some practice by building some practical stuff to learn the ins and outs of the material!
I started by trying to bend the acrylic with the heat gun I picked up in the previous post... talk about a job that requires patience! Maybe it was the type of Acrylic I grabbed off the shelf at Home Depot... or maybe it was that it was so thick... but it took probably 15 minutes of heating to get one edge warm enough to move at all. I took a few photos of the process... but they didn't come out, so I deleted them all. :P
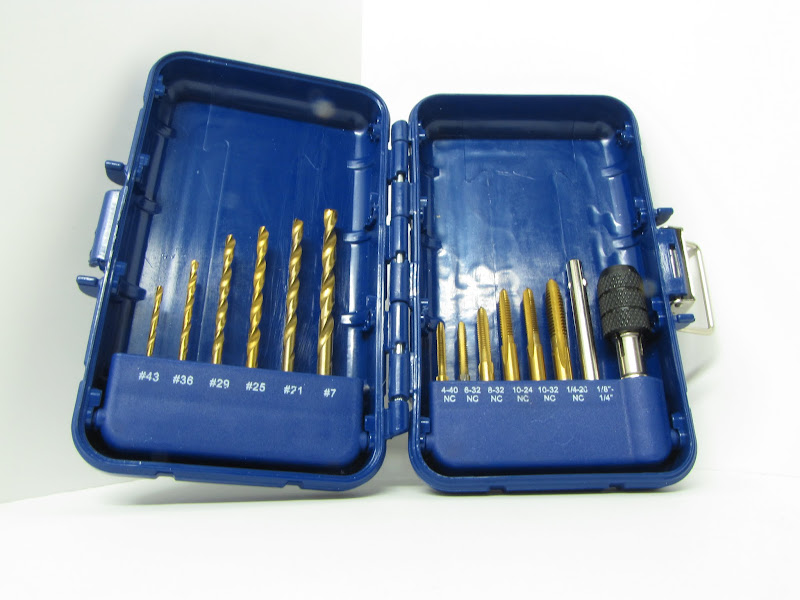
Moving on, I went and picked up a drill and tap set at the local hardware store so that I could try tapping holes into the Acrylic. Not a bad little set for $10.
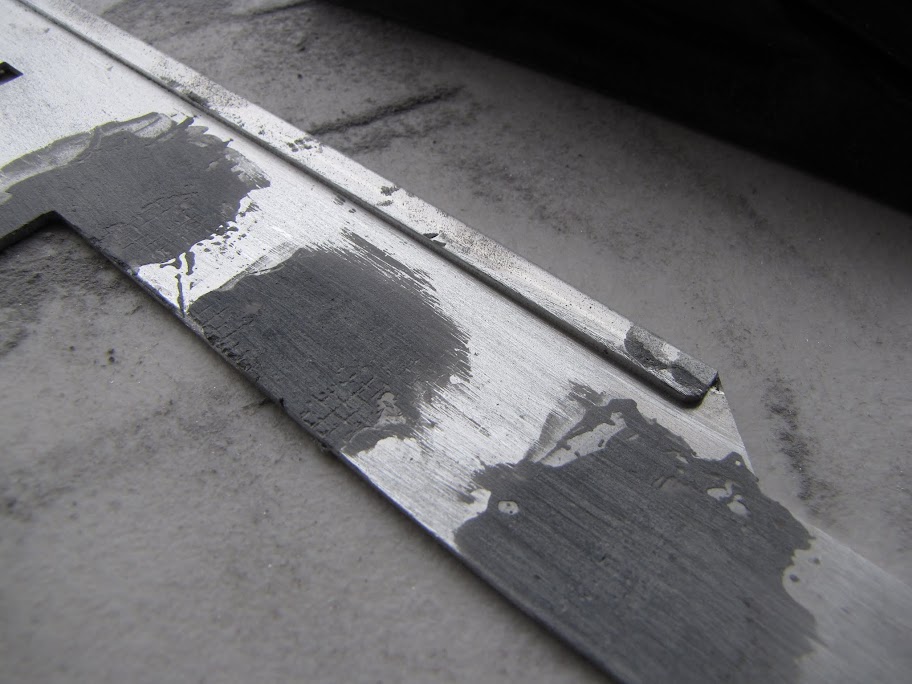
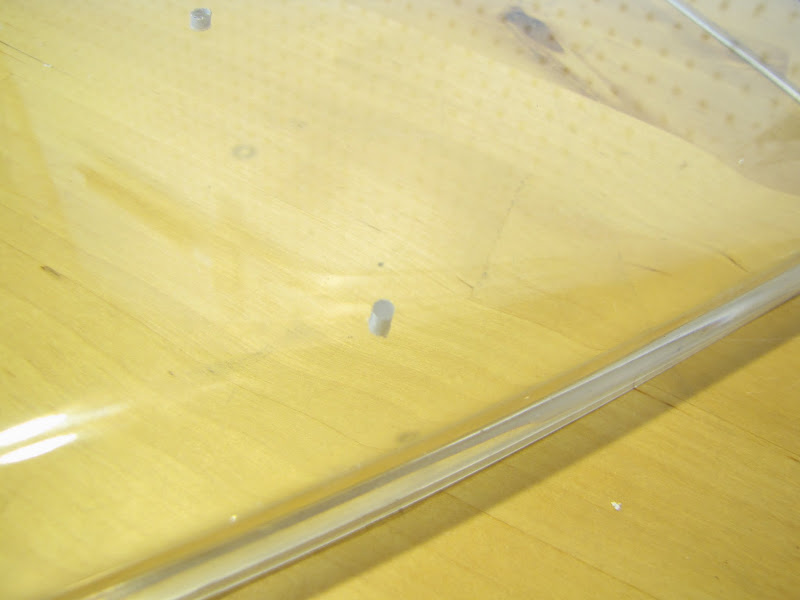
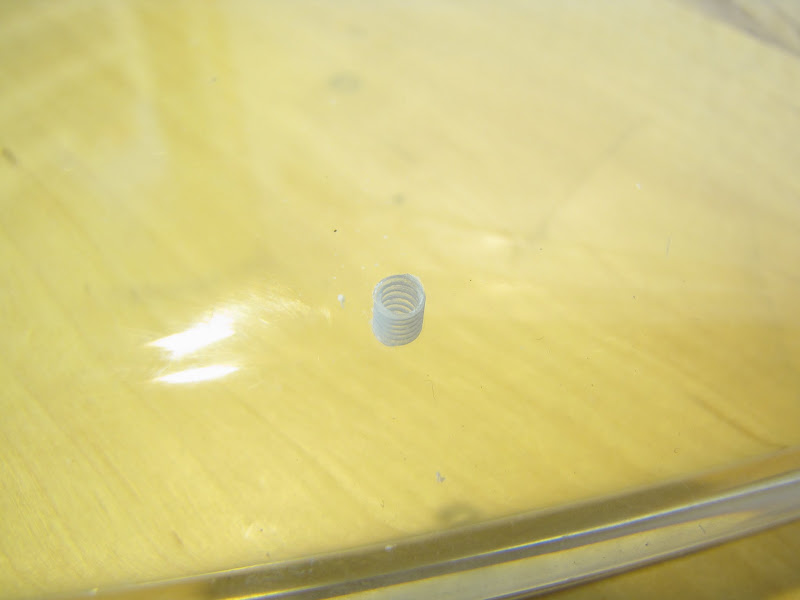
First, I pre-drilled the holes with a bit just slightly smaller than the tap I planned on using (for reference, this was a #36 bit for a 6-32 tap.) I marked a few lines on a piece of scrap wood so that I could use it to line up the bit, so I was directly perpendicular to the Acrylic:
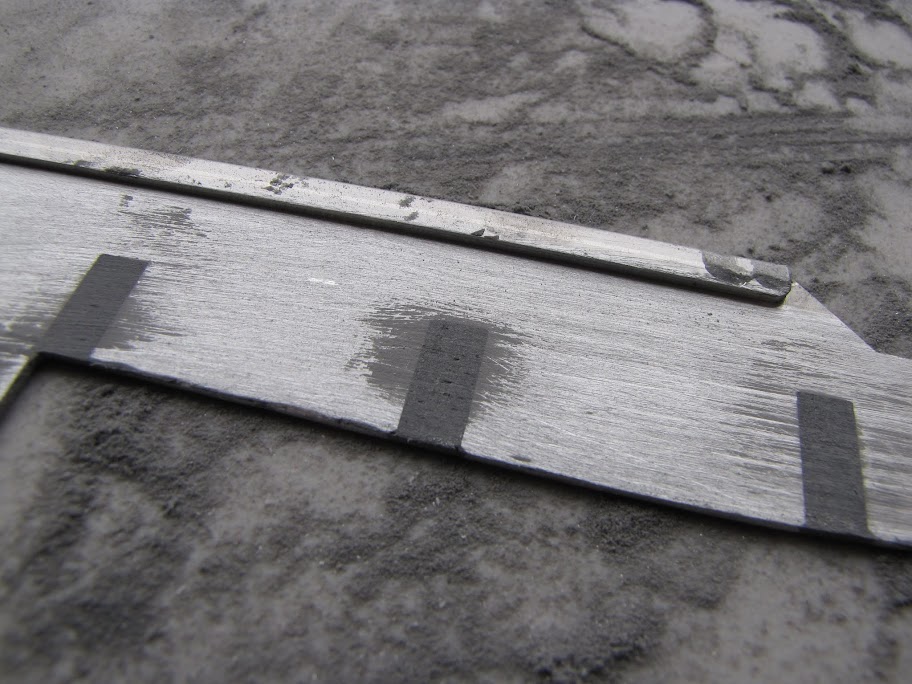
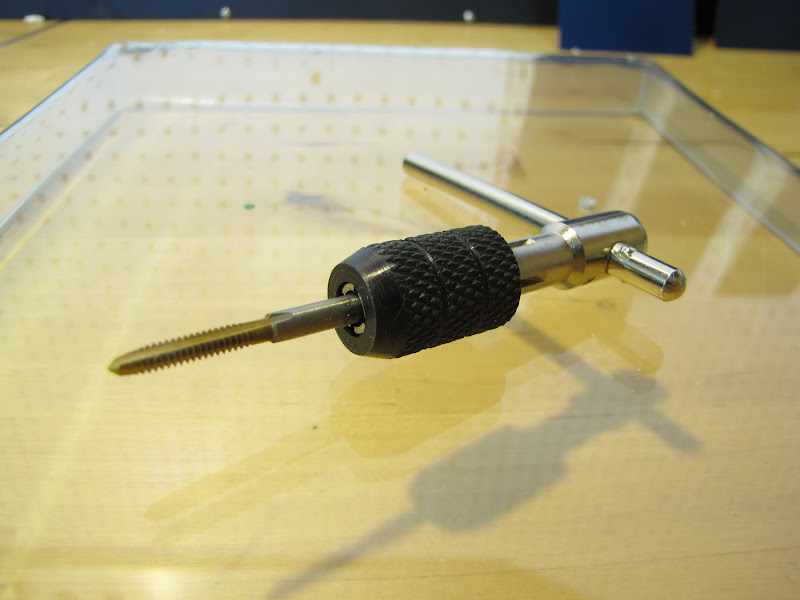
Next, I put together the tap, lined it up with my guide, and slowly turned it... backing up a quarter turn when I felt the bit getting grabby, and slowly proceeding, checking periodically to ensure I was still perpendicular to the Acrylic:
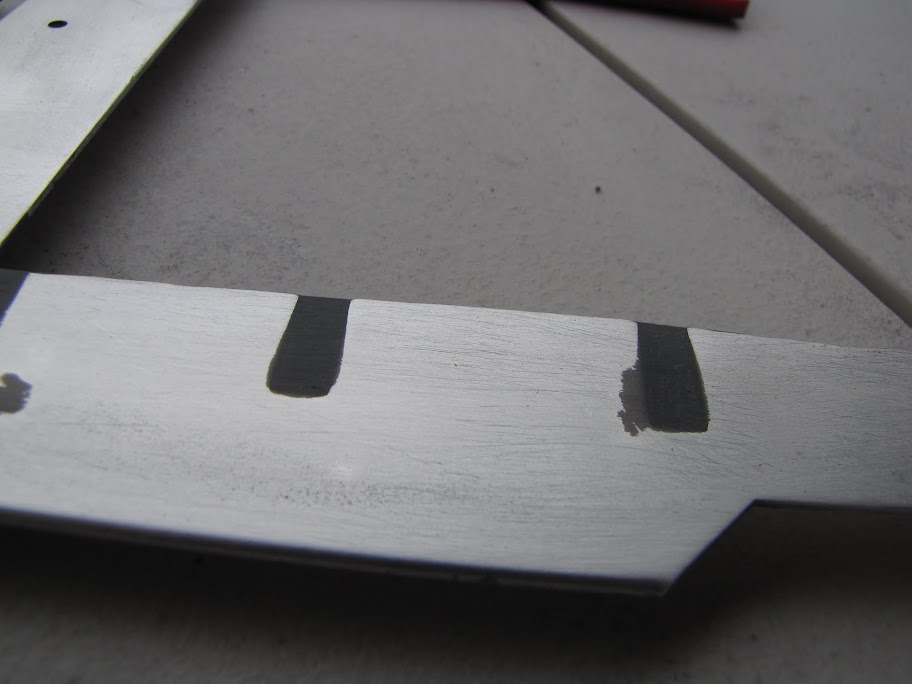
Nice, clean tap!
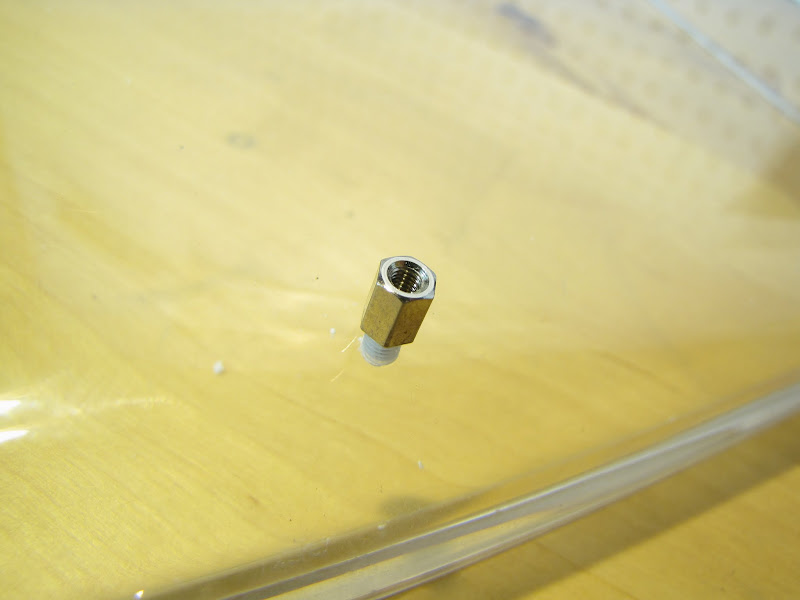
Fits like a glove!
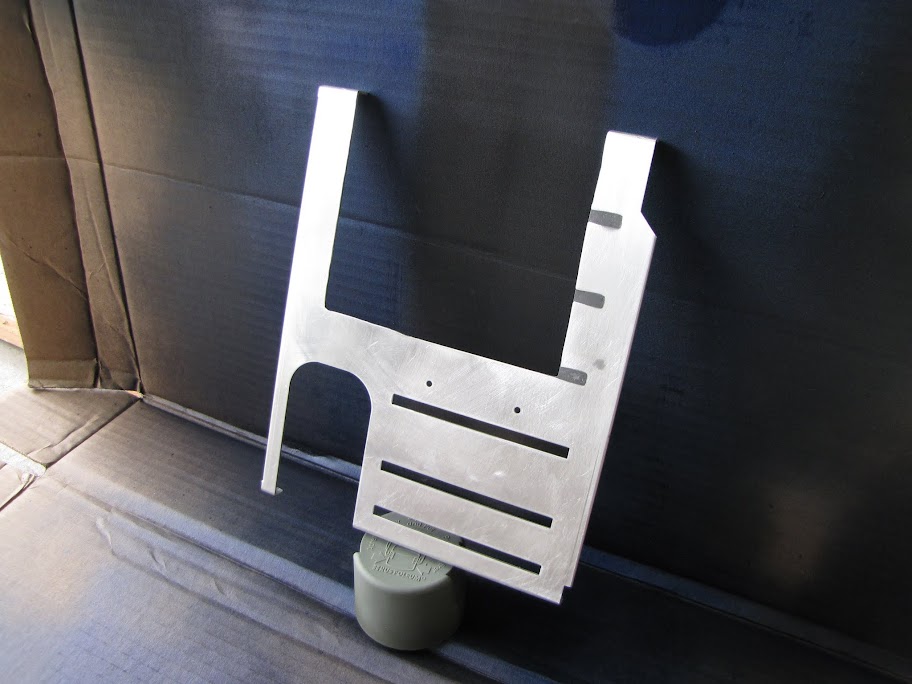
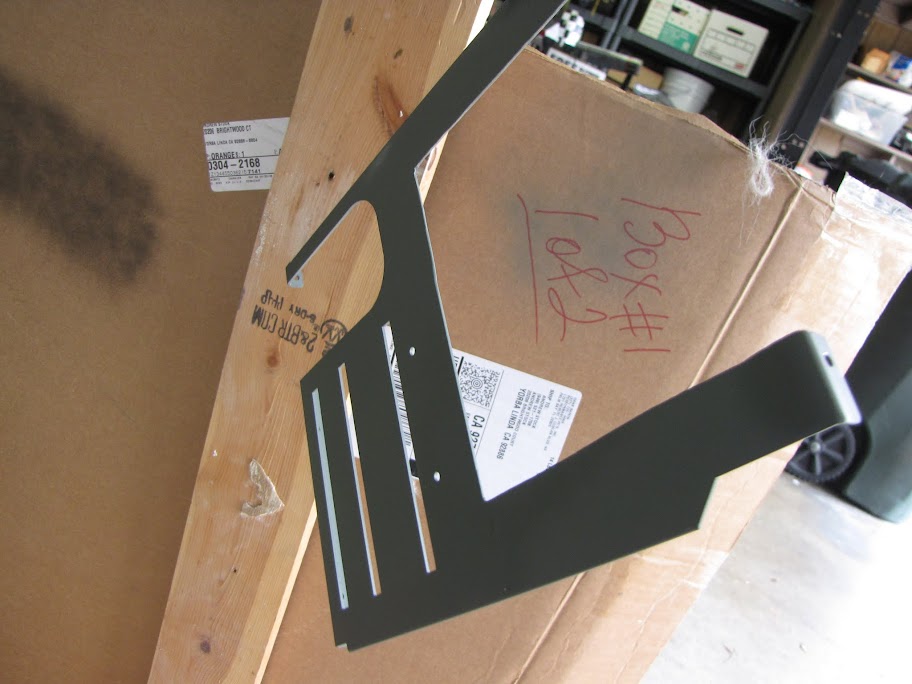
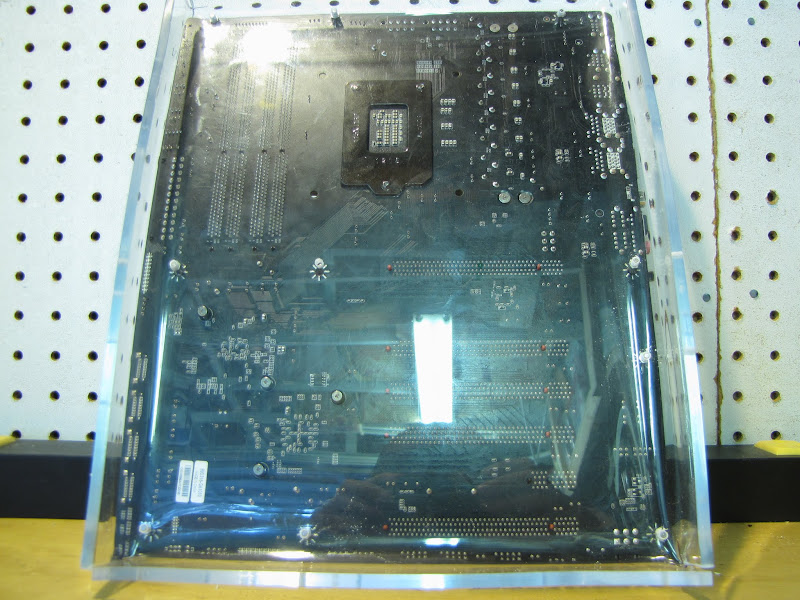
Repeat that process 10 more times... and I had me a simple motherboard tray for my bench!
Granted, the tray is a little crude, and not SUPER useful... but it's great for temporarily mounting a motherboard on so that it's up off the surface of the table, and it makes sure there's room for the PCI-e boards and their faceplates to hang off the edge. Most of all, it was great practice for working with Acrylic a bit!
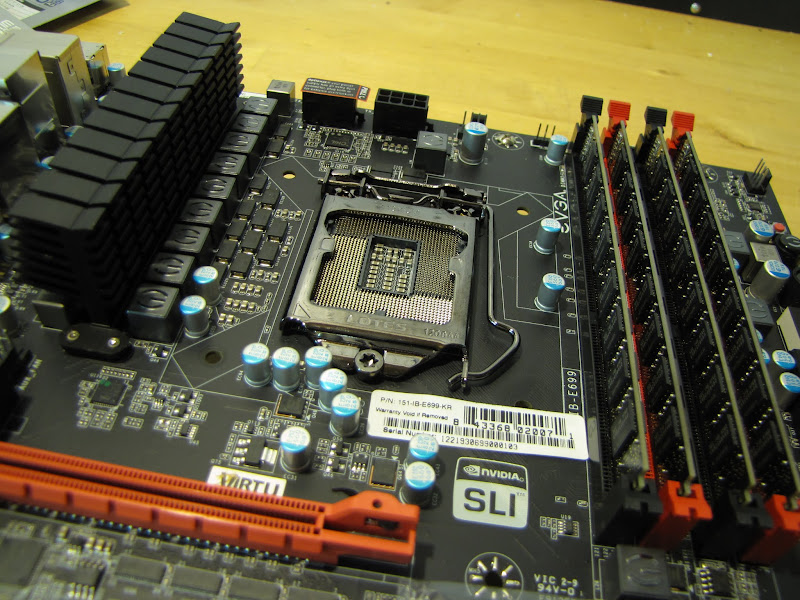
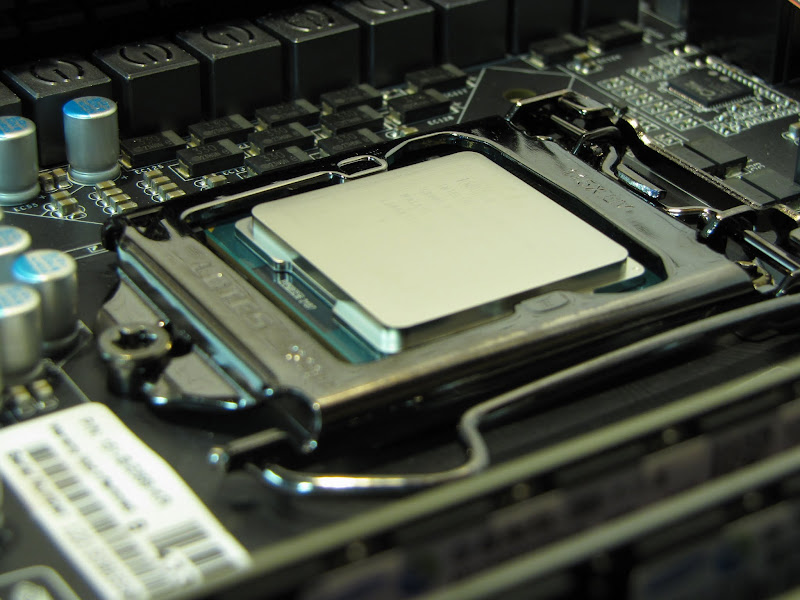
Next... I couldn't resist throwing the new rig together with all it's default cooling, just to give it a spin. Besides, I'll never know if it was DOA or if I broke it all by myself, if I jump strait into water cooling.
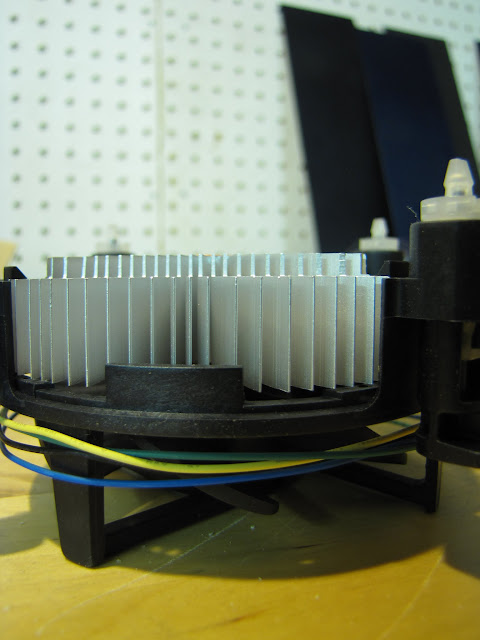
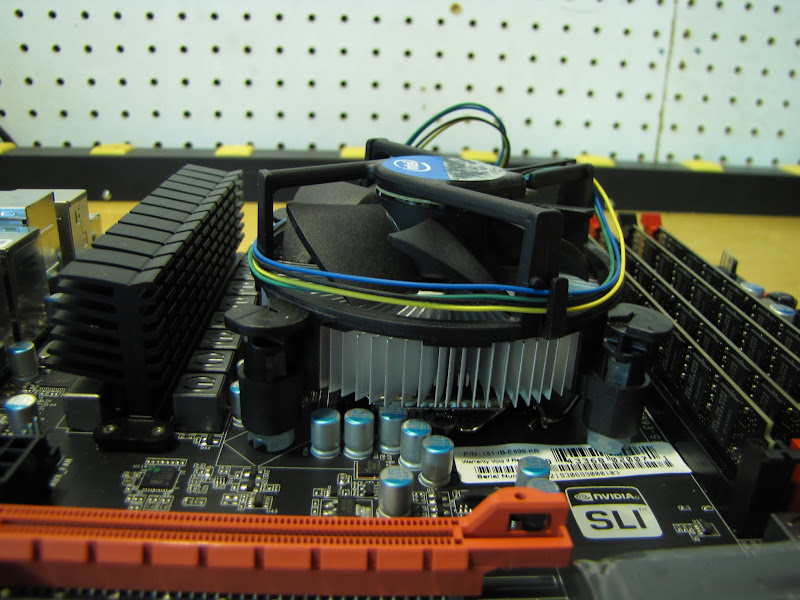
The heatsink that came with the 3770K is about as cheap as it comes... I am a little concerned that this thing will not provide any cooling at all. It's even thinner than the Core 2 Duo stock heatsink fan...
The thing was a pain to mount, too... cheap plastic fasteners. Every time I pressed one side down and gave it the quarter turn, the other side popped right back up. It was only through some creative finger-twister yoga that I managed to hold down and turn all four pegs simultaneously:
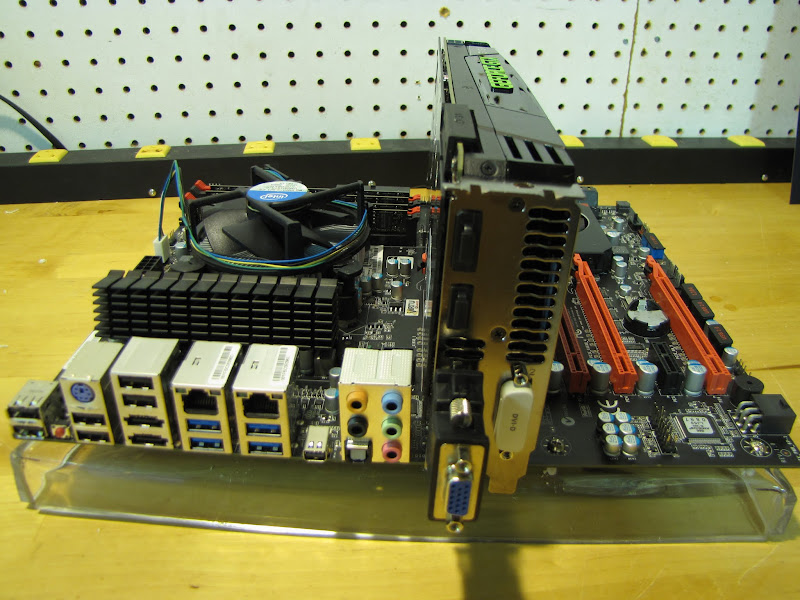
Fortunately, seating in the GTX 680 SC+ was quite a bit easier. This thing is monolithic! It dwarfs the motherboard... seems more like the motherboard is seated into the graphics card, at this point. :P
...and... first try, boot to bios! Huzzaw, no blue smoke!
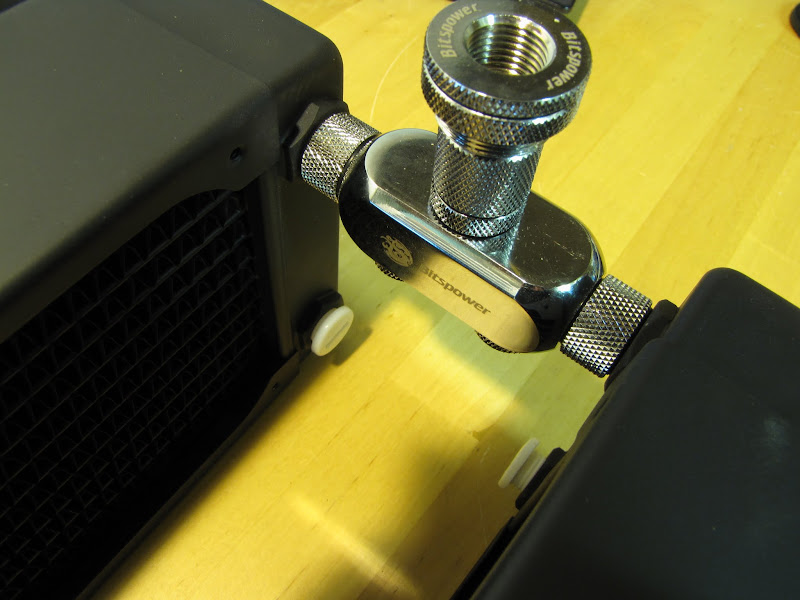
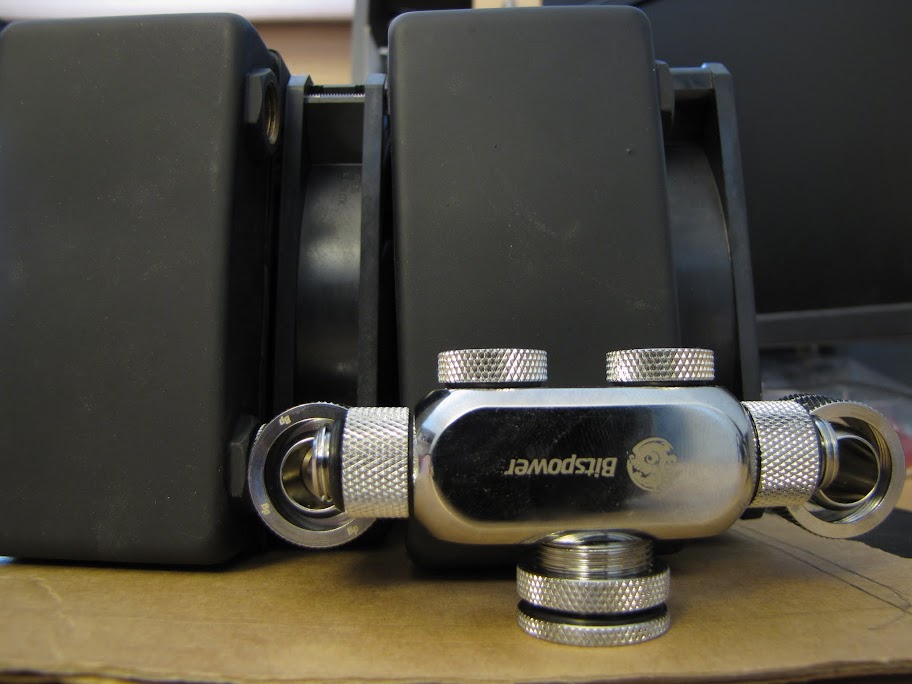
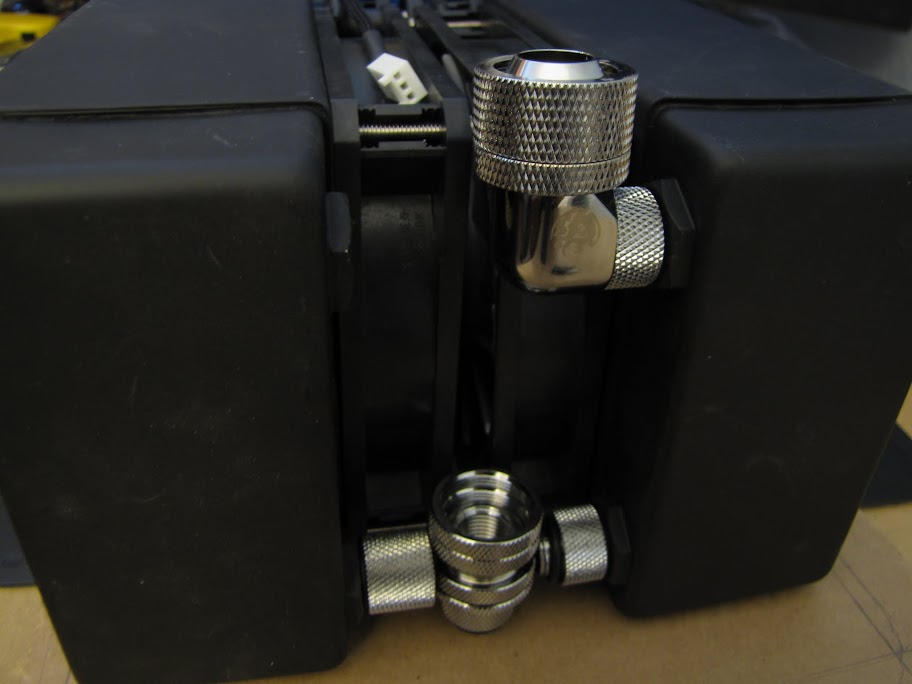
Finally, to round out this session... while waiting for windows to install and update, I decided to unbox the radiators and try putting the core together. I started with the radiator interlink / drain port. All Bitspower parts, looks great!
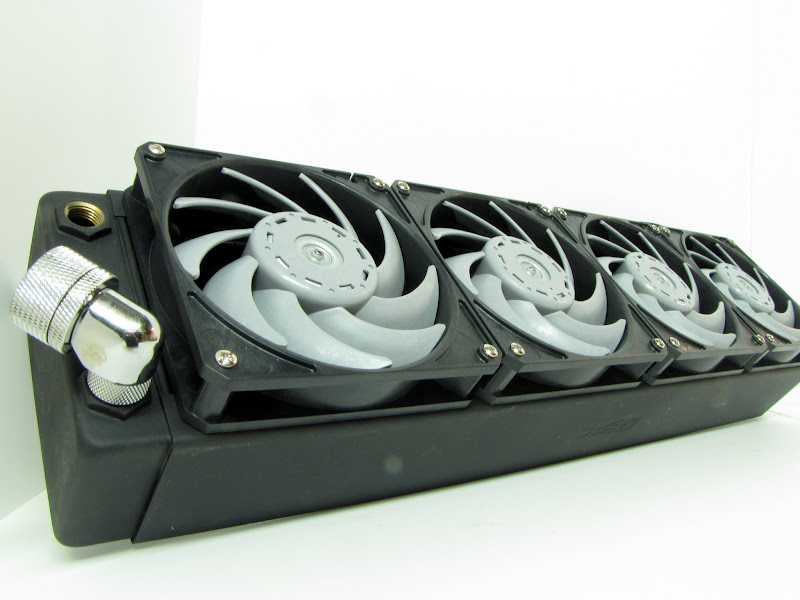
Next, I threw some of my Gentile Typhoon's on the radiators:
And now... for the first setback of the project! Actually, there were multiple setbacks rolled into one here... fortunately, they are all on one part, so maybe I can fix them all together. :p
Setback #1: I cranked up the fans just to make sure they all worked... and one of the leads in my fan power multiplexer is dead. Oh well, I was going to re-sleeve it anyway, I can fix it while I am in there.
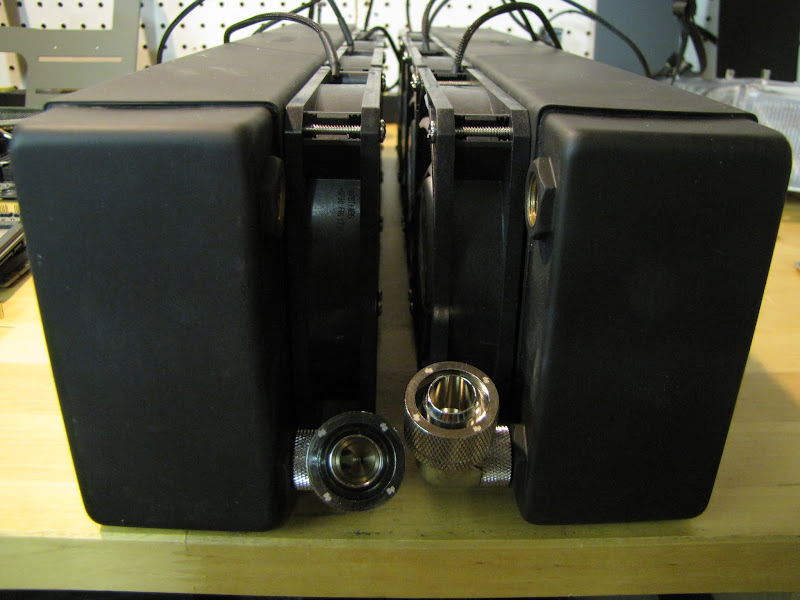
Setback #2: While powered up, I put the two radiators in roughly the position they were organized on my Sketchup drafts earlier in this thread... and my god, the noise! They created some kind of vacuum against eachother, causing a really low vibration that made my head want to implode. I tried putting a fan baffle between the two rows of fans, and it did nothing to help. I also noticed the air throughput coming out the other side of each radiator was dramatically reduced compared to when I separated the radiators. Here's how close they would need to be to even come close to fitting:
No good.
Setback #3: Either the Sketchup was not to scale, my measurements in sketchup weren't true to form, or the radiators were wider than anticipated... but yea... the whole business doesn't fit in the bottom of my case!It's off by about a quarter of an inch. No good.
So... I have some re-planning to do! Hmmm...
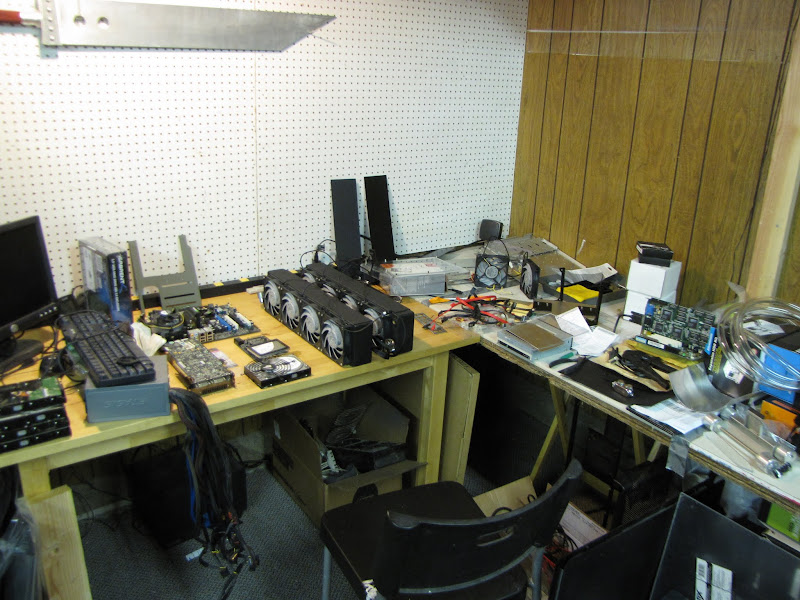
Alas, it was a good weekend of playing around... as evidenced by the current state of my work area:
Next time... maybe some painting?
EVGA z77 FTW -- 16GB of Samsung MV-3V4G3D/US -- Intel Core i7-3770k -- EVGA GTX680 -- Corsair AX850 PSU -- Lian-Li PC-v2000b -- 2x XSPC RX480 Rads -- EK-RES-250 -- EK-DDC Dual Top/pumps -- EK-FC680EN Full Cover block -- Swiftech Apogee HD Block
I did a little playing around this afternoon with options for my radiator 'conundrum' ... here's option 1, 2, and 3 that I came up with. All three fit, and all three will require additional hardware, so it's pretty much a wash any way I end up going. My major considerations are noise and Delta-T for the radiators...
Option 1:
In this option, I would be replacing the 90 degree compression fittings you see coming out of each radiator with TWO 90 degree angle pieces (non compression, g1/4, smaller profile). The one on the left would have one angled out of the radiator like the compression is now, and the other angled to connect to the end of my left hand port on the drain thingy... kinda forming a "Z" if you were to trace the flow of water with a pencil. The right hand radiator would have one angle fitting like the compression is now, and the other connecting to the right hand side of my drain thingy, forming more of a "]" shape. Both rows of fans would be pushing... or pulling... doesn't matter. Personally, I hate option 1. Its lack of bilateral symmetry makes me sad.
Next, option 2:
Option 2 has fans on either side of the radiators, with a "C" shape of 90 degree angles coming out of the right radiator, and a "]" of 90 degree angles coming out of the right hand radiator. The fans on the left would be pushing, and the fans on the right would be pulling. I kinda like design 2... the big question is, how (if at all) do I attach the two radiators to each other? Or maybe I don't, and both are just situated close to each other and mounted independently with some anti-vibration neoprene between them or something. Above all, this puts the fans on the outside of the core, which are much nicer to look at (especially after I have painted them.)
Finally, option 3:
This option looks a lot like the original design, with the difference being that the two rows of fans will be facing the same direction, and they are right against each other. With the ports situated this closely, I would have to drop the 5-way splitter in the other two options in favor of a "Q" style connector from BP, and change the compression fittings out for some standard barbs, because the compression dials are too big to fit. I'm a little concerned that this option will also create vibration if the fans are not spinning at exactly the same speed. I am also thinking that the double row of fans will not really give any benefit... it's not like they will move air faster or anything, right? Alas, I am just keeping my mind open.
There are other designs I came up with in addition to these three... but these made the 'most' sense. Others were variations of putting the radiators' ports at opposite ends lenghtwise, and doing some kind of tube routing between them or something... but I think it just adds clutter.
Thoughts? As I mentioned, I am leaning towards 2... but would love some input!
EVGA z77 FTW -- 16GB of Samsung MV-3V4G3D/US -- Intel Core i7-3770k -- EVGA GTX680 -- Corsair AX850 PSU -- Lian-Li PC-v2000b -- 2x XSPC RX480 Rads -- EK-RES-250 -- EK-DDC Dual Top/pumps -- EK-FC680EN Full Cover block -- Swiftech Apogee HD Block
Looking great Noblesoft. The idea for the res is very nice.
I am inclined to agree that option 2 is preferable over the other two, however none of the three are all that appealing due to the stacking of the rads.
Keep up the good work.
Agreed... in a perfect world, I would have enough space to have both with their own independent air intake.
One option I thought about last night after posting these three was to have the fans on the outside of each radiator pulling air in from the outside, and pushing towards eachother, then have a baffle between the radiators so that the air gets pushed down the bottom of the case (which already has holes cut out and a grill in place). That option seems promising too, and I like the 'double fresh air intake' aspect of it as well.
I think this weekend I will be connecting the whole system up on a bench to see which option gives me the greatest Delta T, then report back.
EVGA z77 FTW -- 16GB of Samsung MV-3V4G3D/US -- Intel Core i7-3770k -- EVGA GTX680 -- Corsair AX850 PSU -- Lian-Li PC-v2000b -- 2x XSPC RX480 Rads -- EK-RES-250 -- EK-DDC Dual Top/pumps -- EK-FC680EN Full Cover block -- Swiftech Apogee HD Block
Nice to see some v2000 action, I love that case too!
As for your radiatorsandwich I would prefer the same with your 2 rx480's as I did once with my 2 PA120.3's (with fans on pushpull).

Duality: Q9550 - P5Q Deluxe - 8GB OCZ - HD5850 - 4,64TB WD - HX650 - X-fi - Aquaero 4 - Lian Li V1000b II Plus @Dual loops watercooling
Loop 1 => DDC18w w/ EK X-top V2 - EK Supreme HF - EK FC5850 - PA120.3 - Multires 150
Loop 2 => DDC18w w/ EK X-top V2 - PA120.1 - MIPS mosfet 1&2 - mips NB - Mips Ramfreezer 4 - MIPS SB - Multires 150
Oh, very nice! The Bitspower "Q" and fittings are very similar to what I was considering for one of the options listed above. It's a little hard to tell what you did with the fans... it looks like a row of fans attached to just one of the two radiators (the right hand side in the image)?
EVGA z77 FTW -- 16GB of Samsung MV-3V4G3D/US -- Intel Core i7-3770k -- EVGA GTX680 -- Corsair AX850 PSU -- Lian-Li PC-v2000b -- 2x XSPC RX480 Rads -- EK-RES-250 -- EK-DDC Dual Top/pumps -- EK-FC680EN Full Cover block -- Swiftech Apogee HD Block
I had a block of free time today (for once in a long while) so I got to make some good progress! ... well... it felt like a lot of progress... but now that I am looking over the images, if feels like I didn't get anything done at all. :p
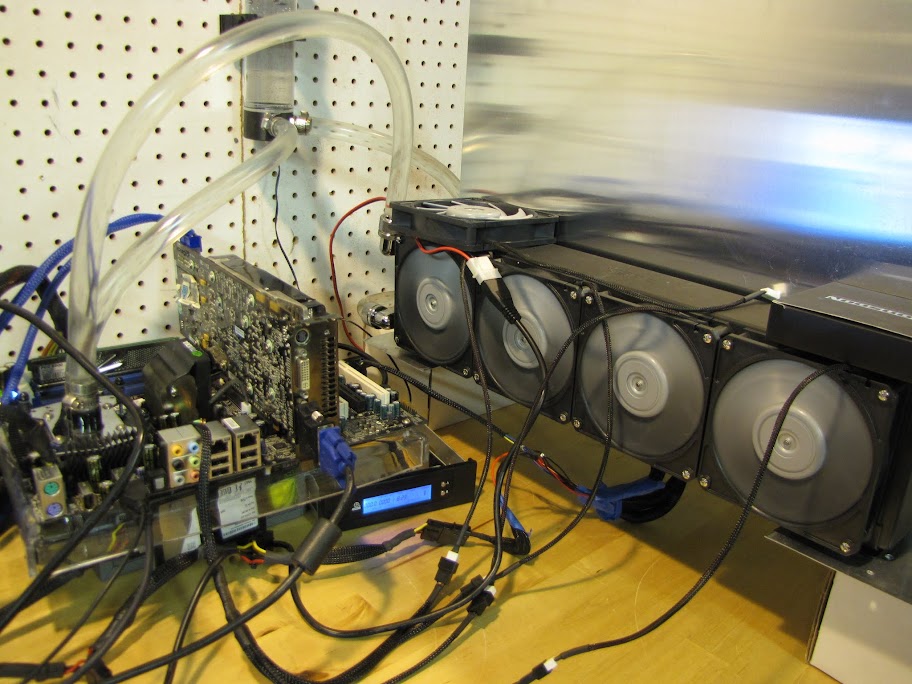
First, I set up a bench in my garage using some of my old watercooling parts from my previous build, and hooked it all up to my new radiators so that I could do some comparisons of airflow to see which combination of fans and radiators gave me the best performance.
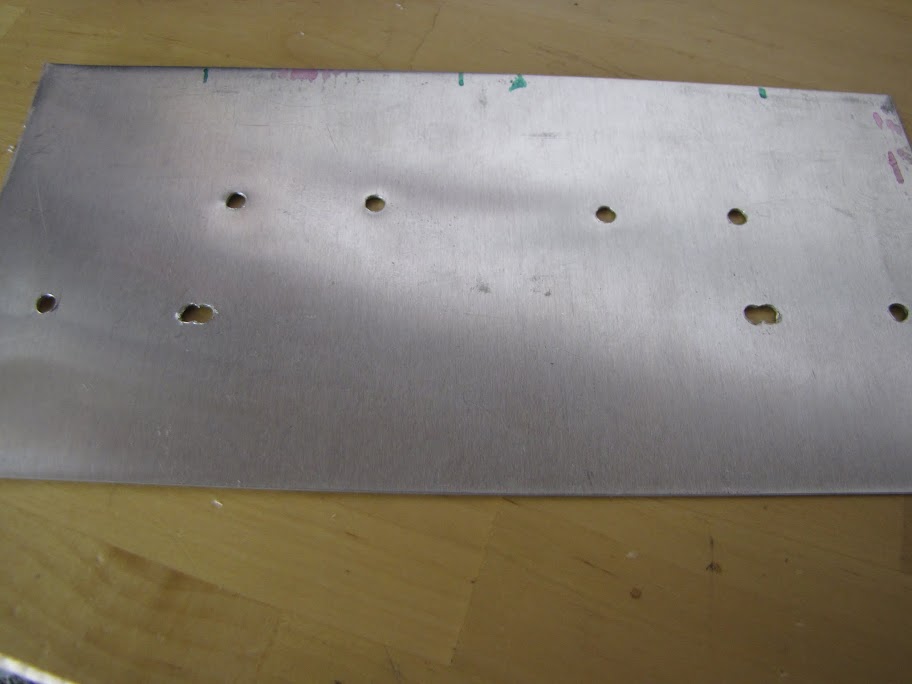
I took some scrap sheet metal and drilled a few holes to help with mounting my radiators, so that they would stay put during the test. I have a set of XSPC radiator stands to help them sit up on end, which screw onto these sheets.
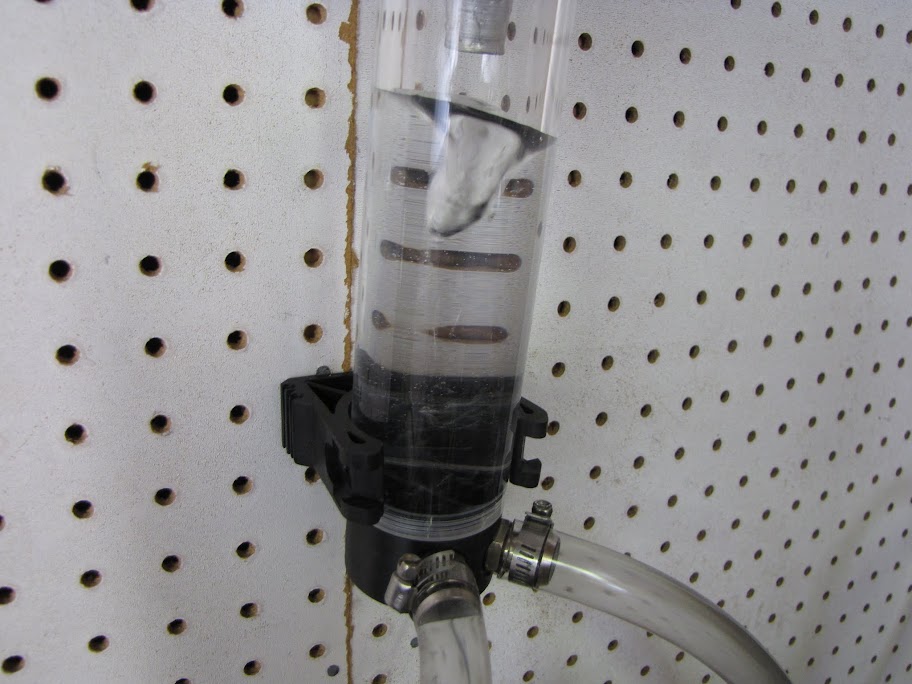
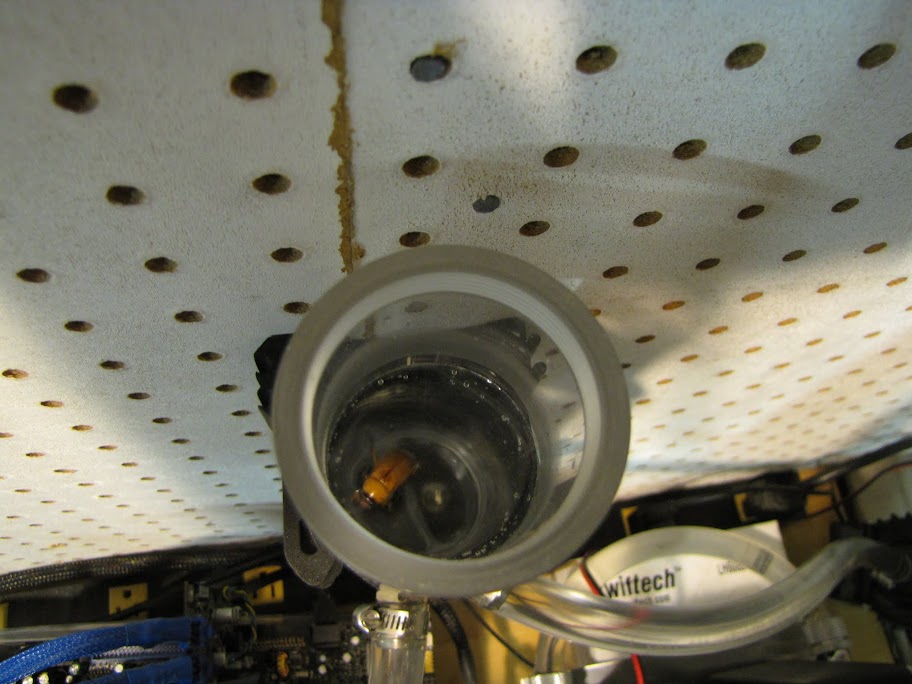
Here we are, filled and running! I only have the processor in the loop, so there's very little flow resistance. I actually had to turn down my pump to it's lowest setting, and was still getting a pretty deep vortex.
It took a few minutes to bleed out all the bubbles and such... go figure, one of the brief minutes I took off the reservoir cap to fill more liquid, a June bug flew into my garage, banked off the back wall, and slam dunked into the water. /sigh. What are the odds? The opening is like 2 inches wide!
System ready!
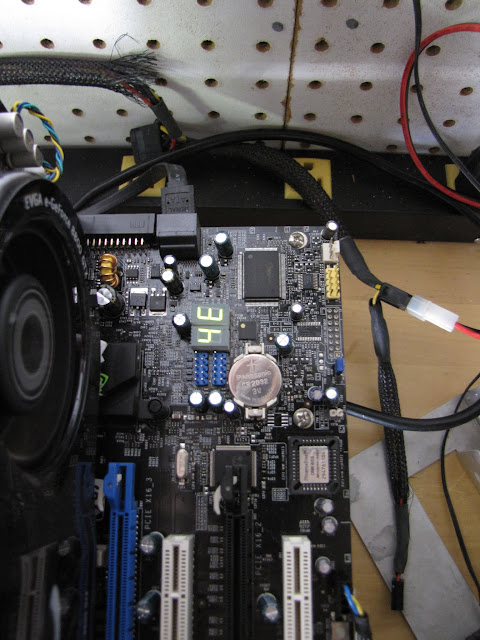
Anyway, I booted up the system and ran prime95 on continuous for 24 hours, writing down the CPU, Air, and water temp every few hours or so. After I was satisfied with the data points for the first radiator config (which was Fan > Radiator |divider| Radiator < Fan ), I shut down the system and reversed the fans to try out Fan < Radiator |divider| Radiator > Fan .
Alas, my motherboard decided that it had enough:
(I think 4E means 'i'm tired')
Without a reliable way to generate heat for the loop, that ends testing for now. EVGA has another motherboard on the way! (Their support / warranty is the best. SO glad I stuck with them for the new motherboard.)
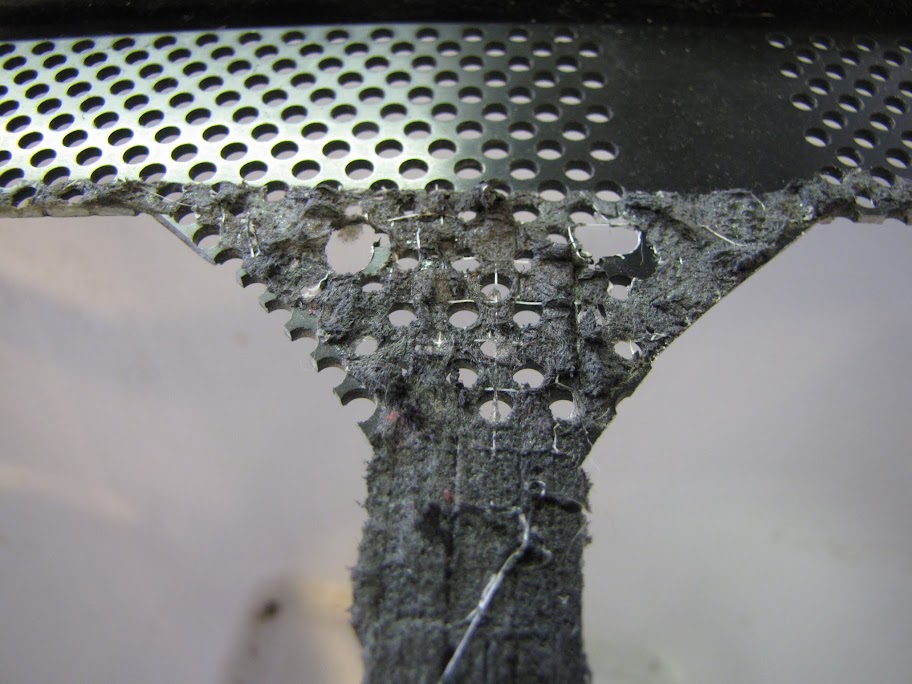
On to the next item, more prep and painting! I started with cleaning all the neoprene sticky gunk off the radiator area of my old case. What a pain! (That's the last time I stick anything directly to the case. Ugh.)
Nothing a little solvent won't solve! (and a LOT of elbow grease)
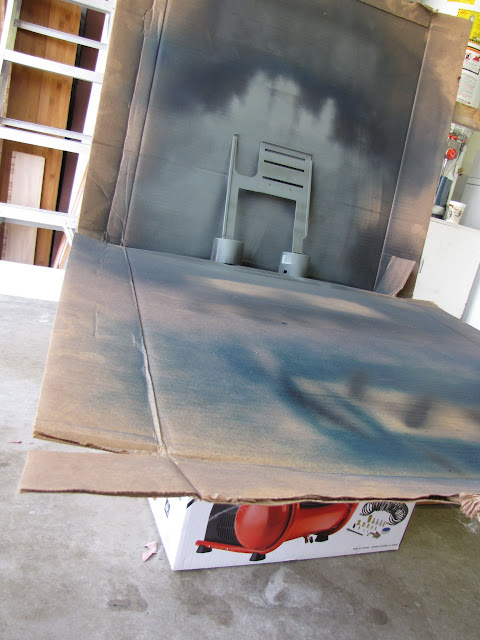
With that out of the way, time for some painting! I propped the painting area up on a box this time to help cut down on some of the debris from the ground that kept getting blown onto the paint job last time. Seems to have helped a little, but still not great... here's a shot of applying the second round of priming to that piece I put the bumper repair epoxy on last time:
I also tacked and wet sanded each of the color strips I had to prepare them for clear coating. Looking pretty smooth!
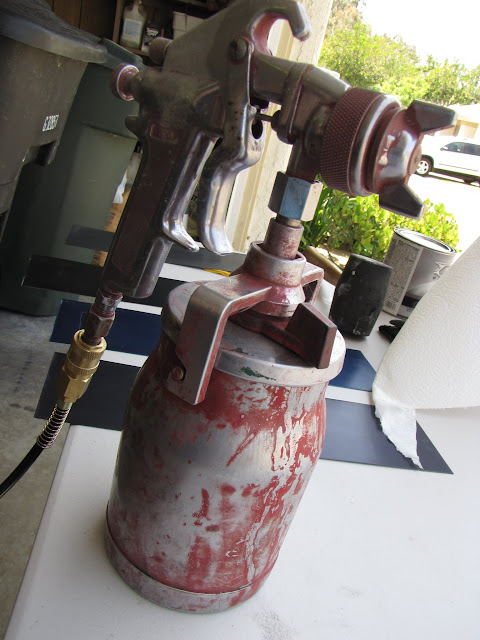
I couldn't find any clear coat in a spray paint can at any of the stores near me, but I DID find some in a regular paint can. I figured... why not? I bought those, and borrowed a spray gun from my dad that he just happened to have from painting an old car:
I have no idea what kind of paint he used... but it was ON there. I tried all the solvents I had, no getting that red off... so I figure it's probably safe to proceed with my clear coats in spite of the ugly looking red all over the sprayer.
Hooray, a reason to use my new toy!
I let the paint strips dry for an hour or so, then started giving them a final tack before the clearcoat, when I noticed something... If I kept scrubbing with the tack cloth, it took off a lot of the haze and left the finish really shiny looking! Weird. I wonder if it was just some of the material on the tack cloth 'buffing' the paint.
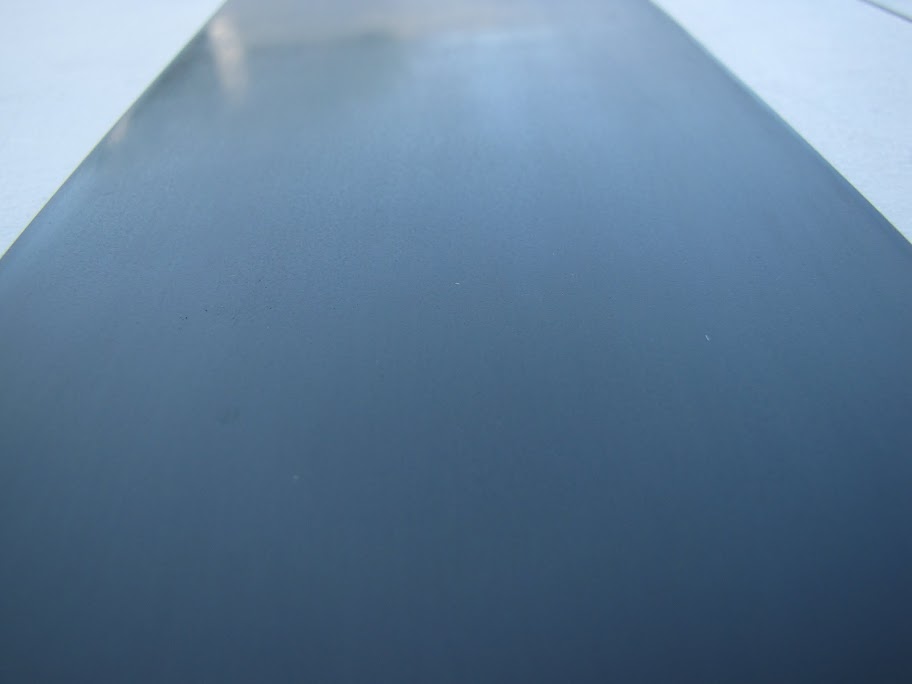
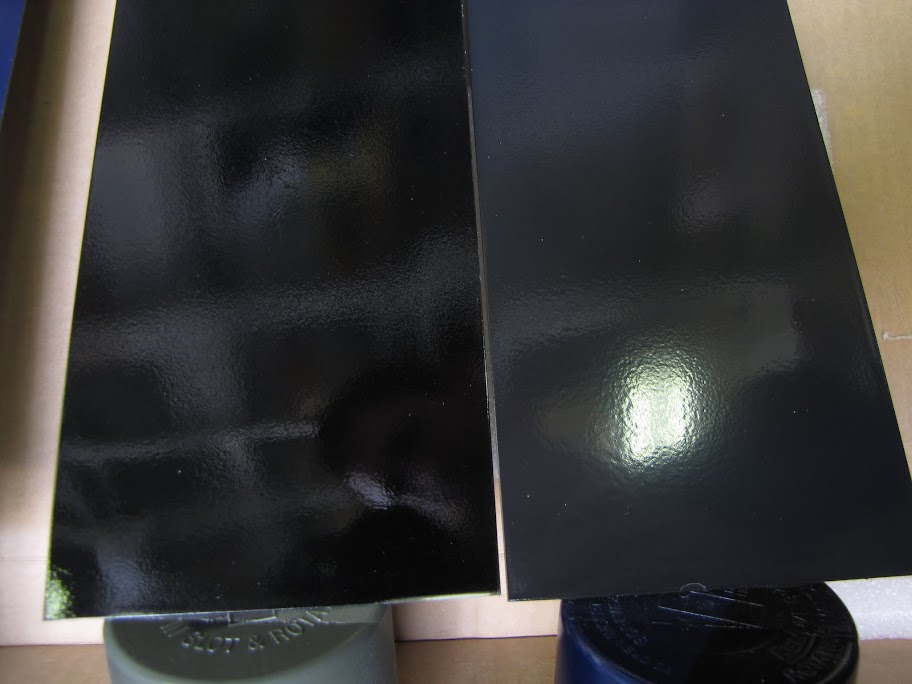
And here's the four strips after clear coat, sitting to dry. The left three got the 'clear' coat, while the right flat black one got the 'matte' coat. They looked pretty similar as a fresh coat, but we'll see how the matte coat comes out when its dry (in 48 hours...)
I really like the shiny black and matte black... I am thinking currently that I'll use some combination of these two on the case... maybe shiny on the large parts, and matte on the small/detail parts. Hmm.
(Also, tons of orange peel at the moment... hoping some of that evens itself out, otherwise I have a lot of sanding coming... :p Anyone know if I did anything wrong?)
That's all for now! Once I get my RMA'd board back (this week) I should be back in business for more radiator testing. Till then!
EVGA z77 FTW -- 16GB of Samsung MV-3V4G3D/US -- Intel Core i7-3770k -- EVGA GTX680 -- Corsair AX850 PSU -- Lian-Li PC-v2000b -- 2x XSPC RX480 Rads -- EK-RES-250 -- EK-DDC Dual Top/pumps -- EK-FC680EN Full Cover block -- Swiftech Apogee HD Block
Well, the connector you have wasn't avaiable back in 2010 in the Bitspower gamma.Originally Posted by Noblesoft

Duality: Q9550 - P5Q Deluxe - 8GB OCZ - HD5850 - 4,64TB WD - HX650 - X-fi - Aquaero 4 - Lian Li V1000b II Plus @Dual loops watercooling
Loop 1 => DDC18w w/ EK X-top V2 - EK Supreme HF - EK FC5850 - PA120.3 - Multires 150
Loop 2 => DDC18w w/ EK X-top V2 - PA120.1 - MIPS mosfet 1&2 - mips NB - Mips Ramfreezer 4 - MIPS SB - Multires 150
Just a quick update for those of you following... no, I haven't died!
Got buried in side projects for work, house construction, and lots of other miscellaneous things... not to mention, the motherboard that I was using as my test bed for the radiators died unceremoniously shortly after testing... so I am waiting on an RMA for that board.
In the meantime I have been hammering out the details on what art/design I want for my case sides and other miscellaneous little things. No pictures to share quite yet, but you'll get some soon enough when I finish the design!
Till then!
EVGA z77 FTW -- 16GB of Samsung MV-3V4G3D/US -- Intel Core i7-3770k -- EVGA GTX680 -- Corsair AX850 PSU -- Lian-Li PC-v2000b -- 2x XSPC RX480 Rads -- EK-RES-250 -- EK-DDC Dual Top/pumps -- EK-FC680EN Full Cover block -- Swiftech Apogee HD Block
Time for a small update! Well... it looks small... but in reality it took hours of internal debating and crumpled up balls of paper... :p ...but I think I have a (semi) final design for my case! Sorry about the crummy photo quality, my scanner is great at text and that's about it. This was also done with a lot of shading that is not evident in the scans... alas, it is the design that's important right now!
First, the case wall. The plan is to have this design on both sides of the case. The right side of the case (the one you can actually see the components in) is drawn here, and the left side of the case would be a mirror image of it.
Some notes about this design:
1) The "inner triangle" at the top right is a flush mounted window that you can look through to see the computer components. It will be edge lit by a RGB LED strip all the way around.
2) The "outer triangle" surrounding the window will be a 1/4 inch piece of acrylic on it's side, flush mounted with the wall of the case. It will be edge lit by a RGB LED strip along its length.
3) The lettering on the "inner triangle" will be etched from the inside, so that it will glow with the color that the window is currently lit with.
4) The radiator cutout at the bottom will have some kind of thin mesh covering the open parts... maybe modders mesh, maybe screen. I haven't decided. It needs to be rigid, have small enough holes to block any dog/cat hair, and removable for cleaning.
5) I am presently planning on painting the case wall black with a mirror finish. I am considering mounting the thin acrylic strips and outer triangle PRIOR to putting on the final gloss coat, so that the entire case surface is one flat clear panel.
That covers the left and right sides of the case. Now for the case front and top:
Some notes about this part of the design:
1) The case top will have similar design features to the case walls... there will be a small window in the top with the etched lettering on it, and flush mounted LED lit acrylic strips.
2) The case top will feature a small RGB-lit LCD negative display along with a few control buttons and a pair of USB 3.0 ports for easy access.
3) The prominent feature on the front of the case will be a centrally located tube reservoir. This reservoir will be suspended by it's top/bottom in a conclave half-cylinder. The cylinder will have a line cut through it lining up with the center of the tube reservoir, so that light shining through it will illuminate the reservoir, diffuse, and create a 'prismatic warping' effect.
4) The base of the front of the case currently has a physical case badge and front-mounted USB/Audio ports. These will be removed and a design similar to the sides and top will be put in its place.
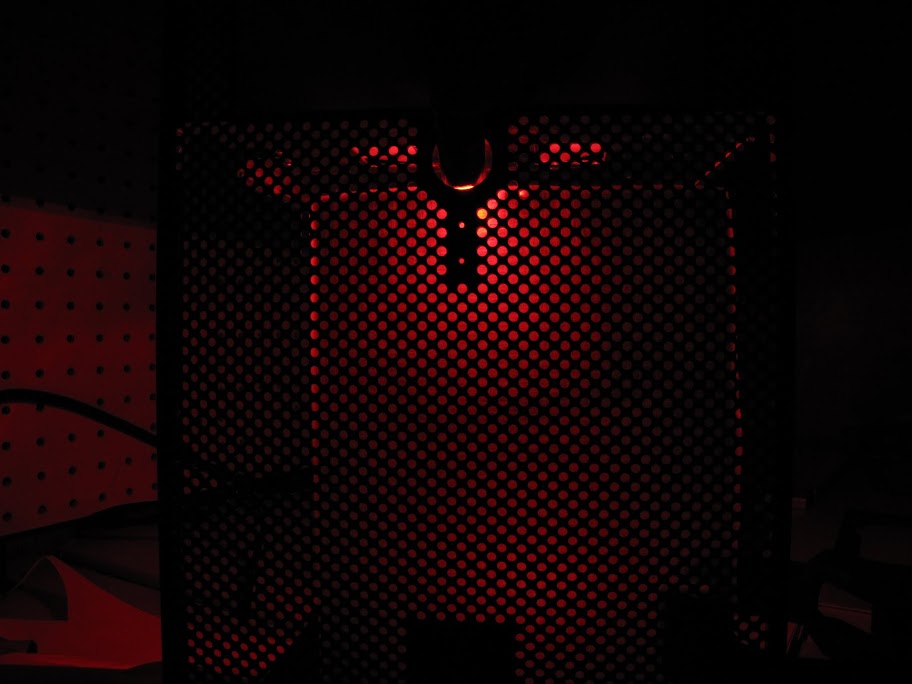
5) The front of the case is mostly perforated mesh in the original design. I am considering backing it with a solid sheet of frosted acrylic that is edge lit so that the entire surface will glow, showing through the perforated mesh.
They linchpin of this design revolves around a central Arduino controller that will be mounted in the case. This Arduino will be able to control every individual led on every strip, producing just about any combination of lights and patterns I desire. The Arduino will also control the display at the top, displaying statistics like temperatures, fan speeds, and liquid flow rate, as well as letting me control fan speeds. The design intent is that I can generate just about any color or pattern I want, like chasing lights, pulsing, etc. One such planned color/pattern is to have the entire case slowly phase from blue to red depending on the temperature of the air, water, or CPU, like a giant thermometer. Other patterns include a slow randomized 'pulse' traveling along the thin acrylic lines, a case-wide heart beat pulse, and a slowly cycling rainbow of colors. I also plan on having a very complex initial animation when you press the power button.
As you can tell, this will be a very ambitious design with a lot of difficult-to-implement features along the way. A lot of the Arduino work is already underway, facilitated by a college friend of mine that I used to program with back in the day. I'm actually going over to his place today to check out the progress! I am also going to be testing the process of flush mounting and glazing the case/acrylic design next... just to make sure that's actually possible and it comes out looking right.
I have a long road ahead, but it should be a lot of fun! Here we go!
EVGA z77 FTW -- 16GB of Samsung MV-3V4G3D/US -- Intel Core i7-3770k -- EVGA GTX680 -- Corsair AX850 PSU -- Lian-Li PC-v2000b -- 2x XSPC RX480 Rads -- EK-RES-250 -- EK-DDC Dual Top/pumps -- EK-FC680EN Full Cover block -- Swiftech Apogee HD Block
Well... either I have terrible luck, or someone at the EVGA warehouse is playing a cruel joke. I have now gone through three motherboards trying to get a replacement from them, all of which have been DOA. The latest victim was a 790i SLI FTW.
They're sending out yet ANOTHER board tomorrow... hopefully I will have this one in time for the weekend to get some testing done!
Sheesh!
EVGA z77 FTW -- 16GB of Samsung MV-3V4G3D/US -- Intel Core i7-3770k -- EVGA GTX680 -- Corsair AX850 PSU -- Lian-Li PC-v2000b -- 2x XSPC RX480 Rads -- EK-RES-250 -- EK-DDC Dual Top/pumps -- EK-FC680EN Full Cover block -- Swiftech Apogee HD Block
good
No replacement this week.(Not entirely unexpected)
They are 'hand testing' the board I just sent back to make sure it is indeed dead, then will get back to me with options.
In the meantime, I spent a few hours last night playing with lighting effects on plexiglass, and designing the front reservoir area. This will be a rather complicated piece, as I am coming to find... but that's fine. More work = more tools = more fun.
Up until now, I have been using cheap plexi that I found at a local hardware store... this stuff seems brittle and is difficult to work with. It does not look like the typical acrylic people are working with that has that brown paper backing, either. Is there a 'generally accpeted as best' acrylic that I should be buying to work with at this stage? Any suggestions greatly appreciated.
I've also been looking for some kind of bonding agent for the acrylic... I've heard there is some kind of solvent out there that bonds acrylic together without leaving a seam of any kind... but the guys at the hardware store look at me like I am speaking greek when I ask for it.
I'll upload a bunch of pictures of my progress tonight when I get home. Until then!
Edit:
I may have answered my own questions through some additional research, but perhaps you all can confirm my findings... for the type of material, I am looking at using Cell Casted Acrylic rather than Polycarbonate, since Acrylic has better light distribution properties and is a bit softer to mold/work with. Cell casted because I guess it is more flexible/durable than the other extruded types. I'll probably use 1/4 inch thickness for most things. For the bonding agent, I am looking at IPS Weld-on #3 I believe. I'll probably also pick up some Novus polishing stuff to fix any scratches and such.
Any other ideas out there?Thanks!
Last edited by Noblesoft; 07-13-2012 at 03:45 PM.
EVGA z77 FTW -- 16GB of Samsung MV-3V4G3D/US -- Intel Core i7-3770k -- EVGA GTX680 -- Corsair AX850 PSU -- Lian-Li PC-v2000b -- 2x XSPC RX480 Rads -- EK-RES-250 -- EK-DDC Dual Top/pumps -- EK-FC680EN Full Cover block -- Swiftech Apogee HD Block
While I can't really comment on how to bond two acrylic pieces, I can tell you that Novus works really well for polishing/cleaning acrylic.
For the edges, I usually wetsand with 1000 grit, then 1200 grit, and then 2000 grit followed by the Novus polish. This results in a nice smooth finish.
Also make sure that you use the correct drill bits when you drill acrylic as well, metal drill bits tend to cause chipping.
Awesome work so far
Gigabyte z68 UD3
2600k @ stock
8Gb G Skill
2x eVGA GTX 680 @ stock
Intel 320 80Gb
Intel 320 120Gb x2
Intel 320 160Gb x2
Thanks for the tips on edge polishing! And yes, I indeed need to find some specialty acrylic bits... all I have are wood/metal right now, and I can certainly vouch for the "chop job" they do on acrylic.
EVGA z77 FTW -- 16GB of Samsung MV-3V4G3D/US -- Intel Core i7-3770k -- EVGA GTX680 -- Corsair AX850 PSU -- Lian-Li PC-v2000b -- 2x XSPC RX480 Rads -- EK-RES-250 -- EK-DDC Dual Top/pumps -- EK-FC680EN Full Cover block -- Swiftech Apogee HD Block
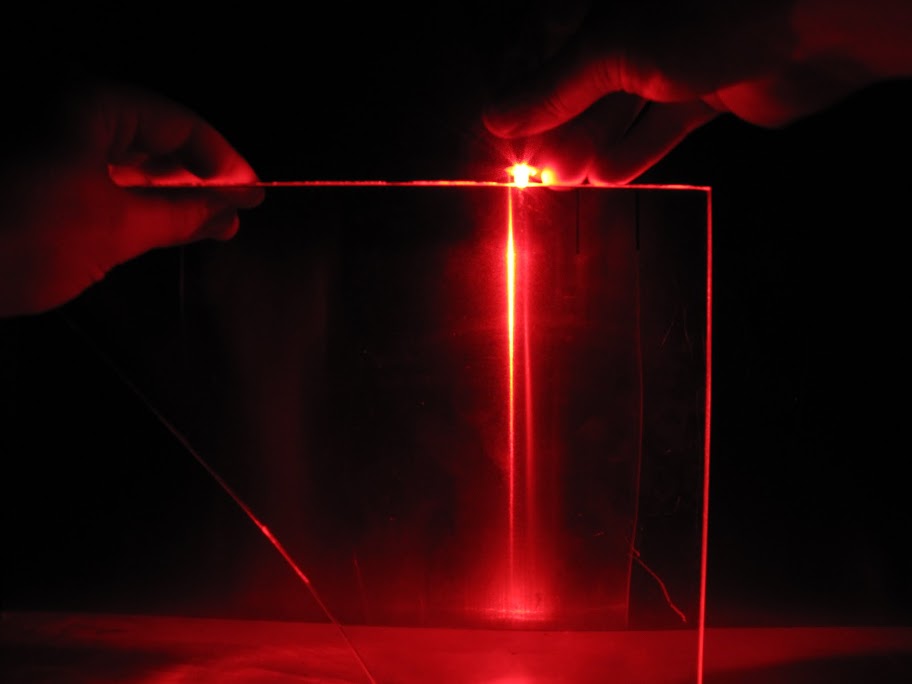
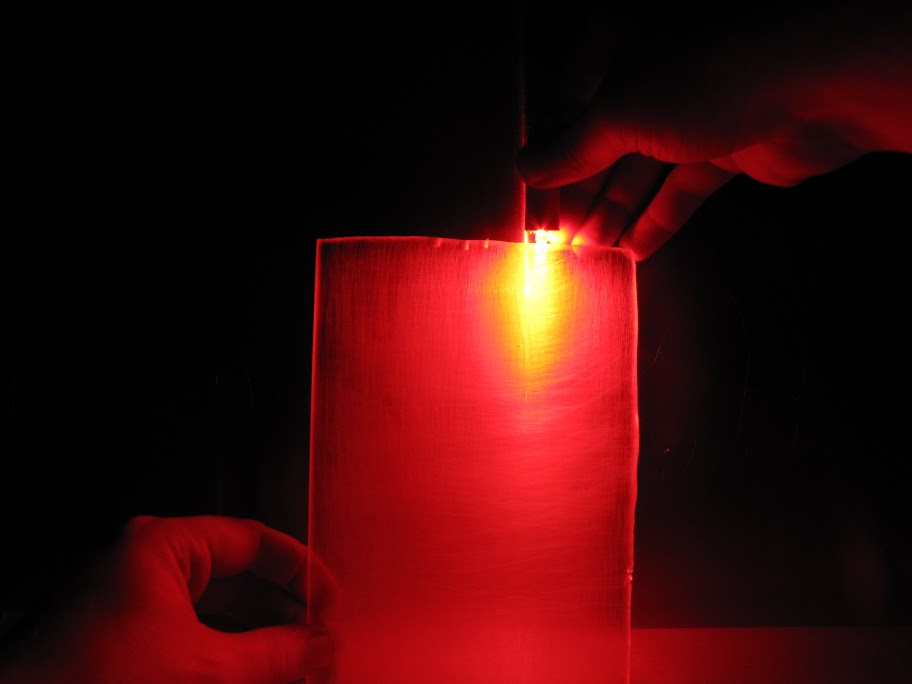
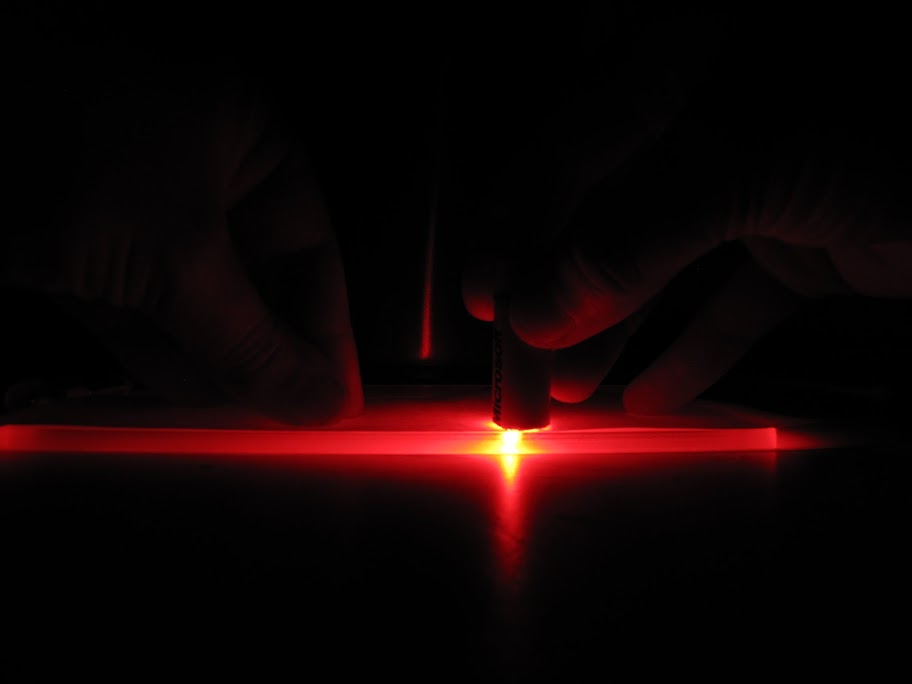
So, in the bits of spare time I have had over the course of this week, I have been thinking about some of the functional intricacies of the focus of my case... lighting! One of the primary light features will be the front of the case, which will be backed by frosted acrylic that will be edge lit to give it a soft glowing effect. The light will be provided by some RGB light strip that I purchased a while ago, and controlled by an Arduino... but that is still 'in development'... so to test, I dissected one of those silly LED lit pens that they give away at trade shows. :p
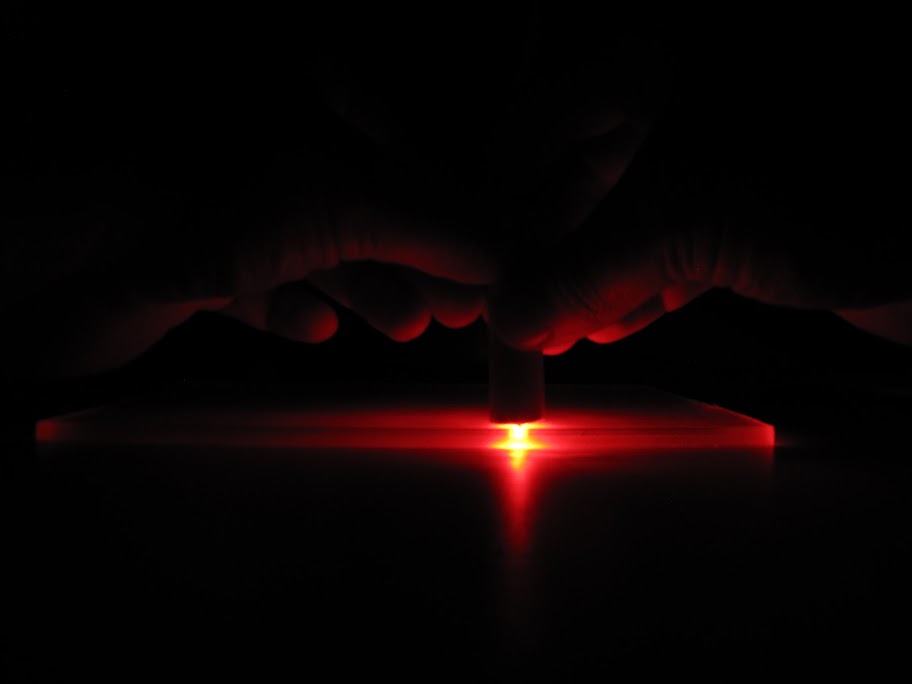
The first test shows, as expected, that light is not diffused in Acrylic very well by default. The edges light up, but that's about it.
So, to help spread the light, I sanded each side of the piece with some 200 grit sandpaper. Enough to scuff it up pretty good. The change is dramatic.
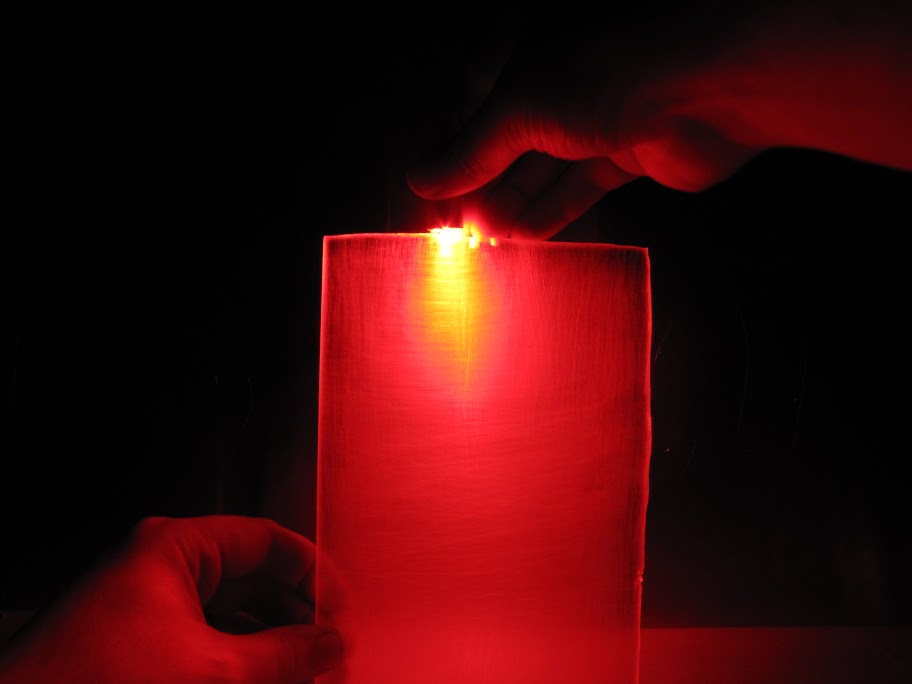
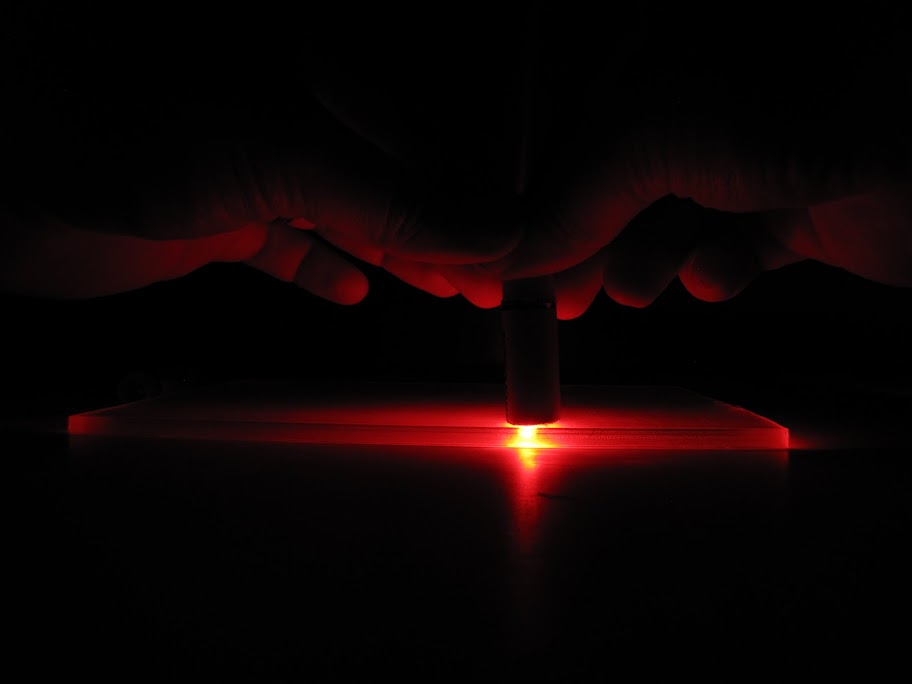
But... still not enough. The color doesn't quite reach the edges, and is a lot brighter at the origination point than anywhere else. I read up a while ago that drilling an inlay hole to embed the light source in would help increase the light absorbed by the acrylic, so I gave that a shot:
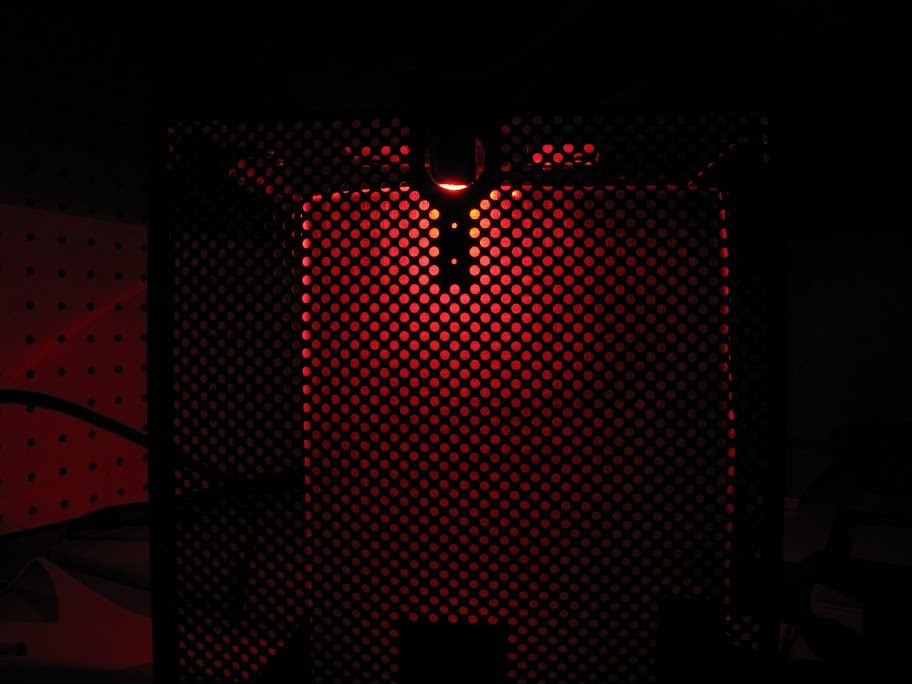
Looking better! But still not quite there. What else can I do? Hmm... perhaps backing it with some material to help contain the light? Here's a shot with some simple printer paper held against the back:
Now we're getting somewhere. Just to try it out, I also put some scrap shiny aluminum behind it, to see what that did:
Eh, not that great. A step backward from white paper. I'm not sure that putting white paper behind my acrylic is the right answer either... but it's on the right track. Perhaps painting the back surface? Hmm.
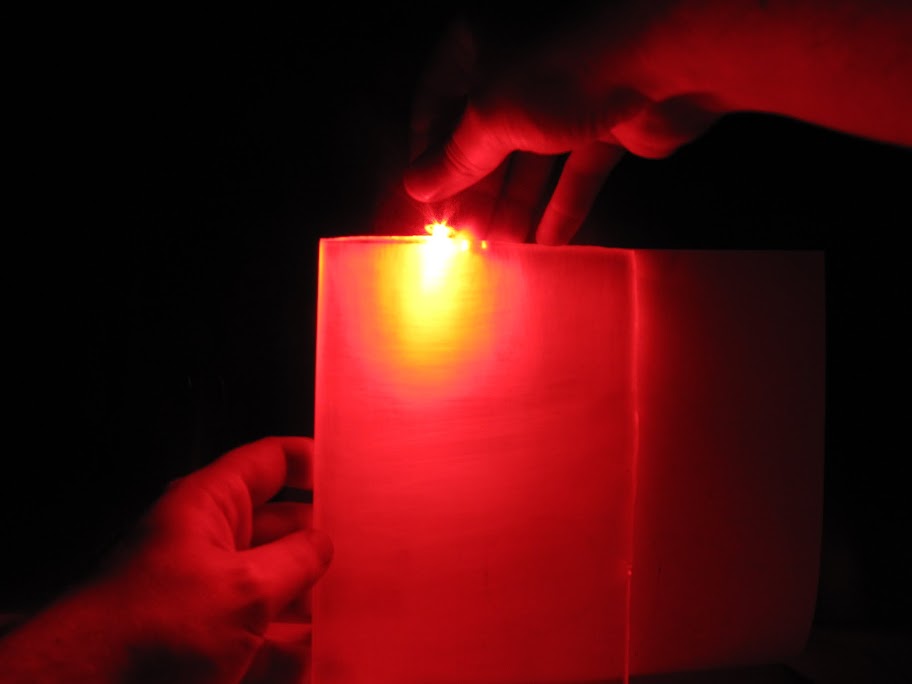
Anyway, here's a rough preview of how the lit acrylic looks in the case:
And here's how it looks with the LED inlaid in the side of the acrylic:
Keep in mind this is with a singe LED, and it will be lit all the way around with a strip that has LED's every 2 inches. So it should be much brighter/fuller.
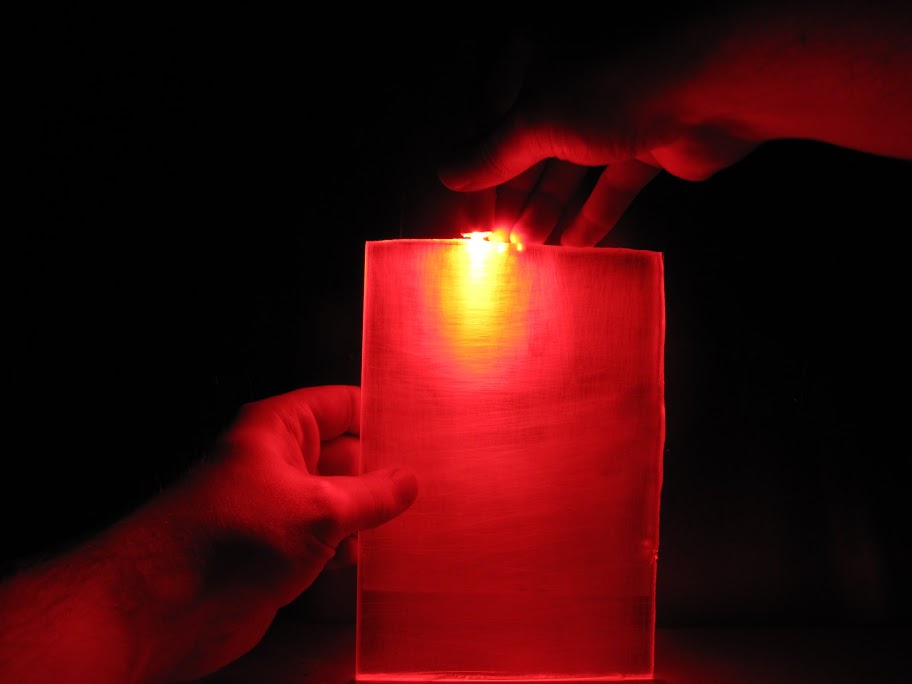
Anyway, on to the thin edge-lit strips that will be featured along the sides of the case! Here was the first shot with the LED embedded into the surface, and no backings:
Not very good.
Next, I set the thing on a piece of white paper:
A little better... but not much. Next, a sheet of paper on each side:
That made quite a difference! Just to try it out, I also backed one side with aluminum:
Meh. Not great. Not as good as double paper, but close.
So, right now it looks like paper (or at least a white surface) is the clear winner for getting light to diffuse. One other thing I am interested in trying is a mirrored surface... they make 1/8" acrylic mirror sheets, and i think that might significantly increase the amount of light reflected back into the acrylic. Worth picking up a sheet to find out, anyway!
Next time... some shots of fabricating the front reservoir housing! See you then!
EVGA z77 FTW -- 16GB of Samsung MV-3V4G3D/US -- Intel Core i7-3770k -- EVGA GTX680 -- Corsair AX850 PSU -- Lian-Li PC-v2000b -- 2x XSPC RX480 Rads -- EK-RES-250 -- EK-DDC Dual Top/pumps -- EK-FC680EN Full Cover block -- Swiftech Apogee HD Block
This is looking nice. I'm waiting for next update... will follow this to the end....
Time for an update!
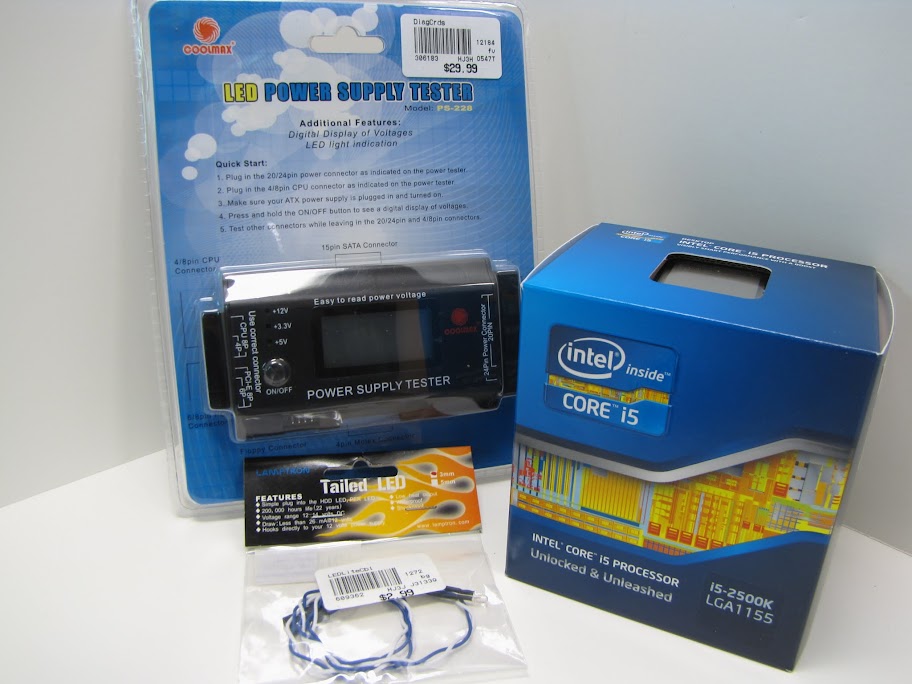
First of all, as shown in my previous post... EVGA finally sent me a motherboard that works! Hooray! To get it working, I had to pick up a new processor... and while I was at it, I decided to pick up a PSU tester JUST to make sure it wasn't my PSU blowing things up.
Fortunately, the PSU for my bench tested out fine. :p I also grabbed that little tail LED so that I could do some more Acrylic/light testing.
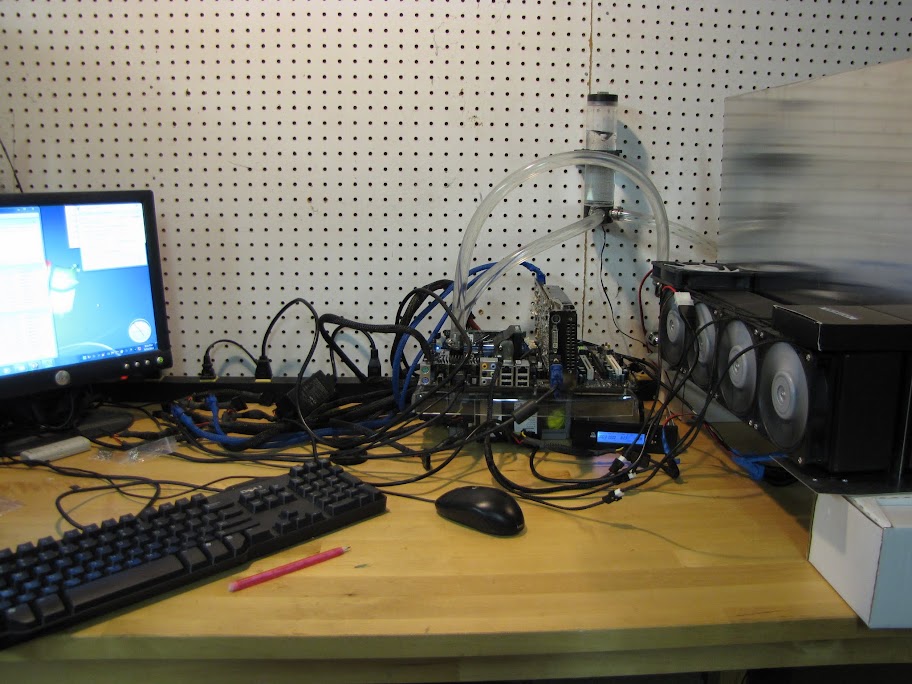
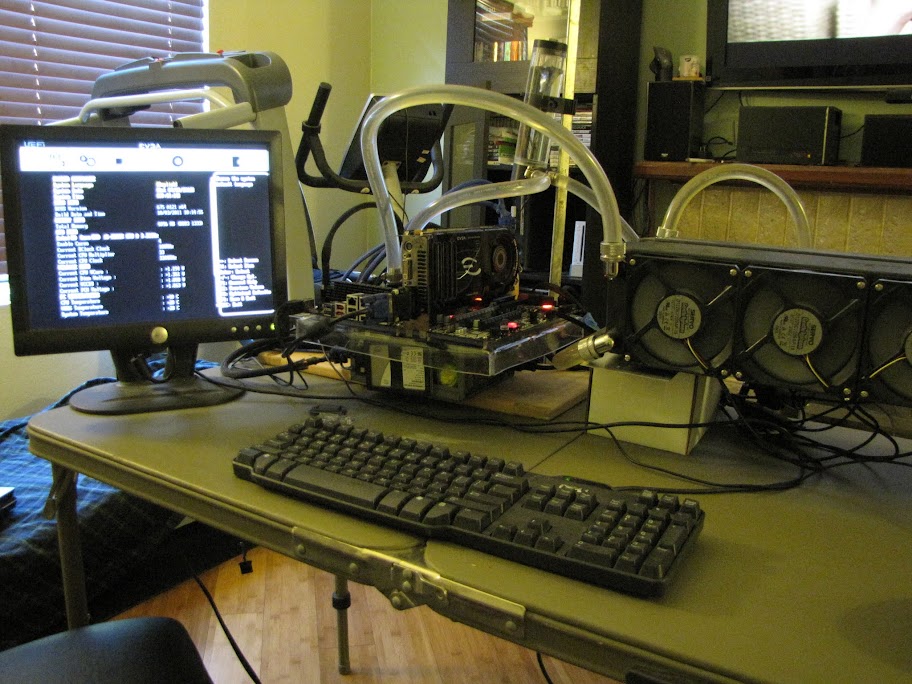
Here's the bench, up and running on the first try!
(I moved it into the living room... it's been 100F outside the past week or two, and the heat in the garage was getting unbearable. So the wife gets to deal with my workbench floating around the house with me.)
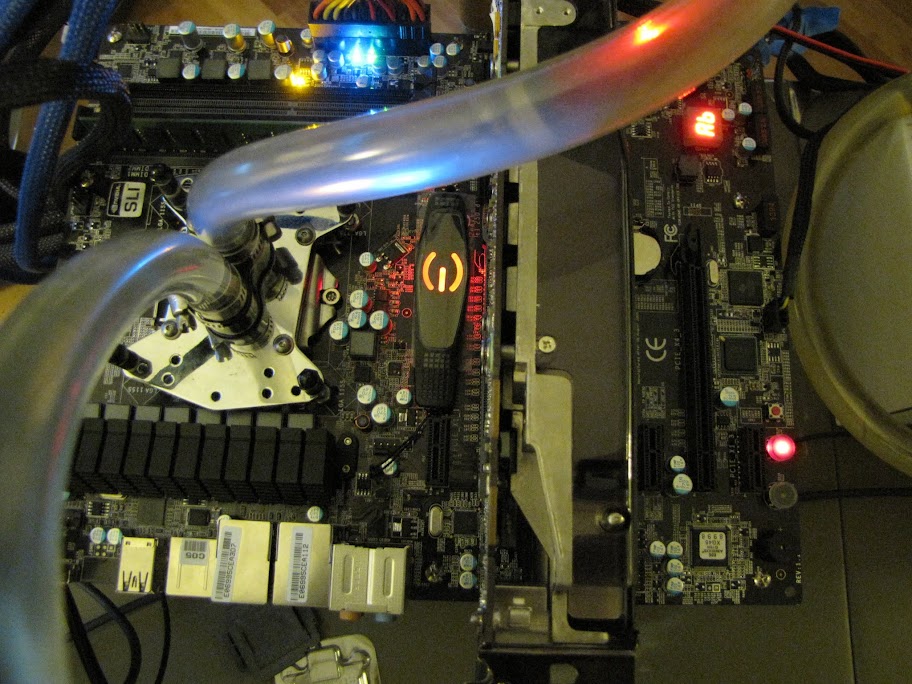
There's that silly "stasis chamber" on the motherboard. As far as i can tell, it's just a useless chunk of plastic with a pulsing LED behind it. Other than that, the board looks great and performs admirably. It's been running at 100% CPU (torture testing with Prime95) for about a week now, and no crashes or problems yet! I haven't been wasting all that burn in time, of course... I've been testing! Stand back, I'm doing SCIENCE!
Okay... so it's not super scientific... but it's sufficient for what I am trying to determine anyway! It helps that I moved my rig into the house... so the temperature is somewhat controlled (only varying 5-10 degrees F instead of 30-40!) I'm just measuring the air temperature compared to the water temperature over the course of a day or so, measuring at random intervals. I then subtract the air temp from the water temp to give me my Delta T (difference in temp between water and air), which gives me a fair idea of how efficient my radiator setup is performing. Assuming that my heat generation is consistent (which it should be, the CPU is 100% pegged using the same wattage the whole time), I should have a pretty good basis for comparison.
So far I have only tested two configurations... The first setup is rows of fans on the outside of each radiator pusing air into the center of the 'radiator core', and there is a gap between the radiators where air is vented up/down. So the orientation is basically Fans > Radiator |air baffle| Radiator < Fans. This orientation yielded a Delta T of around 1.875 degrees F. Pretty darn good! That means the radiators were able to keep the water temperature at nearly air temperature. Keep in mind that a Delta T of 0 should be nearly impossible to accomplish... so yea. Pretty good. :thumbsup:
The second setup I tested was similar to the first, but I just reversed the airflow. Now the fans are configured to pull air from the center of the radiator core, so the setup goes Fans < Radiator |air baffle| Radiator > Fans. As you can see from the second chart, I ended up with a Delta T of 3.88F. I knew that fans in 'pull' configuration weren't as good as fans in 'push' configuration... but I had no idea it would make THIS big of a difference! So it's clear that configuration 1 is superior, and that narrows down my options to only those that consider fans in push mode. Neat!
(Yes, I know, there are other variables at play here that could shift the balance in favor of one configuration over another... but for the highly un-scientific needs of this project, I will consider this level of testing to be sufficiently similar to the performance I will see in 'real world' scenarios, which is why I am doing it this way... because... well... my computer will need to operate in the 'real world' at some point.
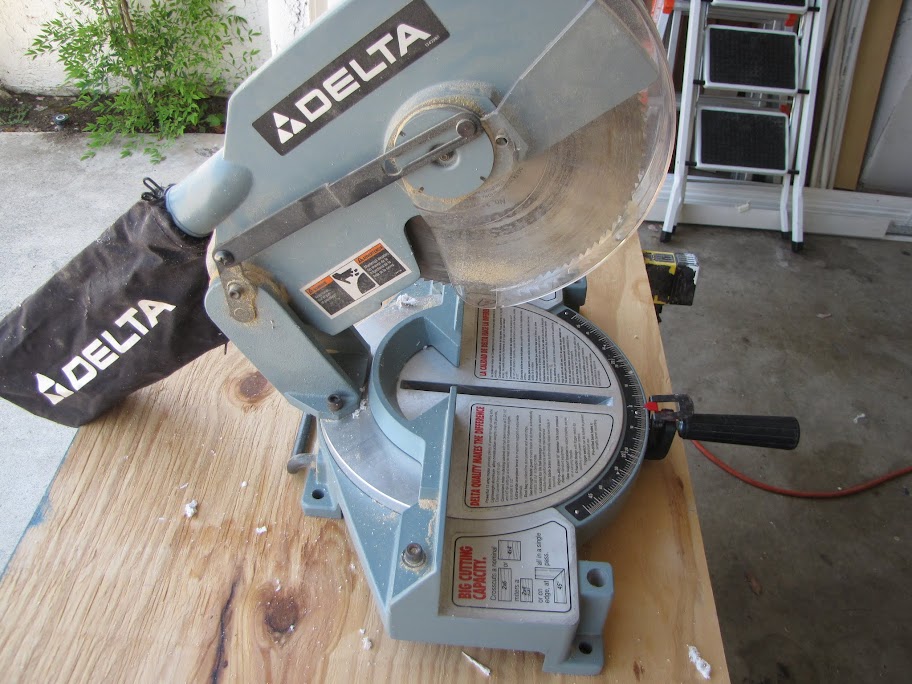
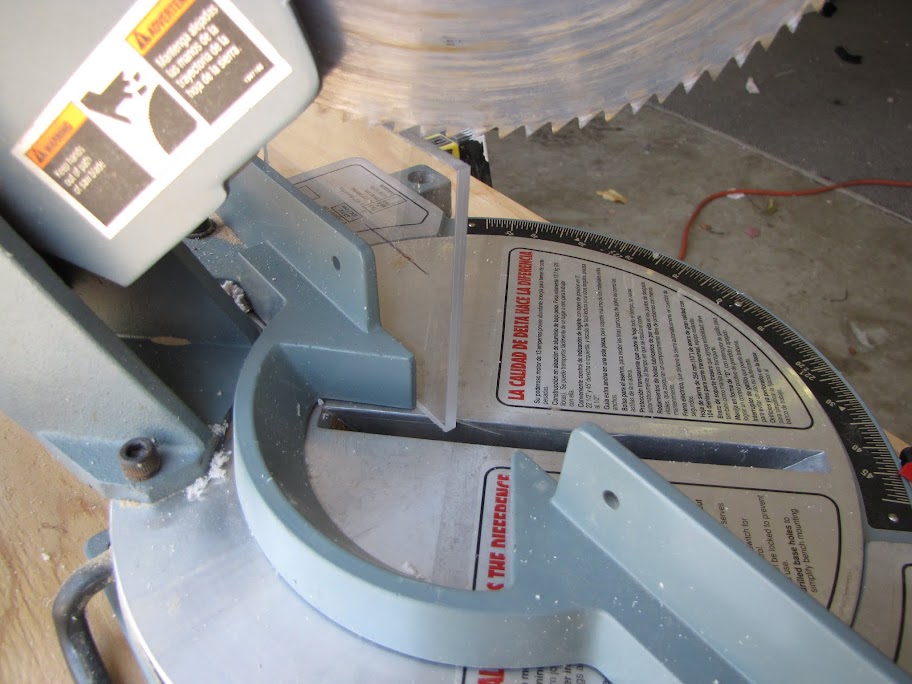
Anyway, while all this was going on in the background, I decided to play around with acrylic some more! Always fun to experiment. This time, I wanted to try out cutting Acrylic with a power saw, joining it with superglue, using a corner mold, etc... all tasks I will need to do in some capacity for the project. First of all, time to meet the power tool... a good old miter saw!
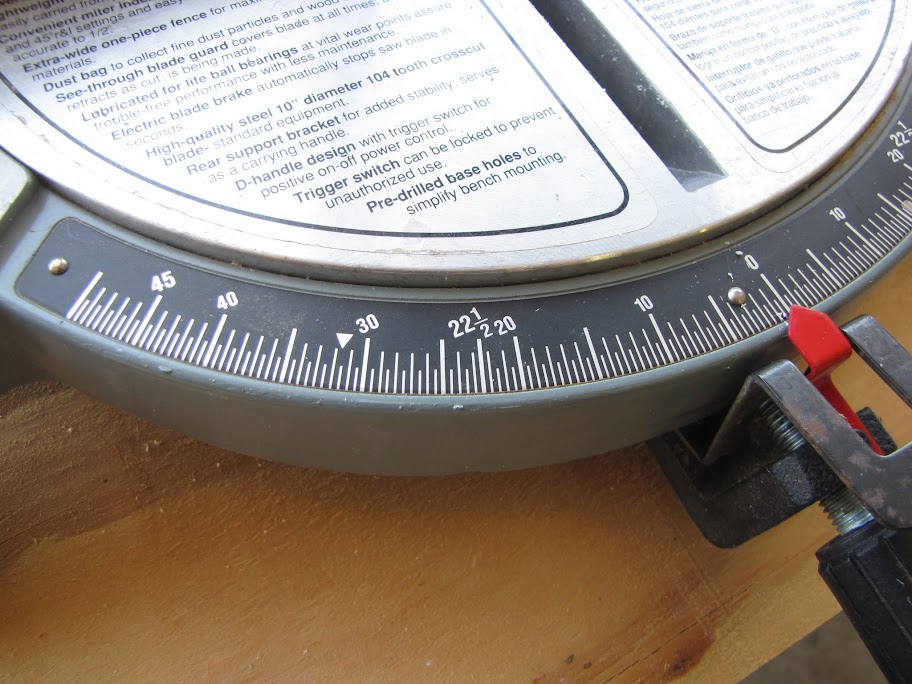
The nice thing about using a miter saw is that it has the angles printed right on the base, making it very easy to get exact angled cuts for joining.
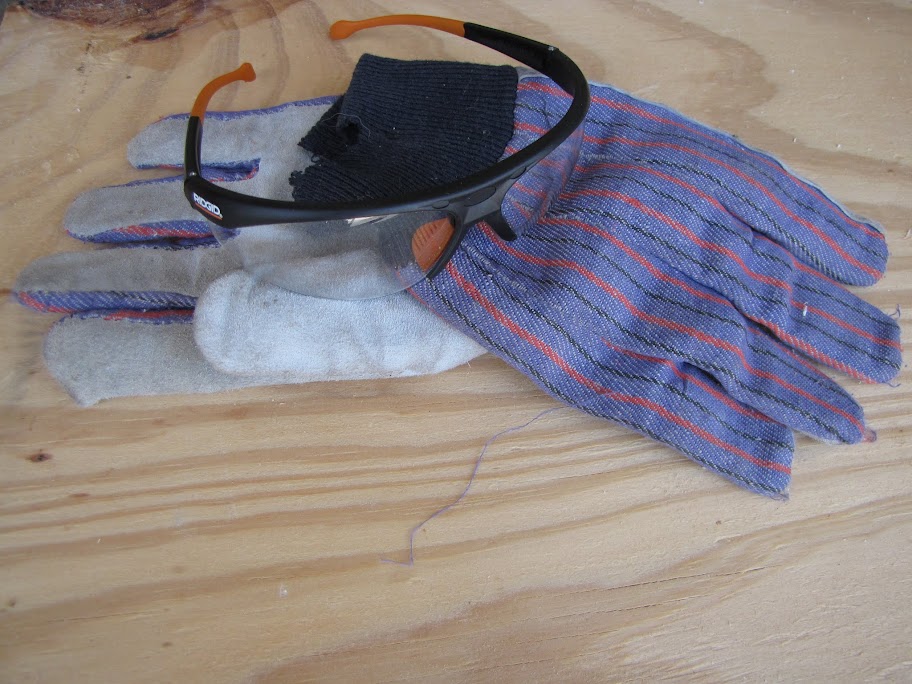
The blade on this saw wasn't designed for Acrylic specifically... but it has a pretty good teeth-per-inch rating on it, so it should be passable. We'll see though. :scared: Safety first! In the small experiences I've had with Acrylic so far, this stuff flakes off like crazy and gets extremely hot... enough to burn your hands should a stray piece land on you...
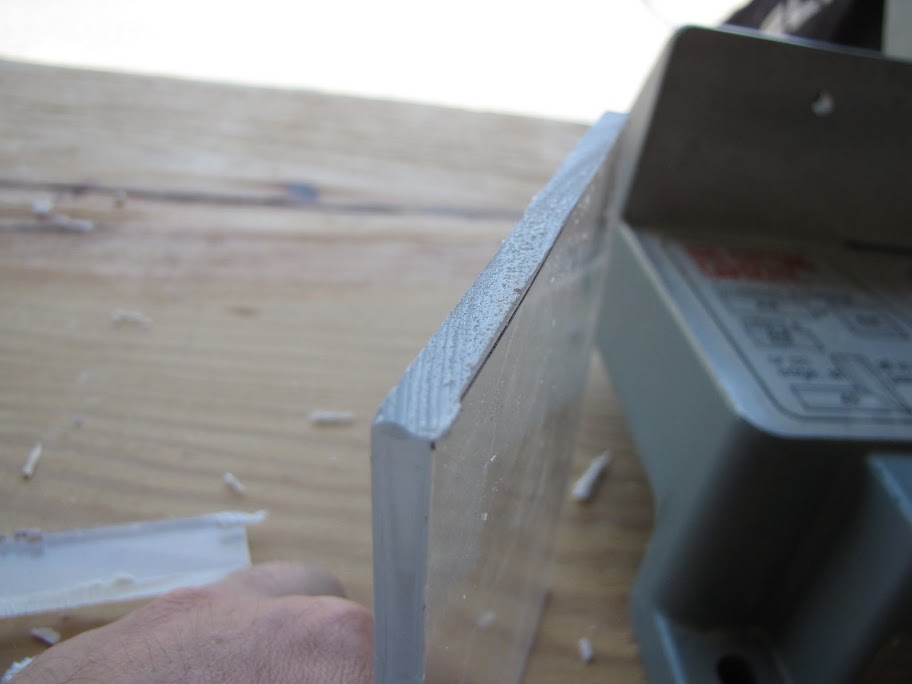
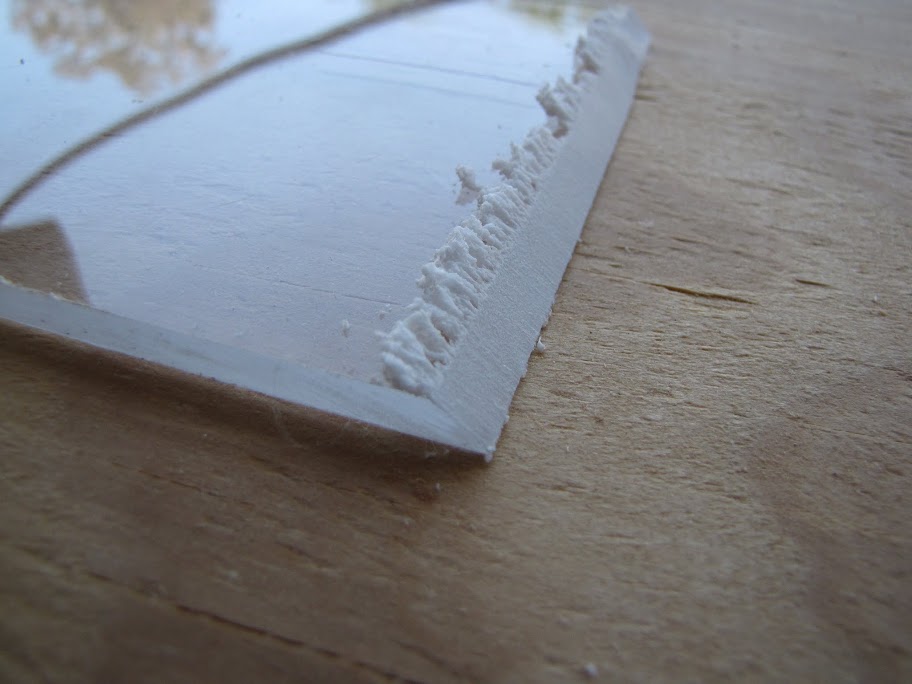
First cut!
Pretty rough... but I rushed it a bit. Nothing a little liberal sanding cannot fix!
Now to try an angled cut!
Also a little ugly. The blade on the saw clearly isn't sharp enough or cut out for Acrylic, as it is melting the stuff rather than cutting/shaving it.
Fail.
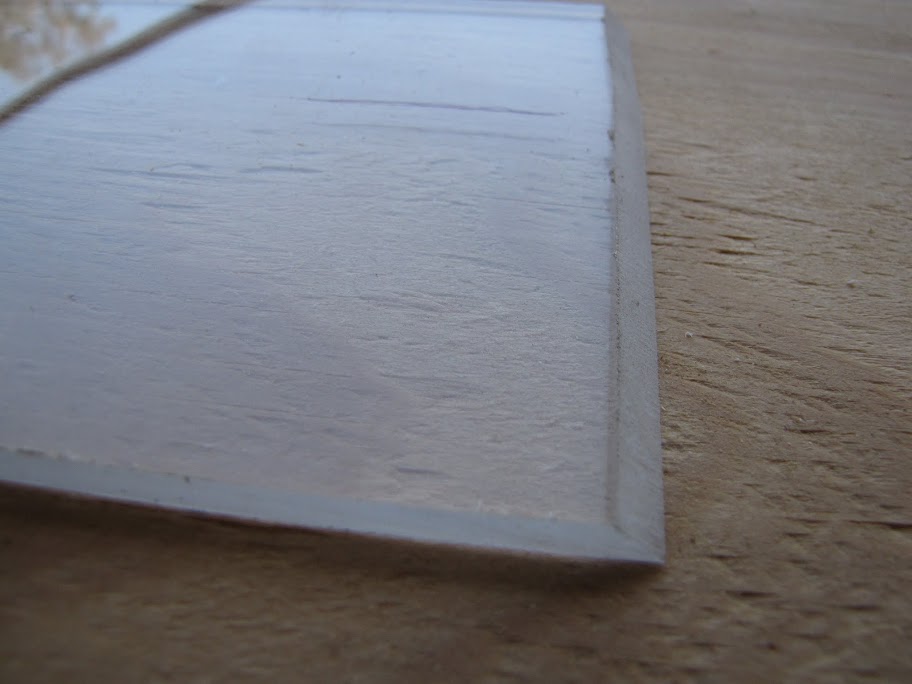
No matter, though! We can still fix the scrap pieces I am working with, and proceed onward. Time for some sanding! I used P250 grit for this work, as there was a significant amount of correcting that needed to be done.
Looking better...
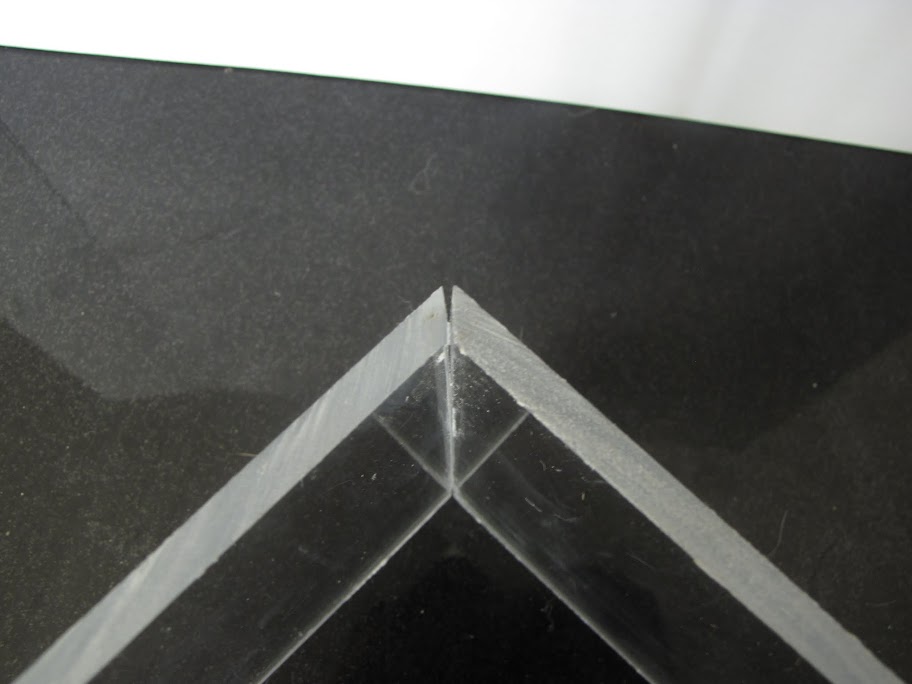
Much better! I cut a second piece using the same process... now to try out joining them! I read somewhere that using IPS Weld-on #3 is about the best stuff you can get for 'highly visible' joints such as what I will be doing on the front of my case... however... I don't have any of that yet, and couldn't find it at the local hardware stores. I also read that super glue can be used in a pinch, though it usually ends up looking rather ugly by comparison. Fortunately, I have plenty of super glue... so let's see how it goes!
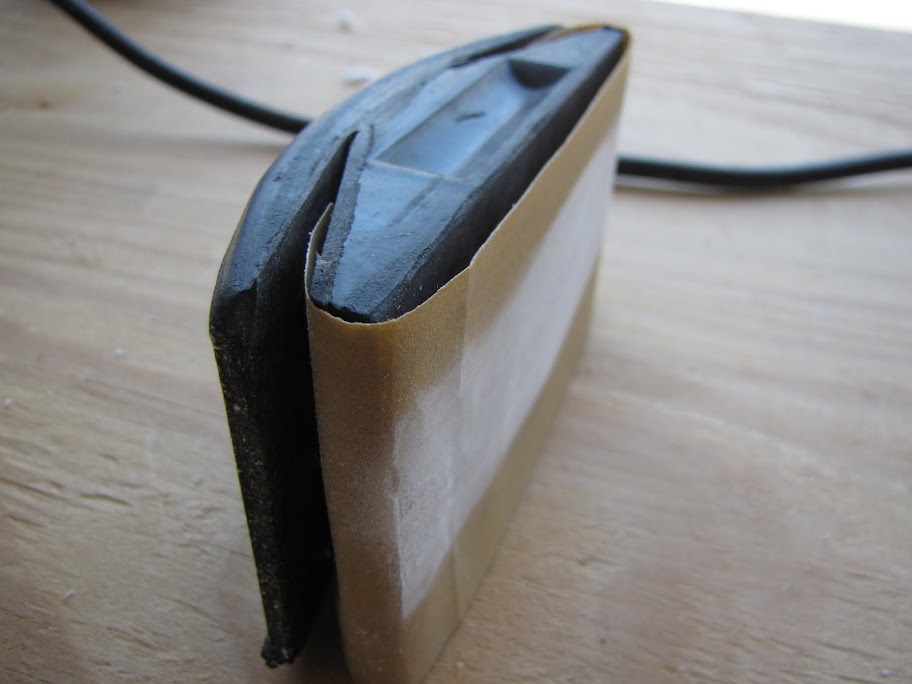
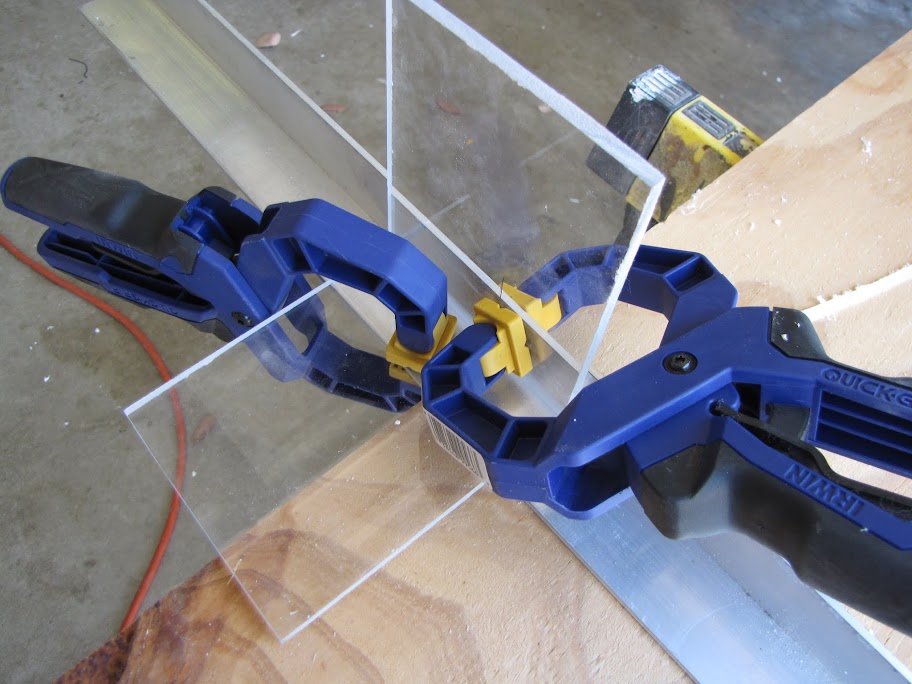
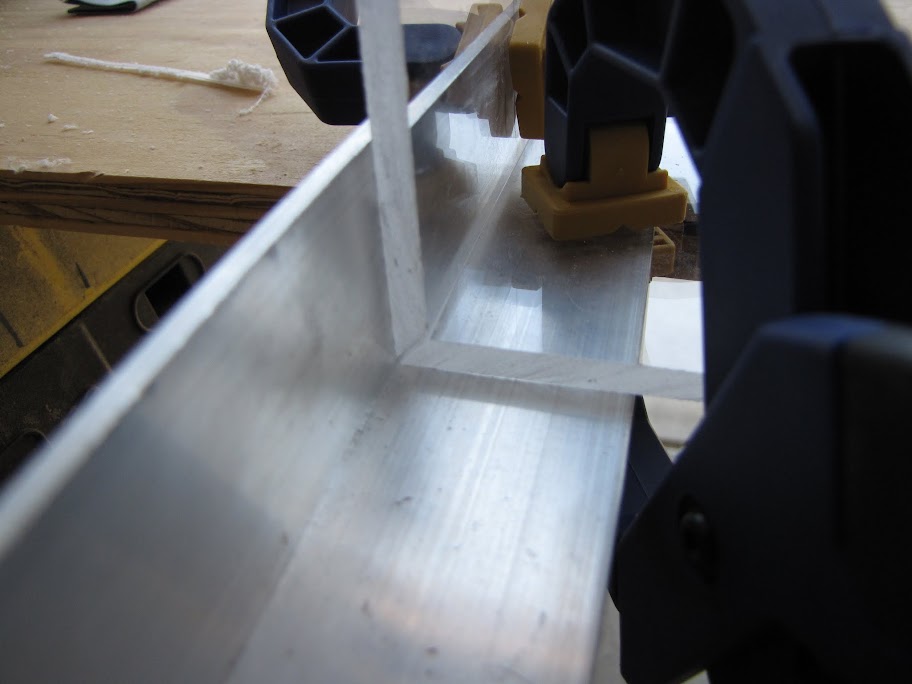
I used a metal corner beam that I found at the local hardware stores as a 'mold' for my 90 degree angles. I put a line of superglue down the crease, then clamped it to the mold to let it dry for a few minutes.
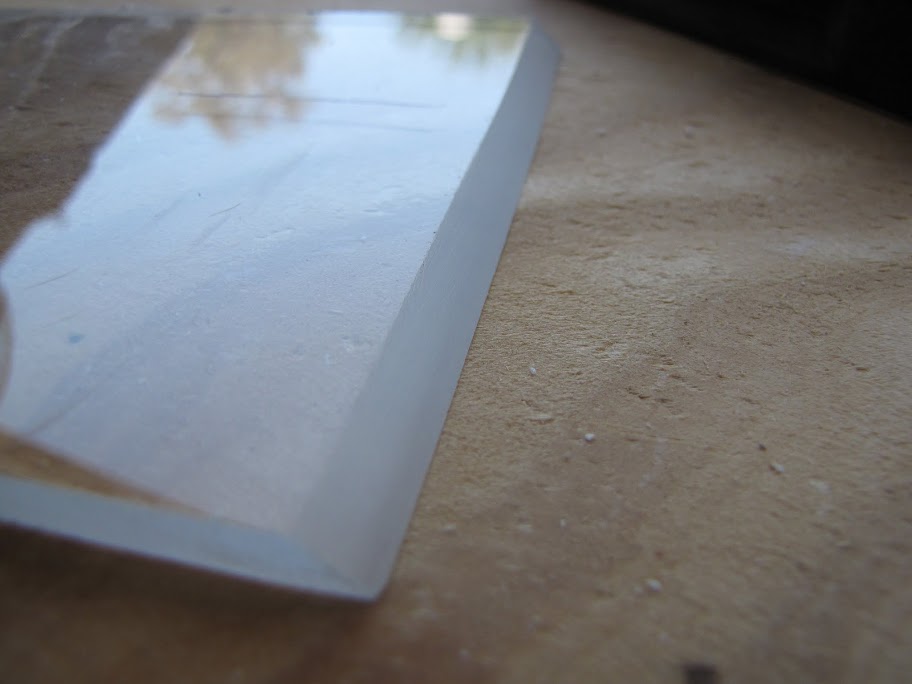
And the result:
Not too bad! I only spent a minute or two sanding, so the edge was not perfectly matched. I also stopped at 250 Grit rather than using higher 1000 or some of that acrylic polish that helps get a perfect surface... so I can see this working very nicely once the joint is uniform. Even with a quick sanding job and cruddy old super glue, the weld ended up being almost invisible... here's a look at it from the front!
Pretty slick! :nod: Looking forward to what I can do with a bit more time and care, on some higher quality Acrylic with appropriate tooling and adhesive!
Next... I went on a bit of a hardware shopping spree... xD I've only just started collecting real power tools and such... most of what I have done around the house could be accomplished with a table saw, hand saw, and simple wrenches/screw drivers/drills. Now that I am getting some serious detail work done, I thought it was time to get some accurate tools for finer work. First, I raided my fathers garage for any old tools he was no longer using... he gave me free reign so long as I 'treated them nicely.' He's seen what I am capable of, clearly.
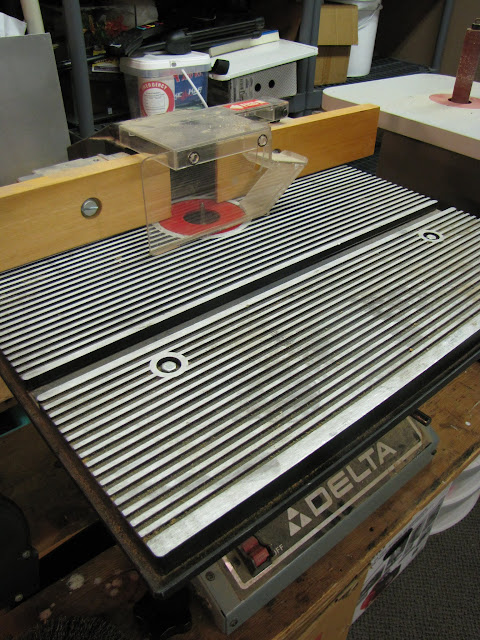
First tool, a table router! This should come in very handy for some of the edging to get my Acrylic window mounted flush against the case wall. Should also be great for using a template to cut identical case windows on either side.
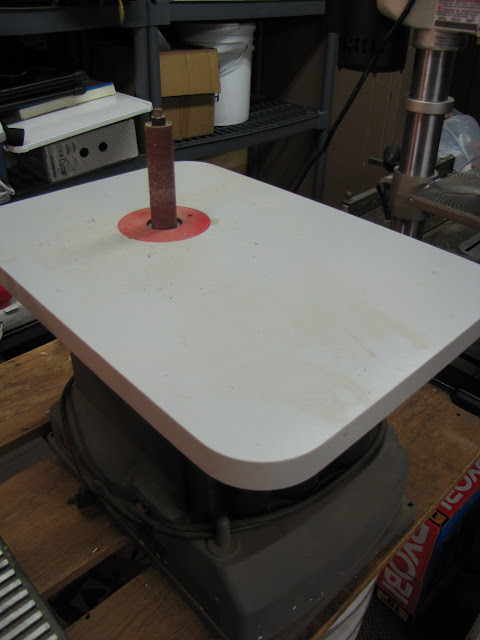
Next, a rotary sander! Beats the heck out of manual sanding for pieces that require a lot of correcting. Finer jobs are best left to manual sanding of course... but this will really speed things along for working with metal I think. Might be a bit much for Acrylic... but we'll see. I can also get a buffing wheel for this to polish my Acrylic and such.
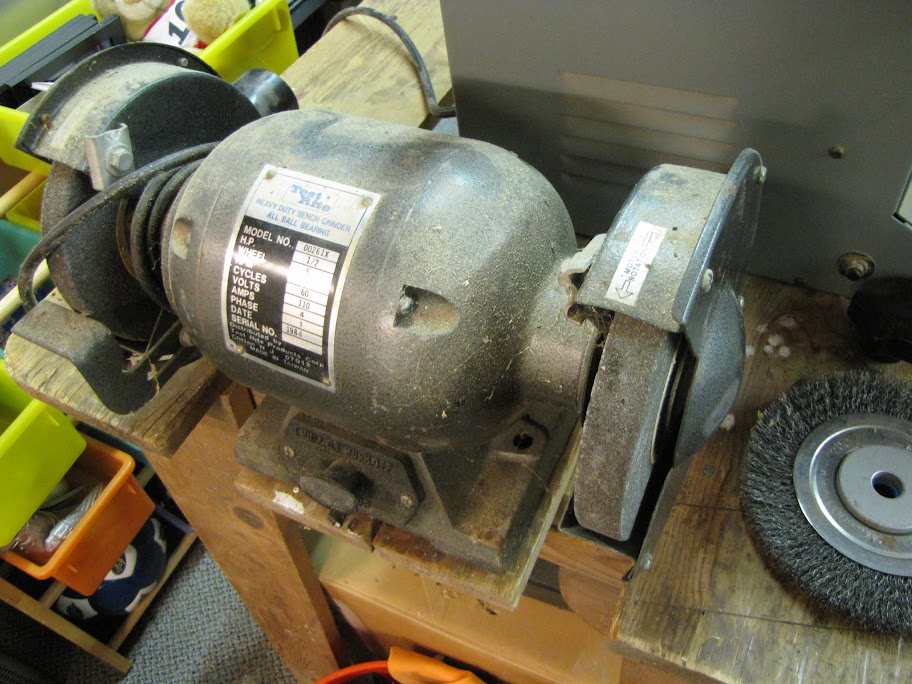
Third... an old, dusty grinder! Should be great for evening up edges on metal cuts, and I can switch the wheels out for buffing and such too.
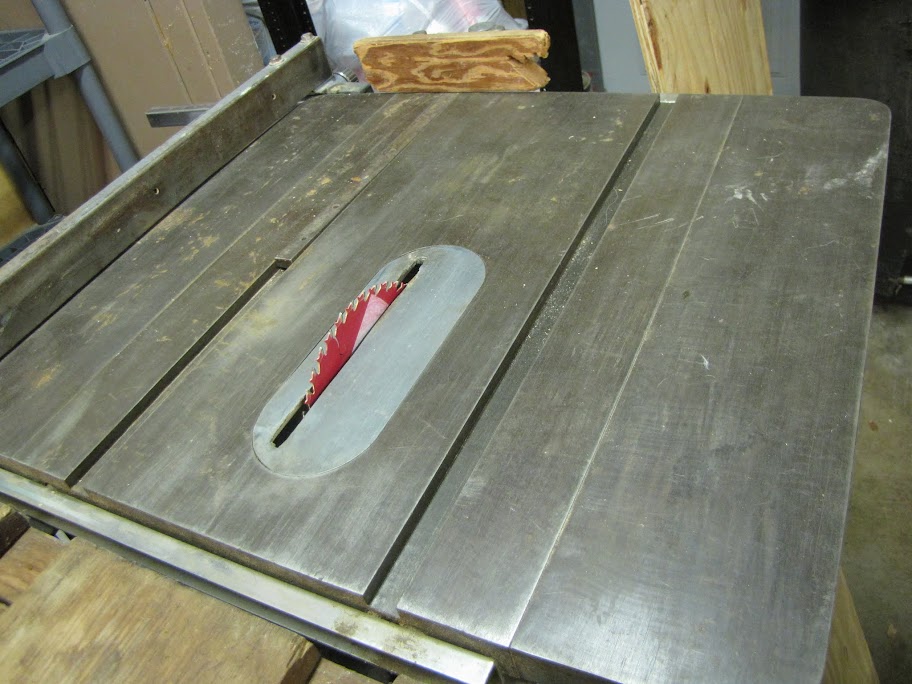
Finally, who can forget a the trusty old table saw?
I also raided a multitude of routing bits and such... can never have too many tools.
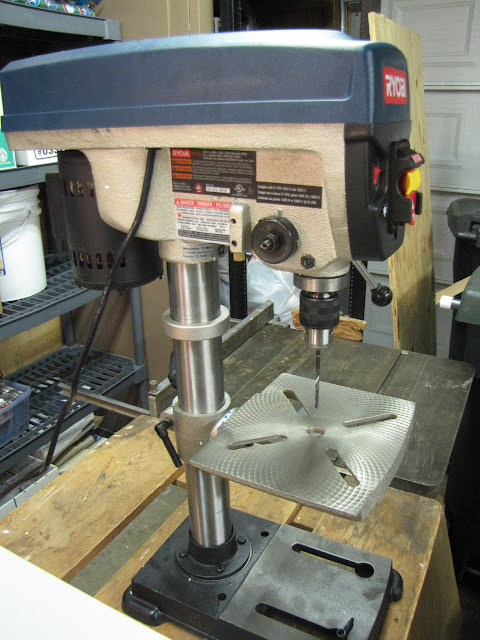
There was still one tool I was planning on getting for this project though, and I finally decided to just go out and get it... a shiny new drill press!
I also cleaned up some of the garage and put together a work area for all these great tools... now I have a pretty solid work area for all of these bits and pieces!
Anyway, that concludes this update! All the tools are in place, save for a few bits and blades... I think it's time for me to go and order some Acrylic now...
EVGA z77 FTW -- 16GB of Samsung MV-3V4G3D/US -- Intel Core i7-3770k -- EVGA GTX680 -- Corsair AX850 PSU -- Lian-Li PC-v2000b -- 2x XSPC RX480 Rads -- EK-RES-250 -- EK-DDC Dual Top/pumps -- EK-FC680EN Full Cover block -- Swiftech Apogee HD Block
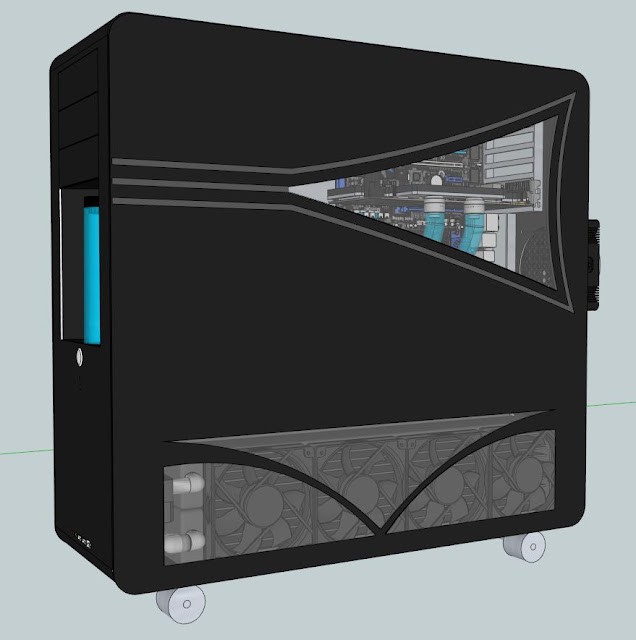
Small update... I've been continuing to test various configurations of radiators and fans (which, by the way, results are coming back way different than I would have anticipated... leads me to believe I need to do a second round of tests of each to 'confirm' the previous round...) and in the meantime I have been figuring out all the dimensions for the various features of my case. I started on paper, but figured I might put it all in sketchup where I can manipulate it a bit better. Soo... here's a render of the progress so far!
The Grey outline triangle will be acrylic on it's side (1/4" thick) that will be backlit to give it a glow that I can manipulate into moving patterns and such... or solid... or pulsing... pretty much whatever I want. I couldn't find an easy way to do 'etching' in the window, but you can imagine a 'PRISM' text etched into the window.
The area at the bottom that you can see the radiator/fans through will be mesh most likely... not sure what kind yet. Could be as thin as speaker mesh / screen, or as thick as mesh you could find on a fan grill. Haven't decided.
I'll be adding the front and top case features next, when I get a bit of time. Busy weekend helping some relatives move, unfortunately! Anyway, let me know what you think!
EVGA z77 FTW -- 16GB of Samsung MV-3V4G3D/US -- Intel Core i7-3770k -- EVGA GTX680 -- Corsair AX850 PSU -- Lian-Li PC-v2000b -- 2x XSPC RX480 Rads -- EK-RES-250 -- EK-DDC Dual Top/pumps -- EK-FC680EN Full Cover block -- Swiftech Apogee HD Block
This is going to be a busy weekend!
1) Continued radiator testing!
My first round of tests completed, and the results are:
Orientation 1: FANS > RADIATOR |BEVEL| RADIATOR < FANS ... Average Delta T: 1.875F "Winner!"
Orientation 2: FANS < RADIATOR |BEVEL| RADIATOR > FANS ... Average Delta T: 3.88F
Orientation 3: FANS > RADIATORRADIATOR > FANS ... Average Delta T: 2.05F
... I was actually very surprised. I thought that having the fans blow air into a small area in the center would reduce air flow so much that it would reduce the effectiveness of this setup. Anyway, I decided to proceed with fitting the winning orientation into my case for some measurements when I realized I made a critical mistake when setting up this test... In the tests, I had the two radiators separated by a sheet of aluminum that was suspended between them, allowing air to flow out in any direction... but that setup would not be possible once it's in the case! :o The bottom compartment that the radiators will be 'trapped' in would gradually heat up with the expelled air, as only one direction (down) is actually venting air out of the case. The other directions (sides and top) would just vent into that sealed space. What's more, heat rises (duh), so some of the heat expelled out of the case bottom would just be rising right back into the case.
Anyway, I have resolved to re-do my testing... this time, I'll be testing it "inside the case" to try and help identify any 'impossible configurations' for this round. Let's see if I get really different results.
To start off the round of testing, I fabricated a really crude bevel out of some scrap acrylic I had laying around. I'll add some pictures tonight, but it's nothing to write home about. :p I then slid the radiator core into the bottom of my partially reassembled case and booted it up for a second round of tests. We'll see what kind of temperatures get generated over this weekend.
2) Case side modifications! Now that I have my design all mocked up in Sketchup, and my tools all in place, it's time to get cutting! I plan on cutting out the two case wall sections and working on how I want to get it all to fit together in the end. The biggest hurdle to jump will be the fact that the triangle window area is 'floating' in the center... you'll notice (from previous pictures) that the design is completely separated from the rest of the case. I plan on using some acrylic (maybe opaque black or something) to bond the strip and window together and to the rest of the case, keeping the whole case wall together. It should be interesting.
3) Case effect planning! My 'partner in crime' that is programming the Arduino side of things for this case is coming over this weekend so that we can hammer out the details of the lighting effects for the case. The hope is that we come out of the planning sessions with a design for adhering the LED strips and mounting them into the acrylic, as well as cable routing for power and control.
This should be a very productive weekend. Looking forward to bombarding you all with photos as we progress! Wish me luck!
EVGA z77 FTW -- 16GB of Samsung MV-3V4G3D/US -- Intel Core i7-3770k -- EVGA GTX680 -- Corsair AX850 PSU -- Lian-Li PC-v2000b -- 2x XSPC RX480 Rads -- EK-RES-250 -- EK-DDC Dual Top/pumps -- EK-FC680EN Full Cover block -- Swiftech Apogee HD Block
Photo time! I spent a little time today playing around with a new photo booth I constructed out of tissue paper and an old cardboard box I had lying around after being inspired by a similar construction over in the photography thread... crude, but effective! Anyway, here's some of my experimentation with the new booth... and some shots of my new toys I just picked up today! That... and a little present from Germany...
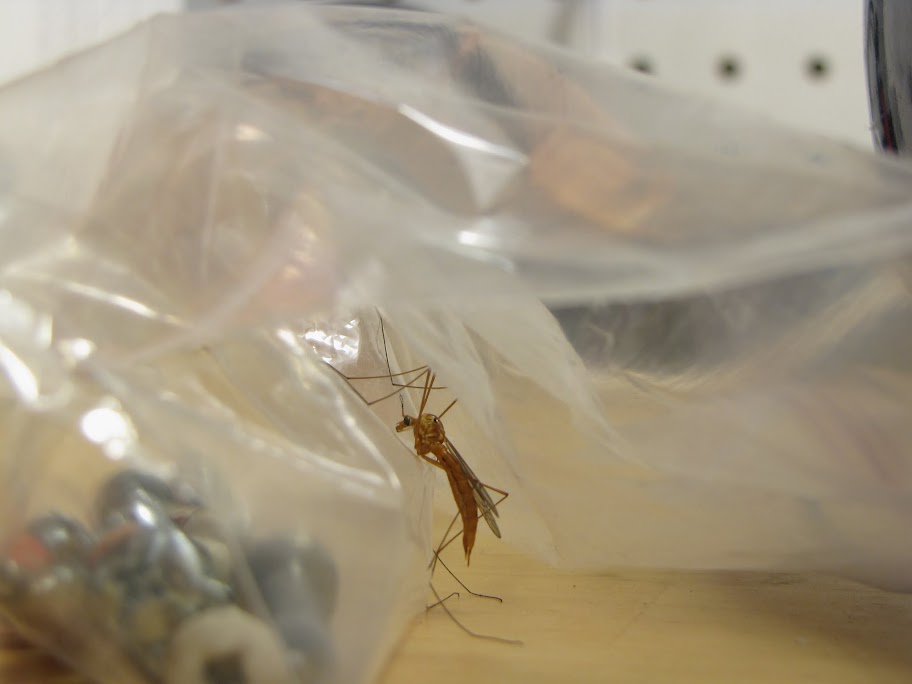
Initial shots with new booth:
Shortly into shooting... I realized I had a problem. It was night time, and dark everywhere except the booth. Turns out that attracts many friends.
Anyway... from Germany! And no... I don't have an alternate personality named Logan... He's the guy doing my Lighting/Arduino work. He needed some molex connectors, so I piggy-backed off of his order. :p
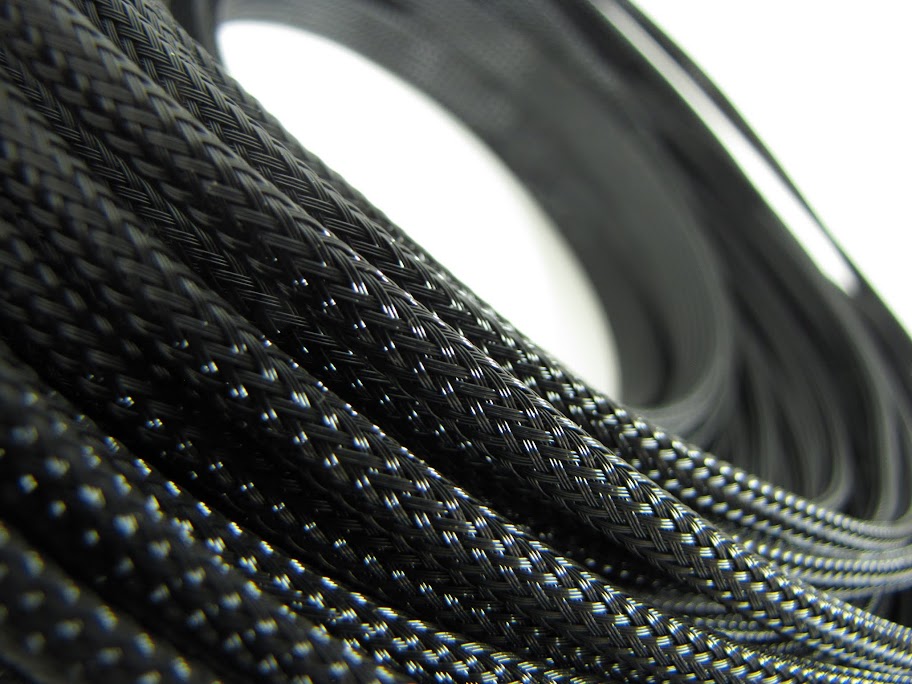
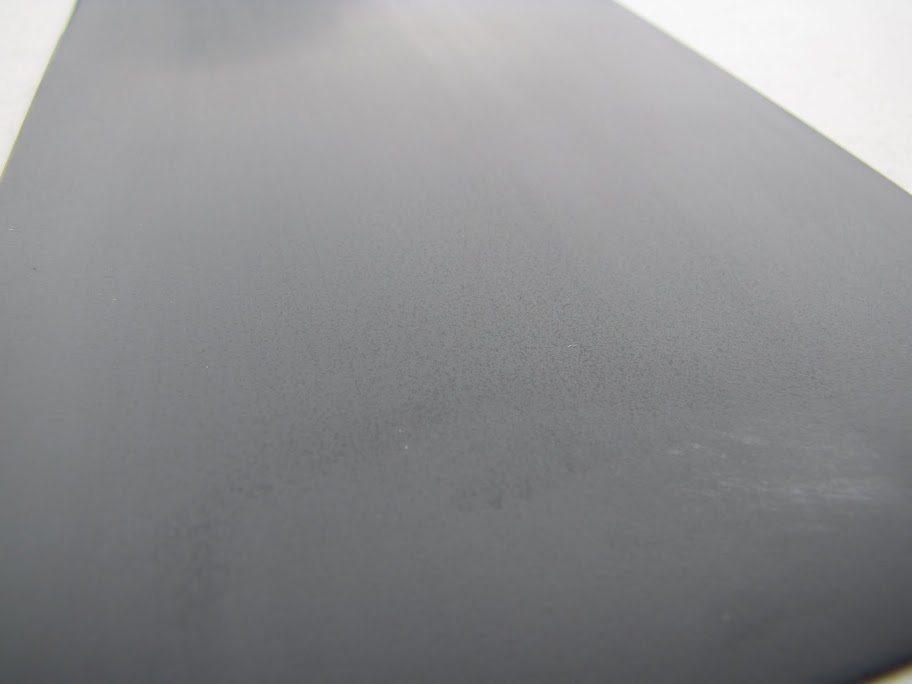
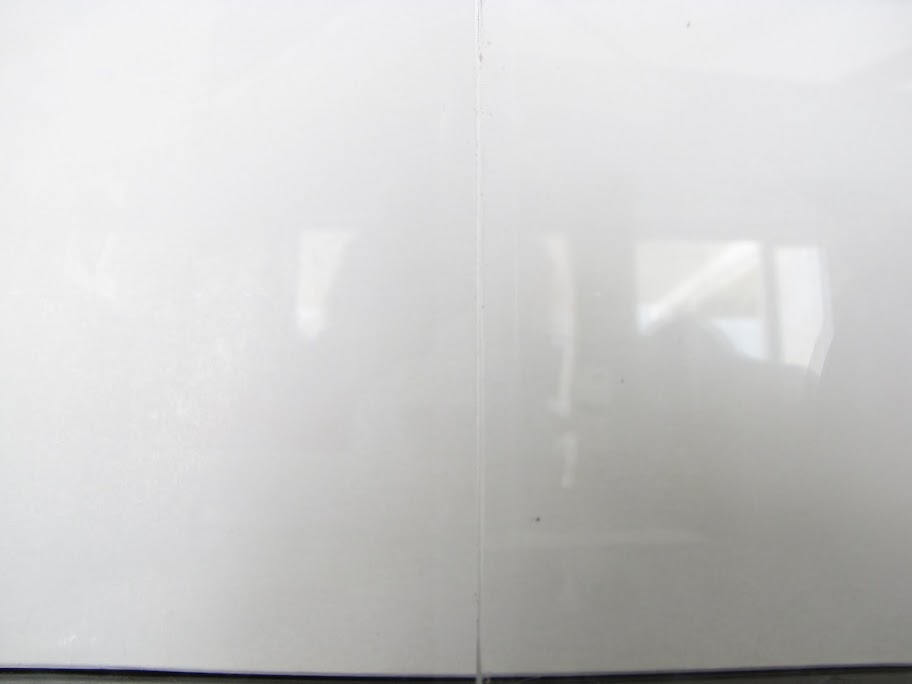
... for some of that snazzy Shade 19!
It really is a sharp dark grey... for contrast, here it is against some of the standard black sleeving:
And now... for some toys!
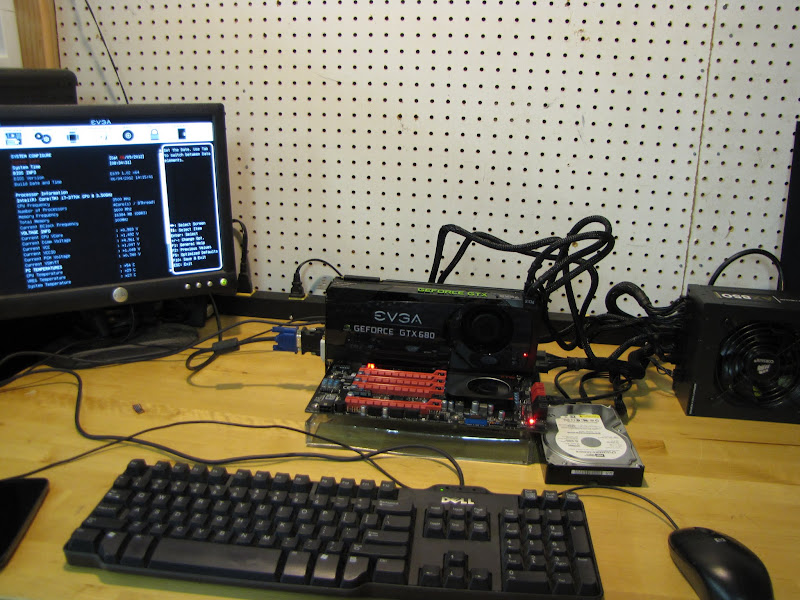
Finally... some shots of my new radiator test bed. It's in a room that has no lights right now (darn dogs chewed through the lamp cord...) so instead of quality pictures, you get dramatic grainy work lamp pictures...
Looking forward to putting that new Dremel through its paces tomorrow!
EVGA z77 FTW -- 16GB of Samsung MV-3V4G3D/US -- Intel Core i7-3770k -- EVGA GTX680 -- Corsair AX850 PSU -- Lian-Li PC-v2000b -- 2x XSPC RX480 Rads -- EK-RES-250 -- EK-DDC Dual Top/pumps -- EK-FC680EN Full Cover block -- Swiftech Apogee HD Block
Whew! This weekend was very productive indeed! So productive that I have run out of time today, and will not be able to post all the work until tomorrow...
But here's a teaser at least! :p
I'll post the full process and results tomorrow!
EVGA z77 FTW -- 16GB of Samsung MV-3V4G3D/US -- Intel Core i7-3770k -- EVGA GTX680 -- Corsair AX850 PSU -- Lian-Li PC-v2000b -- 2x XSPC RX480 Rads -- EK-RES-250 -- EK-DDC Dual Top/pumps -- EK-FC680EN Full Cover block -- Swiftech Apogee HD Block
 Posting Permissions


 Reply With Quote
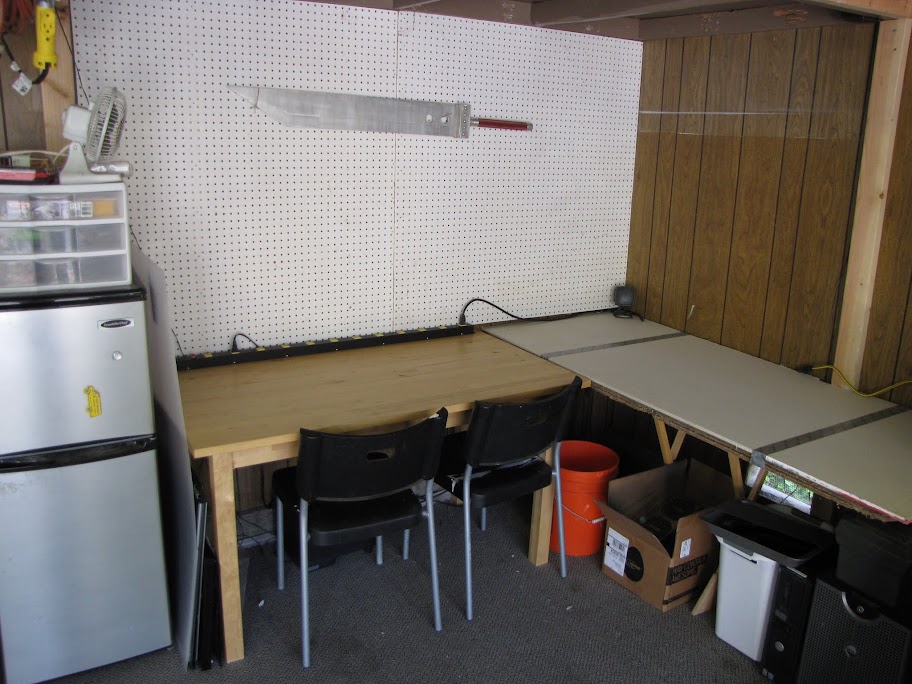


Bookmarks