

That BP scorpion is so effing cool.


That BP scorpion is so effing cool.
The 'always smiling' Mr 3D (design) and Quepee from GoT (CNC milling) both really want to do this!!
Just because it's a challenge for them too!
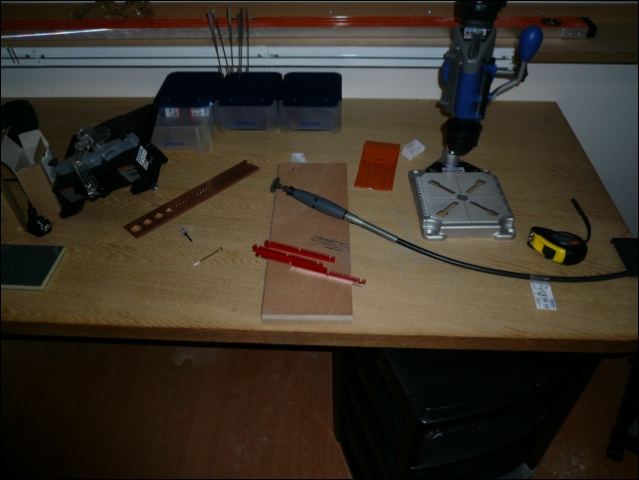
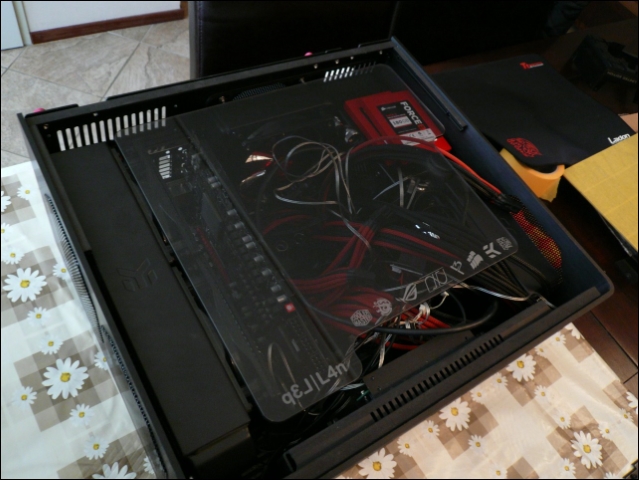
Here's an update already, it's not finished yet but the basis is there
I had to go to work right away
Photos, measuring, info and more photos.
So for who wants to know how that goes ..
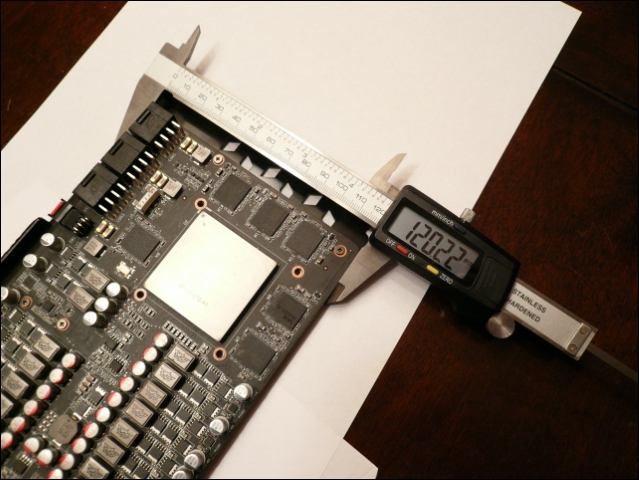
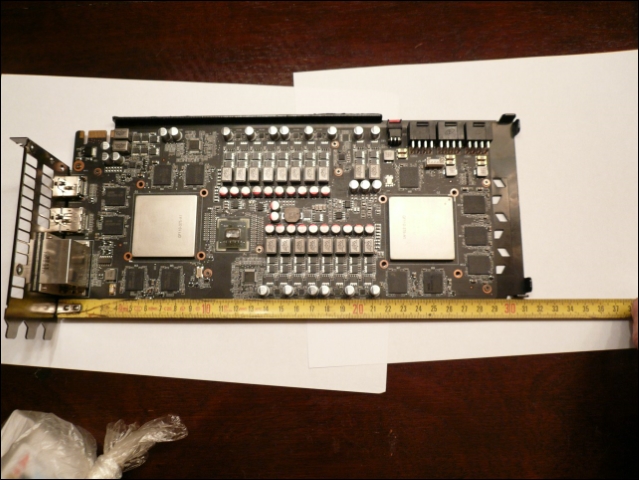
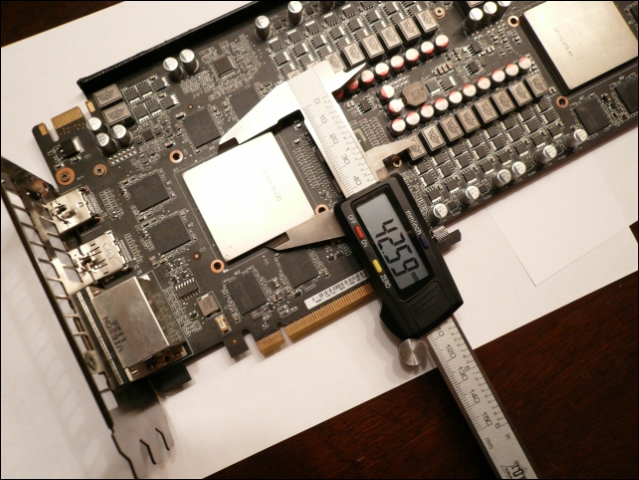
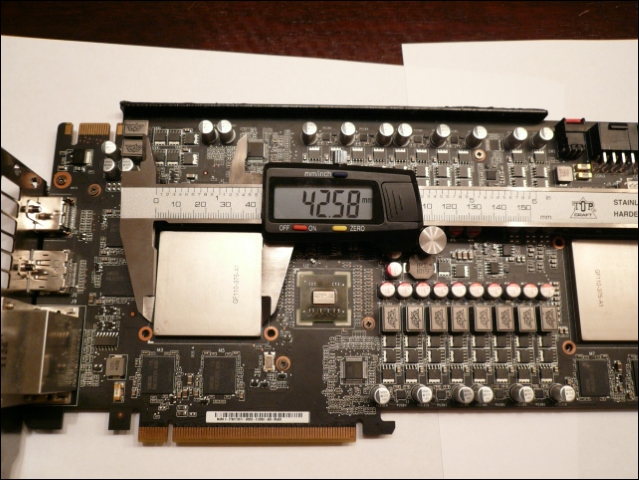
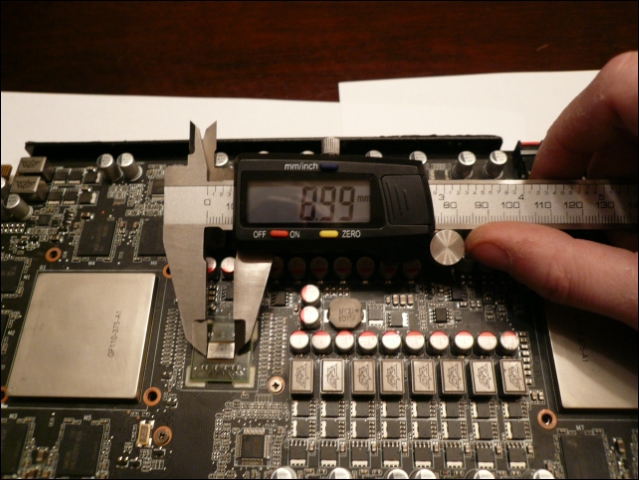
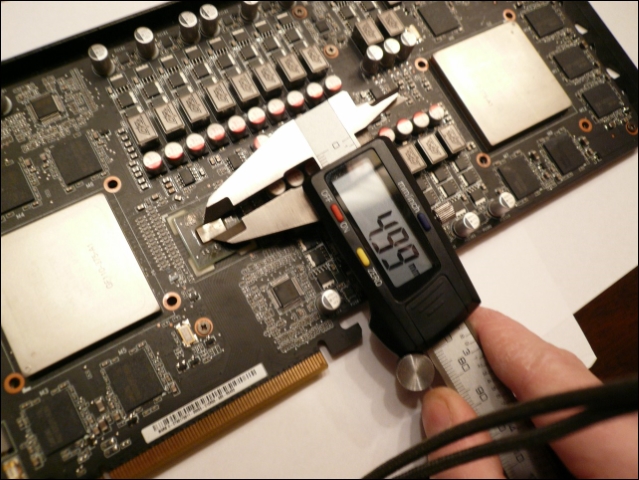
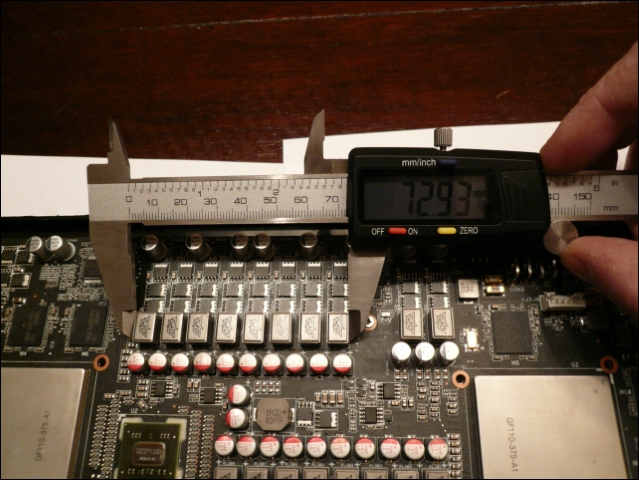
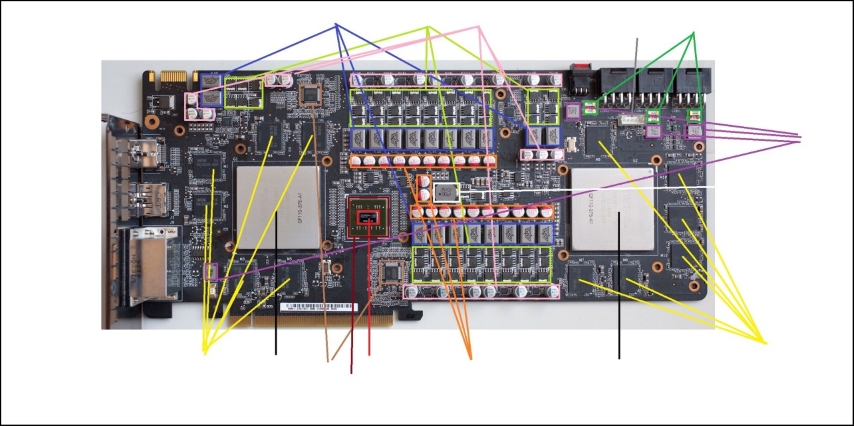
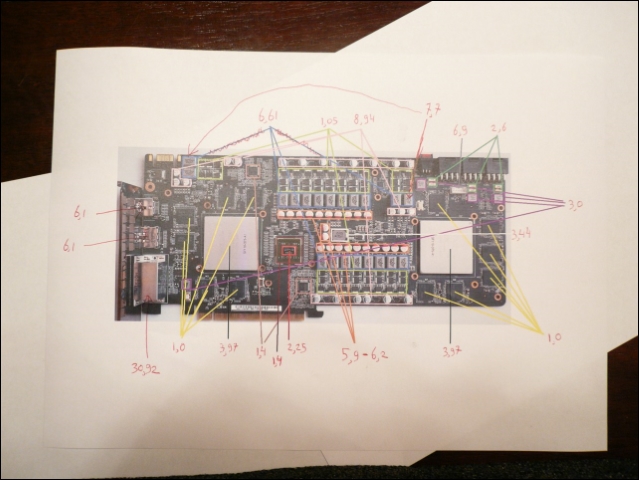
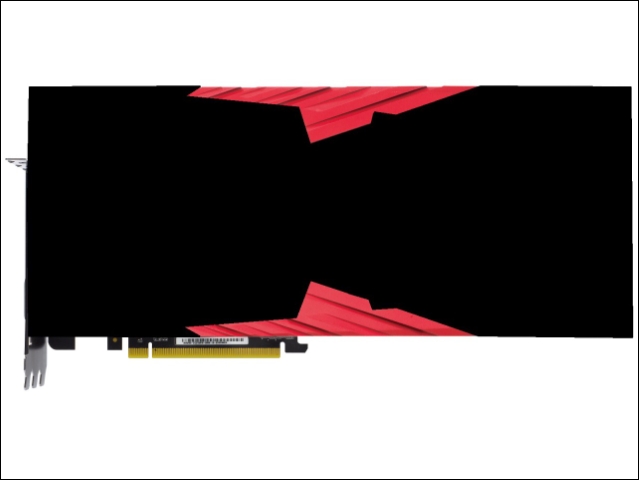
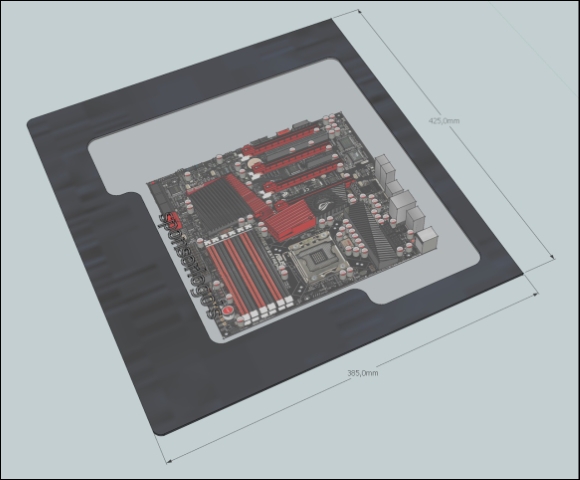
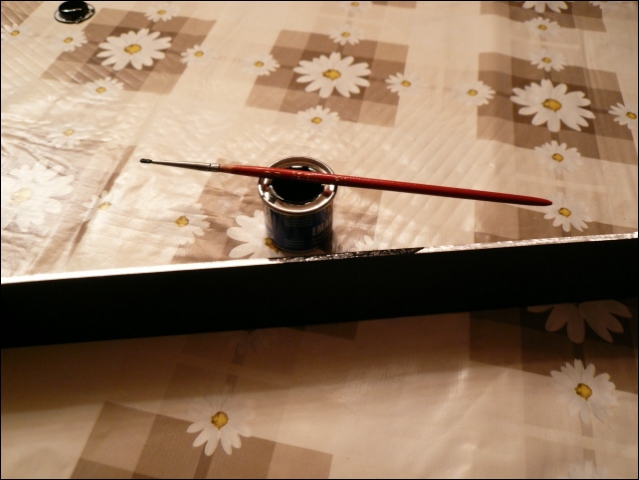
First a clear picture from the PCB
(source: techpowerup.com)
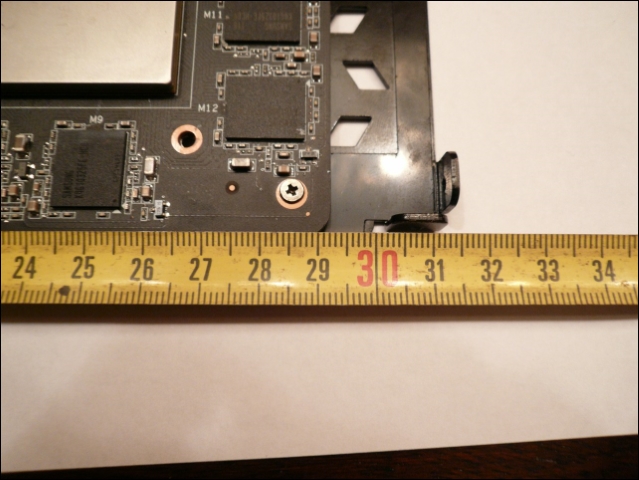
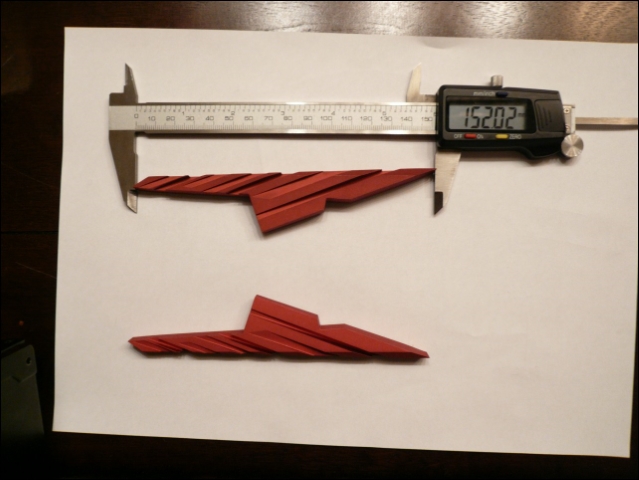
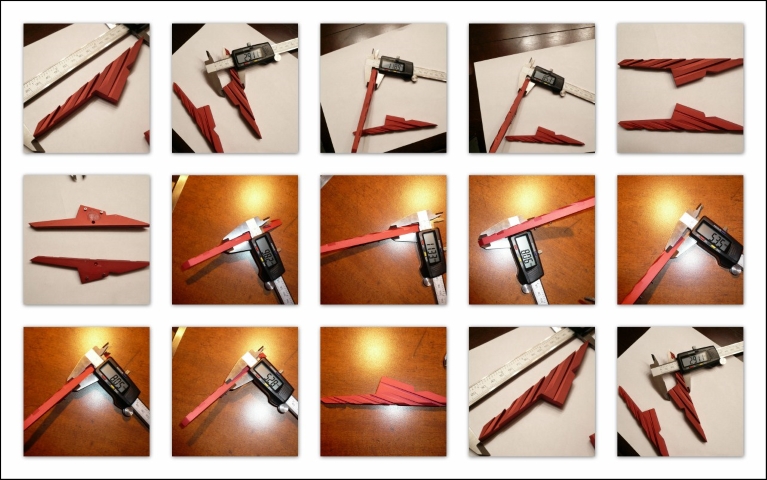
After that Daniel needed a lot of sizes.
He could go on with the first design of the fullcover.
I made a simple paint picture for all the sizes and heights.
Daniel could go on with that again.
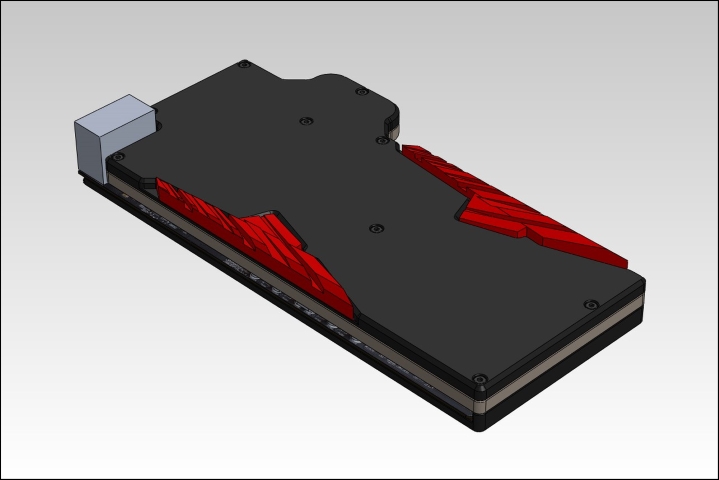
And the first impression.
Still looks boring but more will come
Maybe till tomorrow!
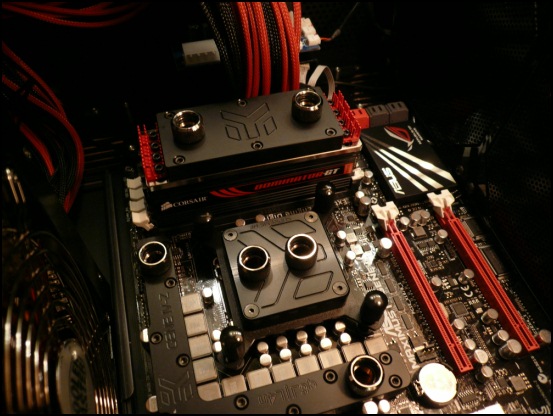
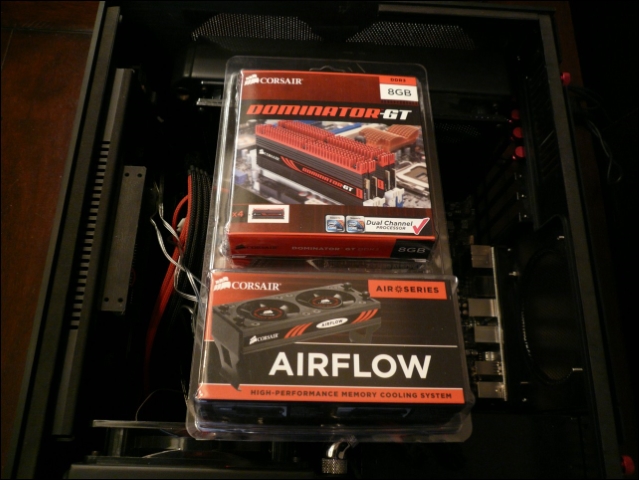
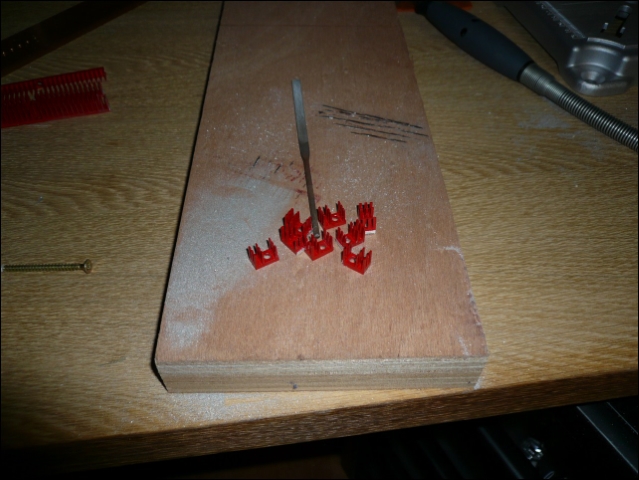
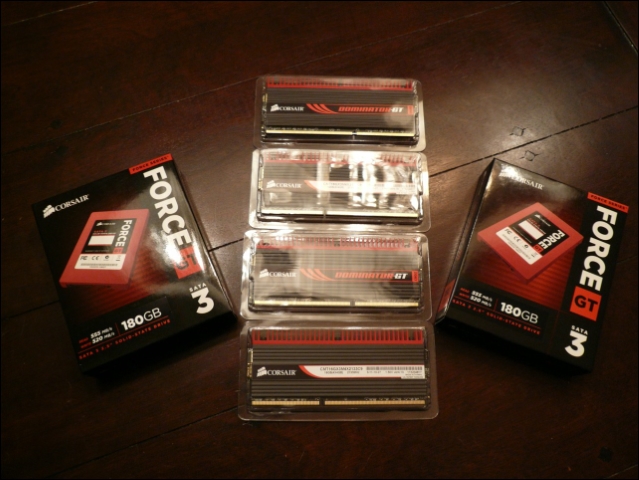
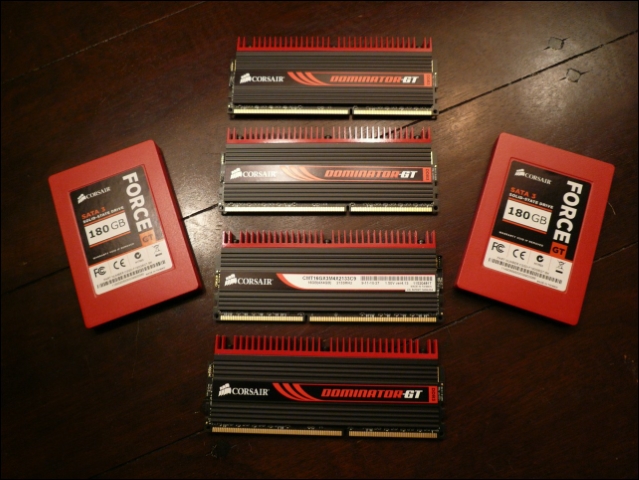
Didn't plan to do anything today but received a package and my fingers started to tingle
Still in love with the red GT fins
Problem is I promised to watercool them. :P
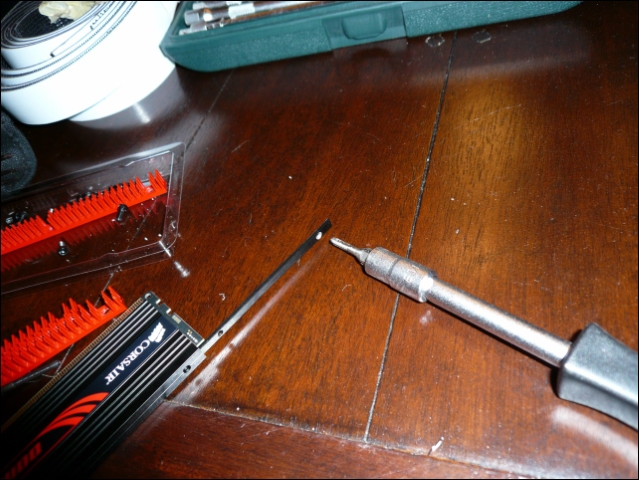
But an idea popped in.
Hmm Corsair uses M2.5 ... Don't have them and certainly not longer ones :\
Ok re-tap them with M3 ...
That works, now the rest.
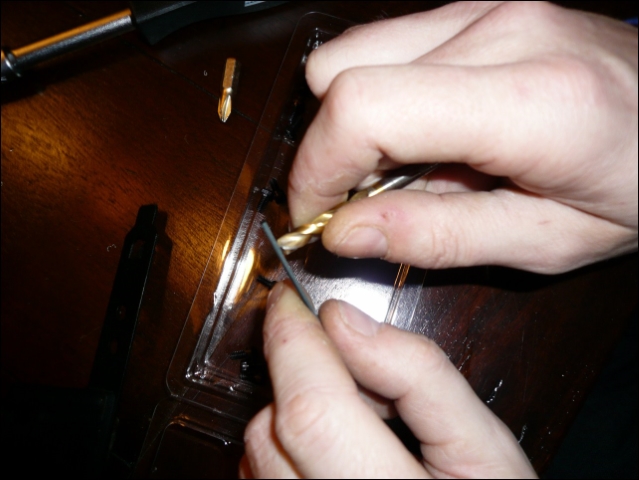
The fins work fine, they get pretty hot when cutting them
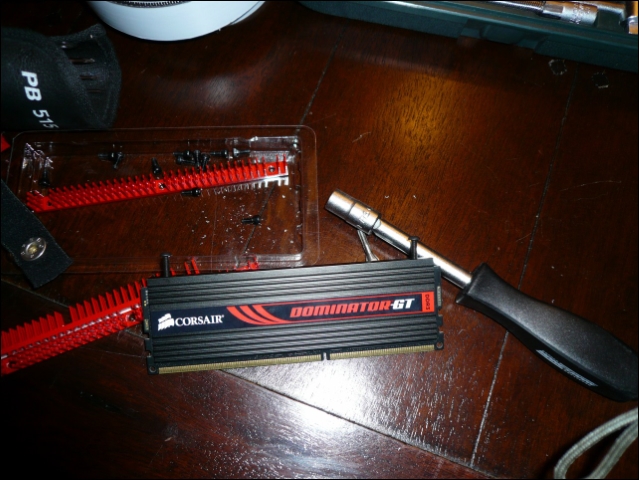
And done.
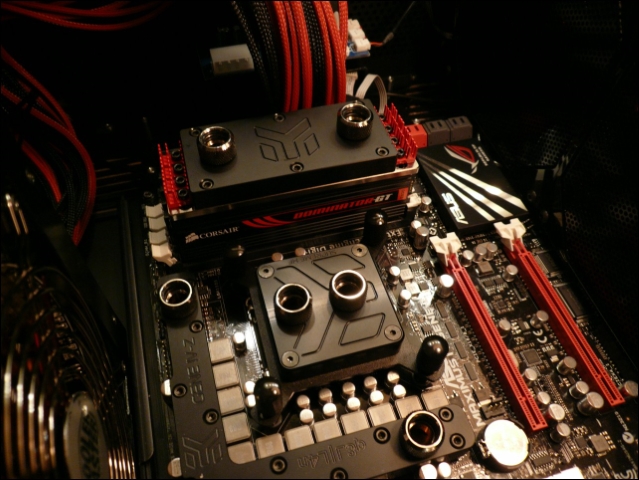
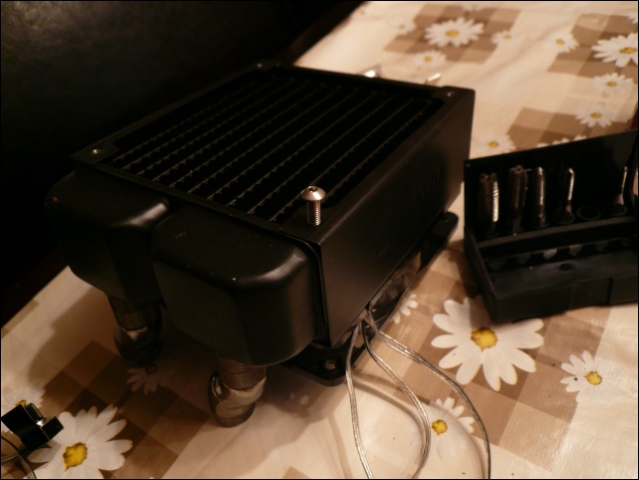
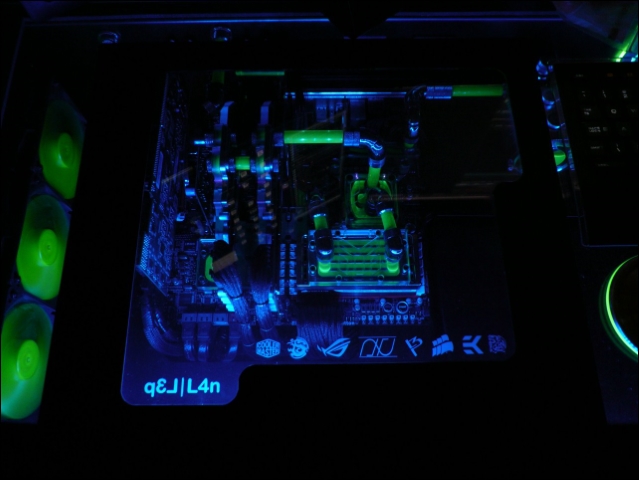
An EK block with some rad fins I love
Top notch job on heatsink parts on ramblock
Awesome work going on on this thread...
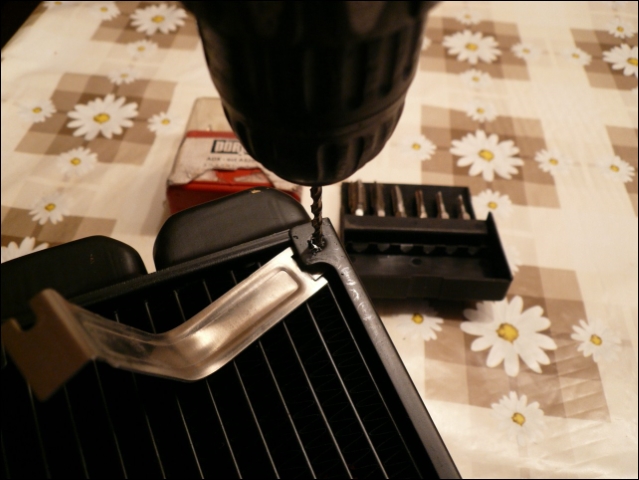
Small update
Drilling and tapping the small radiator to M4.
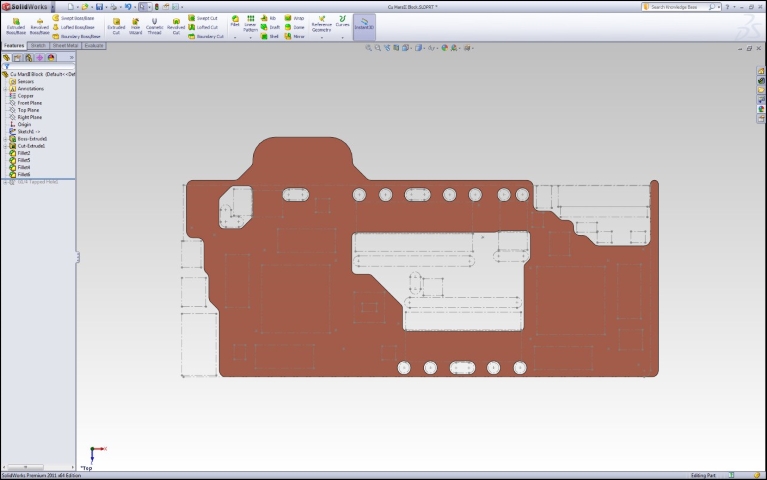
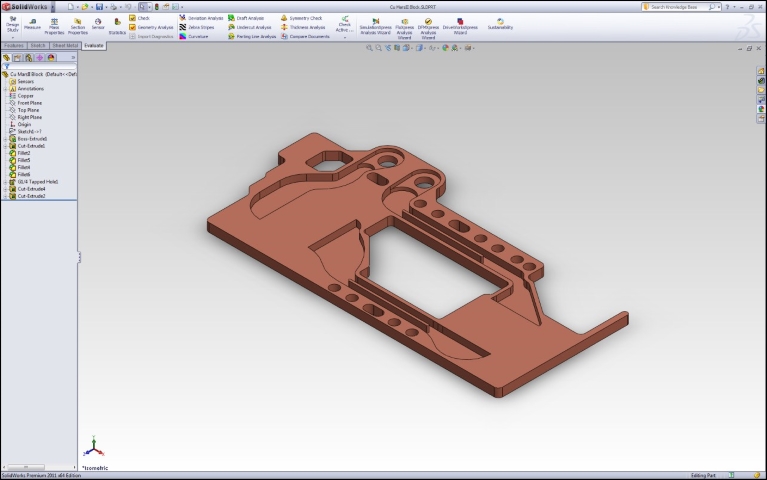
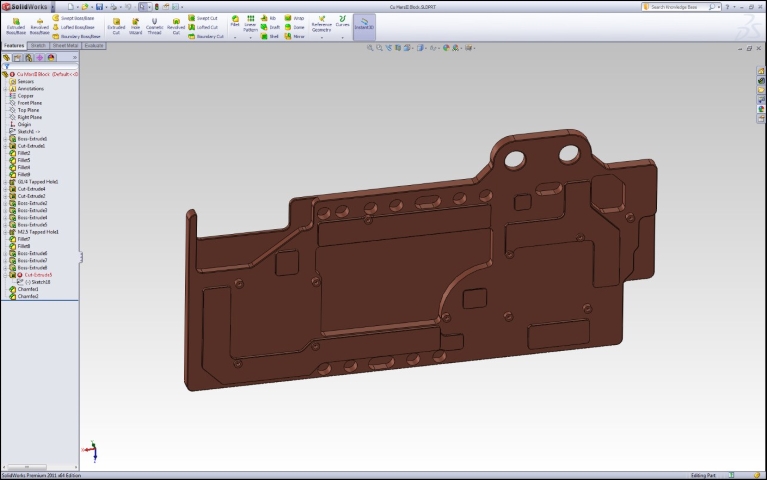
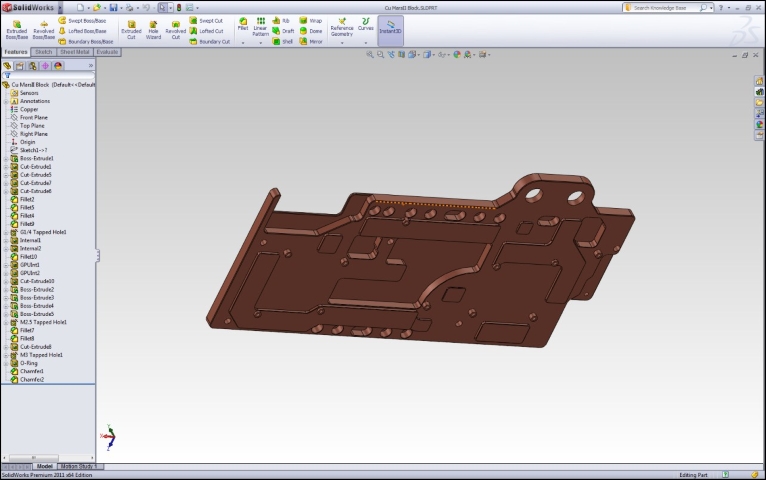
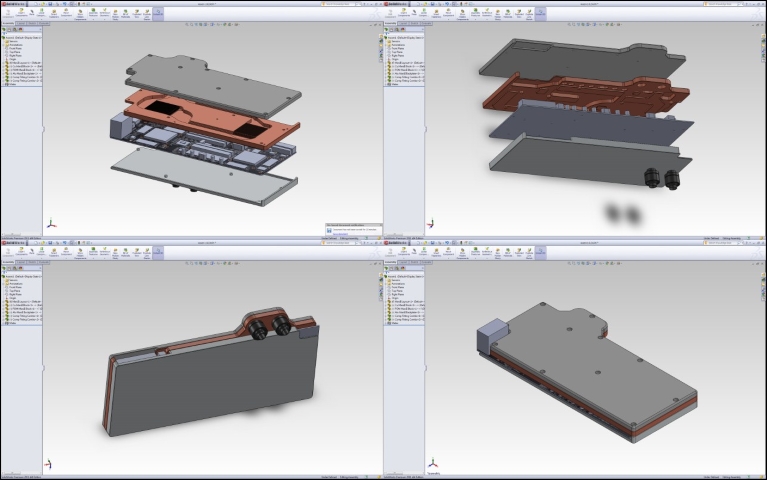
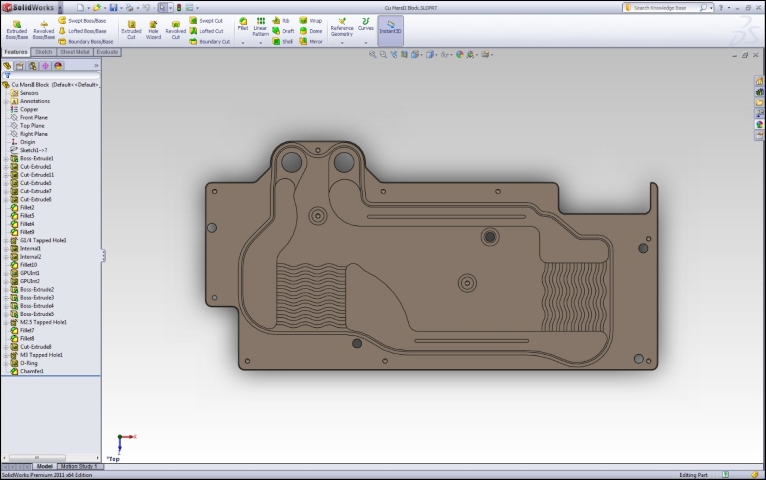
And back to the MarsII block
Daniel has been very busy with it last week.
Really this guy owns :P
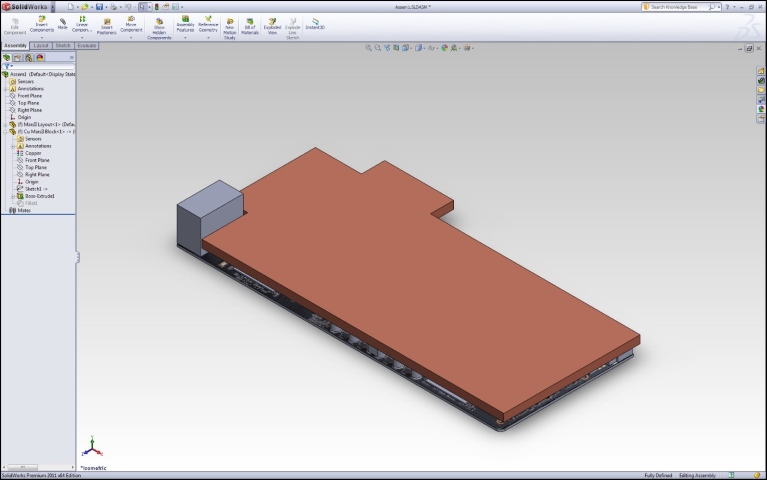
Copper part done.
While he was busy with this I had to think of something for the POM part.
Got a spontaneous idea to recycle the red aluminum parts from the original cooler.
Off course with paint
Daniel didn't know what to think of it but we went for it
Time for me to measure again
And re-measuring. That guy thinks about everything.
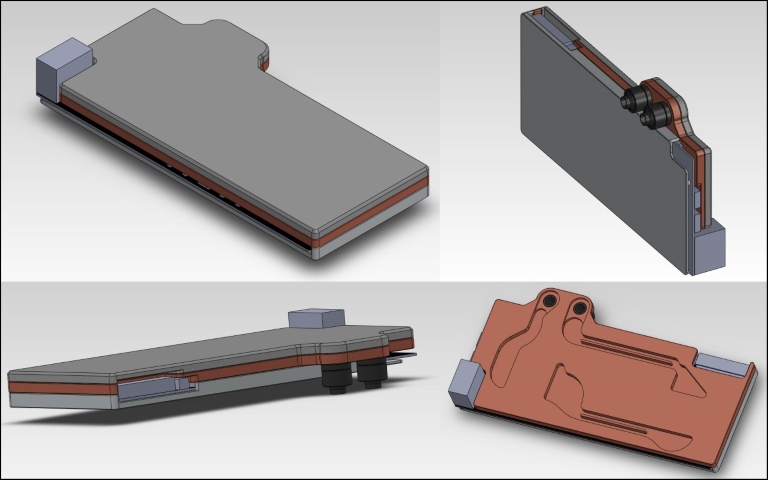
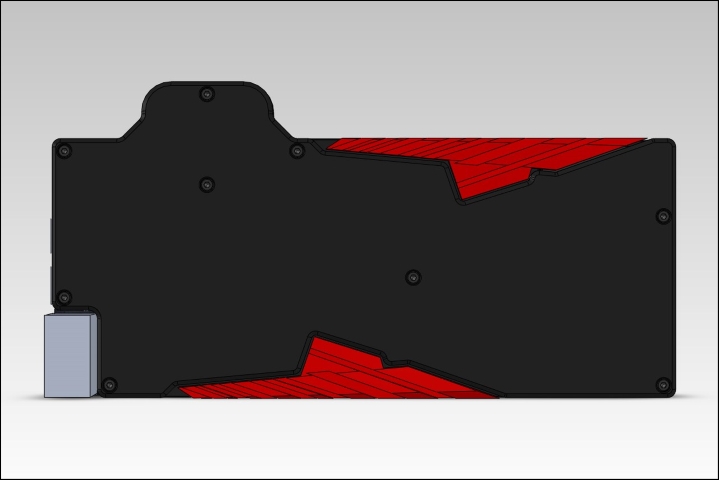
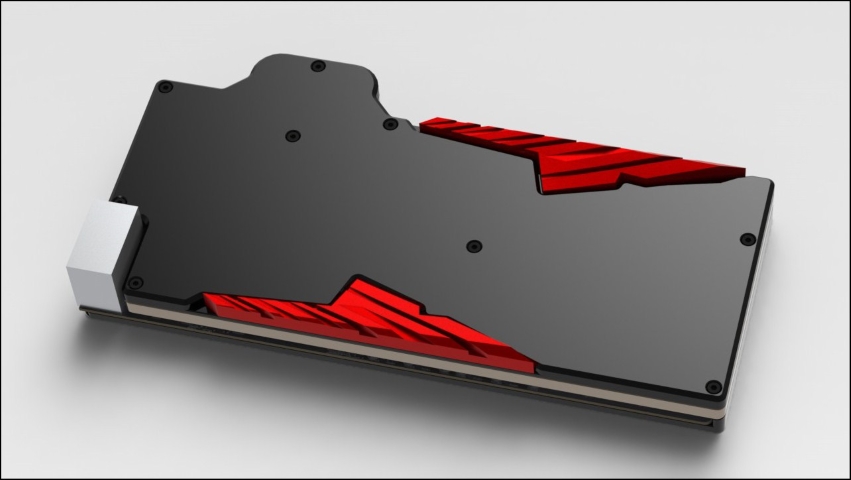
And the result.
Daniel really liked it a lot at the end too, I'm completely in love!
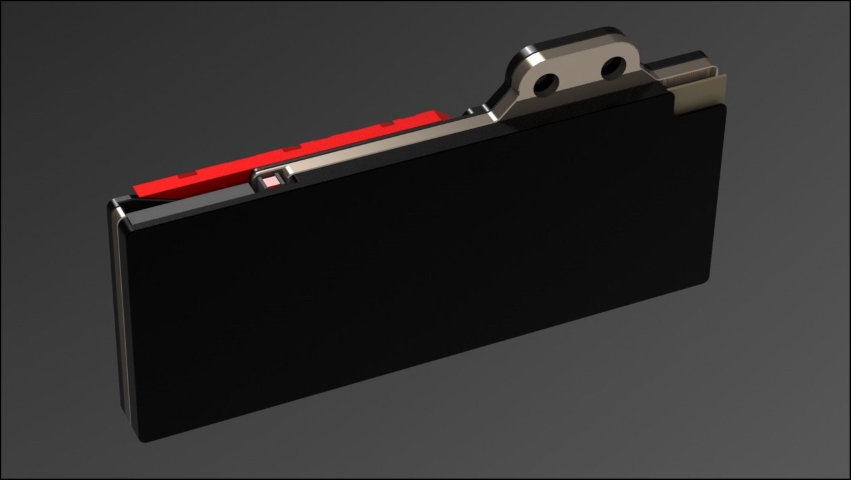
Here the renders.
What do you guys think about it?
Only thing he wants from me is as much possible friends on Facebook, so please go ahead if you can guys
Mr3D a.k.a. Daniel!
Wow, that is absolutely amazing.
Computer: Intel i7-4770k | Asus Z87 Maximus VI Impact | 240GB Corsair Force GT | 240GB OCZ Vertex 3 | 16GB G.Skill Trident X 2400MHz | EVGA GTX690 Hydro Copper 4GB | Corsair AX850 | Steelseries 7G | Logitech G500 | 27" 2560x1440 Overlord Tempest X270OC 120Hz S-IPS
Cooling: Koolance 380i CPU block | Swiftech Hydro Copper GPU block | EK X3 150 Reservoir | EK X-TOP D5 PWM drive | PrimoChill PrimoFlex PRO LRT Bloodshed red | Alphacool NexXxos 240mm XT45 | Alphacool NexXxos 280mm UT60 | Bitspower Fittings | 4x Bitfenix Spectre Pro 120mm | 2x Bitfenix Spectre Pro 140mm | Lamptron FC-5V2
Case: Custom modded matte black Caselabs Mercury S3
Very, very nice design!
Thanks a lot guys!
More to come but first need to focus at something else
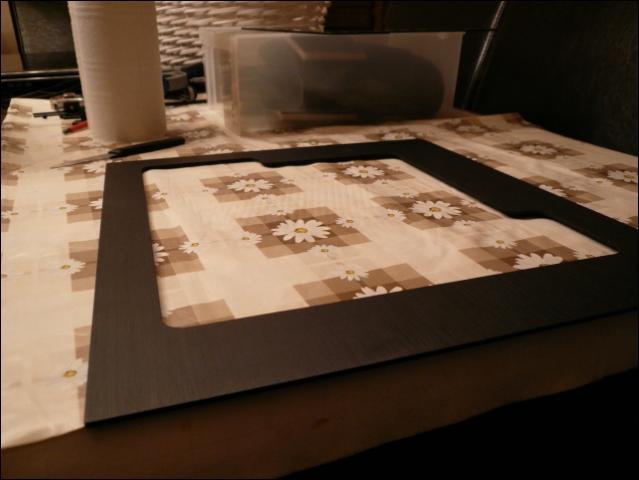
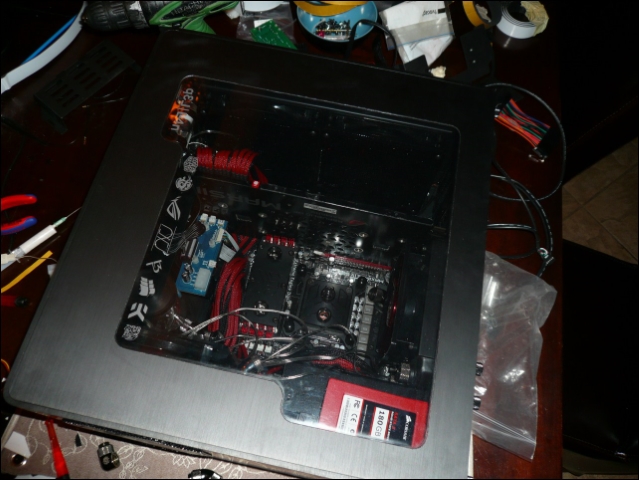
And another small update
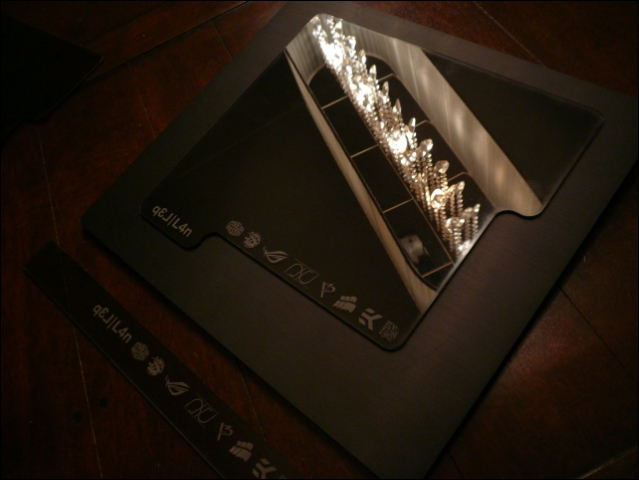
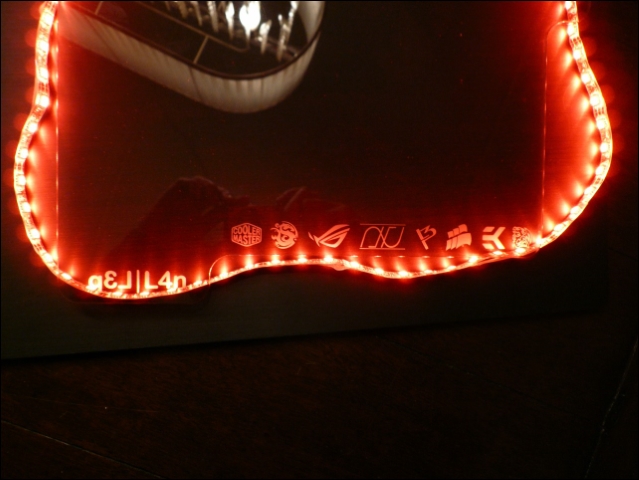
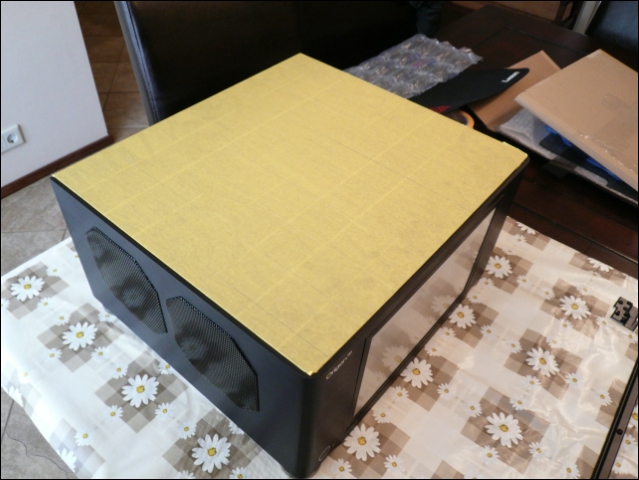
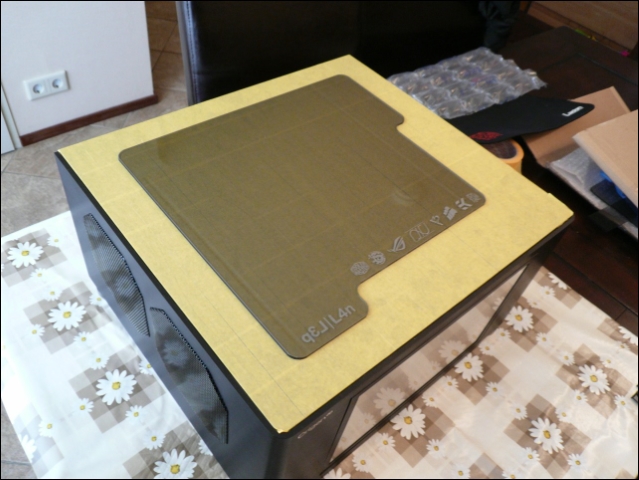
The top panel.
Was walking around for a while with this idea. Want the plexi window to be flush with the black brushed aluminum.
But with only handwork I don't see it succeed. 0.5mm difference will be visible.
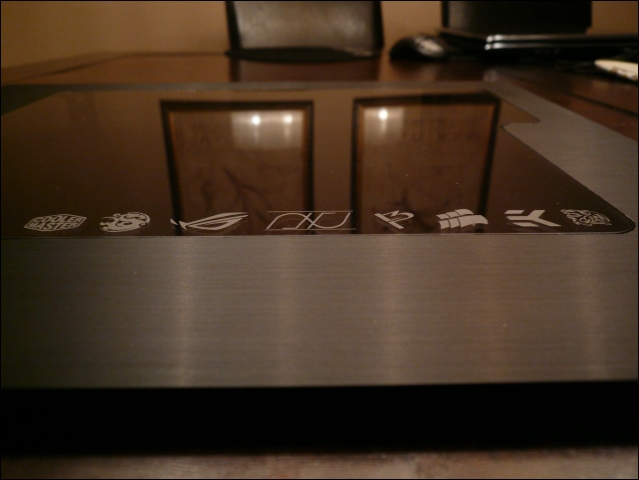
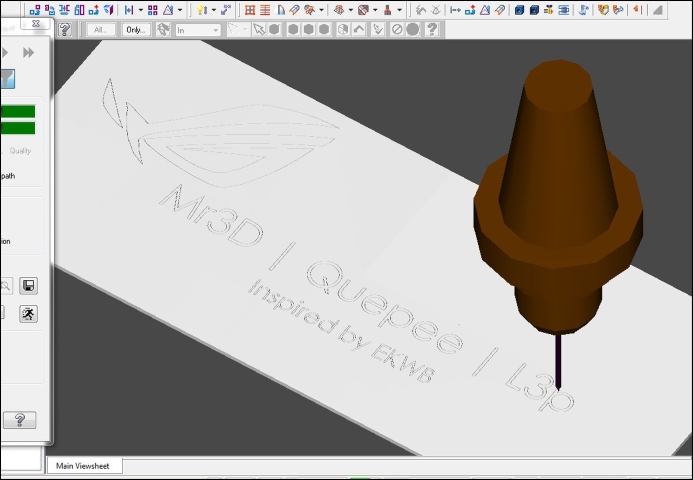
So decided to let the plexi be lasered and then try to get the window in by hand. (Thanks Brian!)
Will also take the opportunity to let the small logo's be lasered too, no names, just logo's.
This is the idea
Then first of all I want to thank Daniel and Ivo again for all the effort. Even till now ( :P ) they still have fun in doing this
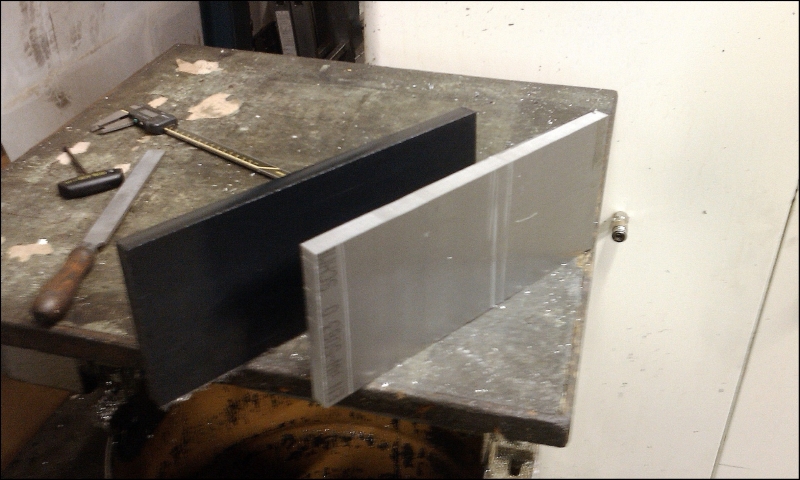
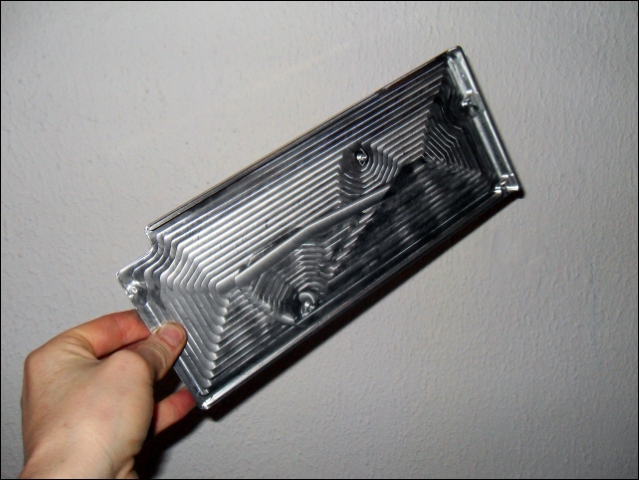
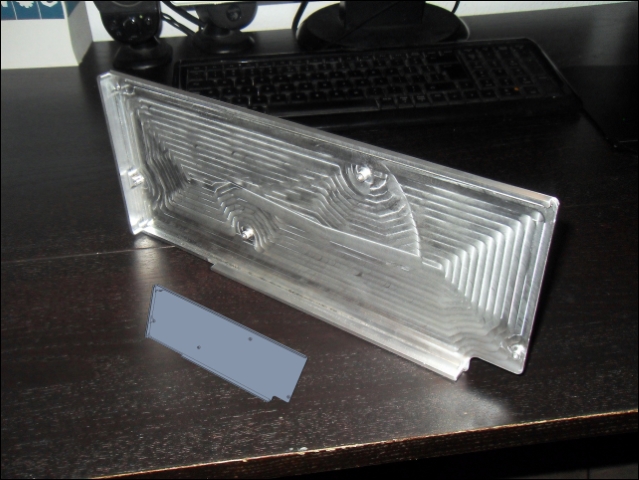
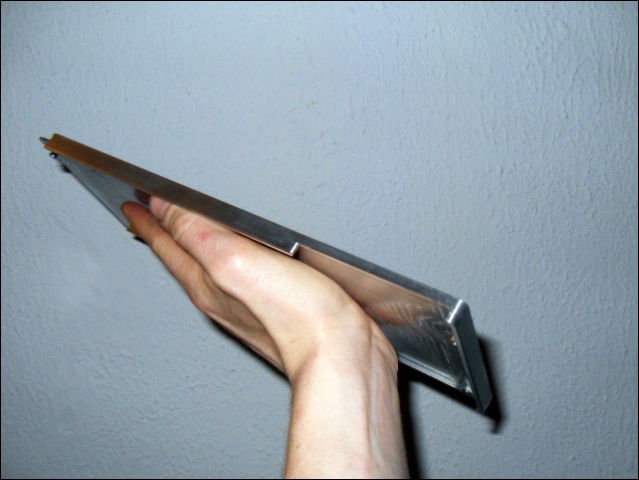
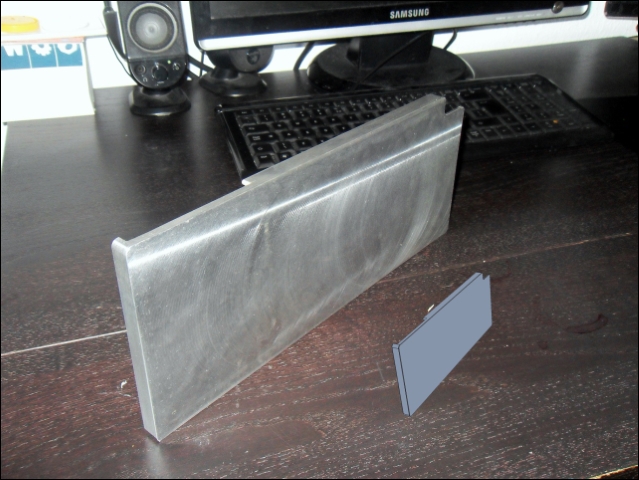
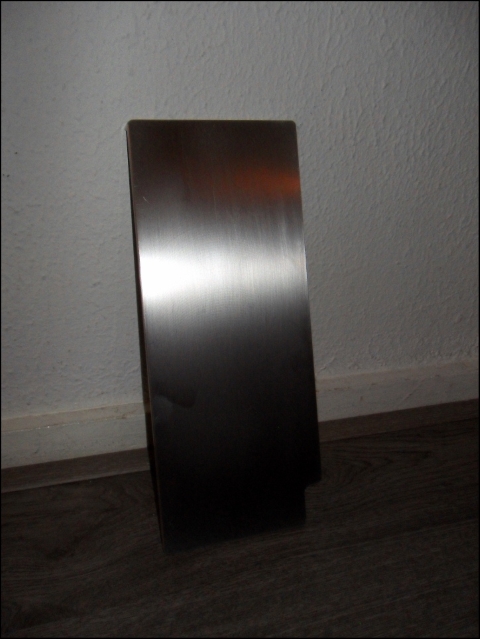
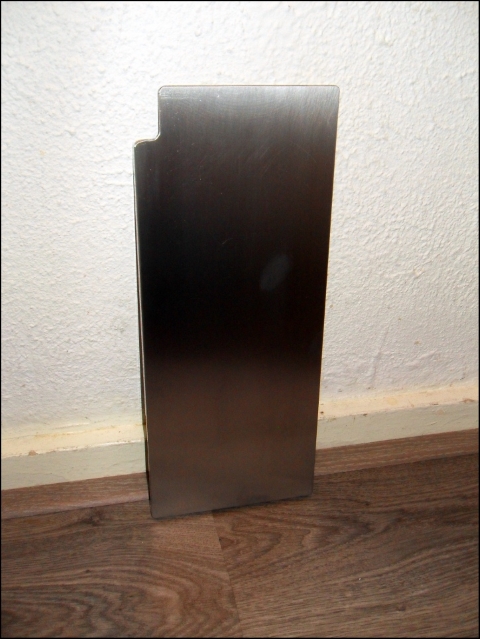
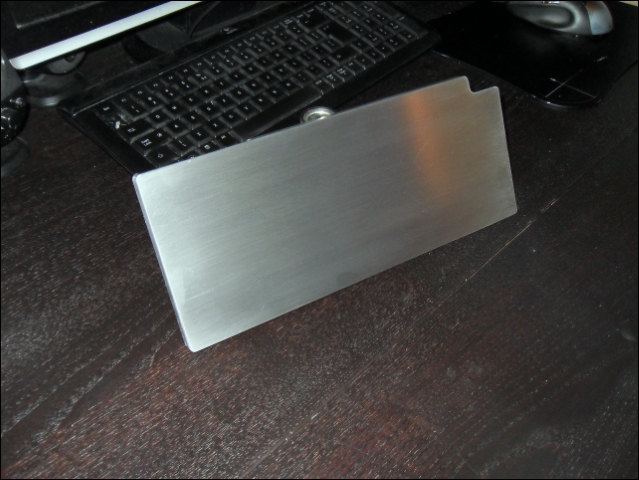
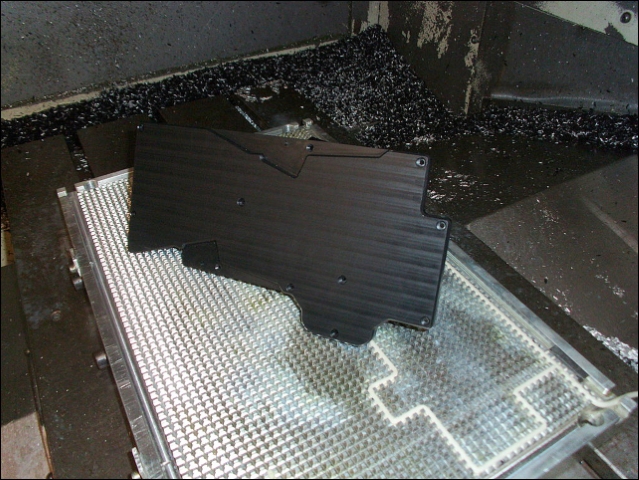
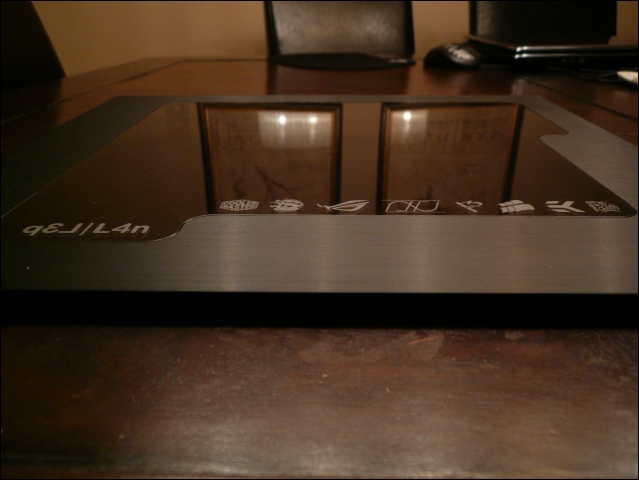
Blocks for the POM Top and the aluminum backplate.
And the milling
Still a bit rough.
After some sanding.
Never saw a backplate without bolts or holes in sight before
The plan is to get it anodized in black and then mill in something.
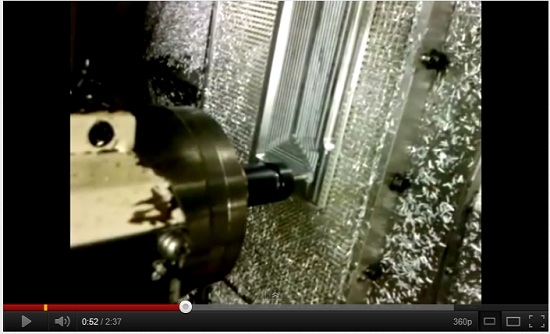
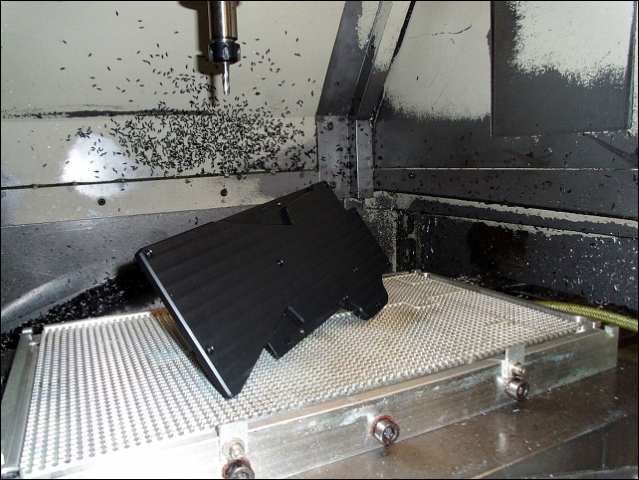
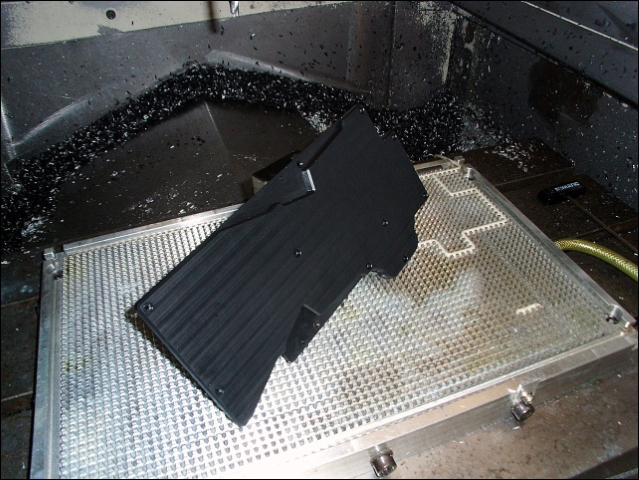
And then the POM block. Some more explaining here.
For example this is 1/100 of the code the machine will go to create the block.
G2X82.098Y1.193I0.J-5.5
G1X126.96Y-14.456
G3X127.125Y-14.484I.165J.472
G3X127.17Y-14.482I0.J.5
G1X134.562Y-13.804
G2X135.064Y-13.781I.502J-5.477
G2X140.359Y-17.791I0.J-5.5
G1X140.584Y-18.592
G3X140.917Y-18.934I.481J.135
G1X170.725Y-28.234
G3X170.874Y-28.257I.149J.477
G3X171.346Y-27.921I0.J.5
G1X176.469Y-13.198
G2X181.161Y-9.529I5.194J-1.808
G1X236.129Y-4.486
G3X236.437Y-4.342I-.046J.498
G1X240.668Y-.111
G2X244.557Y1.5I3.889J-3.889
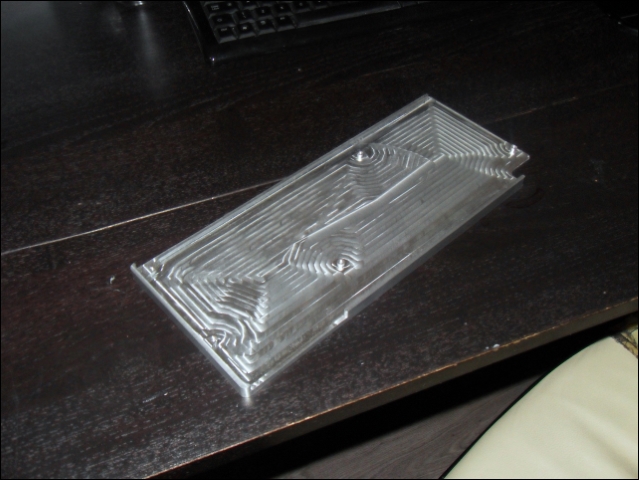
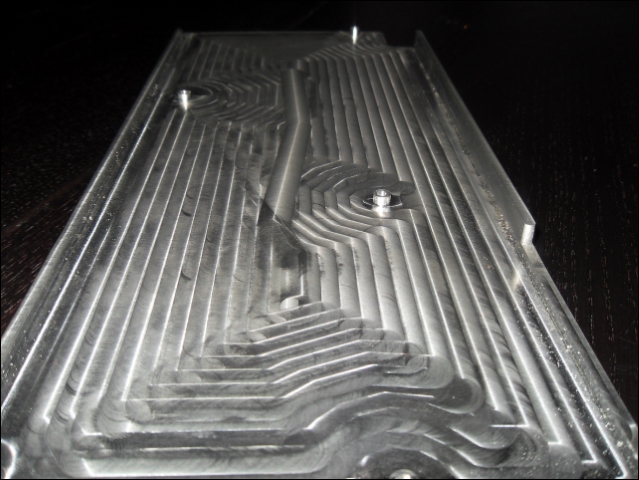
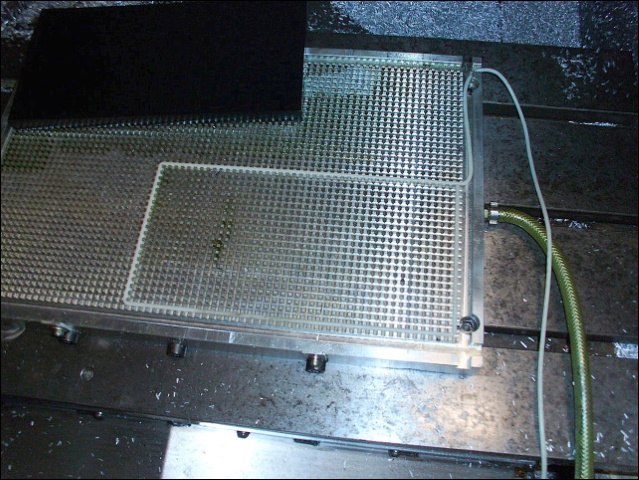
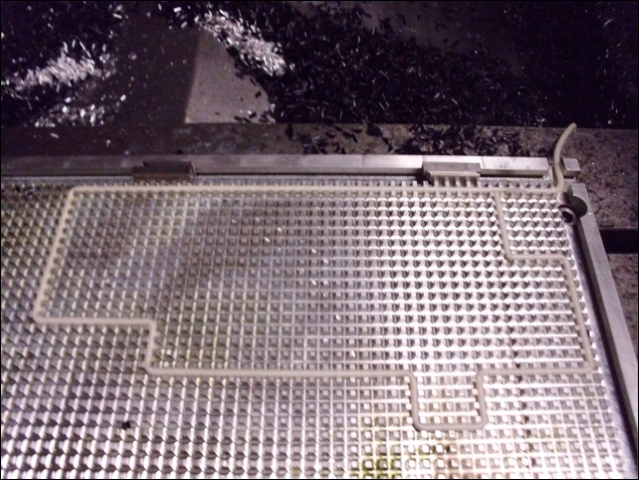
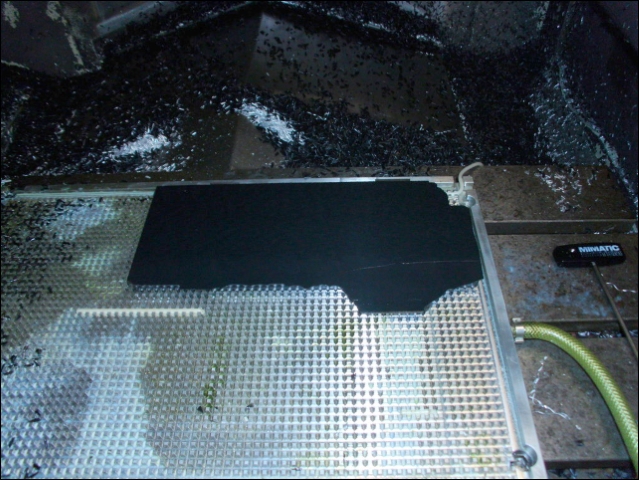
First a rubber cord a little smaller then the block is placed on the workspace.
This so the machine can suck it vacuum to the plate, off course it shouldn't move a mm.
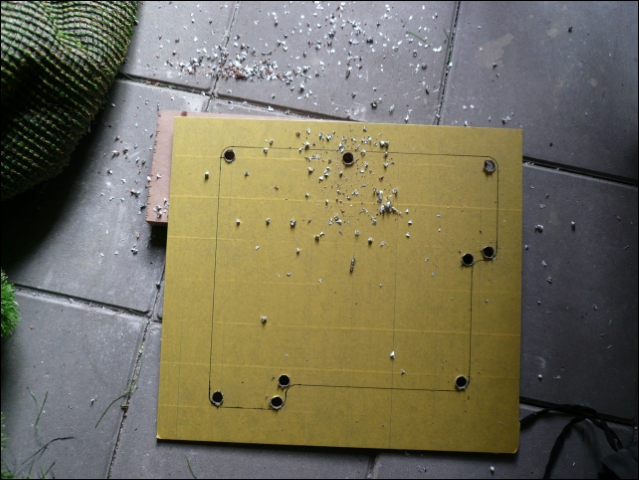
First the holes and the basis shape.
Then adjust the rubber cord so the machine can go on.
And milling again.
The result.
Till the next update... the copperblock
Small update
(Slowly we're getting there)
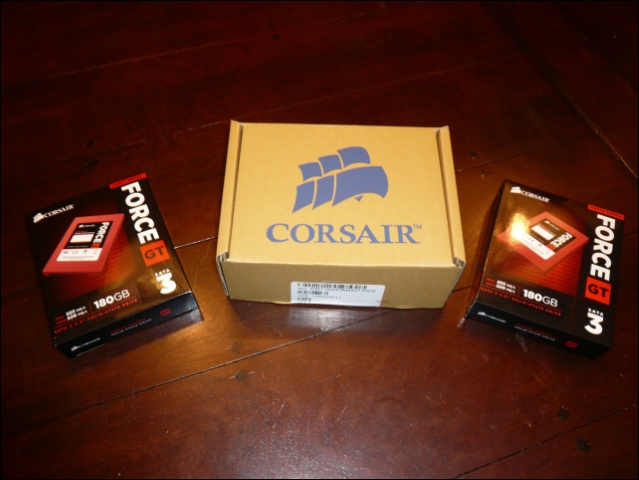
First of all I want to announce a new sponsor .. Corsair!
After the Bit-Tech MOTY they contacted me for sponsoring this project.
(If you only knew how glad I am with this!)
Thanks Corsair!!
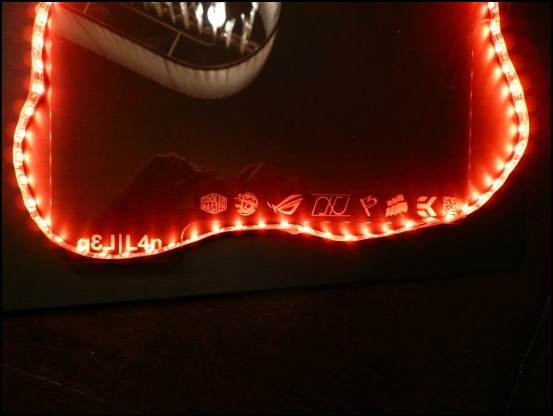
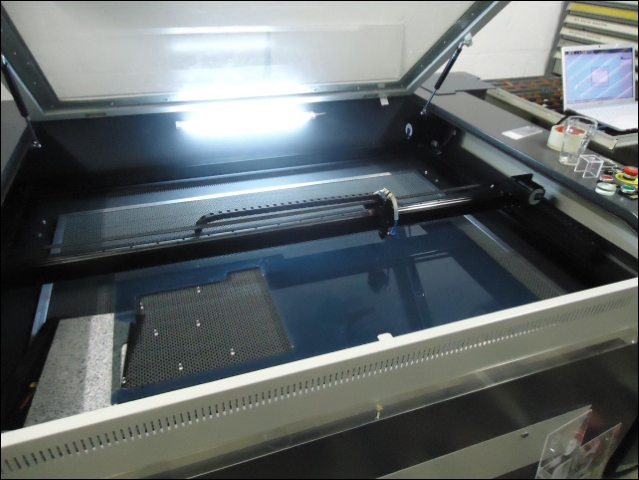
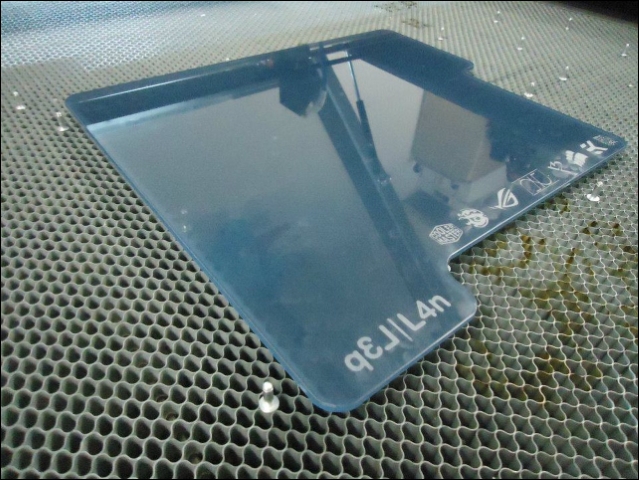
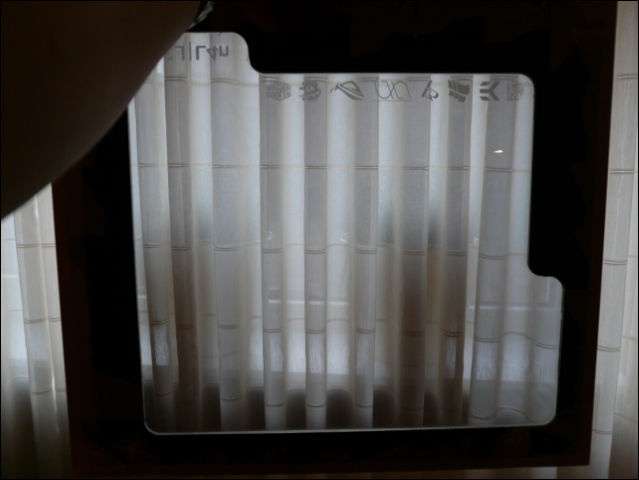
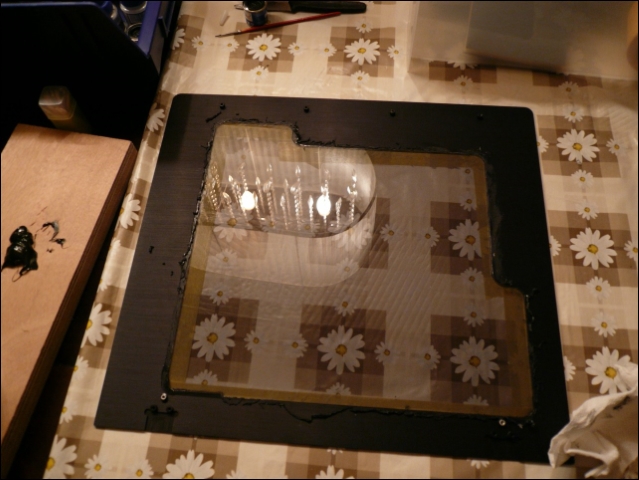
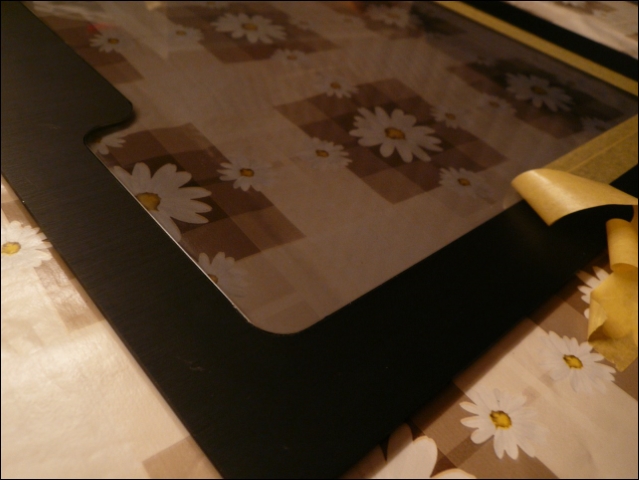
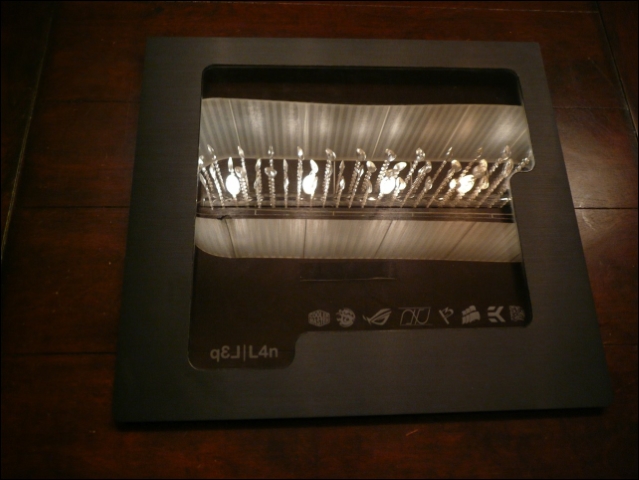
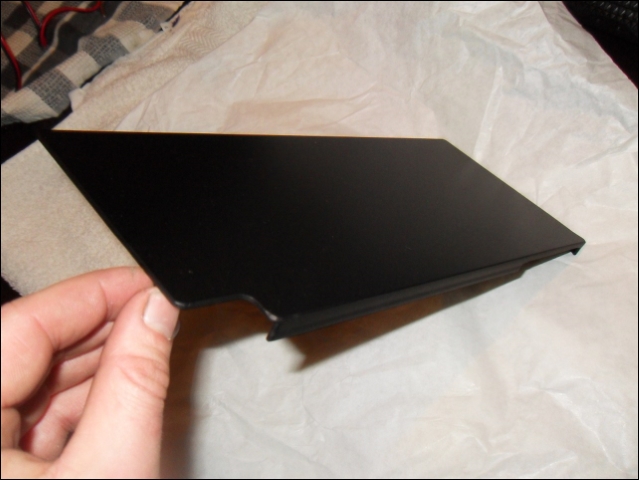
And ordered a laser cutted en engraved casewindow.
If I ever win the lotto ... :P
Done.
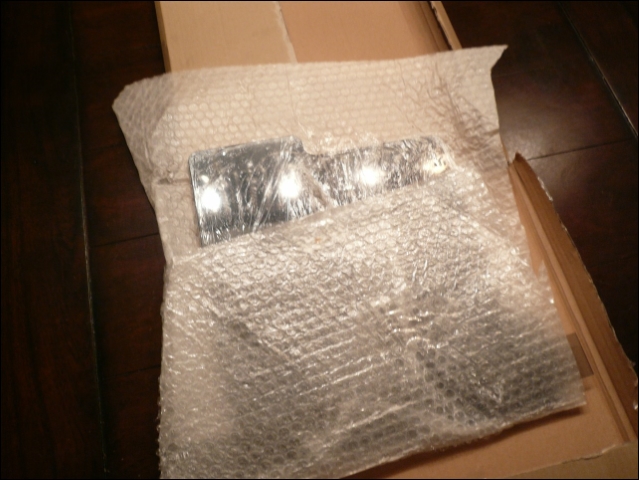
And one day later
Quick preview.
This weekend first saw it in and then a very lot of sanding I guess.
And another test.
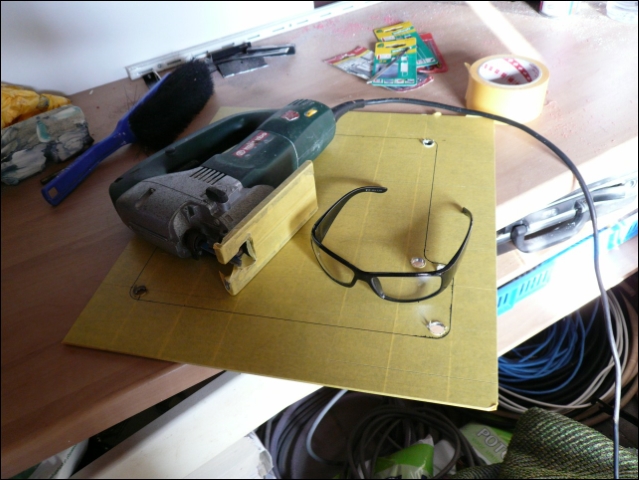
Ok ..this is the first and the last time I'm modding a case with 5mm thick walls and a 3mm thick panel
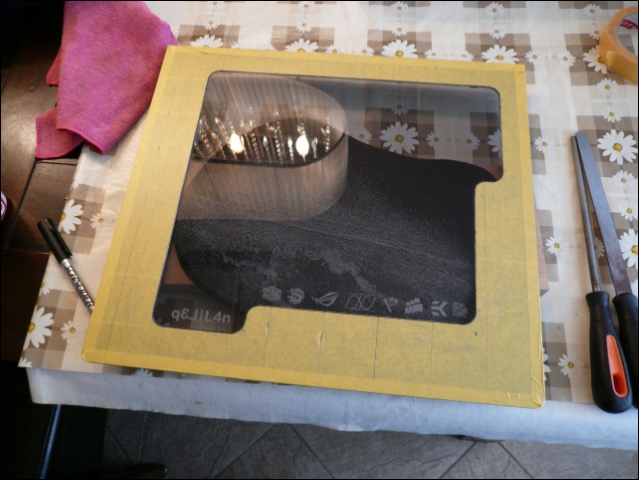
First a double layer of painters tape.
Then re-locating the spot.
And double check it.
Also tightening it very well so I can mark it without moving.
And a triple check.
Drilling the holes was easy
Also taped the jigsaw and got my MNPC glasses.
(Without glasses it always takes me 1 minute to get something in my eyes :P )
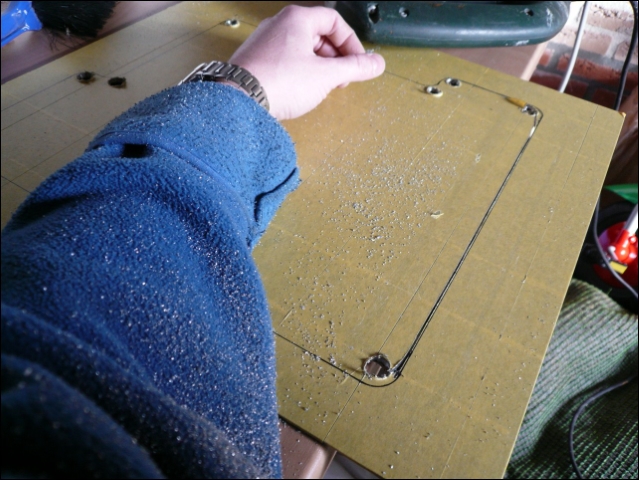
All under it.
Done sawing.
The fitting :/
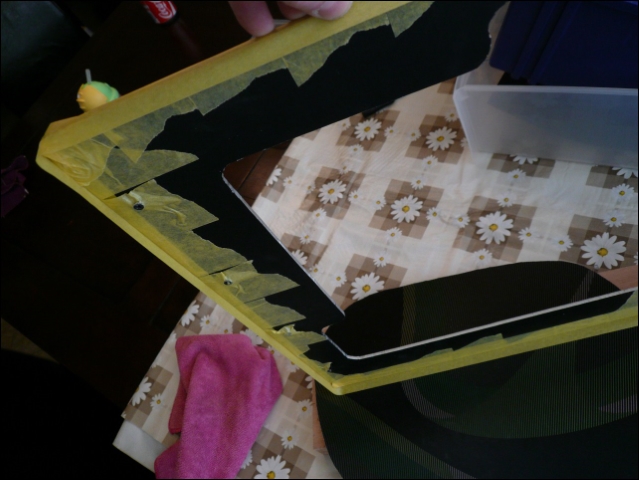
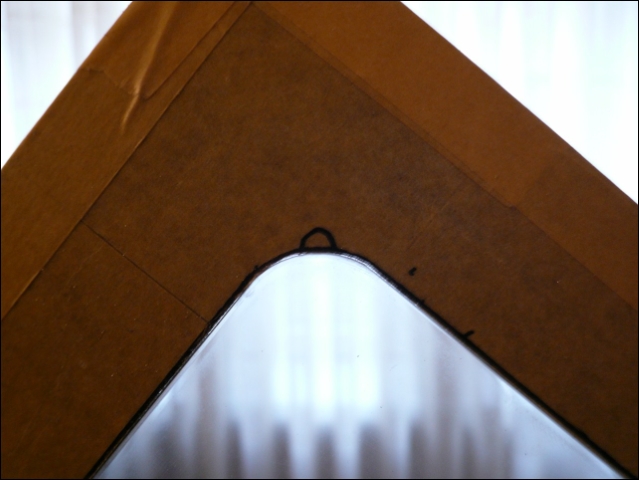
Extra protection for the edges.
Polishing the round edges.
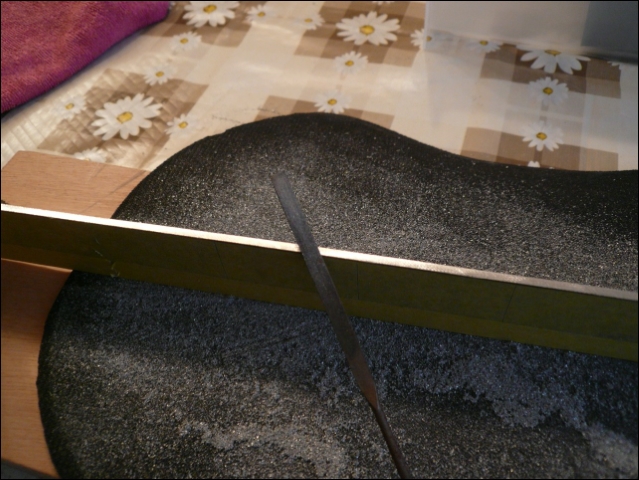
Now the straight pieces.
I always use the file skewed, this way you have more surface and you will get it much more straight.
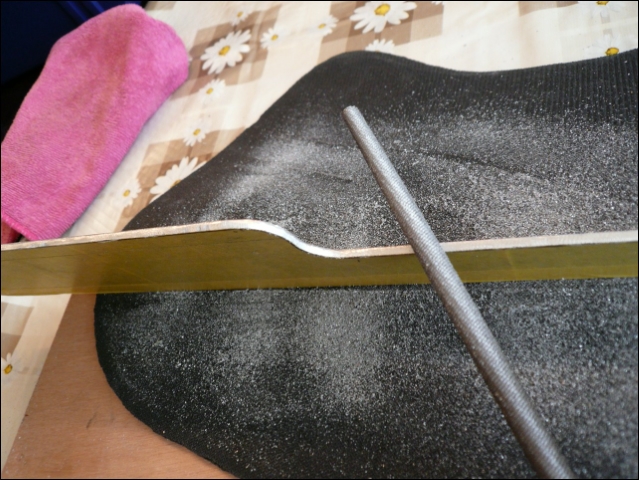
3 hours of filing further (yes three!) it finally fits with some power.
Need to file the points there where the pressure is too high.
Finishing it with a small fine file.
And getting the old knife back to remove the small curls.
Can't do it with a file since it will have skewed edges again
You can see the difference before and after the knife.
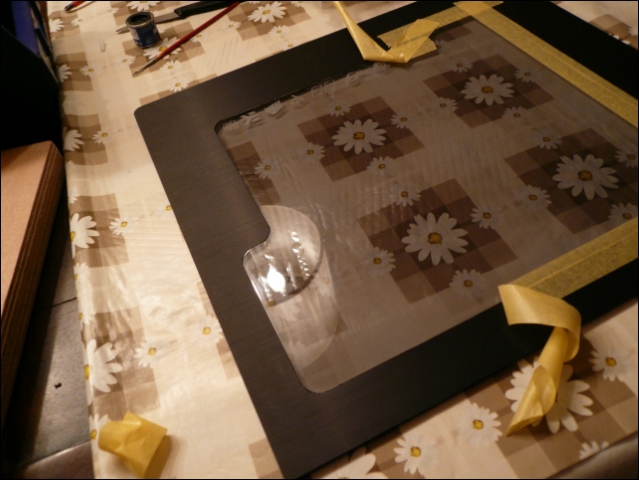
Painting the edges again with matt black paint.
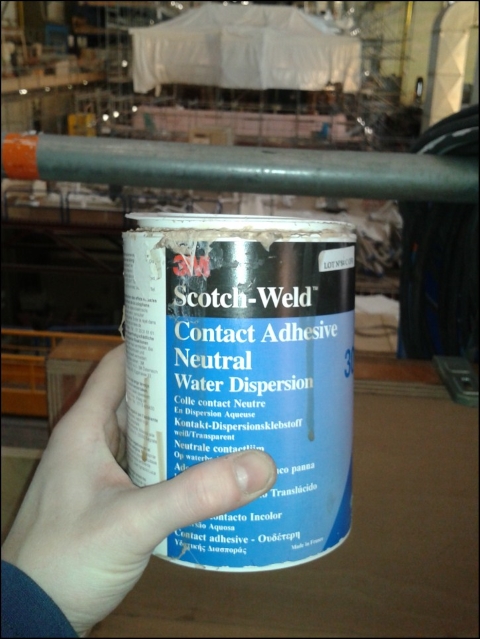
Window in and use rubber glue.
After that remove the remnants again. (Was a kind of a mess)
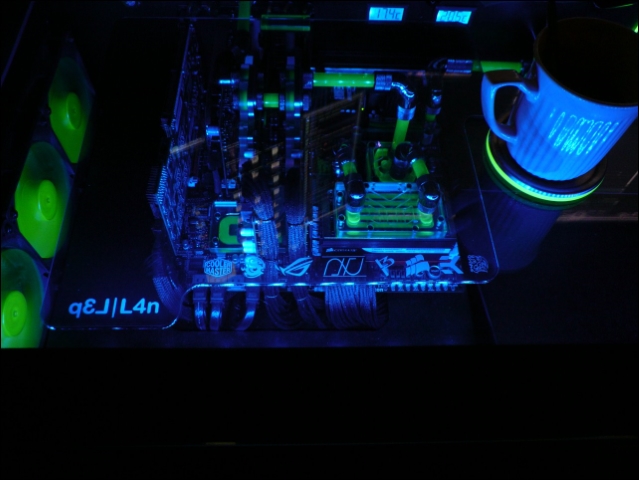
But don't worry. Removing the tape on the other side for the first results.
And a quick test
Tomorrow will fill up some minuscule edges with glue. Am tired of it now
Must say I'm very satisfied..
Till next week :o)
Last edited by l3p; 01-28-2012 at 04:14 PM.

wow!
amazing work!
#1
Evga 680i * Q6600 G0 * 4x2gb g.skill Pi * Evga GTX260 (216) - sli * x-fi fatality * Corsair HX1000
#2
Asus Striker II Formula * Q6600 G0 * 4x2gb corsair * Evga 9600gso * corsair hx620
#3 WIP
Asrock Z77 Extreme4-M * 3570K * 2x2gb samsung * 60gb SSD
Make it happen, man.
Simply make it happen.
\Project\ Triple Surround Fury
Case: Mountain Mods Ascension (modded)
CPU: i7 920 @ 4GHz + EK Supreme HF (plate #1)
GPU: GTX 670 3-Way SLI + XSPC Razor GTX670 water blocks
Mobo: ASUS Rampage III Extreme + EK FB R3E water block
RAM: 3x 2GB Mushkin Enhanced Ridgeback DDR3 @ 6-8-6-24 1T
SSD: Crucial M4 256GB, 0309 firmware
PSU: 2x Corsair HX1000s on separate circuits
LCD: 3x ASUS VW266H 26" Nvidia Surround @ 6030 x 1200
OS: Windows 7 64-bit Home Premium
Games: AoE II: HD, BF4, MKKE, MW2 via FourDeltaOne (Domination all day!)
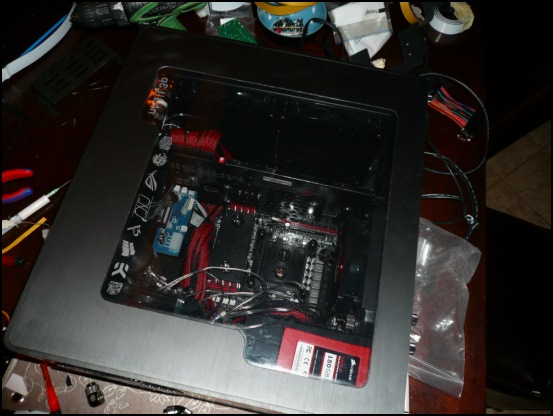
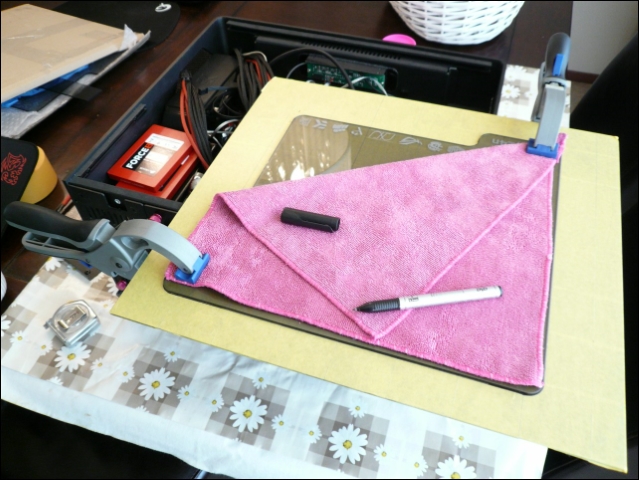
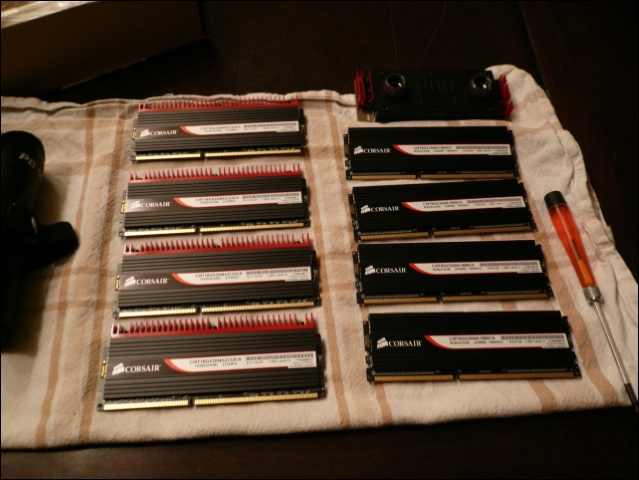
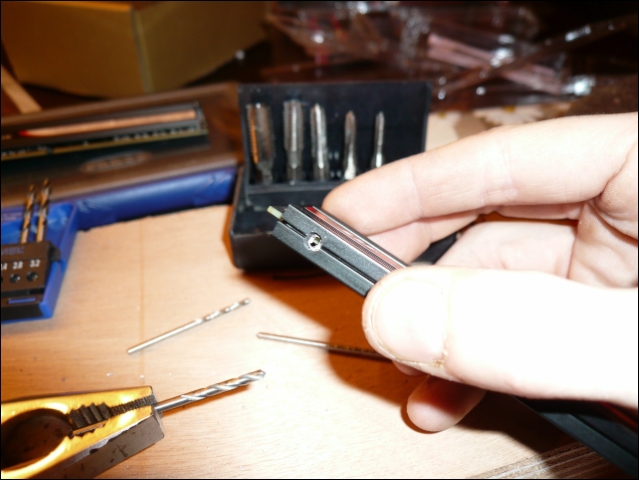
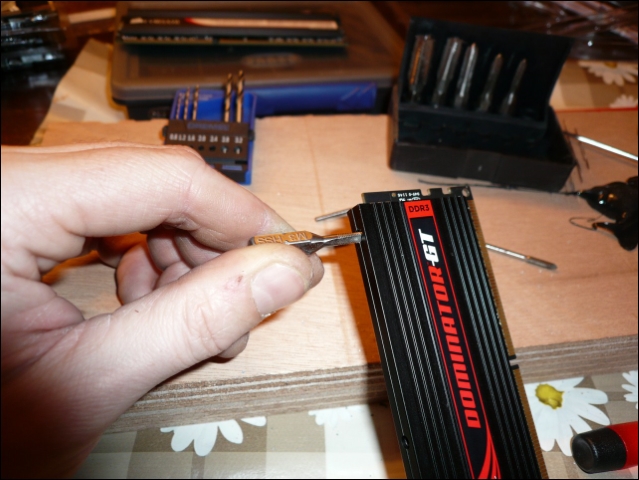
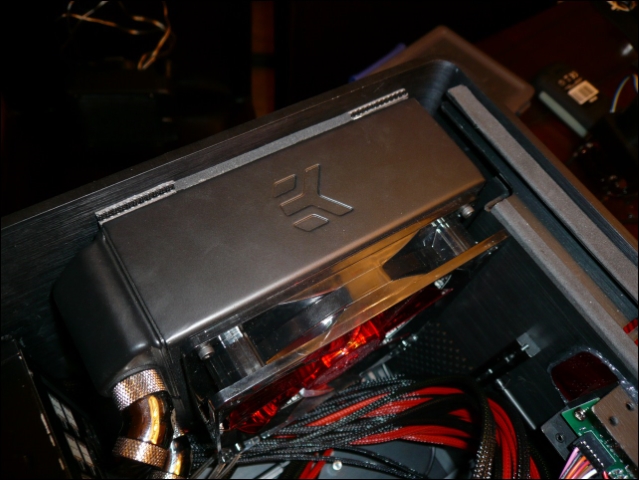
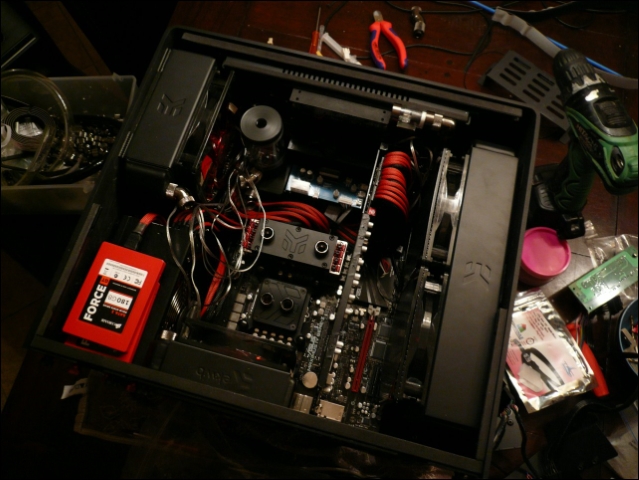
This time maybe a bit boring update.
Changing, (not)fitting, measuring and some cable management.
(Sorry, no block update yet
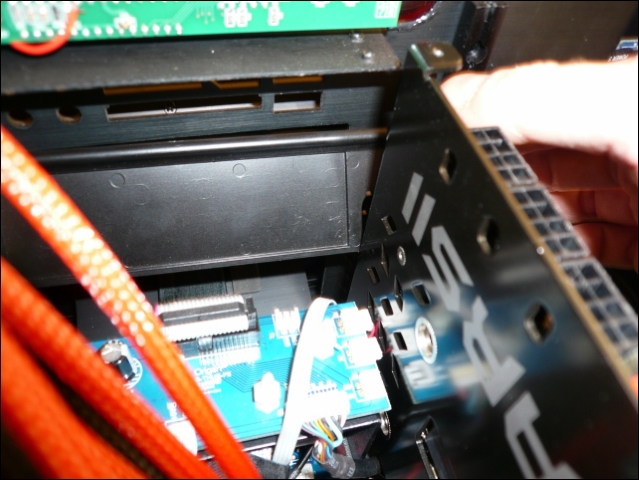
First change the quad kit.
With 5 previous kits on other builds it was easy to remove the plates for the red fin fixation.
With 3 out of 4 it was impossible somehow.
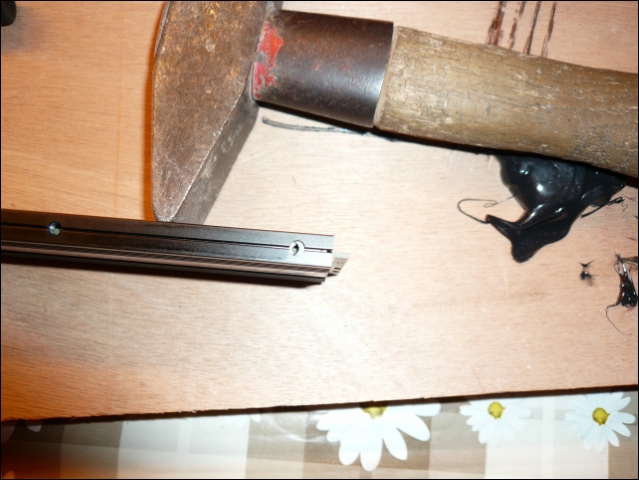
Even with a hammer there were 2 sticks I couldn't replace.
Did see some horror pictures of removed heatsinks with the ram still on it so didn't want to do that either.
Also had another problem cause of hammering on it with 1 stick.
Then carefully drill it by hand.
And the tap by hand.
Got it fixed one hour later
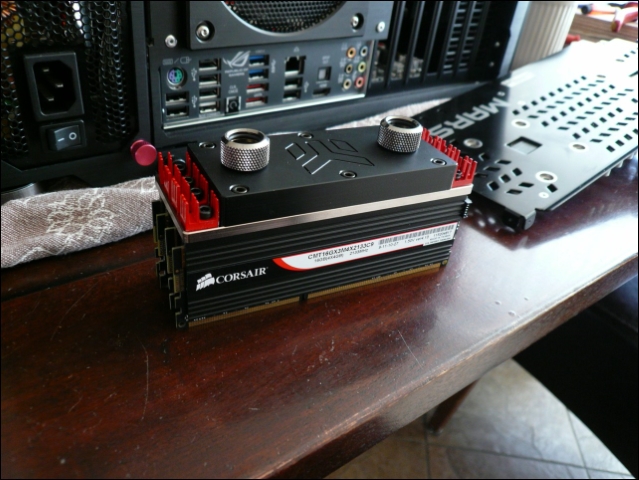
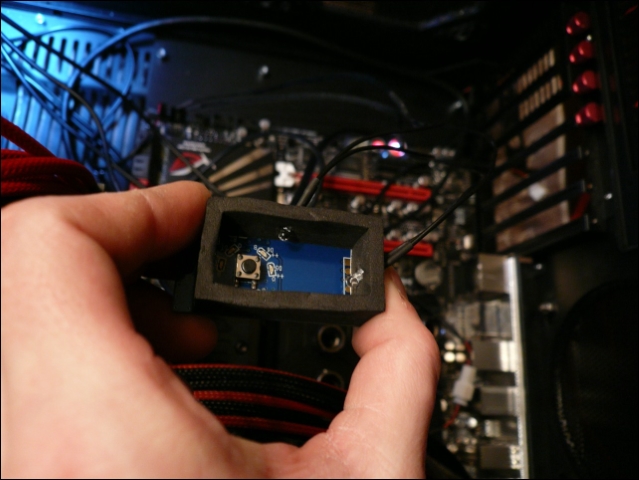
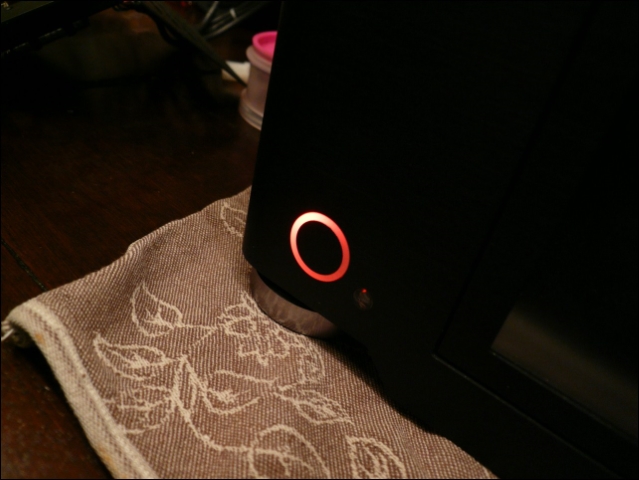
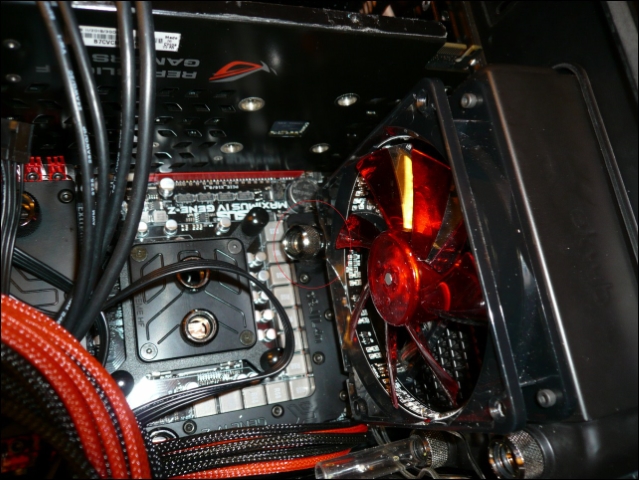
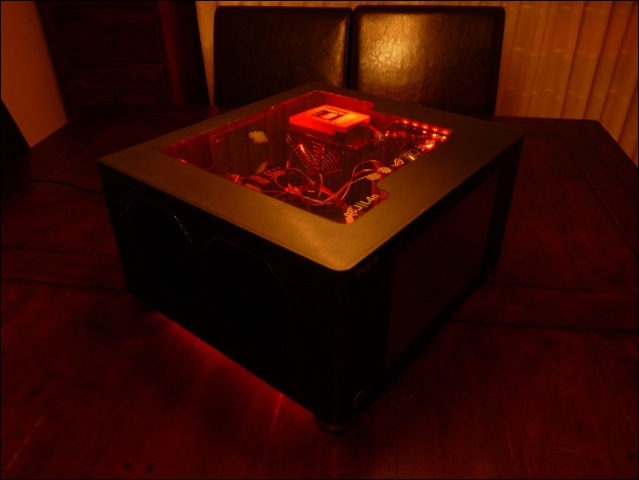
2 red leds soldered and sleeved for the powerbutton.
Disabled the blue smd leds.
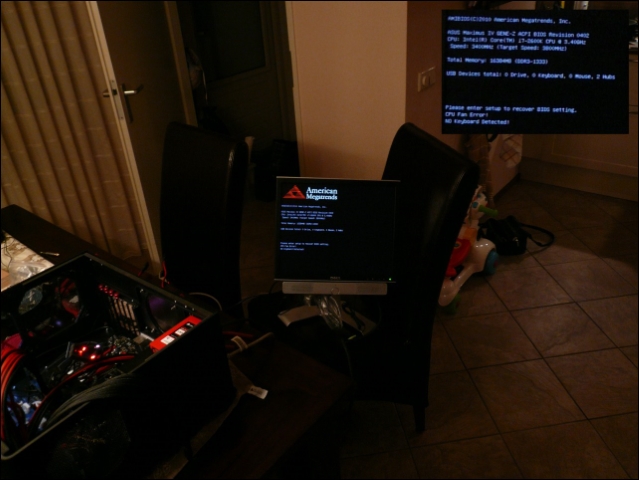
Wanted to test this together with the hardware that didn't run for a single minute yet.
(Incl. the hammered Ram and lapped Cpu)
Joy!
Ok... off ... fast ... no water in the cpu block yet
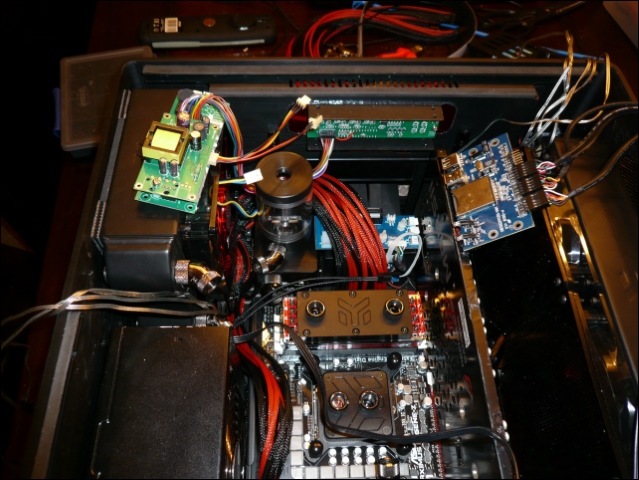
Next small problem...
I measured everything at the start...that was for Matrix cards, the Mars is a little longer.
Sawing again.
Discovering all kinds of convenient stuff in the yacht building industry.
Saw this last week, primer for all kinds of self adhesive stuff like ledstrips
They hang complete ceilings with Velcro with it.
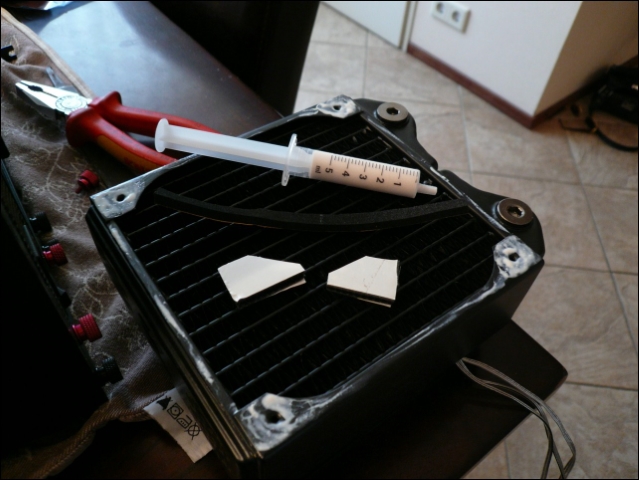
Worth a try on the last radiator.
Did the corners with 3M Velcro, the edges with isolationtape.
Believe it or not ... It works to good .. Can't get it off with my bare hands :P
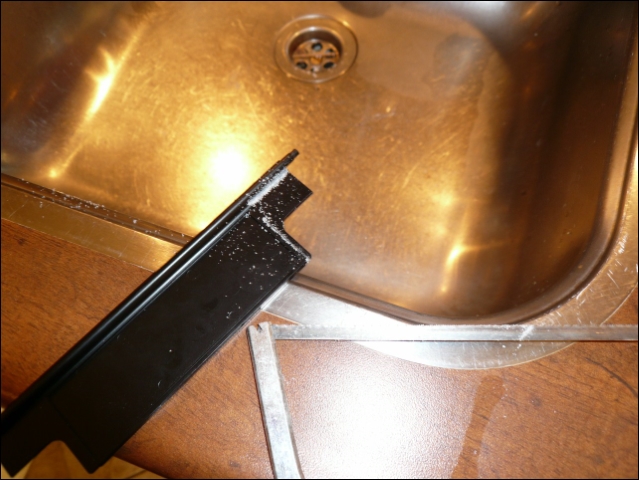
Had to file the fan on the back radiator after measuring with 7 different kinds of BP fittings to make the angle I wanted.
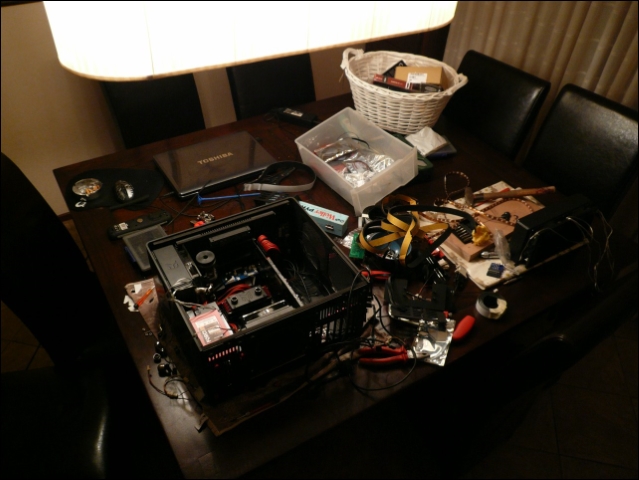
Still 2 prints to hide..
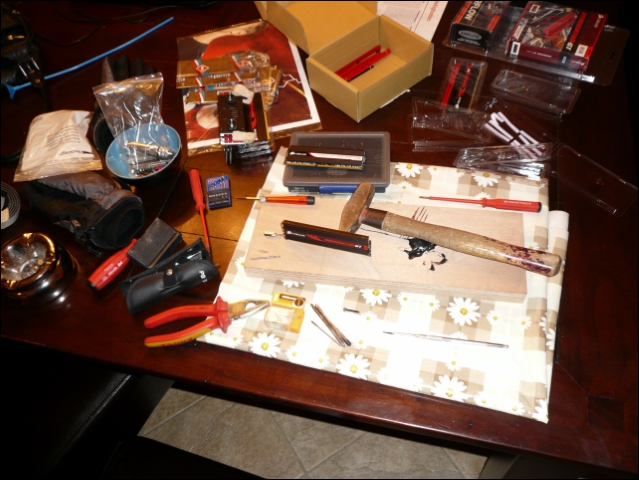
And the mess on the kitchen table again.
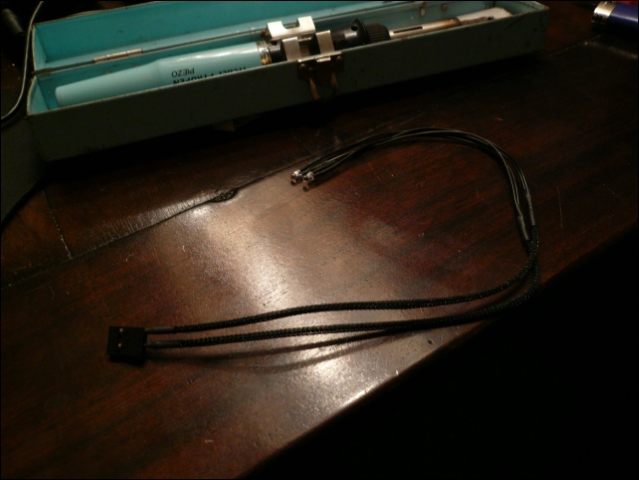
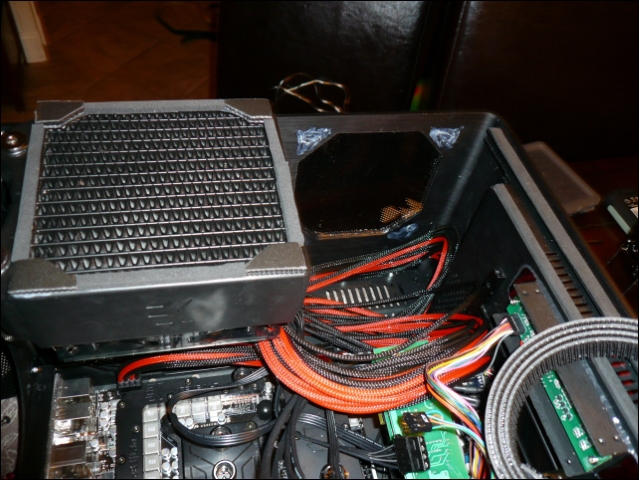
Not easy to hide 3 x 8 pin + 24 pin without a 'double bottom'.
Also sleeved the 2 sata cables.
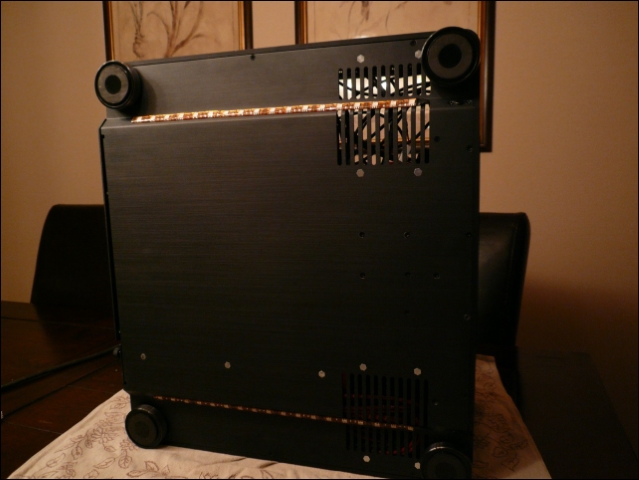
Cover on top .. Till later this week
L3p, you should start providing complimentary kleenex to the viewers!
My toys:
Asus Sabertooth X58 | Core i7-950 (D0) | CM Hyper 212+ | G.Skill Sniper LV 12GB DDR3-1600 CL9 | GeForce GTX 670-2048MB | OCZ Agility 4 512GB, WD Raptor 150GB x 3 (RAID0), WD Black 1TB x 2 (RAID0) | XFX 650W CAH9 | Lian-Li PC-9F | Win 7 Pro x86-64
Gigabyte EX58-UD3R | Core i7-920 (D0) | Stock HSF | G.Skill Sniper LV 4GB DDR3-1600 CL9 | Radeon HD 2600 Pro 512MB | WD Caviar 80GB IDE, 4TB x 2 (RAID5) | Corsair TX750 | XClio 188AF | Win 7 Pro x86-64
Dell Dimension 8400 | Pentium 4 530 HT (E0) | Stock HSF | 1.5GB DDR2-400 CL3 | GeForce 8800 GT 256MB | WD Caviar 160GB SATA | Stock PSU | (Broken) Stock Case | Win Vista HP x86
Little Dot DAC_I | Little Dot MK IV | Beyerdynamic DT-880 Premium (600 Ω) | TEAC AG-H300 MkIII | Polk Audio Monitor 5 Series 2's
Oh, I get it! Because his mod is so cool, we will catch colds, and THUS, runny noses! Brilliant!Originally Posted by Bobsama

\Project\ Triple Surround Fury
Case: Mountain Mods Ascension (modded)
CPU: i7 920 @ 4GHz + EK Supreme HF (plate #1)
GPU: GTX 670 3-Way SLI + XSPC Razor GTX670 water blocks
Mobo: ASUS Rampage III Extreme + EK FB R3E water block
RAM: 3x 2GB Mushkin Enhanced Ridgeback DDR3 @ 6-8-6-24 1T
SSD: Crucial M4 256GB, 0309 firmware
PSU: 2x Corsair HX1000s on separate circuits
LCD: 3x ASUS VW266H 26" Nvidia Surround @ 6030 x 1200
OS: Windows 7 64-bit Home Premium
Games: AoE II: HD, BF4, MKKE, MW2 via FourDeltaOne (Domination all day!)
Something slimy like that!
My toys:
Asus Sabertooth X58 | Core i7-950 (D0) | CM Hyper 212+ | G.Skill Sniper LV 12GB DDR3-1600 CL9 | GeForce GTX 670-2048MB | OCZ Agility 4 512GB, WD Raptor 150GB x 3 (RAID0), WD Black 1TB x 2 (RAID0) | XFX 650W CAH9 | Lian-Li PC-9F | Win 7 Pro x86-64
Gigabyte EX58-UD3R | Core i7-920 (D0) | Stock HSF | G.Skill Sniper LV 4GB DDR3-1600 CL9 | Radeon HD 2600 Pro 512MB | WD Caviar 80GB IDE, 4TB x 2 (RAID5) | Corsair TX750 | XClio 188AF | Win 7 Pro x86-64
Dell Dimension 8400 | Pentium 4 530 HT (E0) | Stock HSF | 1.5GB DDR2-400 CL3 | GeForce 8800 GT 256MB | WD Caviar 160GB SATA | Stock PSU | (Broken) Stock Case | Win Vista HP x86
Little Dot DAC_I | Little Dot MK IV | Beyerdynamic DT-880 Premium (600 Ω) | TEAC AG-H300 MkIII | Polk Audio Monitor 5 Series 2's
Amazing work with the window mod. Fits perfectly! Also really nice to see the GPU block come together, you guys did a great job on that one! :-)
Project Echo | Fractal-Design Array Rev2 | i5 750 | DFI LANPARTY MI P55-T36 | 2x2GB A-Data | Fractal SFF 300w MDPC-X sleeved orange and black | HD5870 | Kingston V-Series 64GB SSD | 2TB HDD | EK Supreme HF | EK-DCP 4.0 | EK Multioption 250 RES | EK-CoolStream-RAD XT 240 | EK-CoolStream-RAD XT 120 | EK-PSC Fitting 12mm - G1/4 Black | 5870 fullcover block |
Theory | By Hannes ~ A Lian Li sculpture | Lian Li PC-8NB | AMD Phenom II x6 1090T BE | Asus Crosshair IV Formula | Cooler Master V8 | 2x Laing D5 + Bitspower TOP + MOD-kit | Bitspower 250 + 150 RES | EK-CoolStream-RAD XT 240 | 19mm 1/4G Bitspower Shiny Silver + Matte black Fittings, rotaries, fillports, plugs etc etc. | MDPC-X Color -X, Black and White Sleeve.
Sponsors: Lian Li, ASUS, Bitspower, Cooler Master, EkWaterblocks, Misco.se, Fractal-Design, PCB Distribution AB, Coolingstuff.se, Enermax.
Lol thanks guys!
Amazing build keep the pics going
Still no news about the copper-block :/
My friend Quepee has been sick quite some days, so he has a lot to catch up at work.
He's all better now so hopefully soon good news!
All I got for you guys is a design for the engraving.
And the backplate came back from the anodiser
These few weeks did give me some time to prepare my next build already
(First info and hardware pictures on site, buildlog will follow)
Red Harbinger Facebook

Triple monitors for the epic win.
\Project\ Triple Surround Fury
Case: Mountain Mods Ascension (modded)
CPU: i7 920 @ 4GHz + EK Supreme HF (plate #1)
GPU: GTX 670 3-Way SLI + XSPC Razor GTX670 water blocks
Mobo: ASUS Rampage III Extreme + EK FB R3E water block
RAM: 3x 2GB Mushkin Enhanced Ridgeback DDR3 @ 6-8-6-24 1T
SSD: Crucial M4 256GB, 0309 firmware
PSU: 2x Corsair HX1000s on separate circuits
LCD: 3x ASUS VW266H 26" Nvidia Surround @ 6030 x 1200
OS: Windows 7 64-bit Home Premium
Games: AoE II: HD, BF4, MKKE, MW2 via FourDeltaOne (Domination all day!)
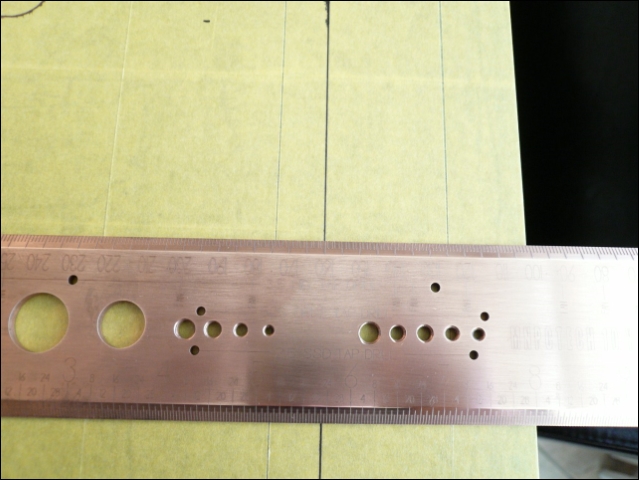
Apparently my friend Quepee has some trouble finding the right piece of copper for the MarsII block. So me and an other guy started looking for it too, but till now no success yet.
It need to be 155x300x15,5 mm (Copper Cu-ETP?)
If anyone has some tips? Please!
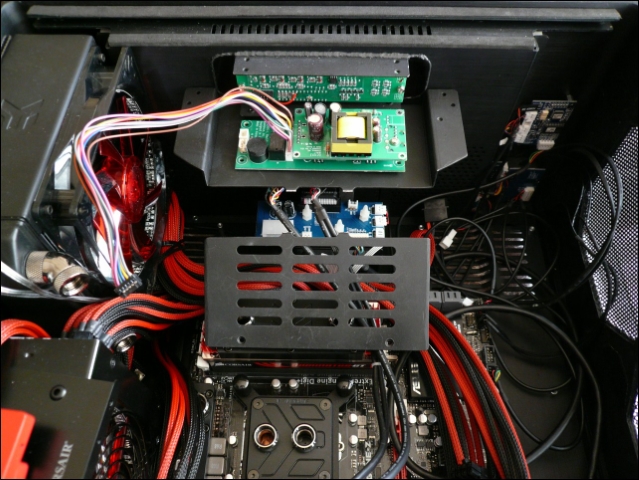
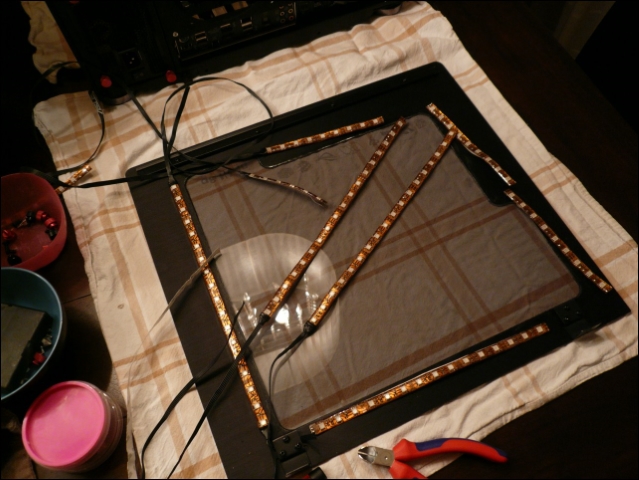
And here a 'small' update.
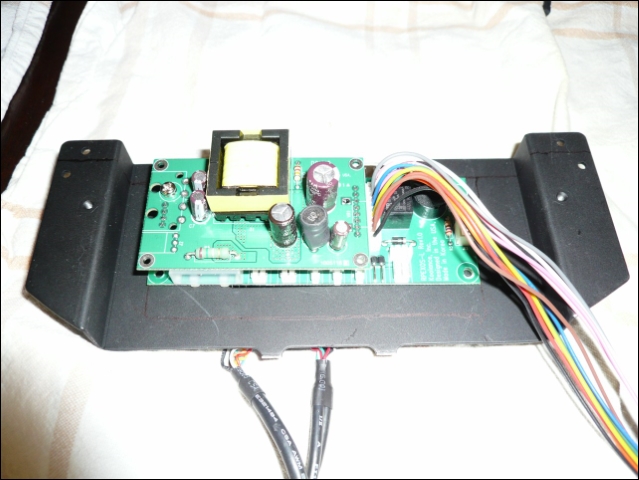
I want to try this DP to VGA converter to use the touchscreen.
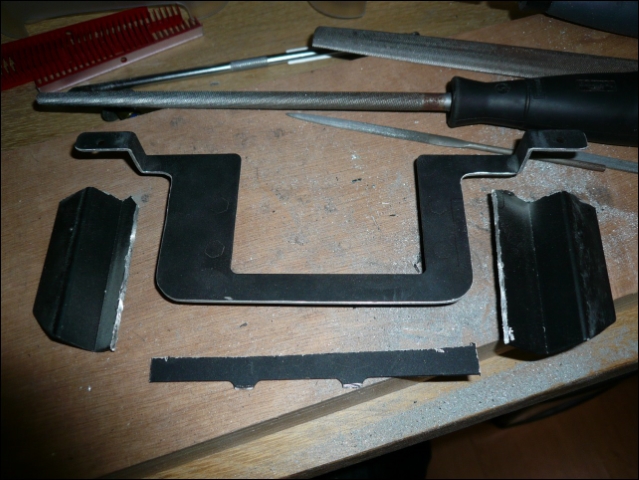
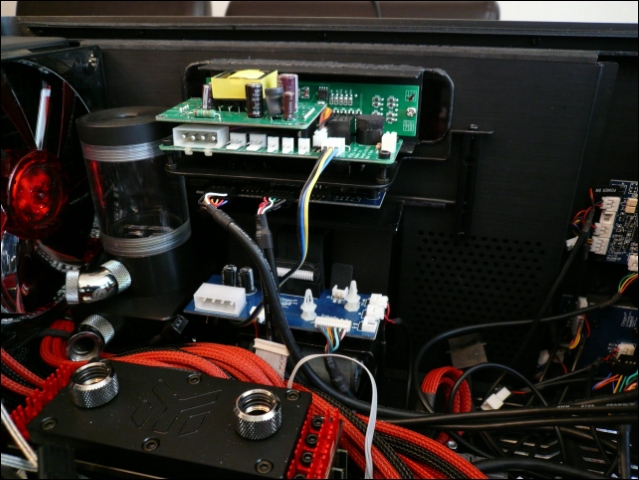
I already adjusted the bracket once but I'll have to do it again because the MarsII is 6cm longer then the Matrix card. Also want to mount the Pump controller print on top of it.
Measuring.
Dremeling.
Filing.
Drilling some holes.
Seems to fit.
So painting it again.
Will be quite some cable management.
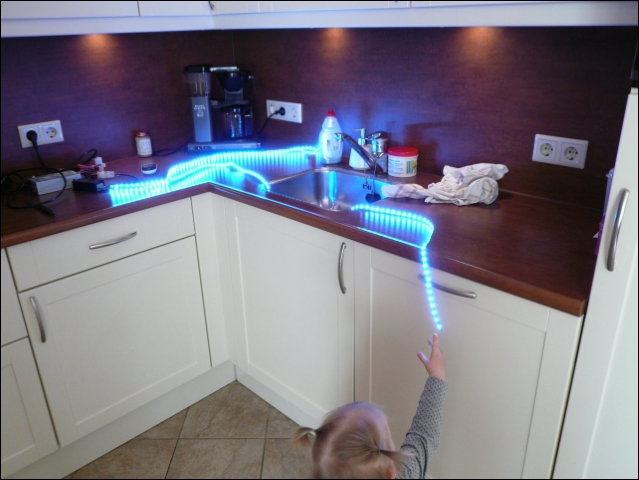
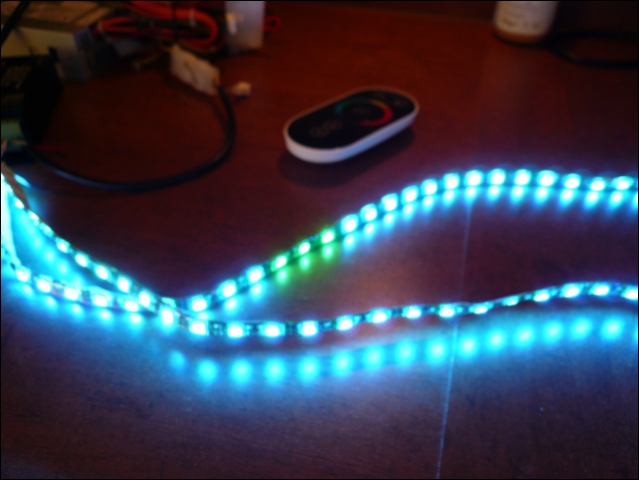
Also need to do the lighting before I start with the watercooling loop cause of all the wires.
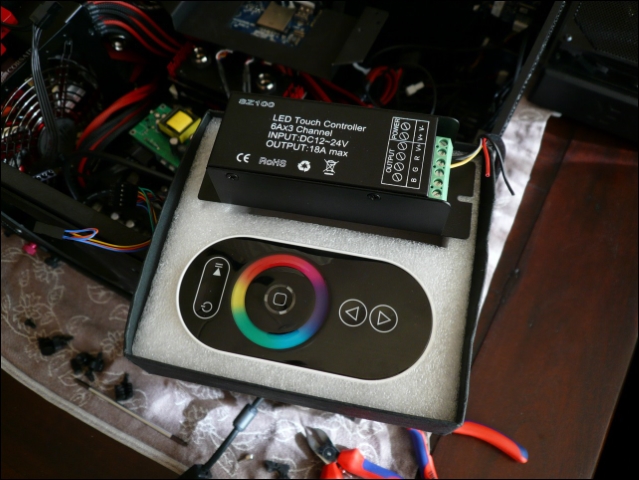
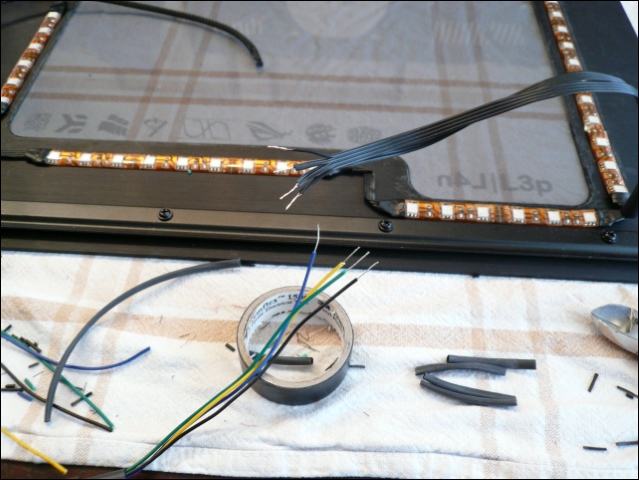
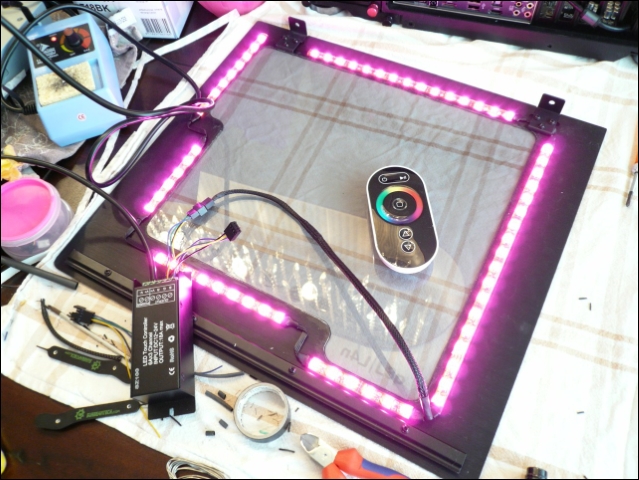
Going to use this controller instead.
It's a Touch remote with RF, so don't have to place any IR eyes
Ik ga dus deze controller gebruiken ipv de vorige.
(Will also be used in my next project)
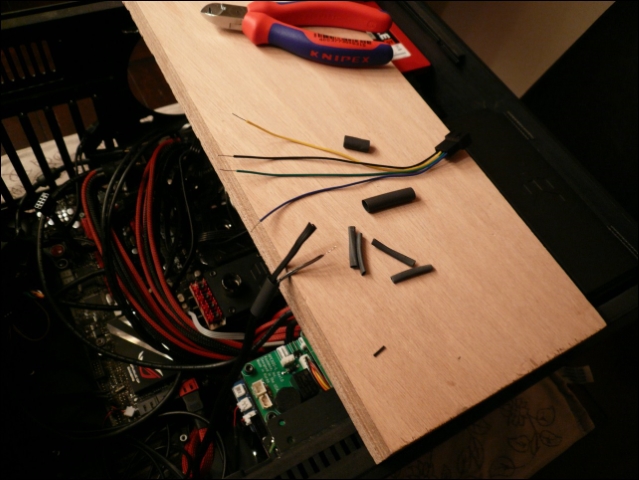
Glad I still had an old black floppy cable.
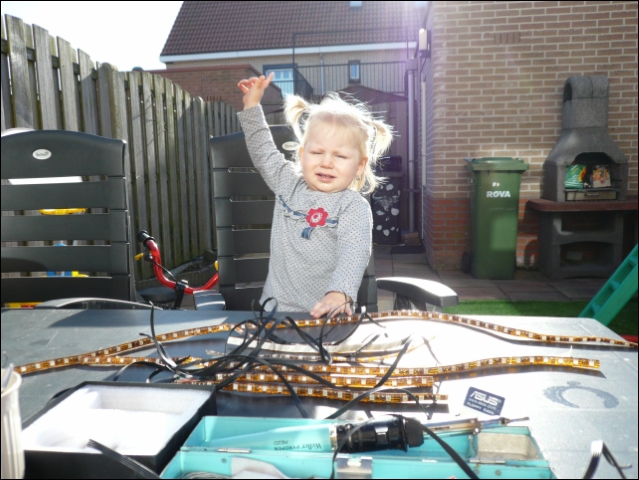
Nice afternoon soldering with my daughter.
She told me to test it before cutting it in pieces.
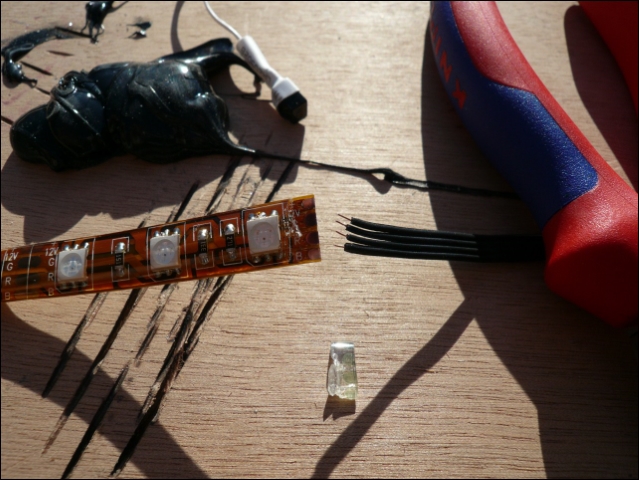
Glad I did, found a break
Can cut that out now.
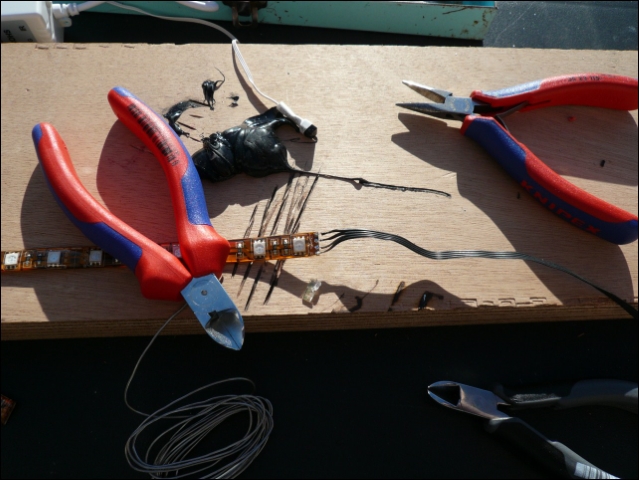
Epoxy layer is easy to remove with a knife.
Hmm my gas-soldering iron is too hot for this.
So got an other one a few days later.
Getting too much work on my neck
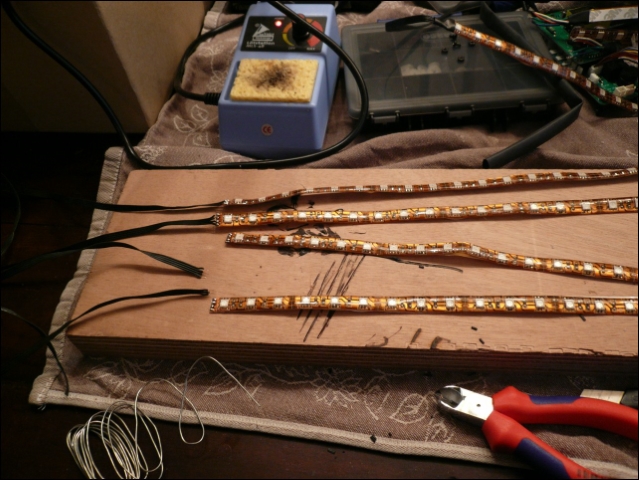
Almost done.
Used some 4-pin PWM plugs to easy-connect it all.
And some tests.
Lets do the bottom too. First had to remove some stickers and old glue.
And done.
Some connectors for the bottom.
And testing again.
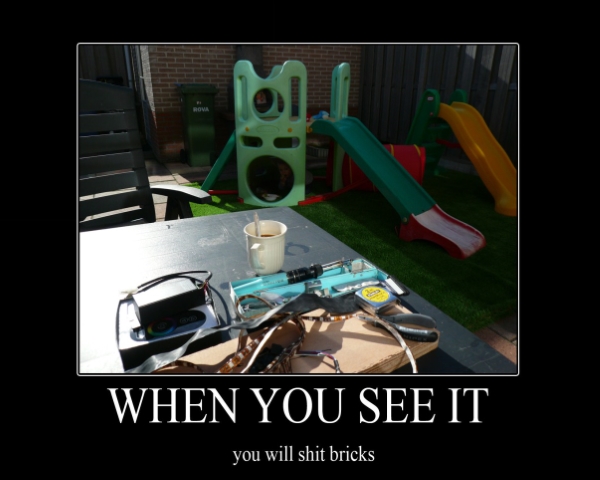
My 'simple' compact camera doesn't show what I see so tried to film it instead
Till the next update!
 Posting Permissions


 Reply With Quote


Bookmarks